

 Thanks:
  Likes:
  Needs Pictures: 0
 Picture(s) thanks:
Results 136 to 150 of 187
Thread: Lingerie Chest
-
30th December 2015, 08:19 AM #136
 Skwair2rownd


- Join Date
- Nov 2007
- Location
- Dundowran Beach
- Age
- 76
- Posts
- 19,922

As usual Derek you have given us an excellent WIP and a beautiful finished piece!!!

I particularly appreciate your willingness to partake in debates and discussions. I think we
all learn so much from them.
Have a great trip !!
-
30th December 2015 08:19 AM # ADSGoogle Adsense Advertisement
- Join Date
- Always
- Location
- Advertising world
- Age
- 2010
- Posts
- Many
-
9th February 2016, 12:52 AM #137
Be inspired. Be creative. Be bold.
- Join Date
- Apr 2001
- Location
- Perth
- Posts
- 10,827
 Four down, four to go ...
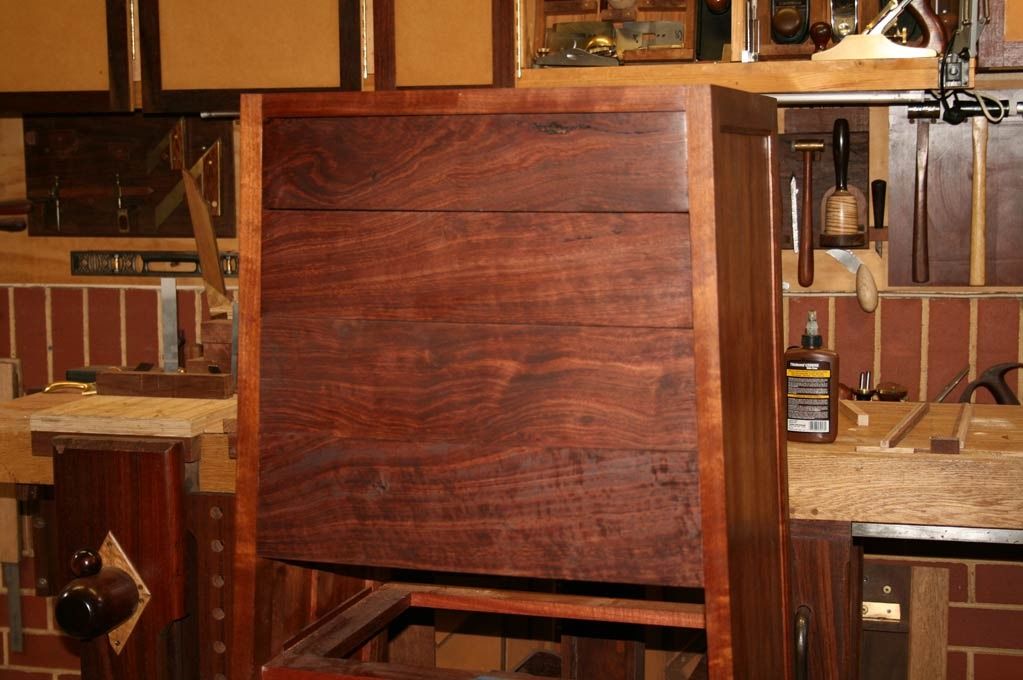
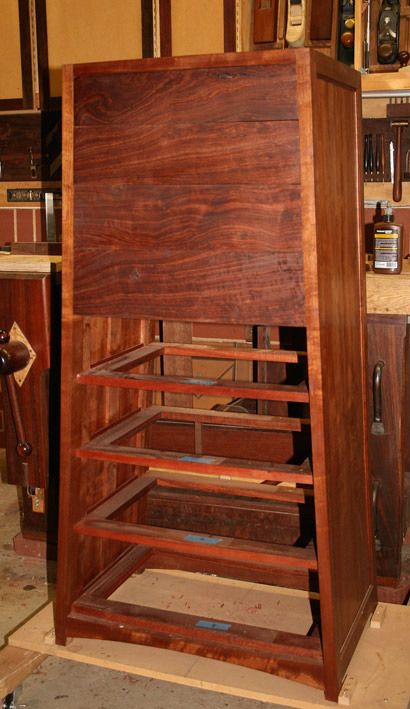
Just a quick update on the Lingerie Chest.
Four drawers done. They take 3 full days each to build (1 1/2 weekends). This includes thicknessing/sawing/shaping all the parts, dovetailing, and fitting.
The gaps between the drawers will be sorted out once all are done. There will be 1/16" between the drawers.
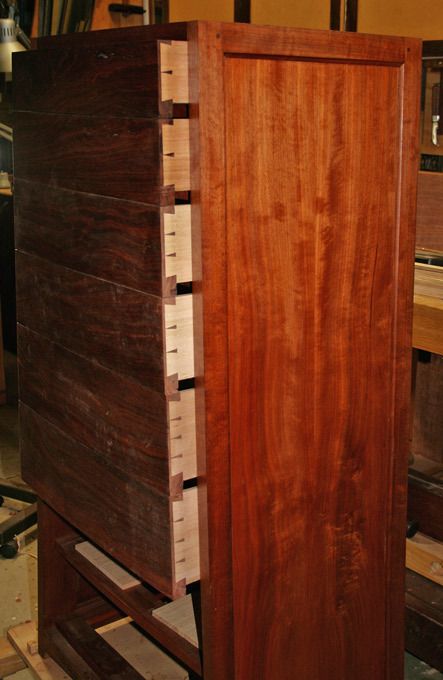
And the obligatory dovetail shot
The dovetails increase progressively, as with the size of the drawers.

Next post will be after all the drawers are done.
Regards from Perth
DerekVisit www.inthewoodshop.com for tutorials on constructing handtools, handtool reviews, and my trials and tribulations with furniture builds.
-
9th February 2016, 01:18 AM #138
Senior Member
- Join Date
- Oct 2015
- Location
- Perth
- Posts
- 298
Simply beautiful Derek,
The quality and detail of your work is just incredible.
I wish I'd never seen the lapdesk you made, actually that's a lie, I'm glad I saw it but I cannot stop looking at the photo's of it, one day I will make one if my skills ever allow it.
Darren.
-
9th February 2016, 08:13 AM #139
GOLD MEMBER

- Join Date
- May 2015
- Location
- Brisbane
- Posts
- 1,149
You are a man of great patience Derek. Beautiful work.
-
1st March 2016, 12:25 PM #140
Be inspired. Be creative. Be bold.
- Join Date
- Apr 2001
- Location
- Perth
- Posts
- 10,827
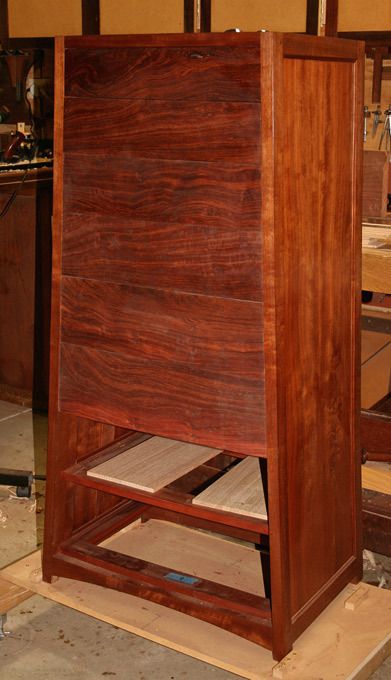
A little update ... six drawers down.
Regards from Perth
DerekVisit www.inthewoodshop.com for tutorials on constructing handtools, handtool reviews, and my trials and tribulations with furniture builds.
-
1st March 2016, 02:41 PM #141
Member
- Join Date
- Apr 2012
- Location
- Perth hills
- Posts
- 56
Looking good Derek
-
15th March 2016, 12:25 AM #142
Be inspired. Be creative. Be bold.
- Join Date
- Apr 2001
- Location
- Perth
- Posts
- 10,827
All the drawers are finally done ..
Well, almost ...
The drawer bottoms have still to be made for 4 of the drawers. After making each one separately, it occurred to me that this was the one item that I could build en masse.
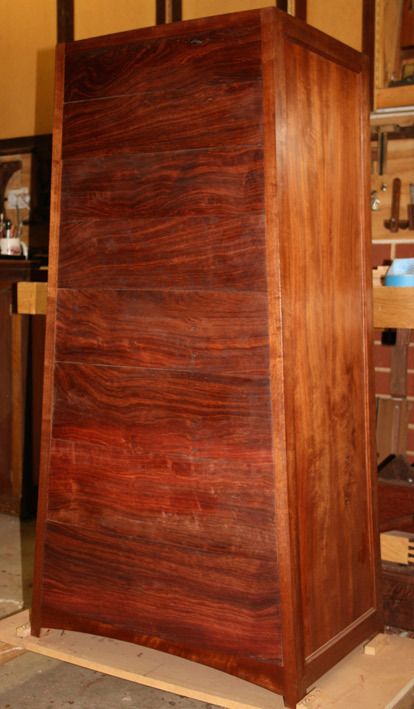

After the drawer bottoms are in, the task will be to make the drawer fronts coplanar. They are close to one another in curve, but there are a few variations here-and-there. What I plan to do is shim the drawers by about 1/2" to raise them out an equal amount so that they all lie proud of the carcase, place the chest on its back so that the drawers face upward, and then sand the faces with a long sander made out of a 2x4.
What do you think of this method? Any other ideas?
Regards from Perth
DerekVisit www.inthewoodshop.com for tutorials on constructing handtools, handtool reviews, and my trials and tribulations with furniture builds.
-
15th March 2016, 12:51 AM #143
Senior Member
- Join Date
- Oct 2015
- Location
- Perth
- Posts
- 298
They are magnificent. You must be please.
 bravabrava
-
15th March 2016, 01:50 AM #144
GOLD MEMBER
- Join Date
- Feb 2003
- Location
- back in Alberta for a while
- Age
- 68
- Posts
- 12,006
Hi Derek Originally Posted by derekcohen

are you striving too much for perfection?
the "few variations here-and-there" could be seen as the marks left by the artisan, while perfect in curvature and all coplanar could be interpreted as the marks of a machine made item.
my suggestion is to get as close as you can using hand tools but eschew the 4x2 and sandpaper.
I'd only go for a "perfect" front if I was planning on using a high gloss for a mirror like finish.regards from Alberta, Canada
ian
-
15th March 2016, 07:39 AM #145
Dehydrated Hydrographer
- Join Date
- Jun 1999
- Location
- Westleigh, Sydney
- Age
- 77
- Posts
- 9,550
-
15th March 2016, 09:47 AM #146
GOLD MEMBER
- Join Date
- Mar 2004
- Location
- Brisbane (western suburbs)
- Age
- 77
- Posts
- 12,136
Derek, depending on just how large the deviations are, I'd be reaching for a compass plane to do the bulk of the work, which should keep the curves sufficiently even, but allow you to work on any high spots. Unless it is going to be too risky to pane (I note that wild-looking grain!), I would only move to the paper for a bit of final cleaning up. I wouldn't be aiming for +/- micron perfection, but I'd certainly want the top of each front to line up with the bottom of the next. I'd think that's where the eye will detect any errors - with that swirly grain, it would be hard to spot small surface deviations over the rest of the fronts. Originally Posted by derekcohen
Wow, this piece of furniture has presence! Having all the drawers in seems to magnify it - it won't be able to hide in any room it's placed in!
Cheers,IW
-
15th March 2016, 06:43 PM #147
Mild Mannered Joiner
- Join Date
- Jun 2015
- Location
- Newport, Sydney
- Posts
- 655
Hi Derek.
I fear that if you lay the unit on its back, then sand, that you may get a little misalignment again when it stood back up. The effort may be in vain. I would leave it upright to fine tune the drawer fronts.
Looking really good.
Well done.
Pete.
-
15th March 2016, 10:52 PM #148
Be inspired. Be creative. Be bold.
- Join Date
- Apr 2001
- Location
- Perth
- Posts
- 10,827
Hi Ian Originally Posted by ian
It will never be perfection. There are too many indications of handplane use, from the dimensioning with jointers, to smoothing, and the scraped mouldings.
As careful as I have been to plane to the line, the drawer fronts have some variations here-and-there. It is enough for me to work on them some more, which I deliberately left to the end since there was no point in trying this earlier. At the beginning of August is the Perth Wood Show, and I usually enter a piece in the furniture competition. I thought that I would enter this piece, if it is completed in time (not sure about that! There is a lot more work to do). I do not stand a chance of winning (my Wegner chair came fourth last time), as handmade cannot compete with the "perfect" machine-made pieces that are entered (and that is a criteria for a good place). The drawers may be acceptable to you and I, but they are too far out for a competition. That is the nature of competition pieces.
The plan now is to use a long sander with a fine grit (600). This will just score the high spots, which I will then plane down. There will still be some variations, but that is fine with me.
Regards from Perth
DerekVisit www.inthewoodshop.com for tutorials on constructing handtools, handtool reviews, and my trials and tribulations with furniture builds.
-
15th March 2016, 11:05 PM #149
Be inspired. Be creative. Be bold.
- Join Date
- Apr 2001
- Location
- Perth
- Posts
- 10,827
Hi Ian Originally Posted by IanW
There is no way I could use a circular plane on these curved drawer fronts (I have a Record #020). The curve is not circular but an ellipse ..
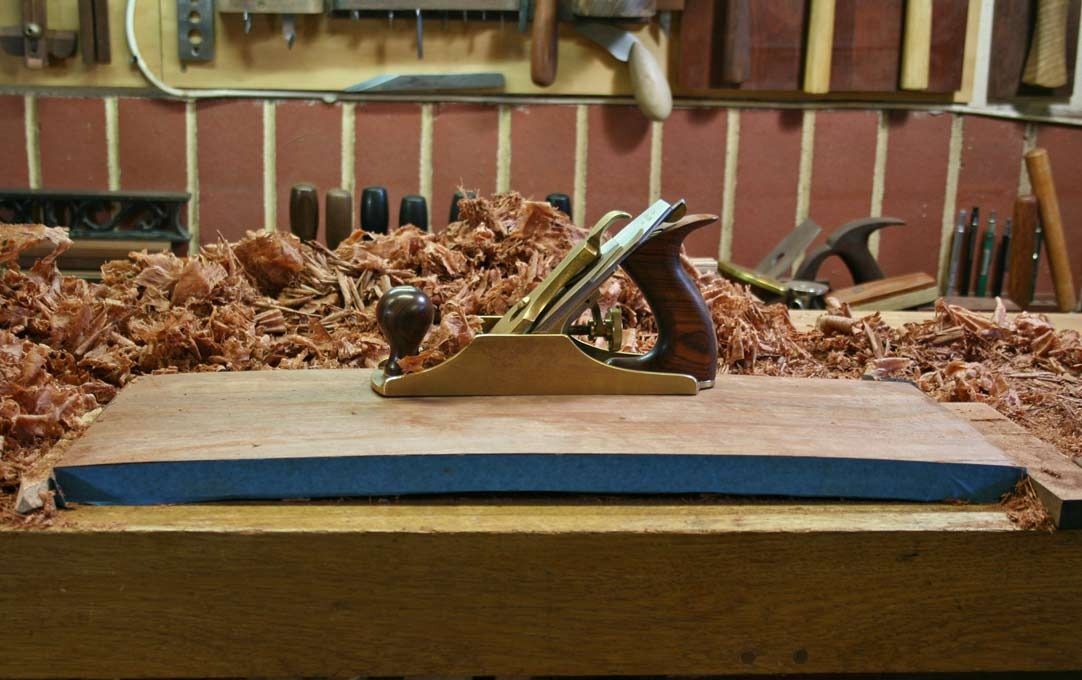
As mentioned above, I shall use a plane. The LN #3 above is used with the chipbreaker, so grain direction is not an issue. I tried to set the chipbreaker on the #020 (I did try it on the hollow side of the bow), but this would not take a shaving.
Regards from Perth
DerekVisit www.inthewoodshop.com for tutorials on constructing handtools, handtool reviews, and my trials and tribulations with furniture builds.
-
15th March 2016, 11:07 PM #150
Be inspired. Be creative. Be bold.
- Join Date
- Apr 2001
- Location
- Perth
- Posts
- 10,827
Pete, thanks for the warning. I will check for any movement, keeping your comments in mind. Originally Posted by Pittwater Pete
Regards from Perth
DerekVisit www.inthewoodshop.com for tutorials on constructing handtools, handtool reviews, and my trials and tribulations with furniture builds.

 Reply With Quote


Similar Threads
-
Lingerie Chest
By derekcohen in forum FURNITURE, JOINERY, CABINETMAKING - formerly BIG STUFFReplies: 17Last Post: 30th November 2014, 05:29 PM -
Sea Chest
By LR09WA in forum WOODWORK - GENERALReplies: 14Last Post: 11th June 2011, 08:00 PM -
Ice Chest
By rod1949 in forum Links to: TIMBER & HARDWARE SUPPPLIERSReplies: 1Last Post: 15th September 2004, 08:13 PM -
Chest
By GRS in forum WOODWORK PICSReplies: 8Last Post: 7th July 2004, 12:26 PM
