

 Thanks:
  Likes:
  Needs Pictures: 0
 Picture(s) thanks:
Results 46 to 60 of 187
Thread: Lingerie Chest
-
21st June 2015, 01:35 PM #46
 GOLD MEMBER


- Join Date
- May 2007
- Location
- Sth Gippsland Vic
- Posts
- 4,410

Derek
I went back to post 29 in this thread and checked the jointing technique used .And checked the website .
I would not recommend jointing two panels that way, at all .
Its a little unclear because the picture is not of the shooting, but the checking I think .
A shooting board sure,made the right way. or in the vice but not off the edge of the work bench
It's not done that way, and the use of an edge plane is asking for trouble , if not guaranteeing it .
Even the best HHG will not hold a gappy joint , the joint has to Kiss as perfectly as possible along its length. Be as airtight as possible . with all glue squeezed out under pressure. Glue joint starvation is something I believe has more to do with epoxy glues. IMHO
There are to many reports of Liquid hide glue failing . I would not risk all that work on a glue that many people have warned others about .
HHG is a well proven strong glue and you just have to walk into an Antique shop to see how well it holds the jointed boards of extension tables together
Flour and water will hold a nice mortice and tenon together. If the jointing is not coming up to scratch a good gap filling glue is the go .
HHG and glue pots was the old way and is good for veneer work, I still use the glue pots for that . Hammer veneering or pressing . I have a side table job on the go that is about to be done with a 150 deep apron that will be covered in Oak this week or next .
My first move away from a glue pot, sometimes , was because of a guy named Ken Neff (? spelling )
Since being very interested in Lutherie though My learning from them about much better HHG methods has leaped forward .
Ill put it into quick steps .
Grind HHG in a coffee grinder
Place in a small jar
Place small jar in a bowl of Boiled hot water
glue will be ready in ten minutes , dont shake but stir and keep jug boiling and replace water in bowl if needed
If its a small job , suck glue out of small jar into an empty eye drop bottle ,screw top back on and place into bowl of hot water and take to job
For a larger job , use same method but pour glue into a sauce bottle , the sauce bottle nozzle must be melted shut and just a micro pin hole made in it.
Place sauce bottle in a pot of hot water and either replace the water with fresh boiling every 15 minutes or keep the pot on an electric element near the work
Only mix an estimated amount for your work .
when done place in the fridge and re use if needed over the next few days
If its an important piece of work though like a guitar part or something with many hours of prep , mix it fresh .
Rob
-
21st June 2015 01:35 PM # ADSGoogle Adsense Advertisement
- Join Date
- Always
- Location
- Advertising world
- Posts
- Many
-
21st June 2015, 01:42 PM #47
SENIOR MEMBER
- Join Date
- Jan 2008
- Location
- NSW southern Highlands
- Posts
- 548
Derek
One problem that can occur is joint starvation where the glue is quickly absorbed by the wood, this can be overcome by applying glue that is thinned down to 10 - 20 % and allowed to dry. The joint is then made later with full strength glue.
However, it sounds like you have have correctly identified the problem for your joint failure.
If I am doing a glue up that does not require a lot of glue, or a relatively complex one that requires a bit of time to get several joints together simutaneously then I would use the LHG, as the working time is better.
If it is a job that is going to use a lot of glue then I would go the HHG route to save on cost.
I use a small electric wax heater with a thermostat as used by beauticians, and put the glue pearls and water into a glass jar in a water bath in the heater. At the end of a day I put the glass jar into the fridge and simply reheat later. I suspect you could get a couple of weekends out of a batch doing this, but I have never had a need to go more than three or four days, which has not been any problem.
i suspect the unreliable issues may stem from people buying the glue from retailers who have low turnover and the glue may have been sitting on a shelf for a long time.
Regards
-
21st June 2015, 07:23 PM #48
 GOLD MEMBER
- Join Date
- Mar 2004
- Location
- Brisbane (western suburbs)
- Age
- 77
- Posts
- 12,136
Derek, I use a touch of 'spring' on joints where the ends are going to show, the reason being I certainly don't want the ends opening up on a table or similar. Using 'spring' really only makes sense if you are pretty certain the wood you are glueing is likely to be at a slightly higher MC than it will assume once the item is in place. As you say, it only needs a touch, and if I'm glueing up at a time of year when I know the MC is at its lowest ebb, I usually do a straight joint. For panels, I rarely bother with any spring, just go for as perfect mating surfaces as I'm capable of achieving. I figure that even if the ends do open a fraction, it probably won't be seen .... Originally Posted by derekcohen

I recall seeing comparisons over the years and the liquid stuff held its head up in any company, iirc. Just about any glue joint when properly done, should be as strong as the wood (at least). If a joint fails. my first course is to blame myself, & only incriminate the glue if I can satisfy myself that's the only explanatoion. Once or twice it has been the glue at fault, but it's usually me. Originally Posted by derekcohen

I use the pearls because that's what I learned on (I'm a bit conservative, I'll admit), but it's a right pita when attempting any sort of complex glue-up! Preparing it doesn't take much faffing about since I chucked the old cast-iron double-boiler & got a plug-in wax-warmer, but it's still more fuss than simply grabbing a bottle & squeezing out what you need. I think the liquid glue has a much longer open time than the hot variety, too, which is one very good reason to use it...
Cheers,IW
-
22nd June 2015, 02:38 AM #49
Be inspired. Be creative. Be bold.
- Join Date
- Apr 2001
- Location
- Perth
- Posts
- 10,827
Hi RobI went back to post 29 in this thread and checked the jointing technique used .And checked the website .
I would not recommend jointing two panels that way, at all .
Its a little unclear because the picture is not of the shooting, but the checking I think .
A shooting board sure,made the right way. or in the vice but not off the edge of the work bench
It's not done that way, and the use of an edge plane is asking for trouble , if not guaranteeing it
Using the bench as a surface to shoot edges is a time-honoured method. Using an edge plane to create a spring joint is not traditional, but I have used it forbears very successfully with thin boards ... just not well with the one panel here Fortunately, the other panel was fine.
Regards from Perth
DerekVisit www.inthewoodshop.com for tutorials on constructing handtools, handtool reviews, and my trials and tribulations with furniture builds.
-
22nd June 2015, 02:40 AM #50
Be inspired. Be creative. Be bold.
- Join Date
- Apr 2001
- Location
- Perth
- Posts
- 10,827
Basil, thanks for this. I shall look into getting one ... if it doesn;t work for hide glue, at least I will have smooth legs!I use a small electric wax heater with a thermostat as used by beauticians, and put the glue pearls and water into a glass jar in a water bath in the heater. At the end of a day I put the glass jar into the fridge and simply reheat later. I suspect you could get a couple of weekends out of a batch doing this, but I have never had a need to go more than three or four days, which has not been any problem.
Regards from Perth
DerekVisit www.inthewoodshop.com for tutorials on constructing handtools, handtool reviews, and my trials and tribulations with furniture builds.
-
22nd June 2015, 02:46 AM #51
Be inspired. Be creative. Be bold.
- Join Date
- Apr 2001
- Location
- Perth
- Posts
- 10,827
[QUOTE=IanW;1875225]
I recall seeing comparisons over the years and the liquid stuff held its head up in any company, iirc. Just about any glue joint when properly done, should be as strong as the wood (at least). If a joint fails. my first course is to blame myself, & only incriminate the glue if I can satisfy myself that's the only explanatoion. Once or twice it has been the glue at fault, but it's usually me. [QUOTE]
Hi Ian
I soooo wanted to blame the glue! Not my fault at all!!
You see, THAT is what I want to avoid! You have much more patience than I.I use the pearls because that's what I learned on (I'm a bit conservative, I'll admit), but it's a right pita when attempting any sort of complex glue-up! Preparing it doesn't take much faffing about since I chucked the old cast-iron double-boiler & got a plug-in wax-warmer, but it's still more fuss than simply grabbing a bottle & squeezing out what you need. I think the liquid glue has a much longer open time than the hot variety, too, which is one very good reason to use it...
Cheers,
Regards from Perth
DerekVisit www.inthewoodshop.com for tutorials on constructing handtools, handtool reviews, and my trials and tribulations with furniture builds.
-
22nd June 2015, 02:47 AM #52
Be inspired. Be creative. Be bold.
- Join Date
- Apr 2001
- Location
- Perth
- Posts
- 10,827
Back on Track
So back to the repair.
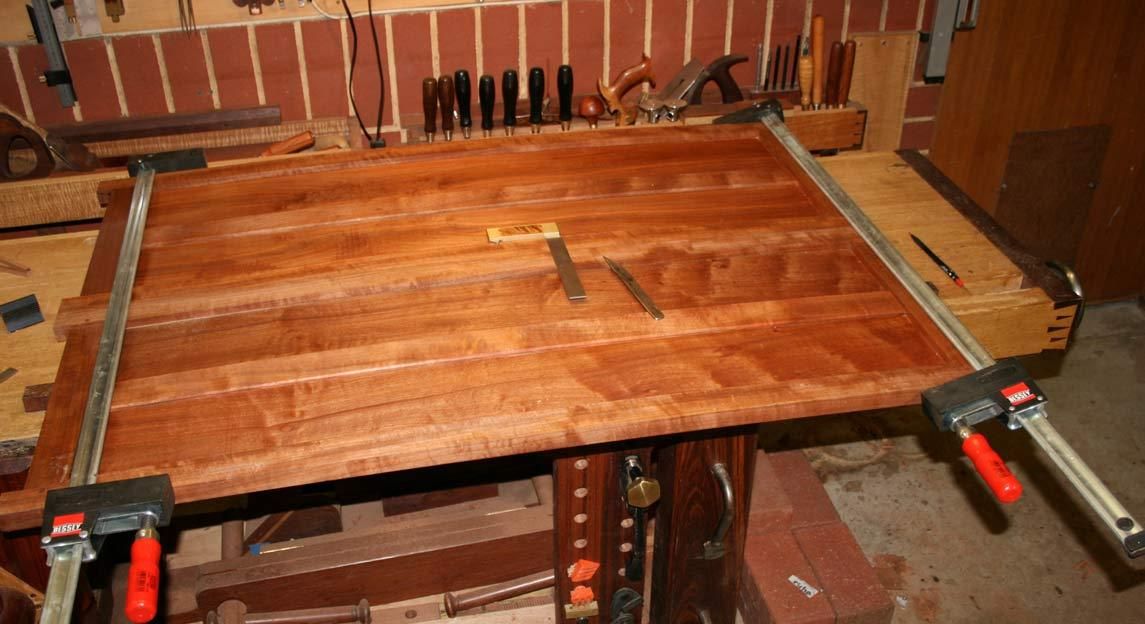
The face needed a minimal amount of scraping to level the joint ...
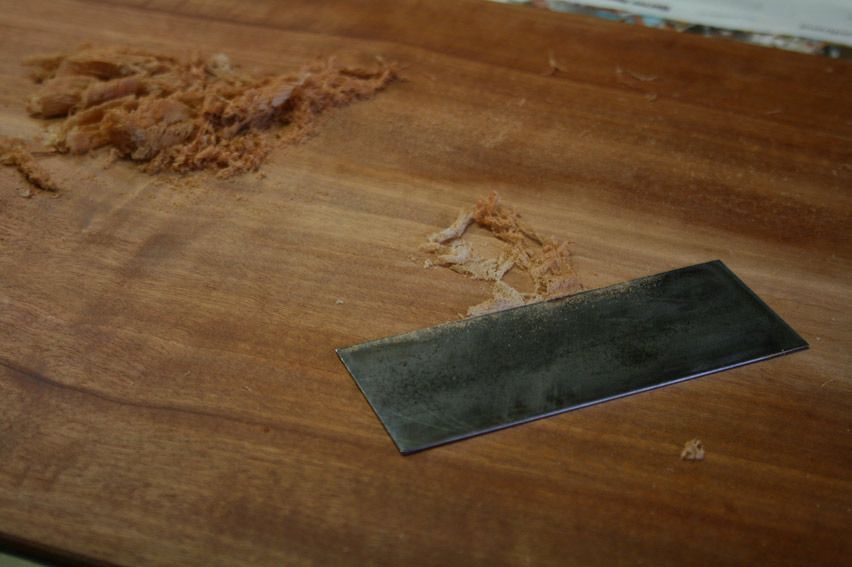
... before I called it good and re-glued and pinned the panel inside the frame.
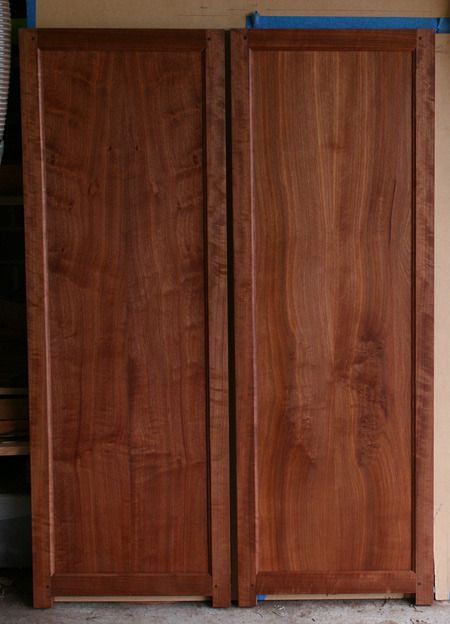
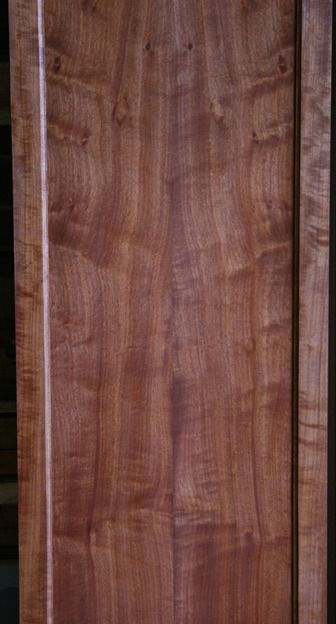
The repaired panel is on the left ...
Reinforcing strips were added to the rear - I had planned to do this anyway to beef up the thin panels. They will not be seen (on the inside) but will offer a little more reliability ..
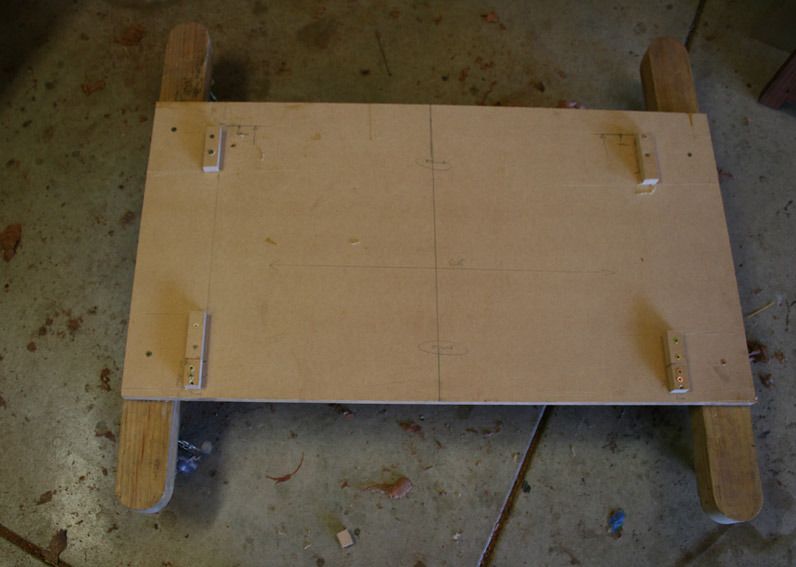
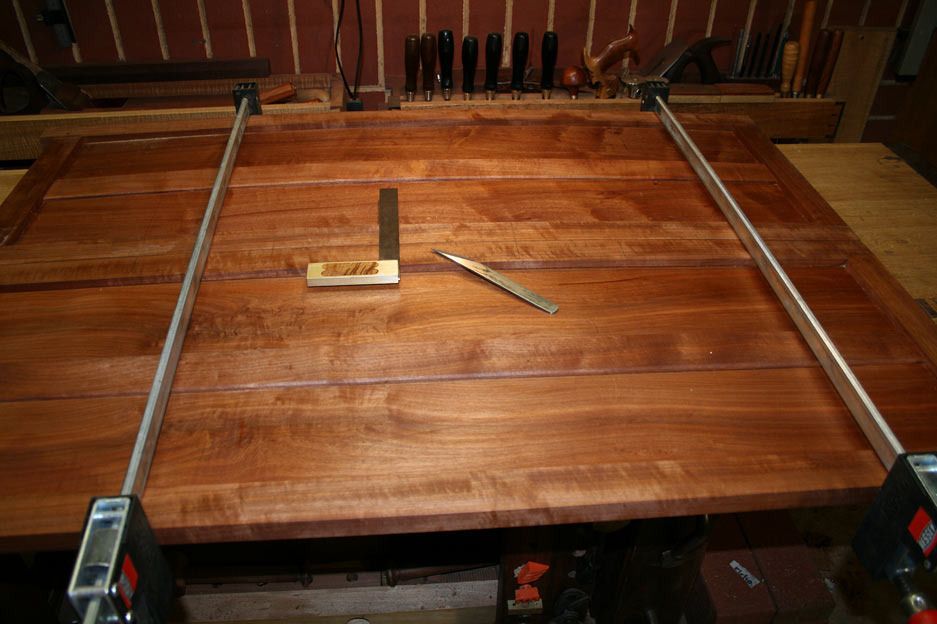
Some may be interested in the supports I built to aid accuracy in dimension and to keep everything square. The first was the base, which also will enable the chest to be moved around later ..
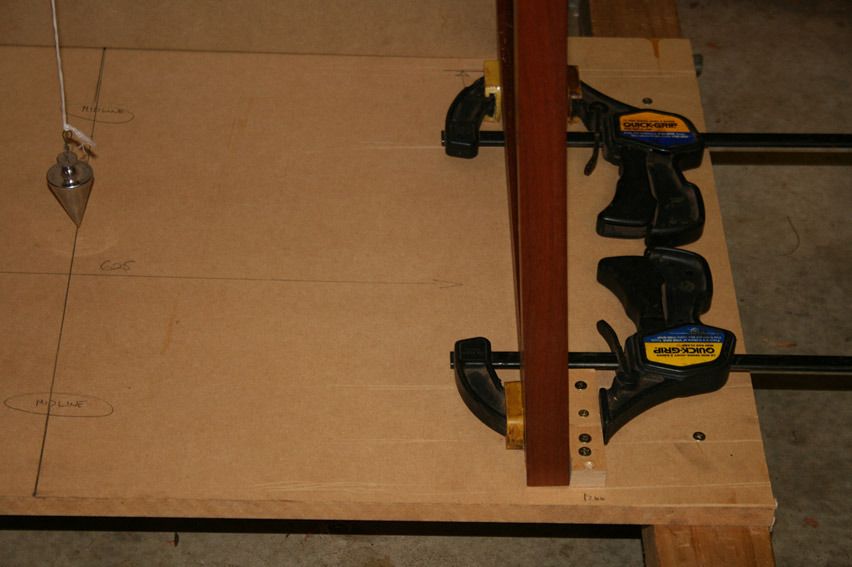
The other clamps across the top ..


So now we are back to clamping all on the jigs, with an added section of MDF clamped to the rear. The plumb bob ensures that vertical and centre is created, and may be returned to at any time ...

Once this is done, the inside perimeter can be traced onto the MDF. The MBF is moved to the bench, where the drawer dividers are drawn in. This is to act as a template.
A line is drawn down the centre of the cabinet template, and the dimensions first marked on this centre line ...
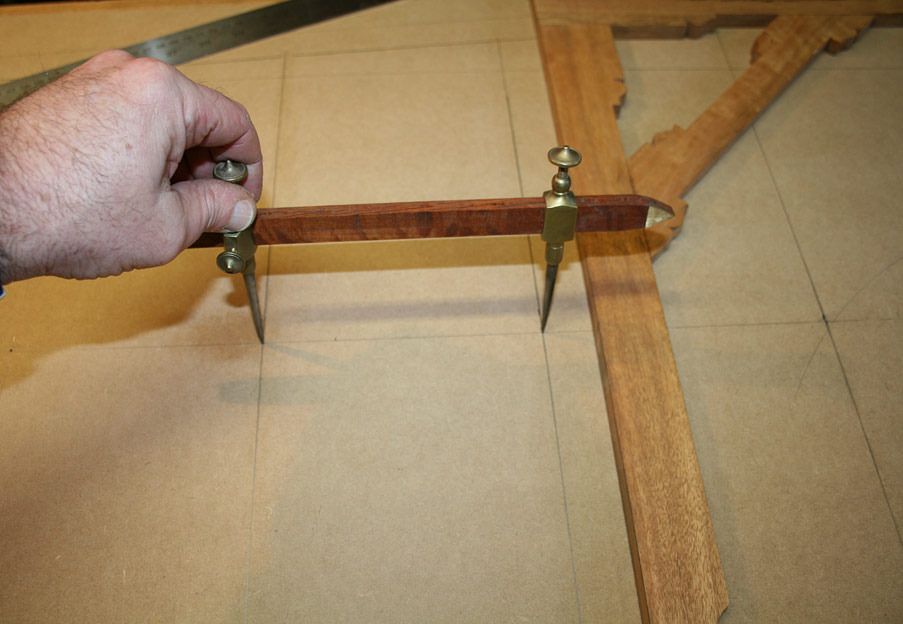
They are then transferred to each side ..


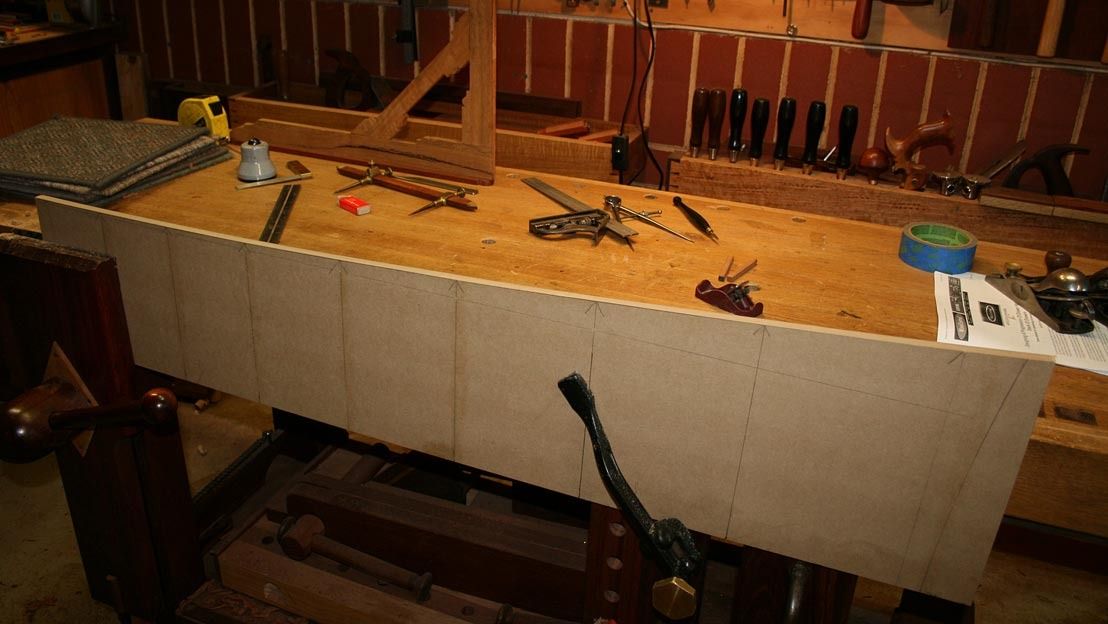
Here is the template back supporting the chest sides ...

I moved it to the other side and it was reassuring that there was about 1mm difference in the marked outline.
Now the intention was not to use these marks as the template, but rather to create a template from them. To do this the MDF outline was sawn down the centre, and then the curved side band sawn out, with a little cleaning up done with a small block plane.
Measurements are marked both sides ..
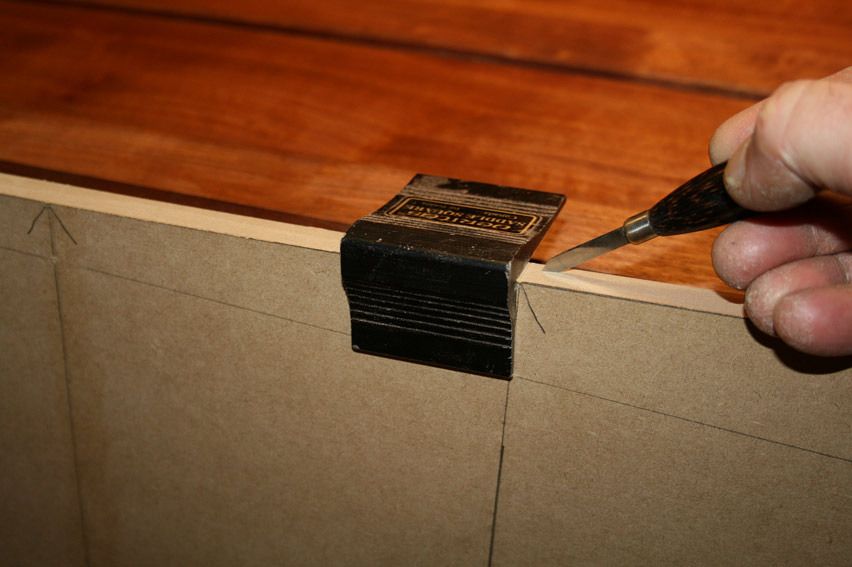
... and then transferred to each side of one board (only) ..

The panels are clamped together and the markings transferred from one board to the other ..
Once one side is match, the boards are rotated to complete the other matching edges ...
Now we can move on to marking out angled sliding dovetails and build the draw dividers.
Regards from Perth
DerekVisit www.inthewoodshop.com for tutorials on constructing handtools, handtool reviews, and my trials and tribulations with furniture builds.
-
22nd June 2015, 10:40 AM #53
SENIOR MEMBER
- Join Date
- Jan 2008
- Location
- NSW southern Highlands
- Posts
- 548
Derek Originally Posted by derekcohen
This is the heater I bought several years ago, mine has been no problem and the fact that they are still for sale indicates that others have found them serviceable. With regards to ' Other ' uses, that is fine, and it may well improve your speed in the Pool. But could you please restrict the photos you post to Furniture only
Regards
-
22nd June 2015, 03:10 PM #54
GOLD MEMBER
- Join Date
- May 2007
- Location
- Sth Gippsland Vic
- Posts
- 4,410
OK . I'm wrong Originally Posted by derekcohen
I went and re read again , you said " the bench top" , I missed that .
And from the picture I could see the boards sitting over the front of the bench .
I thought you had used the front edge of your bench to guide the plane somehow ??
Try the HHG in a plastic Bottle kept heated . As I said above .
Its a good thing .
very little waste and mess
and its fast with the prep
Rob
-
22nd June 2015, 07:30 PM #55
GOLD MEMBER
- Join Date
- Mar 2004
- Location
- Brisbane (western suburbs)
- Age
- 77
- Posts
- 12,136
I read this post, Rob, & realised I'd missed your post on putting HHG in bottles to place in the hot water, etc. Sounds like a very smart idea! I'll give it a try sometime, if nothing else it must make applying the stuff easier than using a brush from the pot, & dripping the wretched stuff all over the place (as I always seem to do). Originally Posted by auscab

Apart from that, the wax warmers are perfect for part-timers like me - you can mix & heat quite small amounts, just enough for one glue-up, which minimises waste. The close-fitting lid is a bonus too, because it eliminates 95% of the evaporation, & you don't get 'skinning' the way I did with my old traditional boiler....
Cheers,IW
-
22nd June 2015, 07:45 PM #56
GOLD MEMBER
- Join Date
- May 2007
- Location
- Sth Gippsland Vic
- Posts
- 4,410
Originally Posted by IanW
Its great Ian .
The speed of application over brushes or knifes or sticks is very quick . You can run the bottle down the edge of a thin panel or stick while finger gauging it to the middle .
re heats out of the fridge the next day are just a short 15 to 20 second burst in the microwave .
Rob
-
22nd June 2015, 09:40 PM #57
SENIOR MEMBER
- Join Date
- Jan 2008
- Location
- NSW southern Highlands
- Posts
- 548
Rob
Are you adding Urea to extend the working time and lifetime of the Glue ? Or are you just turning it over too quickly to worry about that.
Regards
-
23rd June 2015, 01:33 AM #58
GOLD MEMBER
- Join Date
- May 2007
- Location
- Sth Gippsland Vic
- Posts
- 4,410
No Urea in my glue . Ive never had any to try it out . In summer warm days are good enough and in winter I have warmed the workshop with a gas heater .That's just for the larger work. Or very important work . Pretty much what was done in the old days. Originally Posted by Basilg
Rob
-
13th July 2015, 02:56 AM #59
Be inspired. Be creative. Be bold.
- Join Date
- Apr 2001
- Location
- Perth
- Posts
- 10,827
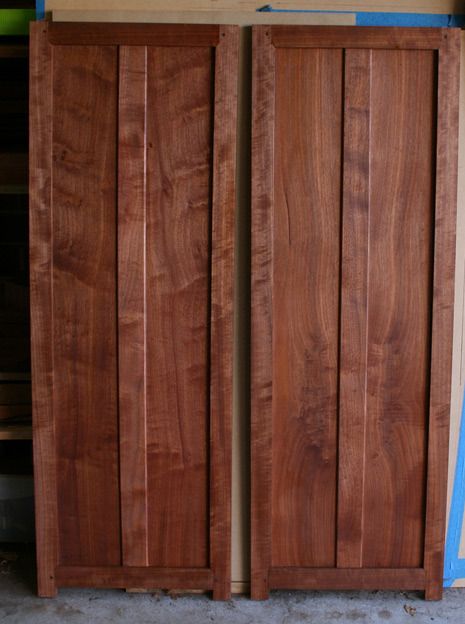
Before the drawer blades ...
The cabinet carcase is now complete and together as a dry fit.
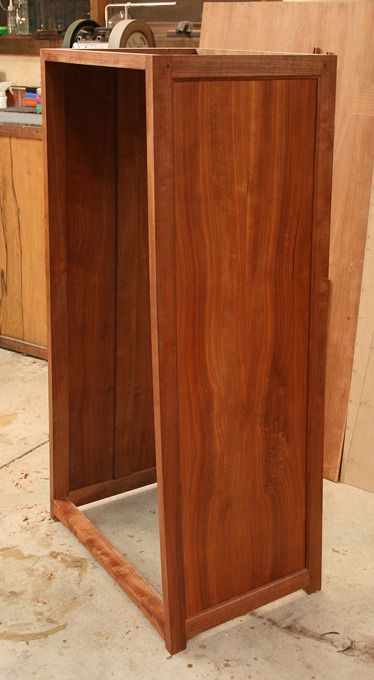
You cannot see the curve on the front elevation in this photo, but it is clearer in the documentation ..
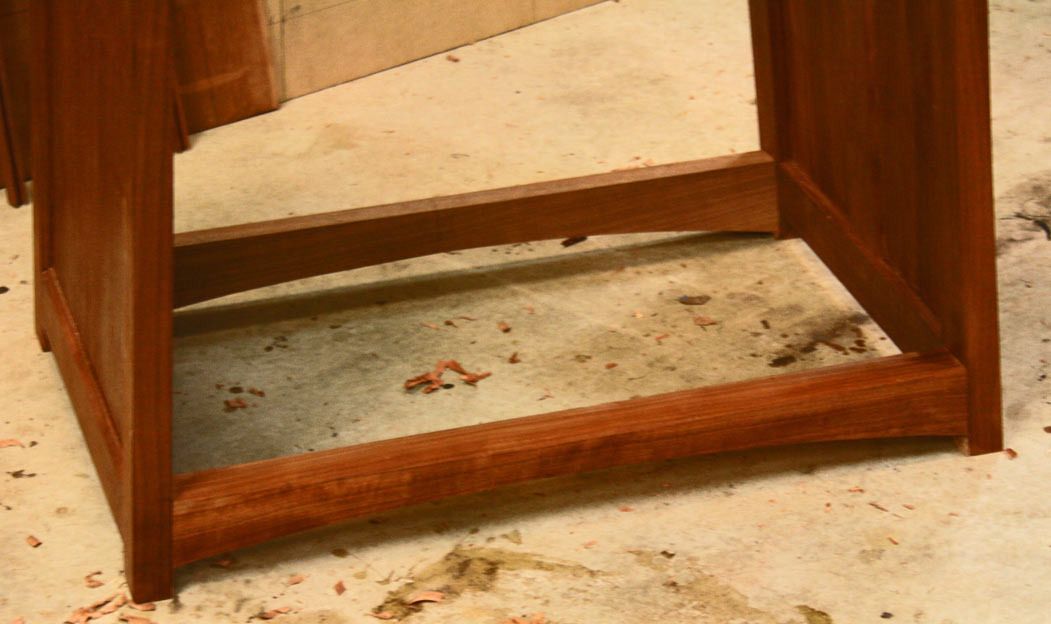
It had been my intention to post the carcase with completed draw blades � this would have been the next stage in any cabinet with straight sides. However it became increasingly apparent that, as a result of the many curves, this build is a tad more complicated, and I am have been left wondering whether I would ever get to be in a position to build the drawer blades as something else kept cropping up! It was a case of �I�d better to this before I get to that as it will not be possible later. And on and on ..
It is possible � and indeed I like to hear the opinion of others here � that the sliding dovetails for the drawer blades could be marked and formed from inside the completed carcase. I am now seriously considering this method. Indeed, I cannot see an alternative. The carcase could be dis-assembled and assembled repeatedly for work to be checked, carried out, and then checked again. However the latter will cause wear on the joinery, with resulting loss of tautness and accuracy.
Let's hear your thoughts on constructing the drawer blades. The front and rear are planned to be sliding dovetails (as has so much of this construction so far).
Here is the build in detail: http://www.inthewoodshop.com/Furnitu...werBlades.html
Regards from Perth
DerekVisit www.inthewoodshop.com for tutorials on constructing handtools, handtool reviews, and my trials and tribulations with furniture builds.
-
13th July 2015, 10:04 AM #60
GOLD MEMBER
- Join Date
- Mar 2004
- Location
- Brisbane (western suburbs)
- Age
- 77
- Posts
- 12,136
I think I'd cut the dovetail trenches before glue-up, Derek. It would be far easier, I'd expect, working on one side at a time than having to manouvre the whole box & dice, & work with your head & half your body inside a box. Then glue up, being ultra careful to keep the carcase symmetrical, after which you can mark the dividers for a perfect fit against the stiles on a now firm carcase. In fact, I would've cut the trenches in the stiles before glueing the side panels together - as far as I can see, their positions are fixed in the initial design. Or did you wish to look at the finished carcase to check if the drawer depths needed adjusting? The through-trenches on the back stiles will be simple enough, but if you plan on having stopped trenches in the front stiles, so that the D/ts don't show, it's going to be a bit awkward cutting them now, with the panels getting in your way (unless you made up a jig & use a 'lectric router...
).
Cheers,IW


 Reply With Quote


Similar Threads
-
Lingerie Chest
By derekcohen in forum FURNITURE, JOINERY, CABINETMAKING - formerly BIG STUFFReplies: 17Last Post: 30th November 2014, 05:29 PM -
Sea Chest
By LR09WA in forum WOODWORK - GENERALReplies: 14Last Post: 11th June 2011, 08:00 PM -
Ice Chest
By rod1949 in forum Links to: TIMBER & HARDWARE SUPPPLIERSReplies: 1Last Post: 15th September 2004, 08:13 PM -
Chest
By GRS in forum WOODWORK PICSReplies: 8Last Post: 7th July 2004, 12:26 PM
