

 Thanks:
  Likes:
  Needs Pictures: 0
 Picture(s) thanks:
Results 1 to 13 of 13
Thread: Redesign an entrance hall table
-
2nd June 2020, 03:22 AM #1
 Be inspired. Be creative. Be bold.


- Join Date
- Apr 2001
- Location
- Perth
- Posts
- 10,823
 Redesign an entrance hall table
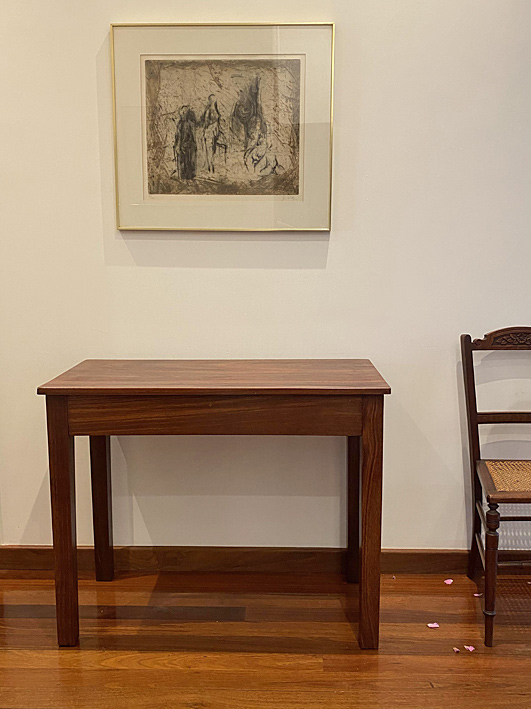
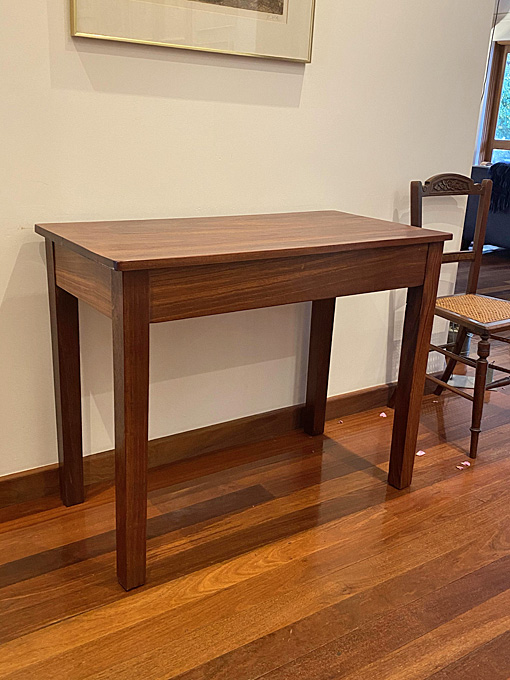
A good friend asked if I would add a drawer to an entry hall table of hers. Of course I said yes, but when I saw the table, I decided that it needed more than a drawer.
She did not ask what I had in mind, but just said said okay.
Why more? I just thought the table plain and .. well .. boring. We have been friends for most of our lives, and I could not recall even seeing this table in her entrance hall. That goes to show how forgettable it is! Okay, some of you may disagree. Everyone is entitled to their own taste. So you tell me what you think of this table, and how you would (or not) re-design it. I know what I plan to do at this stage, but there is time to be influenced. Mostly, I am interested in how you think
The table is solid Jarrah. The base stands 28" high and 35" x 17 1/2". The top is 3/4" thick and 36 1/4" x 18 1/2". The legs are 2" square.
This is in my entrance hall ...
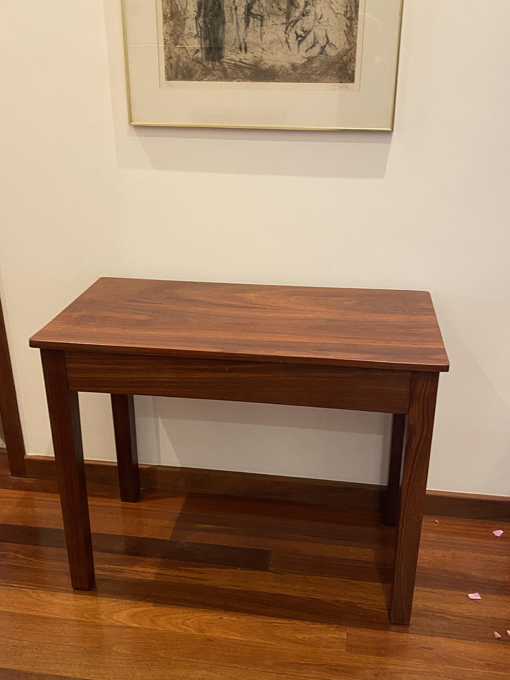
The top ...
The idea for the drawer is that it will be made from the front apron and be invisible. No handle. To do this, it will be necessary to pull the table apart since the apron will need to be cut up.
This is the underside of the table ...
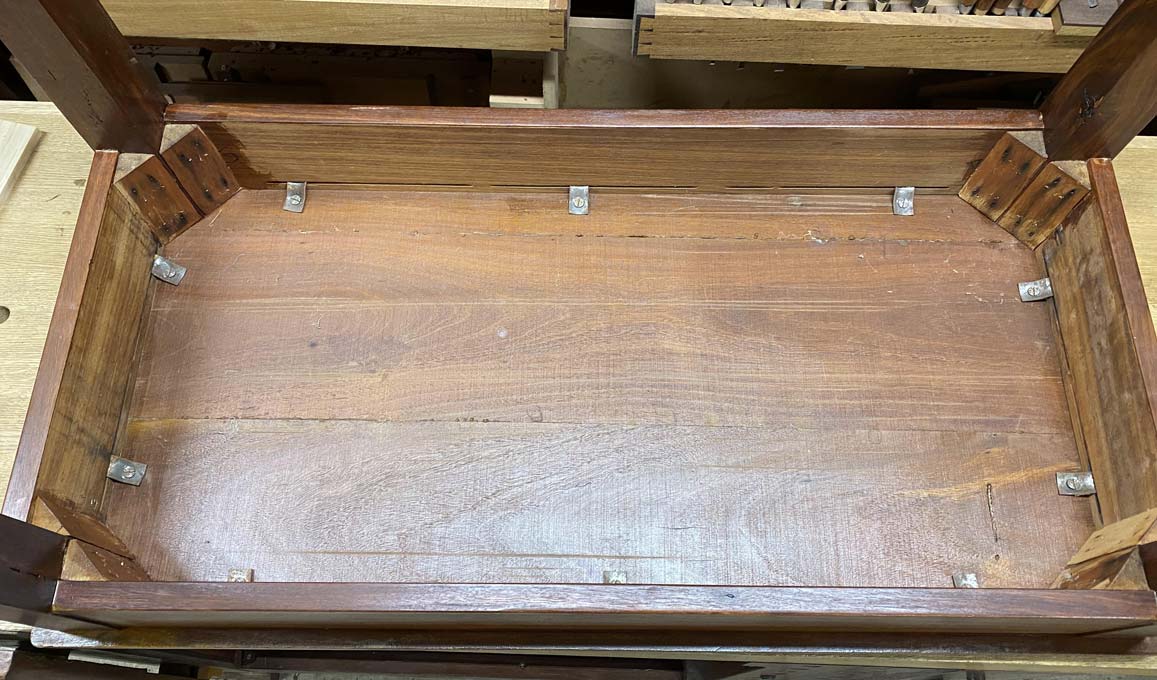
The table is not particularly old, perhaps 40 years? The screws are slotted ...
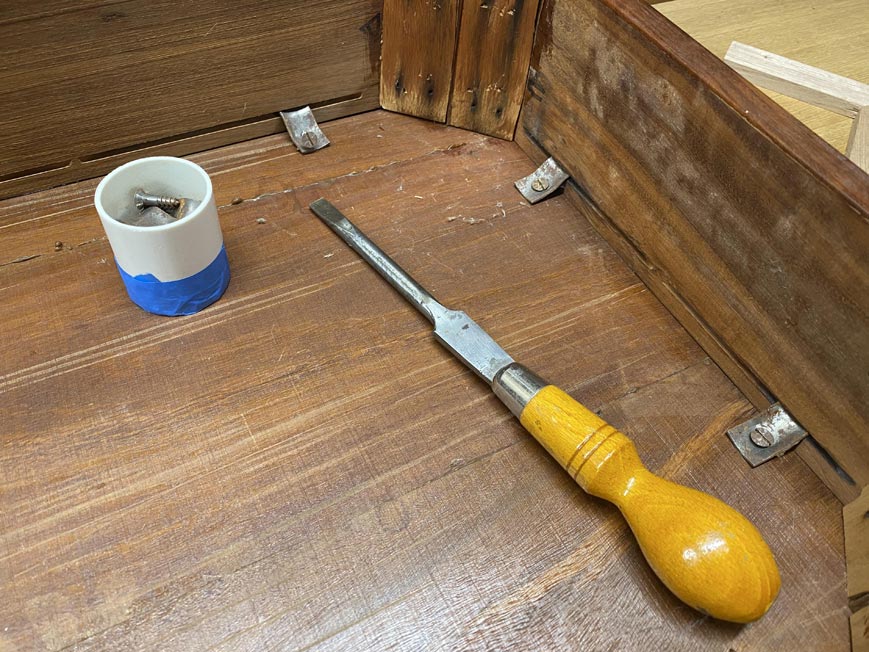
... but the corner blocks were attached with glue and brads.
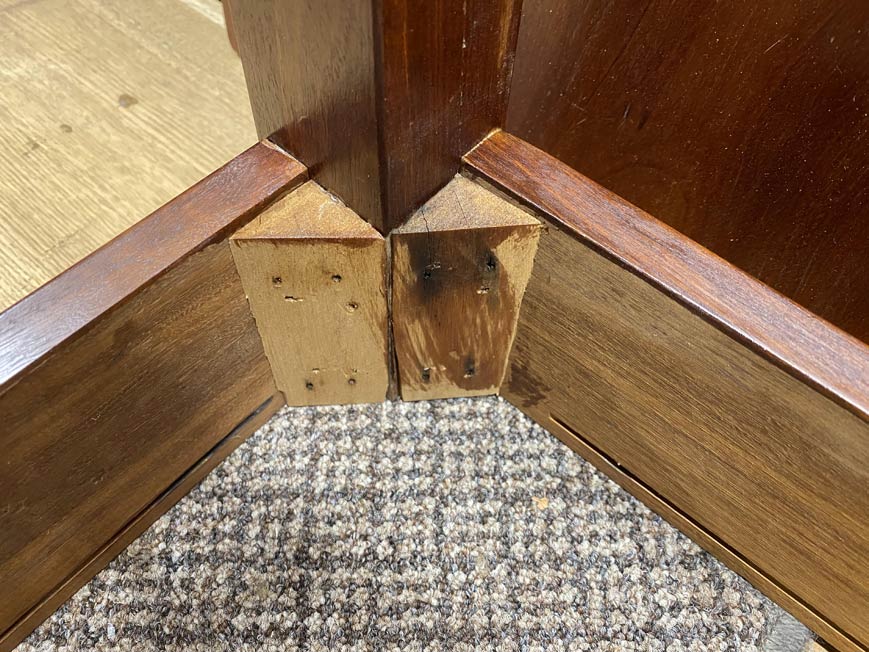
A plague on the house of furniture builders who attached corner blocks with brads! They shoot in and are nearly impossible to remove.
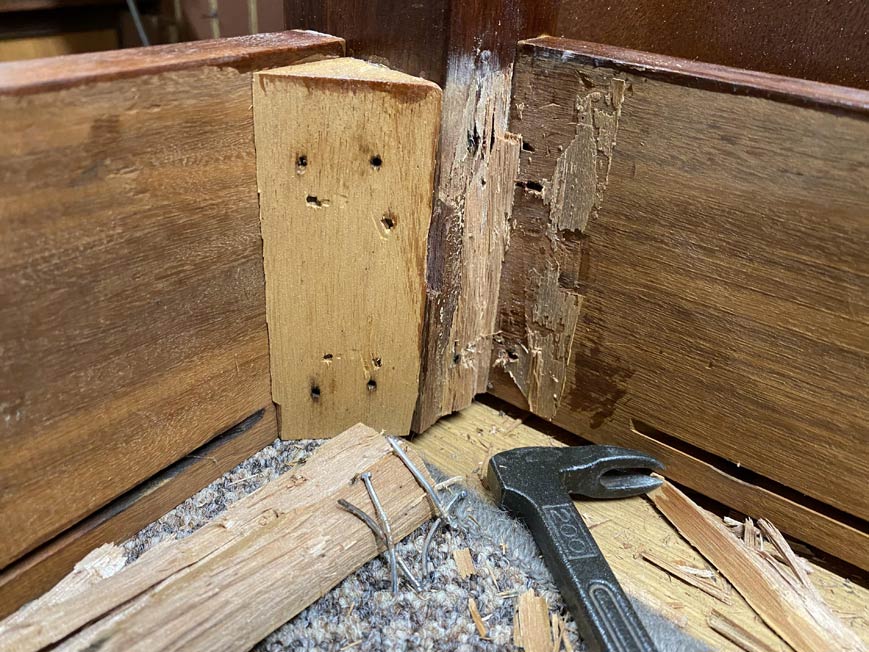
The blocks are tough and it is necessary to split them along the grain ...
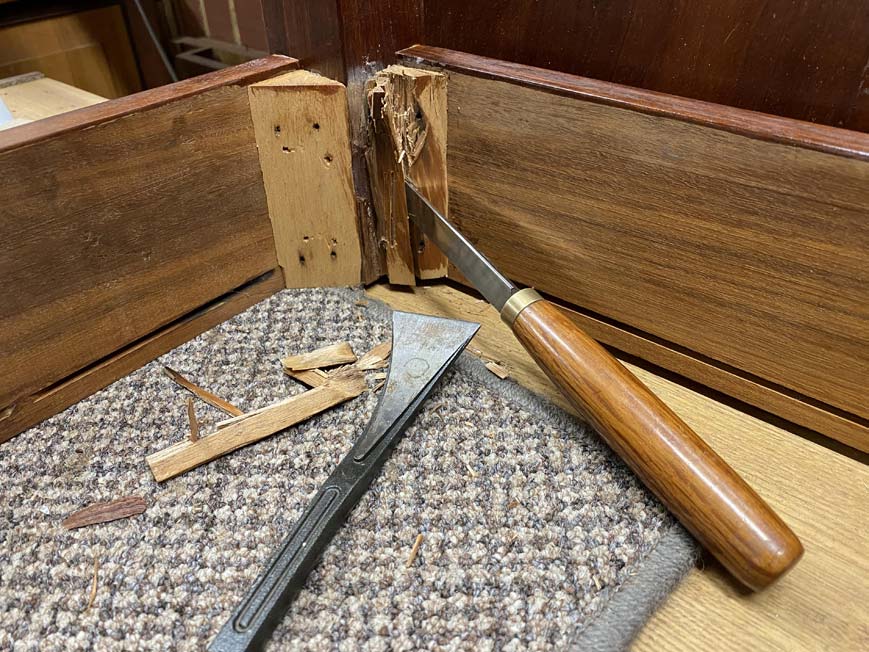
I managed to get out most, but not all the brads. The metal is brittle and a few remain behind ...
So ... thoughts on the re-design?
Regards from Perth
DerekVisit www.inthewoodshop.com for tutorials on constructing handtools, handtool reviews, and my trials and tribulations with furniture builds.
-
2nd June 2020 03:22 AM # ADSGoogle Adsense Advertisement
- Join Date
- Always
- Location
- Advertising world
- Posts
- Many
-
2nd June 2020, 08:02 AM #2
 Butcher of wood
- Join Date
- Jun 2010
- Location
- Bundaberg
- Age
- 54
- Posts
- 3,427
This looks interesting!
Is it necessary to cut up the apron? I can think of a way to fit a drawer which uses the entire apron as a false front while maintaining the overall rigidity of the frame; a sort of secret drawer as there would be no indication of its existence unless you looked underneath. I�ll sketch it out a bit later this morning.
I must admit it looks a little on the bland side but all I can see to improve it would be to cut a taper on the legs and possibly add a side bead along the edges of the aprons; I look forward to seeing what you have in mind.Nothing succeeds like a budgie without a beak.
-
2nd June 2020, 08:54 AM #3
SENIOR MEMBER
- Join Date
- Feb 2015
- Location
- Hobart
- Age
- 77
- Posts
- 649
Derek,
Here's my 2 cents worth !
The table seems to be out of proportions:
1) the table top doesn't overhang enough
2) the profile of the top's edge should be "curved" rather than square
3) the apron looks too wide and
4) the legs' taper could be accentuated.
All this can be easily fixed I'm sure and, while you are already at it, why not add maybe 3 slim drawers with contrasting timber faces - not too "contrasty" mind - one on the long side and the other two for the narrow ones? This will definitely give the piece a greater sense of being and purpose!
Now, to make sure we are one the same page, you need to understand that I have never made anything coming close to a table, nor have I pulled one apart!
Looking forward to seeing your "design"
Cheers Yvan
-
2nd June 2020, 09:12 AM #4
Senior Member
- Join Date
- Jun 2015
- Location
- Mexico. Actual Mexico not Victoria.
- Posts
- 418
Certainly does look like a chunky table.
Yeah, you have my sympathy with those corner blocks. I had a similar thing last year, total PITA.
As for any re-design, personally I'd keep things simple. I won't offer any specific suggestions except to say that it needs to lose weight.
Best of luck with it.
-
2nd June 2020, 11:37 AM #5
Butcher of wood
- Join Date
- Jun 2010
- Location
- Bundaberg
- Age
- 54
- Posts
- 3,427
Ok, here�s what I was thinking (views are essentially upside down because that�s how I imagined it and in keeping with your WIP photos
)
A box section frame to give torsional rigidity and prevent the front legs from splaying. I nominally decided on 4�-ish all round just for the purposes of this drawing. This gives you a drawer width of 22� wide and 11-1/2� deep externally. The drawer is supported on a pair of blades 1/2 thick and 1� wide which would give you ample width for drawer sides and a pair of slips; I drew them stuck on the side of the carcass which is obviously rather weak but is easier to imagine.
30344997-1B1D-4F31-9724-1A5166B6820B.jpg
And here is a 3D visualisation of one side showing the bits assembled. The dotted lines represent the position of the existing apron front that can be attached to the front of the drawer.
8894CE5F-6719-49E5-9CE4-3E8E96F639E0.jpg
I�ve been thinking that it�s been a while since I dragged the drawing board out so this was a good excuse to do so!Nothing succeeds like a budgie without a beak.
-
2nd June 2020, 03:32 PM #6
Franklin Ferrier
- Join Date
- May 2007
- Location
- Gold Coast
- Age
- 70
- Posts
- 2,735
Derek,
Is the intention to make an entirely new table from the timber reclaimed from knocking apart the existing one or to simply add feature to the original by keeping it's proportions mostly intact?
If making a new table I would consider reducing the leg dimensions a little and taper them. I'm having a preference for under bevel on the table tops at the present and would do that rather than a round over or some other fancy edge treatment. You might gain enough new overhang by the reduction in underframe size gained from remaking the frame with new tenon joinery.
Just my 2c worth. Have fun and I hope it mostly comes apart cleanly!Franklin
-
2nd June 2020, 05:20 PM #7
GOLD MEMBER
- Join Date
- Feb 2003
- Location
- back in Alberta for a while
- Age
- 68
- Posts
- 12,006
Hi Derek Originally Posted by derekcohen

my thoughts
1. You've demolished the table. I say demolished (rather than disassembled) because having removed the corner blocks, you will likely
a) replace the blocks with Festool dominos, or mortice and tenons joints.
b) reduce the width of the aprons by the equivalent of two saw kerfs.
c) reduce the length of the front and rear aprons by the equivalent of two saw kerfs.
d) reducing the length of the front, rear and side aprons by the amount required to cut tenons will depend on your decision re M&T or dominos.
aesthetic options.
for Gawd's sake TAPER THE LEGS to something less than 2" square.
allow the top to overhang the base so that it's underside can be chamfered
get creative and inlay the topregards from Alberta, Canada
ian
-
3rd June 2020, 01:33 AM #8
Be inspired. Be creative. Be bold.
- Join Date
- Apr 2001
- Location
- Perth
- Posts
- 10,823
It is so interesting - and re-assuring - how many of us see the same issues, and even come up with similar ideas.
As some recognised, I plan to pull the table apart and rebuild it with the parts.
The table top is the key. It fits the space where the hall table will live. This means that the width of the table cannot be changed. All the other dimensions must work with it.
Clearly the top is too blocky, and the depth needs to be reduced to achieve a more aesthetic proportion. This will allow the top to be re-shaped. Perhaps a gentle curve front and rear (getting rid of the rounded corners at the same time!).
There needs to be overhang to the sides and the front. To enable this, the skirting needs to be shortened front, back and sides. This is the reason I have begun dissembling the base.
The legs will be tapered, naturally.
I have an idea for the drawer. Hopefully interesting enough to add a little playfulness to the design.
Joinery? I need to work out how much the skirting must be reduced. That will decide whether I can do mortice-and-tenon joints for the legs. Otherwise it will need to be dominos.
I suspect that the current joints are M&T as the corner blocks made no difference to the rigidity of the construction. It is Really Strong. No give at all.
Now to draw it up and present the concept.
Regards from Perth
DerekVisit www.inthewoodshop.com for tutorials on constructing handtools, handtool reviews, and my trials and tribulations with furniture builds.
-
5th June 2020, 05:53 PM #9
... and this too shall pass away ...
- Join Date
- May 2012
- Location
- Brisbane (Chermside)
- Age
- 71
- Posts
- 2,084
Lots of good advice here.
I'd be inclined to disassemble the entire table, and as others have suggested, perhaps use the entire apron as a drawer front. However, I generally prefer raised drawer fronts as seen in the first pic ... but that's a taste thing.
Please, at least taper the legs. I like the legs in the pic for this table; tapered with a foot.
IMAG0024.jpg
A long time ago I made a similar table using dark wood. For relief and contrast the feet and the edge of the top were silver ash, which contrasted nicely. Unfortunately, I can't find a pic of it.
The legs below were cut from 2 inch square timber ... it is an option.
IMG20200407172231.jpgIMG20200407172019.jpg
As others have suggested, you need some relief on the edge of the top.
-
5th June 2020, 06:31 PM #10
Be inspired. Be creative. Be bold.
- Join Date
- Apr 2001
- Location
- Perth
- Posts
- 10,823
Thanks for the ideas.
Great tables, but the style preferred by the owner is modern and minimalistic.
The front cannot be a single drawer ... unless one uses metal slides, which I avoid doing. The depth-width ratio will otherwise lead to racking.
I plan on a front drawer which will meld into the skirt. Tapered legs brought in, as a number have identified.
Regards from Perth
DerekVisit www.inthewoodshop.com for tutorials on constructing handtools, handtool reviews, and my trials and tribulations with furniture builds.
-
6th June 2020, 04:08 PM #11
Woodworking mechanic
- Join Date
- Jan 2014
- Location
- Sydney Upper North Shore
- Posts
- 4,470
-
14th June 2020, 04:17 PM #12
Intermediate Member
- Join Date
- Aug 2014
- Location
- Queensland
- Posts
- 34
Hi Derek,
An idea for the construction of the drawer.
I am now embarrassed to say the Hall Table I built looks very similar to the one that everyone say looks crap... Maybe I am not the one to listen to....
The drawer could be made by ripping a small about from the top and bottom of the front apron, You would be left with the top small strip the centre wide strip and the bottom small strip. The drawer front/s would be cut from the center strip. The front apron is then re-assembled with the drawer fronts in place but not glued in. You would then have to rip the side and back aprons to the new width (2 x kerf thickness)
This is probably something that you have already considered but thought it was worth a mention just in case.
Hopefully the pics illustrate what I mean. You can still see the glue line when you look close.
Upon re-reading your original post this design doesn't allow for there to be no handle / invisible.. My mistake!! Now that it has been posted I dont believe I can delete it..
20200614_145737.jpg 20200614_145756.jpg 20200614_145834.jpg
-
14th June 2020, 04:22 PM #13
Be inspired. Be creative. Be bold.
- Join Date
- Apr 2001
- Location
- Perth
- Posts
- 10,823
Thanks. Good thinking. I am doing something similar. I shall share this when done.
Regards from Perth
DerekVisit www.inthewoodshop.com for tutorials on constructing handtools, handtool reviews, and my trials and tribulations with furniture builds.


 Reply With Quote


 ...
...
Similar Threads
-
Sheoak hall/entrance table
By driftit in forum WOODWORK PICSReplies: 34Last Post: 19th March 2011, 08:19 PM -
hall table, wine table, water stone box
By driftit in forum WOODWORK - GENERALReplies: 6Last Post: 1st May 2009, 11:20 PM -
body redesign
By avengers63 in forum MUSICAL INSTRUMENTSReplies: 29Last Post: 30th August 2008, 01:57 AM -
Hall Table
By DarrylF in forum WOODWORK PICSReplies: 8Last Post: 3rd February 2004, 10:50 PM
