

 Thanks:
  Likes:
  Needs Pictures:
  Picture(s) thanks:
Results 16 to 25 of 25
Thread: Transformations
-
2nd July 2020, 04:04 PM #16

 GOLD MEMBER


- Join Date
- Apr 2006
- Location
- Hobart
- Posts
- 5,122

 Originally Posted by derekcohen
Ian, I wonder what will happen if Rita says she wants me to return it to the original? Now that transformation would be amazing to achieve!
Originally Posted by ian
You are absolutely correct, Ian.
All it would require is a new top, new legs and new rails. I am sure Derek has sufficient jarrah stashed away.
-
2nd July 2020 04:04 PM # ADSGoogle Adsense Advertisement
- Join Date
- Always
- Location
- Advertising world
- Posts
- Many
-
4th July 2020, 03:24 AM #17
Be inspired. Be creative. Be bold.
- Join Date
- Apr 2001
- Location
- Perth
- Posts
- 10,821
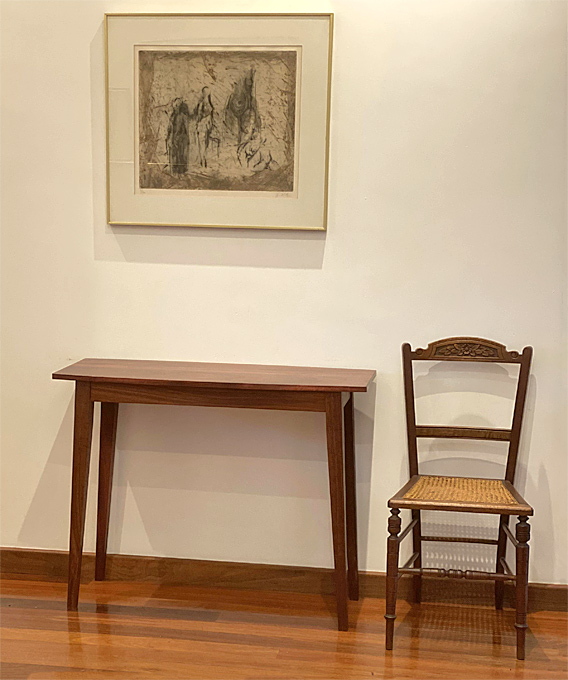
There are four parts to the drawer build: the drawer size and design, the drawer case, fitting the drawer case, and the drawer.
Part 1 described the drawer size and design, and the apron of the drawer case. Part 2 describes the rest.
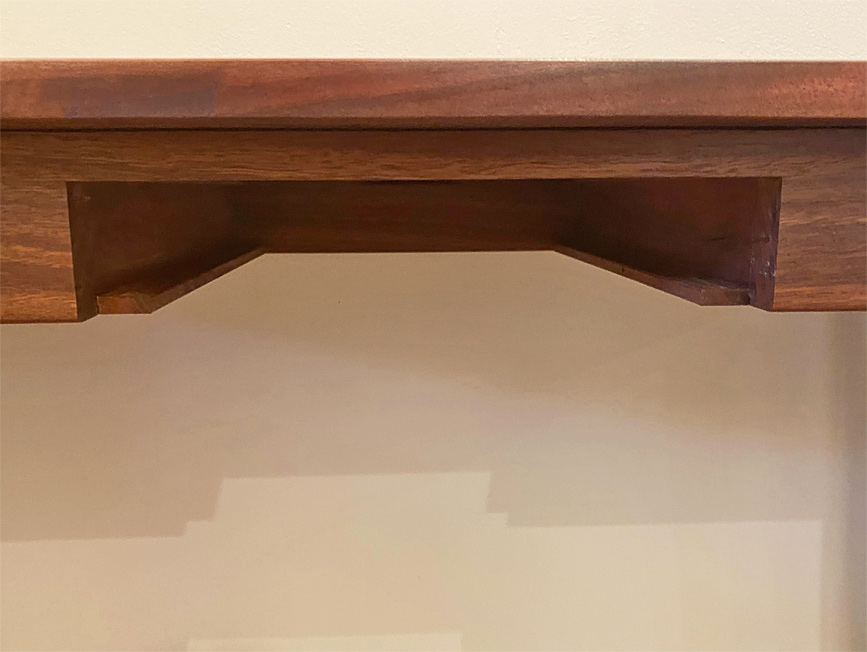
We ended Part 1 here. That is the apron and opening to the drawer case ..
This is where the build ended ...
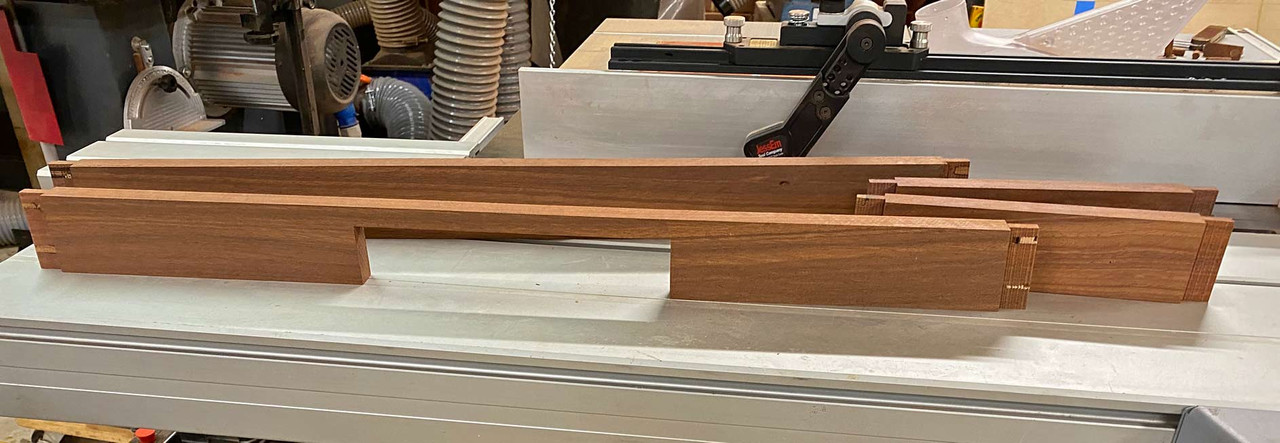
The drawer case and its fitting
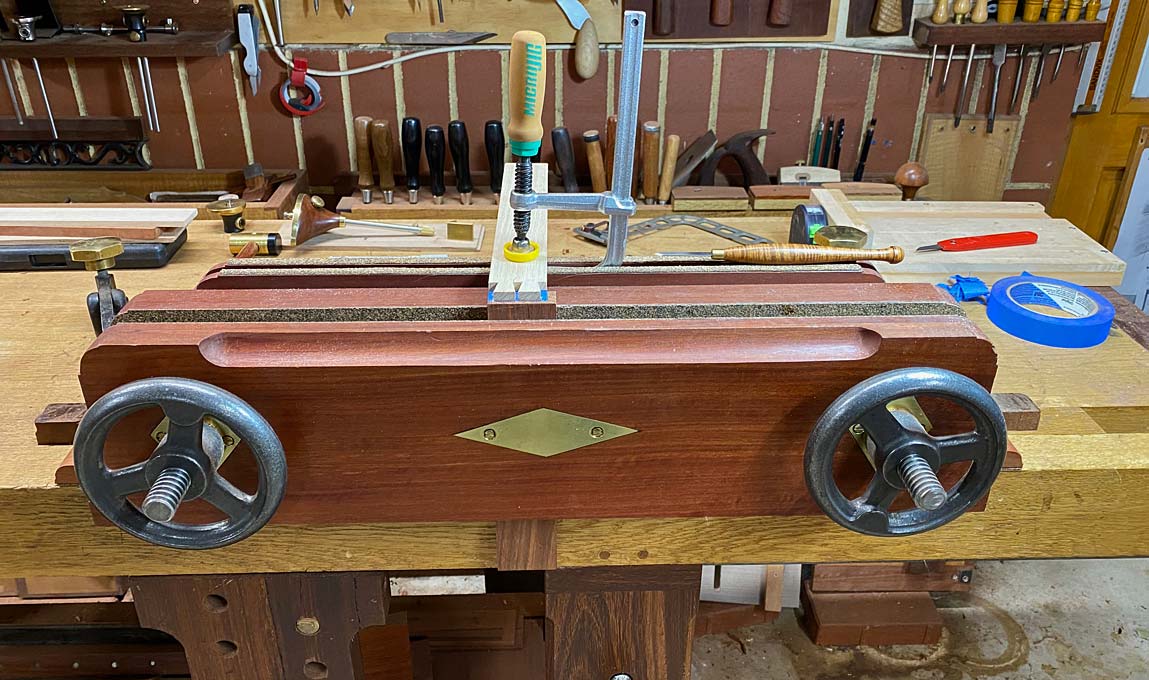
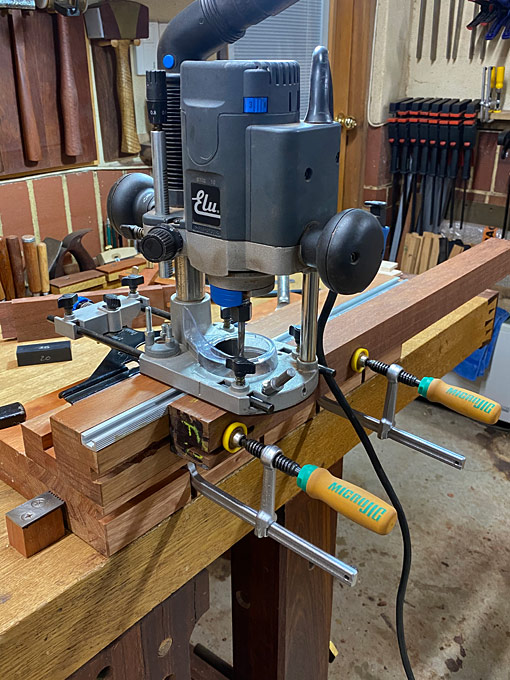
I scratched my head for a week how to do this. How to get the case to support drawer blades. I did not want a heavy, complicated arrangement, one which ran the danger of protruding below the table and might be seen at a distance. It needed to be lean and mean. To be elegant. A design to be appreciated by myself and you. This is what I came up with ..
The case sides were grooved 3mm (1/8") ...
.. and matched with a rebated section which would form the 6mm (~1/4") thick drawer blade ...
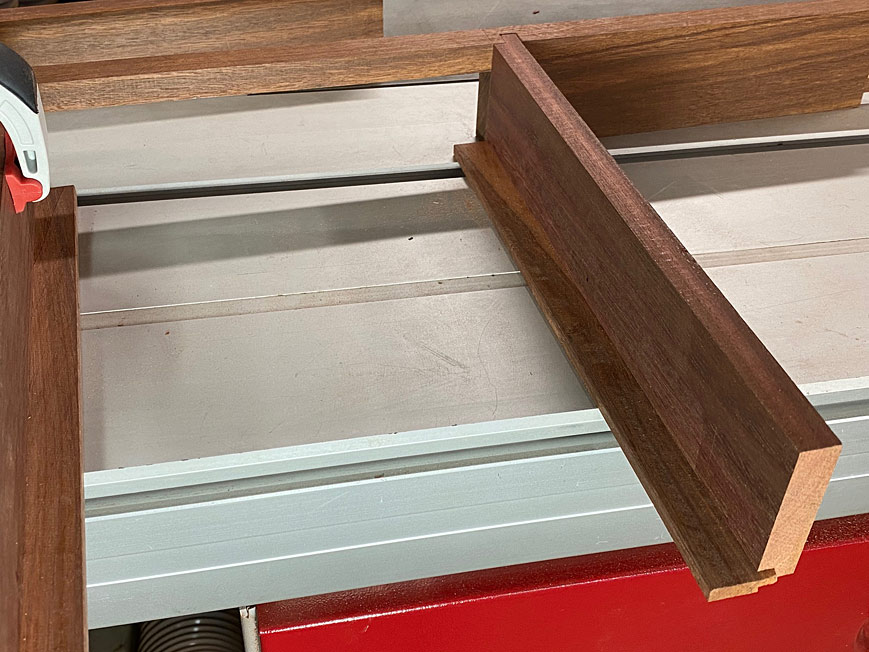
The thickness of each blade is the same as the depth of the lip on the drawer front (which doubles as a drawer pull). This depth is significant.
The reason for the rebate arrangement is to get the blade as low as possible on the case side. Recall that the front of the blade acts as a drawer stop as well, and must be coplanar with the lower edge of the drawer lip.
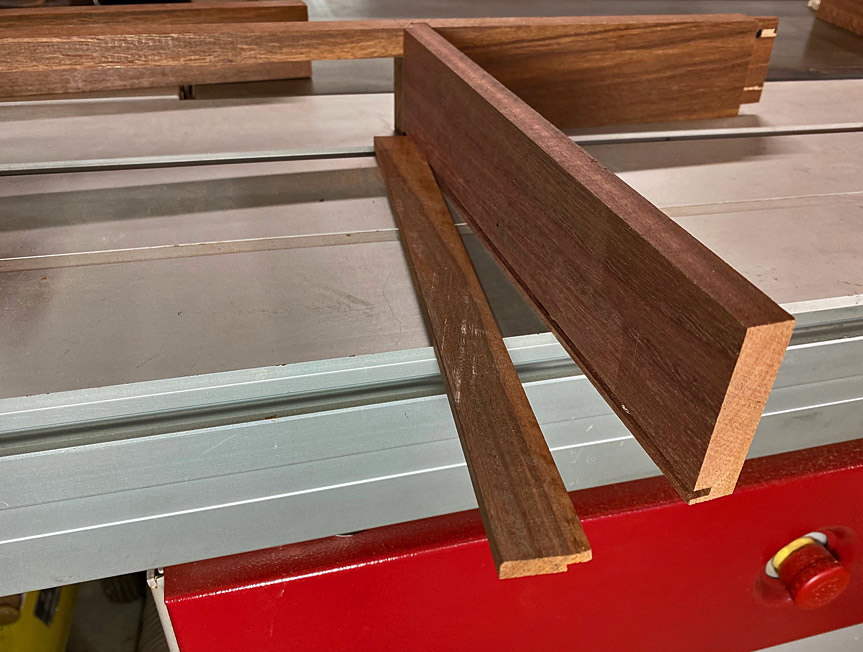
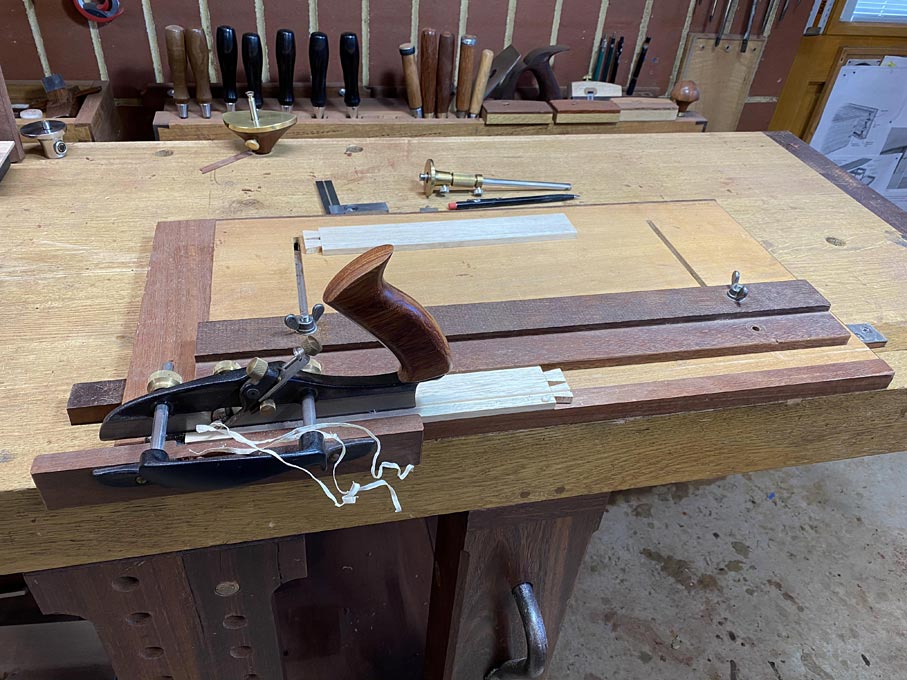
The side/blades are fitted to the rear of the apron with a mortice-and-tenon joint ...
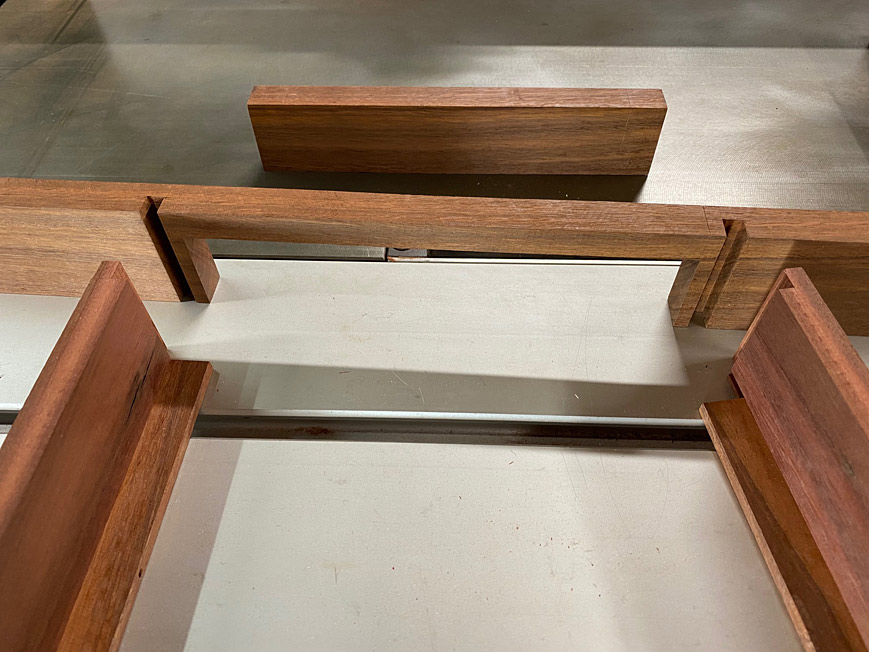
This was definitely a tricky joint to do and it needed to be precisely positioned so that the entry lined up with the sides ... precisely!
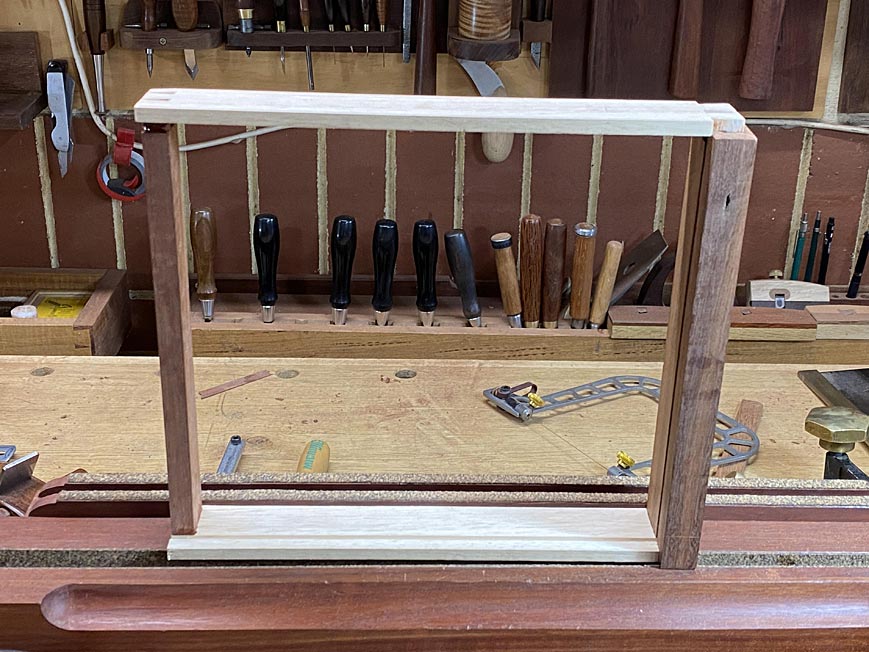
Here is what it would look like with the drawer front inserted ...
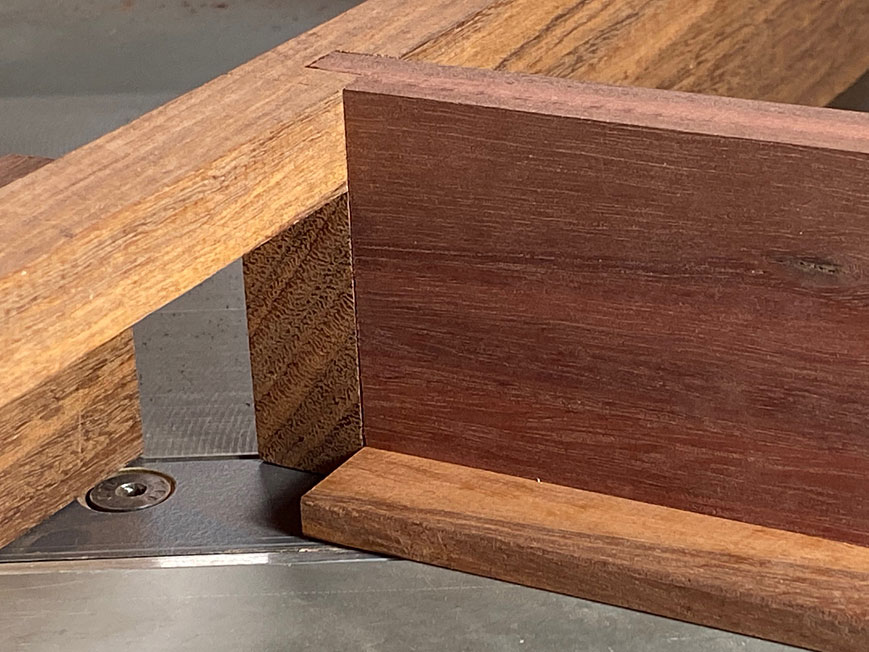
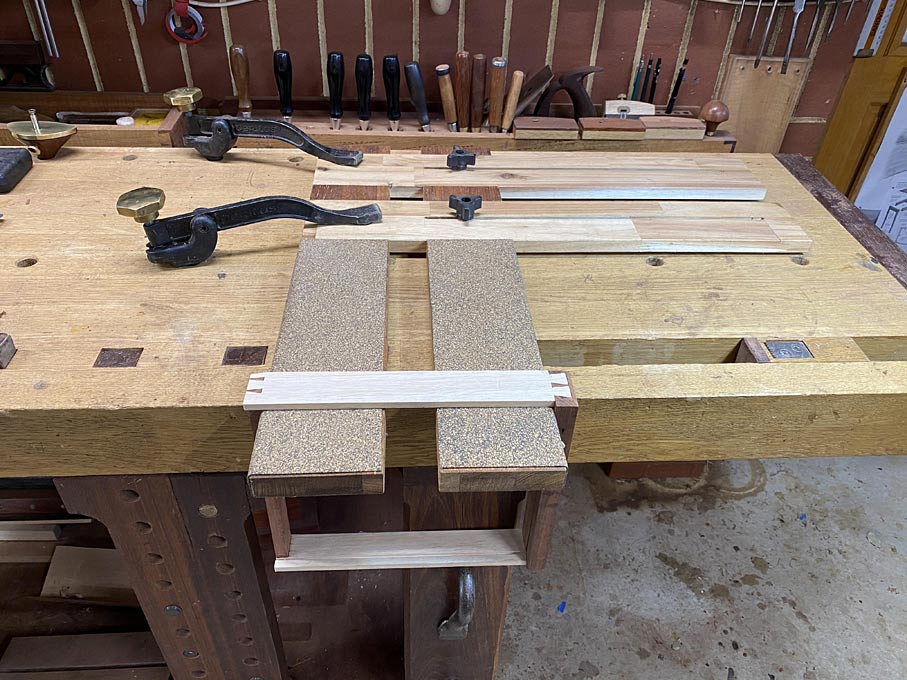
To aid with alignment, I made a MDF pattern ...
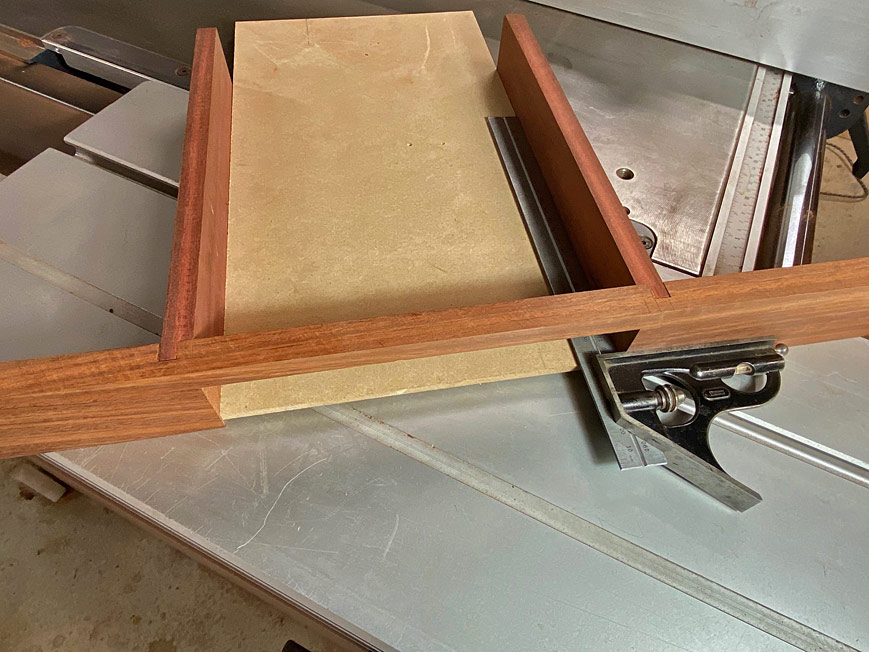
Here's the fun bit - aligning the case with the front and rear aprons, to mark out the rear mortices ...
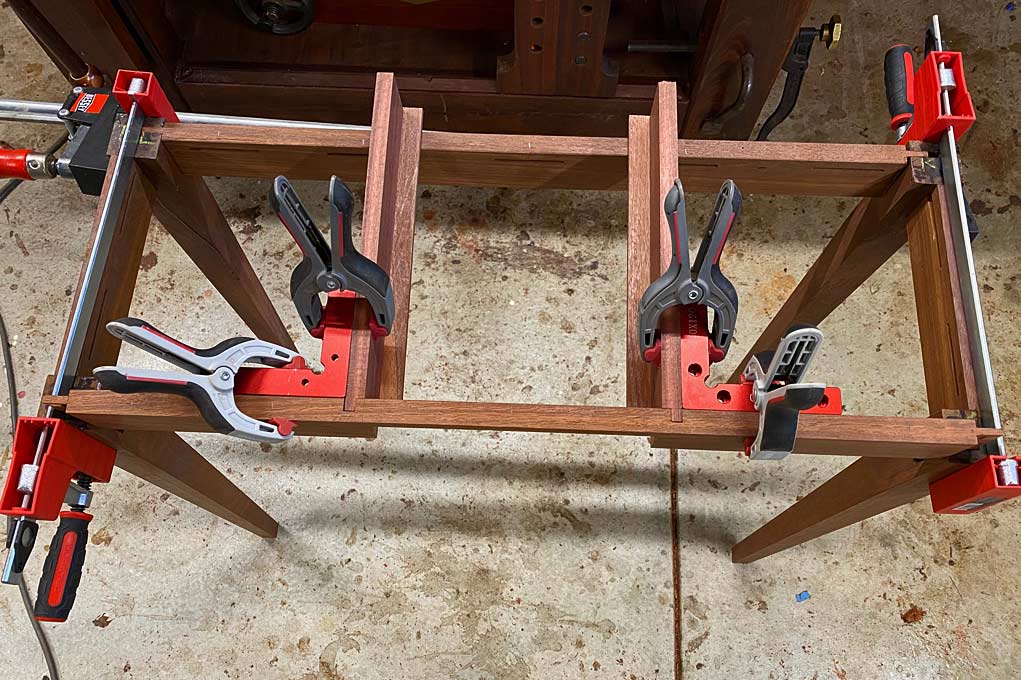
The pattern is inserted and a straight edge is attached to the front apron to prevent flexing ...
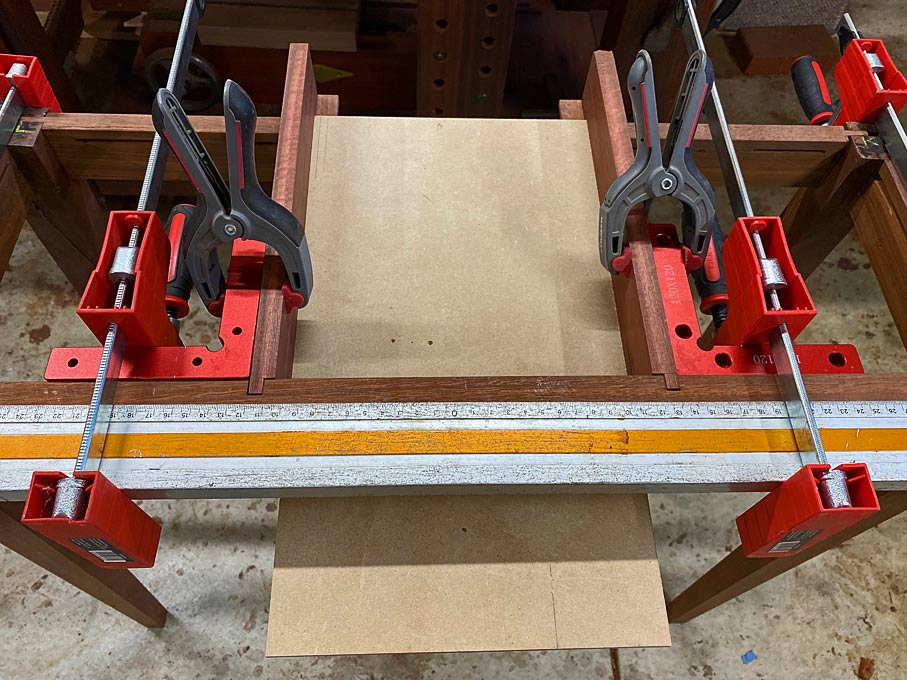
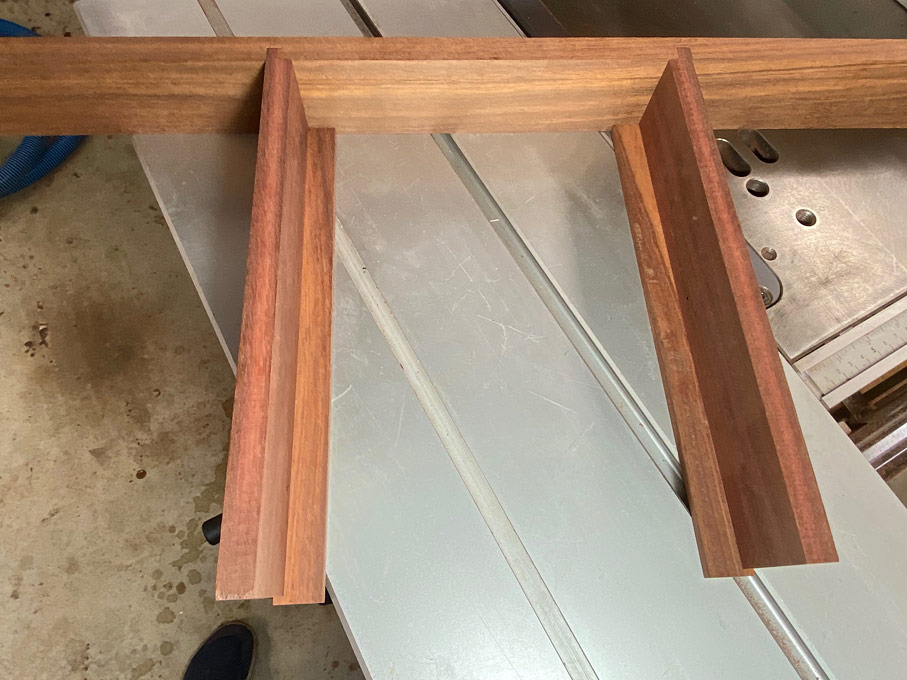
A lot of repeat measurements are taken on the rear apron before I am satisfied it is square and equal front-and-back.
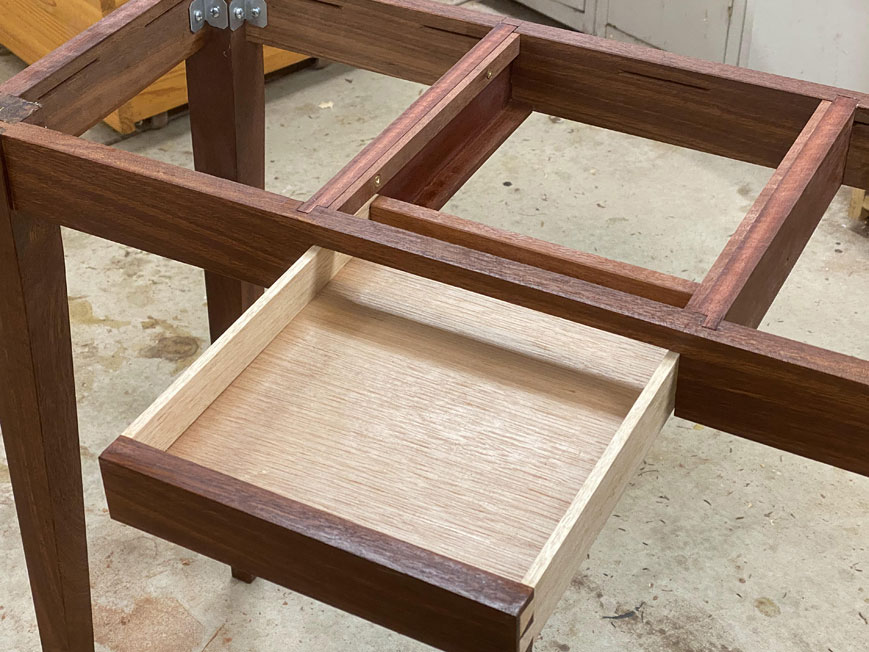
This is the result ...
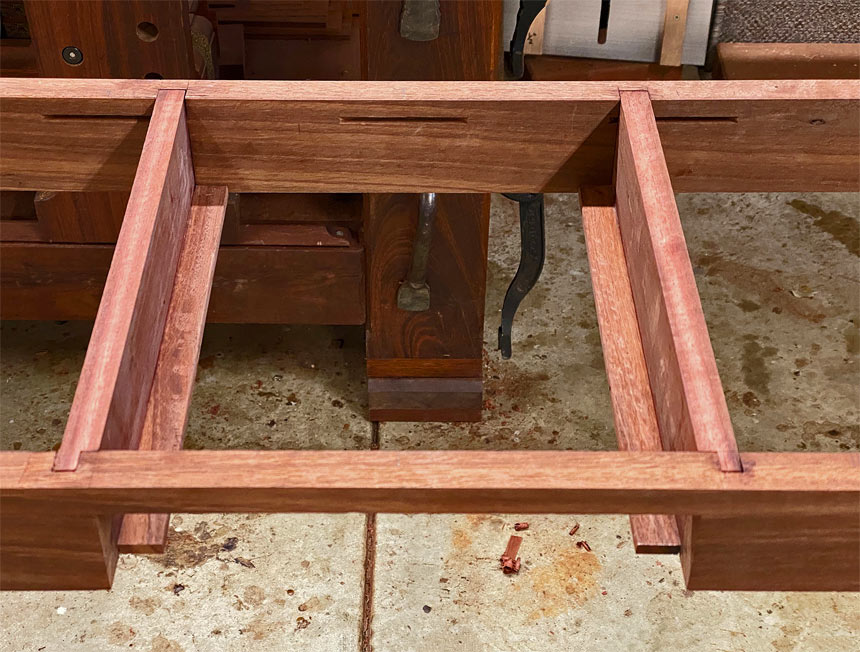
By-the-way, note the biscuit joiner-made slots for attaching the table top.
The drawer
The drawer build was fairly straight forward. The usual half-blind fronts and through dovetail rears.
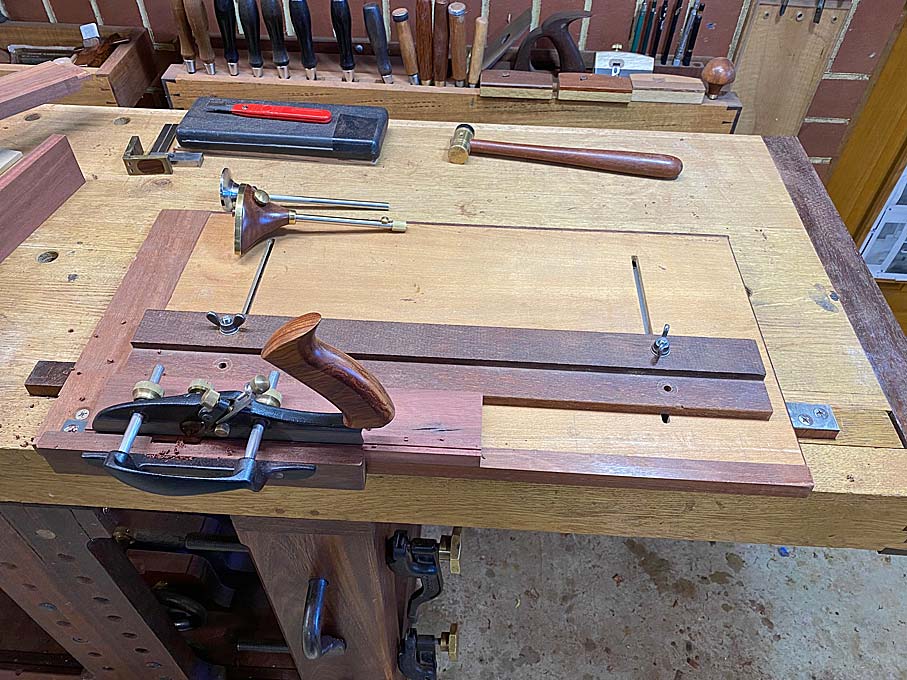
Transferring tails to pins on the Moxon ...
The sides were grooved rather than using slips. This was to save the extra 3mm height needed for the slips (saving as much height as possible for inside the drawer). 3mm grooves ..
Matching groove in the drawer front ...

Below is the stage of glueing up the drawer carcase. You know that it is all coplanar and square (essential for a piston fit) when the dovetail at each end just drop neatly into the matching sockets ...
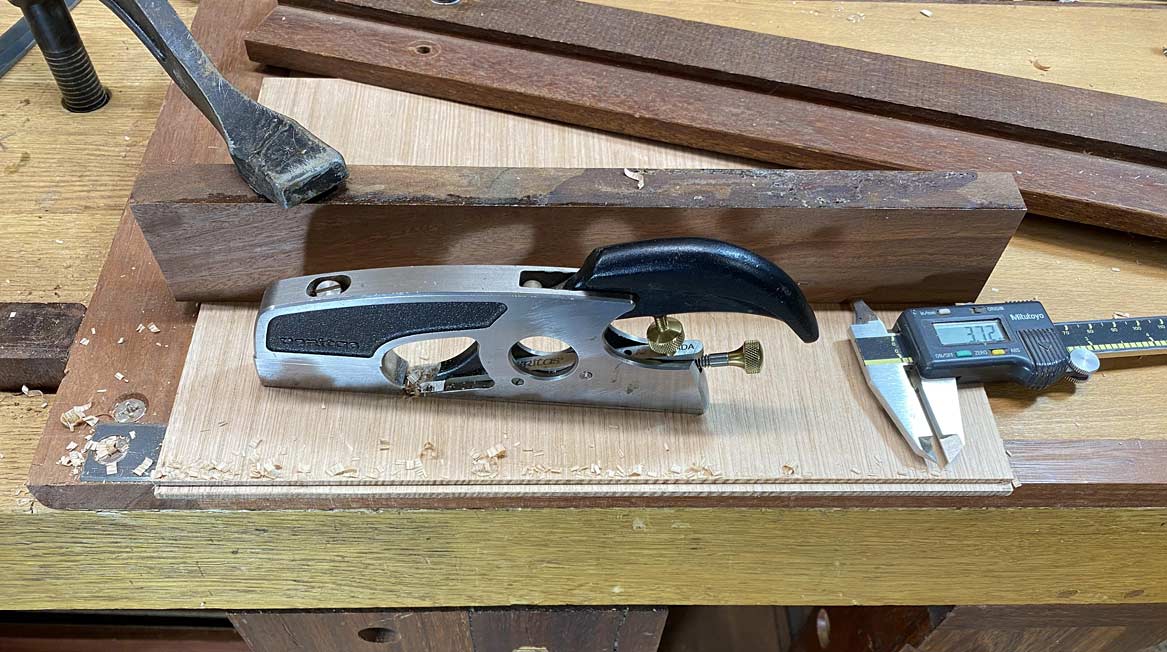
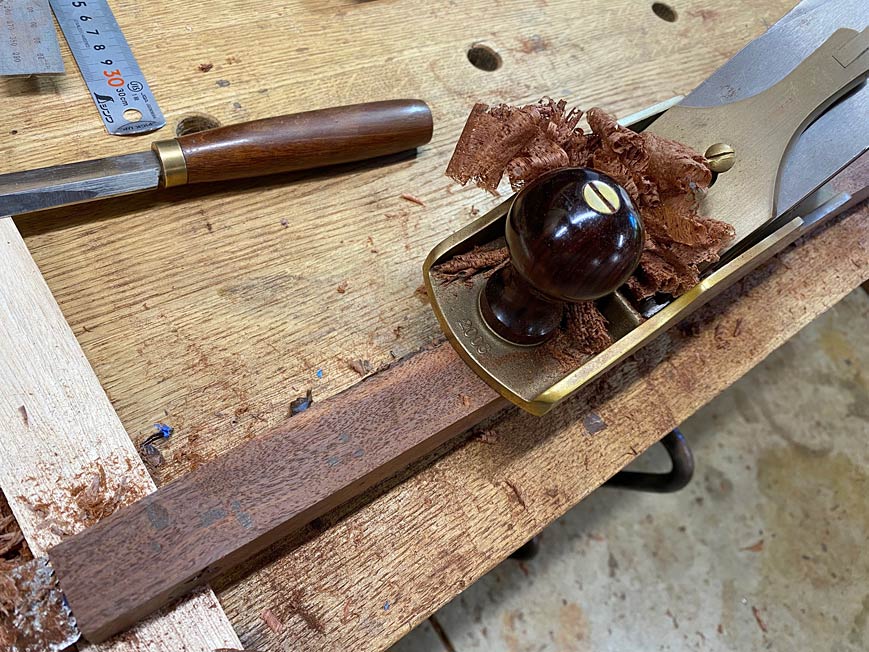
The 6mm thick drawer bottom receives a 3mm rebate. This was made with a moving fillester, and then fine-tuned with a shoulder plane ...
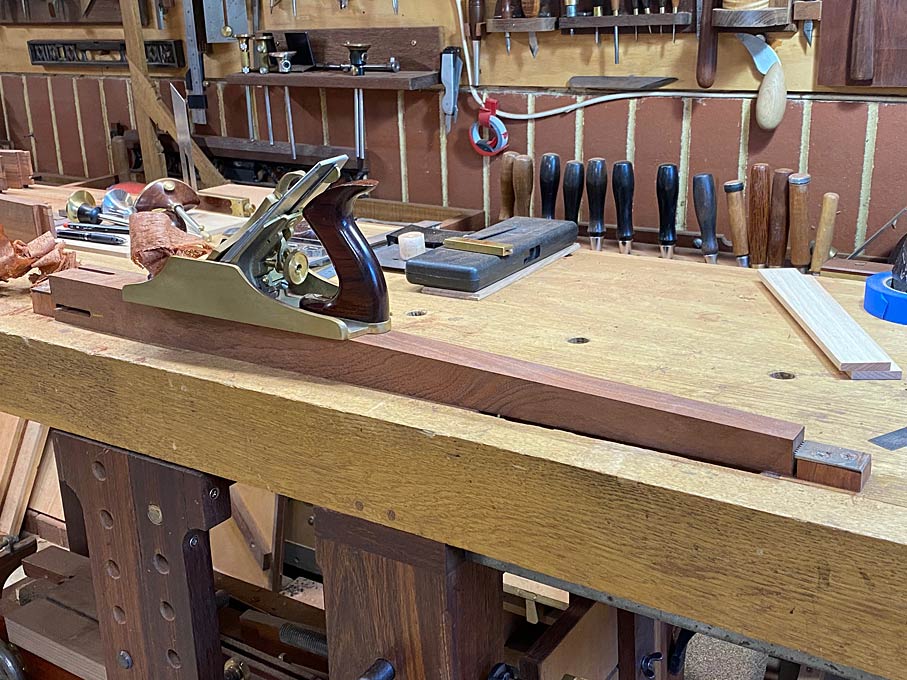
The drawer fits well and needs minimal tuning. Got to use the newly-made drawer-planing fixture ...
Two items added: a very fine chamfer to the top of the drawer front, to prevent binding when the drawer is closed. And a stretcher across the tops of the drawer sides, prevent the drawer tipping ...

This aids in achieving near-full extension ...
The end
Regards from Perth
DerekVisit www.inthewoodshop.com for tutorials on constructing handtools, handtool reviews, and my trials and tribulations with furniture builds.
-
4th July 2020, 04:02 AM #18
GOLD MEMBER
- Join Date
- Feb 2003
- Location
- back in Alberta for a while
- Age
- 68
- Posts
- 12,006
Derek
Great work as by now "expected"
Just one suggestion,
the table I built at Tech used a sliding dovetail for these joints
Originally Posted by derekcohen
regards from Alberta, Canada
ian
-
4th July 2020, 04:08 AM #19
Be inspired. Be creative. Be bold.
- Join Date
- Apr 2001
- Location
- Perth
- Posts
- 10,821
Ian, I contemplated a sliding dovetail. It just felt right. Sat on this thought for days. In the end I decided against it as I was concerned that the dovetails might distort the carcase (if not 100% perfect) and misalign the drawer case. The extra strength is not needed.
Regards from Perth
DerekVisit www.inthewoodshop.com for tutorials on constructing handtools, handtool reviews, and my trials and tribulations with furniture builds.
-
4th July 2020, 07:30 AM #20
 Franklin Ferrier
- Join Date
- May 2007
- Location
- Gold Coast
- Age
- 70
- Posts
- 2,735
Excellent result Derek! And thankyou for the detailed build considerations and build technique.
Is there a reason there are metal reinforcements on the leg joints? Would pegging the tenons not have added enough strength to the joints?Franklin
-
4th July 2020, 11:14 AM #21
Be inspired. Be creative. Be bold.
- Join Date
- Apr 2001
- Location
- Perth
- Posts
- 10,821
Franklin, the leg tenons were large enough overall but reduced in size by the dowels (which had been there in the original build). The corner braces were just added security. And I was not going to use wooden blocks with nails as the original had! Pegging was out of the question for the same reason.
Where did the dowels come from, you may ask?
I had meant to mention the way I dealt with the dowels - original joinery for the legs - but there was not the opportunity before.
Here are the legs, and you can see the ugly dowels. What I did was to turn them upside down, and remove the dowelled section in the taper cut ...
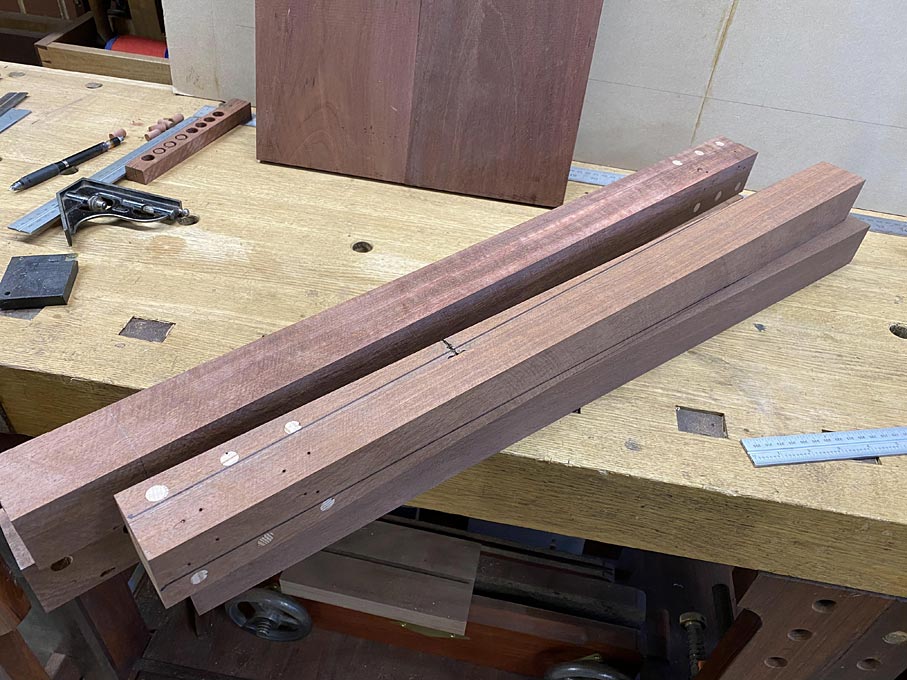
First, the legs were morticed ..
I built a simple fixture for my sliding table saw ...

The nail holes were filled with coloured epoxy, which disappeared after the finish was applied ...
And then smoothed ...
I was asked (when I posted this photo elsewhere) why I planed into the grain. The answer is ‘because I can with a closed chipbreaker’ No, the real answer is because it was easier to keep track of the mark demarcating the flat section.
Regards from Perth
DerekVisit www.inthewoodshop.com for tutorials on constructing handtools, handtool reviews, and my trials and tribulations with furniture builds.
-
5th July 2020, 05:46 AM #22
Be inspired. Be creative. Be bold.
- Join Date
- Apr 2001
- Location
- Perth
- Posts
- 10,821
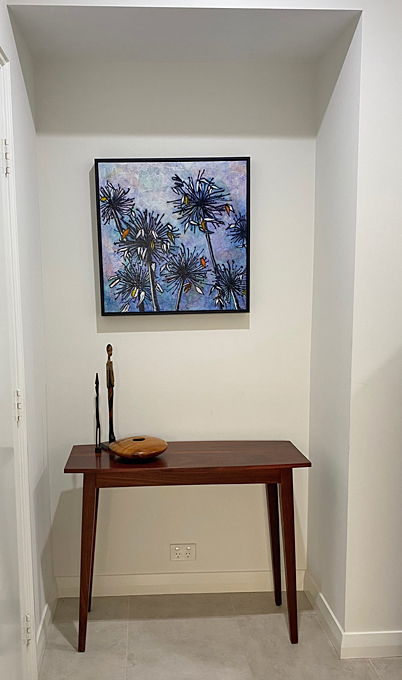
Finally ..
Regards from Perth
DerekVisit www.inthewoodshop.com for tutorials on constructing handtools, handtool reviews, and my trials and tribulations with furniture builds.
-
5th July 2020, 07:25 AM #23
GOLD MEMBER
- Join Date
- Feb 2003
- Location
- back in Alberta for a while
- Age
- 68
- Posts
- 12,006
so, Rita has decided to keep the table.
a very wise decision -- and you do not have to re-refurbish it while 'keeping the drawer" (phew he says)
Originally Posted by derekcohen
well doneregards from Alberta, Canada
ian
-
8th July 2020, 10:15 AM #24
Senior Member
- Join Date
- Jun 2018
- Location
- Brisbane
- Posts
- 283
Lovely work Derek: A quick question: with that degree of piston fit/disappearance level, what are your thoughts on the drawer binding? Not an issue because it's all from one piece? any other tricks needed to mitigate?
-
8th July 2020, 10:58 AM #25
Be inspired. Be creative. Be bold.
- Join Date
- Apr 2001
- Location
- Perth
- Posts
- 10,821
It's a good question. Originally Posted by jpdv
Wood expands across the grain. This means that the drawer sides will expand vertically. The drawer bottom will expand towards the back of the drawer. The drawer front will expand vertically.
Internally, the drawer sides are shaved slightly for the expected expansion. Further, the wood is quartersawn and should be very stable.
The drawer bottom has space to expand about 5mm towards the rear.
The all-important drawer front is chamfered where it meets the underside of the opening. However that is to make it easier to close the drawer. What I expect is that the drawer front will expand exactly the same amount as the apron, from which it was cut.
The table is also in a spot out of the weather/sun, etc.
I think it will be fine.
Regards from Perth
DerekVisit www.inthewoodshop.com for tutorials on constructing handtools, handtool reviews, and my trials and tribulations with furniture builds.


 Reply With Quote


