

 Thanks:
  Likes:
  Needs Pictures: 0
 Picture(s) thanks:
Results 16 to 27 of 27
-
17th September 2020, 06:42 PM #16
 SENIOR MEMBER


- Join Date
- Aug 2003
- Location
- Loxton, SA
- Posts
- 537

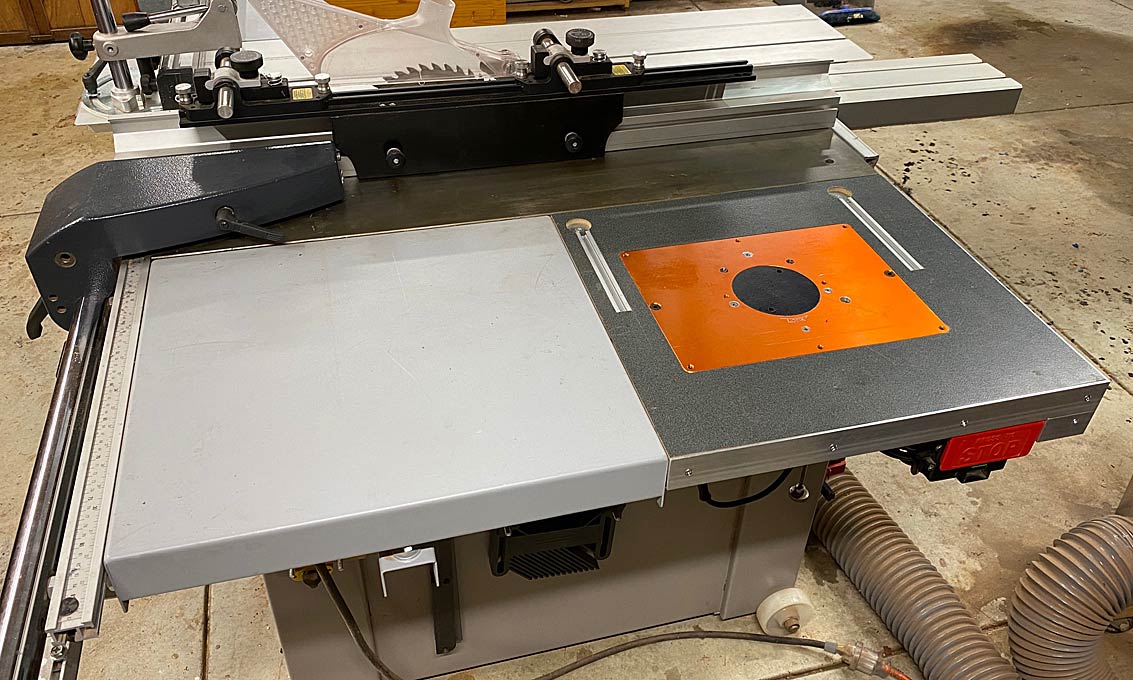
Derek, is your router in a 'wing' on the Felder?
-
17th September 2020 06:42 PM # ADSGoogle Adsense Advertisement
- Join Date
- Always
- Location
- Advertising world
- Posts
- Many
-
17th September 2020, 06:59 PM #17
GOLD MEMBER
- Join Date
- Jun 2005
- Location
- Helensburgh
- Posts
- 7,696
Or try some linear rails and a lead screw and add a DRO. This one has been in everyday use at Illawarra Wood School and it has proven to be bullet proof A Router Table Using Linear Rails For a Lift Originally Posted by Bumper
 CHRIS
CHRIS
-
17th September 2020, 08:37 PM #18
Be inspired. Be creative. Be bold.
- Join Date
- Apr 2001
- Location
- Perth
- Posts
- 10,820
That is my reasoning as well Originally Posted by aldav

Regards from Perth
DerekVisit www.inthewoodshop.com for tutorials on constructing handtools, handtool reviews, and my trials and tribulations with furniture builds.
-
18th September 2020, 10:32 AM #19
SENIOR MEMBER
- Join Date
- Sep 2013
- Location
- Jarrahdale WA
- Posts
- 370
What I would suggest - what I plan to do - is remove one spring, test that, then the other spring, and test this. It may turn out that removal of a single spring offers the best compromise.
Tried that, admittedly NOT with a quality Elu router, but I found the router bound up with pressure on one post and not the other.
Essentially it was "tilting" and then getting stuck.
Keen to get your experience.
I purchased a Triton for my table. Not a fan boy but gave me both variable speed and winder adjustment...from on top.
- - - Updated - - -
-
18th September 2020, 10:49 AM #20
Be inspired. Be creative. Be bold.
- Join Date
- Apr 2001
- Location
- Perth
- Posts
- 10,820
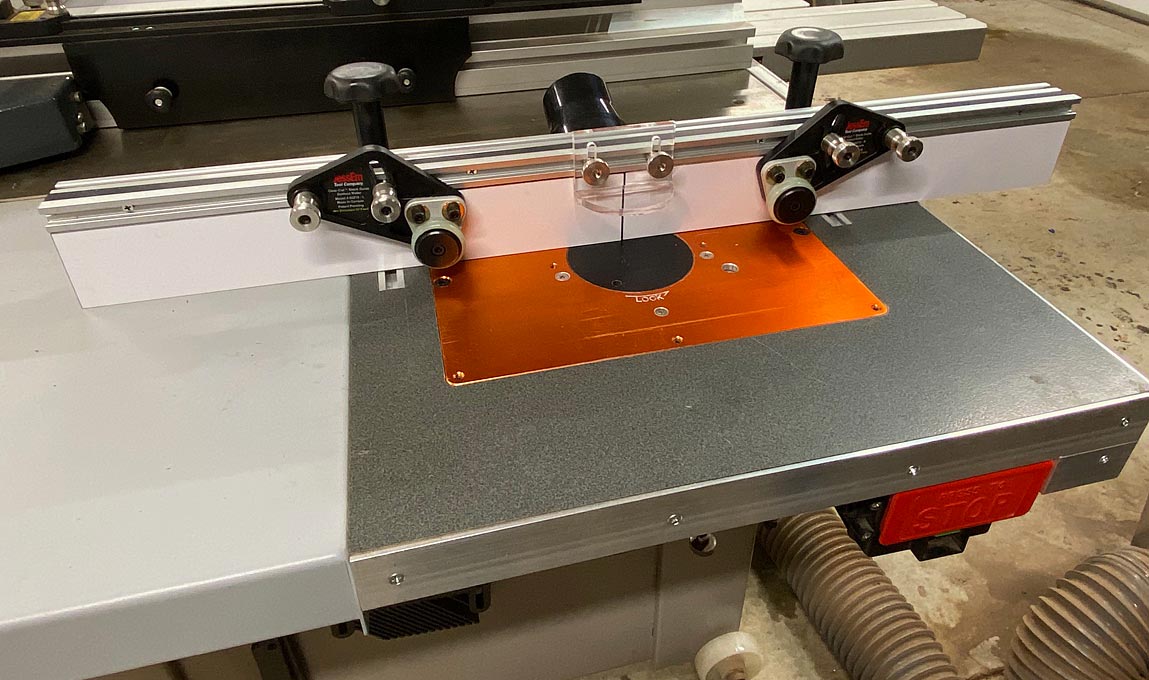
Rev, it is a Hammer K3 slider, and came like this ... Originally Posted by rev

I have just rebuilt (update on the earlier photos) the outfeed to look like this ...
... and completed building a new fence ...
Regards from Perth
DerekVisit www.inthewoodshop.com for tutorials on constructing handtools, handtool reviews, and my trials and tribulations with furniture builds.
-
18th September 2020, 06:32 PM #21
GOLD MEMBER

- Join Date
- Apr 2013
- Location
- Sydney
- Posts
- 1,557
Triton recommends removing both springs when inverted in a table to assist in winding up the router, either by the handle on early models or the insert winder handle through the table top on later models. I removed both and bloody glad I did, makes life so much easier and less pressure to wind up. The springs are only there for plunging cuts.
-
18th September 2020, 07:23 PM #22
 GOLD MEMBER
- Join Date
- May 2011
- Location
- Albury
- Posts
- 3,034
Rev has a Dewalt 625, not sure that Triton's recommendations would apply to his router. Makita describe their springs as not removable so there's a fair variation in what manufacturers advise and recommend. Originally Posted by Fumbler
-
18th September 2020, 07:46 PM #23
Woodworking mechanic
- Join Date
- Jan 2014
- Location
- Sydney Upper North Shore
- Posts
- 4,469
My Triton only has one spring.
-
20th September 2020, 02:07 AM #24
Be inspired. Be creative. Be bold.
- Join Date
- Apr 2001
- Location
- Perth
- Posts
- 10,820
Plunge routers in a table have to fight their springs. I considered removing both springs, tried this, however it felt too loose - the router has to rely on its weight and gravity to open. One spring adds a little tension, and is a decent compromise. Originally Posted by rev
The spring which remained is the one alongside the Router Raizer ...
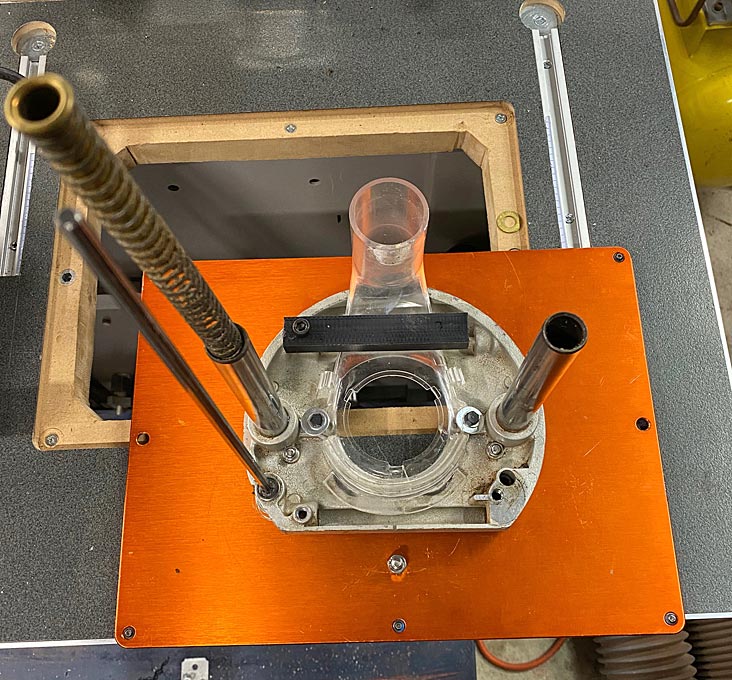
Up-and-down travel is now smoother and less effort.
Regards from Perth
DerekVisit www.inthewoodshop.com for tutorials on constructing handtools, handtool reviews, and my trials and tribulations with furniture builds.
-
20th September 2020, 08:23 PM #25
SENIOR MEMBER
- Join Date
- Aug 2003
- Location
- Loxton, SA
- Posts
- 537
Thanks for posting back about this Derek. I would have just removed both springs and probably have to re-do it all adding one spring back. So you have saved me some time for taking this path first. Thanks!
By the way, how much time did you put into this?
-
1st October 2020, 07:31 PM #26
SENIOR MEMBER
- Join Date
- Aug 2003
- Location
- Loxton, SA
- Posts
- 537
I tried as you suggested Derek and it was a significant improvement but not 'silky' smooth so I removed the second spring and preferred that. Perhaps the DeWalt springs are a little stronger than the Elu you have. Anyway, I'm happy with the result and I'm glad I saved the excess parts from the installation years ago for the sake of the spare retaining washers among them; I had to cut the originally installed ones off with side cutters.
-
1st October 2020, 08:57 PM #27
Be inspired. Be creative. Be bold.
- Join Date
- Apr 2001
- Location
- Perth
- Posts
- 10,820
Thanks for the feedback.
Perhaps the DeWalt springs are stiffer. Perhaps not. I did find that the no-springs set up was too floppy for me, and I preferred a little resistance that one spring gives. We may just differ on our preferences. Neither right nor wrong. I am pleased that you found your preferred set up. The bottom line is that it shows that it is important to test our the options.
Regards from Perth
DerekVisit www.inthewoodshop.com for tutorials on constructing handtools, handtool reviews, and my trials and tribulations with furniture builds.

 Reply With Quote
 It will help reduce any binding that you might get in the plunge posts.
Similar Threads
-
Taking router lifts to the next level
By Gestalt in forum WOODWORK - GENERALReplies: 6Last Post: 12th August 2016, 06:40 PM -
router lifts
By HUON in forum ROUTING FORUMReplies: 2Last Post: 4th March 2016, 07:53 PM -
router lifts
By Husq2100 in forum ROUTING FORUMReplies: 10Last Post: 10th July 2013, 06:21 PM -
Router Lifts
By DSEL74 in forum ROUTING FORUMReplies: 25Last Post: 30th December 2012, 11:23 PM -
Router Lifts
By tlamb1 in forum ROUTING FORUMReplies: 26Last Post: 28th March 2010, 08:10 AM
