

 Thanks:
  Likes:
  Needs Pictures: 0
 Picture(s) thanks: 0
Results 1 to 10 of 10
Thread: Holding and carving stool seats
-
25th October 2020, 04:56 AM #1
 Be inspired. Be creative. Be bold.


- Join Date
- Apr 2001
- Location
- Perth
- Posts
- 10,860
 Holding and carving stool seats
I was carving stool seats today and wondered how others held such awkward shapes.
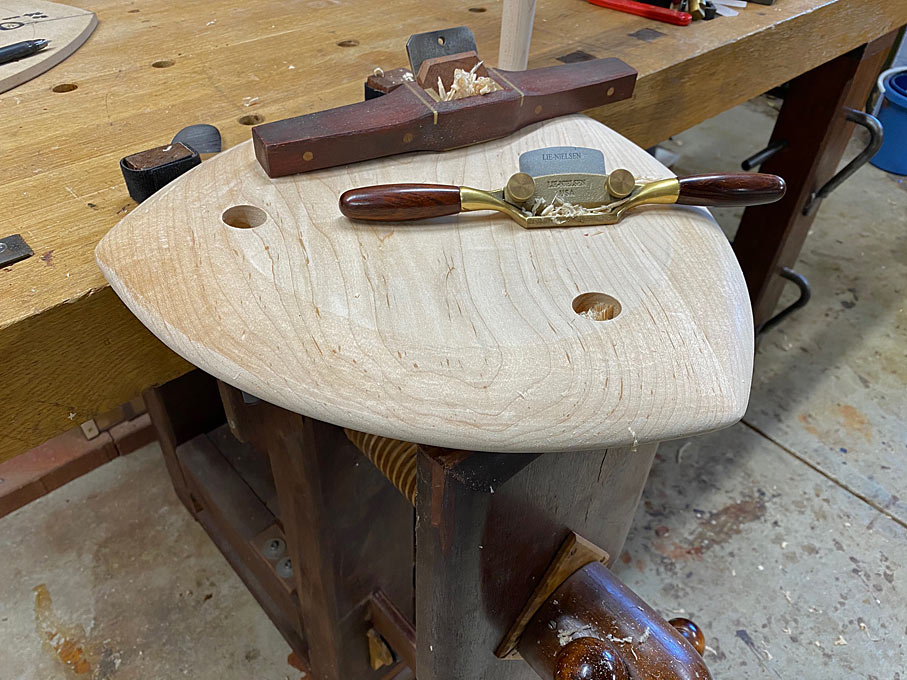
What I have done here is use the leg vise and two bench dogs ...
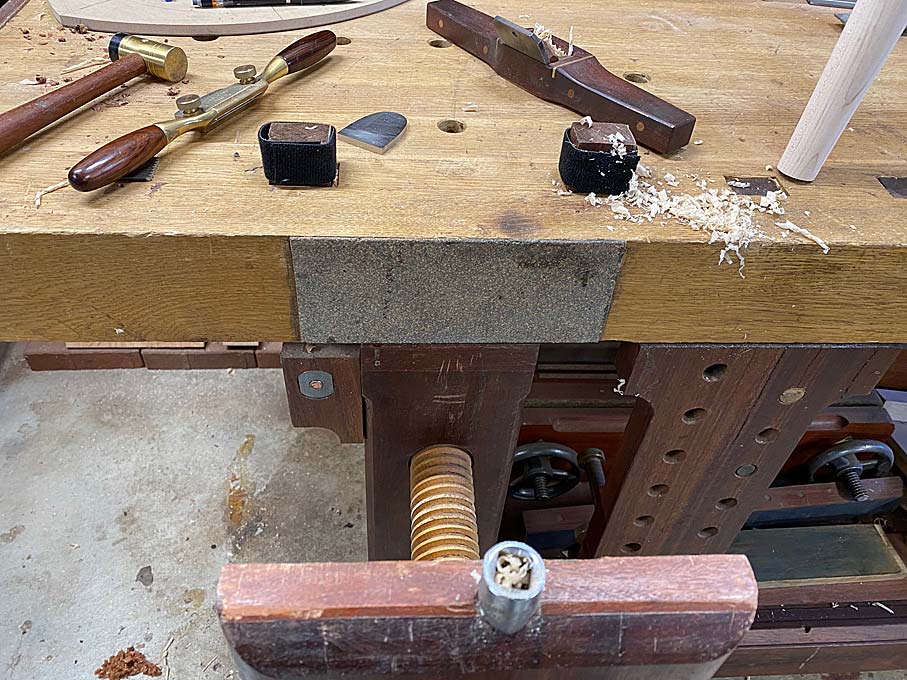
There is a mortice in the chop of the leg vise for a Veritas spring-loaded brass dog. This is too short to work here. So I used a socket (from a socket wrench set).
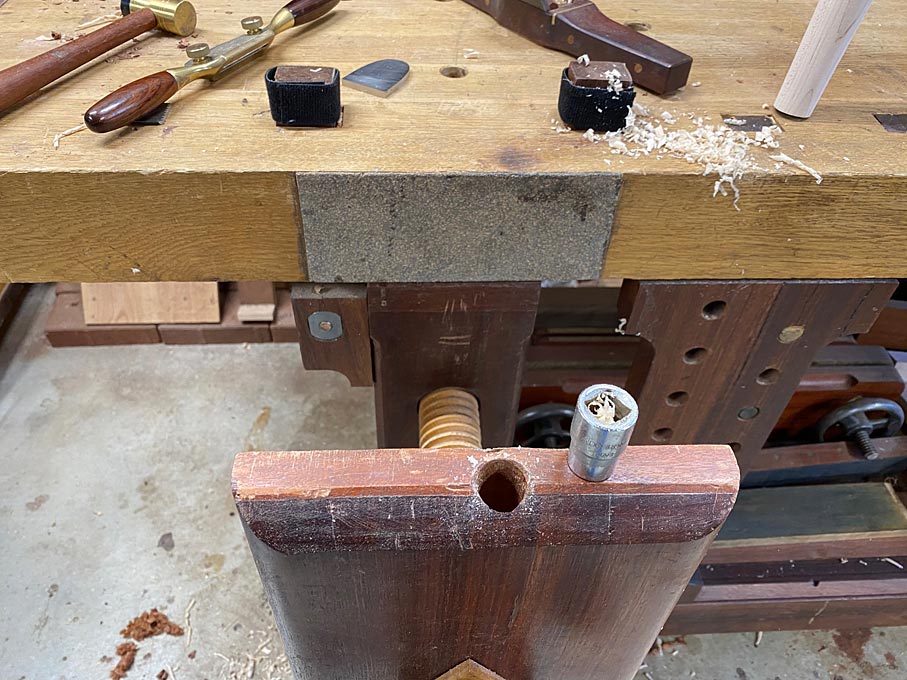
This pops in the mortice in the leg vise ...
The bench dogs are cushioned with velcro wrap to prevent marring the edges of the seat.
The leg hole drops neatly over the socket.
All is held very securely ....
Regards from Perth
DerekVisit www.inthewoodshop.com for tutorials on constructing handtools, handtool reviews, and my trials and tribulations with furniture builds.
-
25th October 2020 04:56 AM # ADSGoogle Adsense Advertisement
- Join Date
- Always
- Location
- Advertising world
- Posts
- Many
-
25th October 2020, 12:29 PM #2
GOLD MEMBER
- Join Date
- Feb 2003
- Location
- back in Alberta for a while
- Age
- 68
- Posts
- 12,006
I favour Peter Galbert's method -- hold the seat vertically in a vise. Originally Posted by derekcohen

 regards from Alberta, Canada
ian
-
25th October 2020, 12:40 PM #3
Be inspired. Be creative. Be bold.
- Join Date
- Apr 2001
- Location
- Perth
- Posts
- 10,860
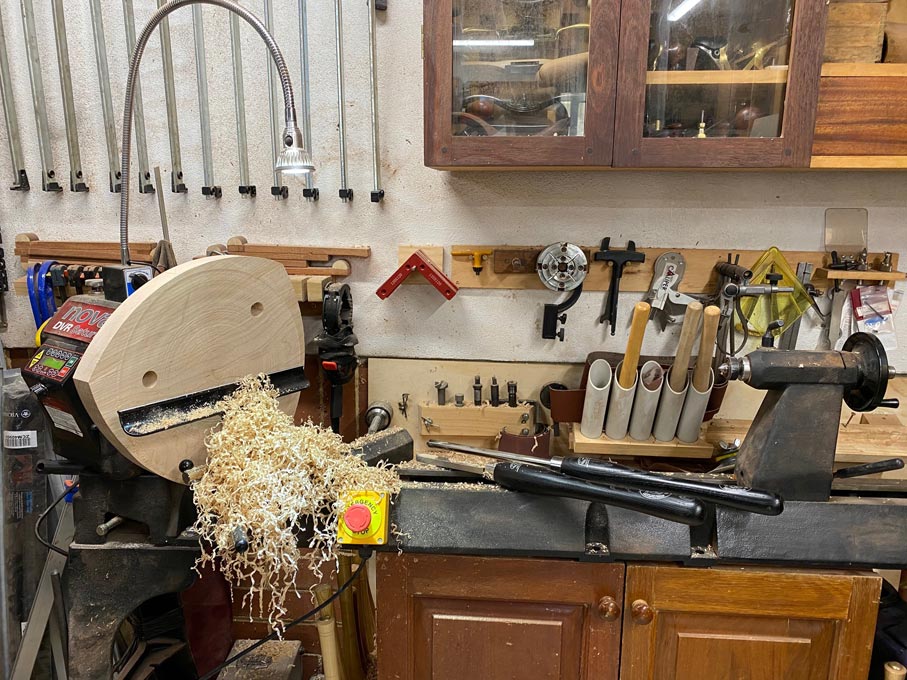
Ian, these stools could have been done the same way as you alude - drill legs first, the shape the inside before shaping the outside (I believe that Pete only does the outline this way). However, since the design is a variation of round, I wanted the inside to be circular, and decided to enlist my lathe for that purpose. That required sawing the outline to have some balance on the lathe.
Why a variation of round? These stool seats are a little different in that they are symmetrical, -basically, the idea is that there are three seating positions, to enable stretchers at different heights for people with different leg lengths.

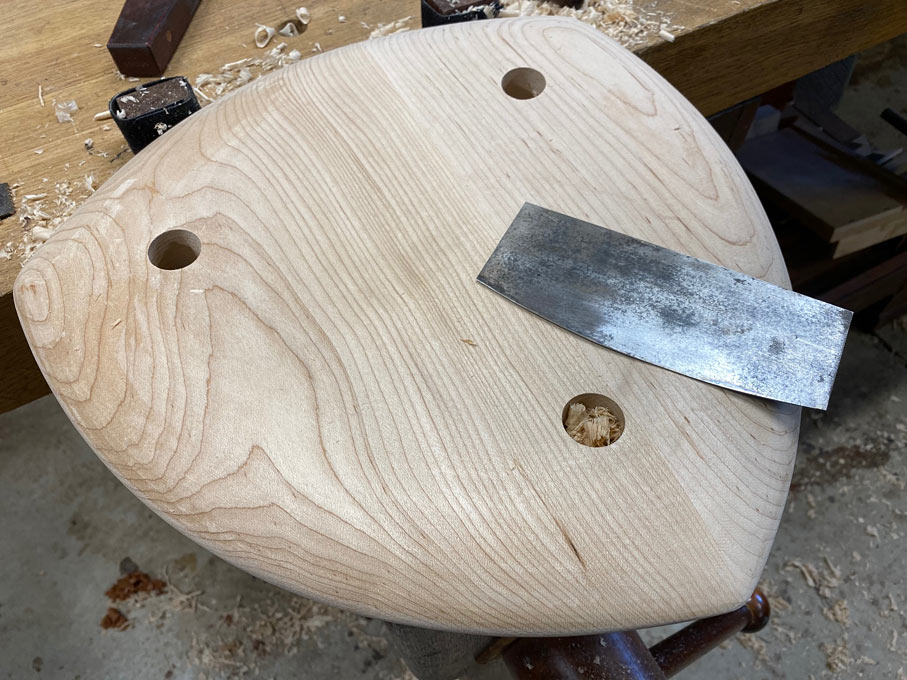
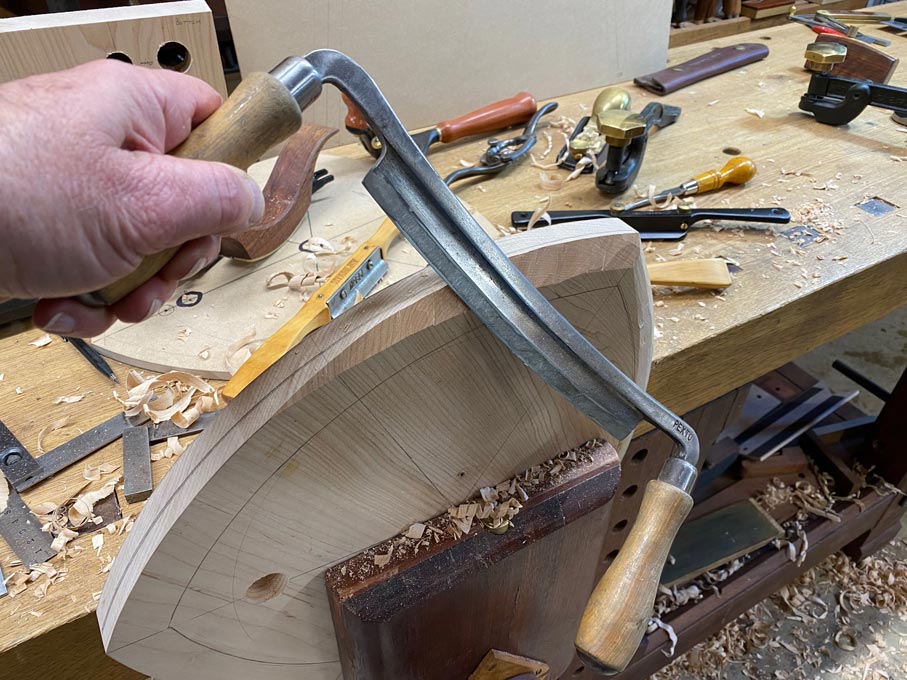
This was followed by a drawknife with the seat held in a leg vise ...
��� and the travisher and spokeshaves, with the seat now needing to be held flat. I tried hold downs, but this was not particularly secure because of the odd shape.
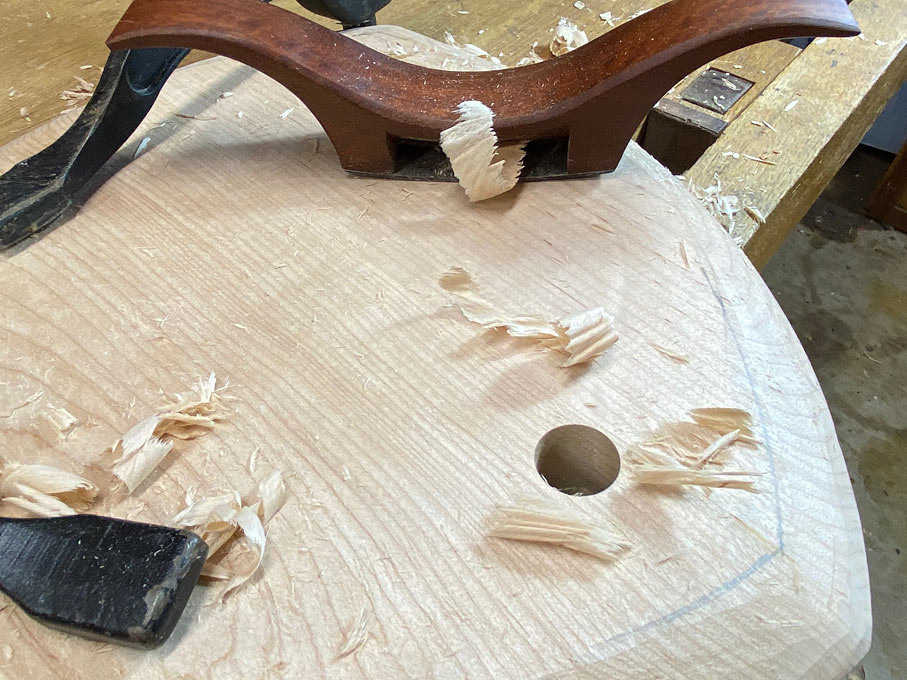
Hence the set up in the leg vise ...
A bit backwards, perhaps?
Regards from Perth
DerekVisit www.inthewoodshop.com for tutorials on constructing handtools, handtool reviews, and my trials and tribulations with furniture builds.
-
25th October 2020, 03:17 PM #4
GOLD MEMBER
- Join Date
- Feb 2003
- Location
- back in Alberta for a while
- Age
- 68
- Posts
- 12,006
Perhaps a bit backwards, but ... Originally Posted by derekcohen
there's nothing inherently wrong with turning the seat in the lathe, shaping the outside, then refining the stool seat with your travisher and shaves.
However, if you haven't test sat a prototype -- which knowing you, you probably have -- I'd be a little concerned that the stools will not be as comfortable as you would desire.regards from Alberta, Canada
ian
-
27th October 2020, 09:43 AM #5
Senior Member
- Join Date
- Dec 2010
- Location
- Townsville
- Posts
- 130
Hi all
I have used the method I read about in The Christopher Schwarz books/blogs, screw a batten to the bottom of the seat shape and clamp that into your leg vice. I found between that and my HNT Gordon tail vice combined with the lift up stop in the middle of my roubo I got my seat shaped nicely. Sorry I don't have a photo of the method.
Pedro
-
27th October 2020, 12:14 PM #6
GOLD MEMBER
- Join Date
- Nov 2004
- Location
- Millmerran,QLD
- Age
- 73
- Posts
- 11,172
Derek
I think you have it all sorted, but not having the gear that you have I would have used this with a piece of scrap wood underneath to bring up the height in the jaws:
P1060611 (Medium).JPGP1060614 (Medium).JPG
I recently used it to hold log "biscuits" to cut inside grooves with a small chainsaw and then chisel out the pipe. There is about 420mm between the jaws.
It doesn't always look as scruffy as this: It was cleaned up for the photo shoot . It has a hard life living outside.
Regards
PaulBushmiller;
"Power tends to corrupt. Absolute power corrupts, absolutely!"
-
27th October 2020, 04:45 PM #7

 GOLD MEMBER
- Join Date
- Apr 2006
- Location
- Hobart
- Posts
- 5,162
This is something that I am certainly not comfortable with. My learning curve is still quite steep! What I have found so far:
The hardest task, for me, is hollowing out the "cheek pattern" in the seat. My best results - [read: still not really good] - have come from:
- make three cross-wise templates and two lengthwise templates and mark their position with a line on the seat. These measure progress and symmetry.
- Hollow the seat while it is still largely square timber using an inshave and gouges. Much easier to hold work piece and visualise progress while still square.
- Hold seat on bench top between dogs and dogs on vice.
- After seat is hollowed bandsaw edge shape and refine as you did. I mainly held seat on benchtop with holddowns with edge over bench edge to give tool access. Ipprefer to rough with draw knife, then refine with spokeshave.
But I claim no expertise. Just something that has been made to work.
-
27th October 2020, 11:54 PM #8
Be inspired. Be creative. Be bold.
- Join Date
- Apr 2001
- Location
- Perth
- Posts
- 10,860
Pedro, your post reminded me that I had the solution all along and did not realise it.
Above is a photo of the seat on the lathe. Well, the seat was attached with a headstock connector ...

Now I just need a connection to the bench for this
Regards from Perth
DerekVisit www.inthewoodshop.com for tutorials on constructing handtools, handtool reviews, and my trials and tribulations with furniture builds.
-
28th October 2020, 11:03 AM #9
Senior Member
- Join Date
- Dec 2010
- Location
- Townsville
- Posts
- 130
Hi Derek
If you clamp that fitting in the leg vice, and line up one of the leg mortises and a dog hole with a piece of dowel through them both, it won't pivot.
I think.........
Pedro
-
7th December 2020, 09:28 PM #10
Member
- Join Date
- Oct 2012
- Location
- Melbourne
- Posts
- 91
I've had difficulty working with rounded pieces and needing to hold them secure with almost all of the top accessible - especially when the bottom of the piece is heavily rounded.
When I have the space, I'll make a fold-away combination shaving horse/bowl horse/spoon mule. It will have 1 frame with interchangeable heads.
In the meantime, I aim to make some simple timber 'hook dogs'. Essentially, a 3/4" dowel with a small 'crochet hook' at the top. If needed, there could be some sort of wedge or pin inserted into the dowels to lock them in place. They would be similar in function to the socket head you used.
I'd then use a strap of webbing threaded through a couple of dog holes and stretched out by the opening of a bench vice. I'll attach a couple of photos to demonstrate. Long and relatively thin pieces would likely only need this strap part. If the webbing is placed through holes near the edge of the bench, most of the item can be freely accessed. This would be most ideal for curved items.
So for your item (aside from the excellent option of clamping the headstock connector from your lathe OR a simple square block of wood with screws going through the same 4 points) I'm thinking that 2 small 'crochet/hook dogs' and one strap on a corner could hold it well. Obviously the job is done, I just wanted to share an idea I've been playing with.129053201_659512011390421_1315988772438454372_n copy.jpg129673189_1521558731373105_3026746733562735115_n copy.jpg129722276_247753380024986_6800953734268499079_n copy.jpg


 Reply With Quote


Similar Threads
-
Seats with no coils???
By bonita in forum UPHOLSTERYReplies: 3Last Post: 15th October 2012, 10:26 AM -
canoe seats
By westford in forum MISC BOAT RELATED STUFFReplies: 1Last Post: 28th September 2012, 06:52 AM -
Carving copier jig for chair seats.
By JDarvall in forum HOMEMADE TOOLS AND JIGS ETC.Replies: 37Last Post: 27th August 2011, 07:48 PM -
bentwood seats
By gda27 in forum RESTORATIONReplies: 5Last Post: 16th August 2010, 10:00 PM -
Bench seats
By Tex B in forum WOODWORK - GENERALReplies: 5Last Post: 17th September 2006, 09:52 AM
