

 Thanks:
  Likes:
  Needs Pictures: 0
 Picture(s) thanks:
Results 1 to 15 of 20
Thread: Mat's Split Top Roubo
-
9th June 2016, 04:30 AM #1
 1 legged lumberjack


- Join Date
- Oct 2008
- Location
- Melbourne
- Posts
- 156
 Mat's Split Top Roubo
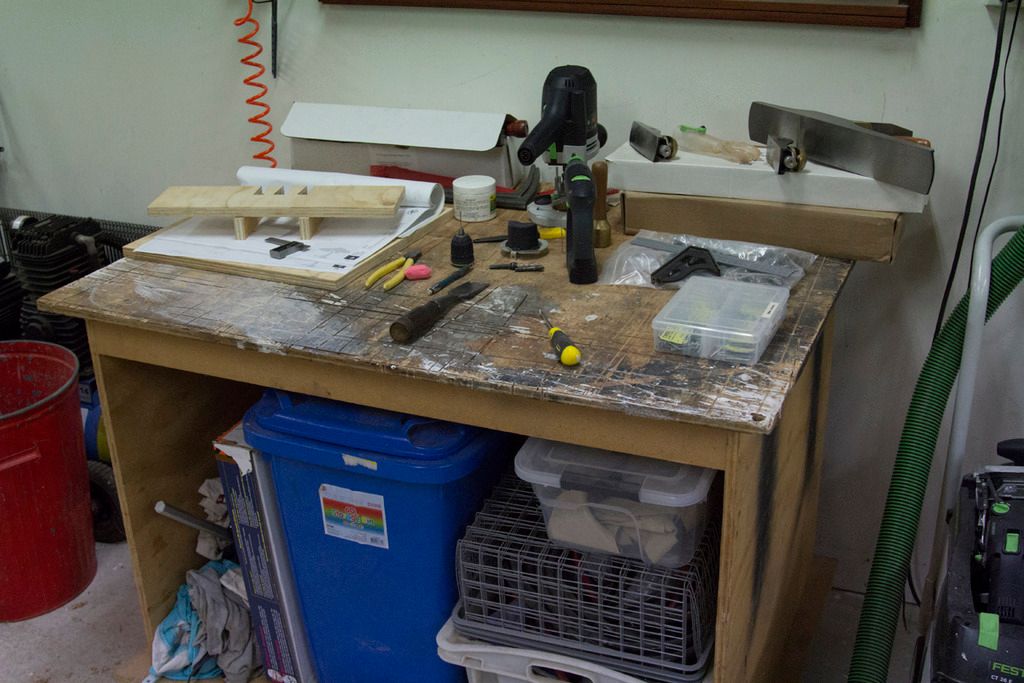
Hi all, the time has come to build a proper workbench.
fed up with using the same horizontal surface ( not even a bench really ), it wobbles, its sagged despite 2 2x4's under the bottom. It's done ok, renovations, kids, you name it, its coped.
but its time....
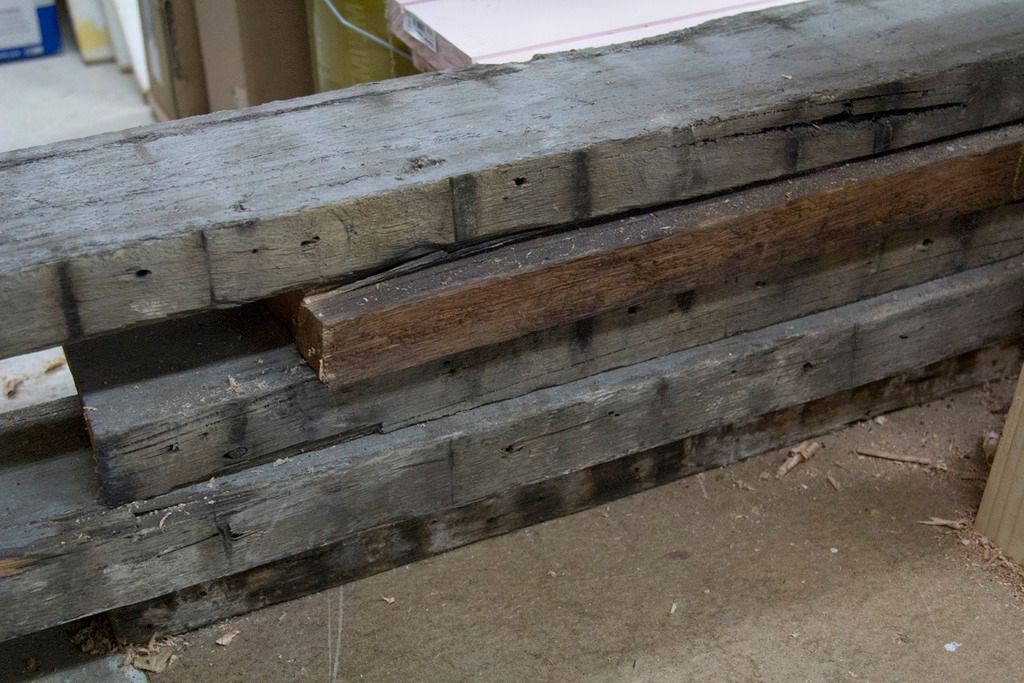
I'm using Benchcrafted hardware and because they know heaps more than me about bench's, I'm using their plans as well. I originally acquired (i.e.. free) a quantity of Oregon for the purpose but then Mark from Recycled Timber Specialists let me know he had a large quantity of 90yr old BlackButt from a Sydney Warehouse demolition available for an unbelievable price.
That sat in the shop for over 12 months as I struggled with health issues, slowly as time and pain permitted I dragged out over 1kg of nails/screws/bracketry in preparation.
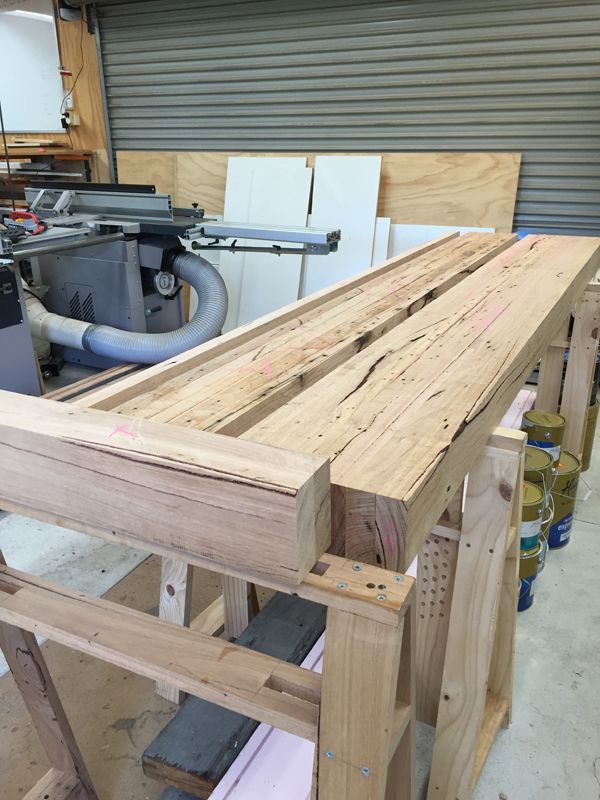
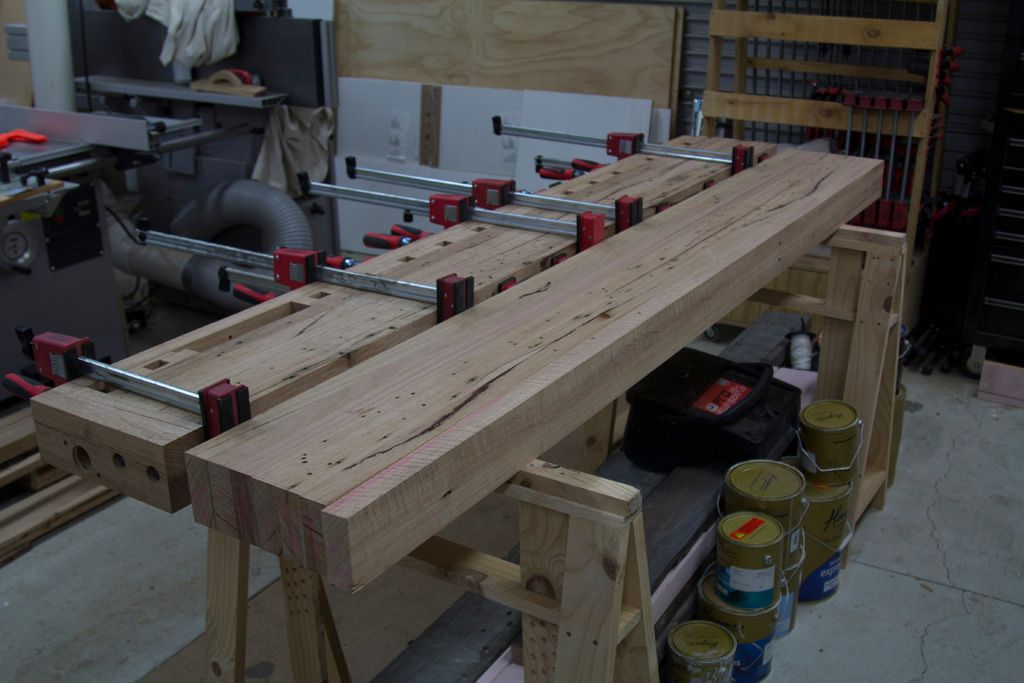
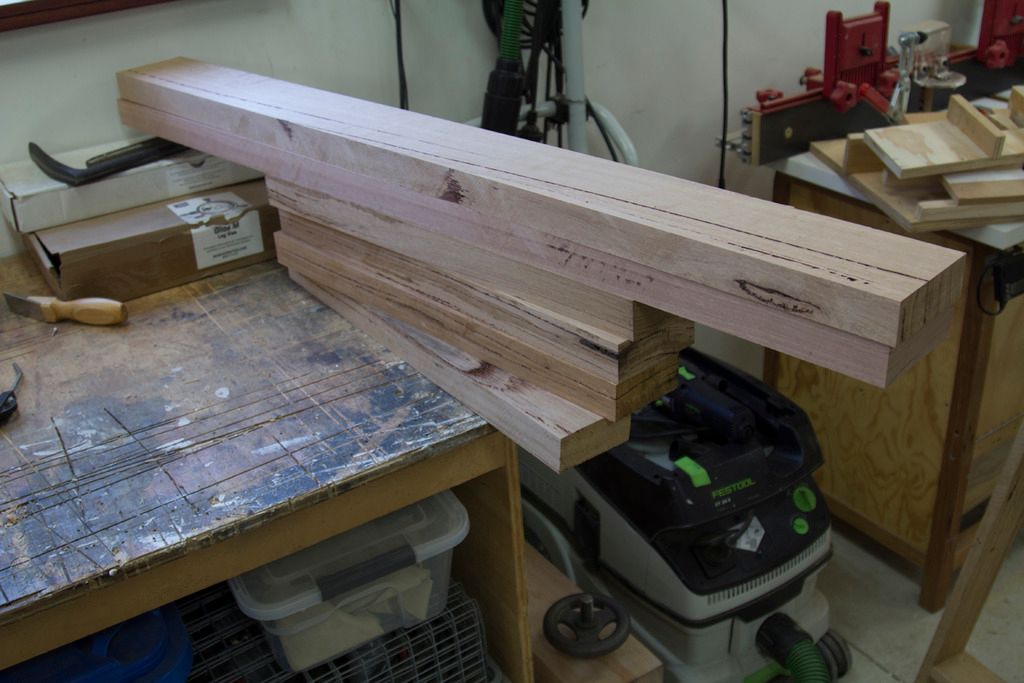
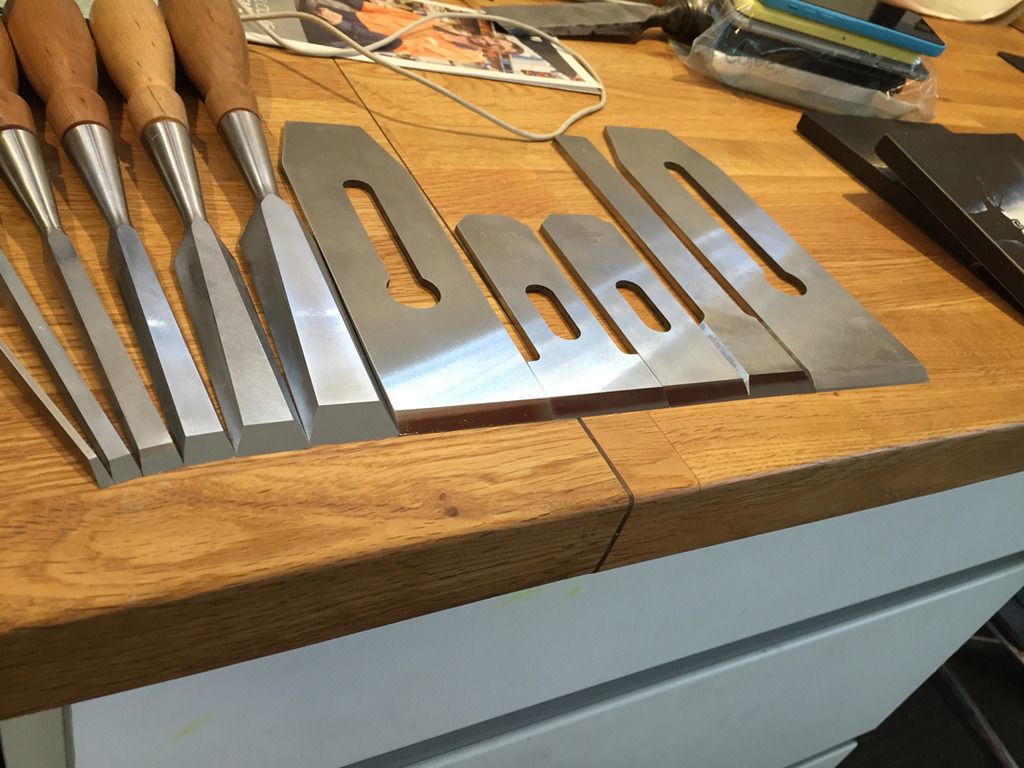
I had help running the boards over the planer, some were up to ( 4.8m originally, cut for travel ) 2.6m long, all 160mm high and 50mm thick.
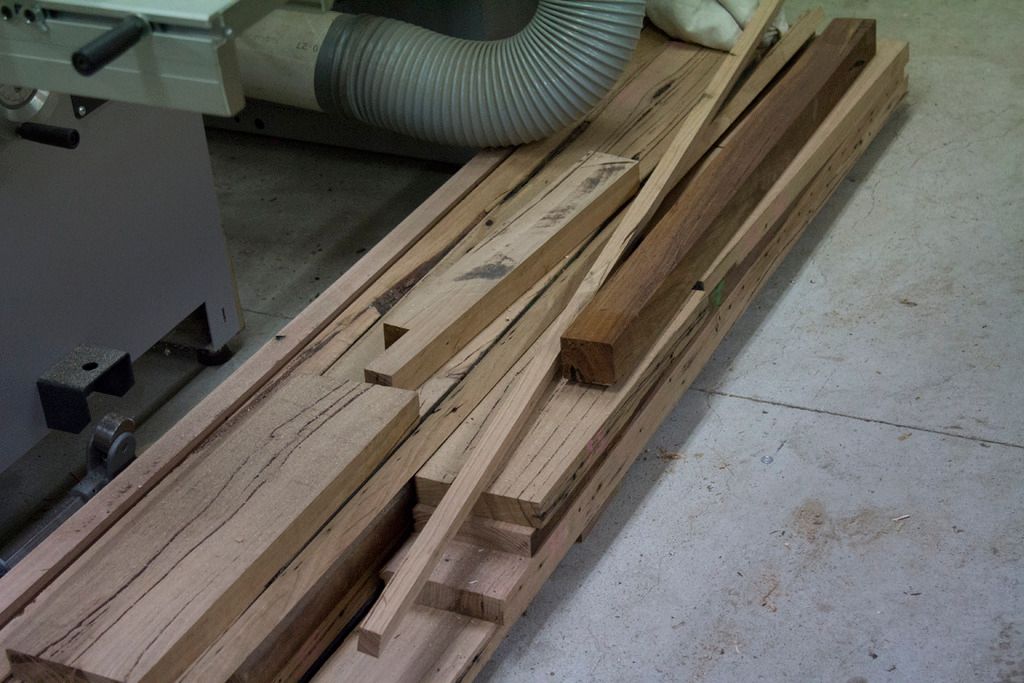
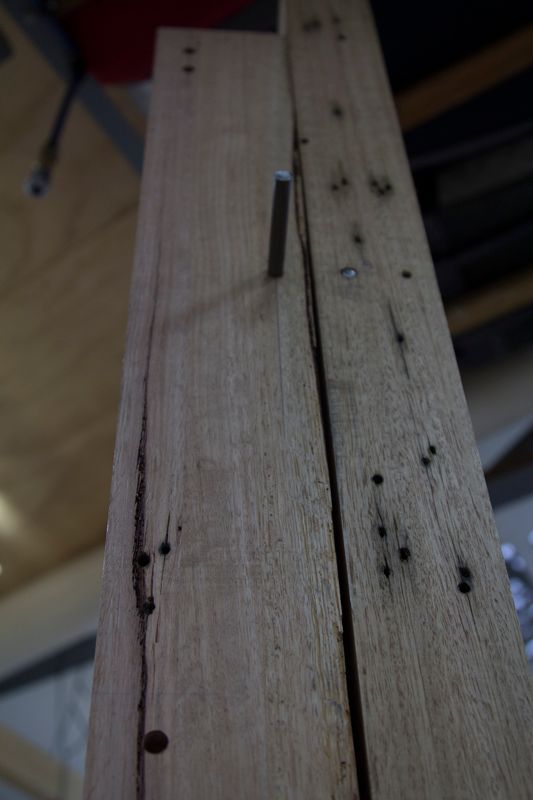
was a tricky process getting a straight edge off the planer, in the end I pulled out the TS55 and track, was a little challenging for the saw but we got through it pretty quick, peeling off the hole ridden edges and back to something that was usable. Thickness wise 40mm was the max we got and down to 32mm minimum. Even though I pressure washed the boards, they were still terrible for the planer/thicknesser ( a3-31 ) destroying 2/4 sides of silent-head knives, not to mention the few nails that slipped through despite the metal detector.
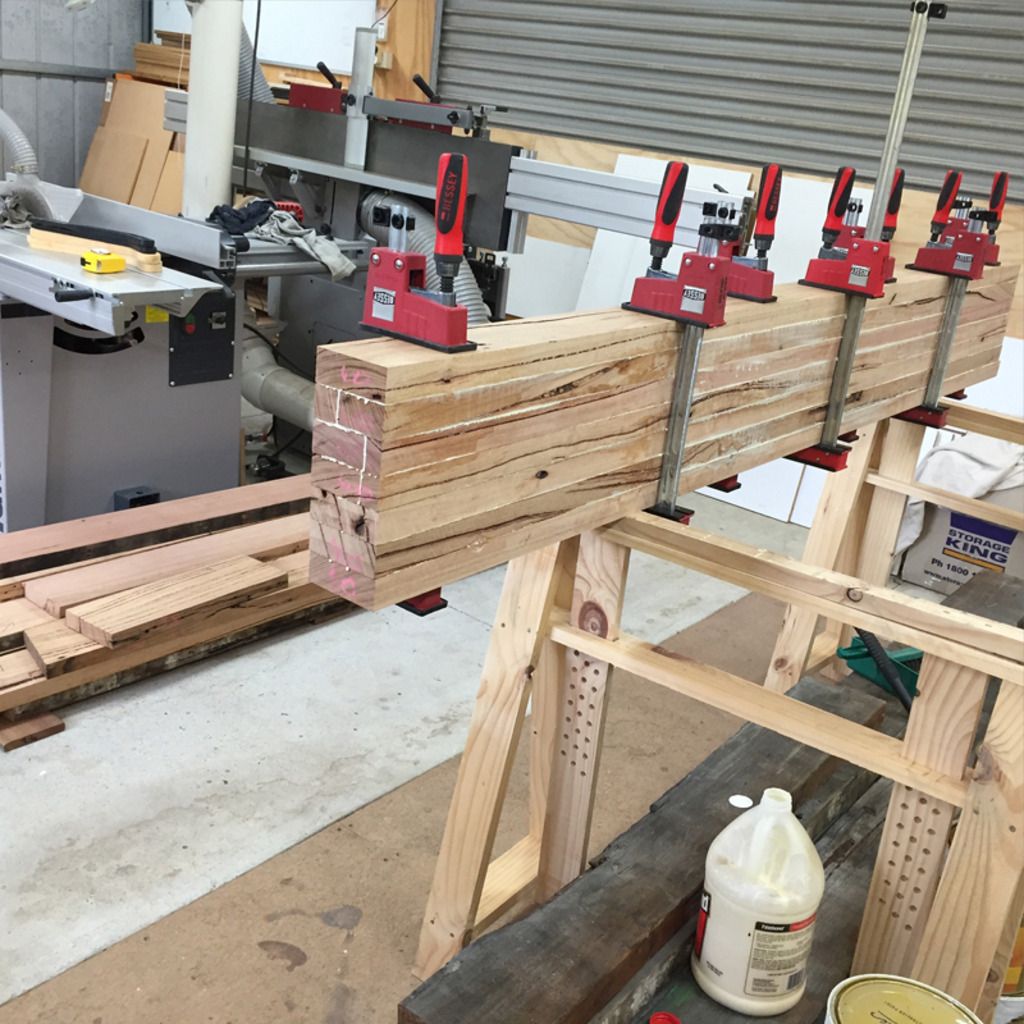
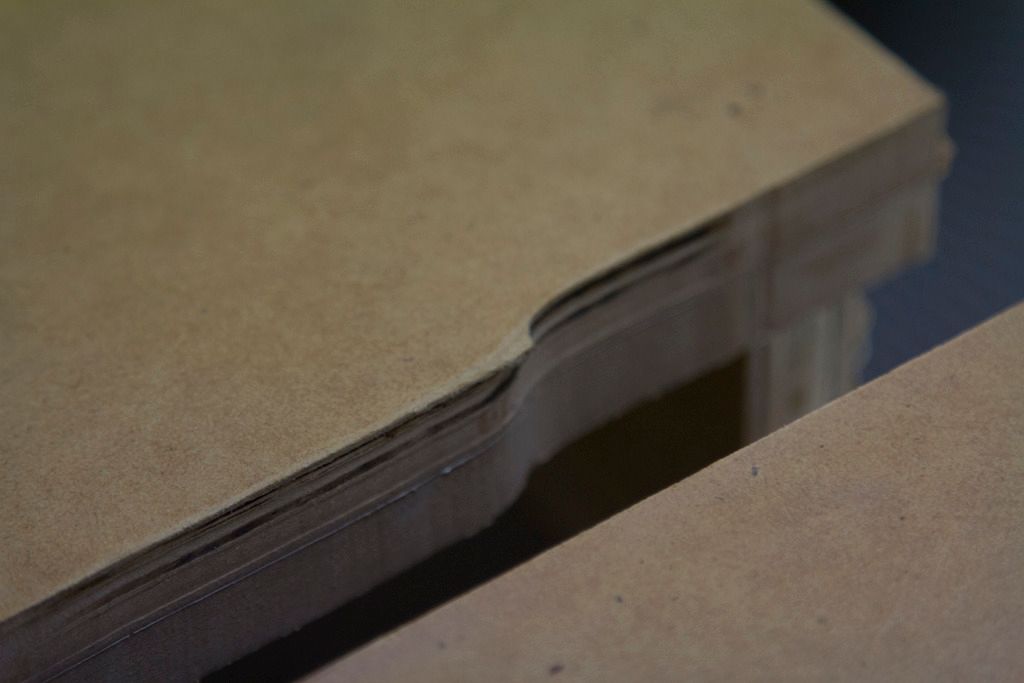
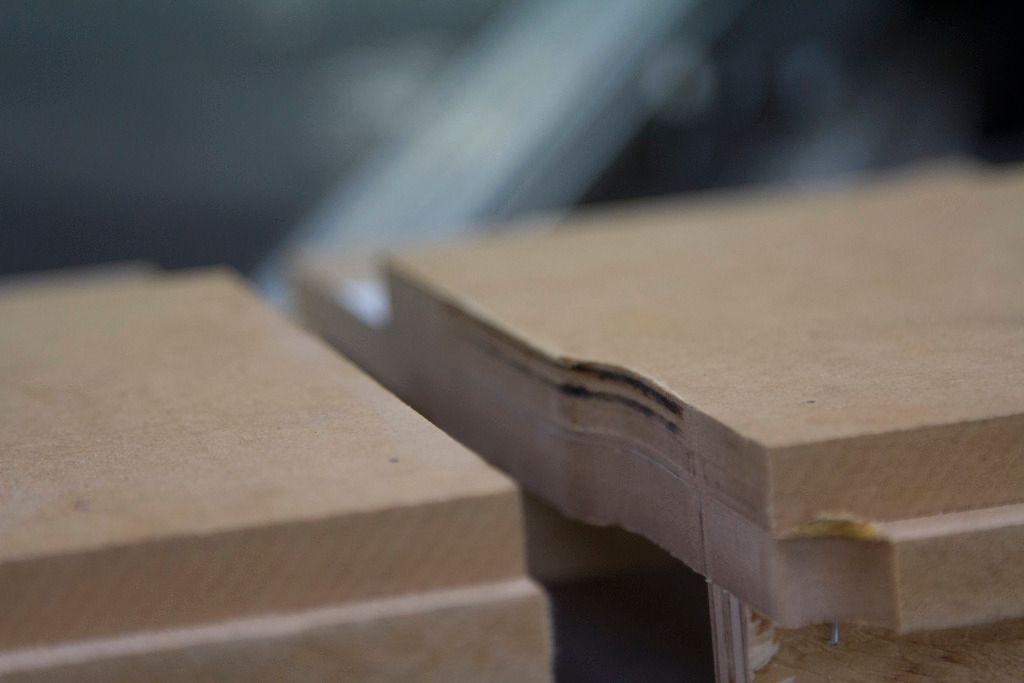
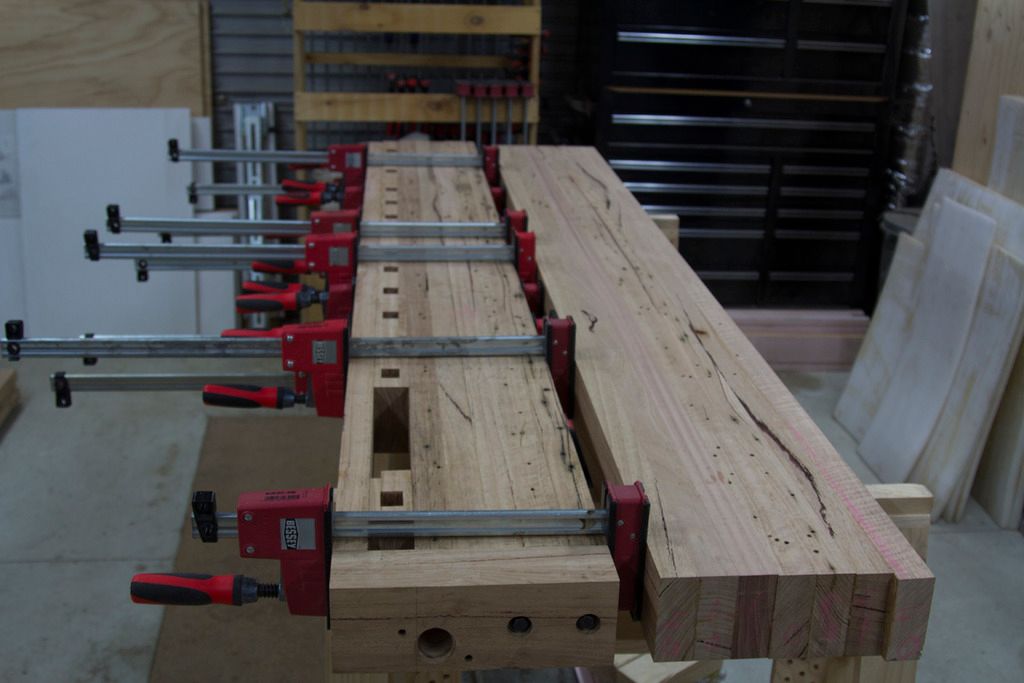
Glue up the rear slab to an exact 281mm as required. I used dominos to align the boards during glue up, but something still went wrong and the final board has slipped 4mm to low at one end. I will wait until I finish the rest of the bench before I fix it, Probably just rout out a portion and glue in a strip, seems the easiest way.
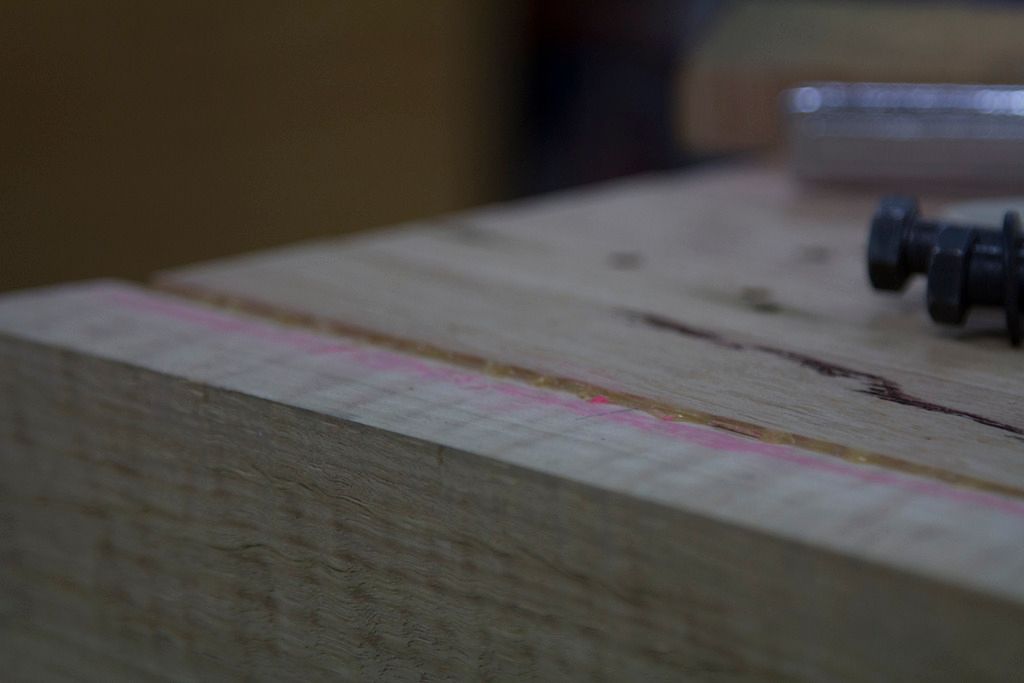
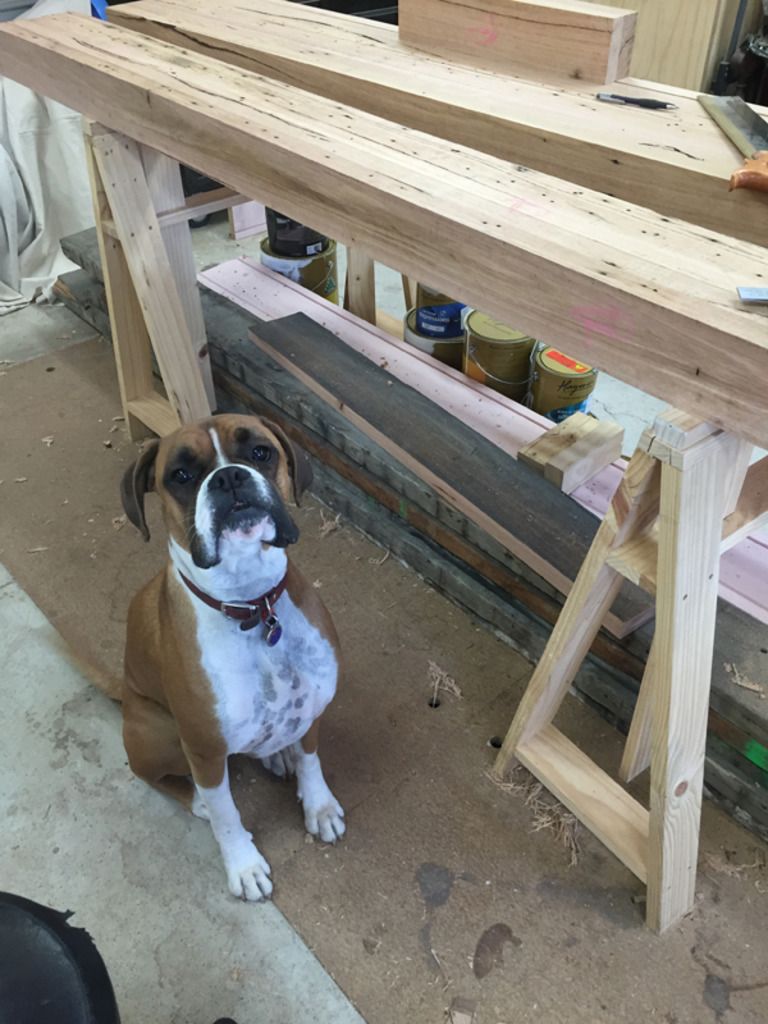
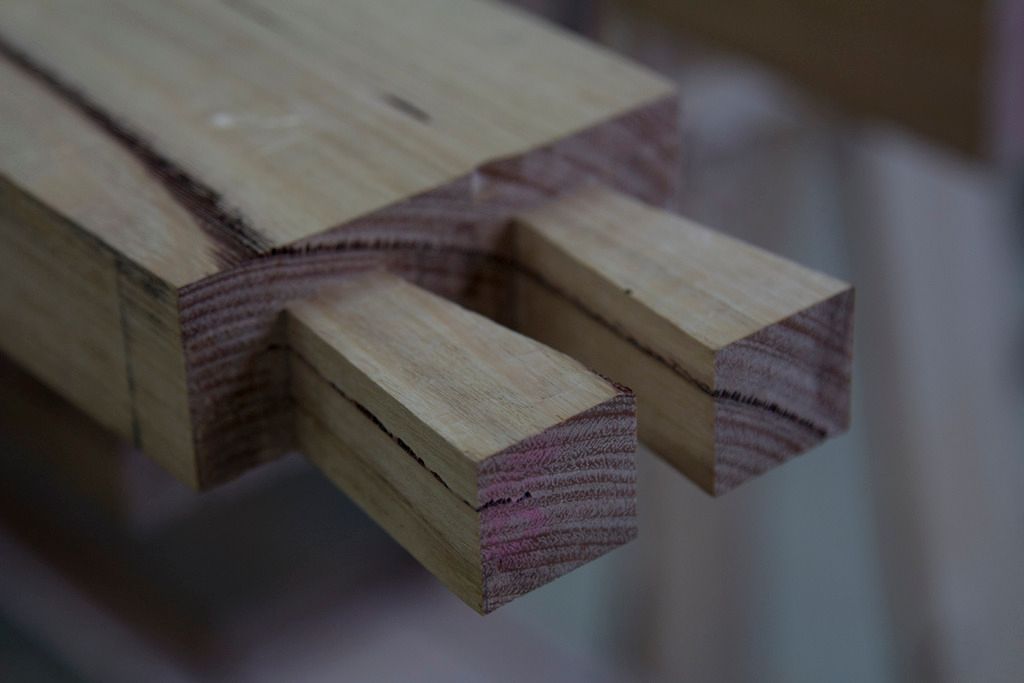
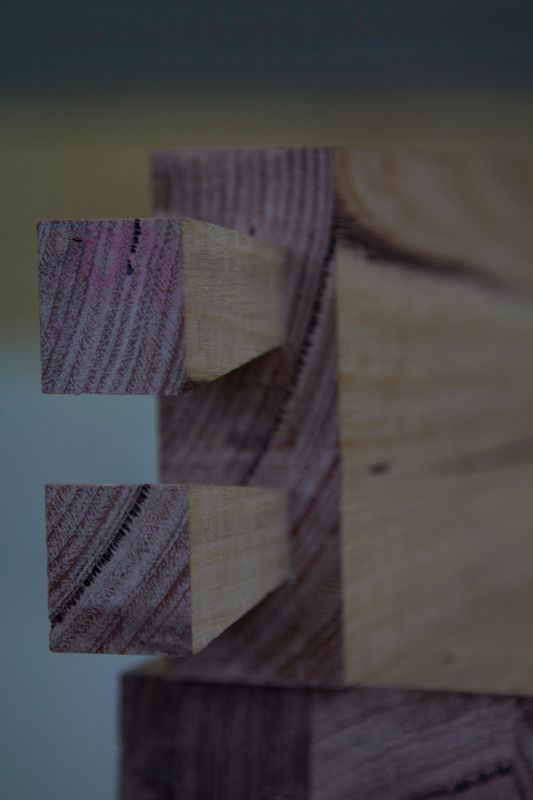
The front slab runs an end-cap to house the tail vice, I went with an open ended mortice and tenon, really happy with the fit, a slight gap (.2mm) underneath but the top is seamless. The dog was only too happy to approve of the workmanship so far.

* as an aside, the plans call for 2 slabs measuring 281mm wide, I astonished myself, having the rear slab measure exactly 281 and the front slab measure in at 282mm. From 7 laminations each. My thicknesser seems to be very accurate......
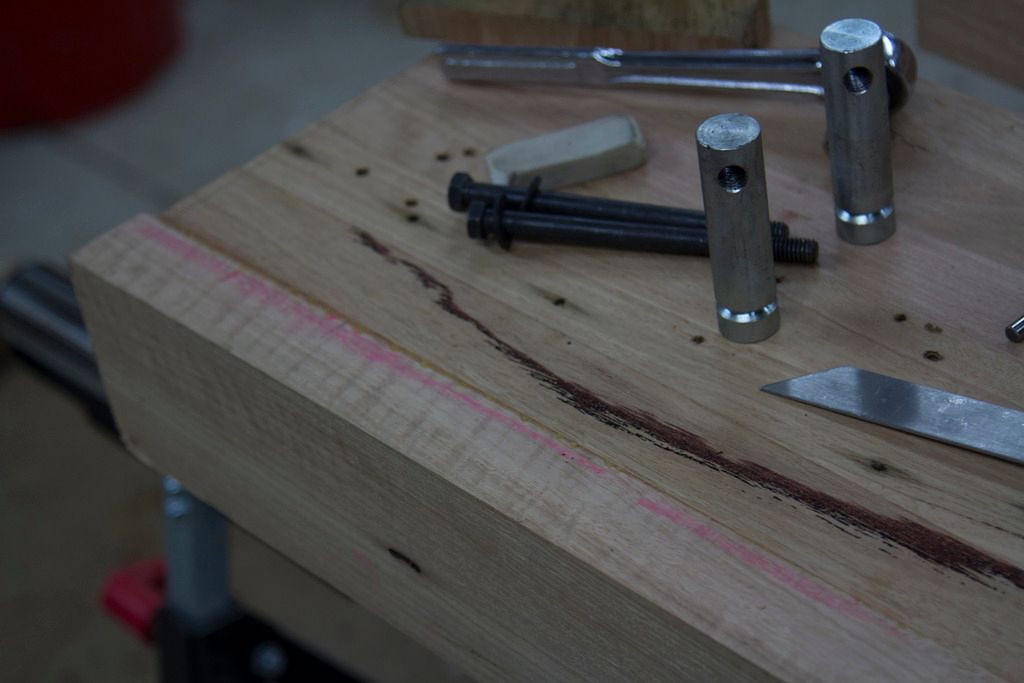
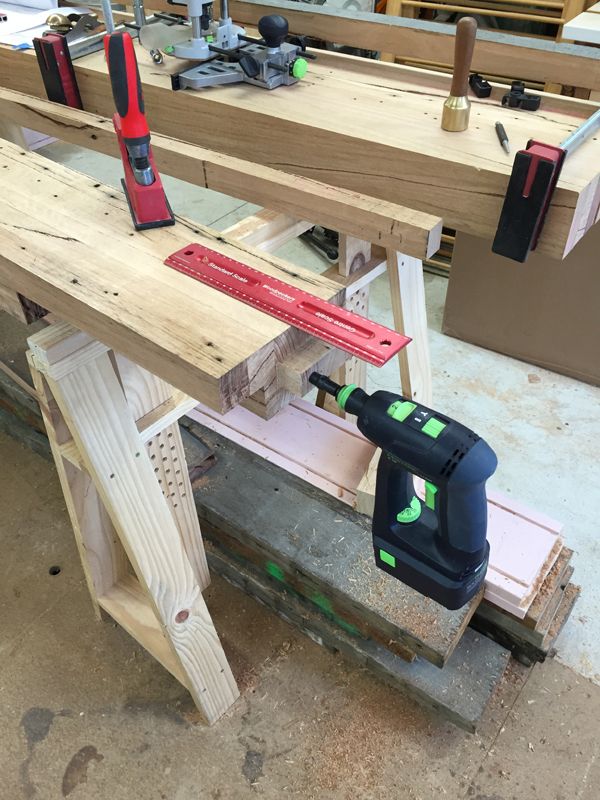
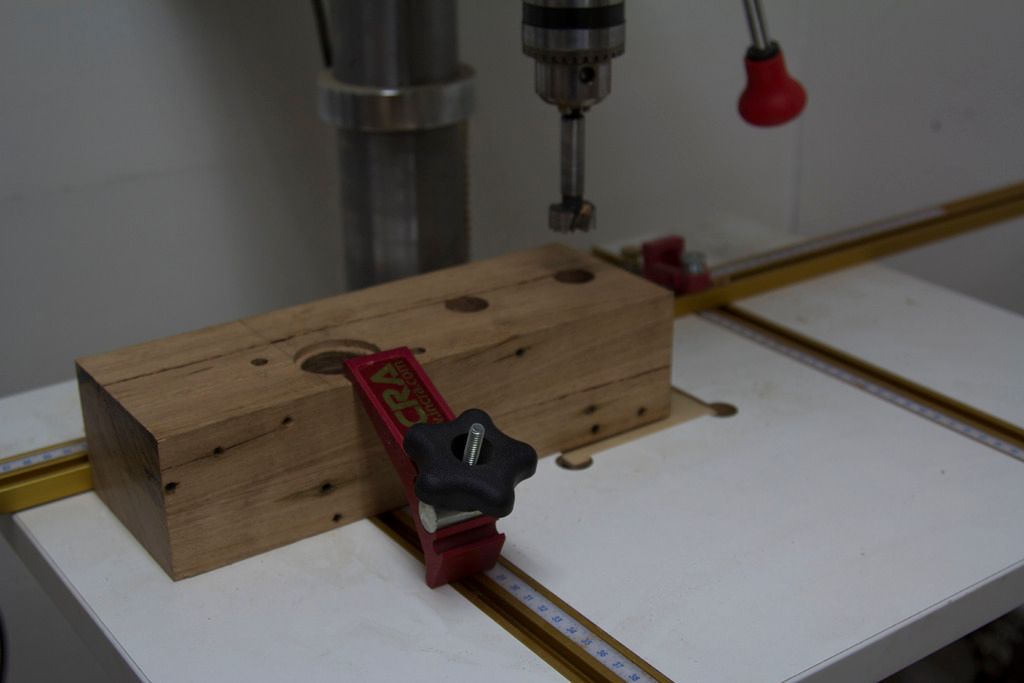
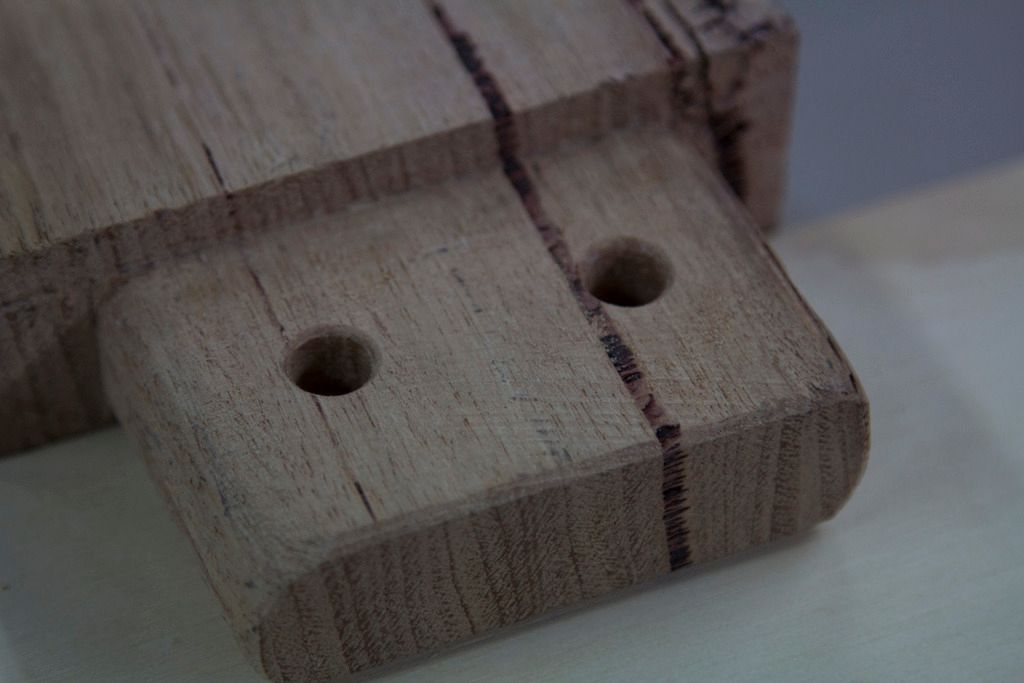
then came time to drill the end-cap for the bolts to secure it and also the tail vice screw, at this point the drill press (3yrs old) blows up!!! and i have to pull out the moxon vise and battery drill to continue the process. I was 1/2 convinced I was going to screw it up, but surprised myself with reasonably straight holes, certainly acceptable for this project anyway.
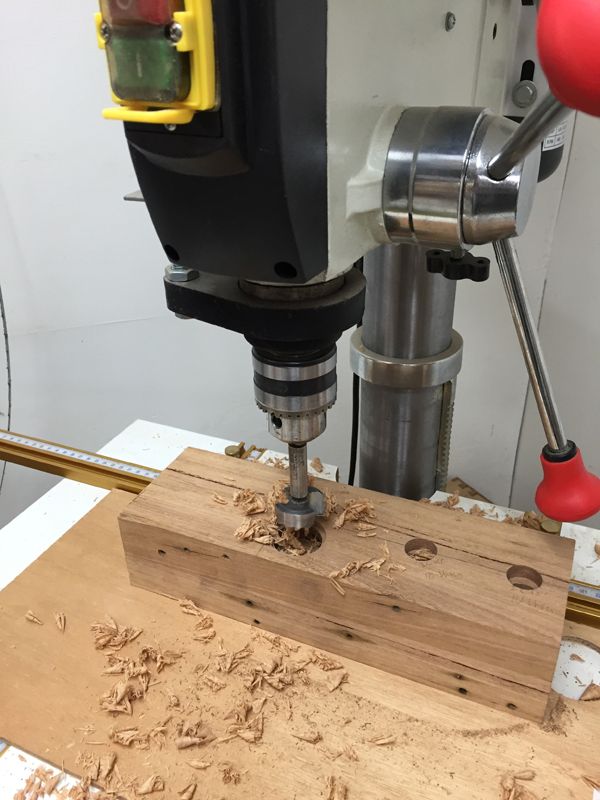
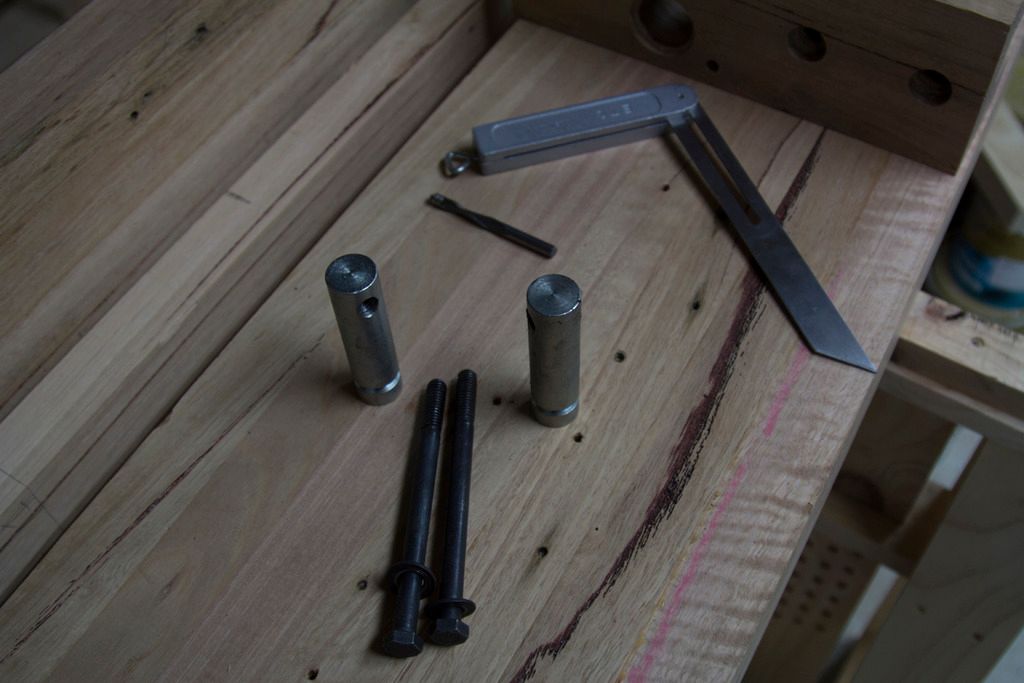
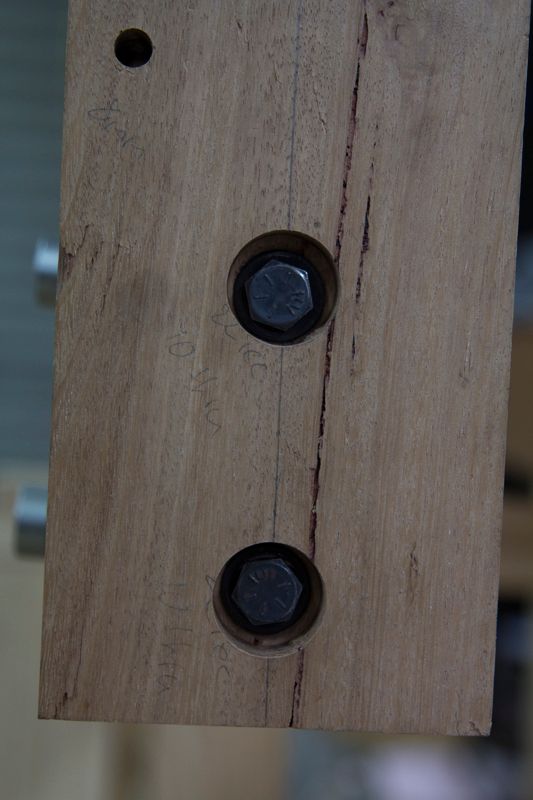
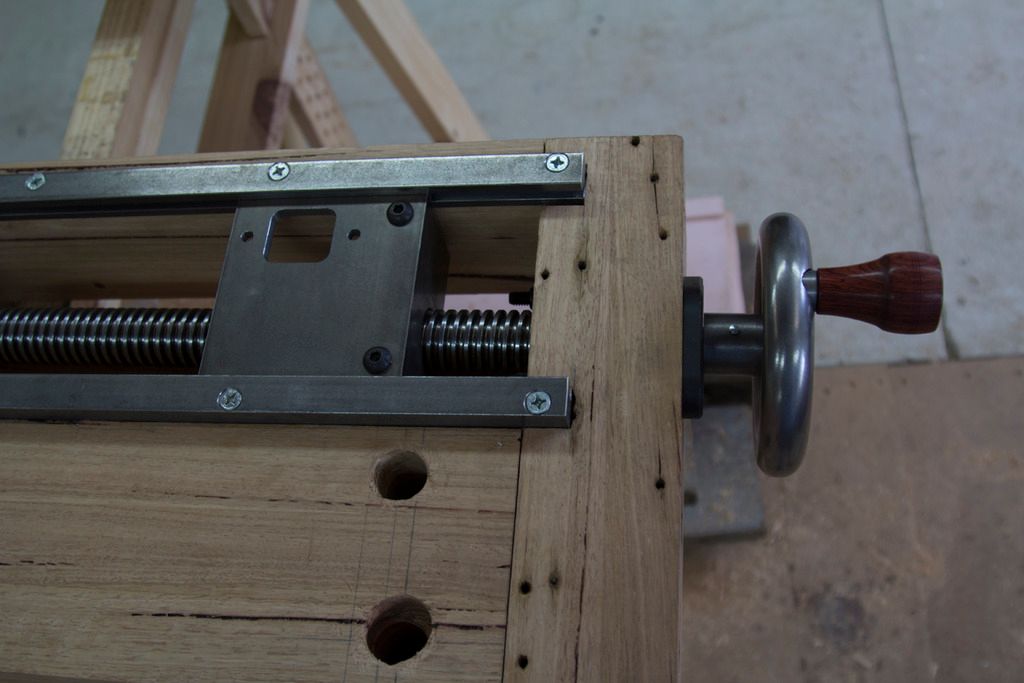
to secure the end cap to the front slab I am using Benchcaefted's Barrel nuts. this is where the errors crept in. no drill press, so high on confidence after failing to completely mess up the end cap I tackle the drilling free hand.
I succeeded in making a royal mess of it. Holes not straight nor aligned properly, I manage to get the barrel nuts in then promptly proceed to cross thread one and have to re tap the barrel nut and bolt to get it to all work. Its certainly not pretty and I may look into a more elegant solution, but for now, it on the underside of the front slab, unseen, and working as intended.

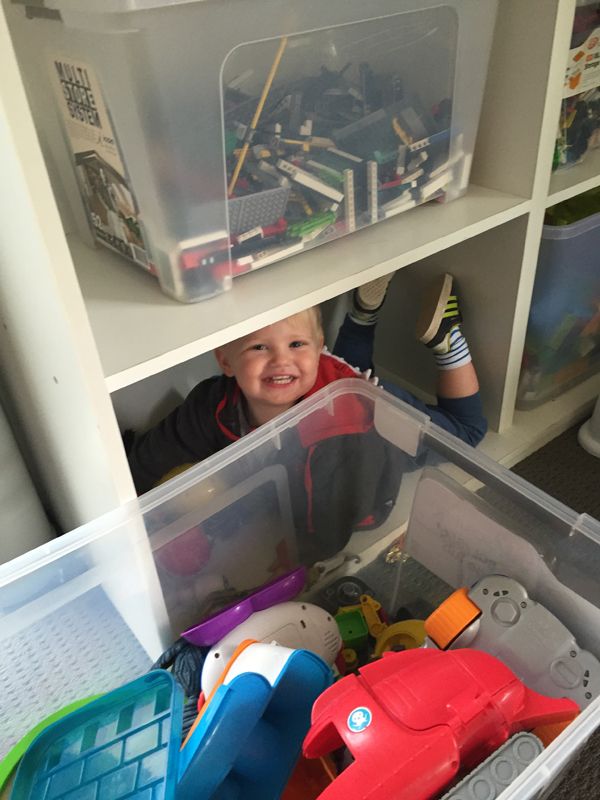
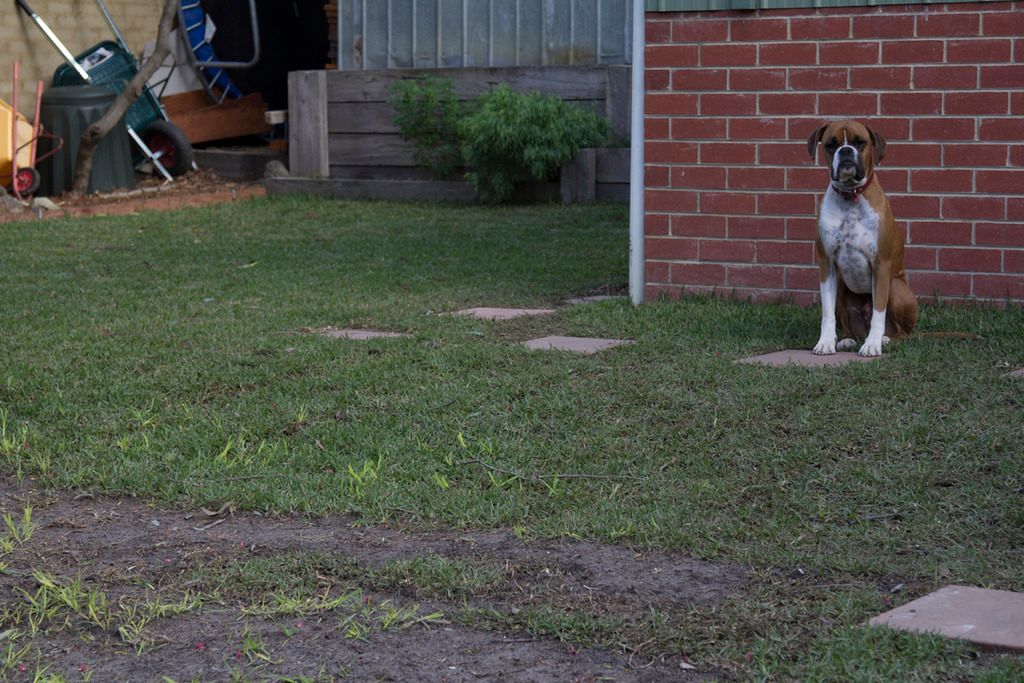
when I'm not out in the shed, I spend my days looking after this little fellow( Hugo -22months) who on this wonderful day found a new and exciting spot to hide
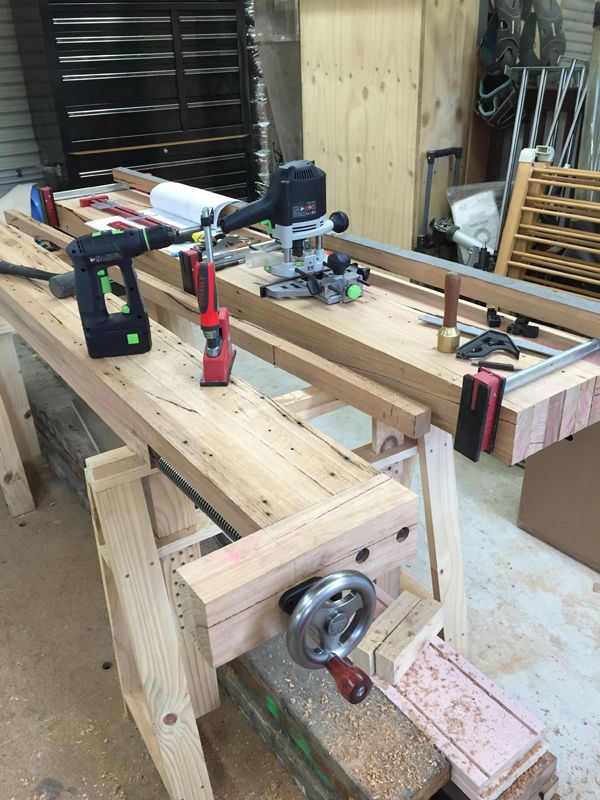
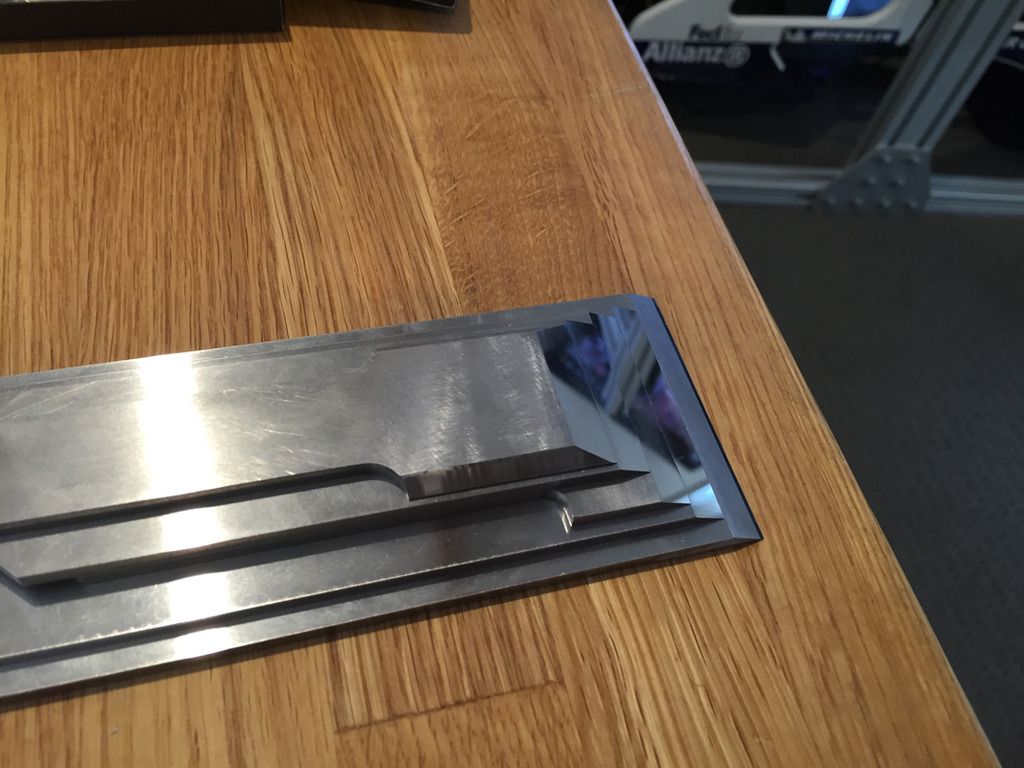
Next up comes the dog strip, a pretty simple affair, a template and router did the job in no time, although, bit size was an issue, I used a pattern bit that was slightly to large and didn't pay enough attention to where the bearing ran, and as a consequence, managed to rout my template and change the shape slightly, Luckily it has no effect on the end result and you would only notice via the stiffness of the dogs motion up and down.
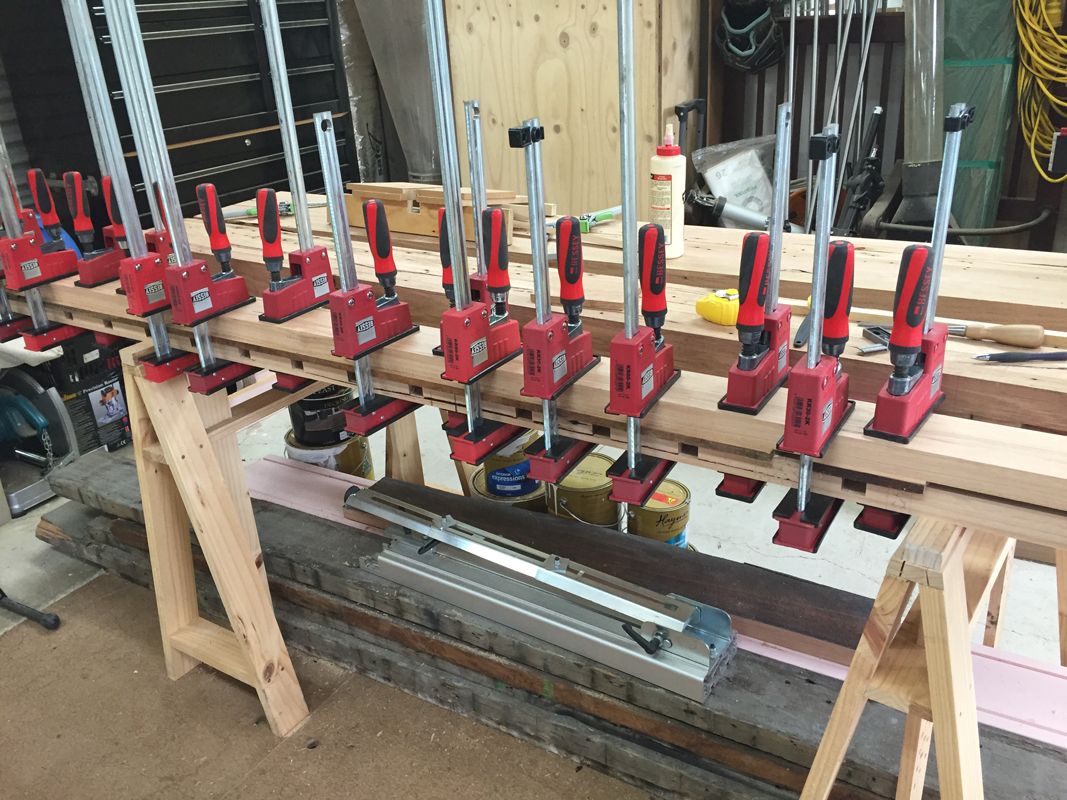
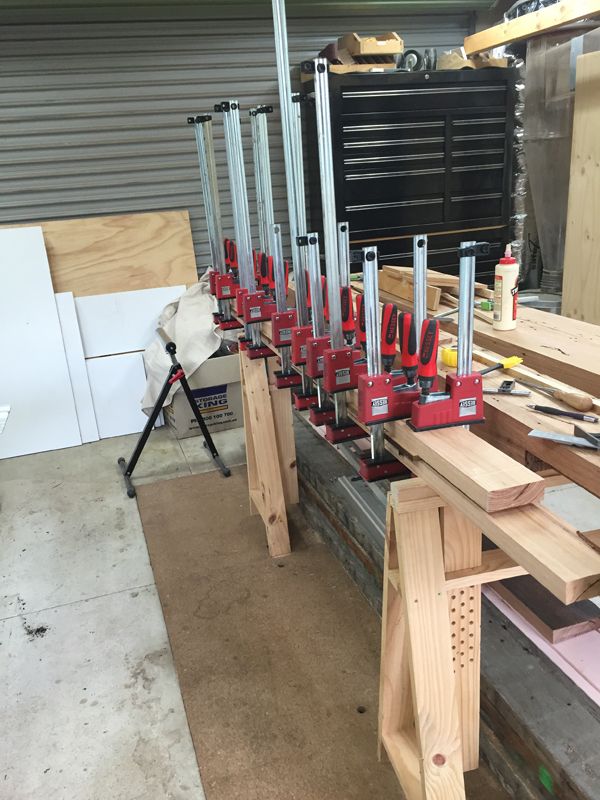
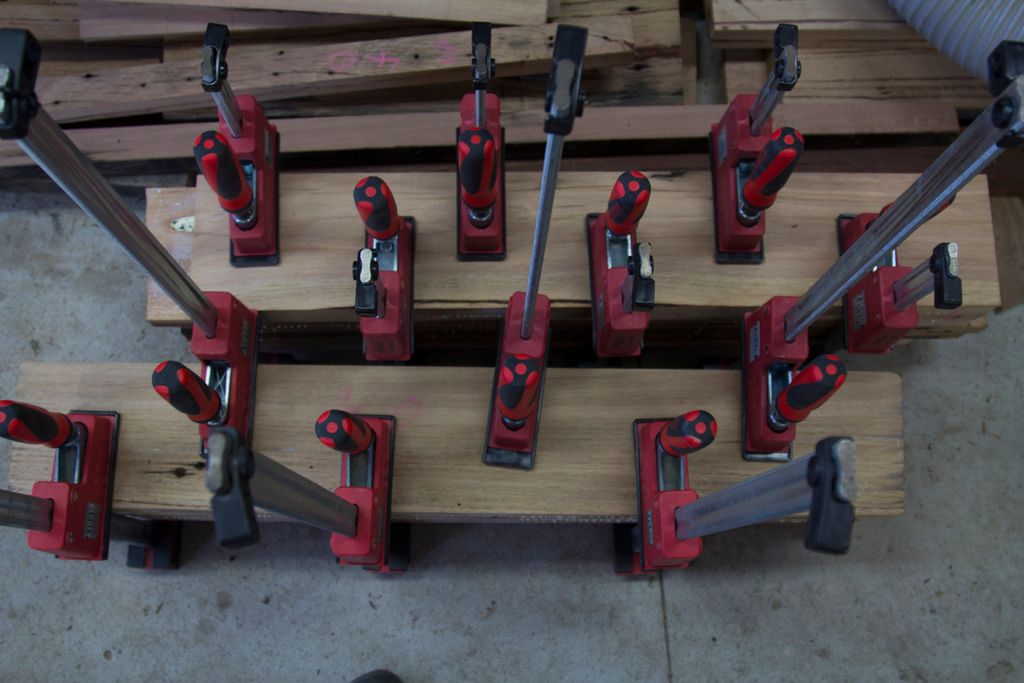
can you ever have too many clamps?
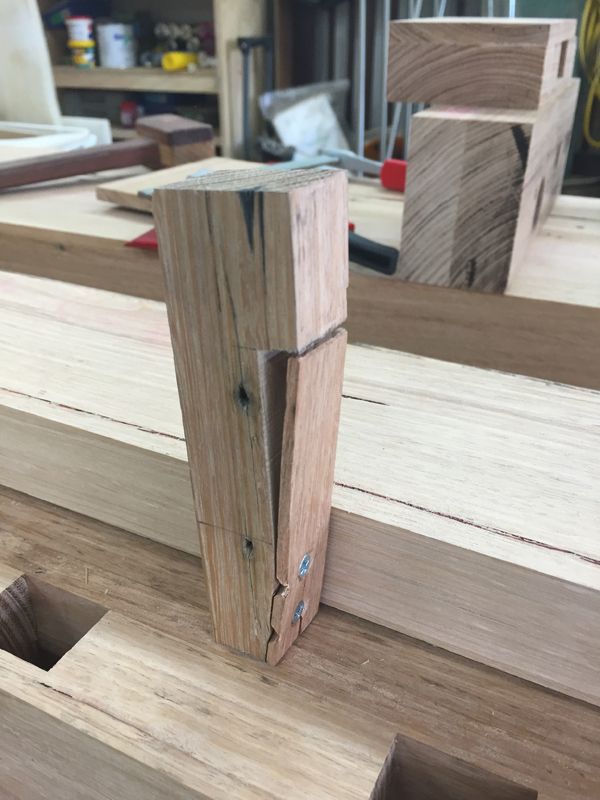
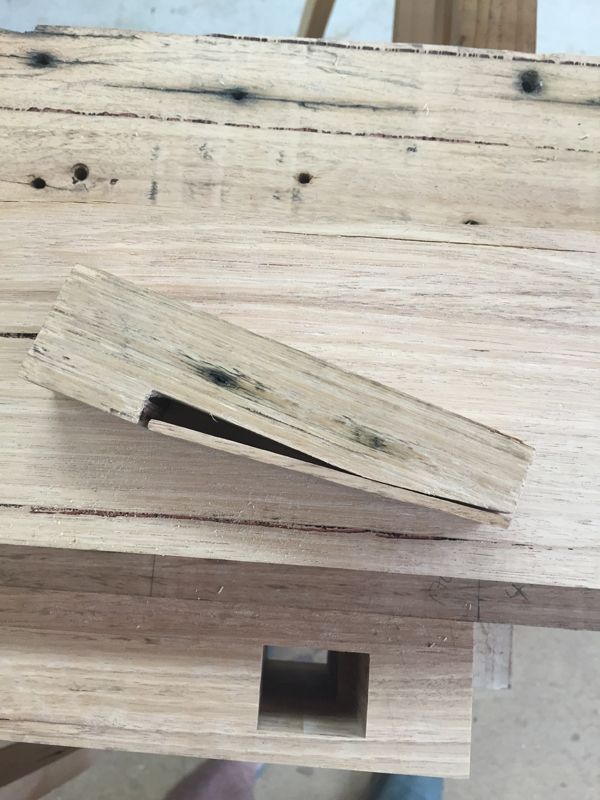
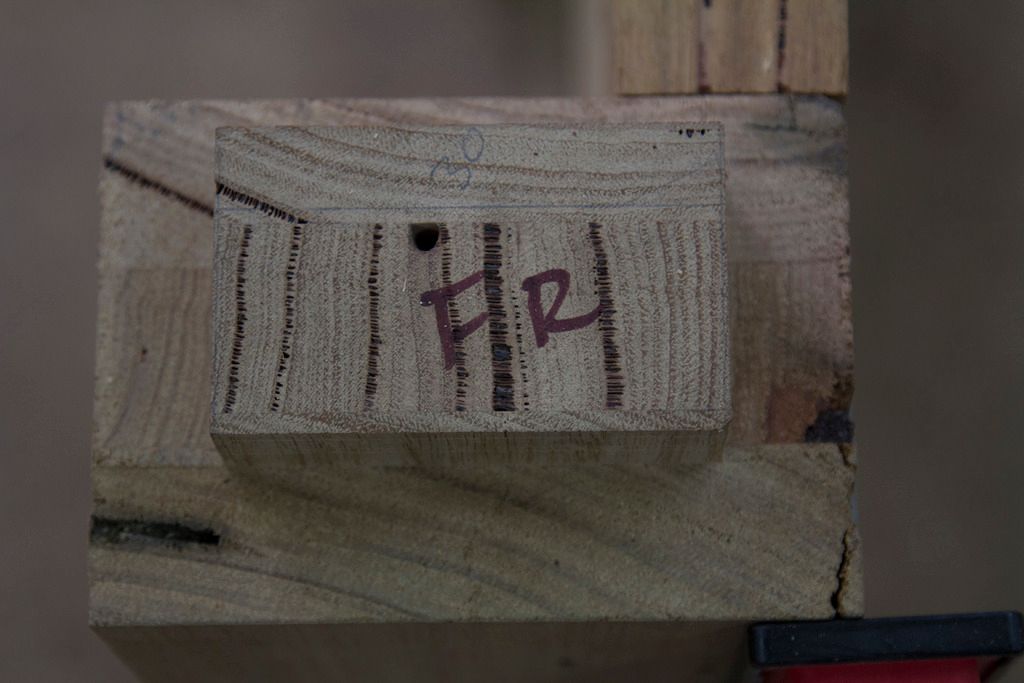
Next is supposed to come the dovetail into the end-cap, but alas breakdown #3 occurred when rough cutting some timber, my bandsaw blade broke, So the dovetails are on hold until a new one arrives. I started a prototype Dog to refine the fit before making a template to allow mass production and re-production later on, using scrap BlackButt I tweaked it to get a nice feel and hold, but for some reason my dogs have to be a whopping 40mm shorter than the plans dictate, makes no difference in their operation, but I'm still curious to see where the error lies.

-
9th June 2016 04:30 AM # ADSGoogle Adsense Advertisement
- Join Date
- Always
- Location
- Advertising world
- Posts
- Many
-
9th June 2016, 07:43 AM #2
SENIOR MEMBER
- Join Date
- Jan 2001
- Location
- Langwarrin, Victoria, Australia
- Age
- 56
- Posts
- 677
Nice work !
Glenn Visca
-
9th June 2016, 07:17 PM #3
GOLD MEMBER
- Join Date
- Mar 2004
- Location
- Brisbane (western suburbs)
- Age
- 77
- Posts
- 12,130
Coming along nicely.
Couple of observations: Years ago I tried making wooden springs for my dogs. First I did it by making the dog a bit fat, then cutting out a slot to make a spring. After a while, the spring leaf lost its mojo, so I tried a few remedies like putting screws in the sides to push the spring leaf out a bit, but that only worked for a short while, too. Then I tried adding the leaf like you've done, which worked a bit better, but eventually I discovered the simplest, & so far the best solution which is to put a ball catch in the stem. This worked very well and all the dogs with catches have gone on working for many years: Dog breeds.jpg
I understand your problems with barrel nuts - getting two holes drilled at right angles 150mm or more apart to intersect precisely is no mean feat! I've long since given up on them & find simple bolts & nuts far easier (and cheaper). Rout a generous slot for the nut, and it doesn't matter if your bolt hole is a bit off, you can still get the nut on easily. You have to hold the nut with an open-end spanner as you tighten it, but that's a small price to pay....
Cheers,IW
-
10th June 2016, 01:32 AM #4
1 legged lumberjack
- Join Date
- Oct 2008
- Location
- Melbourne
- Posts
- 156
Dovetails
yeah thanks Ian, I'm going to try a few different wood species for the leaf, the BlackButt splits to easy, I have some Hoop Pine that I think will work great. the ball catch looks like it would work pretty well.
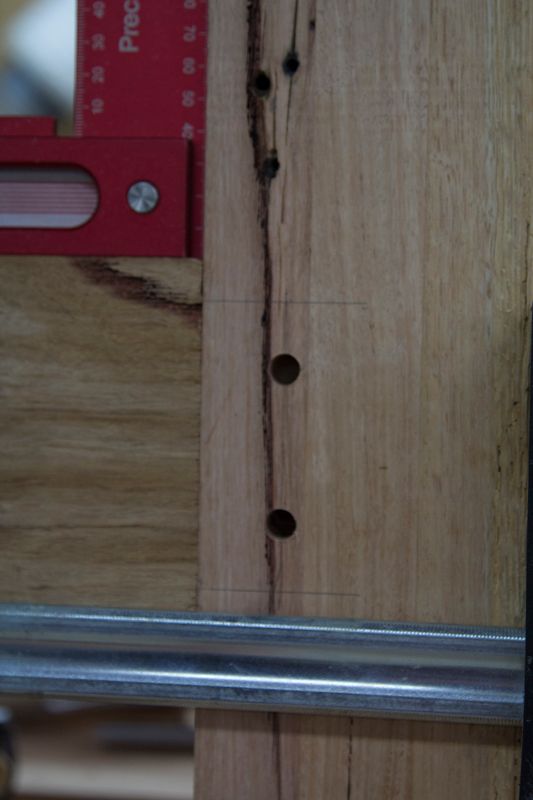
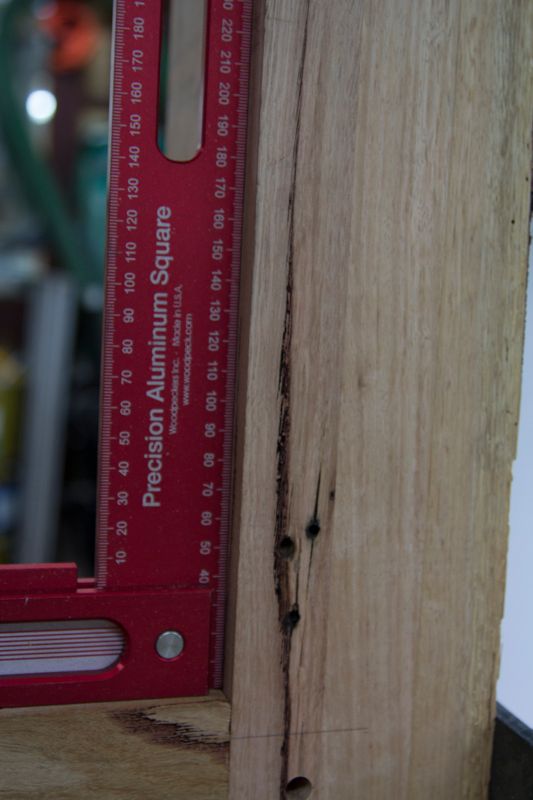
As for the Barrel nuts, compounding my issue was the hole wasn't drilled wholly vertical causing racking of the nut, leading to cross threading, not a massive deal, its assembled now and I don't envisage having to remove it anymore.
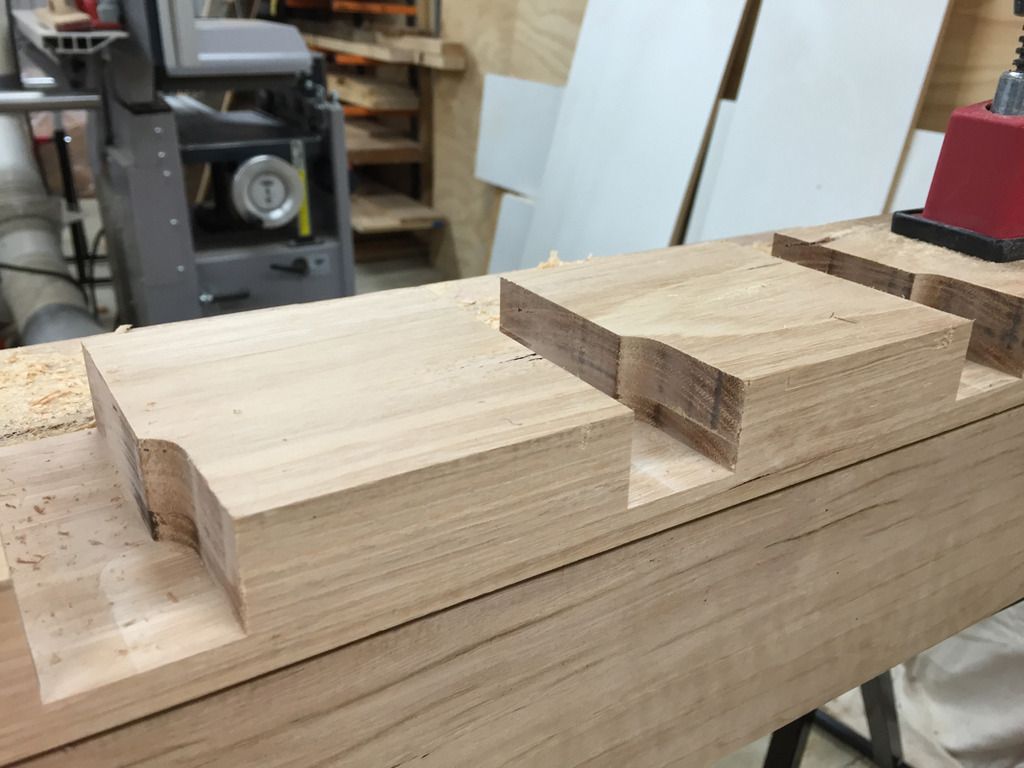
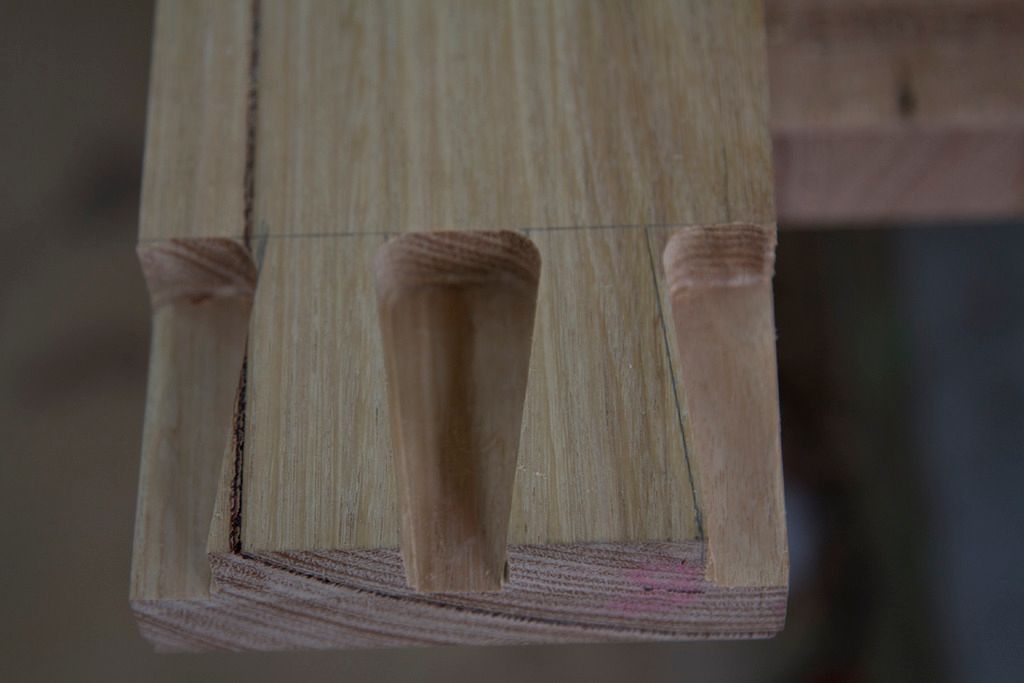
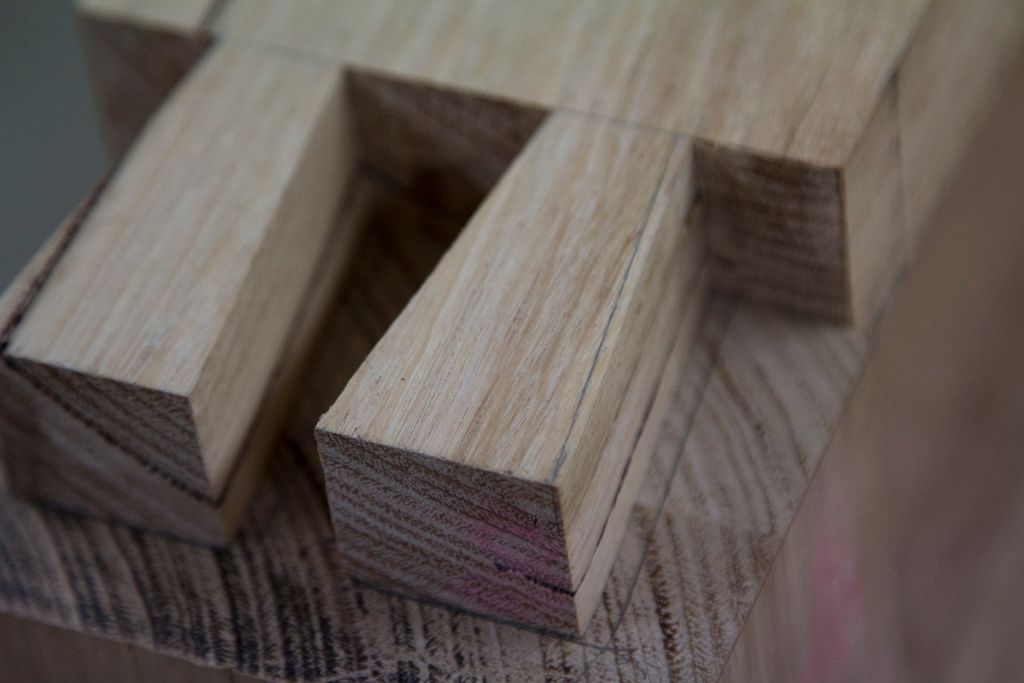
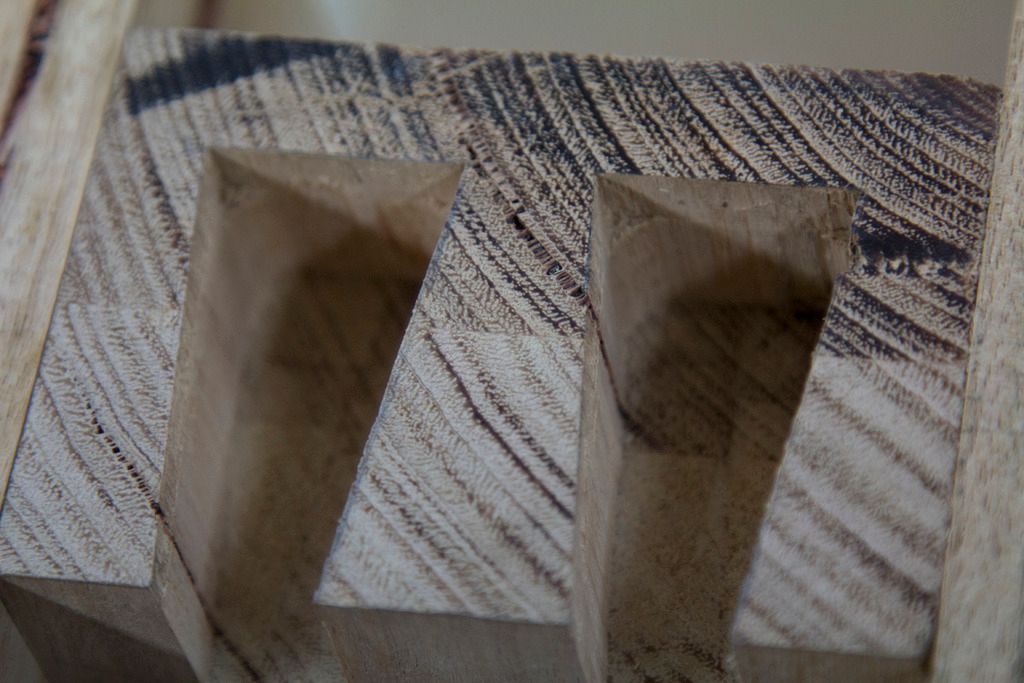
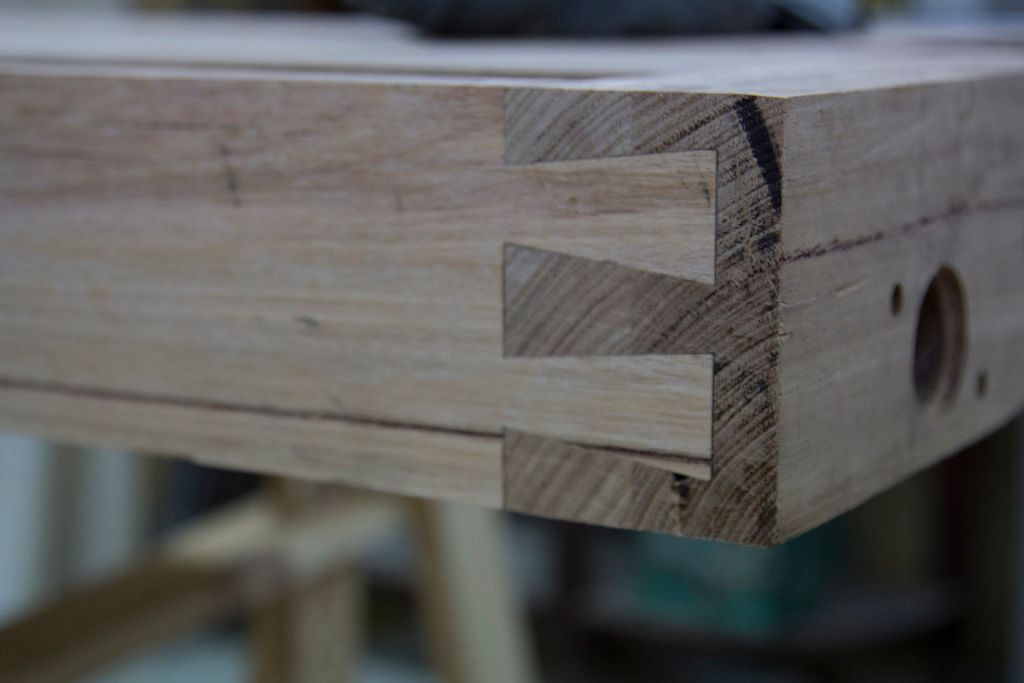
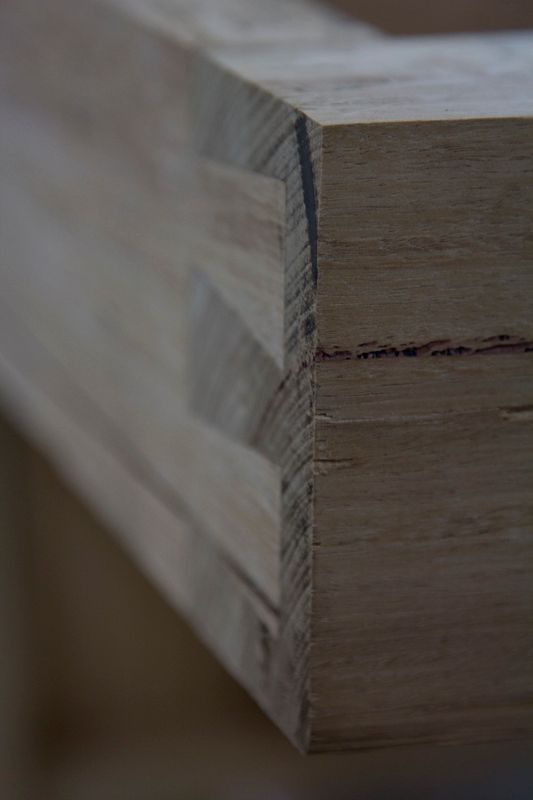
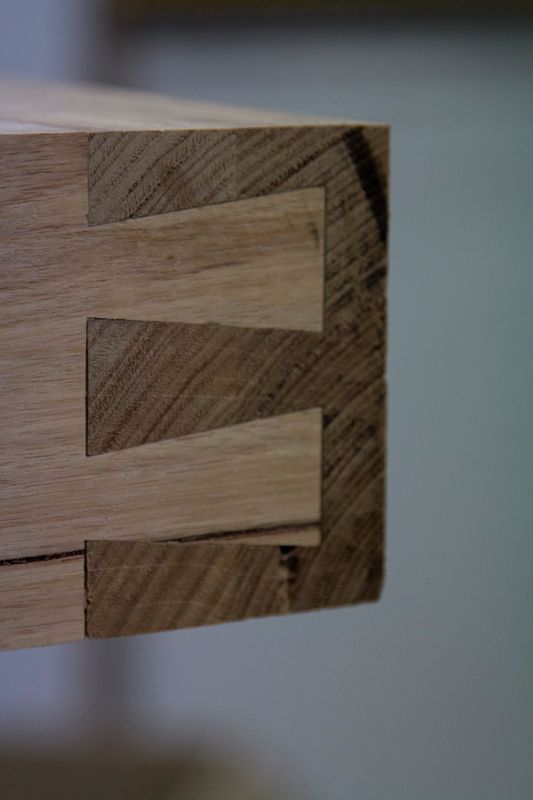
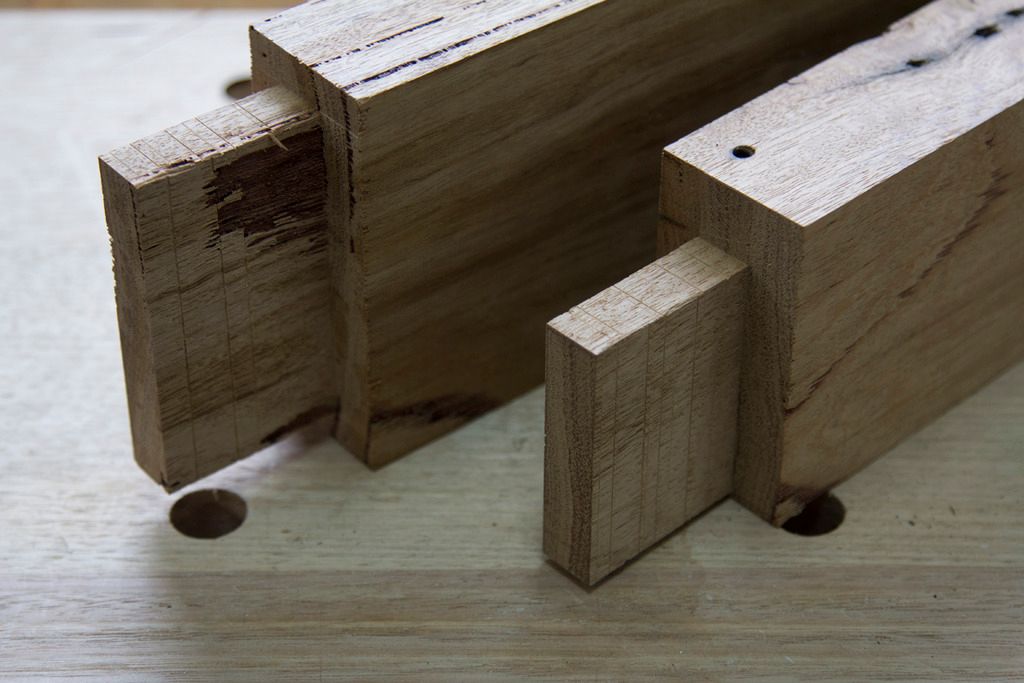
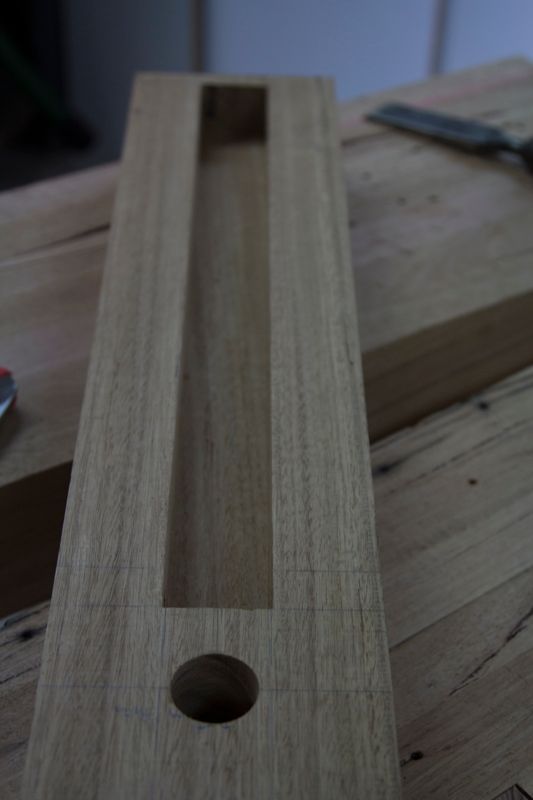
Completed the dovetails today, used a process I handy used before, worked very well, quite pleased with the outcome.
I started by creating a template on the tablesaw
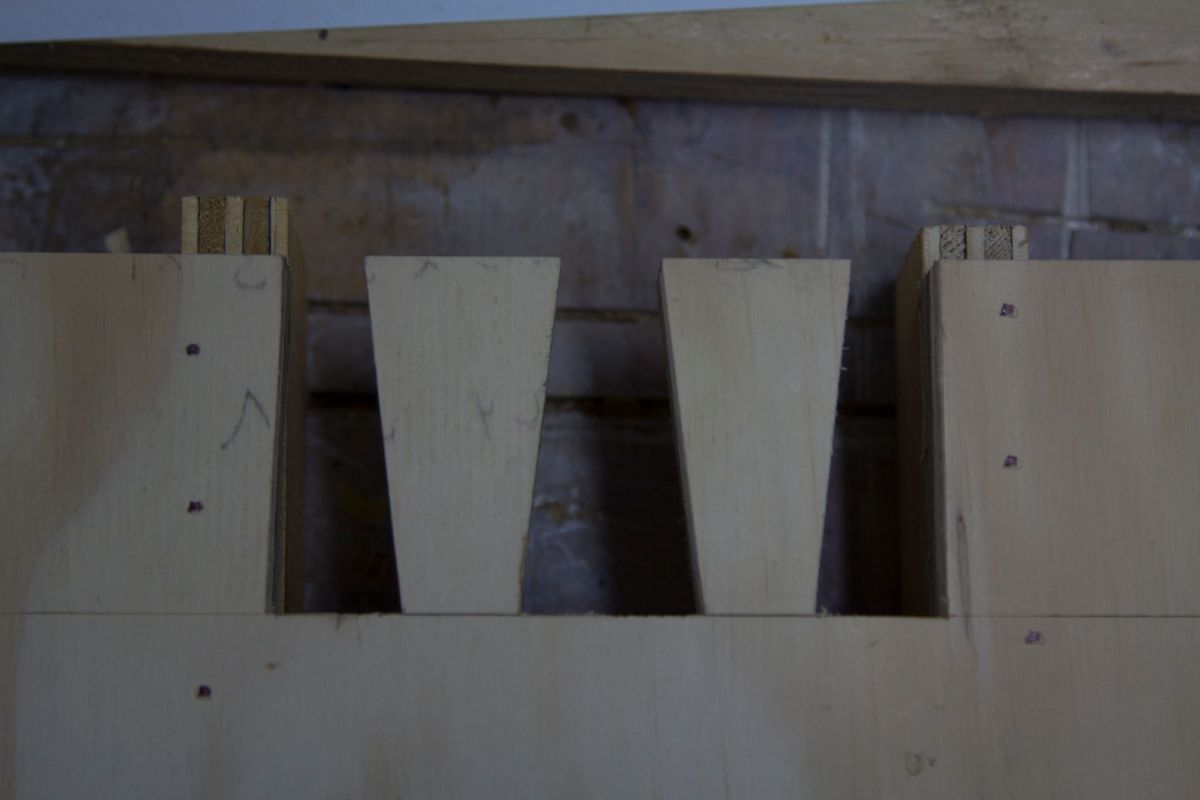
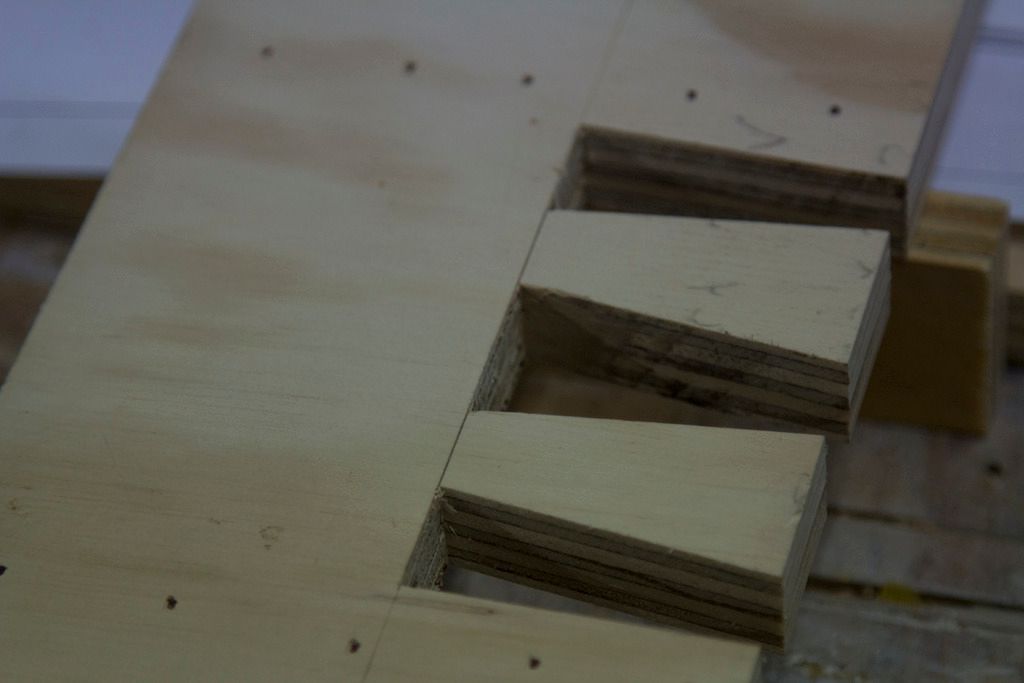
Using an 8mm spiral bit and a copy ring I removed some waste the followed up with a pattern bit to establish crisp clean edges then another pass with the copy ring togged to the desired depth and a final pass with the pattern bit
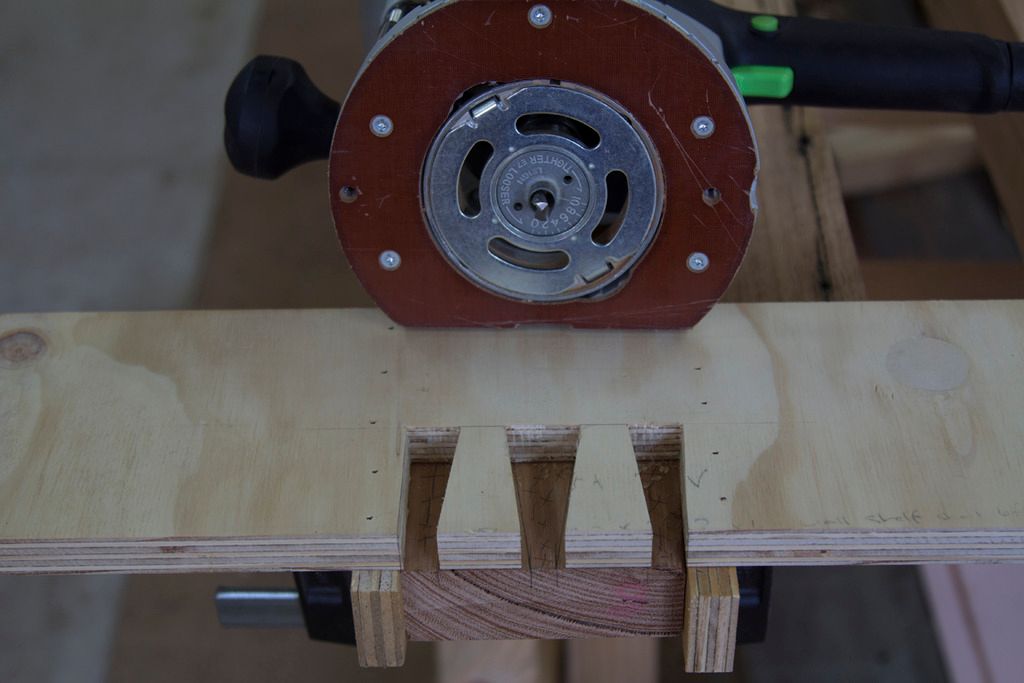

Flipping it over I used and edge guide to establish the rear face and ever so carefully remove the waste from the rear face ending up with a crisp pair of dovetails
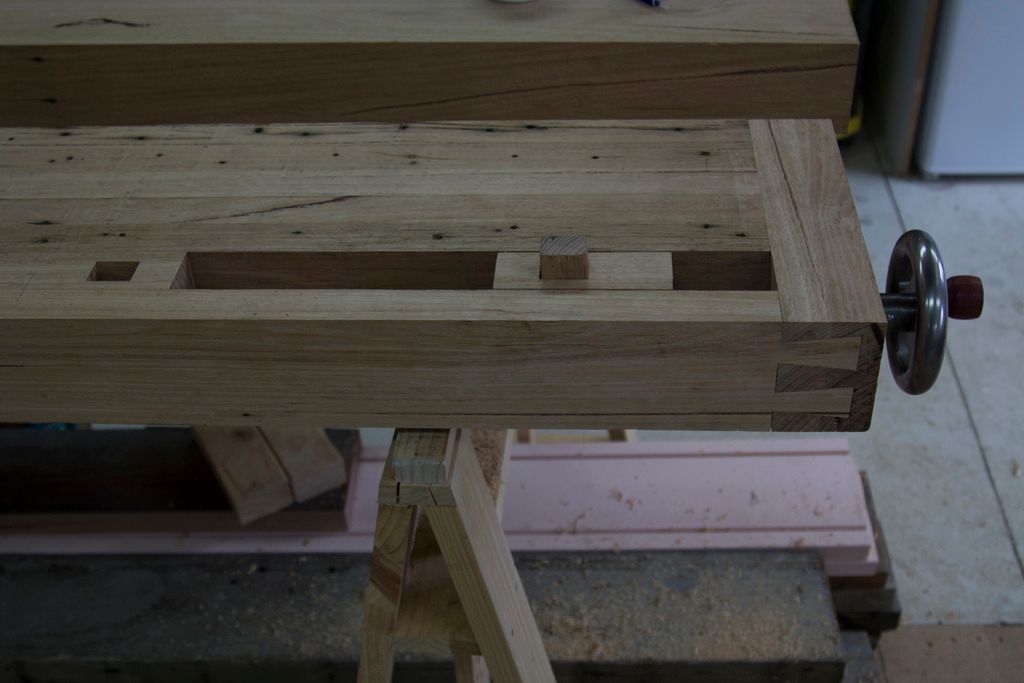
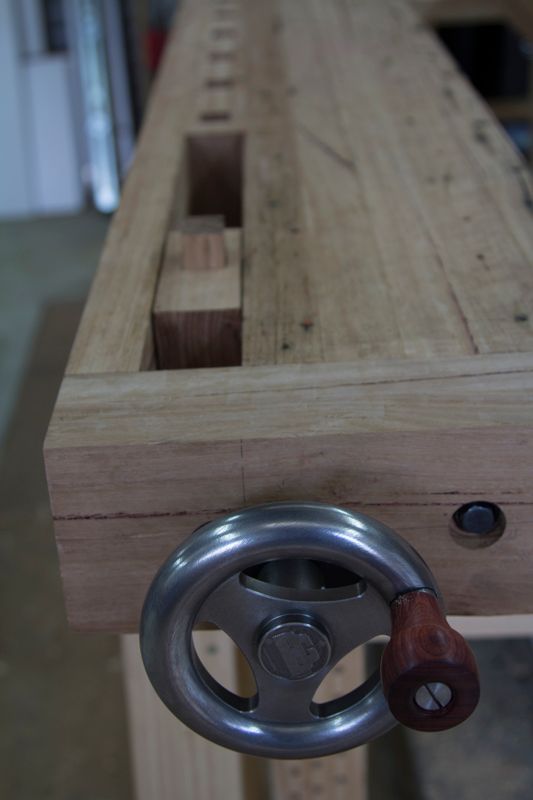
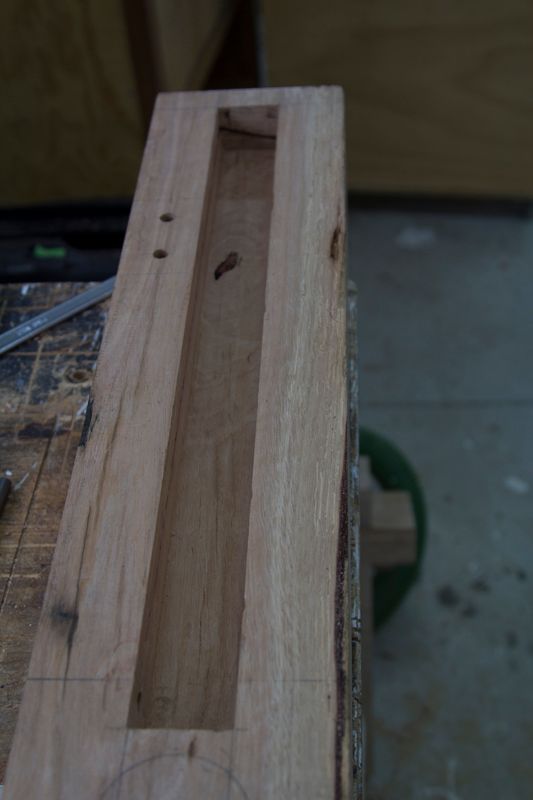
EndCap
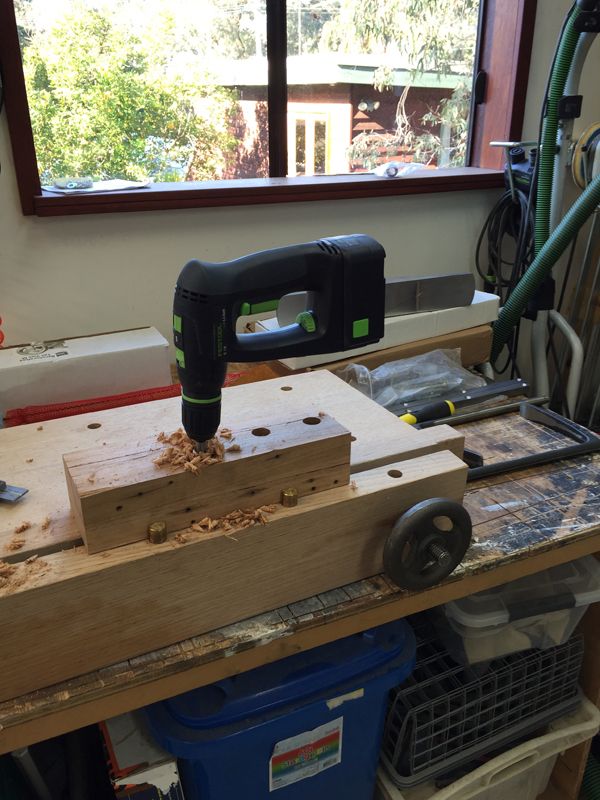
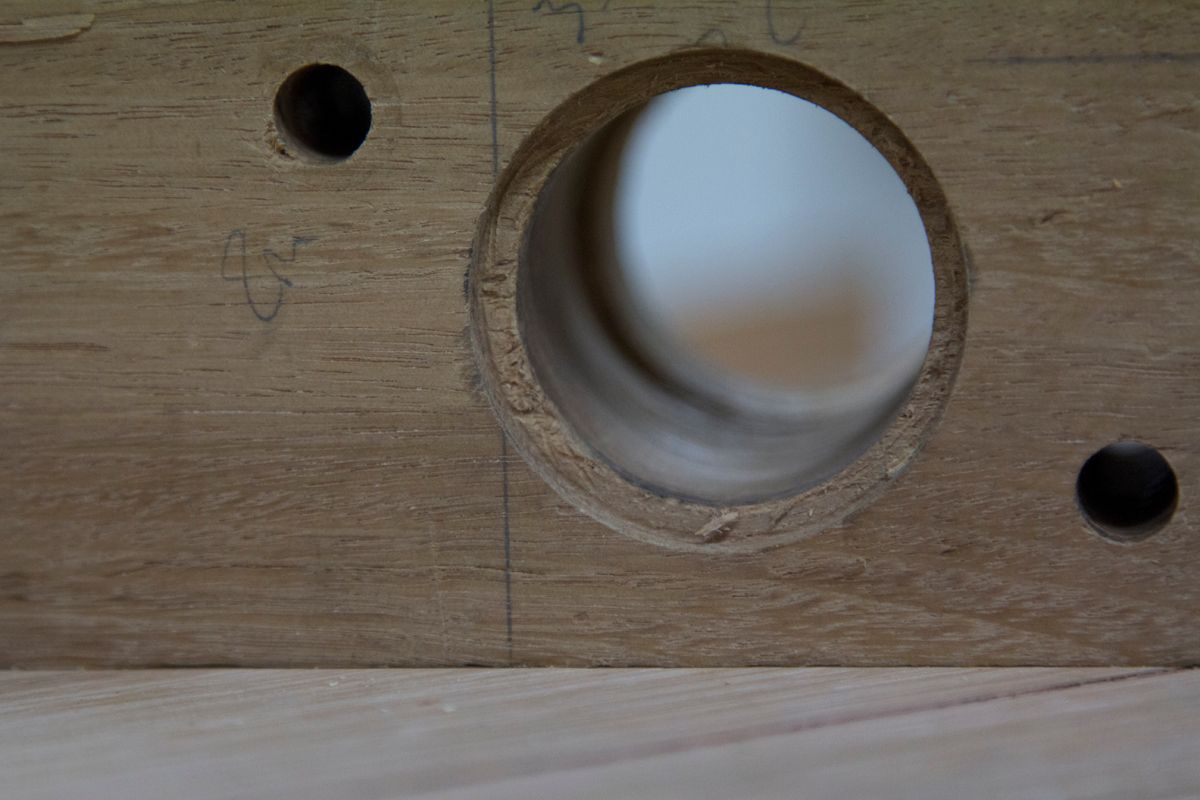
Next was refitting the end-cap into its final place, which required me to fix an earlier ailment, the recess for the end-cap bolts want quite large enough to allow enough clearance for the bolt movement. Firstly I had to replace the drill press motor then a quick hole enlarging fixed it all up satisfactorily.
offsetting the dovetails to allow my marking knife to establish the edge, then very very very carefully hogging out ~12mm of waste freehand with the router, made it super easy to come in with a chisel and create a very accurate housing for the Dovetails.
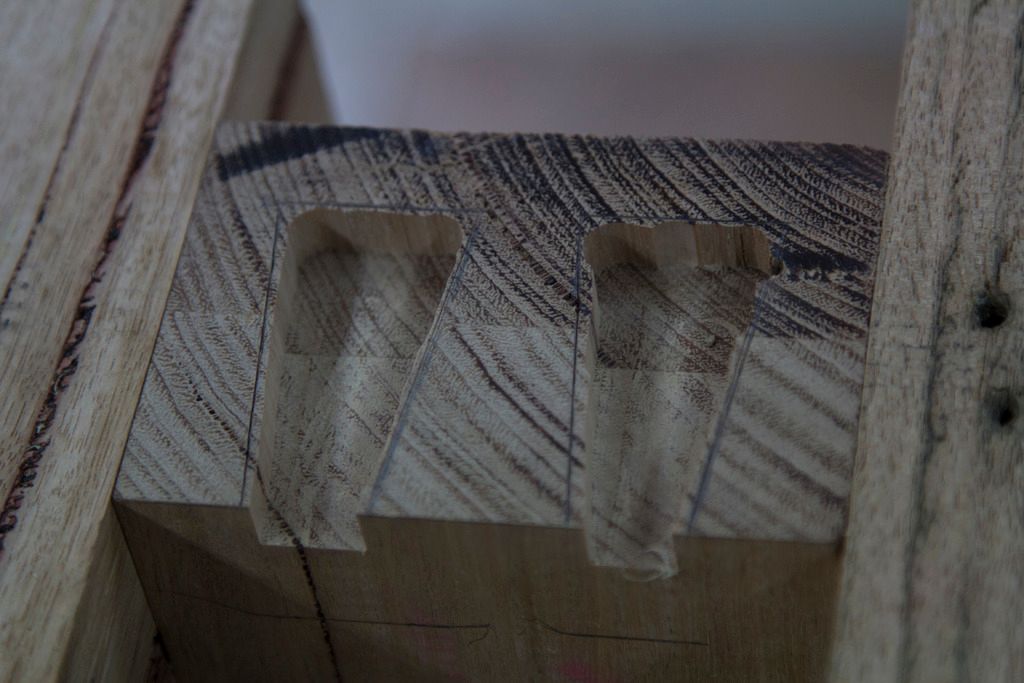
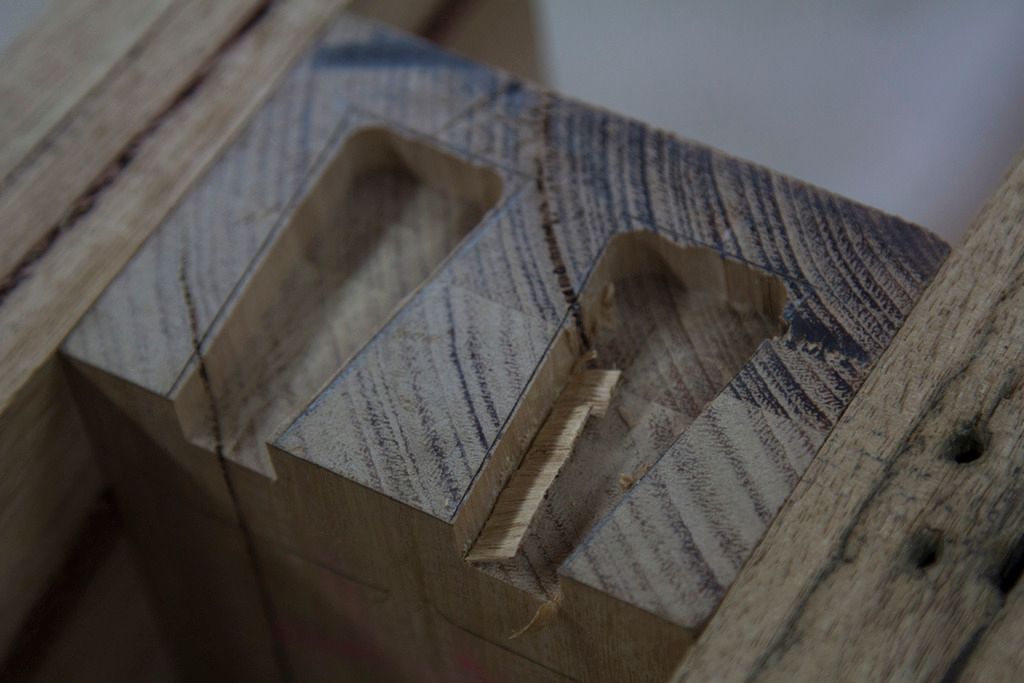
refitting the pattern bit and using the established housing allowed super easy and a great fitting joint. cleaning up the corners with a chisel.
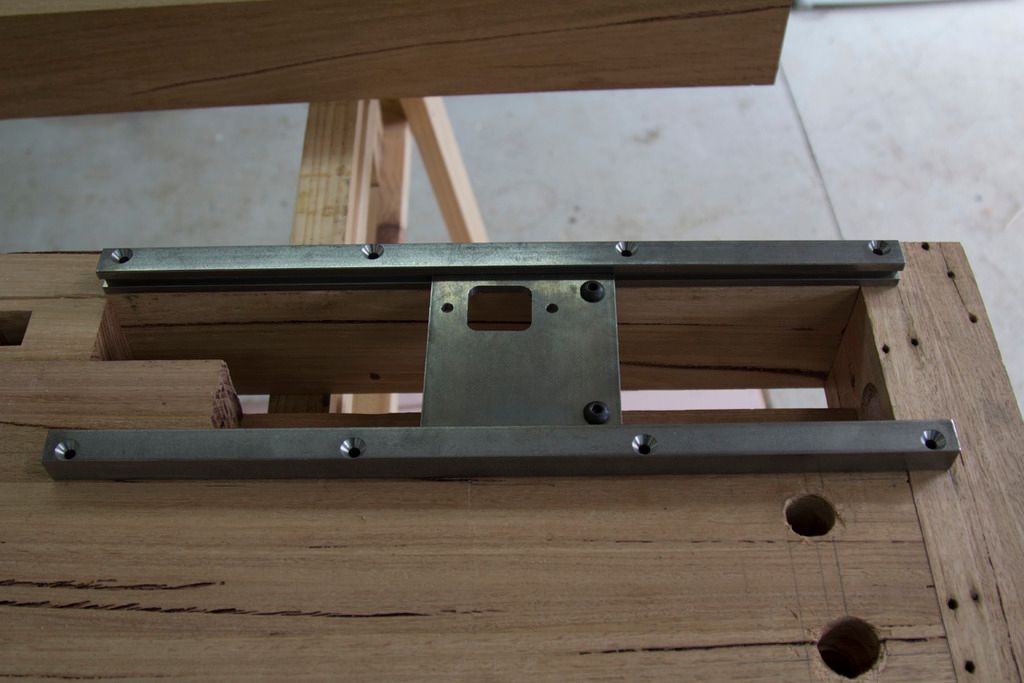
next is the fitting of the tail vice
but its looking pretty good I must say
-
10th June 2016, 08:24 AM #5
SENIOR MEMBER
- Join Date
- Oct 2011
- Location
- Langwarrin
- Age
- 43
- Posts
- 952
Ripper job so far mate. I have all the gear to tackle one of these builds but other things have popped up. I'm watching with interest and loving the detail and accompanying photos.
Mentioning your mishaps and what to look out for is also useful so thanks for throwing them in there (we all have them, I usually choose to block them from my memory)
It's looking amazing so far, can't wait to see the finished product."All the gear and no idea"
-
10th June 2016, 08:50 AM #6
GOLD MEMBER
- Join Date
- Mar 2004
- Location
- Brisbane (western suburbs)
- Age
- 77
- Posts
- 12,130
Nice fit with the D/Ts, but such a complex routine would do my head in, I reckon. I have enough trouble with "mark, saw, chisel-out waste". Your method would increase my capacity to stuff up, several-fold.....

CheersIW
-
10th June 2016, 09:08 AM #7
Lignum Vexator
- Join Date
- May 2007
- Location
- North of the coathanger, Sydney
- Age
- 68
- Posts
- 9,417
cool build
 regards
Nick
veni, vidi, tornavi
Without wood it's just ...
-
10th June 2016, 11:07 AM #8
almost a woodworker
- Join Date
- Feb 2007
- Location
- blue mountains
- Posts
- 4,890
Nice work and plenty pictures. We all like that.
Regards
John
-
10th June 2016, 11:36 AM #9
Deceased
- Join Date
- May 2008
- Location
- BELL POST HILL, 3215
- Age
- 87
- Posts
- 2,332
Photos.
Hi MatMann,
Great Pics, & nice new Machinery + He who has the most Clamps, WINS.
I have always had the feeling, that there should be a 3rd. leg in the centre, as when you hammer anything, the bench still bounces, very slightly, but still bounces.
Justmy2senceworth.Regards,
issatree.
Have Lathe, Wood Travel.
-
11th June 2016, 04:41 PM #10
1 legged lumberjack
- Join Date
- Oct 2008
- Location
- Melbourne
- Posts
- 156
thanks Originally Posted by IanW

it was a little tedious changing bits all the time but a pretty easy way of doing dead accurate D/T's. I would of used the bandsaw but it broke.
thanks Originally Posted by Gabriel
so far it hasn't been overly hard, patience and measure measure measure gets you through, there are tons of build logs around for these type of benches so they make it easy to comprehend the processes needed.
thanks Originally Posted by issatree
the Machinery isn't that new, all the Hammer gear is 2010 vintage and I do tend to keep a clean shop, which helps to keep things in better condition imo.
as for the leg, I simply could not imaging anything allowing this bench to bounce. a third rail across the centre of the bench make alleviate that bounce.
-
11th June 2016, 05:16 PM #11
1 legged lumberjack
- Join Date
- Oct 2008
- Location
- Melbourne
- Posts
- 156
tail vice installation
this was a very straight forward process.
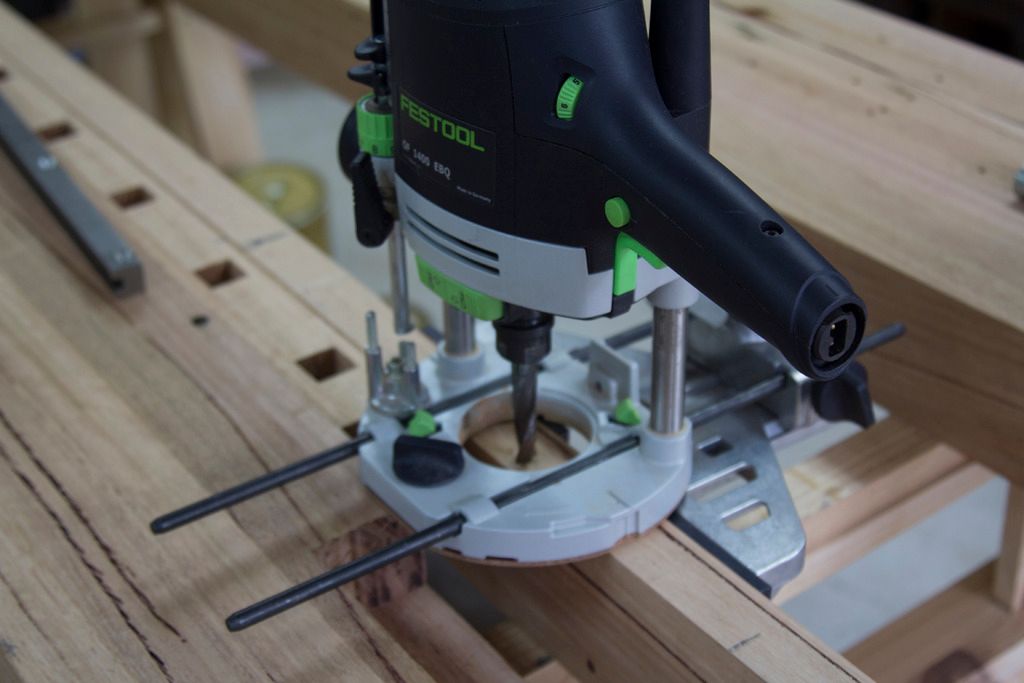
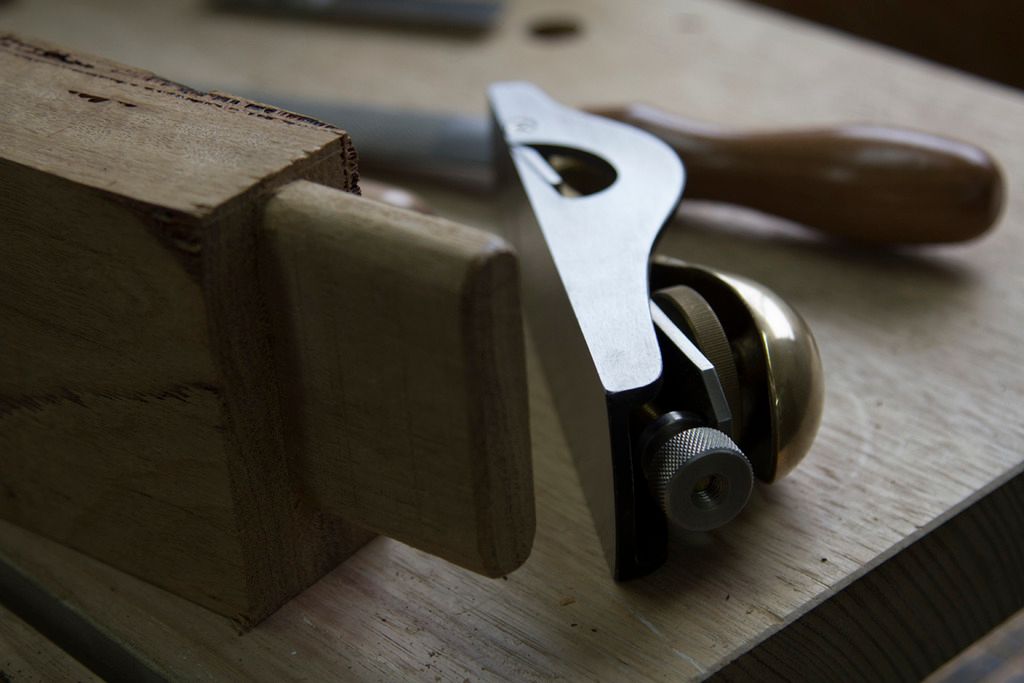
Laid out the profile and marked it up, back to the router with the edge guide and rout the 2 rabbits, square them up with a chisel
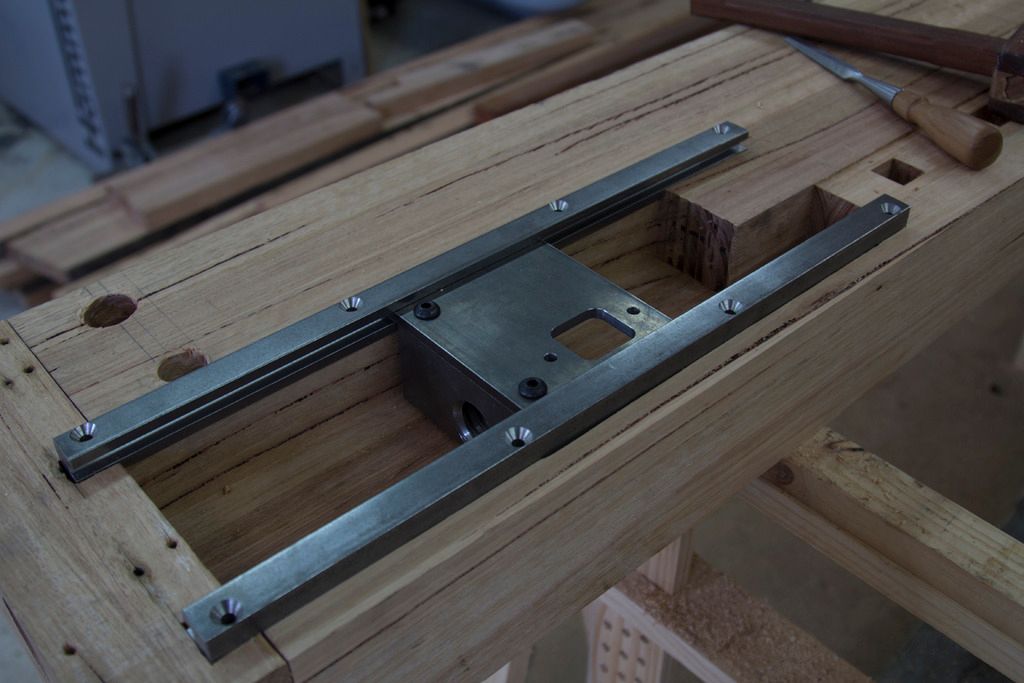
with that all sorted, I slot in the screw only to find that its a little offset and with the dog block installed, binds up at the handle end. after measuring and checking I see that my original positioning for the screw and bolts are out by 2mm at most, not much but enough to cause dramas. I drilled the bolt holes from 8mm to 10mm with seems enough to free up the binding, and I'm satisfied with the smoothness of motion. I think the out of whack positions wasn't inaccurate measuring when i did the holes, I can only assume the the D/T's have somehow moved the end caps relation the the front lamination.
now on the the base...
-
19th June 2016, 09:06 AM #12
Skwair2rownd
- Join Date
- Nov 2007
- Location
- Dundowran Beach
- Age
- 76
- Posts
- 19,922

That is a great looking unit!! Well done!!
-
22nd June 2016, 07:30 PM #13
1 legged lumberjack
- Join Date
- Oct 2008
- Location
- Melbourne
- Posts
- 156
Progress Progress Progress
I haven't been Idle, a long weekend and busy kids activities has kept time limited but progress has been made.
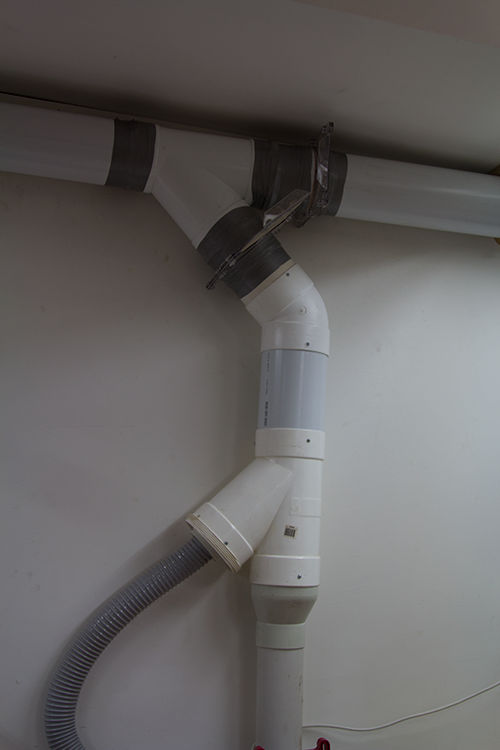
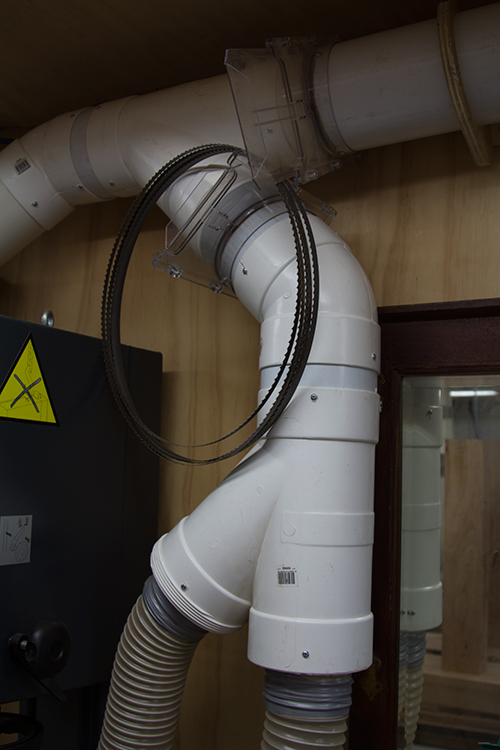
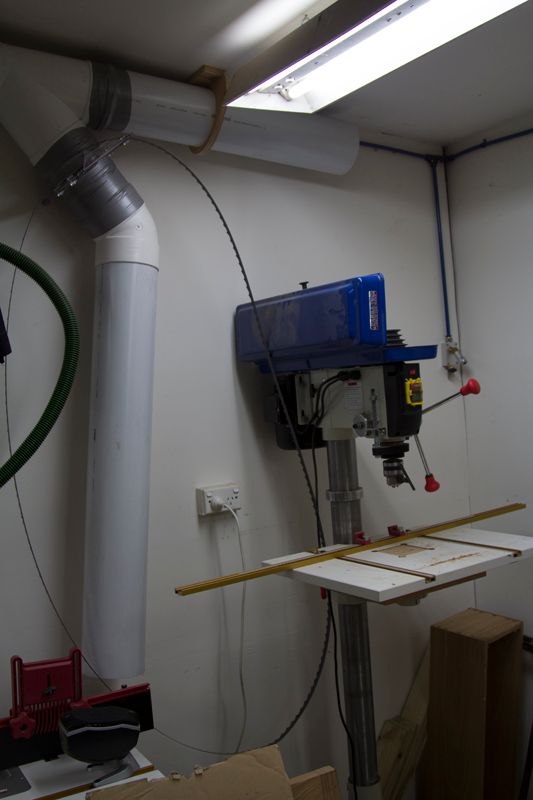
I managed to mill up the legs and rails, and I also needed to move machines around the shop to better facilitate the bench where I want it. So that meant disassembling and re-assembling the DC ducting. What a pain.
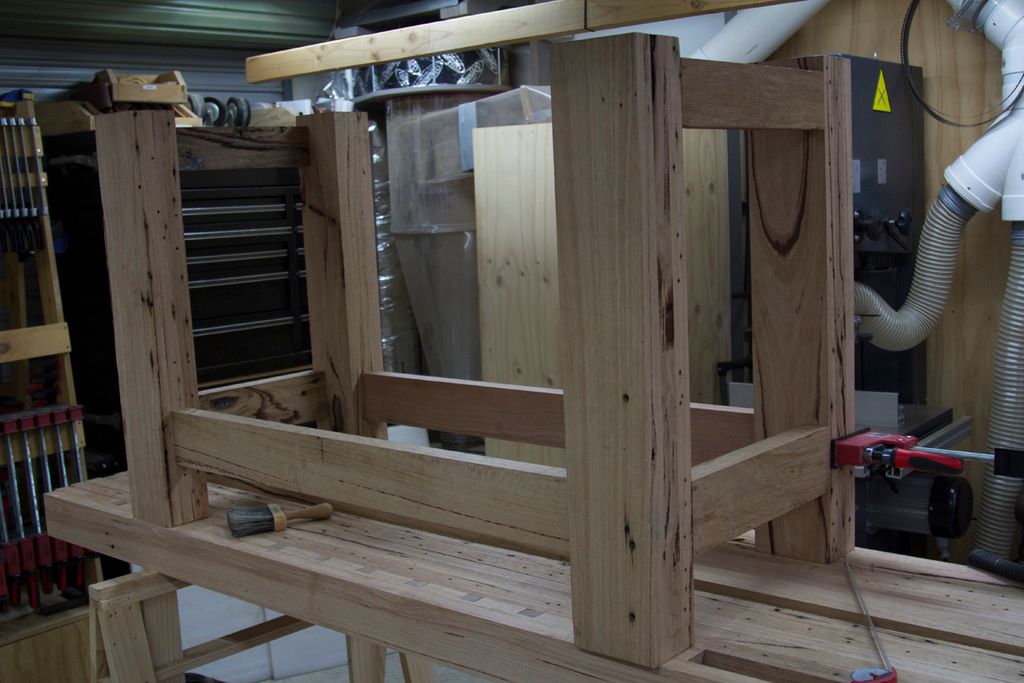
once the laminated legs ( 140x100x850) were dry, onto the mortices for the draw-bored mortice and tenon's. More routing with the edge guide made it simple and repeatable on all four legs.
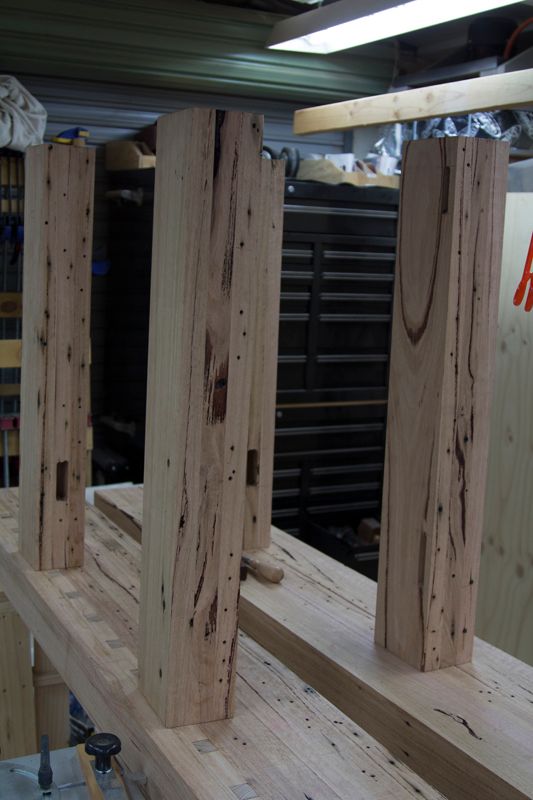
Tenons were done using a dado stack then rounded off with chisel, rasp and blockplane
the moxon vice again proving itself
took some fiddling with the block plane to get nice fitting tenons, but when it went together...
it appears the my rear lower rail is actually brush box, not the blackbutt like the rest of it.

pull it all apart again to drill the holes for the pegs, offsetting the holes on the tenons by ~2mm and a small chamfer to help them through..
and its even square !!!
leg vice is up next.
-
25th June 2016, 05:38 PM #14
Lignum Vexator
- Join Date
- May 2007
- Location
- North of the coathanger, Sydney
- Age
- 68
- Posts
- 9,417
Not sure how you will be able to live with that, you'll just have to start again Originally Posted by MatMann
 regards
Nick
veni, vidi, tornavi
Without wood it's just ...
-
28th June 2016, 03:35 PM #15
1 legged lumberjack
- Join Date
- Oct 2008
- Location
- Melbourne
- Posts
- 156
grass, sharpening and mortices
things have been very slow the last week, the way I started off I was hoping to see this one in as little as 2 weeks, but there are always things ( namely kids ) that inhibit progress.
grass
We finally had a dry day or 2 so an urgent task in the backyard had to be completed, after 10 years of lawn failure after failure, 2 months ago I bit the bullet and removed 10m3 of sand and hard packed clay, removed the small retaining wall dividing the yard and redid 2 other retaining walls, brought back in ~7m3 of quality soil and laid 30m2 of Sir Walters finest. After the rain we've had, it was time to get the pavers re-laid.
sharpening
then the next day I had, the power went out, for the whole day......... so it became a sharpening day. The sigma power select stones from Tools from Japan do an awesome job!
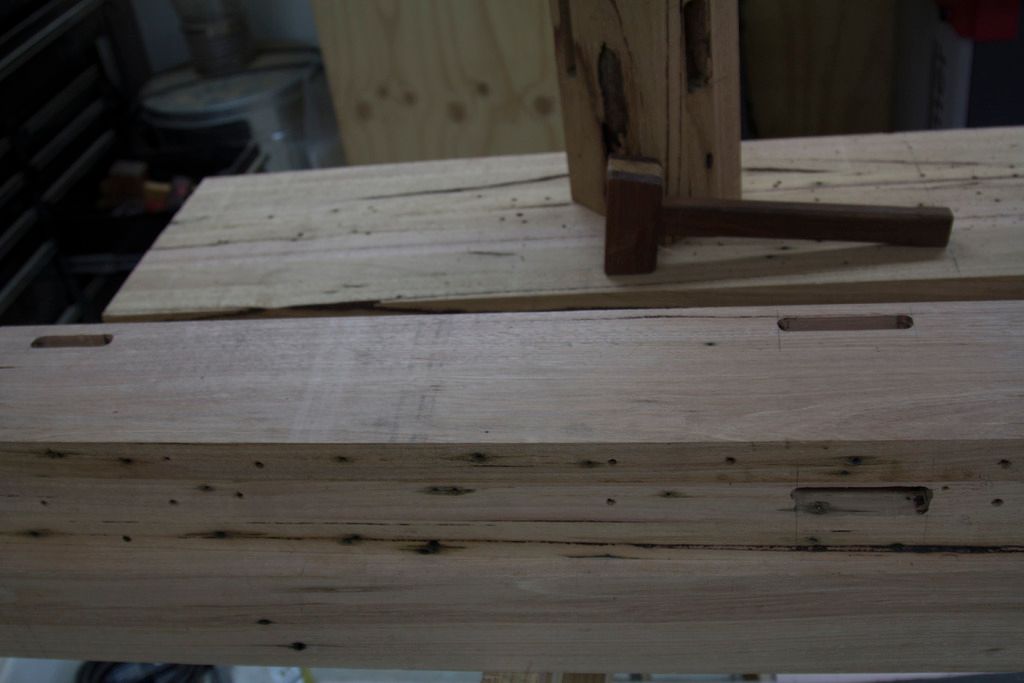
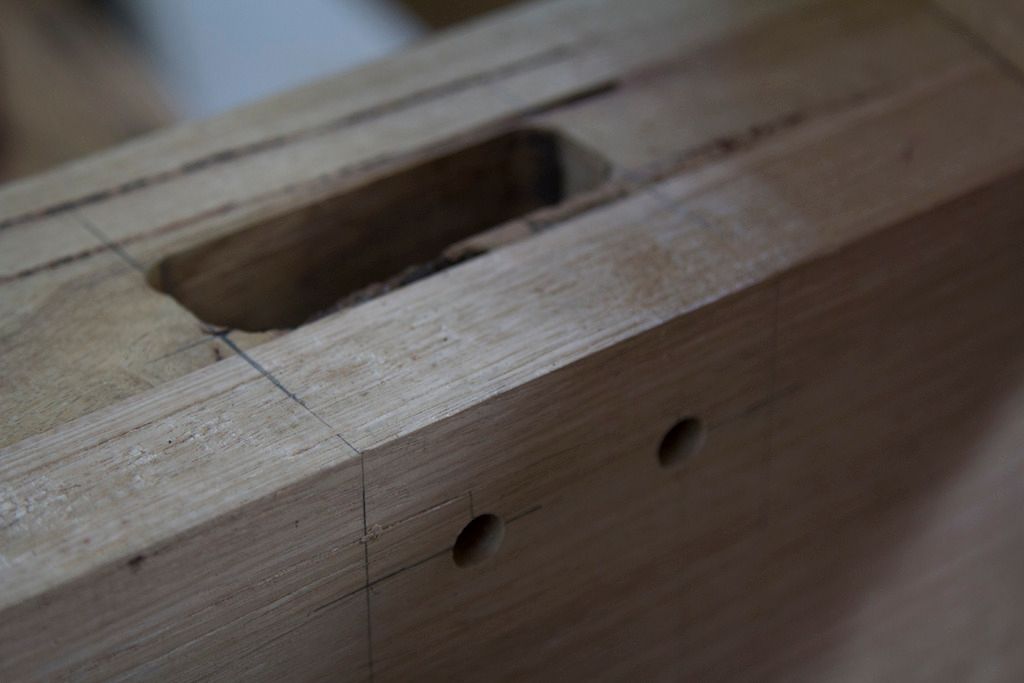
mortices
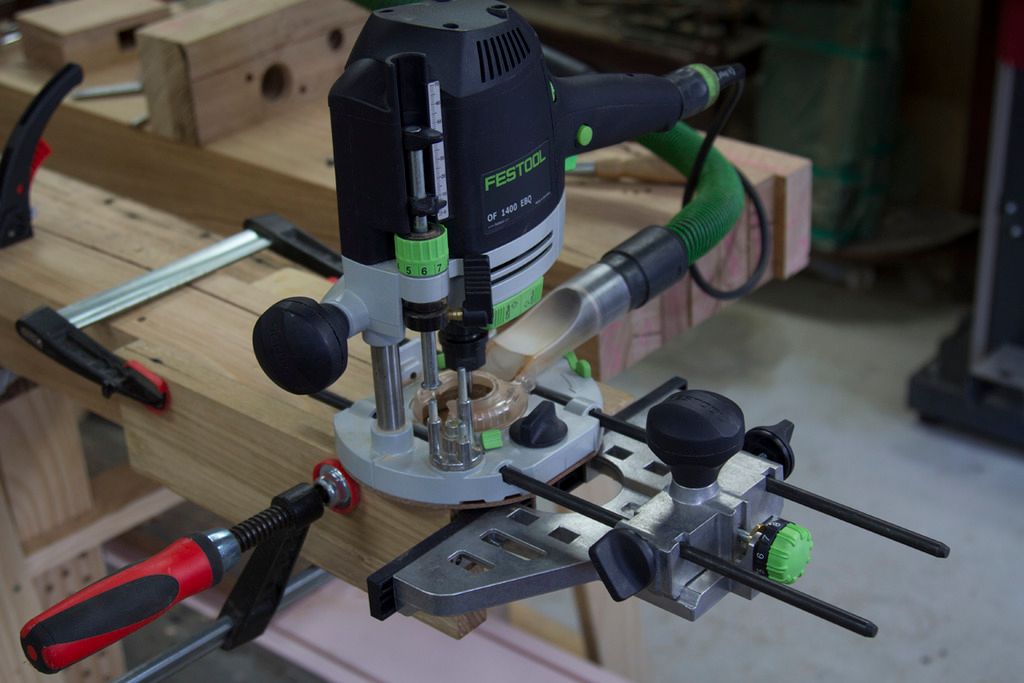
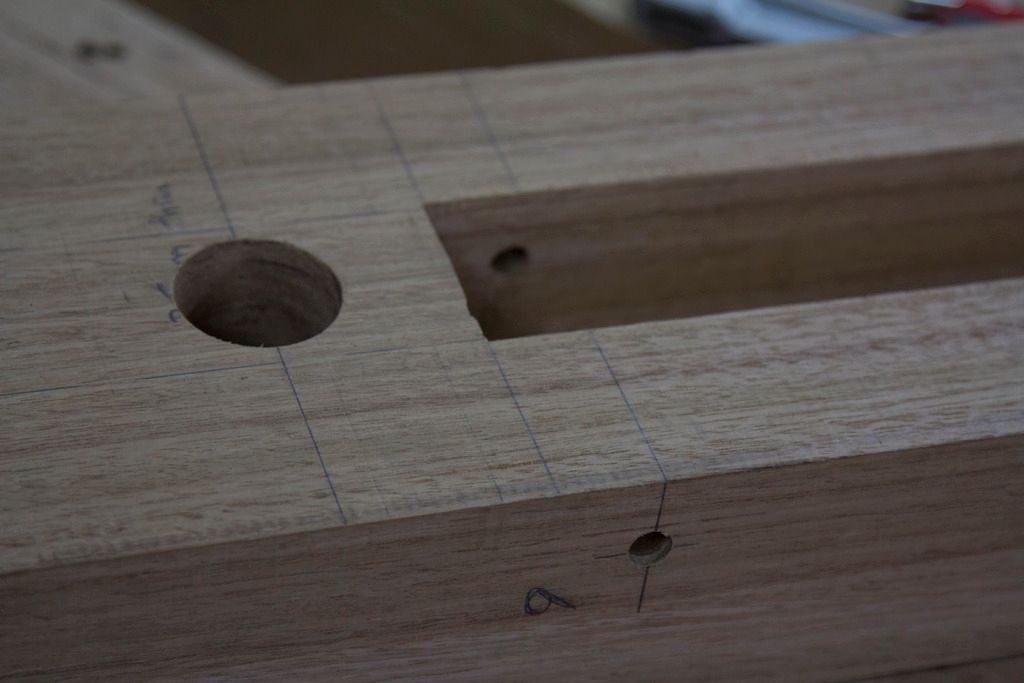
then my next free day involved car servicing, that used up 1/2 a day because i need to wait, so that left 3 hours, First came the mortices for the Crisscross mechanism. my 1/2" spiral bit is shagged now, it didn't enjoy all this hard wood.
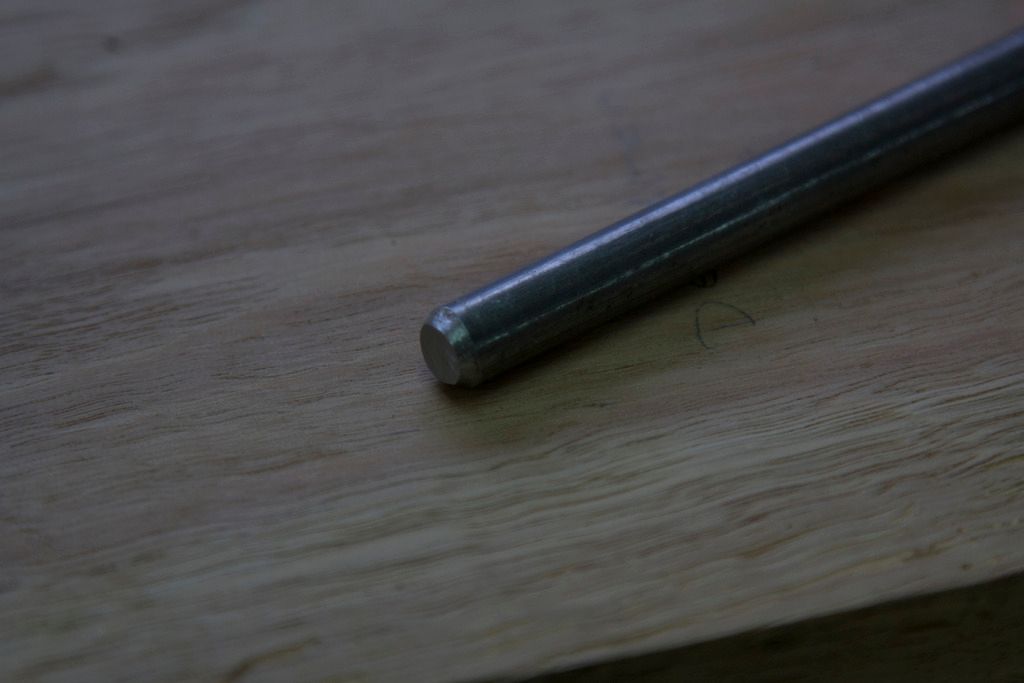
and as I'm using the "solo" version, holes for the pins got drilled and had to add a bevel the pins to aid insertion
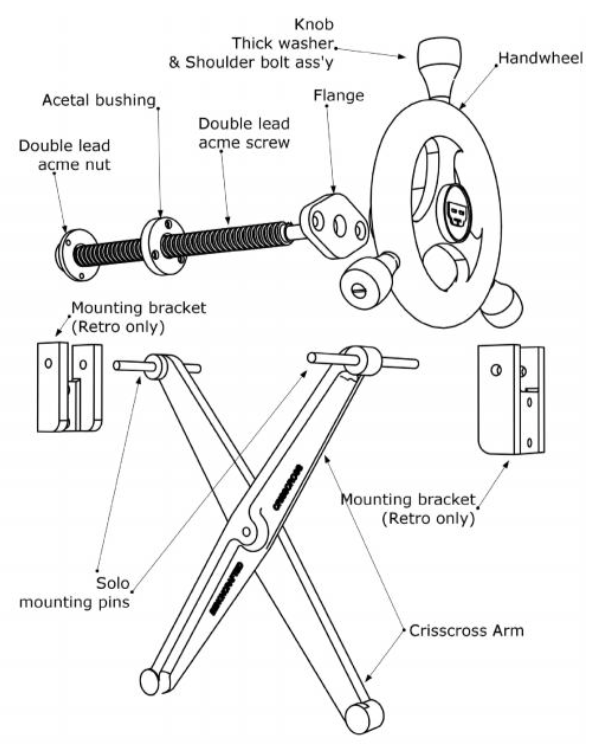
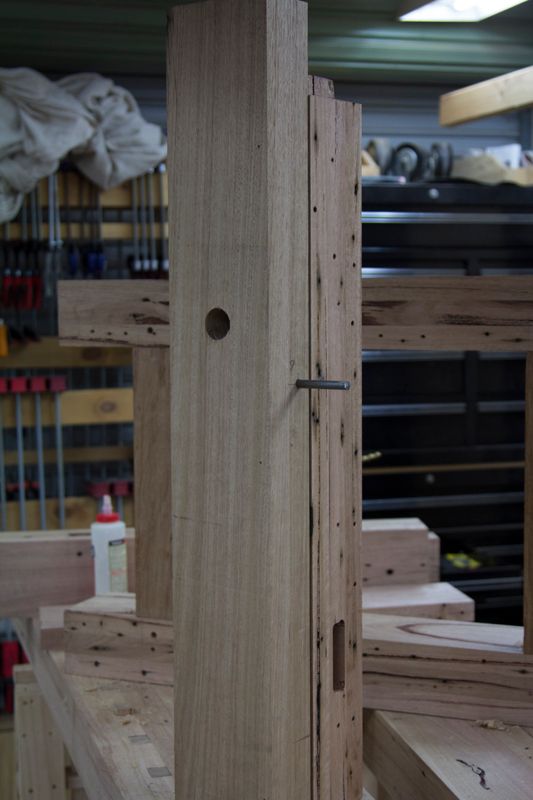

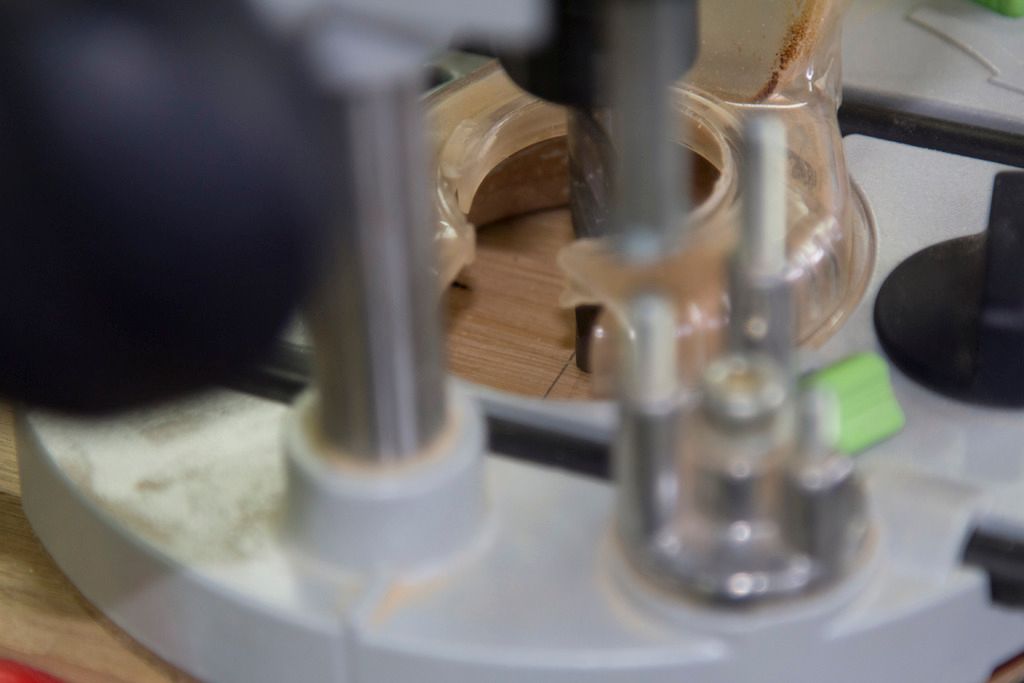
the toe-in(taper) looks a lot but its within their recommend spec of 3-9mm bottom gap but when the top goes on it'll push out even further, will be easily fixed by deepening the mortice another mm or 2. I'm up to doing the 70mm recess for the acetal bushing, was hoping to use the mfs-400, which is a great little bit of gear, but the smallest hole it will do is just under 80mm, , then I thought I'll use the jigsaw and circle jig to cut template, , it just couldn't do it nice enough to even try and clean it up for the router to follow, short of buying a trim router and making a jig for that, not sure how I'm going to do a clean 70mm recess.
I haven't decided on any embellishment for the chop yet, I have some other plans for the bench so don't want to do things that I may have to undo later on.
next up is the acme screw install, acetal recess, through hole and the nut and flange mountings. Taking the young fella golfing tomorrow so hopefully Thursday gives me enough time to finish up the leg vice, before I have to change my attention to finishing the bedroom Reno whilst the Minister takes the kids for a long w/e.

 Reply With Quote


Similar Threads
-
First bench build - roubo split top inspired
By grantoboy in forum THE WORK BENCHReplies: 13Last Post: 30th May 2017, 09:09 AM -
My Roubo bench WIP
By bsg in forum THE WORK BENCHReplies: 20Last Post: 22nd October 2013, 10:58 PM -
Another Roubo
By ochaye in forum THE WORK BENCHReplies: 16Last Post: 29th July 2012, 04:16 PM -
Benchcrafted split-top roubo completed
By airbag9 in forum THE WORK BENCHReplies: 17Last Post: 6th July 2012, 12:11 PM -
Split-Top Roubo
By Arry in forum THE WORK BENCHReplies: 4Last Post: 11th June 2012, 08:47 AM
