

 Thanks:
  Likes:
  Needs Pictures:
  Picture(s) thanks:
Results 46 to 60 of 112
Thread: Underbench cabinets
-
18th January 2021, 12:03 PM #46
 GOLD MEMBER


- Join Date
- Feb 2016
- Location
- Canberra
- Posts
- 5,124

Shhhh ... Dont mention the B-word!
These must have been smuggled by a far-travelled friends acquaintance, from an exotic continent and obtained under the harshest conditions. Great risks were taken!
-
18th January 2021 12:03 PM # ADSGoogle Adsense Advertisement
- Join Date
- Always
- Location
- Advertising world
- Posts
- Many
-
18th January 2021, 01:54 PM #47
Be inspired. Be creative. Be bold.
- Join Date
- Apr 2001
- Location
- Perth
- Posts
- 10,820
I meant to say that they were obtained at midnight under a full moon on Rottnest Island, and I swam them back in 6 hours to Fremantle, getting in the early hours of the morning to avoid the coast guard. Only had to fight off two Bull Sharks and a small, 3m Great White. Easy Peasy. Originally Posted by woodPixel


Regards from Perth
DerekVisit www.inthewoodshop.com for tutorials on constructing handtools, handtool reviews, and my trials and tribulations with furniture builds.
-
19th January 2021, 02:20 AM #48
Be inspired. Be creative. Be bold.
- Join Date
- Apr 2001
- Location
- Perth
- Posts
- 10,820
Cock ups
I recently wrote that I aim to build as best as I can. Sometimes it does not go well at all

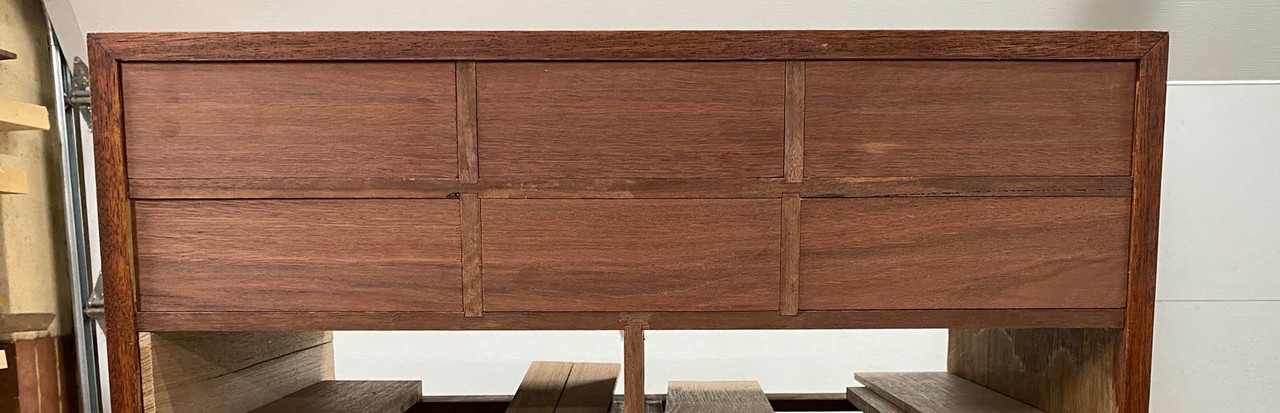
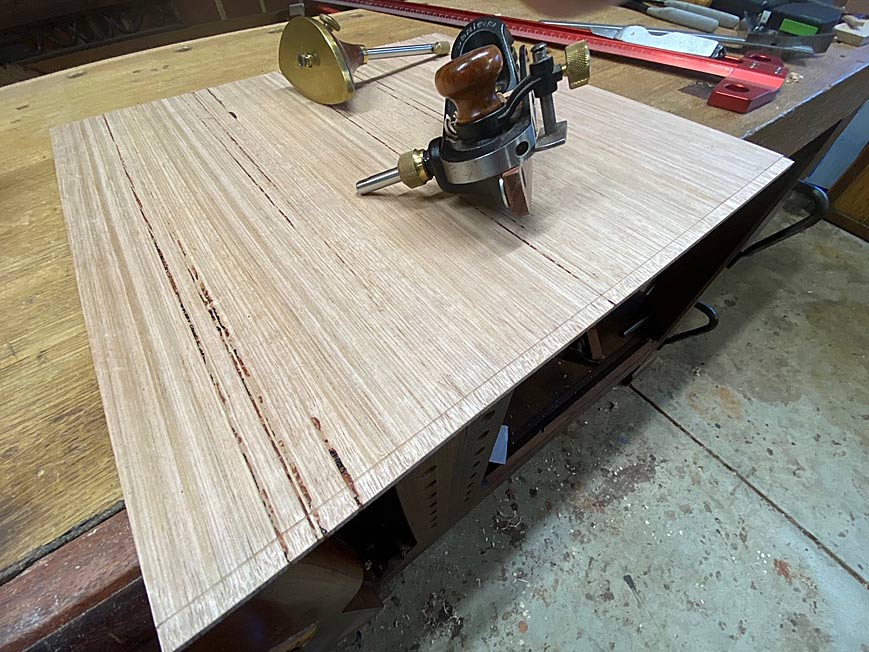
I make two repairs today. Usually, the mistakes I make are as I get spatially challenged, and cut the wrong side of the board. The first one here was being a little over-enthusiastic with a block plane when trimming a drawer front (a few days ago). The problem is difficult to detect from a distance ...
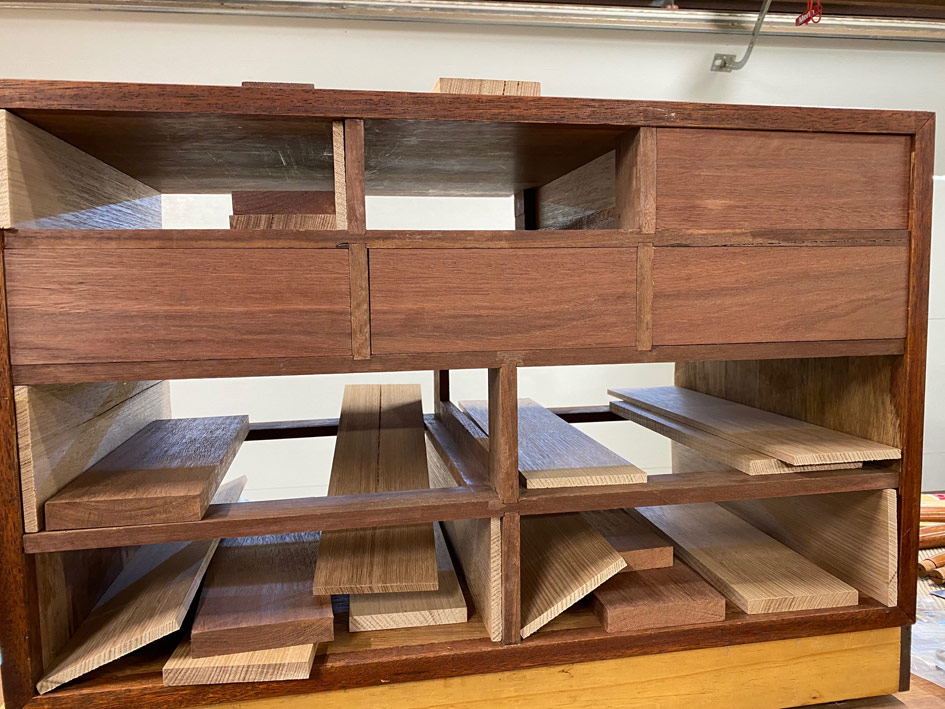
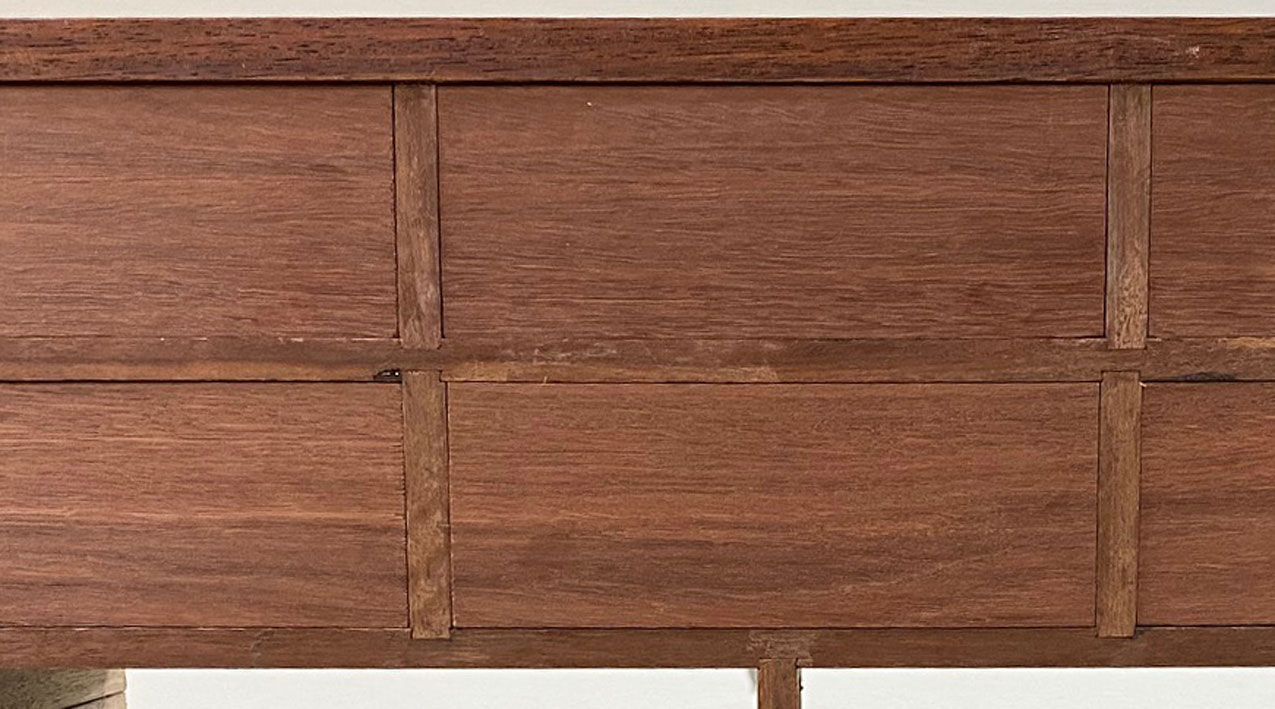
... but close up .... !
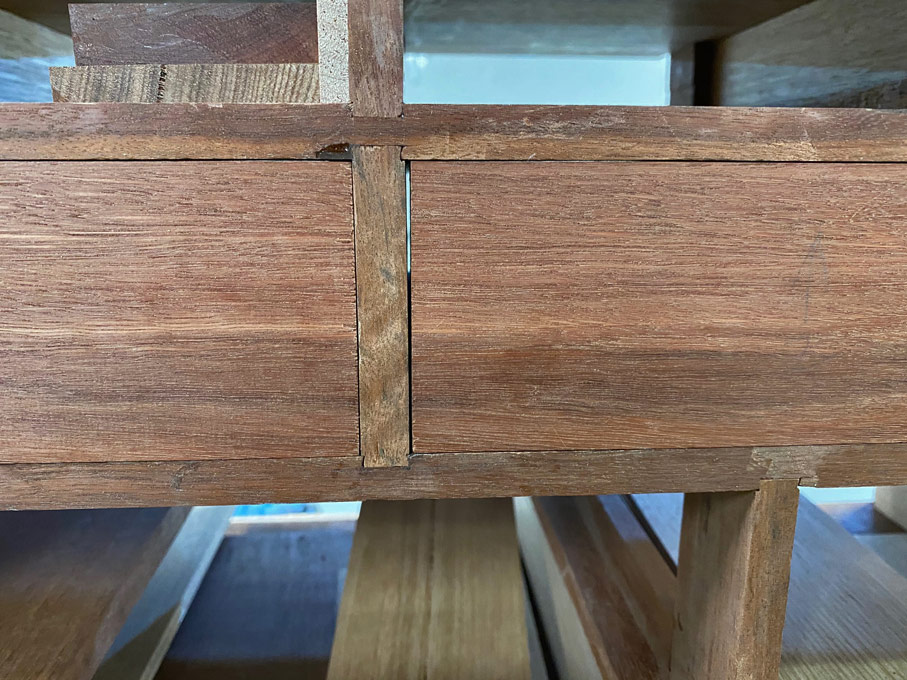
Damn. The drawer front is part of a set of three. It cannot simply be replaced. One also cannot glue a filler to the side of the board.
But one can add a filler to the drawer divider ...
Here it is glued proud ...
When trimmed flush, it is nearly invisible. With a coat of finish, it will be ...
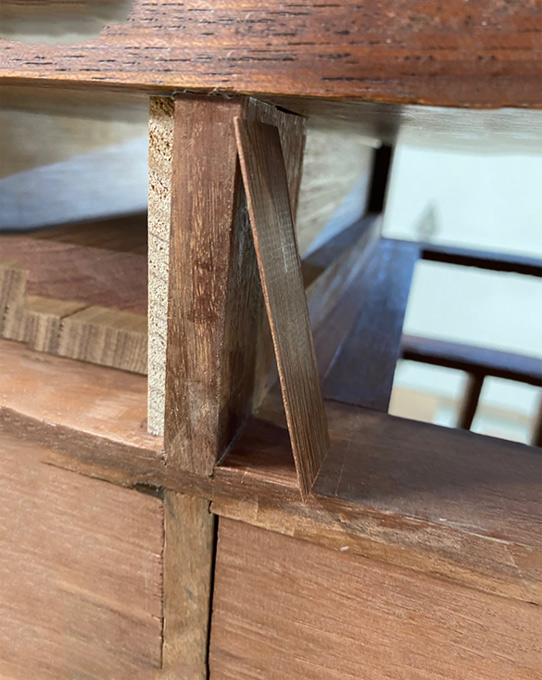
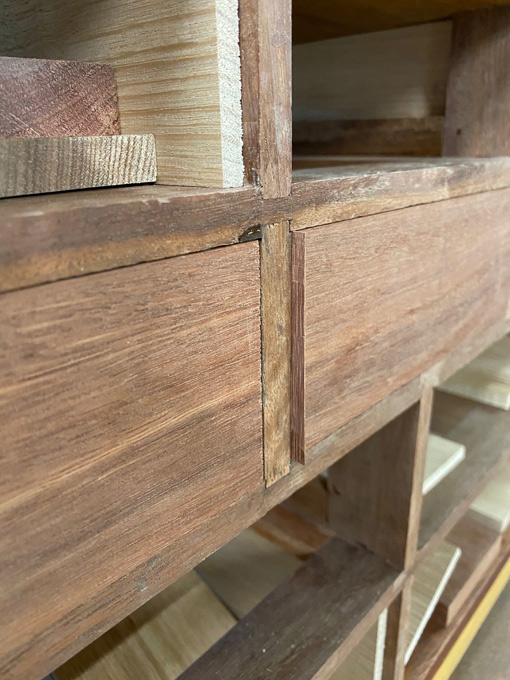
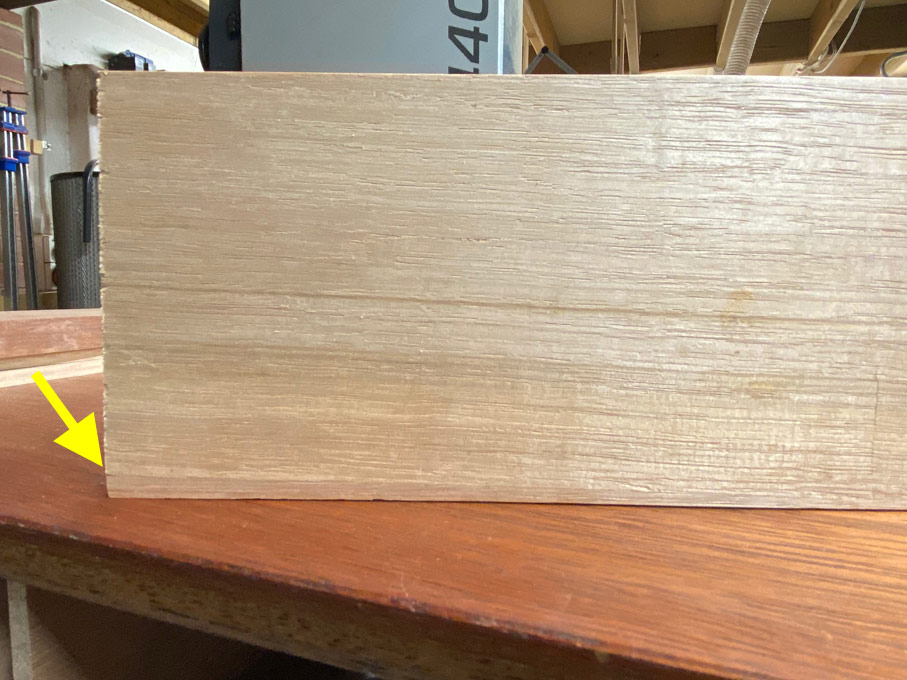
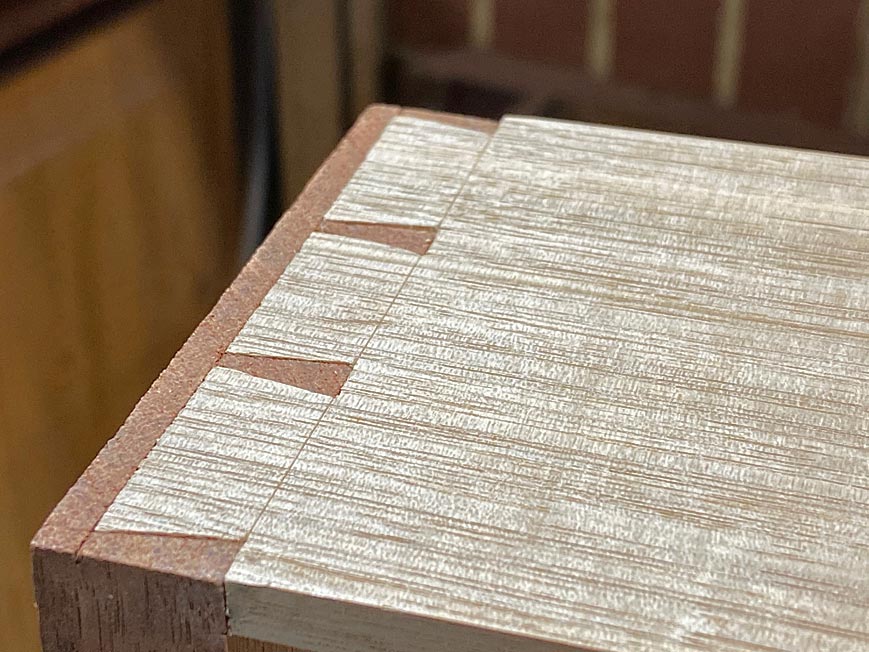
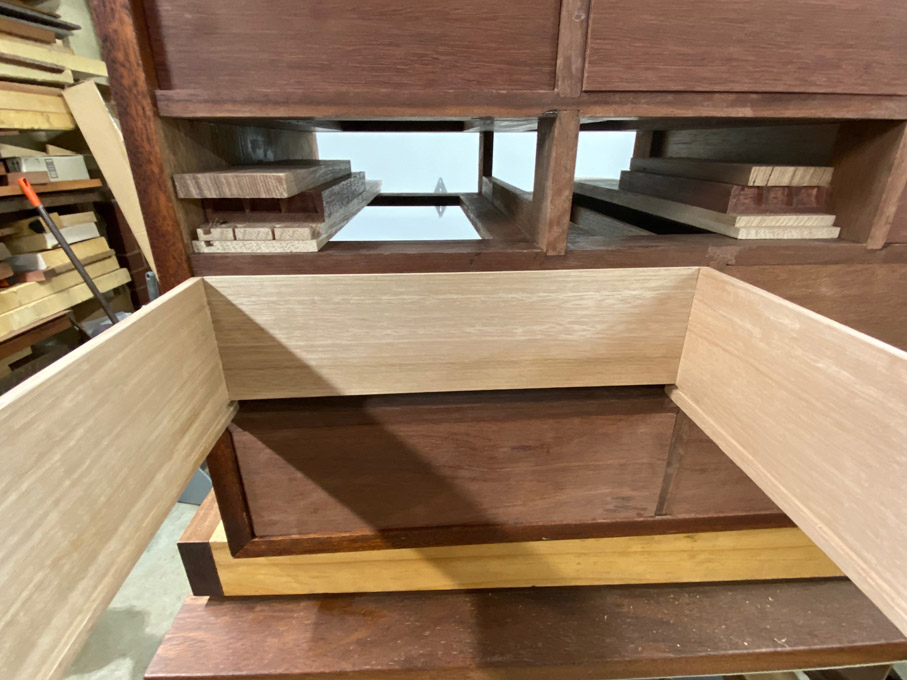
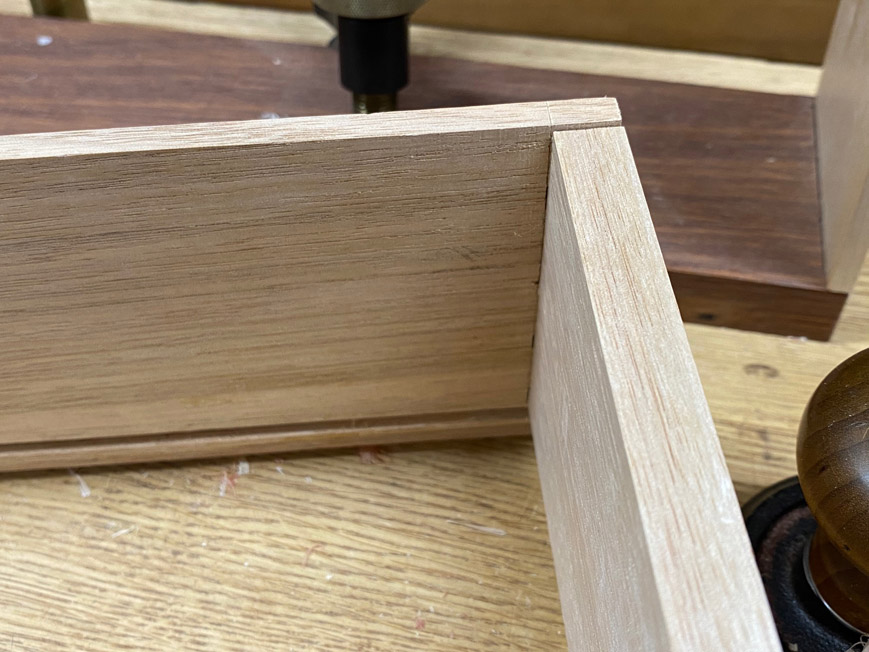
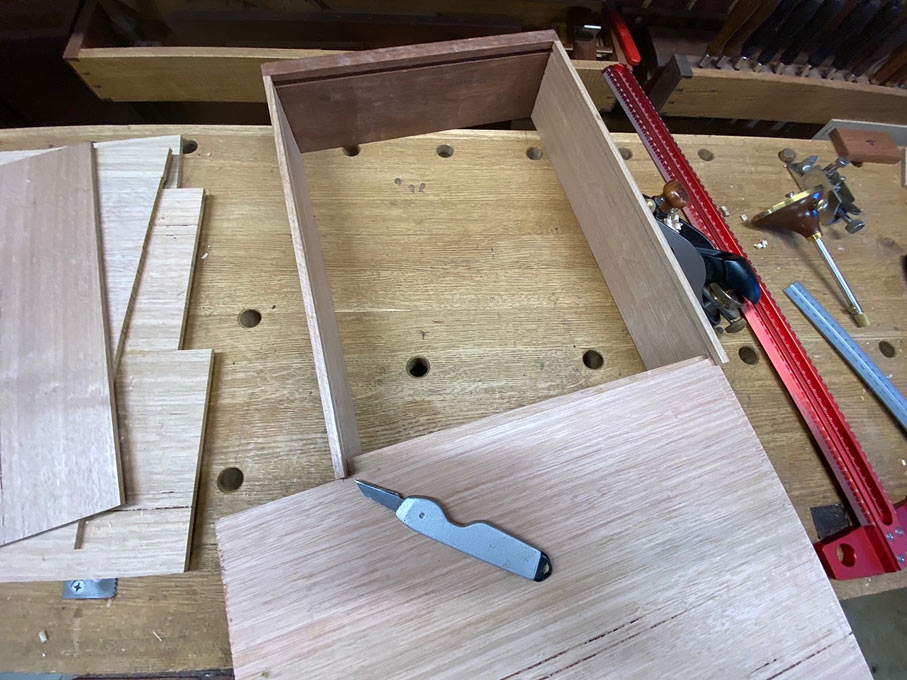
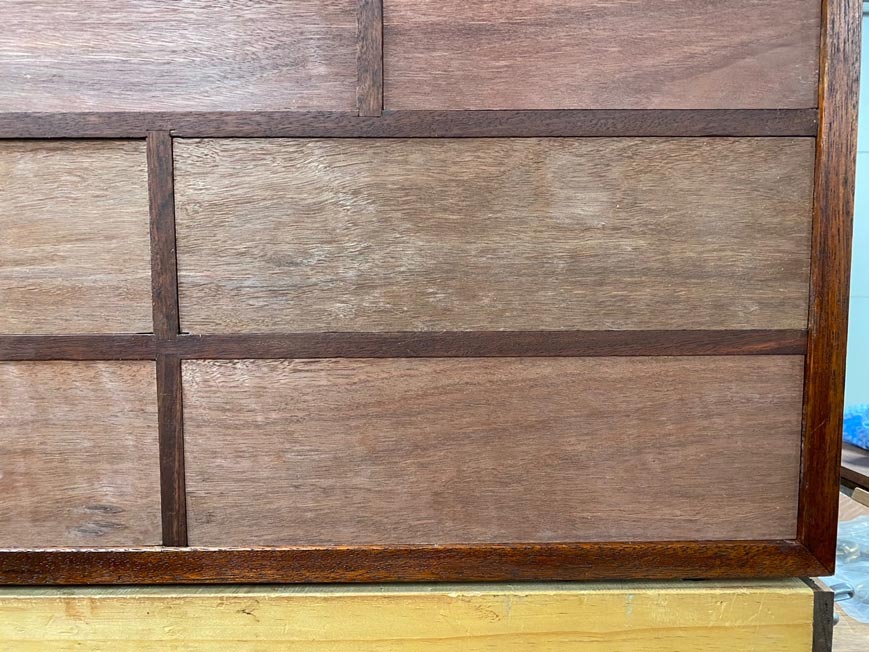
The second fix was this ... after all the mention I made about the importance of a combination square to ensure the side was square to the drawer front ... well, one got away from me. When I placed the three sides on a flat surface, the far end of one side was about 3mm high.
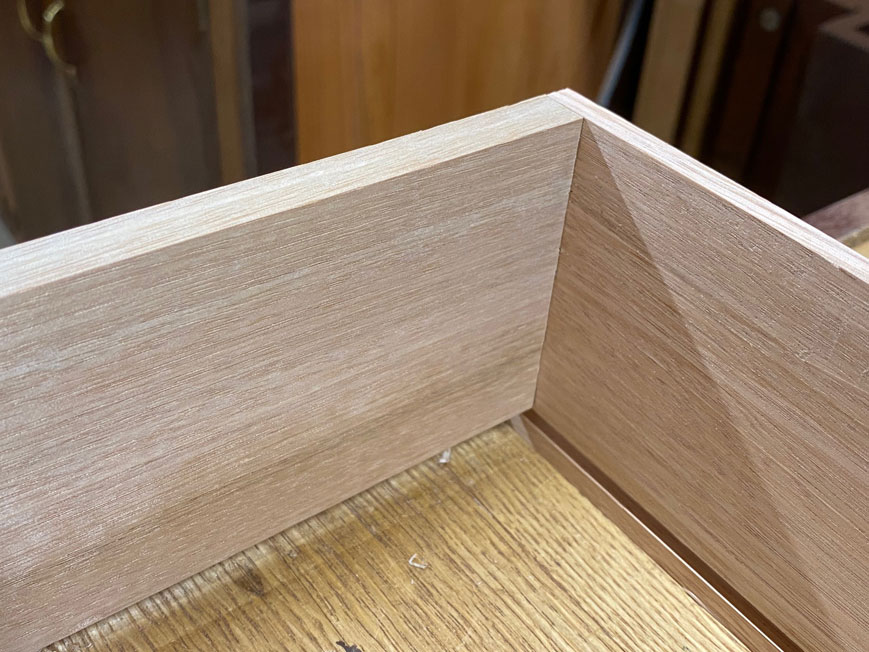
This was the fix. Can you spot the repair?
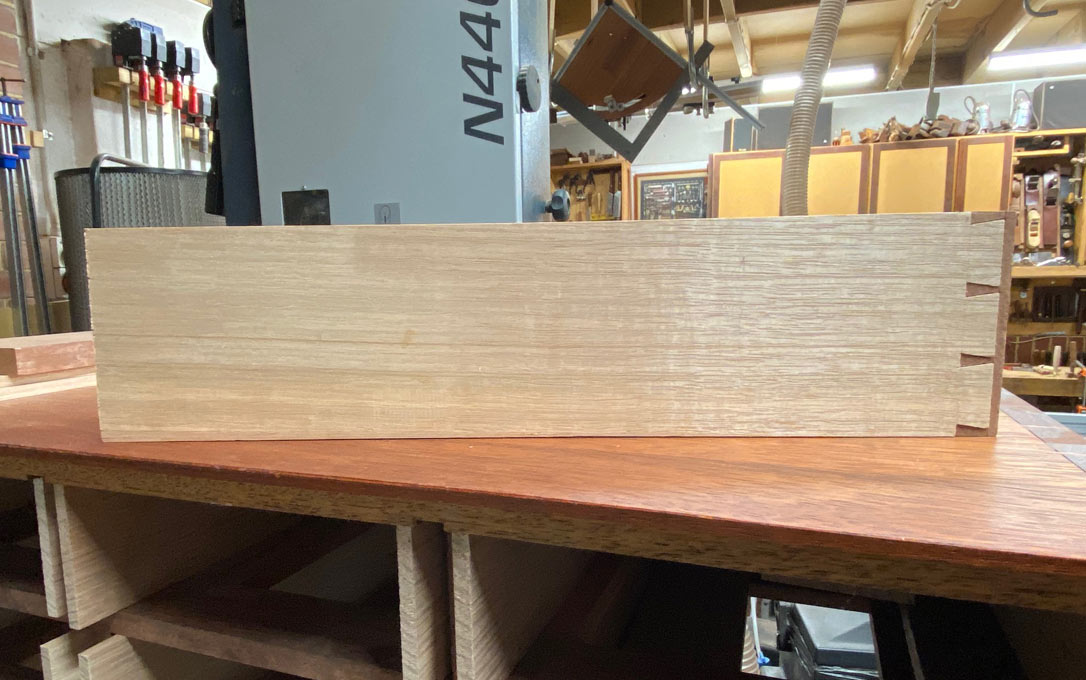
Eagle eyes will note that there is a light line. This is where a triangular fillet was glued in, and planed flush (The corresponding top side needed to be planed down to fit inside the drawer case).
Regards from Perth
DerekVisit www.inthewoodshop.com for tutorials on constructing handtools, handtool reviews, and my trials and tribulations with furniture builds.
-
19th January 2021, 12:35 PM #49
 Butcher of wood
- Join Date
- Jun 2010
- Location
- Bundaberg
- Age
- 54
- Posts
- 3,426
Originally Posted by derekcohen
I reckon your minor errors were the result of a vicious curse..... by quokkas .
.
NEVER trust a species that smile all the time; they're hiding something.Nothing succeeds like a budgie without a beak.
-
8th February 2021, 01:46 AM #50
Be inspired. Be creative. Be bold.
- Join Date
- Apr 2001
- Location
- Perth
- Posts
- 10,820
Perhaps I need to explain the title, "Dovetailing for Blood". In part, the description comes from a book, "Backgammon for Blood", by Peter Becker I read about 4 decades ago. It's about taking the game to the most competitive level. This series of articles is not a how-to about dovetailing; it is about the strategies I use when building drawers. I offer them for discussion and your interest.
This is the drawer in question.
In the previous article, the focus was on strategies for connecting the drawer front and drawer sides via half-blind dovetails. The aim there - and continued here - is to complete the dovetailing in such as way that the drawer may be glued up, and dry inside the drawer case. The advantage of drying inside the drawer case is that a good fit is assured.
Today the drawer back needs to be attached with through dovetails.
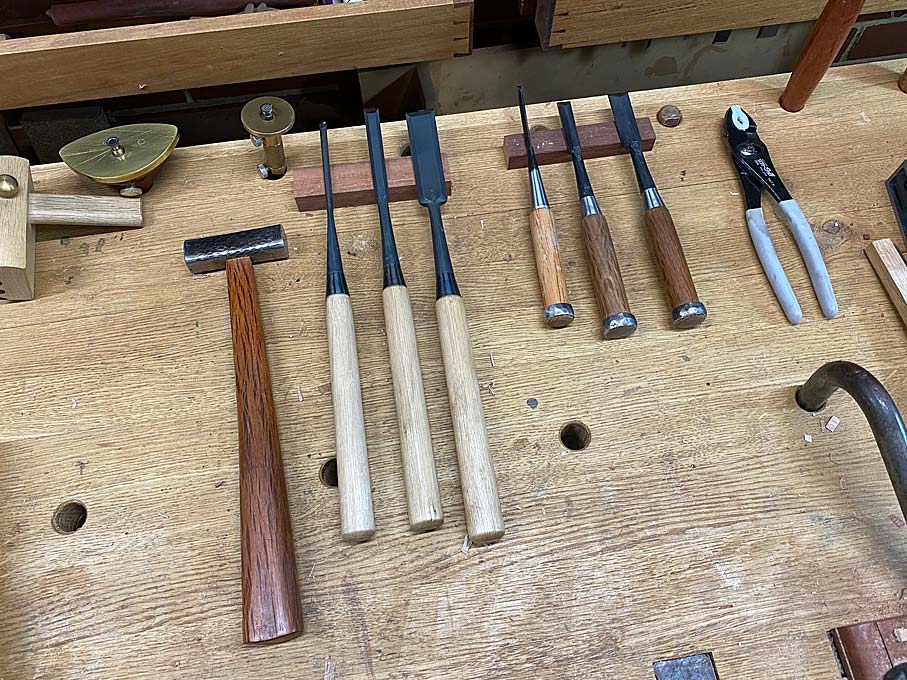
For interest, here are the chisels I used: Kiyohisa slicks and Koyamaichi dovetail.
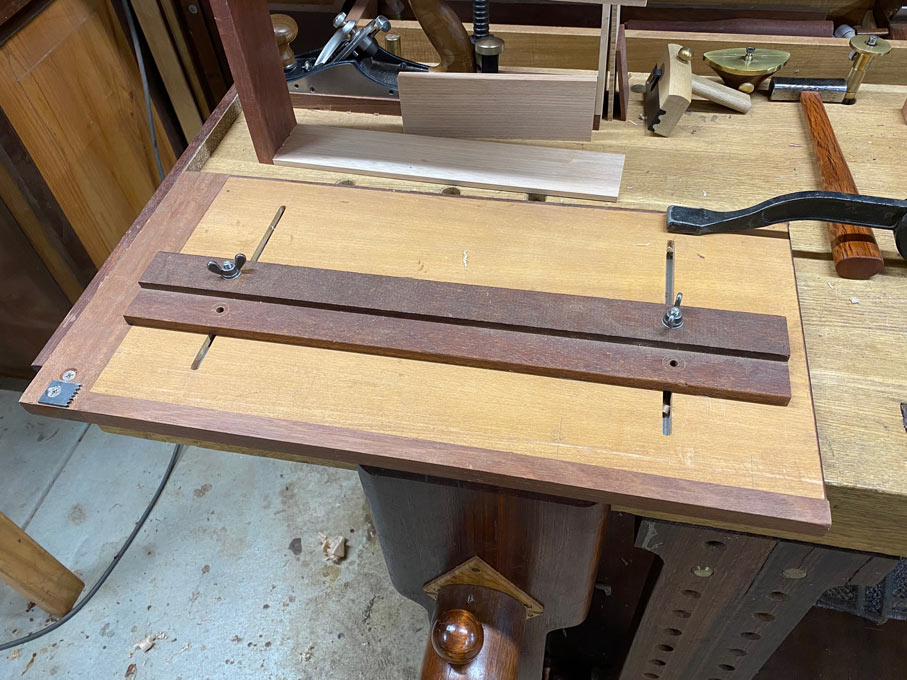
Noticeable in the drawer above is that there are no grooves for the drawer bottom. These will now be added using a plough plane and a sticking board to hold the work...
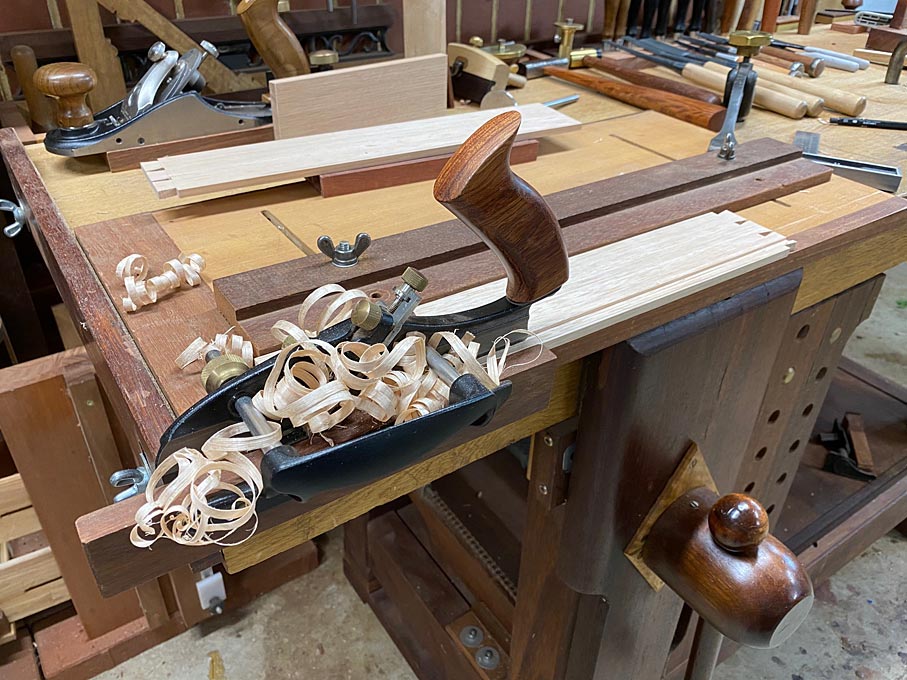
The drawer sides are around 7mm at this stage, with the expectation that they will end up at 6mm. The inside and outside faces have been planed. The groove is 3mm deep ...
The groove in the 18mm thick drawer front is 6mm deep ...
The drawer back receives a shallow groove ...
Reason?
The drawers are designed for a tool cabinet. Unlike drawers for the home, where the backs are lowered, these drawers will have a full rear, in height, ending at the drawer bottom. We start with drawer backs exactly the same dimensions as the drawer front. The lower section needs to be removed. The top of the groove marks this position.
The waste is removed on the table saw, a smidgeon grace ...
... and the machine marks then planed away.
It needs to be stated that drawers are not the same as boxes. While they may both be dovetailed, the drawer width is determined by width of the drawer case. It cannot be larger or be smaller. The drawer front and back are made as a pair, and their dimensions are not permitted to be altered.
With boxes, one can leave dovetails proud, and then level them to the sides. Or one may level the sides to the dovetails. You cannot do this with drawers, especially if the game plan is to aim for the glued up drawer drying in the drawer case. Consequently, the dovetails must end up flush with the surface ....
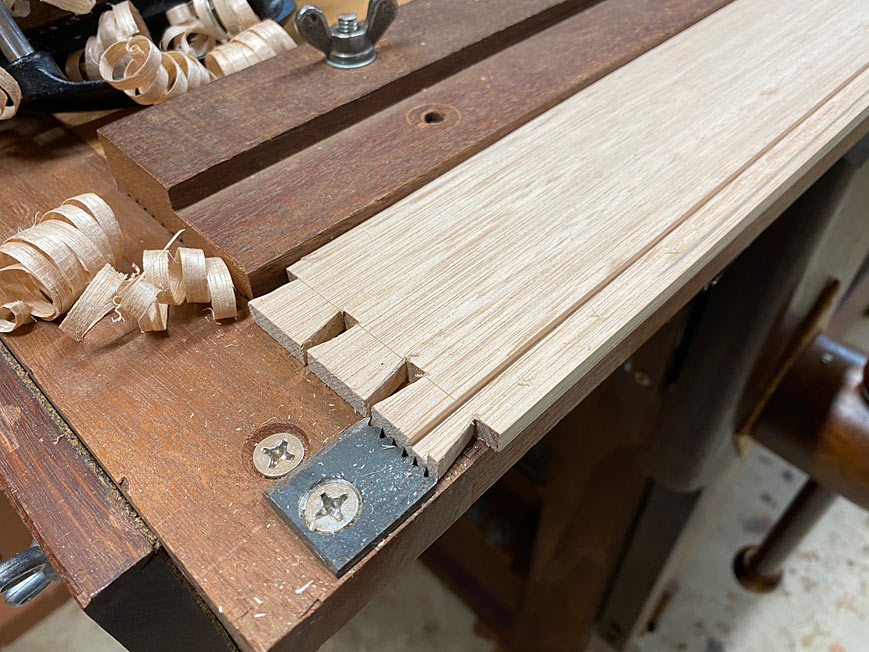
We move over to dovetailing the rear:
The first step, with 6 drawers of the same height and width, is to make a template for the spacing of the dovetails.
While the template stretches across the board, the area of importance is above the drawer bottom.
Mark out the tails, as usual, but then flip the board so that you are sawing from the inside of the drawer ...
Again, this is not a box. The inside of a drawer is seen, and it is important to keep the baseline as clean as possible, that is, no over-sawing.
Similarly, when removing the waste with a chisel, start with the outside face of the drawer, and finish with the inside. That way there is less danger of inadvertently chiseling over the baseline.
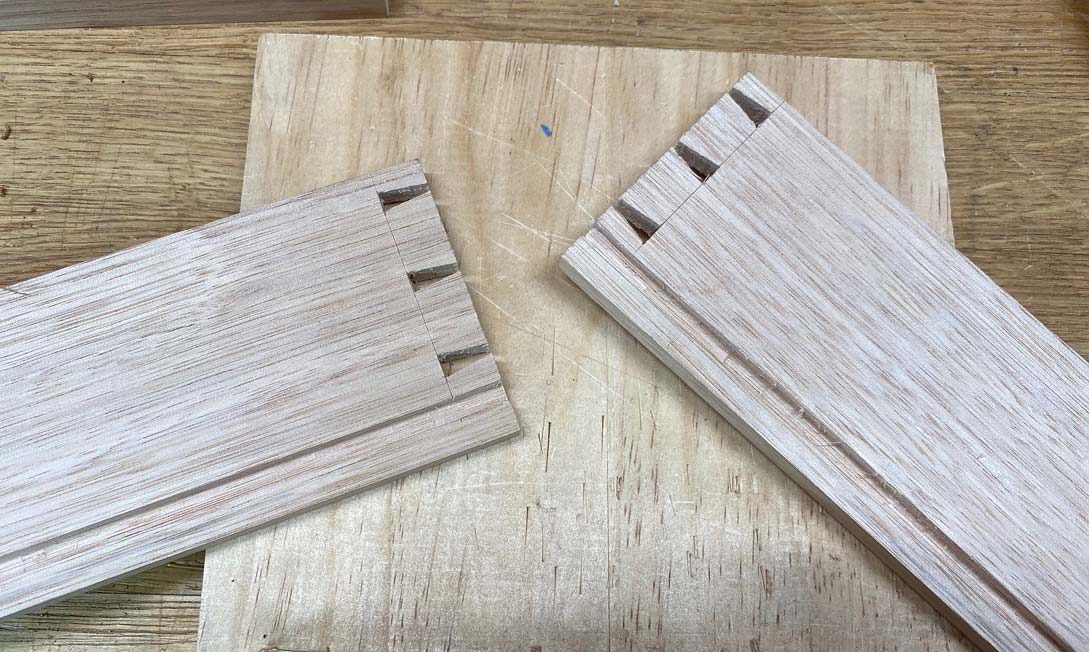
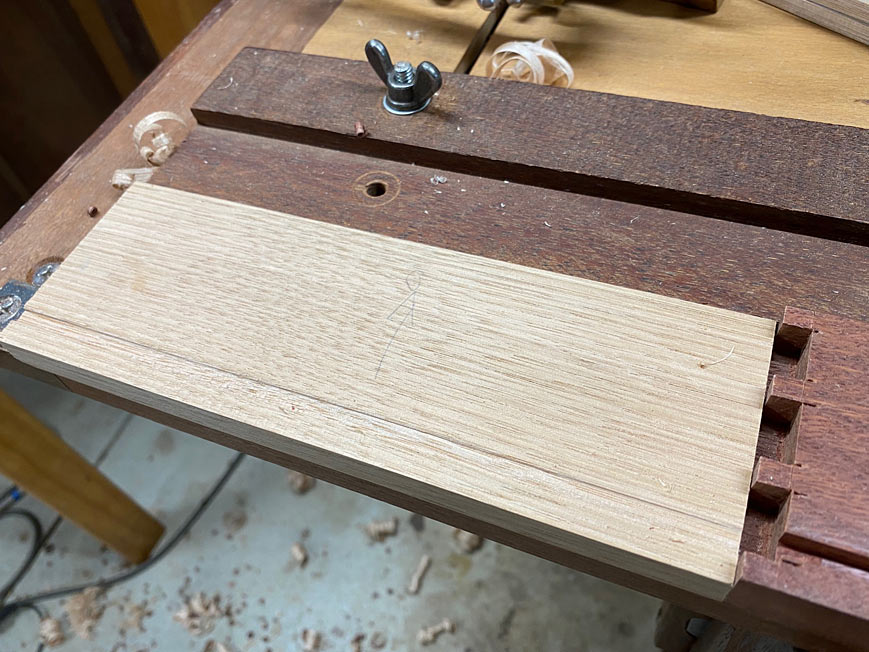
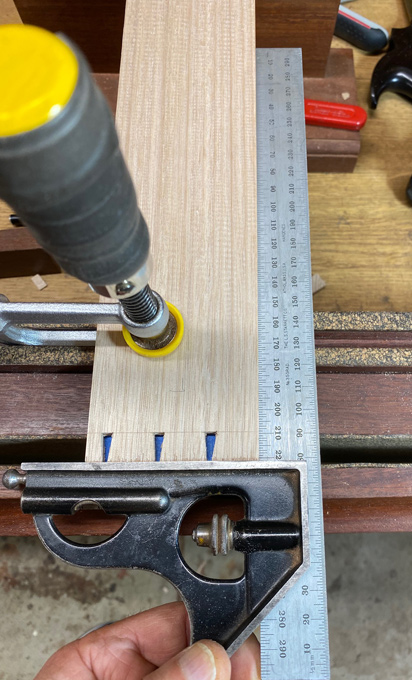
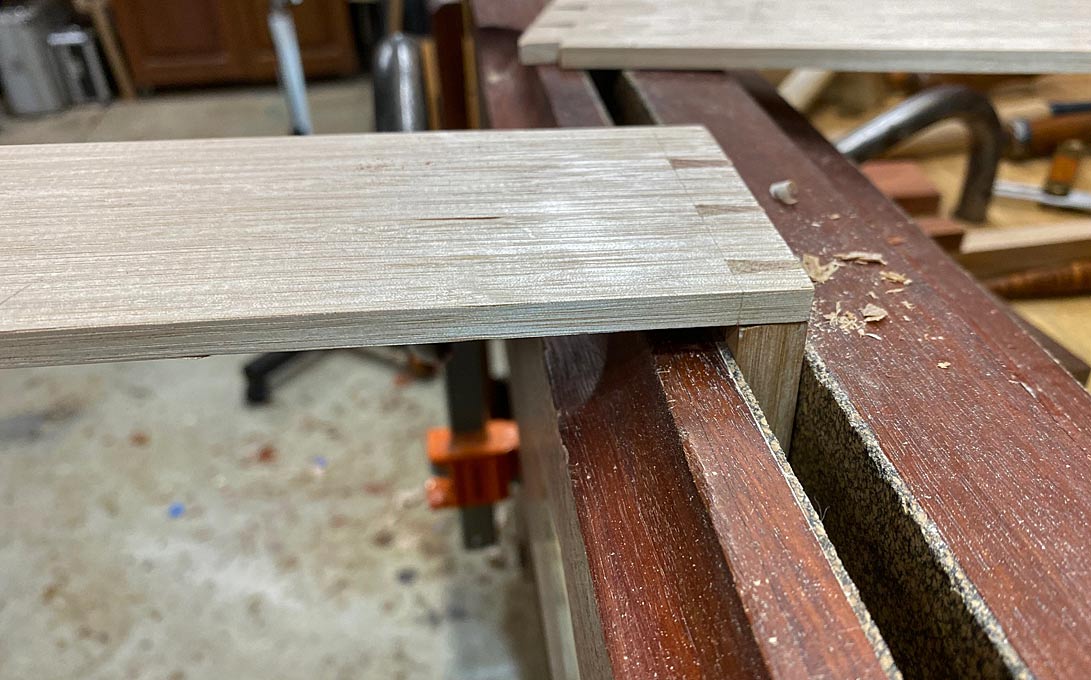
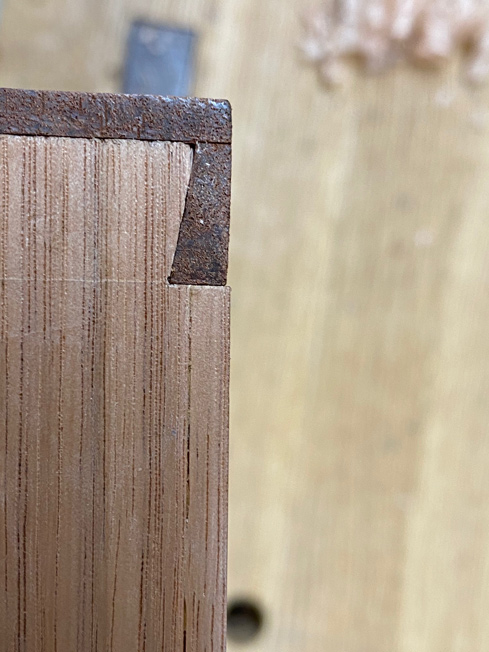
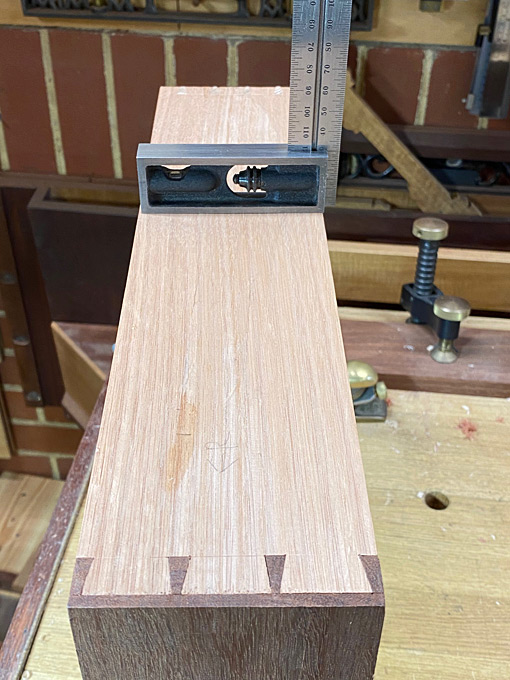
Now ... the interesting part comes with transferring tails to pins. This can make-or-break the drawer.
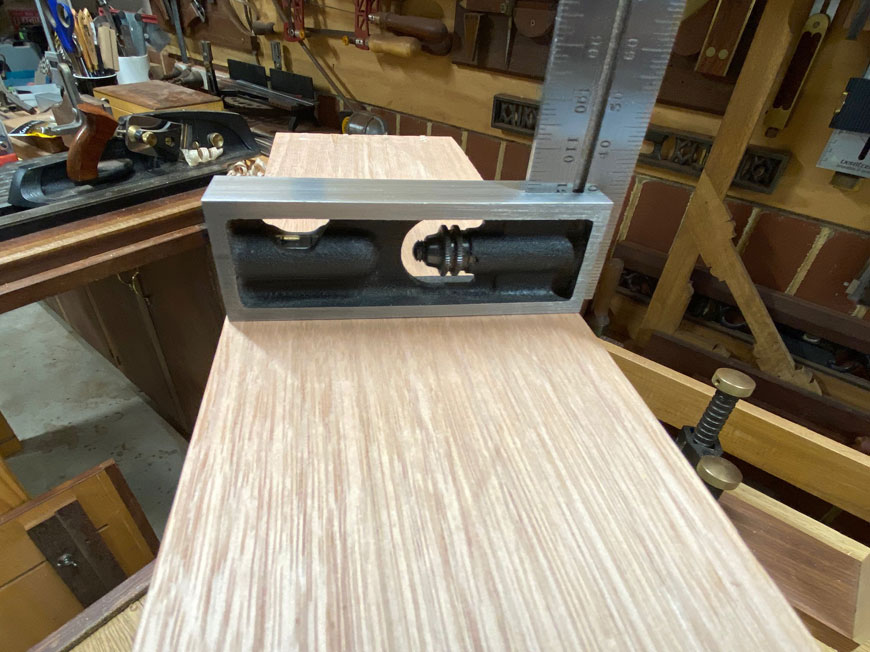
Here we see the tail and pin boards aligned. But are they?
A square shows that the side is out at least 1-2mm at 300mm (12").
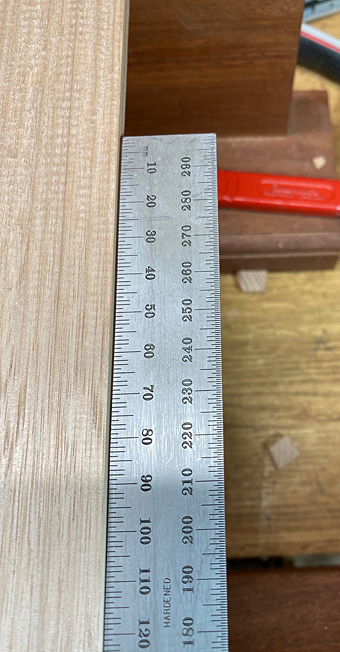
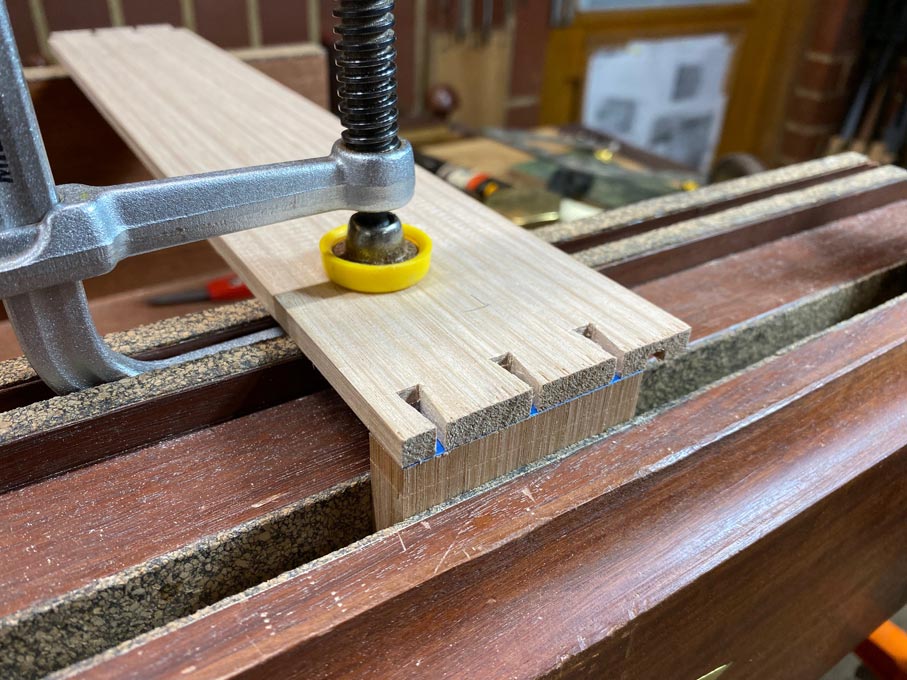
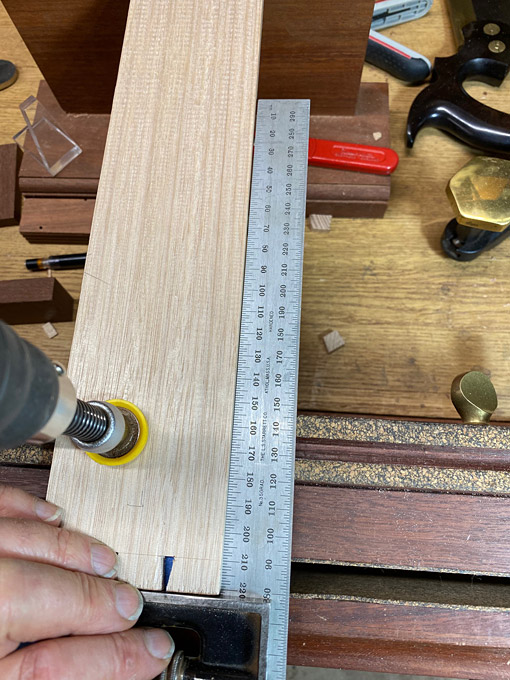
Left like this, the drawer will not sit flat. It will act as if it has a twist. Significant efforts will need to be made to align the drawer in the case. It becomes essential that the side is aligned accurately. This can be a little fiddly, but a long square helps considerably ...
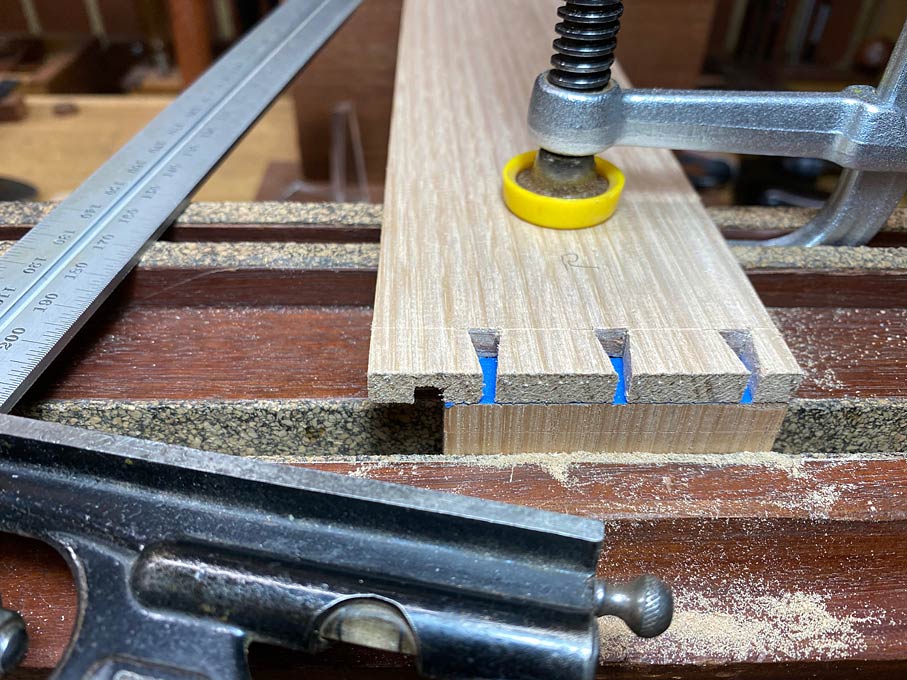
At some point, someone will mention the side-alignment fixture designed by David Barron. This is a wonderful concept, however it excels at making boxes and not drawers. Look here ...
The tail and pin boards are not aligned at the square ends (which would enable David's fixture to be used). They are aligned on the reference side, which is the lower edge of the drawer sides. You are aligning from the left side of these boards ...
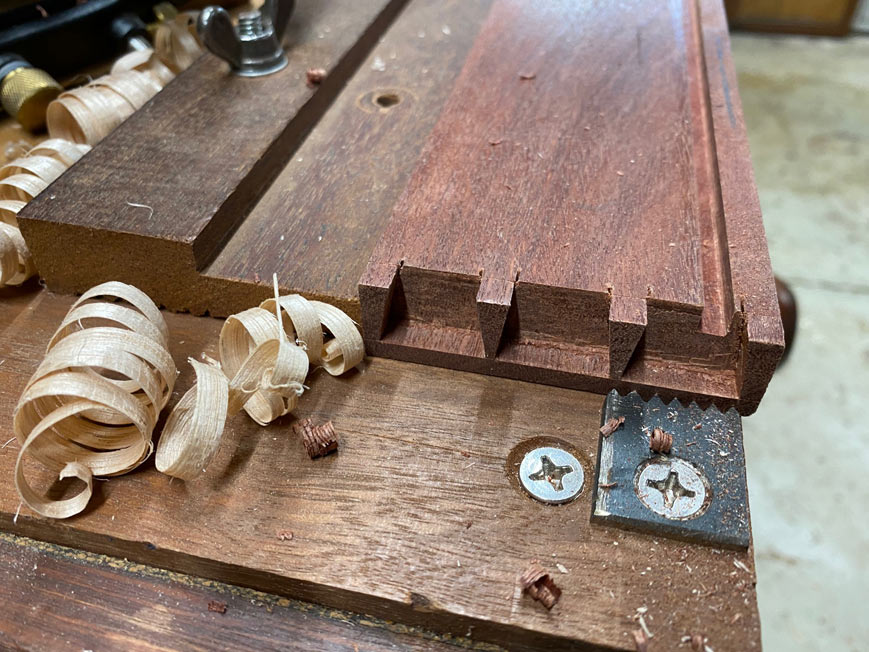
Having transferred and sawn the tails, the bulk of the waste is removed with a fretsaw (as detailed before). Here is a reminder - first chop out the waste from the outside face, half way down ...
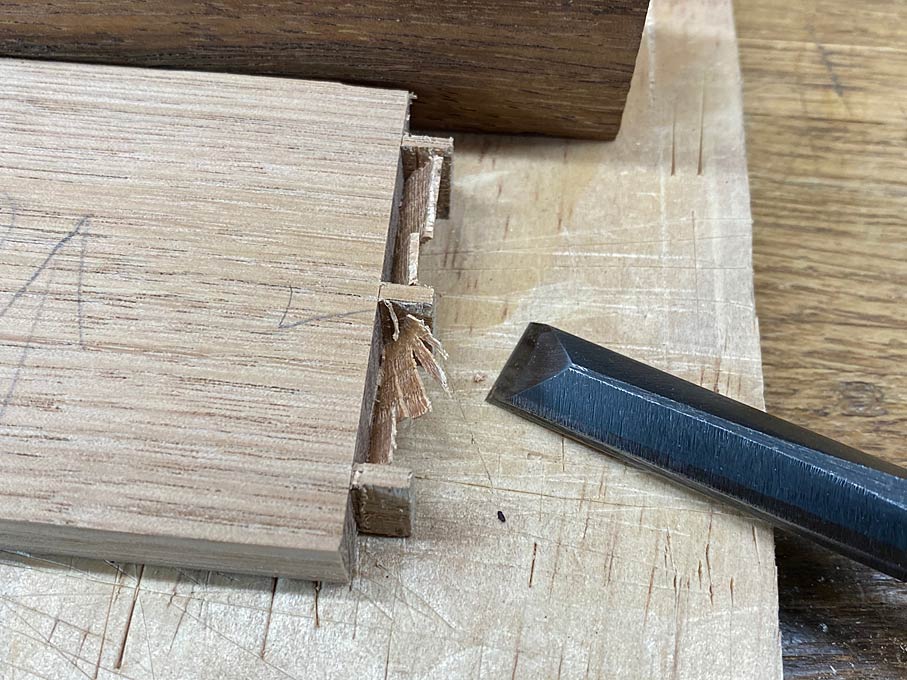
... and then complete from the show-inside face.
My preference is to angle the chisel slightly away and create a "tent" ...
This is then removed with a slicing paring action, again form each side to the centre ...
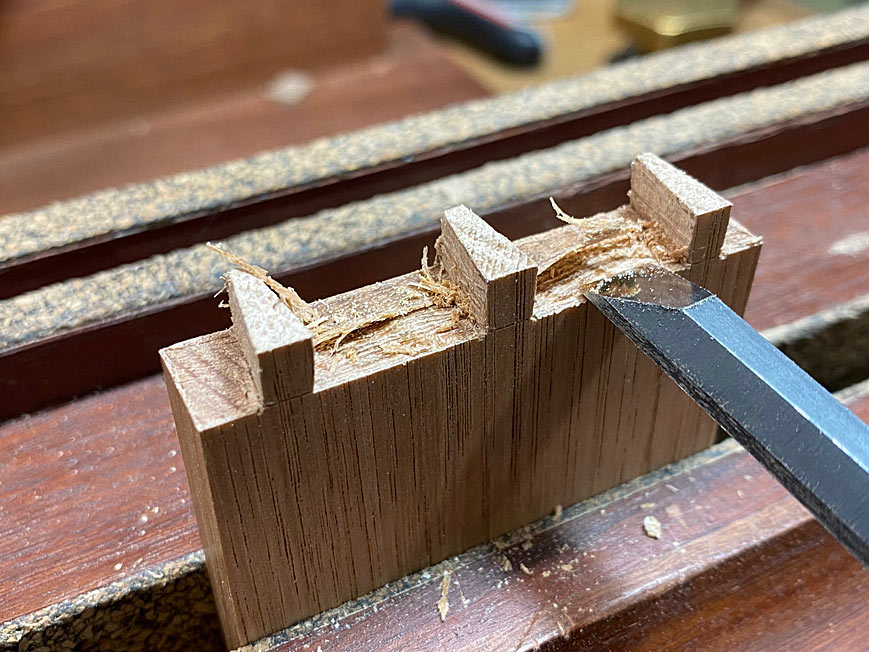
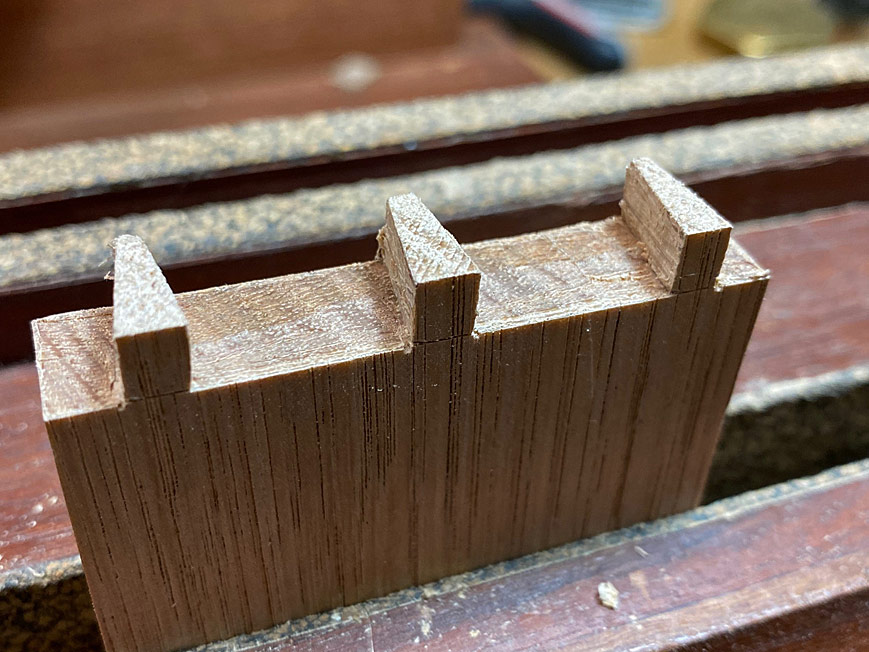
Use a narrow chisel to pare the ends: having first sawn these away, the remnants for paring lie above the chisel walls (again discussed in a previous article) ..

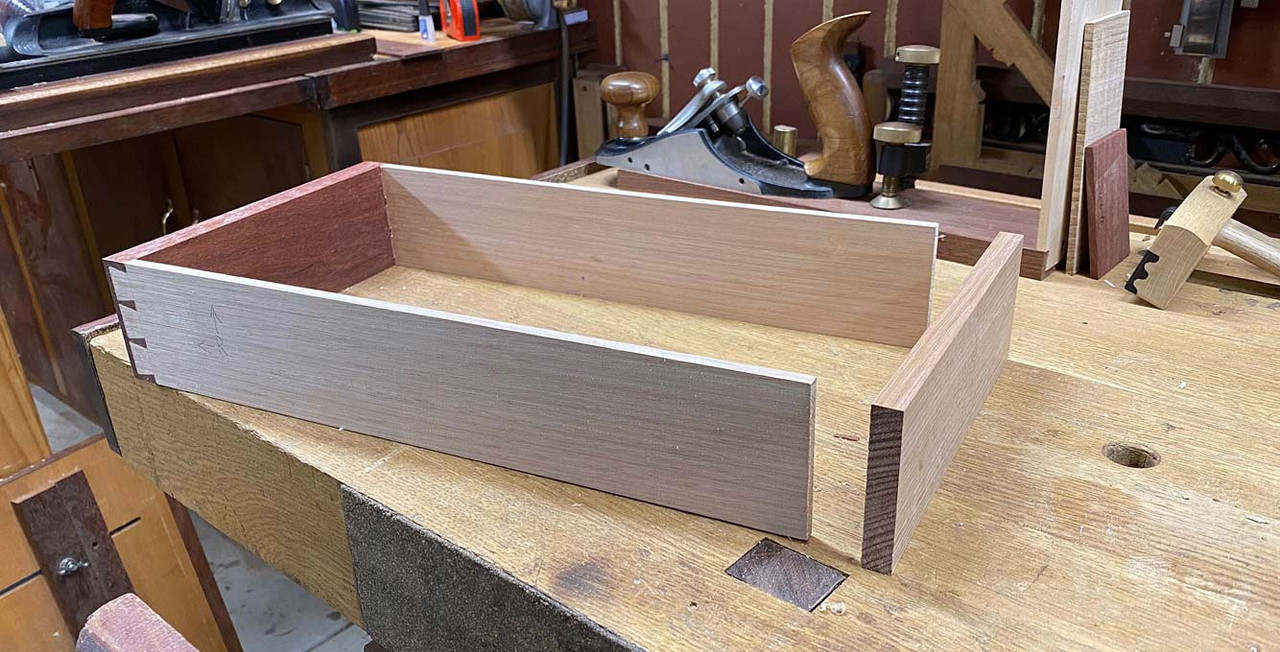
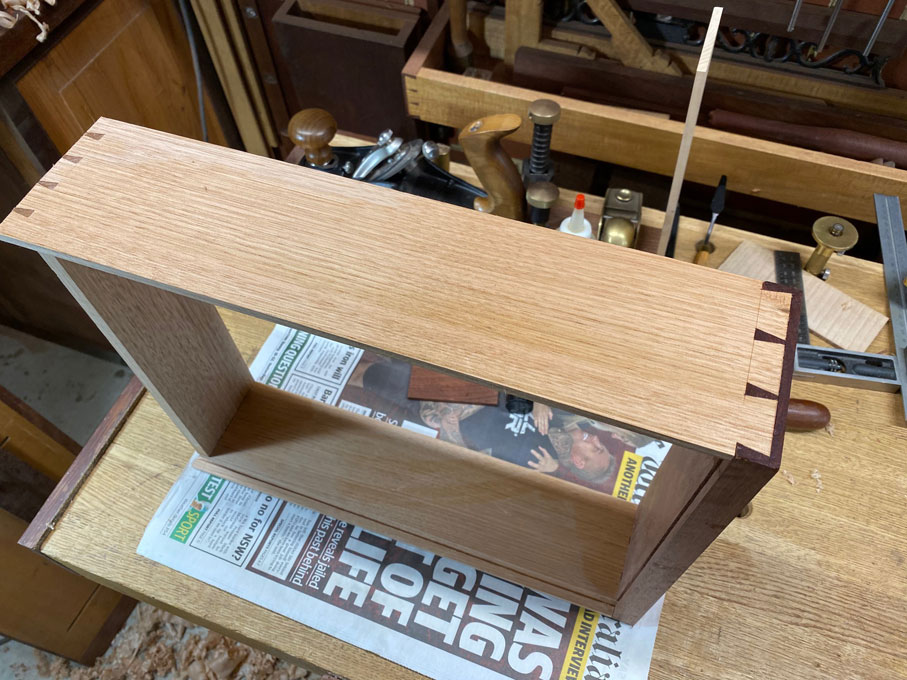
This is what we are after: flat ...
Dry fit ...
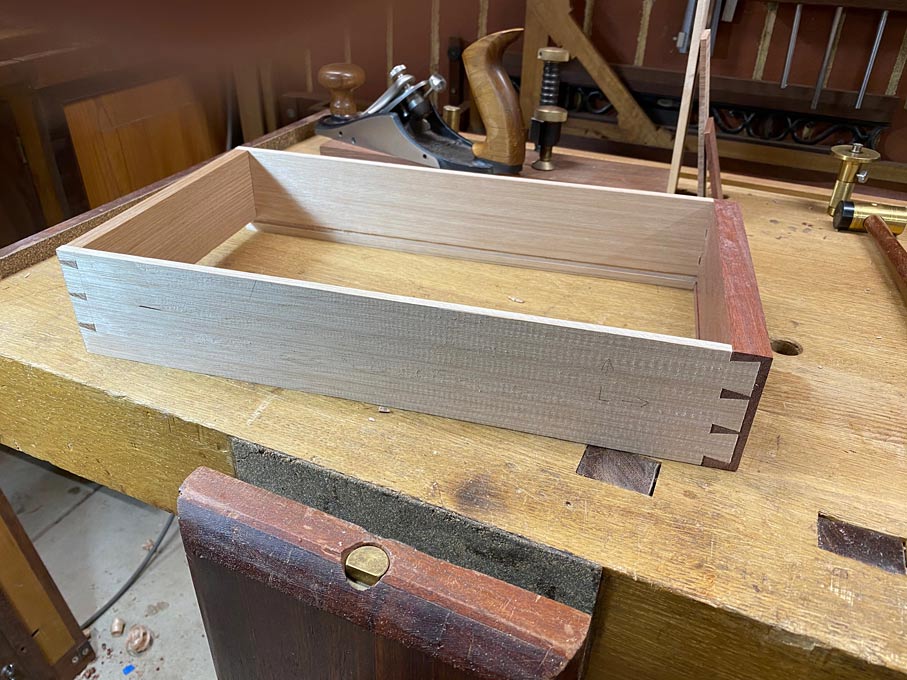
The drawer must fit the drawer case ...
It does, but we are not finished. More in a while ..
Regards from Perth
DerekVisit www.inthewoodshop.com for tutorials on constructing handtools, handtool reviews, and my trials and tribulations with furniture builds.
-
8th February 2021, 03:45 AM #51
Be inspired. Be creative. Be bold.
- Join Date
- Apr 2001
- Location
- Perth
- Posts
- 10,820
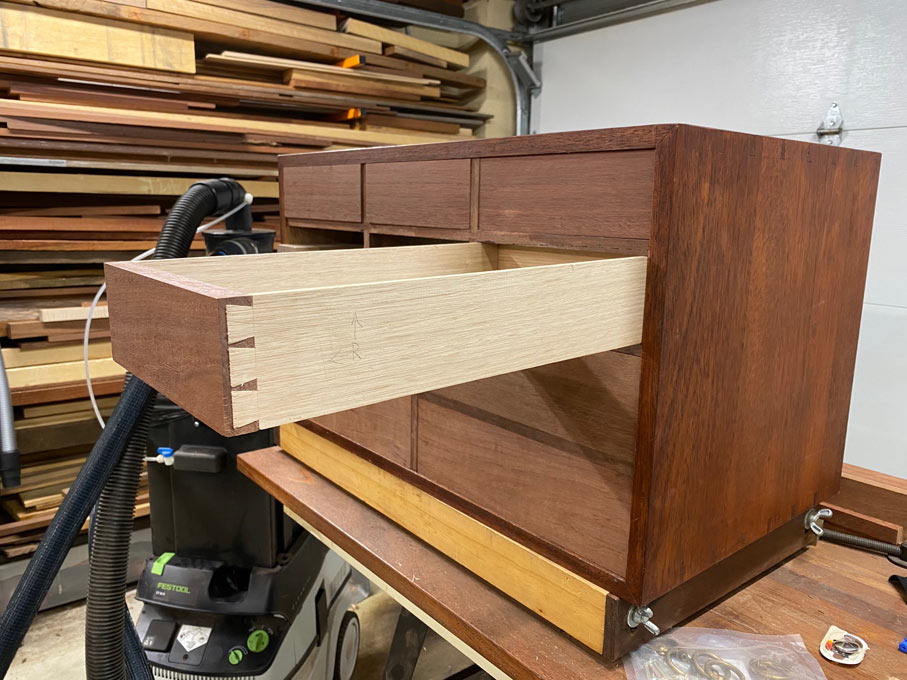
The aim is to glue up the assembled drawer and let it dry in the drawer case.
This drawer fits ...
... however it is a tight squeeze and I know that there are issues which need to be corrected before glue is applied. It is the same for every drawer.
Each drawer needs to go through an assessment, trouble-shooting for issues, until the drawer moves smoothly.
I need to point out at this stage that, although drawers are made in batches (a row), each drawer is fitted, tuned, and glued up before assembling the next drawer. At this stage, six (of ten) drawers have been completed to this stage. There is one further stage after this chapter.
So we pull the drawer out of the case. It comes out with effort. The sides twist slightly - I can feel one side is moving more freely than the other. Something is causing it to hang up.
Examining the half-blind dovetails, the first item of note is that there is a slightly raised pin ...
Since the drawer is a dry fit, it is a simple matter to knock it apart to make any fixes.
The pin is planed flat.
I note that the one drawer side sits a little proud at the underside, about 1mm ... maybe not even that much ..
This is also planed down.
The drawer back is presented to the case opening ...
It is a tight fit now. It will be a tighter fit later if there is moisture in the air. The drawer back is removed and the height planed down by about 1mm. Re-assembled,
the sides now are higher ...
The sides are planed to the side height ...
I can still feel a little more stickiness on one side. Are the sides flat, or has there a cup developed to create a high spot?
Yes. Slight but it is there ...
Plane this flat. Just a few thin shavings ...
Now the drawer is moving well - it feels taut, but free.
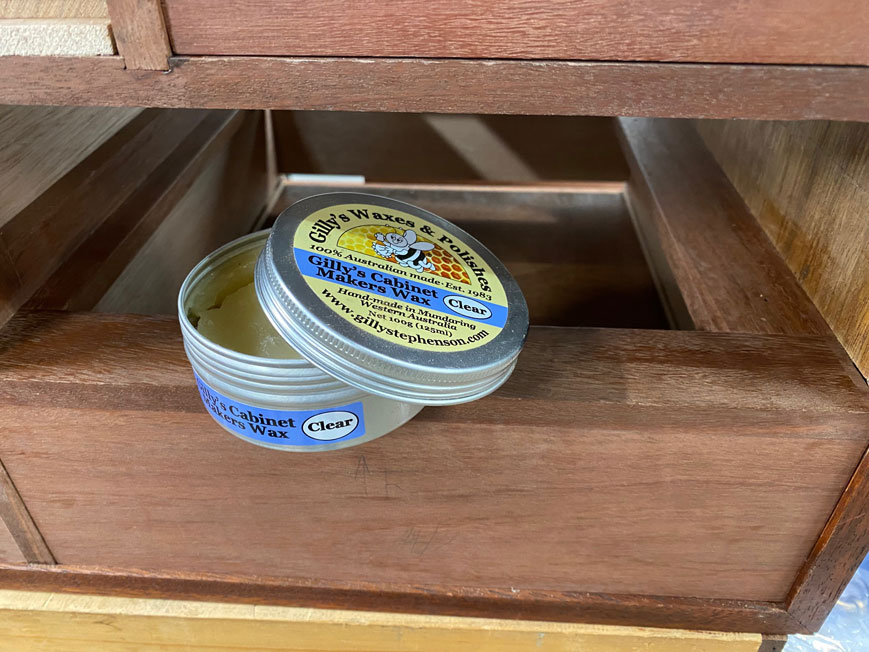
The case is waxed, not so much at this stage to promote ease of movement, but to prevent any glue adhering to the sides ..
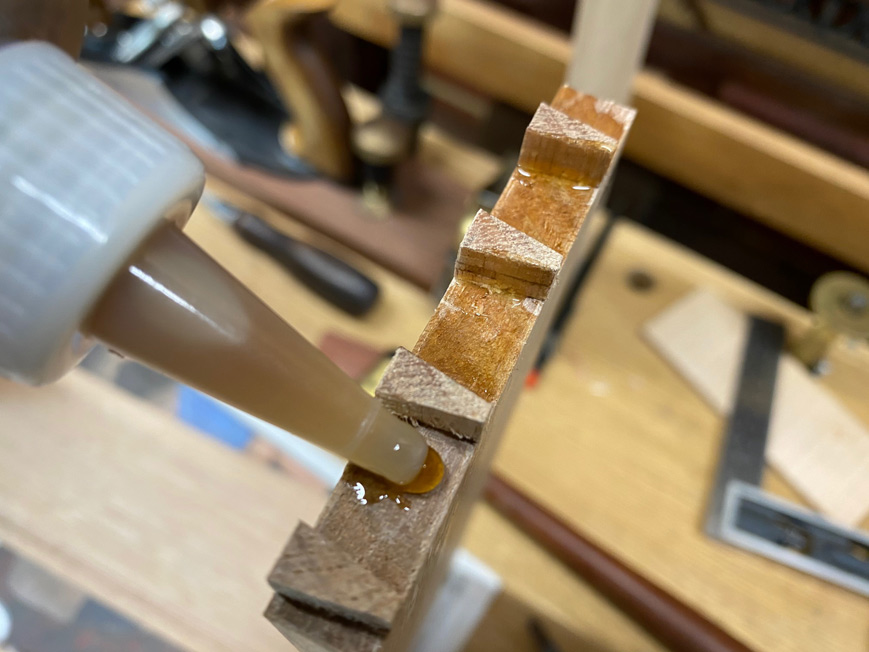
Now we are ready to glue the drawer parts. Here are the items involved ...

I am using Titebond Liquid Hide Glue. I like that it has a longer open time, that it is reversible, repairable, and cleans up with water. There is a spatula for application, a fishtail chisel handy if a corner needs to be cleaned, a small mallet, and a wet rag.
The hide glue is decanted into a small bottle ...
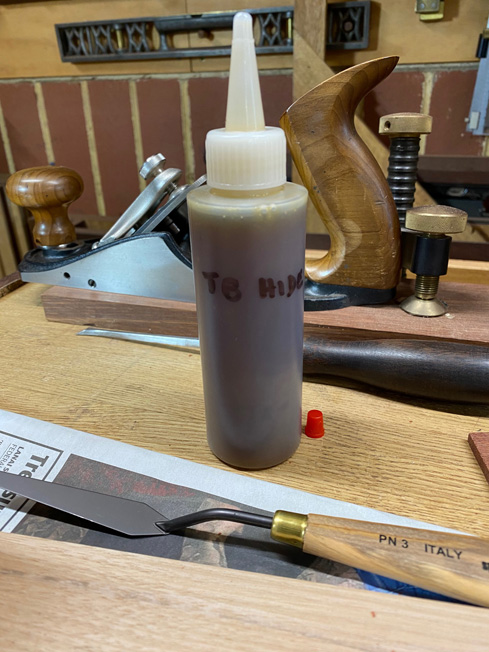
This small bottle is a game changer! I was watching Rob Cosman and noted that he used small bottles as well. I found a bunch on eBay. What they do is let you deposit glue in exactly the spot you want to do, and then the spatula lets you spread it around.
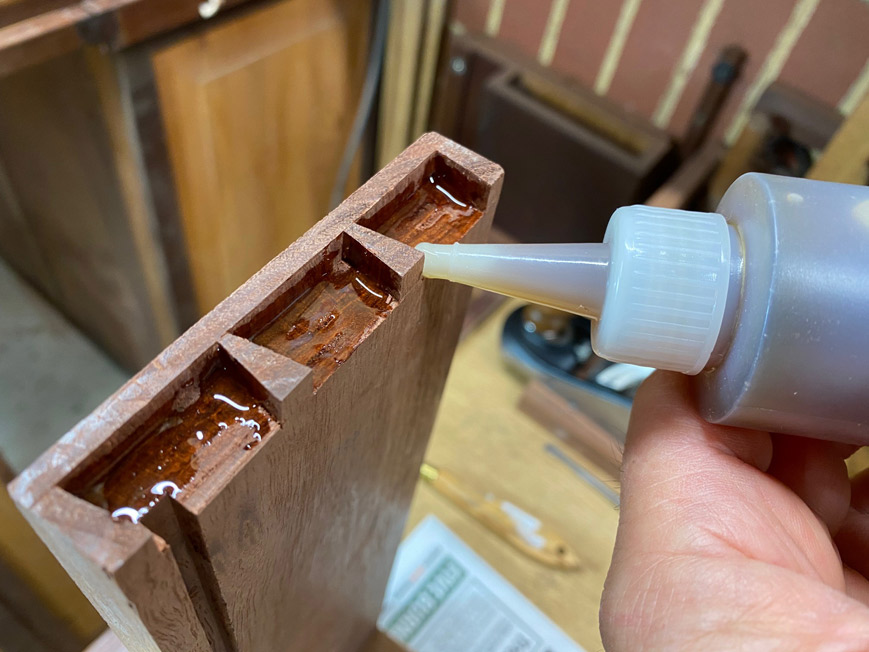
I only glue one side of the joint, but there is enough for both sides ...
It is important that the sides are seated flush ...
The drawer looks good ...
... and, importantly, slides into the case smoothly and firmly.
Regards from Perth
DerekVisit www.inthewoodshop.com for tutorials on constructing handtools, handtool reviews, and my trials and tribulations with furniture builds.
-
16th March 2021, 04:13 AM #52
Be inspired. Be creative. Be bold.
- Join Date
- Apr 2001
- Location
- Perth
- Posts
- 10,820
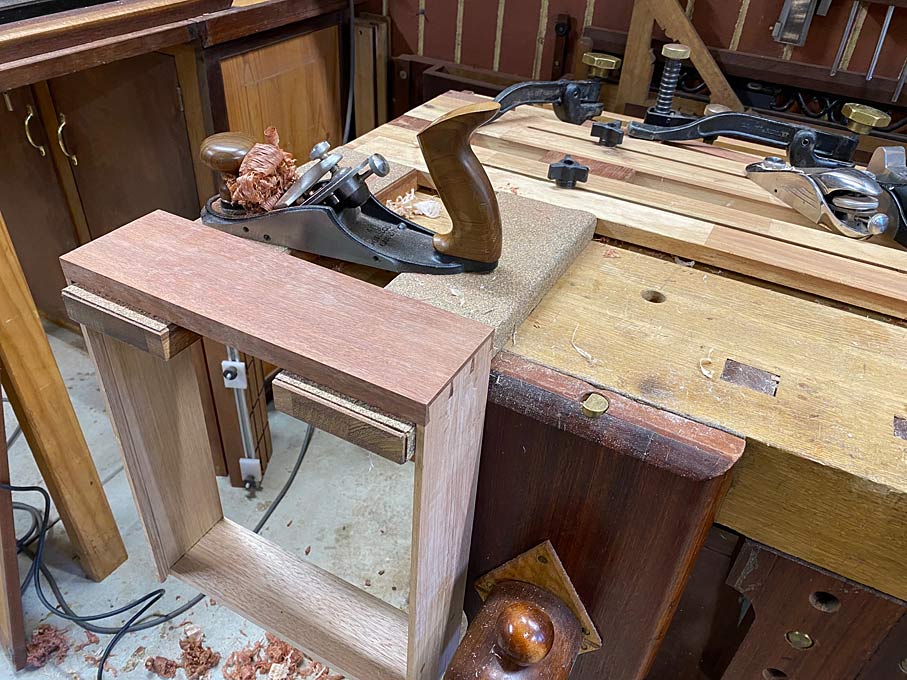
One of the least pleasurable areas of drawer making is fitting drawer bottoms. Why? Because there always seems more to do than anticipated - there are more panels to machine to thickness and area, and this feels like it is endless. Mindless.
Before starting on the bottoms, the drawer fronts are planed, chipped dovetails repaired, and fine-tuning of the bottom-less drawer is completed ...
Link to the fixture here: http://www.inthewoodshop.com/ShopMad...ngFixture.html
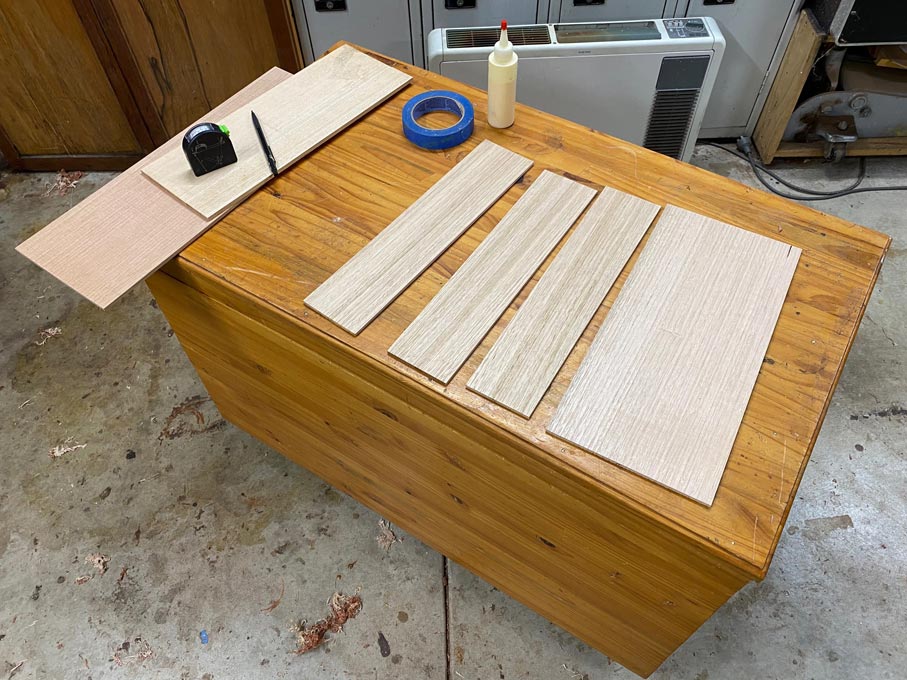
One of the rules I set for myself at the start of this project was that, being a just for the workshop, I would use as much scrap or cheap wood as I could scrounge up. The Jarrah drawer fronts are the exception. The case is Merbau stained to match the Jarrah drawer fronts.
Over various projects, I save bits which I think may be used ... don't we all For now, offcuts of Tasmanian Oak, which make great drawer sides and drawer bottoms.
Modern machines, such as jointers and thicknesser/planers, enable the redesign of cabinet parts. In this case, drawer bottoms. One can use the minimum thickness, saving weight and wood.
I am very fortunate to own a Hammer A3-31, which turns the scrap into usable boards ...
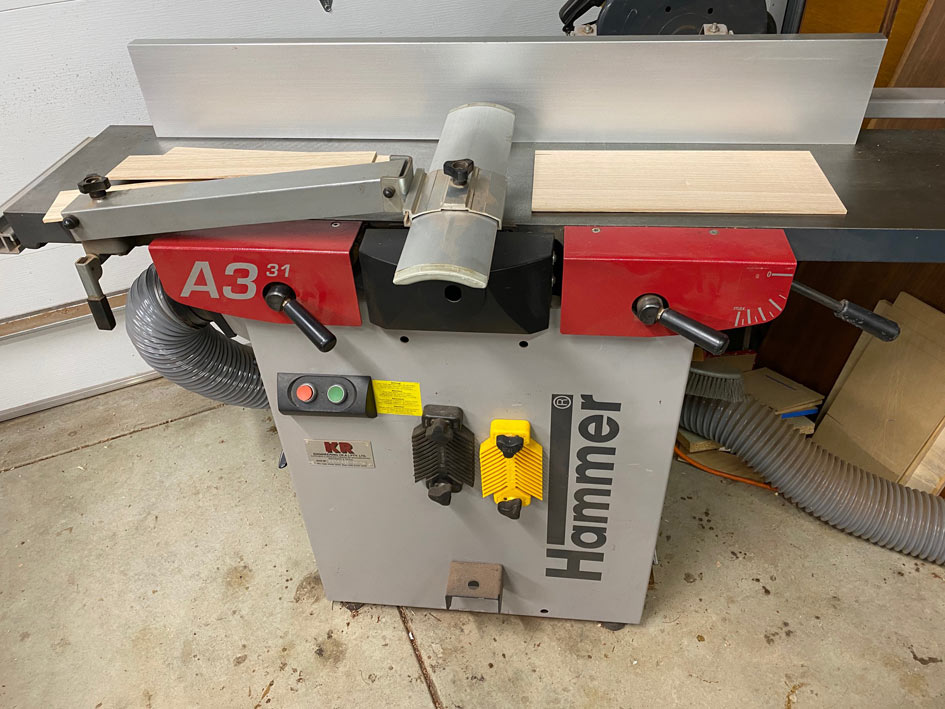
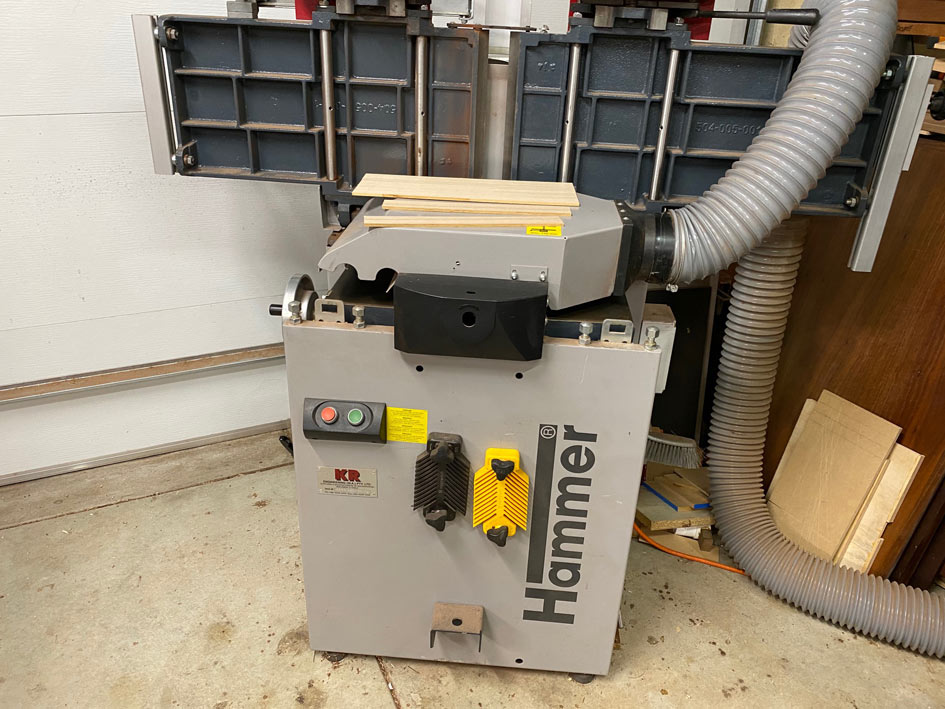
These boards ended up a smidgeon over 5mm thick. The grooves in the drawer sides are 5mm wide and 3mm deep. The drawer sides are 6-7mm thick.
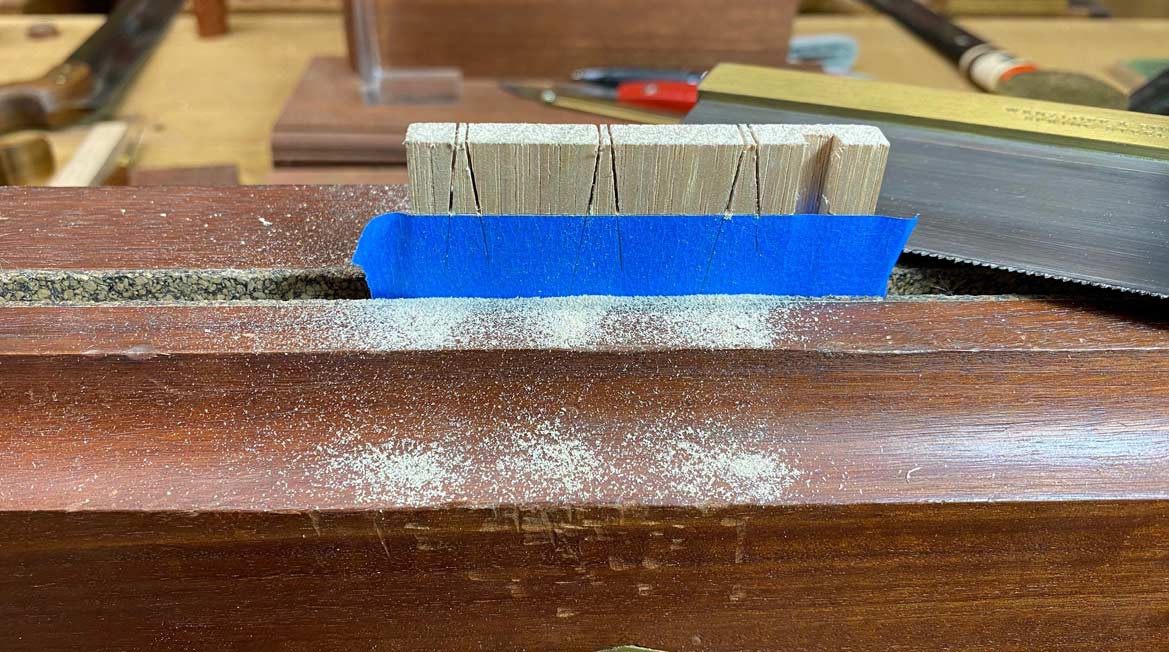
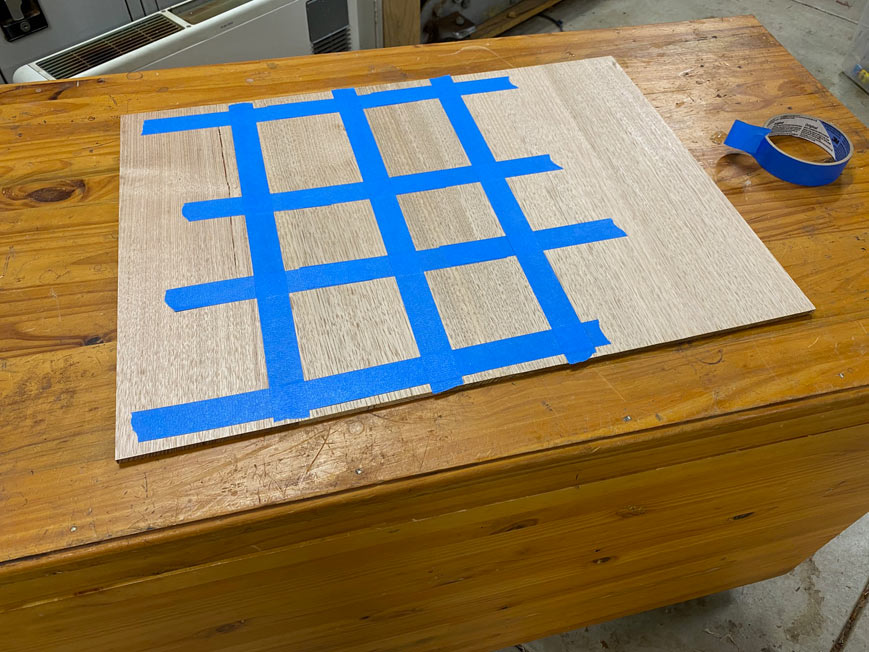
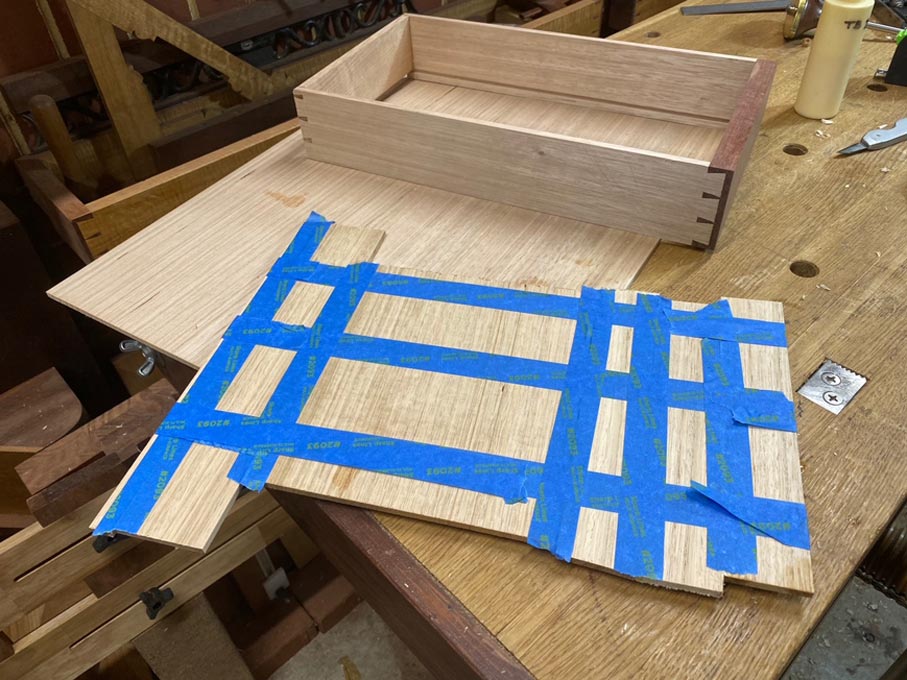
Joining such thin boards is quite easy - no clamps used. Just blue tape
Butt two boards, and stretch the tape across the join. The blue tape has some flex to it, and the stretch contracts and pulls the joint tight ...
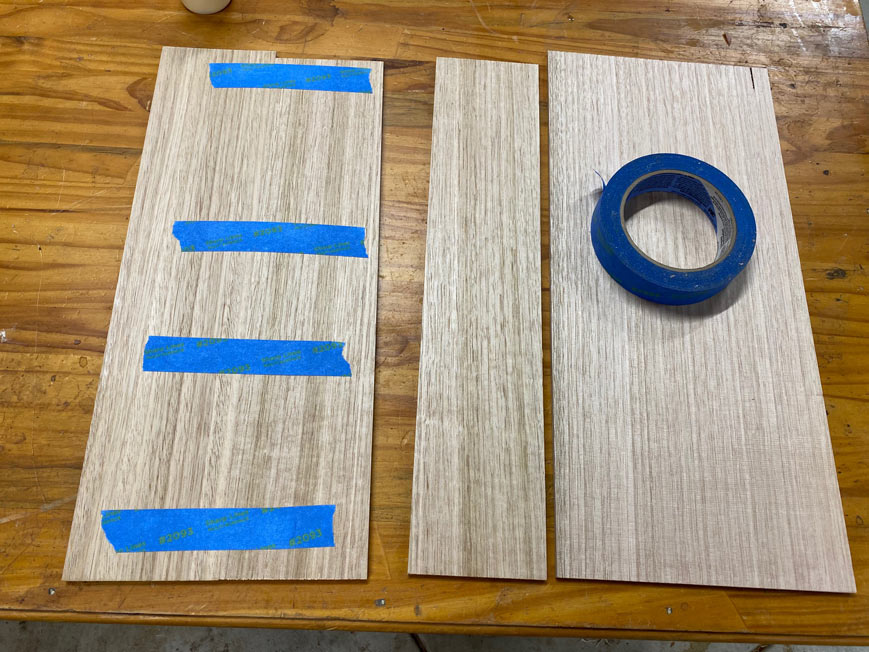
Do this with all the joins, and then lay a strip down the seam (which is to prevent glue squeezing out ...
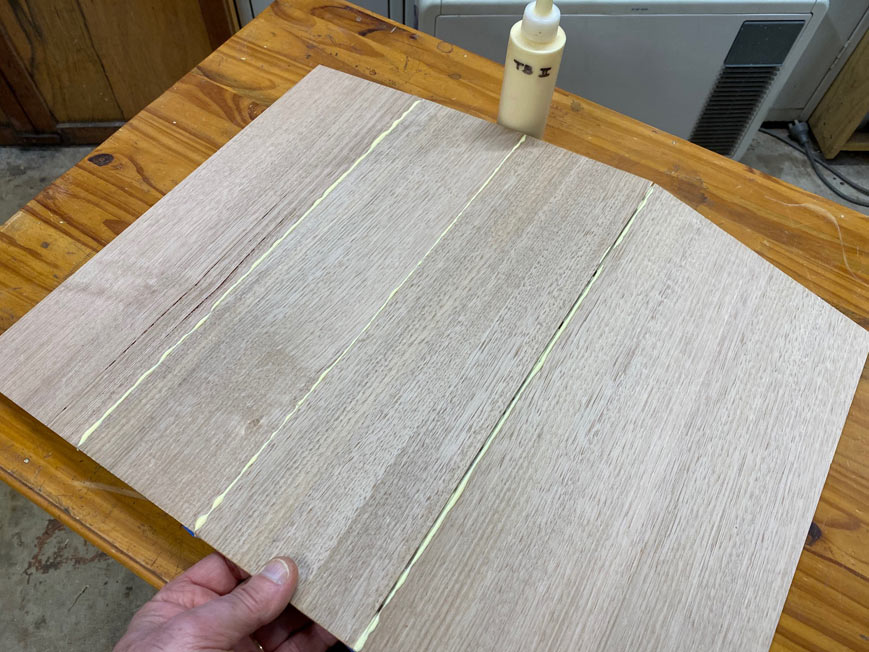
Flip the boards and insert glue into the seam. Wiggle the boards open-and-closed to spread it evenly.
Lay flat and wipe away the glue (Titebond II) squeeze out with a wet rag. Freshen this for each join.
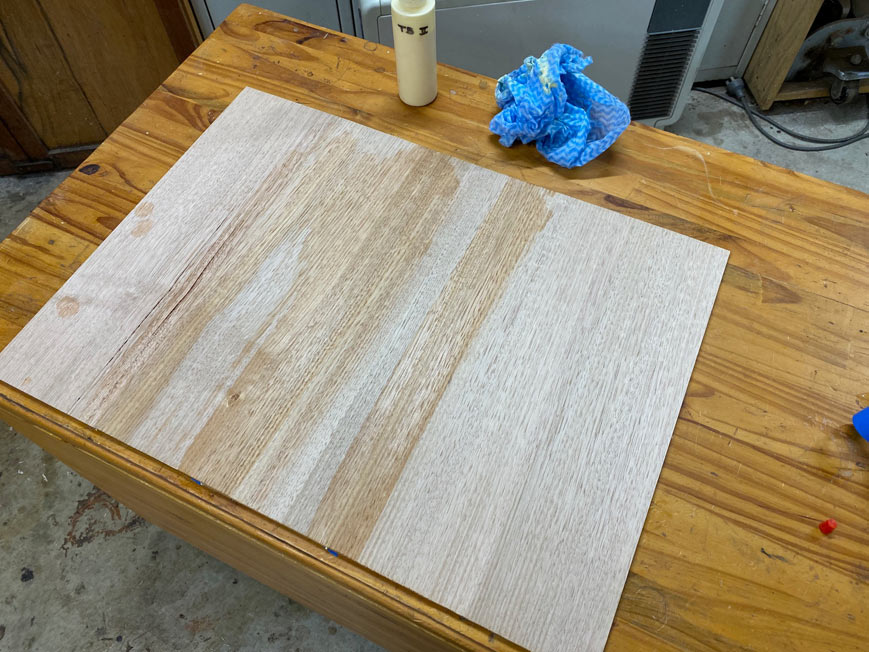
Yes, I know many warn against this practice, but I have not experienced any problem with finishes. Once clean, tape the side to hold the joins tightly together ...
The machining and glueing takes all day, and finally ...
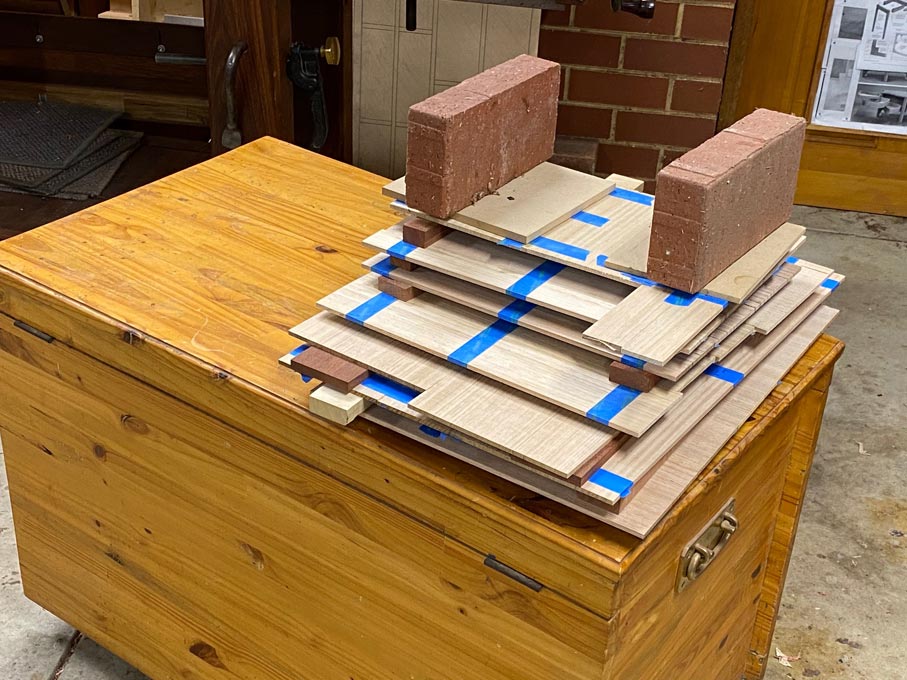
Of course - Murphy's Law - the next day I discover that I am going to be one drawer short, and more offcuts are found and glued together. Smaller pieces this time ...
Then it is time to unwrap the presents and make a blue tape Christmas tree ...
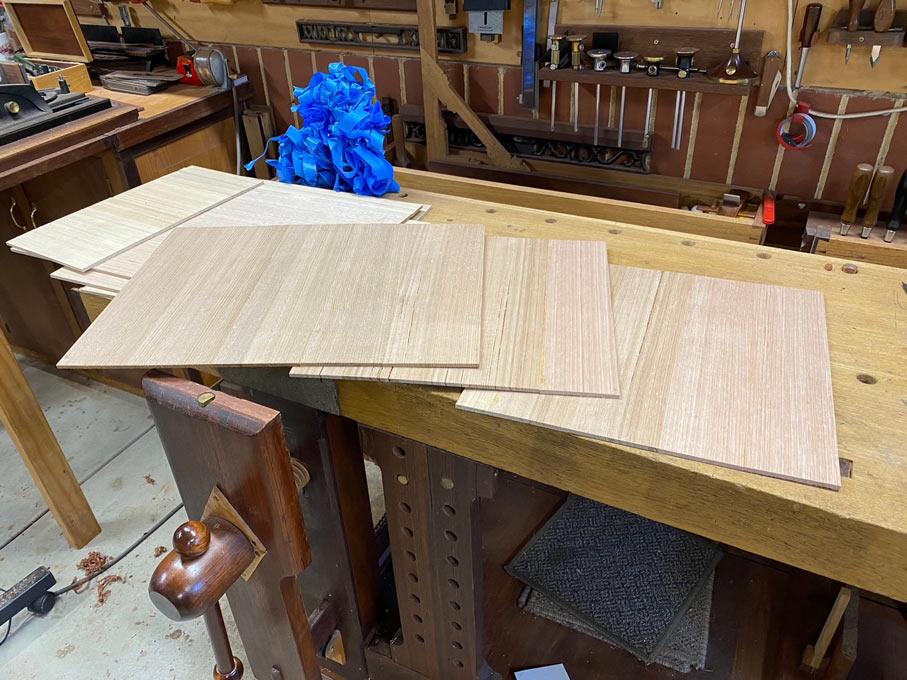
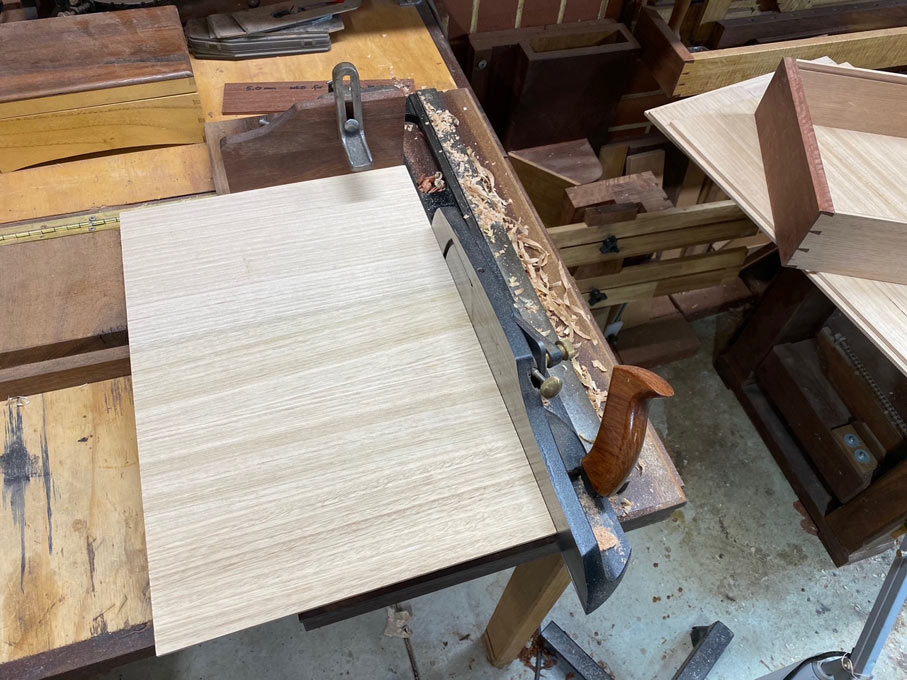
The drawer bottoms are roughly sized, and the top side is sanded to 240 grit (the underside will not be seen, so just leave it be) ...
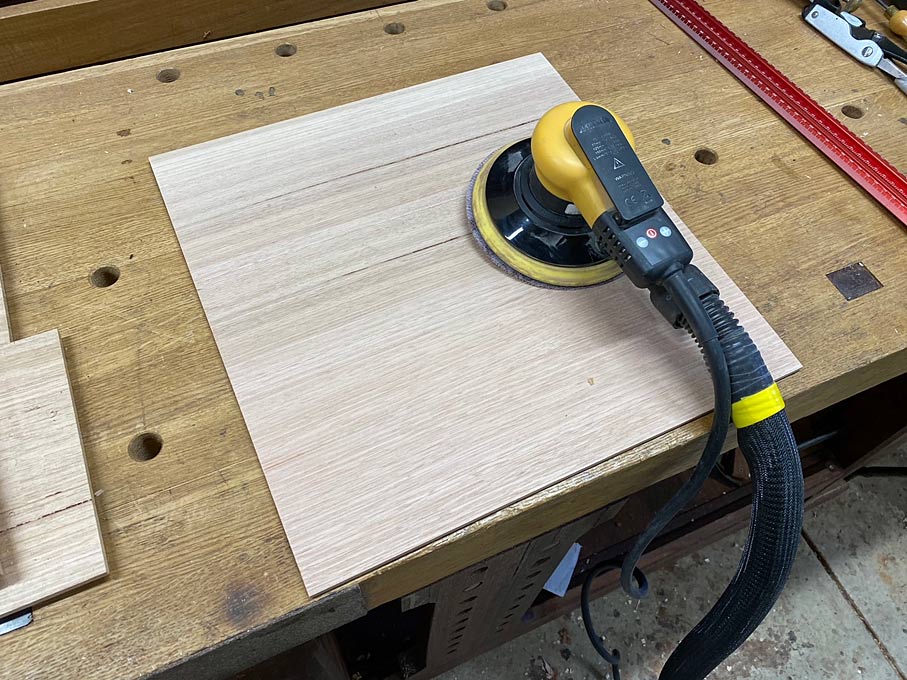
Why sand? Well, it is just easier. The panels are curvy, not flat, and would be too awkward to hand plane. This is what sanders are for. What I have here is a Mirka Ceros, which uses Abranet mesh. Hooked up to a vacuum cleaner, the result is the closest thing to dustless sanding.
One edge on the underside receives a very shallow rebate. This is to enable the panel to fit the groove. The plane here is a Veritas skew block plane, which has a nicker as it is planing across the grain. It has a fence and a depth stop. Great little plane ..
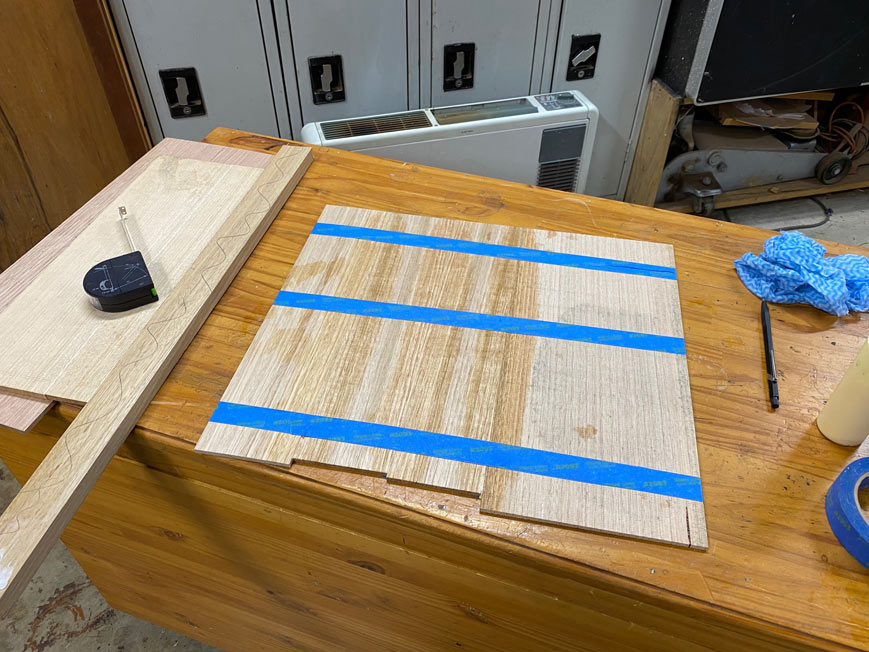
The width of the panel is measured. Note that the drawer bottom runs across the drawer (expansion then takes place front-to-back) ...
After ripping to size on the table saw, fine tuning takes place with a shooting board ...
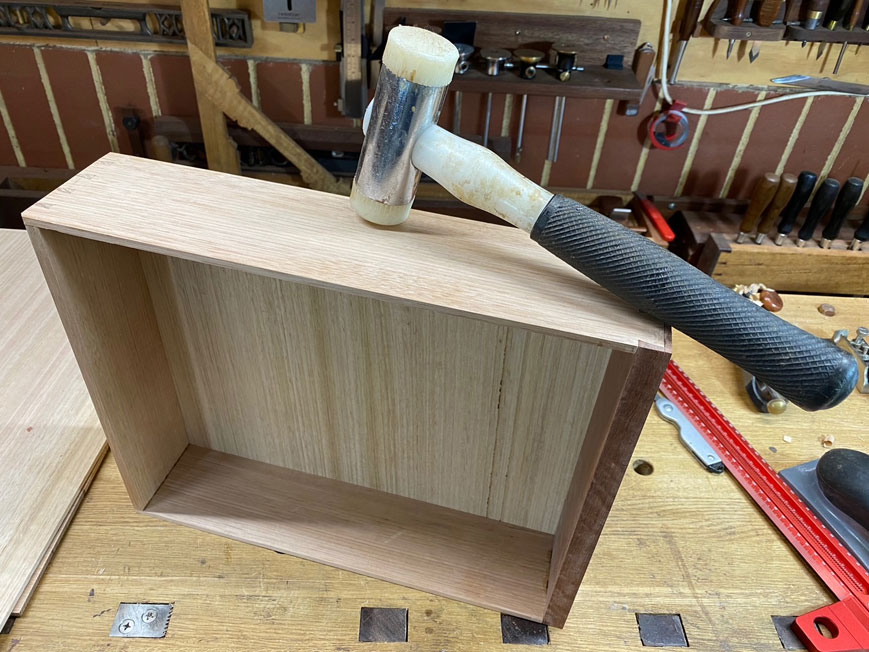
Time to fit the drawer bottom.
Of course, if it is too tight, it will not run smoothly. But even if it appears to run smoothly, it can be creating a potential problem.
In the earlier chapters (Dovetailing for Blood), one aim was to make the dovetails an exact depth so that the newly glued drawer could dry in the drawer case. The other aim was to fine tune the drawer (minus the drawer bottom) to move smoothly in the drawer case. Now, if when adding the drawer bottom, the smoothness is lost, then we know that something is wrong.
So, the drawer bottom is dropped part way ...
... and this is presented to the drawer case at this point. Will it run as smoothly as before?
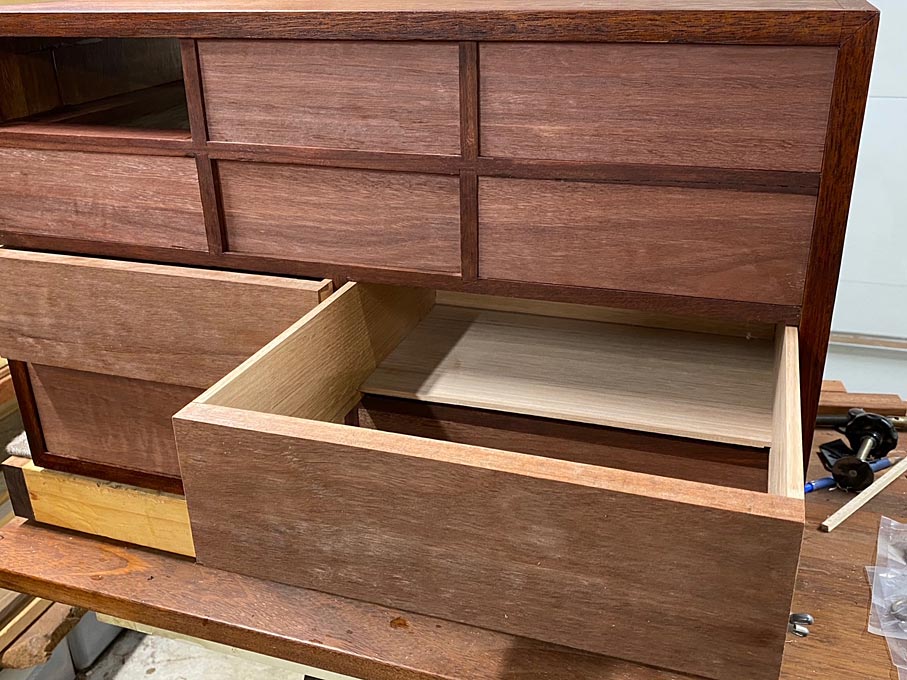
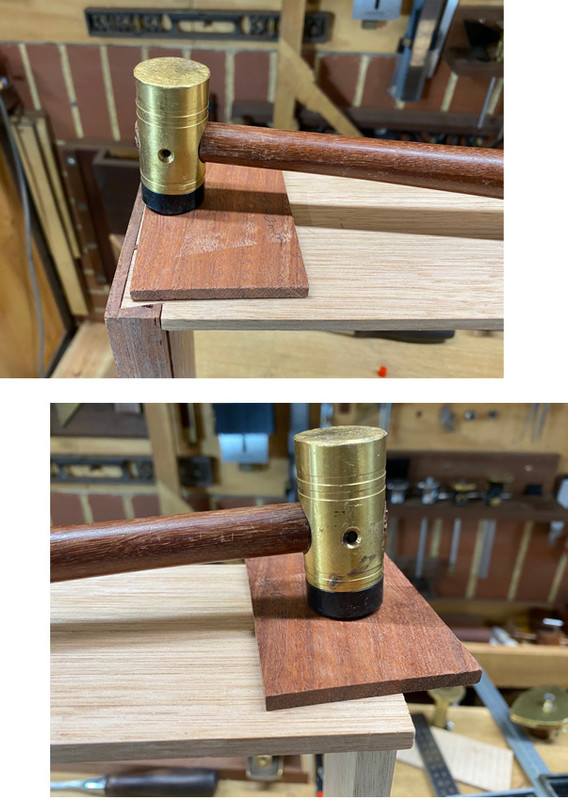
If the drawer appears to have tightened in the case, the problem may be that the sides are slightly bowed. Try tapping the sides to push them flat ...
The drawer bottom is lowered further, and again tested for fit ...
All good, and the bottom is tapped into the groove behind the drawer front. A good fit
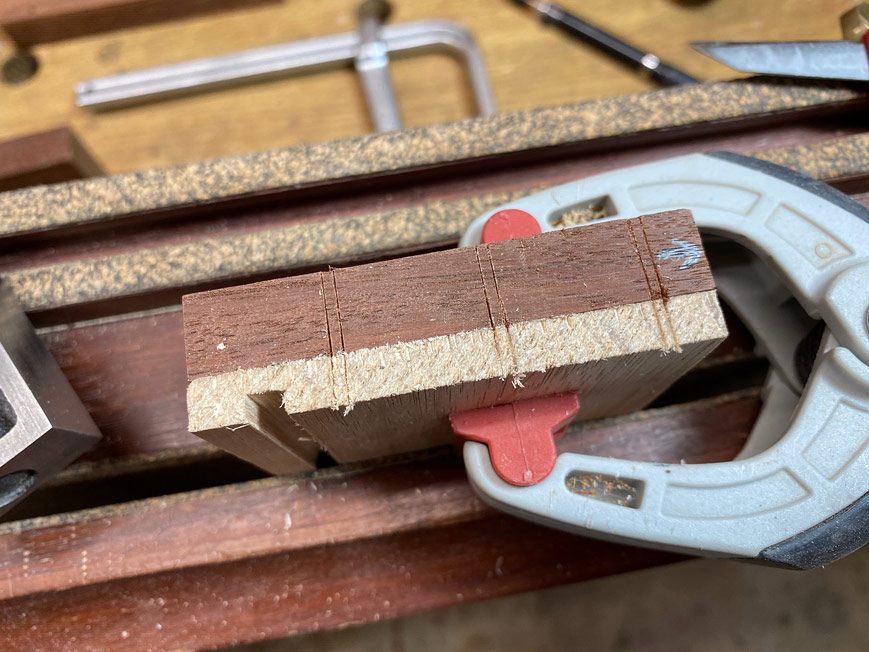
Slips are a traditional way of reinforcing thin drawer sides to increase the surface area and reduce wear over time to the runners. Usually when making slips, I would groove the slip rather than, as here, the drawer side.
Here is one of Richard Jones' wonderful illustrations ...

I decided to do something a little different this time. I am not sure whether this can be termed a true slip, but it functions exactly the same way. The drawer sides have a shallow 3mm groove. To support the thin drawer side, as well as support the drawer, a 6mm square Jarrah section was glued to the drawer side directly under the drawer bottom. Care was taken to allow the drawer bottom to remain free to move.

Drawer stops were added ...
All the drawers fit and move smoothly ...
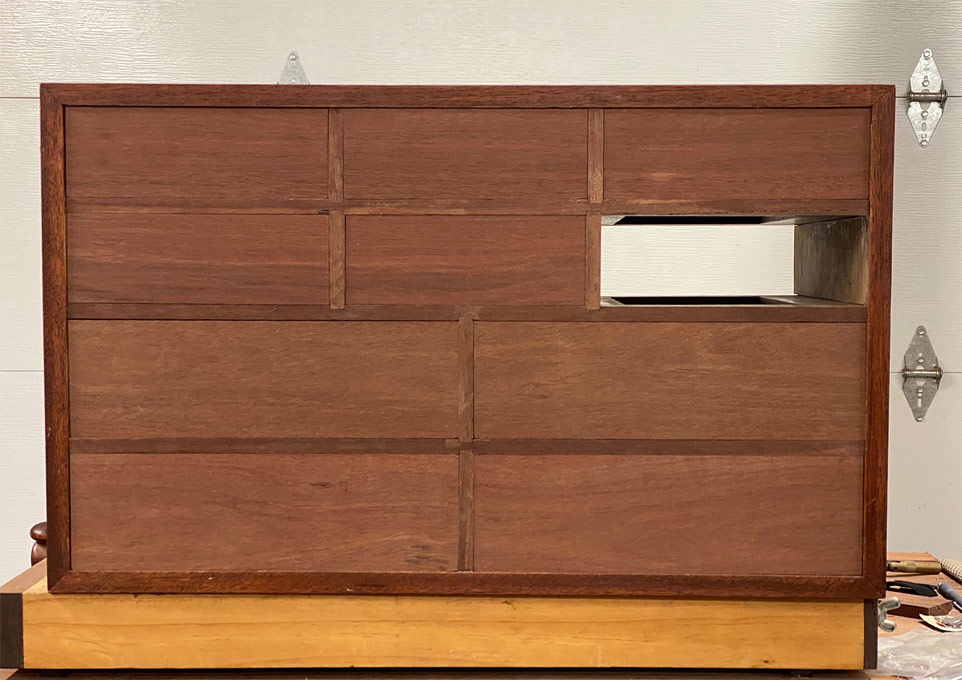
And this is what it looks like at present ...
Of course, there is the case back to make, and the handles to fit .... and then the fun bit begins - fitting out each of the 10 drawers for tools. Lots to do still.
Regards from Perth
DerekVisit www.inthewoodshop.com for tutorials on constructing handtools, handtool reviews, and my trials and tribulations with furniture builds.
-
16th March 2021, 11:21 AM #53
GOLD MEMBER
- Join Date
- Feb 2016
- Location
- Canberra
- Posts
- 5,124
absolutely unbelivable
Derek, your posts are incredible. The information I extract from them is ... fantastic. Detail, nuance, useful.
Many superlatives, but you deserve all.
BTW, love drawer slips. I love them - they show quality.
Lastly - with the drawer stops, how do you ensure they are exactly right? In the past Ive added a screw to the back of my drawers... wind it in/out to get the depth stop perfect. With the wood blocks, are these trimmed somehow?
-
16th March 2021, 02:21 PM #54
Be inspired. Be creative. Be bold.
- Join Date
- Apr 2001
- Location
- Perth
- Posts
- 10,820
That is such a good question! Originally Posted by woodPixel
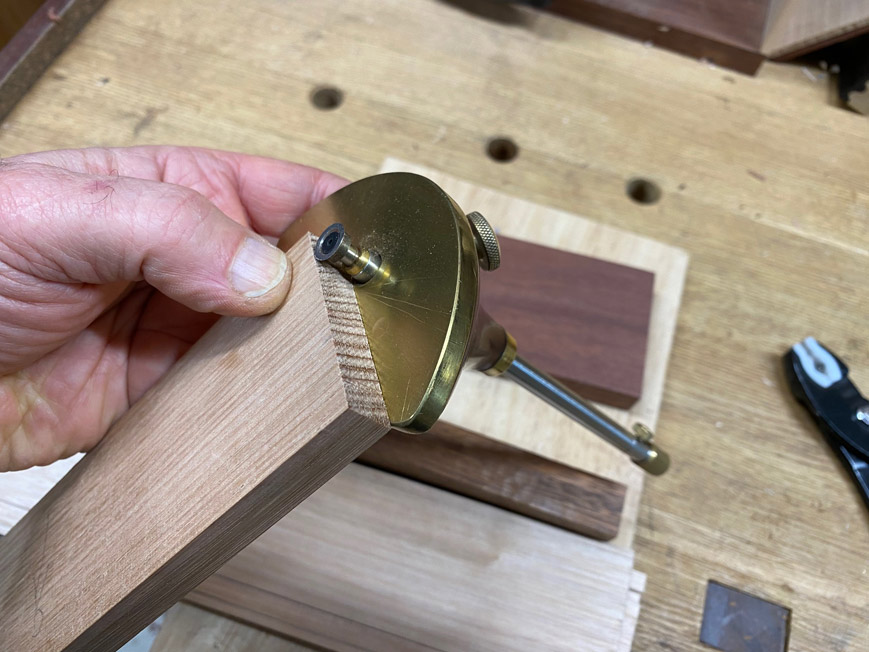
And my simple method may not be the best, but it works for me. What I do is use a cutting gauge set to the thickness of the drawer front, and add the amount wanted for recess (if this is wanted). Now score a line inside the drawer case. That is where the stop block will be positioned (the stop block needs to be lower that the underside of the drawer bottom). A little glue gets it fixed. One can add a screw at this point if satisfied with the position.
Regards from Perth
DerekVisit www.inthewoodshop.com for tutorials on constructing handtools, handtool reviews, and my trials and tribulations with furniture builds.
-
23rd March 2021, 04:25 AM #55
Be inspired. Be creative. Be bold.
- Join Date
- Apr 2001
- Location
- Perth
- Posts
- 10,820
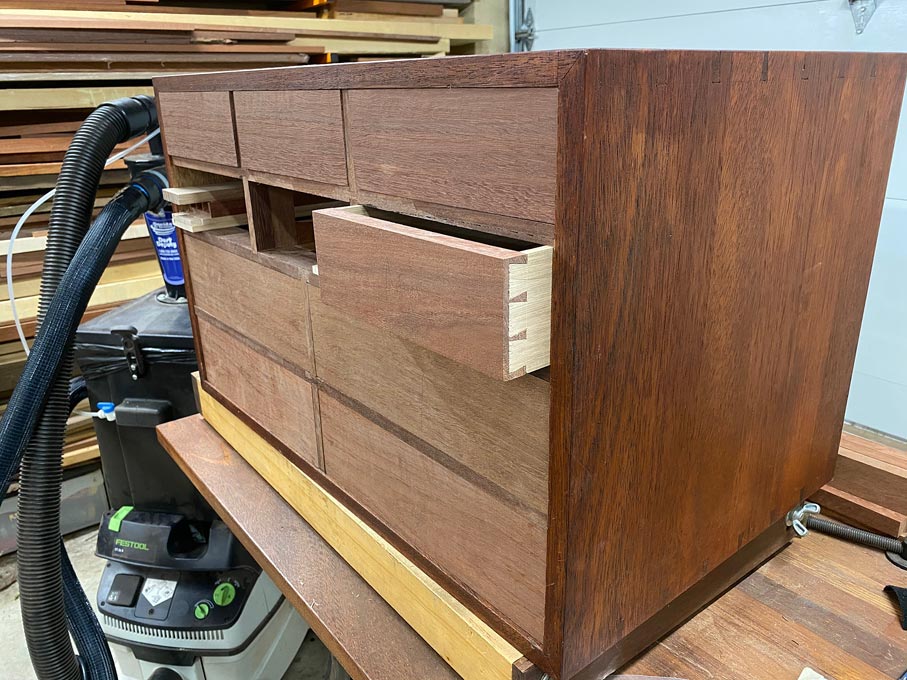
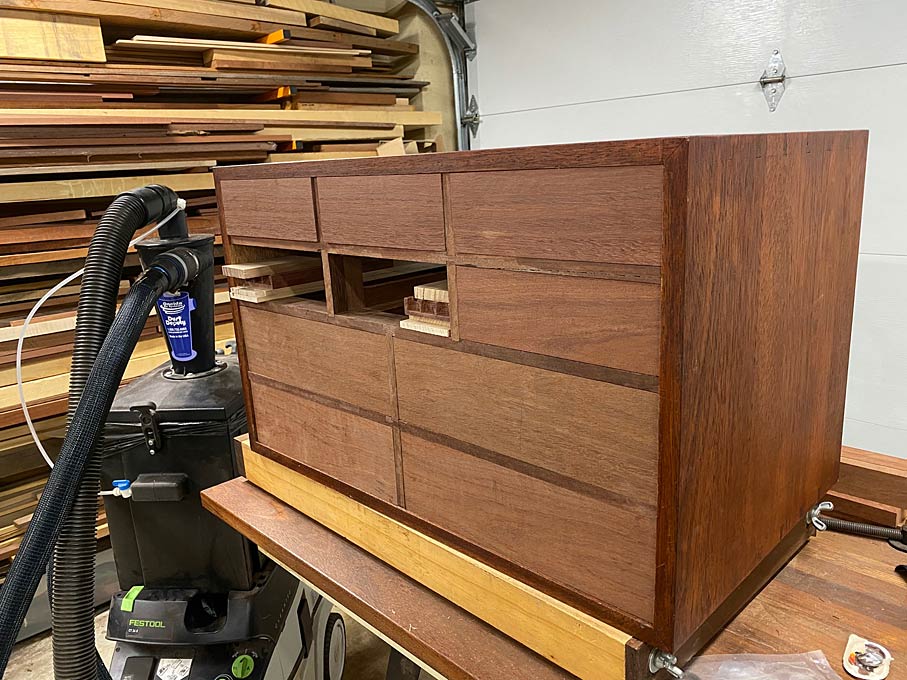
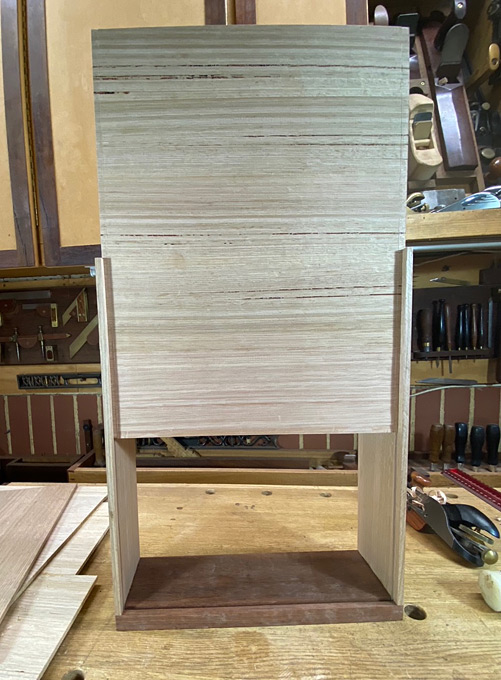
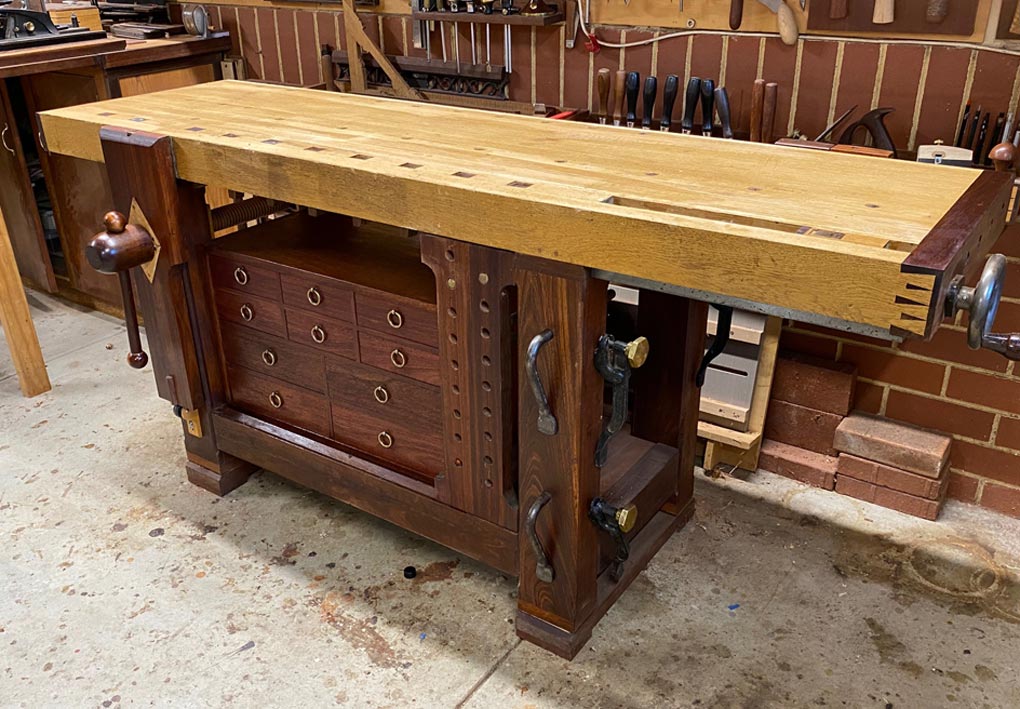
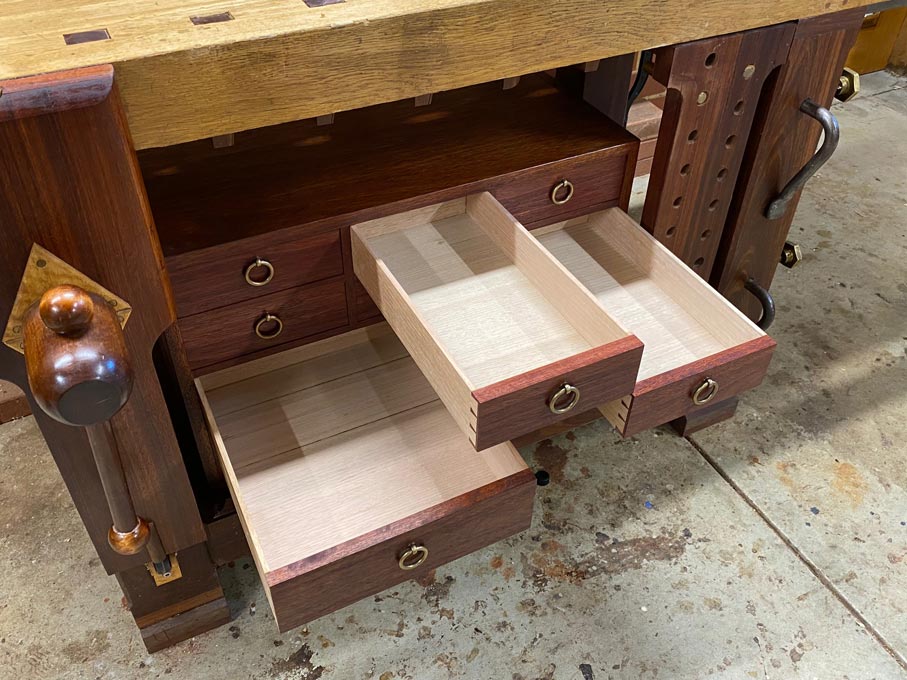
These are final pictures of Stage One. "Stage One" - what does that mean? Well, the first step is to build the cabinet under the bench. The second stage will be to fit out the drawers for the tools. I plan to do some of the latter shortly, and some later. I will post these as they are done. For now, here is the underbench cabinet ...
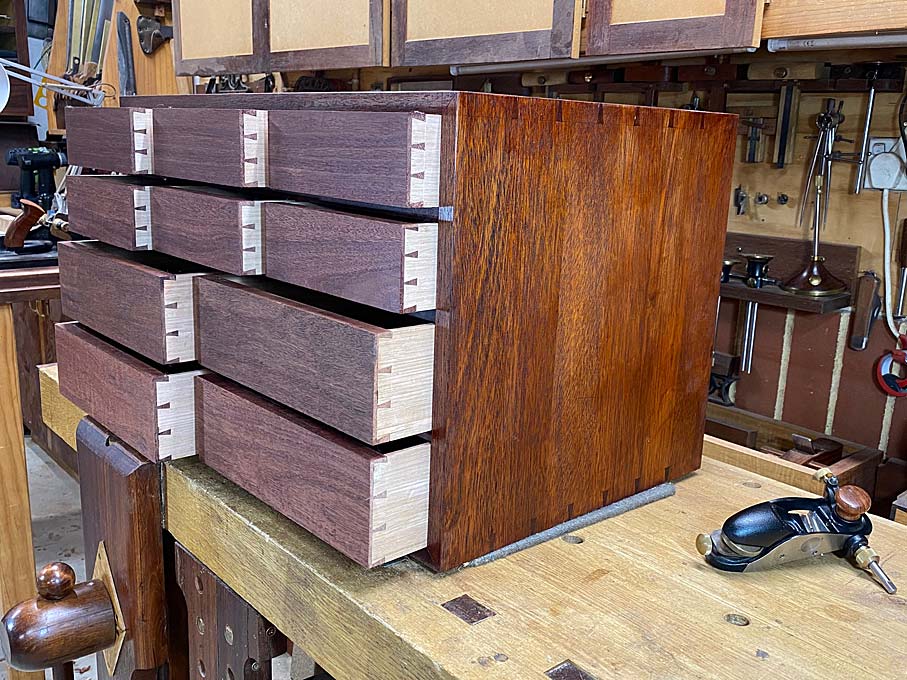
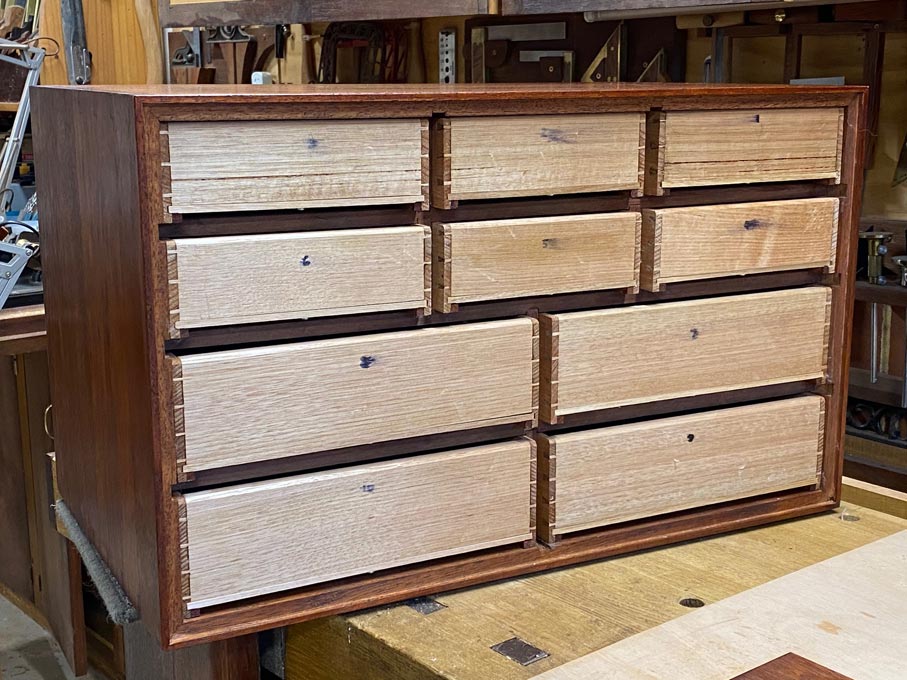
The rear, before the back was installed ...
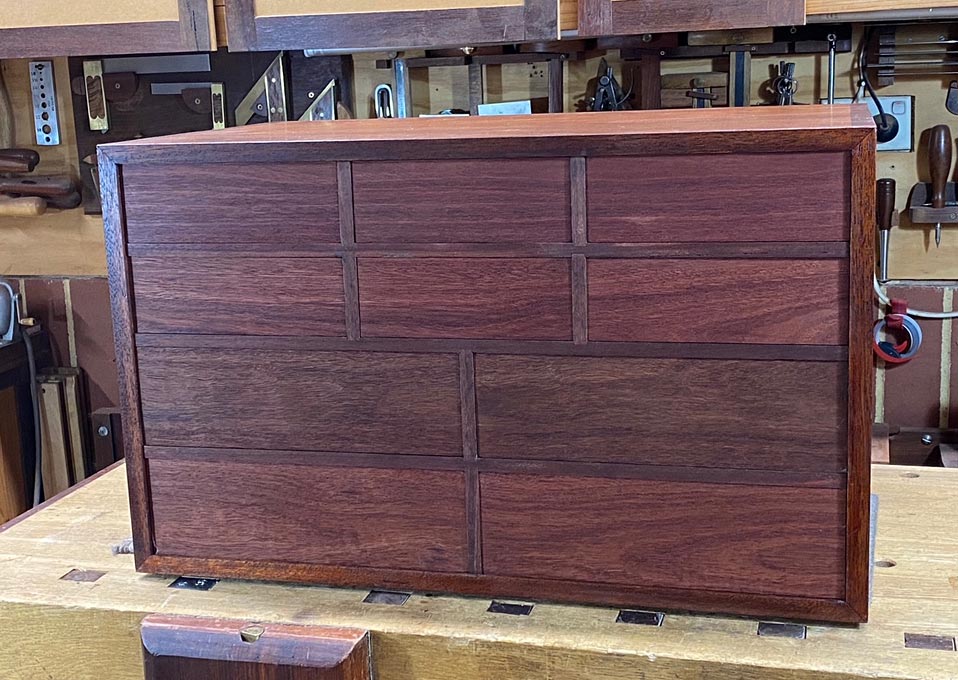
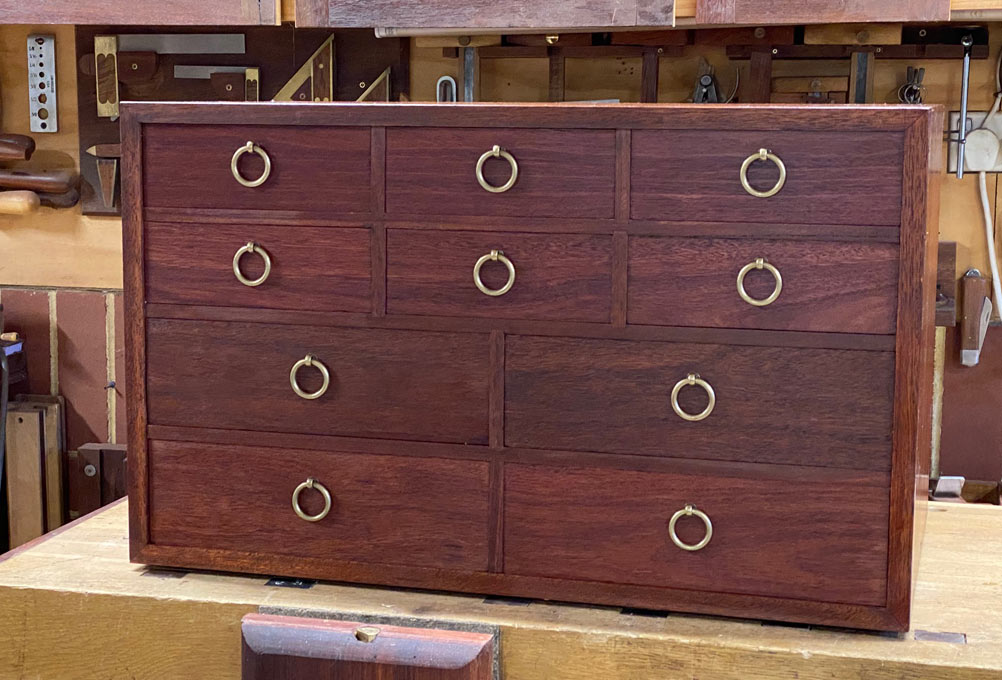
The front. The ring pulls are antiqued brass (they are not shiny). I need to work them a little more to remove the still-new look. These were chosen as they drop down and do not project out from the front of the cabinet ...
Under the bench ...
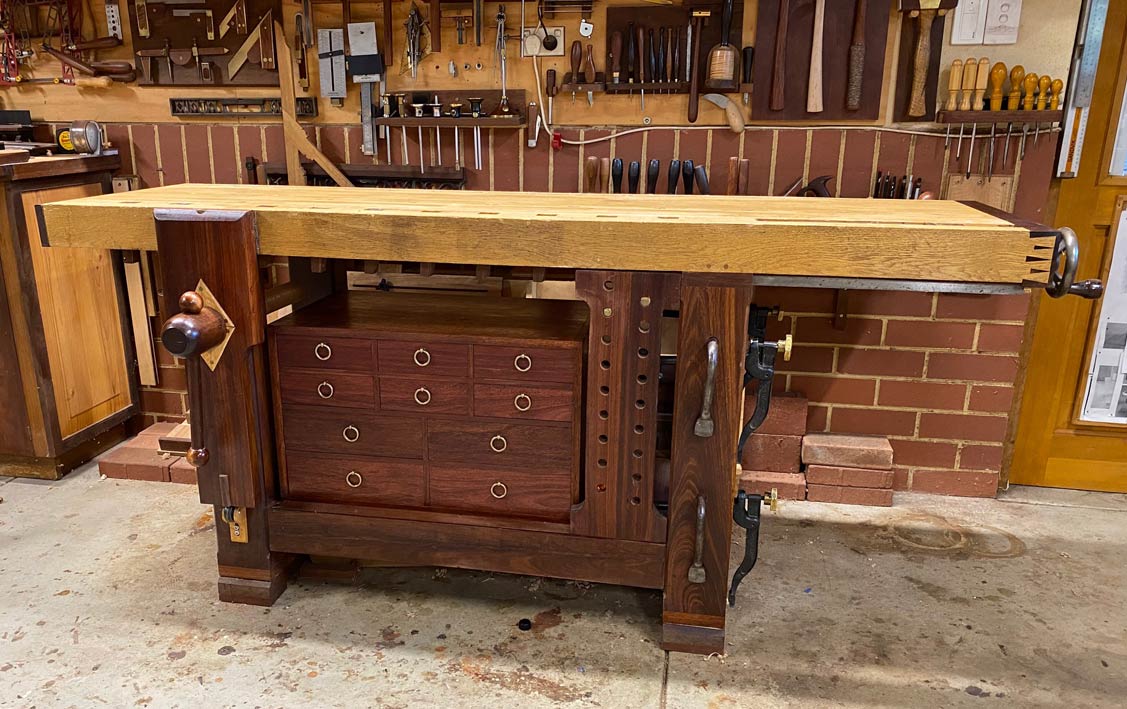
The bench top received a little flattening, and a single coat of danish oil ...
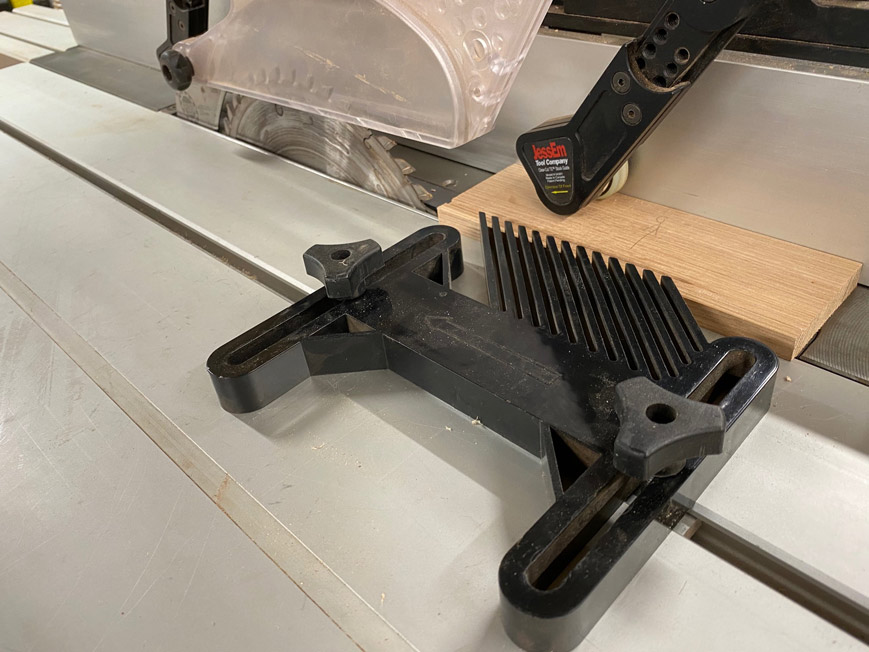
Someone is sure to ask why the cabinet is low. The answer is that there needs to be space for hold downs ...
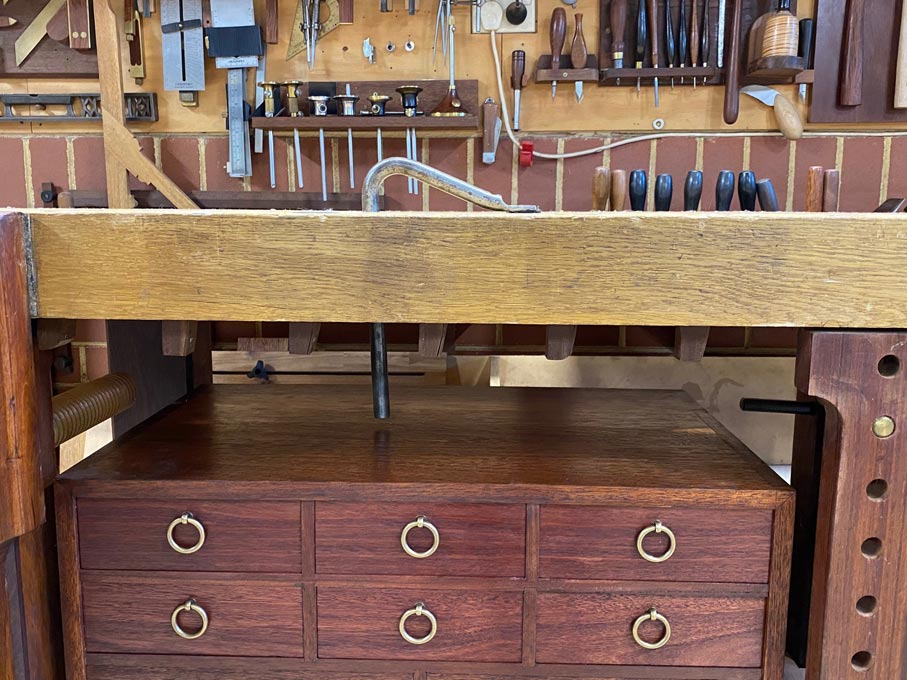
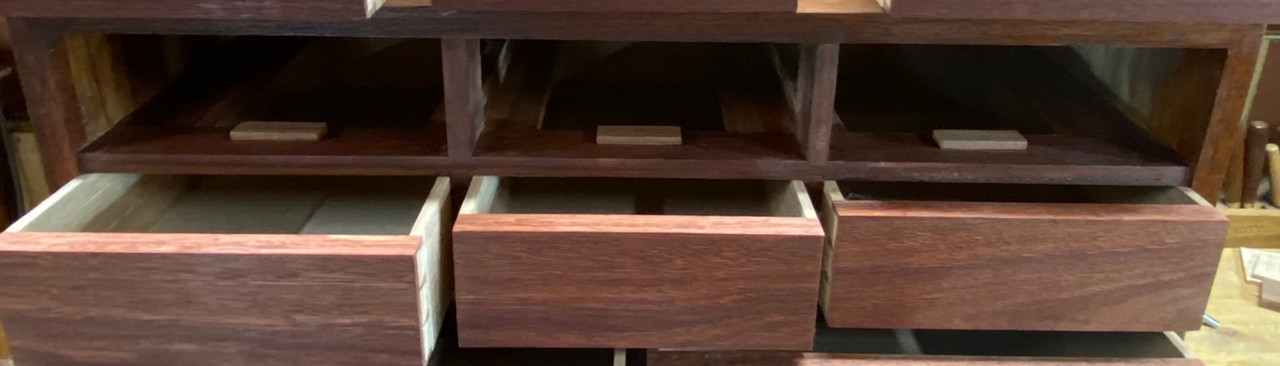
The drawers manage about 90% extension ...
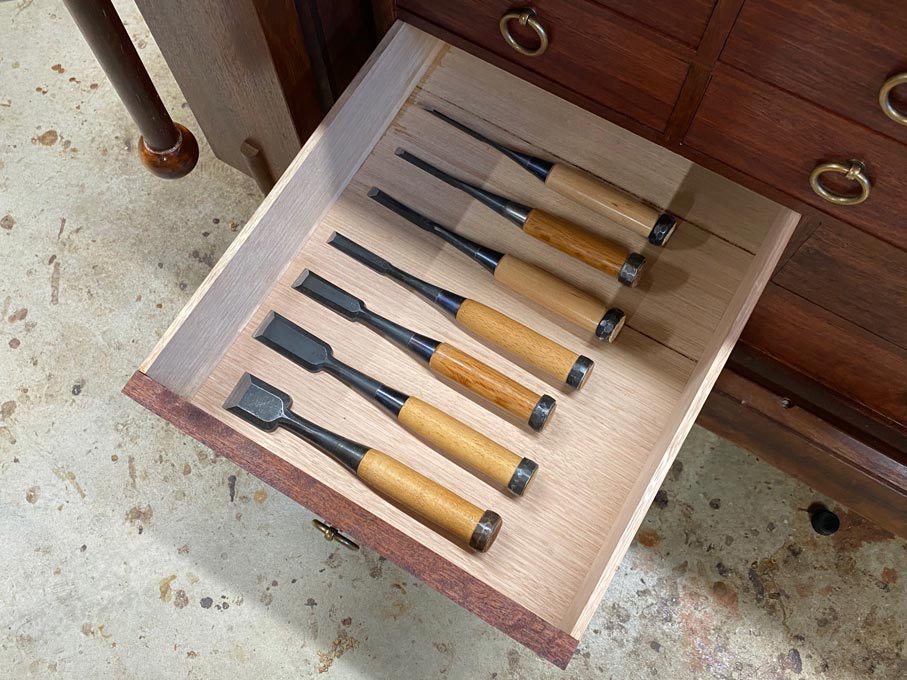
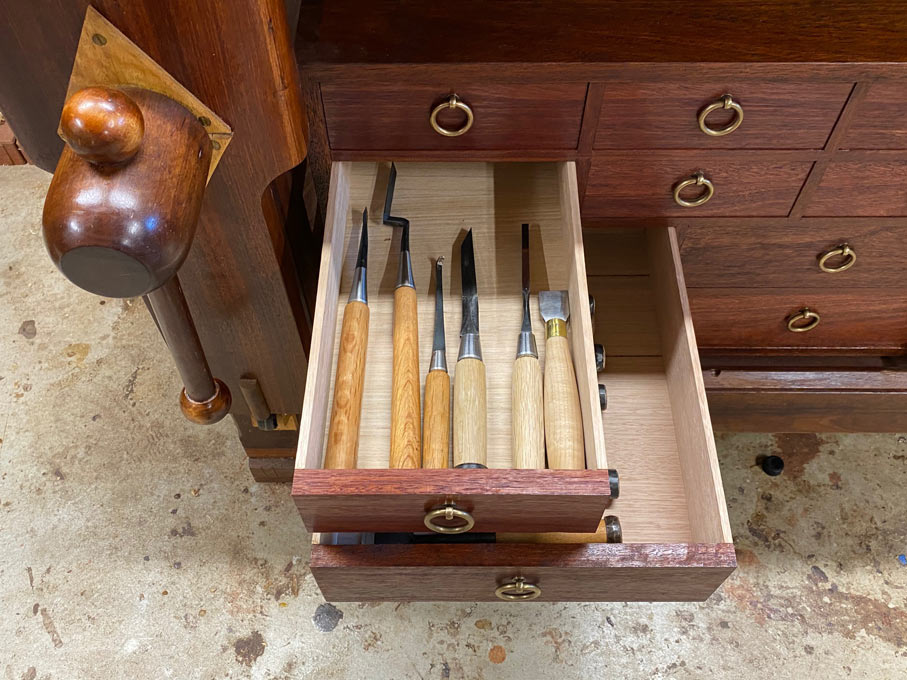
One of the first fit outs will involve this set of Kiyohisa bench chisels I have been collecting one-by-one (these are no longer available) ...
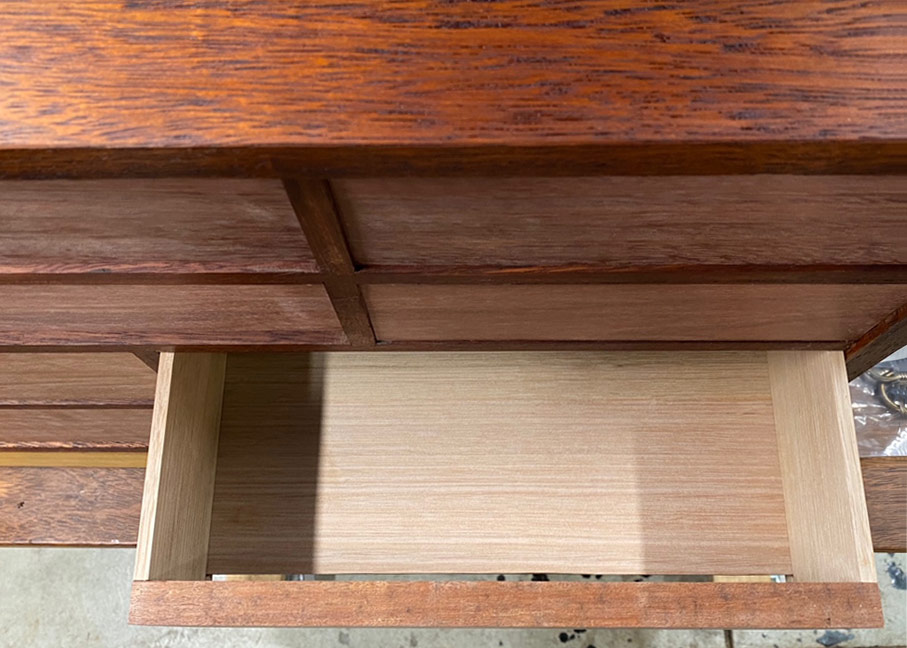
And here is one of the small drawers ...
Thanks for supporting the build to date. Hopefully there were some aspects that will prove helpful.
Regards from Perth
DerekVisit www.inthewoodshop.com for tutorials on constructing handtools, handtool reviews, and my trials and tribulations with furniture builds.
-
23rd March 2021, 06:25 AM #56
Butcher of wood
- Join Date
- Jun 2010
- Location
- Bundaberg
- Age
- 54
- Posts
- 3,426
Very nice, and looking forward to see how you tackle fitting out the drawers.
 Nothing succeeds like a budgie without a beak.
-
23rd March 2021, 08:30 AM #57
SENIOR MEMBER
- Join Date
- May 2019
- Location
- Brisbane
- Posts
- 836
Thanks for sharing the process in such detail. Has definately proven helpful to me in some of my more humble projects.
That cabinet is amazing and am looking forward to the fit out as well.
Sent from my SM-G950F using Tapatalk
-
24th March 2021, 08:04 PM #58
Senior Member
- Join Date
- Jun 2018
- Location
- Brisbane
- Posts
- 283
Exquisite work Derek, but just one comment. The handles don't do your execution justice - they look (to me) a little out of place for the overall appearance of the bench/cabinet. The rest of the design is very masculine, they have a feminine/hoop ear-ring appearance...
Have you considered classic campaign chest handles?

I reckon that would look better, and be completely flush - but restate, this is no comment on your workmanship!
-
24th March 2021, 09:44 PM #59
Be inspired. Be creative. Be bold.
- Join Date
- Apr 2001
- Location
- Perth
- Posts
- 10,820
I did consider the handles used in campaign chests. They were my first choice, and I have used them before (I started building campaign furniture before Chris Schwarz made this genre popular).
Two chests used as a stand for TV ...
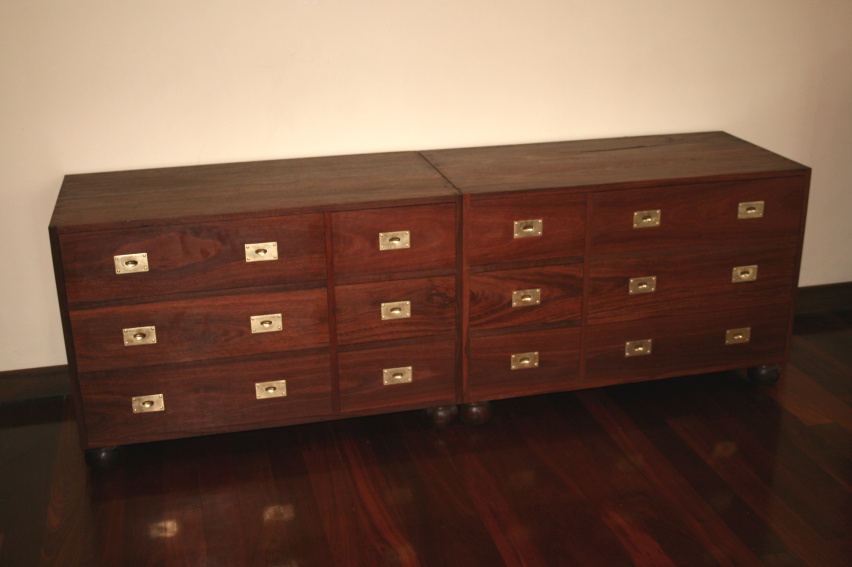
The issue with these handles is that the smallest available is too large for the drawers of the underbench cabinet. Just that simple. The smallest handle is around 2 1/2" high (roughly 65mm), and the high of the smaller drawers is 70mm. The result would look awful!
The handles I used actually look right after a little while, once you take in the whole bench ... notice how the rings link with the sliding deadman. Lastly, the brassy look is going to be toned down chemically, and the rings will be less dramatic and more subdued.
Regards from Perth
DerekVisit www.inthewoodshop.com for tutorials on constructing handtools, handtool reviews, and my trials and tribulations with furniture builds.
-
25th March 2021, 09:03 AM #60
Senior Member
- Join Date
- Jun 2018
- Location
- Brisbane
- Posts
- 283
Aha! You were way ahead of me...

 Reply With Quote


Similar Threads
-
Underbench kitchen island floor shelves
By chode in forum WOODWORK - GENERALReplies: 12Last Post: 15th February 2016, 09:21 PM -
underbench dust collection
By Bluegum in forum DUST EXTRACTIONReplies: 1Last Post: 7th February 2013, 07:40 PM -
Ply for cabinets
By noelb in forum TIMBERReplies: 0Last Post: 20th May 2011, 08:06 PM -
Underbench Storage of Router table and thicknesser
By Dengue in forum WOODWORK - GENERALReplies: 4Last Post: 24th November 2010, 05:07 PM -
1hp Underbench Dust Extractor
By PEN in forum HAND TOOLS - POWEREDReplies: 8Last Post: 14th April 2005, 11:02 PM
