

 Thanks: 0
 Likes:
  Needs Pictures: 0
 Picture(s) thanks: 0
Results 16 to 30 of 42
-
27th March 2013, 09:23 AM #16
 Rank Beginner


- Join Date
- Jun 2011
- Location
- Melbourne
- Posts
- 484

The narrator optimistically says something along the lines of "creating X will be like child's play" and goes on to show an exceedingly expensive, monstrously complex machine that resembles a Transformer operated by a slightly nervous-looking little man.
Only the Germans would build a bench like this:
183182-caterpillar-power-loader-j-5000-i-aliens-i.jpg
It's a while since I laughed so hard. I am very fond of the ancestors, but man, they haven't kept up with trends in Musak.
Anyway I'll be watching this build with great interest.Cheers,
Eddie
-
27th March 2013 09:23 AM # ADSGoogle Adsense Advertisement
- Join Date
- Always
- Location
- Advertising world
- Posts
- Many
-
28th March 2013, 03:43 PM #17
Senior Member
- Join Date
- May 2006
- Location
- Somewhere on the Central Coast; Tasmania
- Posts
- 158
If you want to hear musak just type Guido Henn into your search engine.. Their is the the designer of the bench being built in this thread and their is an extremely popular musician of the same name.. Originally Posted by snafuspyramid

Don't get the two confused or there may be issue with the neighbors re excessive noise from the shed
Andrew
-
20th April 2013, 10:05 PM #18
Senior Member
- Join Date
- Oct 2007
- Location
- Tasmania
- Posts
- 132
What a great looking bench, can't wait to see the finished product. Are you planning to make the guide rail set up?
-
21st April 2013, 07:46 AM #19
Senior Member
- Join Date
- Nov 2008
- Location
- Hunter Valley
- Posts
- 208
Yep going to whole hog.
In saying that, I am going to mount the Kreg mitre saw system to the long rail instead of what this guy has done with the home made stops etc.
......bloody carbatec sent for the wrong thing (mitre guage not measuring system.....) and I've not got around to returning it yet.....
Also waiting on some hardwood which I'll get next week to progress things. Hopefully I'll add a hardwood end to both ends of the table (unlike one as this guy has) as I dont like where I got to with the current ones
Upstate:
- have mitre track which I need to install
- found a metal worker locally who is drilling the plate for me (going to take 3 weeks)
-
10th June 2013, 04:08 PM #20
Senior Member
- Join Date
- Nov 2008
- Location
- Hunter Valley
- Posts
- 208
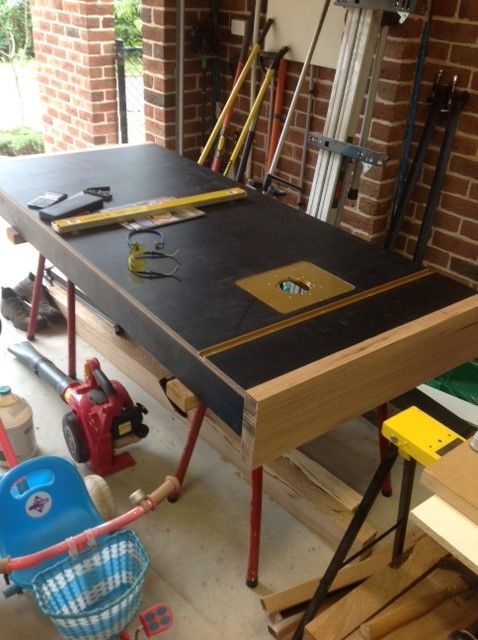
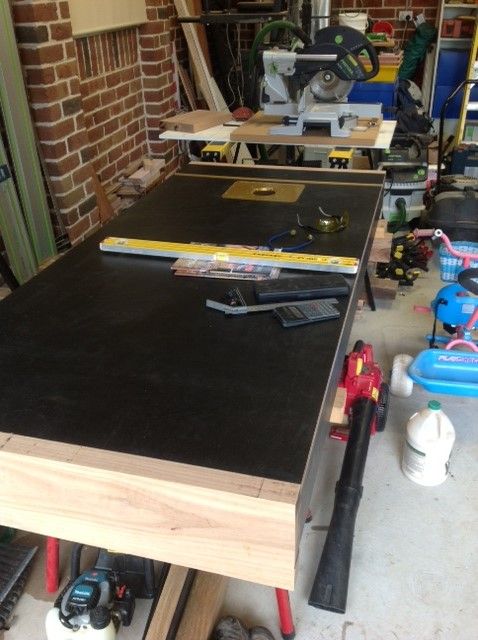
Had some time this weekend to progress things a little - I've had a few set backs with the ends. But they're just about right now:
 [/URL]
 [/URL]
-
10th June 2013, 04:18 PM #21
Senior Member
- Join Date
- Oct 2007
- Location
- Tasmania
- Posts
- 132
Good to see it progressing

-
10th June 2013, 11:07 PM #22
Skwair2rownd
- Join Date
- Nov 2007
- Location
- Dundowran Beach
- Age
- 76
- Posts
- 19,922

Been watching but haven't commented until now.
Form ply coated with hard wearing and slippery resin is
a good choice of material.
Looks great so far!!!!
-
11th June 2013, 10:54 AM #23
Senior Member
- Join Date
- Feb 2011
- Location
- Brisbane - Southside
- Posts
- 273
Where's the unlike button ? Originally Posted by wheelinround

This Spurs supporter will also be watching despite the silly rag on the wall.
-
11th June 2013, 02:51 PM #24
Senior Member
- Join Date
- Nov 2008
- Location
- Hunter Valley
- Posts
- 208
Thanks for the comments all, I'm pretty happy with it so far....slow going though.
Unfortunately us toon fans dont have much to cheer about at present....other than not being relegated!
That's what I thought...this stuff marks relatively easily and the edge isn't that strong. I'm not sure about longevity on this front. I can see myself PVC edging it at some point. Originally Posted by artme
I think when I am finished I'll give it a good clean and possibly a wax (better test this first)
-
16th June 2013, 09:42 PM #25
Senior Member
- Join Date
- Nov 2008
- Location
- Hunter Valley
- Posts
- 208
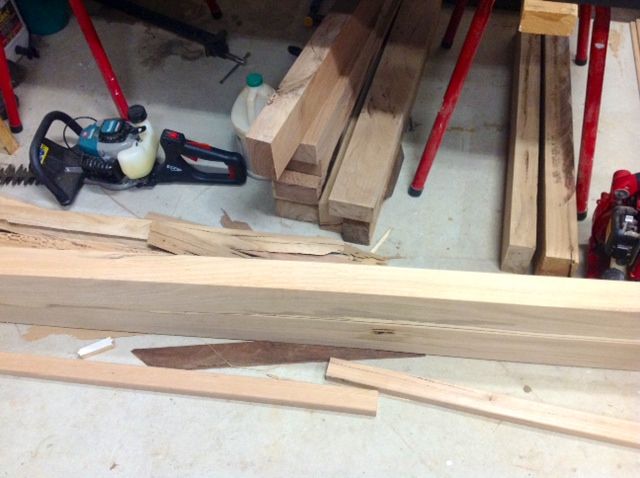
Spent the weekend milling the timber for the frame, just needs a sanding now:
 [/URL]
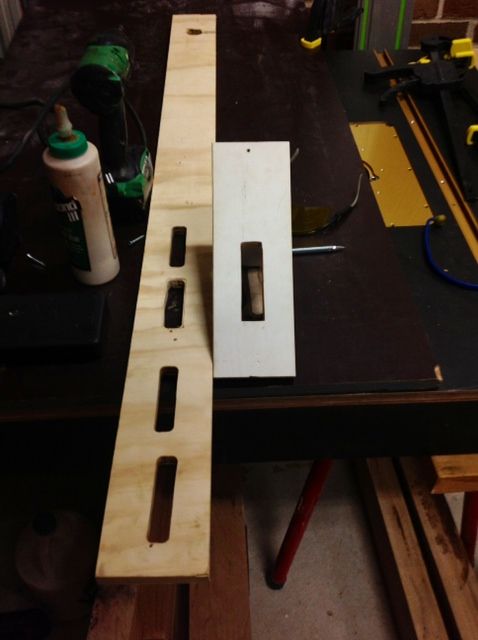
...also working up a simple mortise jig - I'm going to use floating tenons of shot lengths of spotted gum decking..see how it goes.
The "jig" is basically a bit of 19mm pine with a profile cut out of it for my router's guide brush to sit in. Seems to have worked ok
Here's the jig
 [/URL]
On the router
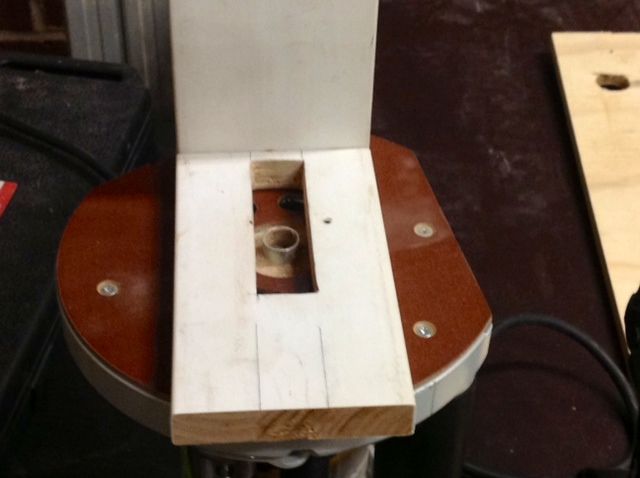 [/URL]
Test cut in some ply with a length of decking. Its a reasonable fit, slightly wonky but not bad for an amateur
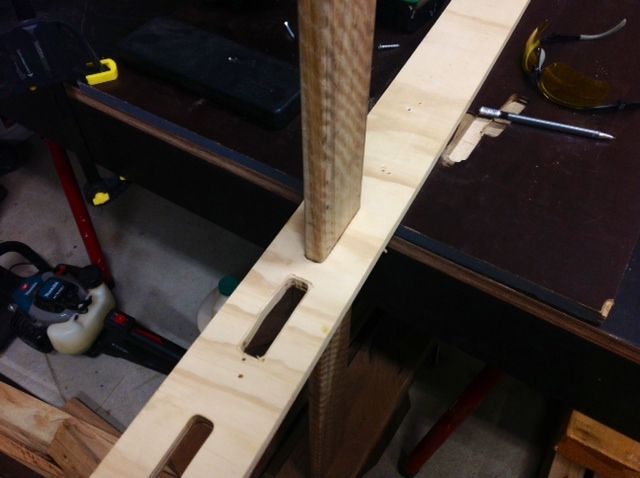 [/URL]
-
18th June 2013, 08:53 AM #26
Mildly Moderate
- Join Date
- Nov 2007
- Location
- Albury Well Just Outside
- Posts
- 13,315
Originally Posted by Elill
We prefer the term hobbyist.
-
18th June 2013, 10:13 AM #27
Senior Member
- Join Date
- Nov 2008
- Location
- Hunter Valley
- Posts
- 208
LOL, well from one hobbyist to another, in your expert hobbyist opinion, what do you think of my idea for the tenons?.....I've not done this before, it'll be my first M&T joint
-
7th July 2013, 09:27 PM #28
Senior Member
- Join Date
- Nov 2008
- Location
- Hunter Valley
- Posts
- 208
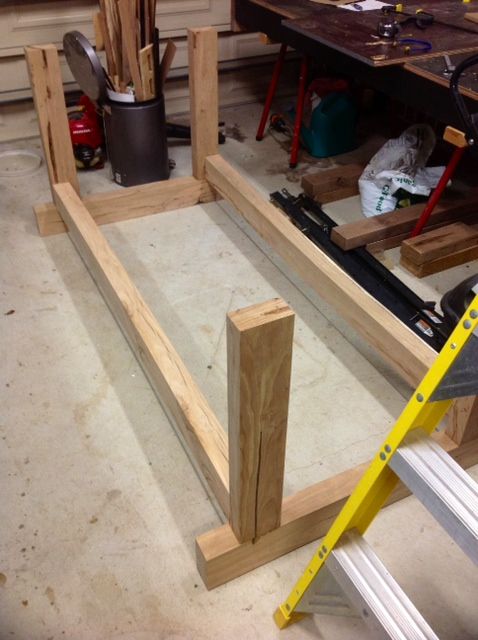
Exciting day, my first mortise and tenon joint....ok floating tenons, but still a first for me!
Here are the legs and cross members
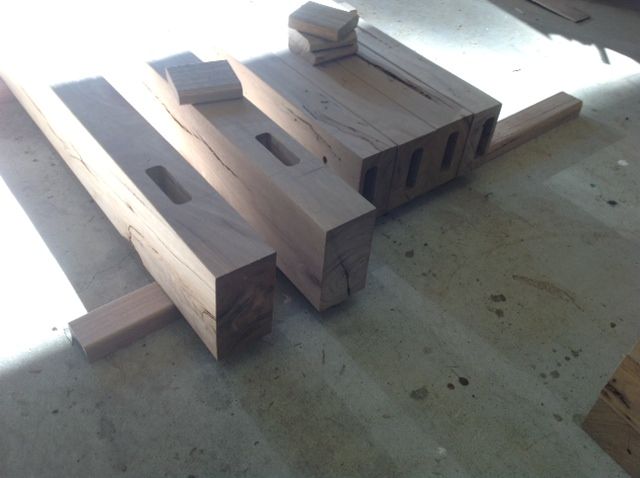 [/URL]
Here is the floating tenon, made of 19mm spotted gum decking
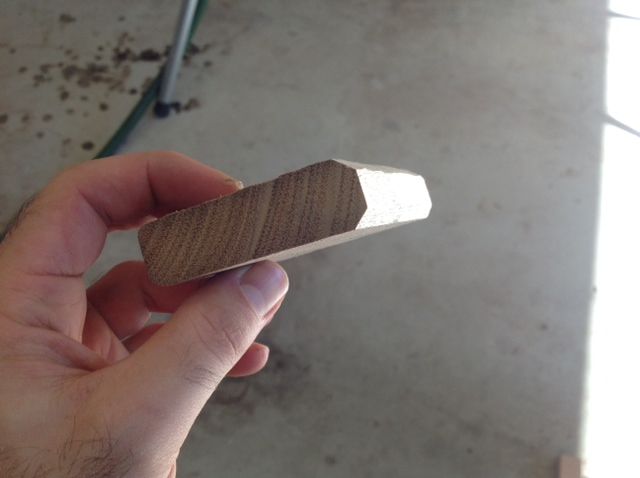 [/URL]
All seems to have gone ok. They're downstairs in clamps at present, but all nice and square etc. If you have a keen eye you'll see the mortises aren't perfectly centred....this is due to different width timbers being used and the one jig
I got that nice popping sound when pulling out the floating tenons, pretty cool.
Spent the rest of the afternoon cleaning and tidying the garage. With a bit of luck I'll have the base finished next weekend. Then I'll do a new stand for the drop saw and then back into the tricky parts of the bench
-
9th July 2013, 04:14 PM #29
New Member
- Join Date
- Jul 2013
- Location
- Queensland
- Posts
- 1
Great project and thanks for the pic's. I would like to build one also. Did you manage to get the plans from the HolzWerken.net site? if you did could you let me know how you got them as my German is non existent.
You mention the garage space is at a premium. Have you seen Guido's video on the Festool German site? It's called "catastrophe". There is a link on the FOG site where he shows him getting really organised. German efficiency or being anal? I really liked it.
Cheers
-
14th July 2013, 08:11 PM #30
Senior Member
- Join Date
- Nov 2008
- Location
- Hunter Valley
- Posts
- 208
Hi Andrew,
I purchased the magazines from their website, relatively straight forward. Its not going to be exactly the same, partly because I stuffed up part of the top and partly because I am "customising" it (and partly because I cant be bothered banging it all into google translate). I haven't seen his video, sounds interesting, I'll dig around for it.
Here is this weekend's progress.....not a lot. Its not glued together as there are 4 "stringers" that go in between:

 Reply With Quote

Similar Threads
-
My Garage Workbench
By BenSwayne in forum THE WORK BENCHReplies: 8Last Post: 20th November 2012, 05:18 AM -
building a garage workbench for under $100
By garageman in forum THE WORK BENCHReplies: 1Last Post: 6th August 2011, 07:04 PM -
Well ___ G'day from Downunder of Downunder
By Bono in forum G'day mate - THE WELCOME WAGON -Introduce yourselfReplies: 3Last Post: 25th July 2011, 06:31 PM -
Garage workbench for a newbie.
By J-Tim in forum THE WORK BENCHReplies: 16Last Post: 21st February 2011, 10:06 PM -
The Downunder Clock
By SAISAY in forum WOODWORK - GENERALReplies: 7Last Post: 24th January 2009, 06:17 PM
