

 Thanks:
  Likes:
  Needs Pictures: 0
 Picture(s) thanks:
Results 1 to 8 of 8
-
17th November 2022, 10:30 AM #1
 GOLD MEMBER


- Join Date
- Nov 2004
- Location
- Millmerran,QLD
- Age
- 73
- Posts
- 11,135
 Cubism - Ready for Judging thread
This thread is, as the title suggests, the one where you submit your finished entry for judging. There should be a detailed description of the materials used in up to five hundred words, but rest assured, the judges are not going to be counting: It is just a guide for you. Any special techniques or little tricks as well as difficulties are welcomed in the description and can should be accompanied by up to twelve pix. The pix are very important and on the picture aspect we encourage you to post as many as you like up to twelve. In fact twelve should be both maximum and minimum as they are considered most important. Did we mention that before?
The pix can be new or previously posted.
Title your post with your Forum name and "Ready for Judging."
Good luck to you all and thank you for participating. The judges are going to have an extremely difficult task selcting a winner, but of course, in reality you are all winners.
One last mention is that only the competitors should post in this thread and only with their own entries. However "Likes," "Thanks" etc are acceptable.
Regards on behalf of the judges
Paul
Edit; One additional request is that you give the overall dimensions of your work and nominate which of the two sizes of cube (250mm or 500mm) you are placing your entry.Last edited by Bushmiller; 17th November 2022 at 12:06 PM. Reason: Another request
Bushmiller;
"Power tends to corrupt. Absolute power corrupts, absolutely!"
-
17th November 2022 10:30 AM # ADSGoogle Adsense Advertisement
- Join Date
- Always
- Location
- Advertising world
- Age
- 2010
- Posts
- Many
-
18th November 2022, 08:44 AM #2
aka The Wooden Potter
- Join Date
- Jul 2005
- Location
- Flinders Shellharbour
- Posts
- 5,692
Vortex, 'time for judgment' hughie
Well that time is here.
307128709_669923017899969_8387265207940263472_n.jpg
Vortex in Camphor Laurel 10 open spirals 22.5cm high by 15cm in dia, oil finish, weight 200gm
This particular design has been in the back of my mind for sometime, with design I find getting onto paper is often a major step as it forces me to consider every aspect of it
I used Camphor Laurel for ease of carving but with that comes fragility and that was major issue to over come when it came to finishing. There are no shorts cuts with this piece and all boils down to patience and an eye for the details. Some technique obviously involved, but its very simple and is easily taught as it uses common place tools. What I have designed and purpose built make life easier, but are not necessary to make one of these.
IMG_2934-horz.jpgIMG_2974-horz.jpgIMG_3267-horz.jpg
The layout was done on my purpose built lathe. I use this lathe for all my layouts as it has a custom indexing system 15 to 98 in about 8 steps, across two discs mounted behind the chuck, included in this is a fractional adjustment along with a unique custom made compass for the scribing of the layout lines.
Carving is done with a mix of Dremel and conventional tools , files, rasps, small handsaws for sandpaper I use Noritake Astra Dot exclusively and have done so for years. One of the aspects of this piece is that of thickness was important. Where normally I'm fairly flexible of wall thickness, top and bottom thin and thick in the middle to allow deeper carving to accentuate the spirals. The thickness needed to be the same all over to give idea of lightness within the bounds of whats practical.
Due to the fragility of this piece it was finished inside and out completely before layout and a coat of Danish Oil applied to the inside and allowed to dry completely, but not the outside as I mark out in pencil an oil finish wont take the pencil markings. Once marked out it then taken to my carving jig. This jig is also custom made and takes any one of my SN2 chucks, universal in movement and fully rotational through 360 degrees and its used for my embellished pieces.Last edited by hughie; 18th November 2022 at 09:25 AM. Reason: re-arrange
Inspiration exists, but it has to find you working. � Pablo Picasso
-
18th November 2022, 08:38 PM #3
Timber recyclist
- Join Date
- Feb 2009
- Location
- Adelaide - outer south
- Age
- 67
- Posts
- 937
Labr@ - Ready for judging
My original idea was for a box with marquetry tambour and several complicating factors. The idea behind these was to challenge myself and maybe learn a few things.
A proof of concept model was made and this proved that it was possible to achieve some of the design goals but others had to be abandoned. While dithering about materials for the box carcase I was sidetracked by several factors including making some other small boxes, going on holiday and having a request for a special box to hold received greeting cards.
At this point the cubism project switched to being a redgum box with a marquetry panel on the lid.
The box was designed with dimensions to suit the requirement � ie sized to suit greeting cards to be stored in it and also with the marquetry design supplied by the customer. The lid was to be made separately by framing the marquetry panel and adding locating strips inside.
Some redgum was purchased for the box and the pieces for the sides were made by splitting a board to get the continuous grain effect. Dimensioning and smoothing were done by scraper plane and abrasives and took ages due to the squirly grain.
sIMG_20221103_165951 [800x600].jpg
For the marquetry I already had some timbers in stock to cut veneers from. Made a veneer cutting jig inspired by the John Samuels design and cut the veneers needed. Did the marquetry on 3mm MDF backing and used purchased karri veneer (already in stash) on 3mm MDF for the bottom panel.
The grooves for panels to sit in were cut into the lid frame pieces and sides by hand using a Record 043 plough plane.
IMG_20221029_175304 [800x600].jpg
Mitres for the lid frames and locating inserts were done with hand tools. Made a saw guide for this. Frame pieces needed some trimming but the inserts fitted straight off the saw. Had to have 2 goes at assembling the lid due to too many gaps on the first try.
IMG_20221111_205224 [800x600].jpg
Used my home made router table to cut the mitres on the box sides and glued up the box using rubber bands as clamps. These can exert a remarkable amount of force if enough bands are added.
IMG_20221111_134124 [800x600].jpg IMG_20221111_142541 [800x600].jpg
Final result
The box came out fairly much as planned but I also gained a few things from the challenge.
I now have a scraper plane, a veneer cutting jig and a saw guide that I made. I also have a plough plane and 2 waterstones that I bought. All of these came about because of a need that was highlighted by the activities in the challenge.
After a coat of white shellac followed by traditional wax (both Ubeaut) the finished box looks like this:
P1120376 [800x600].JPG P1120381 [800x600].JPG P1120391 [800x600].JPG P1120392 [800x600].JPG P1120393 [800x600].JPG P1120397 XXX [800x600].JPG P1120398 [800x600].JPG
Size is 270 x 201 x 130 so it fits into the 500mm cube category.
The best thing of all is that the recipient saw it finished and gave her enthusiastic approval .
Cheers, Bob the labrat
.
Cheers, Bob the labrat
Measure once and.... the phone rings!
-
19th November 2022, 10:30 AM #4
Intermediate Member
- Join Date
- Mar 2022
- Location
- Ararat
- Age
- 46
- Posts
- 29
CRaatz - Ready for Judging
I got given access to a good amount of unmilled timber harvested decades ago by a 90 year-old local and now friend here in Ararat Victoria. All he asked for in return was a smallish jewellery box made out of the Banksia log he had amongst his stash. I had built one jewellery box previously out of She oak for one of my daughters, so I felt confident enough to try again and thought at the same time to enter it into the 250mm3 Cubism contest.
SANY0004.jpgBeing riddled with grub-holes, this log was a great candidate for resin filling. SANY0022.jpg I choose this billet among the three good ones I made.
SANY0025.jpgSANY0027.jpgSANY0028.jpg
I sent the billet through the bandsaw and got the four sides and lid and base out of it at about 15mm thick, later thicknessed to about 12mm. With a couple of rebates made with the router, 4 pins out of the same Banksia using a 6mm plug cutter, and sanding the inside surfaces to 120grit, it was assembly time. I used a No. 4 plane to give the base a 45o chamfer all the way around before proceeding to glue it to the sides. I used Pear timber plugs/pins helping attach the base. I used an Ogee router bit to mold a decorative shape on the lid. I sent the assembled box through the bandsaw to separate lid from base.
SANY0033.jpgSANY0036.jpgSANY0043.jpg
Having earlier on figured out I had heaps of depth to the box, I decided to make a lift-out insert with 3 equal partitions. The lower compartment has 1/3, 2/3 sized compartments for larger items. I used Spalted Cypress as stock for the insert which is assembled with box joints. I used red water-based dye stain to colour it to continue the red theme. Red flocking was applied to the internals.
I cut-in the recesses for the hinges and test fitted. Having fixed my miss-aligned hinge screw holes and having repaired a flawed area of resin-fill on the lid I proceeded to finish the box. I installed 5mm round magnets in the lid and base. All faces that were covered with flocking were sanded to 120grit. All others to 240. All resin-fill areas were sanded through to 2000 & 3000 on the lid only. I used Cabot's Cabothane Clear Gloss aerosol as a lacquer finish.
SANY0057.jpgSANY0060.jpgSANY0065.jpg
Internal dimensions - 172x70x100mm
Footprint - 200x88x116mm
Products Used:SANY0047.jpg
Things I was pleased with - That the red resin was reserved to the lower parts of the sides of the case and therefore didn't dominate the beautiful Banksia grain. The continuous grain from case to lid. The ogee lid detail. The two-tiered layout with removable upper internal insert. The spalting on insert. That the insert box-joints are perfect. The even shadow line between lid and case. The narrow clearance between insert and box.
Things that may have improved the result - try box-joints or dovetails on case over a simple rebate and use higher-end hinges, both mainly for aesthetics. I could have repeated the ogee on the case base to mirror the lid detail.
-
22nd November 2022, 03:47 PM #5
Woodie.
- Join Date
- Dec 2006
- Location
- Cudgen NSW
- Posts
- 103
 Cubism 2022 ready For Judging RGP
Hi there judges here is my entry for the competition. Australian coachwood, recycled from an old desk mainly. Sloping sides using hand cut London style dovetails. removeable tray, full mortice keyed lock & leather base lining. Finish is Organo oil & beeswax.Cubism 2022 6.jpg
Cubism 2022 50.jpgCubism 2022 54.jpgCubism 2022 53.jpgCubism 2022 52.jpgCubism 2022 51.jpgCubism 2022 49.jpgCubism 2022 48.jpgCubism 2022 47.jpgCubisn 2022 45.jpg The 3 degree slope on the sides made the box quite difficult to assemble, cutting the lid section off was also tricky. Box final dimensions 230mm square at the base & also at the outer top, box is 210mm in height. The tray is 190mm square & 80mm high to top of the handle.
Thanks. RGPLast edited by RGP; 23rd November 2022 at 05:49 AM. Reason: adding dimensions
[/SIGPIC]Pigs a#@*.
-
22nd November 2022, 04:07 PM #6
 GOLD MEMBER

- Join Date
- Nov 2011
- Location
- Melbourne
- Posts
- 7,013
RGP, Originally Posted by RGP

Can you please edit your thread, an include overall dimensions.
Cheers Matt(Judge)
-
22nd November 2022, 08:55 PM #7
SENIOR MEMBER
- Join Date
- Mar 2009
- Location
- Sydney
- Posts
- 651
'shanesmith80' ready for judging
I think as I said, my daughter asked if we could buy a backgammon board. Buy? I said, nah I'll make one!
My original plan was to have backgammon one side and chess the other. Although I had some ideas of how to do it, the many challenges of trying to get both boards to line up when the box was opened was too much so decided to just go the backgammon board.
As with all well planned things I start, I started with no plan, and started cutting triangles. The first challenge was to cut a template triangle. Unfortunately I can't remember how I did this, I think I cut as close as could with bandsaw then planed to the line. Anyway I didn't even realise I was in the competition at this stage so didn't take any photos. I was so intent on keeping it a mystery. So what to use for the outside face.
Some not very flat burl veneer which come from my partners late grandfather.IMG_2897.jpg
After 2 weeks of being pressed it was pretty flat and glued it down to some MDF.IMG_2856.jpg
Rounded up some Blackwood offcuts, cut them up and glued them into a mitred box. IMG_2858.jpg
Cut it open, added some hinges, and what do you know, a backgammon board.IMG_2902.jpg IMG_2904.jpg IMG_2905.jpg
This was also my first time at trying flocking, which was surprisingly easy and not too bad of a finish.
Hmm, I guess we will need some pieces for playing with. Now, turning is definitely not my strong point(come to think of it, not sure I have found my strong point yet) but thats never stop me before.
Turned up some sticks from an offcut of Jarrah and a piece of Salmon Gum from the inlaws farm.IMG_2901.jpg The one on the top is Qld maple to practice. Are they all the same diameter? Not even close, its handmade!
Cut them up into little disks, of which only a few went flying across the workshop.IMG_2906.jpg These were sanded and a small round over putAttachment 519530 on top, then also put some flocking on the bottom of these.
For fun had a go at making some dice and a little dice thrower thingy. All I can say about them is, they work.
IMG_3050.jpgIMG_3056.jpgIMG_3051.jpgIMG_3052.jpg
Here's some action shots of the game I just played with my daughter. Yes, i lost..
Its 430 x 270 x 80mm, so 500mm cube category.
cheers.
-
30th November 2022, 06:27 PM #8
Be inspired. Be creative. Be bold.
- Join Date
- Apr 2001
- Location
- Perth
- Posts
- 10,824
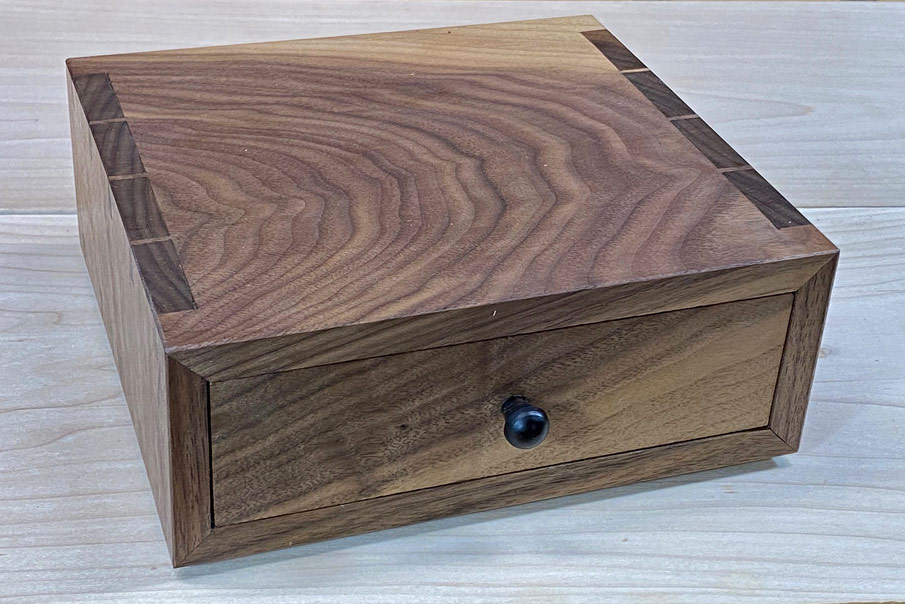
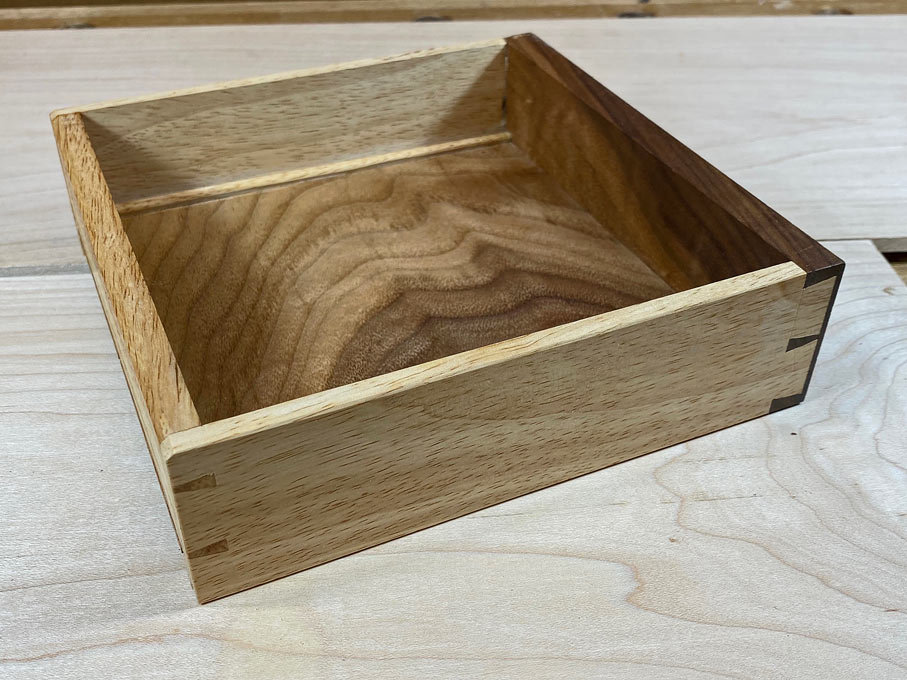
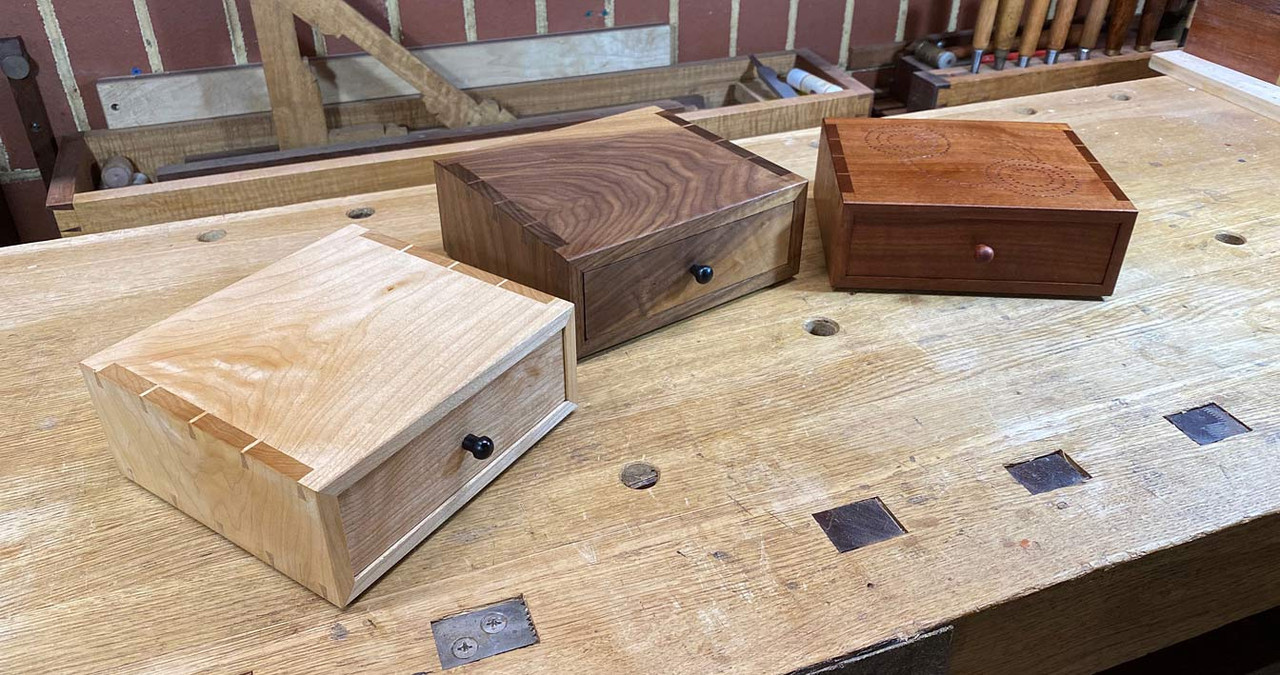
Okay PauL, in the spirit of the forum, here are my boxes. These were gifts for family and in-laws at my son's recent wedding.
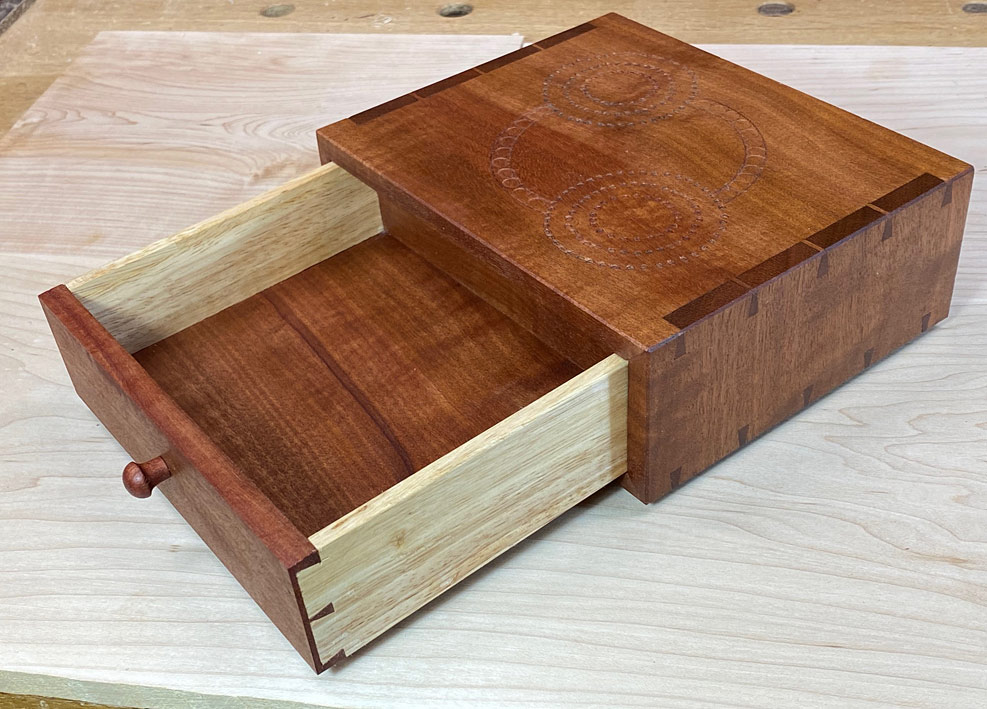
This was for my new in-laws, with an Aboriginal-inspired inscription indicating the joining of two families by members of the other. Makore and Tassie Oak.

Mitred-through dovetails ...
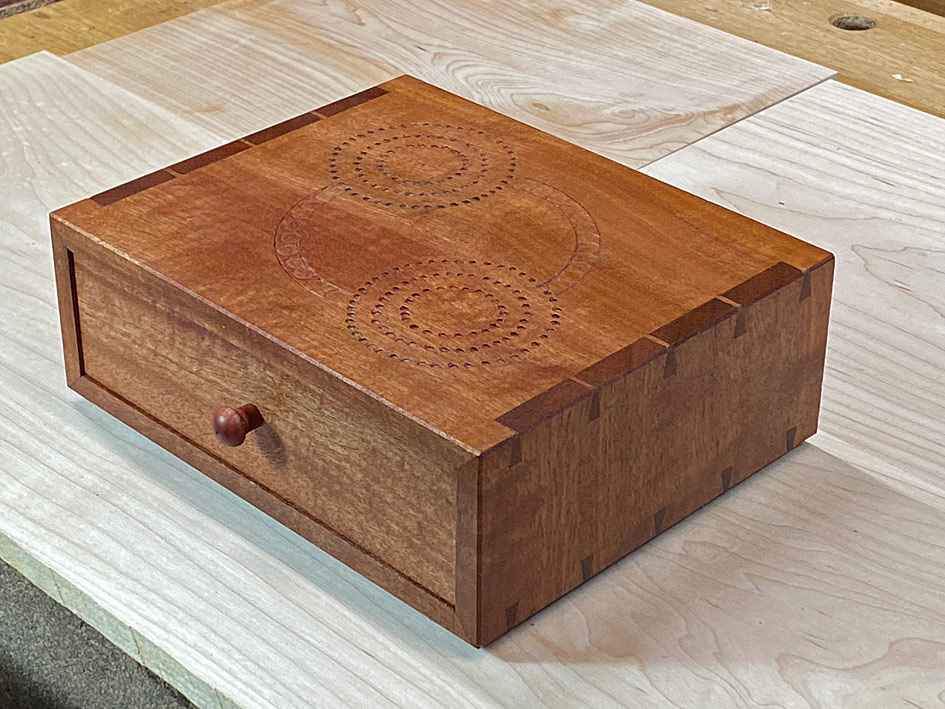
One aim was to make the inside as important to the whole as the outside ...
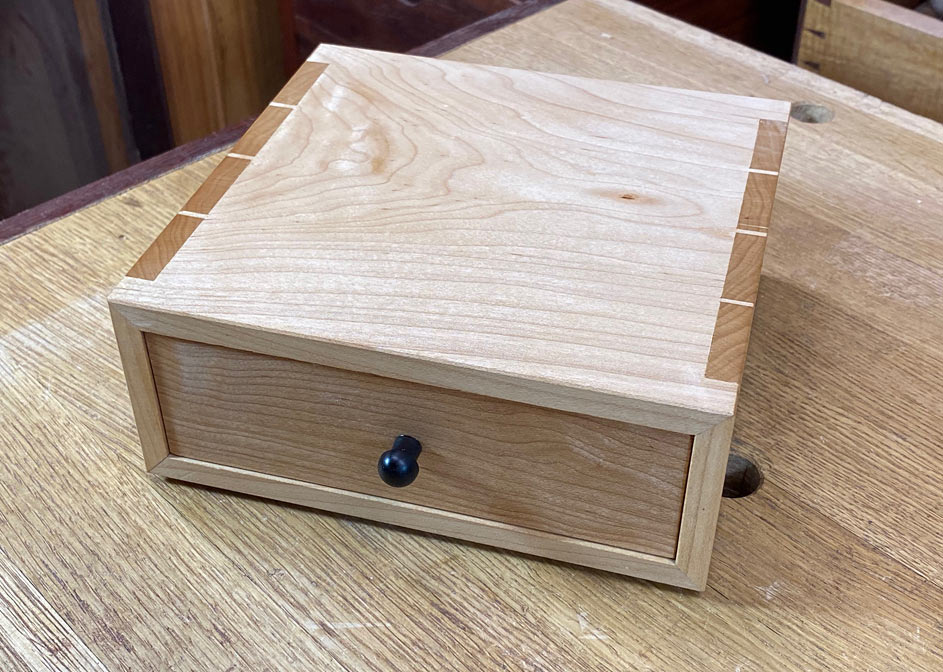
A second box went to my son's godmother, who travelled from Sydney. This is USA Hard Maple though out. The aim was a softer, feminine feel ...
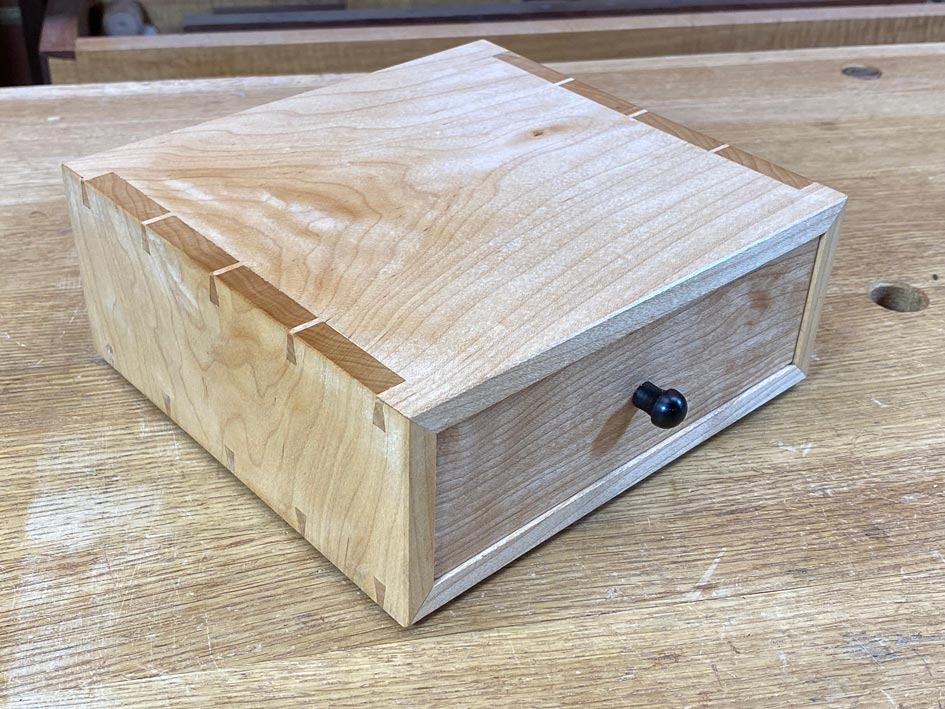
Waterfall sides.
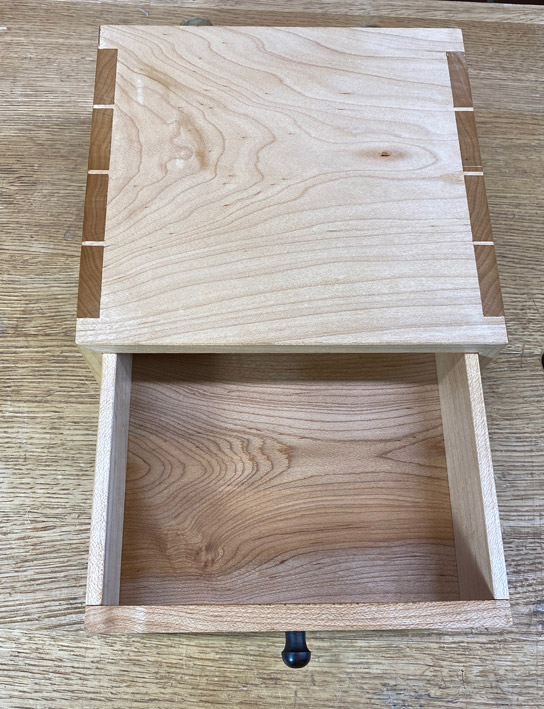
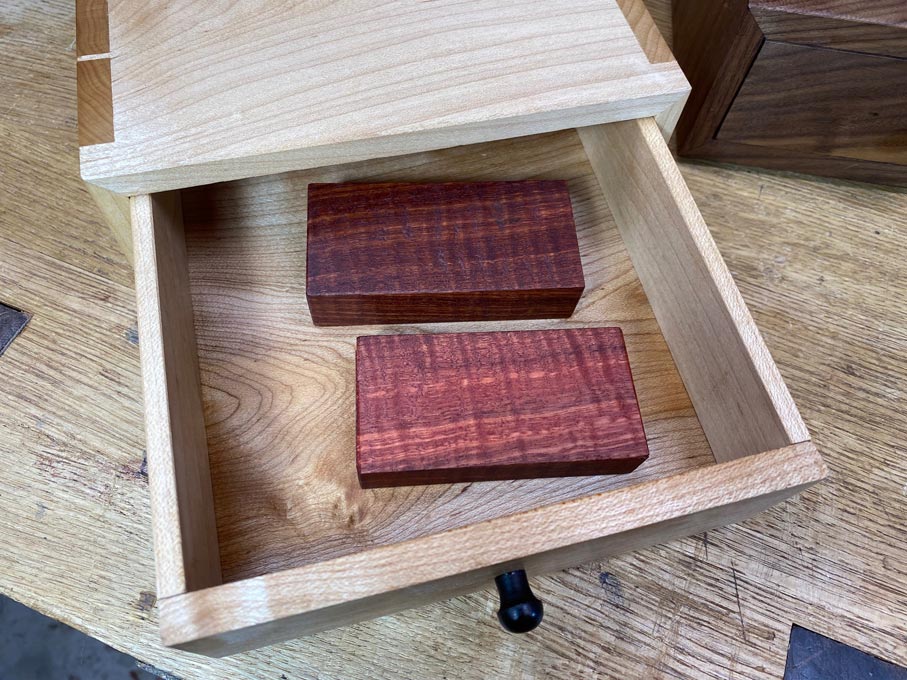
The third box went to my brother-in-law and wife from NZ. This is in USA Black Walnut. The feature was a waterfall over the drawer ...
And a drawer with slips ...

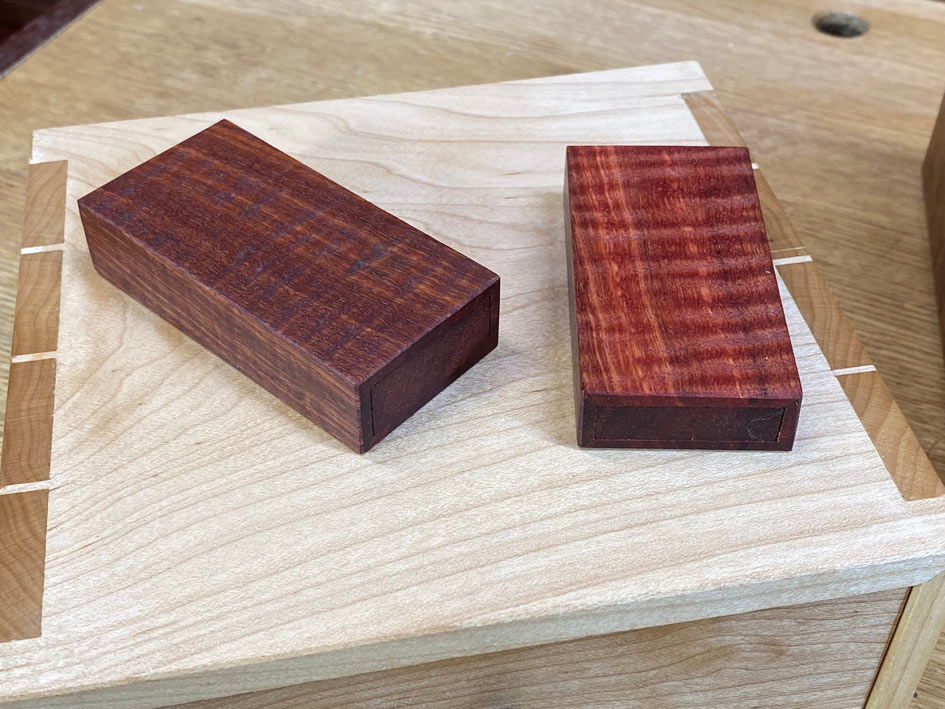
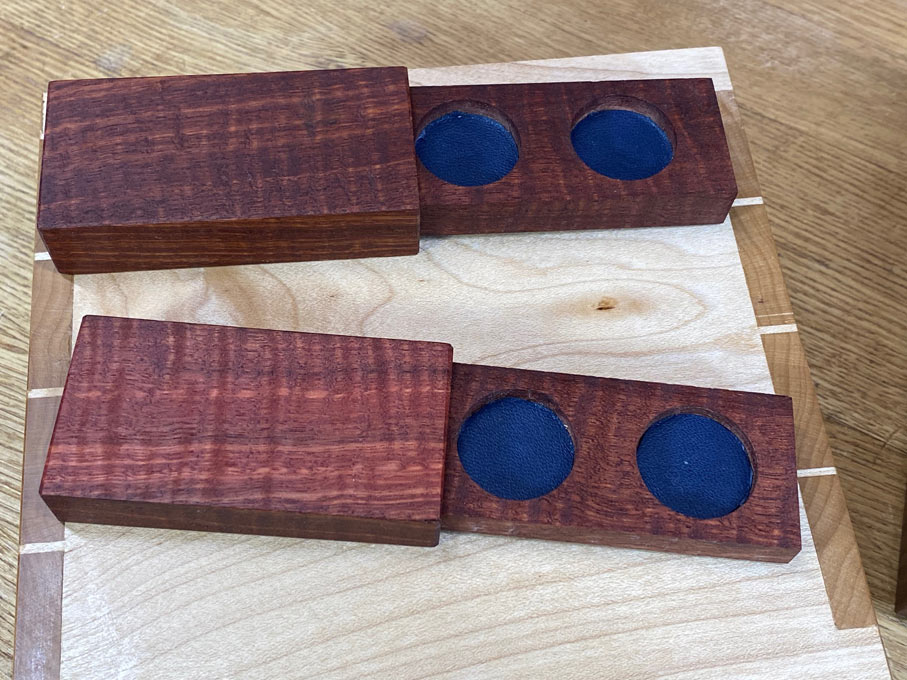
Bonus wedding ring boxes in Fiddleback Jarrah ...

Regards from Perth
DerekVisit www.inthewoodshop.com for tutorials on constructing handtools, handtool reviews, and my trials and tribulations with furniture builds.


 Reply With Quote


Similar Threads
-
Plane Complete, Ready for Judging
By IanW in forum PLANE CHALLENGE 2020-21Replies: 137Last Post: 9th July 2021, 03:14 PM -
Judging Distance
By Rodgera in forum WOODIES JOKESReplies: 0Last Post: 20th August 2016, 10:32 AM -
Judging blade height
By Arron in forum TABLE SAWS & COMBINATIONSReplies: 4Last Post: 26th November 2012, 10:57 PM -
Judging good steel
By Arron in forum HAND TOOLS - POWEREDReplies: 2Last Post: 18th August 2003, 10:49 PM
Tags for this Thread
acceptable,
behalf,
competitors,
considered,
description,
difficult,
entries,
extremely,
forum,
judges,
judging,
likes,
luck,
mention,
participating,
paul,
pix,
post,
previously,
ready,
reality,
rest,
selcting,
task,
thread,
title,
twelve,
winner,
winners,
words
