

 Thanks: 0
 Likes: 0
 Needs Pictures: 0
 Picture(s) thanks: 0
Results 136 to 150 of 360
Thread: Building a Waller TS540
-
27th July 2009, 11:26 AM #136
 Awaiting Email Confirmation


- Join Date
- Jul 2009
- Location
- Melbourne
- Posts
- 3
 Paint Finish
Rob,
Paint Finish
Rob, Originally Posted by rob540

Hi, have you explained on this site how you managed to get such a good finish to the paintwork with a roller? If so, can you point me to it.
Thanks
-
27th July 2009 11:26 AM # ADSGoogle Adsense Advertisement
- Join Date
- Always
- Location
- Advertising world
- Posts
- Many
-
27th July 2009, 12:26 PM #137
SENIOR MEMBER
- Join Date
- Oct 2008
- Location
- Victoria
- Age
- 71
- Posts
- 631
Hi Phil, not sure that I have. Welcome to the forum by the way.
The recommended rollers are the little synthetic mohair ones, which I used for lots of other stuff, including epoxy, but I used 4" foam rollers for these coats. They are the ones recommended by Boatmik in the thread "Brightside Preparation" (I think).
I'm really no painter of flat areas, so although the photos look OK, the finish is still not 'new car' quality. But I'd rather have a serviceable finish that can be touched up by roller or brush without the new work screaming out to be noticed because of its different texture.
Anyway, it seems the trick is to try to keep the pace so that any wet edge(s) you have can be re-visited before the paint has finished flowing out. It seems particularly important to resist the temptation to overwork an area, because that's when it builds up a texture. Errant bits of sandwich, bottle tops* and dog fur should be left on the paint until it dries, because you'll make less mess removing them later. Whole dogs should be removed at once because they wriggle.
The foam roller is good at depositing a thin film and the soft edges enable you to remove the edge lines by reducing the pressure as you go over again. The foam does produce little bubbles though and these are best removed (as quickly as possible without panicking while the wet edge getting dryer is making you nervous) by going over the work without any pressure at all. This, I sometimes have to think hard about, because hurrying tends to make me want to be more forceful!
I resigned myself to a bit of wet and dry work after each coat because the shapes on the boat mean that there are too many (no longer) wet edges for one person to get around to in time. I've used 320 W&D to ensure that the next coat has a flattish surface to adhere to, rather than building up the imperfections of each coat into the next.
The thing that I've found hardest is maintaining the correct level and angle of light while moving around the boat. The right light is so important in not missing little areas, and when sanding, in seeing the textures that you need to remove. It is so much easier when the sun shines, but I've had precious little of that and the bow end is always sheltered from it anyway. If I can finish the trailer and magic the boat onto it, I might do the final paintwork on it to find shelter and/or sunshine while painting.
Hope that is useful Phil. I'll post some more shots of progress later because I like pics; they make me feel like something is actually happening!
*I lied about the bottle tops. Take 'em off.
-
27th July 2009, 12:50 PM #138
SENIOR MEMBER
- Join Date
- Oct 2008
- Location
- Victoria
- Age
- 71
- Posts
- 631
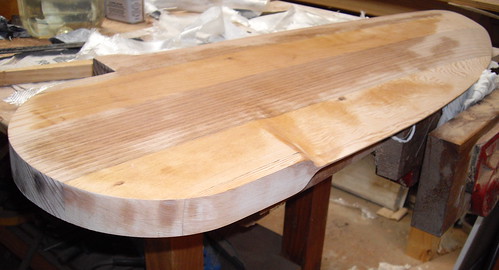
One of my sons has done a better job of the rudder blade than I did of the centreboard
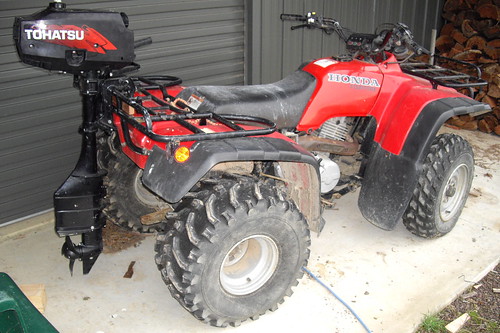
This machine is your belt and braces gully crossing vehicle. (the motor may be resurrected for the boat and the ATV was a good stand to try starting it)
-
27th July 2009, 03:33 PM #139
Grumpy old Bugga
- Join Date
- May 2003
- Location
- South Oz, the big smokey bit in the middle
- Age
- 67
- Posts
- 4,377
Hmm, Top Gear did the English Channel with a Toyota Ute and an outboard so you're going to try Bass Straight with a quadbike and outboard

Richard
-
27th July 2009, 05:33 PM #140
SENIOR MEMBER
- Join Date
- Oct 2008
- Location
- Victoria
- Age
- 71
- Posts
- 631
Wot, you think I'll have a problem? I admit I haven't completely thought it through....

-
27th July 2009, 05:39 PM #141
Deceased
- Join Date
- Dec 2007
- Location
- Guernsey Channel Islands UK
- Age
- 54
- Posts
- 307
Originally Posted by Daddles

that rudder looks like a nice bit of work rob, i assume it's going to have a bright finish,
as for your paint finish it looks perfect in the photos (like me your just to fussy ) give a few trips out and it'll be full of scuffs from use, the first one is always the worst
-
3rd August 2009, 12:31 PM #142
SENIOR MEMBER
- Join Date
- Oct 2008
- Location
- Victoria
- Age
- 71
- Posts
- 631
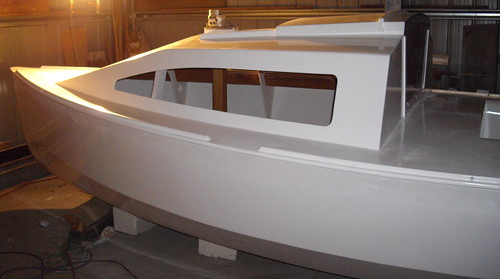
she's on the trailer now:
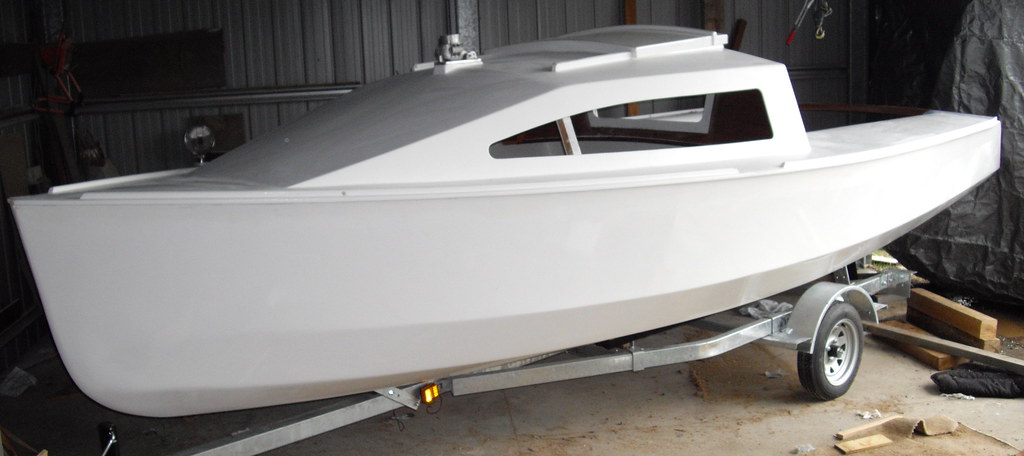
Thought it might be a good idea to finish the trailer and get the boat a bit more mobile before finishing the painting, given how rough the weather has been.
For those that might have to do something similar one day, the plan was to do it by myself with jacks and a winch, but number two son appeared at the right time and together we jacked her up on blocks and axle stands. The front blocks were arranged either side of the centreline with a stout board over the top so that the front end of the trailer could be slid through under the stem. Winching her up high enough without undue stress on the roof purlin was considered to be a bit difficult, so we opted to take the wheels off the trailer, slide it under, fit the beds and rollers ( as well as I could at the time), then lower the boat onto the trailer and jack up the trailer frame to put the wheels back on. This would have been a lot easier if someone hadn't stolen my trolley jack a few years ago, but we managed with one jack and two axle stands, and lots of blocks of wood.
-
3rd August 2009, 02:15 PM #143
GOLD MEMBER
- Join Date
- Mar 2007
- Location
- Adelaide
- Posts
- 2,139
 getting that little bit closer to splash time.
Rob you've done an amazing amount of work in 6 months I can say that because I know now how long it takes to do all the bits you don't see.
Cheers
Mike
-
3rd August 2009, 08:26 PM #144
SENIOR MEMBER
- Join Date
- Oct 2008
- Location
- Victoria
- Age
- 71
- Posts
- 631
Who let you out of the shed Mike? But since you've broken out and have been your old generous self, thanks!
It's amazing how a bit of interest from the forum can actually contribute to a person's productivity. I know some posters just want an uninterrupted thread that becomes a comprehensive record of technical problems and their solutions, but I really like a bit of 'argey-bargey' (does anyone actually say that any more?), a bit of chat and the sense that it is an interest shared as much as a showing of progress. I'm sure that what I'll take from this thread when it's finished will be the sense that a few of us have had a bit of fun as much as anything else. And that's the bit that can actually help productivity.
I enclose the shot below to prove that I haven't forgotten the inside stuff- the white dust is there as proof. My wife has also started to sew the cushion covers, so there's something I don't have to get around to. Also I was a bit lazy at work to-day, took the afternoon and fitted the centre-board up through the slot, having sort of forgotten that the compression post would prevent it going in from inside....more jacking and blocking. I haven't caulked the pin and plates yet because I was so shocked that it all just went together first time, and fitted.....must have overlooked something
-
4th August 2009, 01:02 PM #145
Senior Member
- Join Date
- Oct 2008
- Location
- fff
- Posts
- 394
Rob;
The neighbors were getting a new roof, I just went next door and asked
if the crew could help me for a couple of minutes. They picked the boat
up and set it on the trailer. No problems.
Once it is on the trailer, the whole project changes to a finishing mode.
Really looking good.
-
4th August 2009, 02:39 PM #146
SENIOR MEMBER
- Join Date
- Oct 2008
- Location
- Victoria
- Age
- 71
- Posts
- 631
Good to hear from you Papa, yes, a crowd is handy sometimes! I had friends over for the turning of the boat, and we made a pleasant day of it, but I thought it best not to try my luck this time; maybe hope a few will turn up for the splash.
-
10th August 2009, 12:28 PM #147
SENIOR MEMBER
- Join Date
- Oct 2008
- Location
- Victoria
- Age
- 71
- Posts
- 631
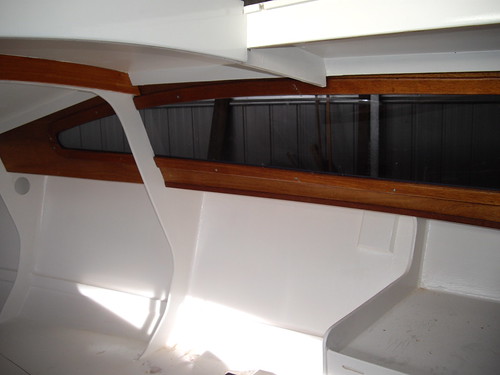
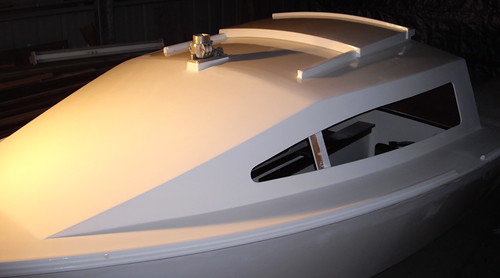
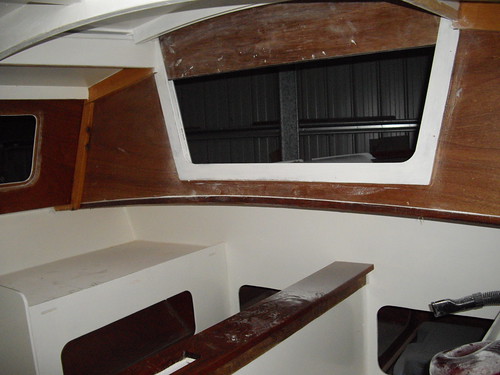
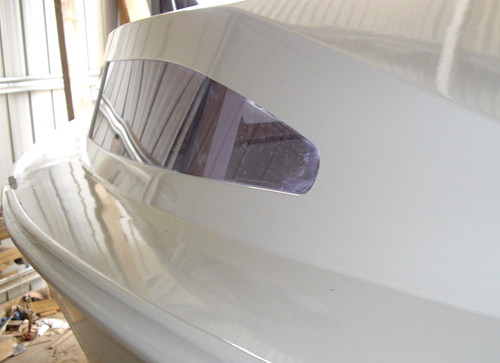
Windows are bedded in sika, and interior trim is screwed down. I'm putting a little thin trim strip along the cabin sides (one dry fitted under the window interior above left) to match one I put under the aft cabin panel. It is Merbau and it sort of harmonizes the wood colours and emphasizes a couple of nice curves. I'm pleased with the tint on the acrylic. Just dark enough from inside, I think.
Painting is now about smaller areas, and I'm having trouble 'calling it'- because it looks OK, but there are surface irregularities that I know I could get rid of, if I can get around to cutting it all back and going over it again. But I don't think I'll bother; life's too short.
-
10th August 2009, 05:23 PM #148
Deceased
- Join Date
- Dec 2007
- Location
- Guernsey Channel Islands UK
- Age
- 54
- Posts
- 307
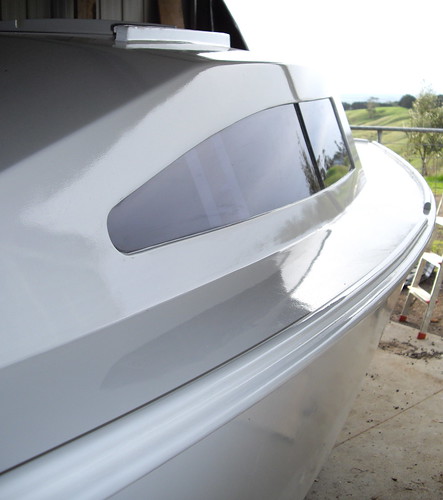
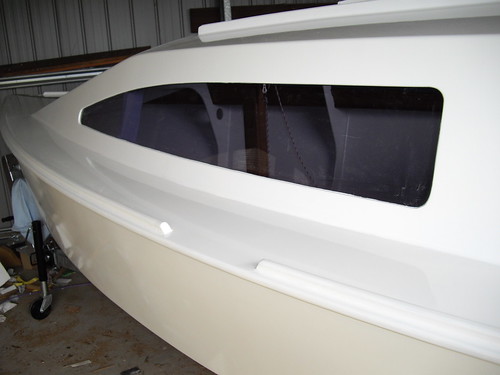
oooooooooo that paint finish looks very nice Rob, i bet you feel very proud of your self when you stand back and look at the lovely job you've made of her.
is the hull a different white/ivory or is it just the angle of the photo? i had always assumed it was white.
-
10th August 2009, 08:50 PM #149
SENIOR MEMBER
- Join Date
- Oct 2008
- Location
- Victoria
- Age
- 71
- Posts
- 631
Thanks Richard, the hull was painted a lot earlier and is a bit dusty. Same colour, but it wasn't fully finished at the top because the rub rails and sheer were done after turning. Below the sheer is probably picking up the colour of the dusty concrete in the photo too. So, the upper chine really needs cleaning, mild sanding and re-coating...that was always the plan.
Talking of plans....got yours yet???
-
11th August 2009, 03:59 AM #150
Deceased
- Join Date
- Dec 2007
- Location
- Guernsey Channel Islands UK
- Age
- 54
- Posts
- 307
not heard a thing from Sam since the last not so helpful email, and to be honest starting to loose interest in the whole thing Originally Posted by rob540

i'll give him another shout in a week or two and if i get the same sort of reply i'll cancel my order for the plan and start my search again


 Reply With Quote


Similar Threads
-
Building a bed
By bizzy in forum WOODWORK - GENERALReplies: 11Last Post: 16th January 2008, 09:00 AM -
Waller TS 5.4
By catbuilder in forum BOAT DESIGNS / PLANSReplies: 7Last Post: 11th October 2007, 05:42 PM -
Waller 880 cruising cat.
By dopeydriver in forum BOAT DESIGNS / PLANSReplies: 8Last Post: 17th November 2006, 08:33 PM -
Building a bed
By bizzy in forum WOODWORK - GENERALReplies: 1Last Post: 21st January 2006, 11:52 AM
