

 Thanks: 0
 Likes: 0
 Needs Pictures: 0
 Picture(s) thanks: 0
Results 1 to 15 of 16
-
13th July 2011, 02:47 AM #1
 Stick Bender


- Join Date
- Jul 2007
- Location
- Northern California USA
- Age
- 62
- Posts
- 211
 Random mystery boat parts thread.
I am going to do something a bit different with this thread...as I progress with a boat I am now building, I am going to post pictures of the various components with little or no comment and let you fellers scratch your heads wondering what sort of nonsense I am up to
 In the coming weeks there should be a fairly regular stream of bits appearing.
First up, spars. Starting with spars first makes sense in a small work space with limited room....get the long things done and out of the way so you have room to work on the hull and other parts.
Spars are facet-nating
-
13th July 2011 02:47 AM # ADSGoogle Adsense Advertisement
- Join Date
- Always
- Location
- Advertising world
- Age
- 2010
- Posts
- Many
-
15th July 2011, 01:54 AM #2
Stick Bender
- Join Date
- Jul 2007
- Location
- Northern California USA
- Age
- 62
- Posts
- 211
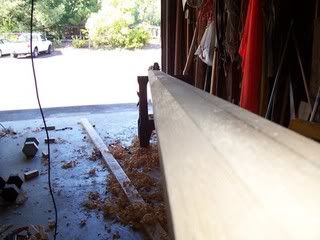
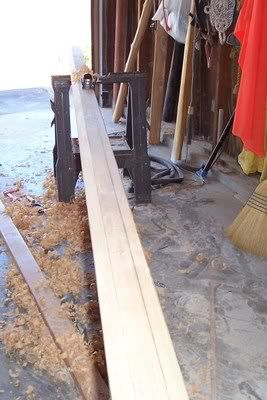
The stick is 15' 6" long, 3" in diameter at the butt tapering in the last 43" to 2 1/8" at the top. It will be stayed.
-
15th July 2011, 04:39 PM #3
Yacht Designer & Builder
- Join Date
- Feb 2008
- Location
- Eustis, FL, USA
- Posts
- 2,270
Rick it doesn't help much if you tell us what the mystery piece is, before anyone tries to guess . . .
-
15th July 2011, 10:24 PM #4
AJ
- Join Date
- Jun 2007
- Location
- Aberfoyle Park SA
- Age
- 63
- Posts
- 1,787
So it's a stick, eh?
Well I'l be jiggered.
I thought it was a mast.

-
16th July 2011, 01:16 AM #5
Stick Bender
- Join Date
- Jul 2007
- Location
- Northern California USA
- Age
- 62
- Posts
- 211
Ha! The mast isn't the mystery...the mystery is what the mast is gonna be attached to!
-
16th July 2011, 01:34 AM #6
AJ
- Join Date
- Jun 2007
- Location
- Aberfoyle Park SA
- Age
- 63
- Posts
- 1,787
Hmmmm....
You are getting seriously Green & fitting the pick-up with sails ?
You've decided MIK's "Beth" looks too tame & you're putting serious canvas on Quick Canoe?
close?
-
16th July 2011, 01:53 AM #7
Stick Bender
- Join Date
- Jul 2007
- Location
- Northern California USA
- Age
- 62
- Posts
- 211
Even though I live in Sonoma County, California, my patchouli-drenched neighbors haven't convinced me to give up gasoline power for land transportation, so no, the mast isn't going on me pickup Originally Posted by b.o.a.t.


Your second option is getting closer to the mark
-
18th July 2011, 12:48 PM #8
Stick Bender
- Join Date
- Jul 2007
- Location
- Northern California USA
- Age
- 62
- Posts
- 211
Handy tool
Here is a useful tool for working areas of a piece where the grain rises and dips and is prone to tearing when worked with a conventional shave or plane blade. It's a toothing plane, a serrated iron that cuts very shallow grooves. I use it mostly for prepping bamboo slats for bows (archery) but it is use anywhere you run into problematic grain. With it you can ignore grain direction.

-
18th July 2011, 05:39 PM #9
Yacht Designer & Builder
- Join Date
- Feb 2008
- Location
- Eustis, FL, USA
- Posts
- 2,270
Rick can you resize you images slightly smaller?
-
19th July 2011, 04:15 AM #10
Stick Bender
- Join Date
- Jul 2007
- Location
- Northern California USA
- Age
- 62
- Posts
- 211
Originally Posted by PAR
Sorry 'bout that. Better now?
-
23rd July 2011, 06:30 AM #11
Stick Bender
- Join Date
- Jul 2007
- Location
- Northern California USA
- Age
- 62
- Posts
- 211
Mast is inlet for the halyard sheave, will set the mast aside until I get the rest of the hardware together for it. Moving on to boom and yard....my plan is to get all the spars done and then do epoxy coating and finishing in one swell foop.
http://i1104.photobucket.com/albums/...abies002-1.jpg
-
23rd July 2011, 11:13 AM #12
Yacht Designer & Builder
- Join Date
- Feb 2008
- Location
- Eustis, FL, USA
- Posts
- 2,270
Your sheave axle doesn't appear to be perpendicular to the spar Rick. Also, if you elect to use a high tech line such as spectra, you should make a metal mouth opening, for the line entry and exit or it will quickly saw right through your spar (don't ask how I learned this).
-
23rd July 2011, 03:14 PM #13
Stick Bender
- Join Date
- Jul 2007
- Location
- Northern California USA
- Age
- 62
- Posts
- 211
Yeah, it was a bit off kilter. I have since trued it up. A metal liner makes good sense. Some of the high tech modern bow string materials are spectra , and I've seen limb tips sawn off bows. Originally Posted by PAR
-
24th July 2011, 07:07 AM #14
Stick Bender
- Join Date
- Jul 2007
- Location
- Northern California USA
- Age
- 62
- Posts
- 211
Paul, would you suggest lining the entire slot or just the lower margins where the rope can make contact with the spar?
-
25th July 2011, 05:34 AM #15
Yacht Designer & Builder
- Join Date
- Feb 2008
- Location
- Eustis, FL, USA
- Posts
- 2,270
I don't have a picture handy at the moment, I'll see if I can find one, but generally, what I do is place a bit of thin steel or copper over the area, then tap it down into the inlet or exit hole. Eventually I have to cut the hole open so the metal can continue around the corners of the opening. This is glued in place or used as a template for a heavier piece of material. On larger mast, where I have a fair bit of hole to work with, I'll make a hardwood copy of the hole and do some serious pounding.
The protective plate needs to be around the corner a bit, but how much depends on the entry/exit angle, sheave location, etc., so each is application specific. I usually draw up a scale profile to see how much rubbing will take place and I make the plate to cover just past this point(s). The last thing you want is the line "sawing" on the edge of the plate, so error on too much, rather then not enough.
This would seem to be a function of low testosterone, maybe you're just getting old. Originally Posted by Rick_Tatum


 Reply With Quote

Similar Threads
-
Mystery Boat Bit
By idle1 in forum BOAT BUILDING / REPAIRINGReplies: 6Last Post: 16th September 2009, 08:07 AM -
Update from Texas on Mystery Boat
By johnny a in forum MISC BOAT RELATED STUFFReplies: 7Last Post: 12th March 2009, 09:26 PM -
Mystery Thread
By barkersegg in forum METALWORK FORUMReplies: 5Last Post: 20th July 2008, 10:08 PM -
Mystery boat
By Keith J in forum BOAT DESIGNS / PLANSReplies: 8Last Post: 8th March 2007, 05:14 PM
