

 Thanks:
  Likes:
  Needs Pictures:
  Picture(s) thanks:
Results 166 to 180 of 551
Thread: Tom Cat
-
4th February 2013, 03:57 PM #166
 Senior Member


- Join Date
- Dec 2007
- Location
- Toowoomba
- Age
- 72
- Posts
- 373
 Hi Greg
 Originally Posted by gregleetaylor

More than happy to share my build experience. I'm looking forward to your thread continuing. Please don't hesitate to contact me should you want any "what to do" or "not what to do's"!
-
4th February 2013 03:57 PM # ADSGoogle Adsense Advertisement
- Join Date
- Always
- Location
- Advertising world
- Age
- 2010
- Posts
- Many
-
4th February 2013, 06:29 PM #167
Senior Member
- Join Date
- Dec 2007
- Location
- Toowoomba
- Age
- 72
- Posts
- 373
78 Breast Hook and Quarter Knees
The Breast Hook on this boat is a real monster as it caters for the cat boat Mast Partner as well as the usual function of keeping the bow together! I have followed the design provided by the Willow build in this area. From what I can make out this has been redesigned to fill the entire space between the Stem and the Deck Beam that supports the fore peak of the half cabin coaming. It adds approximately 125mm to the overall length and at 50mm thick carries some serious weight whilst it is not shaped to the deck crown. Not having sufficient thickness board I made up a template and laminated it from 25 x 200mm Hoop Pine boards. I still have an opportunity to remove the extra 125mm length as the side deck supports are fastened to the same Deck Beam from aft hence I conclude the reason Garden left it short. However, I think there is always an opportunity to use dowelling in lieu of a glued and screwed construction to affix the side deck supports to the Deck Beam as everything is epoxied anyway. This will be a de-construct by destruction boat!
DSC01792-1.jpg DSC01795-1.jpg DSC01793-1.jpg
DSC01803-1.jpg DSC01801-1.jpg
The Quarter Knees need not be that thick so I used the same Hoop Pine Stock but laminated some 12mm marine ply to the bottom to give 38mm. I get the added advantage that the ply will offset the single grain direction in the Hoop. Garden has indicated an increase in the Traveller width dimension from 560 to 1170mm between the stops. This converts to an overall increase to 1270mm taking the 50mm bend radius into consideration. This puts the fastening points in the middle of the Quarter Knees I designed.
DSC01804-1.jpg DSC01806-1.jpg
Last but not least with these pieces the plans show the CB lifting tackle attached to the Mast but considering the boat will live on a trailer I needed this point to be affixed somewhere else for convenience. To that end I have added a 25mm bracket to the underside of the Breast Hook. Looking back at the photos tells me that I am committed to the new length! Im hoping this will suffice for this important job.
DSC01807-1.jpg DSC01810-1.jpg DSC01811-1.jpg
-
4th February 2013, 06:52 PM #168
Senior Member
- Join Date
- Dec 2007
- Location
- Toowoomba
- Age
- 72
- Posts
- 373
79 Breast Hook Crown
Just a couple of pics to highlight the amount of wood to be removed to shape the foredeck crown. The two blocks fwd and aft are temporary to aid in inserting the Breast Hook and keeping it at the correct height whilst the glue sets.
 I havent done this yet its awaiting a complete inside sand and epoxy of the interior x 2. As can be imagined its one of those tasks that you dont want to do, needs to be done and must be done prior to moving on to the next stage.
  Ive not added any since removing the peel ply. Refer Post #123. I thought I might get away with one coat way back then but much has been completed since and I believe a couple more coats sanded back will atone for all the additions that have been made to the interior.
DSC01812-1.jpg DSC01813-1.jpg DSC01814-1.jpg
-
18th February 2013, 03:18 PM #169
Senior Member
- Join Date
- Dec 2007
- Location
- Toowoomba
- Age
- 72
- Posts
- 373
80 Final Interior Epoxy Coat
Its been a week of vacuuming, cleaning and epoxy coating (basically all boring stuff).
 Time constraints only allowed 1/3 of the boat being completed each day.
- Arrive early
- Vacuum up to Frame 3
- Clean down with acetone
- Mix epoxy
- Roll on a coat
- Tip off
- Cover with plastic (pesky insects)
- Come back approx 2-3 hours later
- Mix epoxy
- Roll on a another coat
- Tip off
- Cover with plastic
- Next day repeat up to Frame 6
- Next day repeat up to Transom
DSC01816-1.jpg DSC01817-1.jpg DSC01818-1.jpg DSC01820-1.jpg
Anyway all done - you forumites must be getting sick of the inside of my boat with no apparent moves forward. I sure am!
Now finally ready to move forward with the Pt and Stbd Seat Supports. I had visions of steaming the slight edge set bend required for this but instead after much soul searching have decided to make a template and cut them out of a wide board. I figure this will be easier to manage the bevels required on top of the pieces to take the seat boards. I spent this morning marking all the Stn lines on top of the Sheer to make life easier when fabricating the Fwd and Aft Deck Chocks. Somewhere along the way I lost my Station marks! Boo Hoo! Sob! It took around 4 hours all up to get them back!  Find a reference point, fix a level, check the drawing, measure from bow down to Sheer both sides to remain square, remeasure, tap, tap, remeasure, tap,tap....and so it goes until your satisfied. Finally got them all back, plus some required indicators for the aqscertaining the Fwd and Aft Deck Chock contour requirements for the Coaming line.
-
21st February 2013, 05:15 PM #170
Senior Member
- Join Date
- Dec 2007
- Location
- Toowoomba
- Age
- 72
- Posts
- 373
81 Port and Stbd Seat Supports
First job was to mark the seat heights on the Frames that will support the Seat. I took levels from various places the installed Supports on the Transom and the top of the CB Case to mark and double check everything. Once that was complete I used a left over piece of 3mm fibreboard and a compass to mark the curve required for the Supports. Cut this out and fine tune for a nice template. Pic 1 shows the edge set of the Support.
DSC01822-1.jpg
On to the real thing not as easy as I thought. The Hoop pine doesnt give as much as the FB
go figure! Anyway it has taken some time to get the pieces planed and shaved to an agreeable accuracy. There was much on again off again as these were fine tuned. Fiddly is the word I was use for this. I will not complete the depth of these until such time as I have bevelled and refit them. This ensures Im not doubling my work by trimming both top and bottom as I make adjustments. BTW... I used a heat gun to assist in bending them in place - it helped.
The Hoop pine doesnt give as much as the FB
go figure! Anyway it has taken some time to get the pieces planed and shaved to an agreeable accuracy. There was much on again off again as these were fine tuned. Fiddly is the word I was use for this. I will not complete the depth of these until such time as I have bevelled and refit them. This ensures Im not doubling my work by trimming both top and bottom as I make adjustments. BTW... I used a heat gun to assist in bending them in place - it helped.
DSC01824-1.jpg DSC01823-1.jpg DSC01826-1.jpg DSC01828-1.jpg
Anyway there they sit awaiting the bevels to be applied. I had taken the bevels off previously prior to epoxying the interior as I was setting up the Transom Seat Supports...will attack this job tomorrow. Gosh another week has slipped by!
Nearly forgot - the board and the level are for clarification of the method. These levels are actually out by the amount of bevel required. I'm actually installing them to lines marked on the frames. The level will come into its own when I actually begin the job of bevelling.
-
7th March 2013, 04:26 PM #171
Member
- Join Date
- Jan 2013
- Location
- Pennsylvania, US
- Posts
- 73
Cat Boat
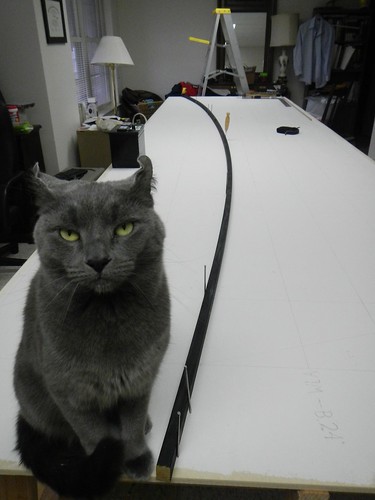
Laurie, giving this a try... over on Wooden Boat too
-
7th March 2013, 06:26 PM #172
Yacht Designer & Builder
- Join Date
- Feb 2008
- Location
- Eustis, FL, USA
- Posts
- 2,270
He's got that look - "you, that's enough with the flashy thingie" . . .
-
22nd March 2013, 07:12 PM #173
Senior Member
- Join Date
- Dec 2007
- Location
- Toowoomba
- Age
- 72
- Posts
- 373
82 Port and Stbd Seat Supports Cont
Greg I love the cat! The look on his face and those ears could not be reproduced anywhere! Weve got a couple of Siamese but I wouldnt even contemplate competing with that!
Ive had a week away with work again and that has slowed me down a bit but have done a fair whack since last post although it is indiscernible to most. Hard yards! The bevels are completed on the Seat Supports and the boat has been sanded stem to stern. What a job! On top of that, in retrospect, I should have added some sanding filler to my three coats of epoxy as a couple of things have emerged as a consequence of not stopping to think.
Firstly, the sanding was hard!! Grrrh, what a DH!! Secondly the film thickness didnt quite cut the mustard and have exposed the glass in a number of places so will have to redo!!! @#$%^&*!!! At least I will be savvy enough now not to do that again. Some filler, some filler, some filler! (for those watching Master Chef, youll know what I mean!)
I have also finally bitten the bullet with regards the join of the CB to the boat. Ive been putting it off, putting it off, putting it off (there we go again!). It just needed sanding to smooth it off all round inside the case what a job. Special tooling was required, sticks with sandpaper glued on etc, head down, back side up, in the boat - on my back underneath working up, outside the boat. However, it made me realise that it was a good thing as I have taken the paint off where it was and now I will take the opportunity to redo the contact surfaces. I will mix a few batches of epoxy and graphite and give it three coats. This should assist the wear characteristics of those surfaces inside the case. If I do it right, coat on coat on coat, it should only need a light sand before paint or alternatively just leave it. There are no UV rays likely to get in there. Thoughts from anyone?
Just a couple of pics of the bevelled Seat Supports and the fully sanded interior.
DSC01830-1.jpg DSC01829-1.jpg DSC01831-1.jpg
-
22nd March 2013, 10:06 PM #174
Yacht Designer & Builder
- Join Date
- Feb 2008
- Location
- Eustis, FL, USA
- Posts
- 2,270
Paint is just going to rub off, so why bother. Graphite is helpful, but I've been bonding Teflon sheets inside cases for a long time. I use to bond the Teflon with stickum in a tube, but now I've learned how to epoxy the stuff successfully. Super slippery case sides that can take some abrasion for years. To treat the Teflon, I just wave a torch over it very quickly, as to not distort it, then this is immediately applied into the wet goo. Something to do with carbonizing the surface molecules on the Teflon, which opens up the surface for a good mechanical "keying" with epoxy. I use .01" sheets (.25 mm), but it can be had thicker. PTFE (polytetrafloroethylene) can also be used and it can be had with an adhesive backer, which sticks well to 'glass and epoxy. There are a lot of ways to go. A buddy recently did a case, but used Xynole instead of 'glass cloth. The Xynole is 6 times more abrasion resistant then regular 'glass at about the same price.
-
15th April 2013, 10:15 PM #175
Senior Member
- Join Date
- Dec 2007
- Location
- Toowoomba
- Age
- 72
- Posts
- 373
83 Seat Stanchions and Framing
Thanks for all the advice PAR. Still havent decided on the way forward there. It always happens when you get great feedback and advice from the forum! Anyway, didnt get any work completed over Easter took a break and went down the coast for a few days.
On top of that I didnt get onto the final part of the insides of the CB case. I left that and went onto installing the seat stanchions and main cross support. Its good to be back using final finish timber in the boat. This time its New Guinea Rosewood and the shed smells wonderful. I had the foresight to have the seat support posts turned up a couple of months back by the local woodworking club. Those guys have done a great job from a sketch I provided and extremely cheap!! Wahoo!! They do look great. Anyway they have been fitted and the athwartship support piece has also been fabricated, routed and fitted - nothing permanent yet.
I need to get some more bits finished and in place before I can think of that. Im thinking of installing another athwartships support between the main piece and the Transom. This will be of Hoop pine of smaller dimensions than the main beam also need the fwd pieces of the side benches. Lot of fitting and fiddling but am enjoying the smell of that Rosewood!
-
16th April 2013, 05:20 AM #176
Member
- Join Date
- Jan 2013
- Location
- Pennsylvania, US
- Posts
- 73
Nice!
Hi Laurie. Nice to see your progress! Inspirational! Questions: Did you locate the frames near the spindles with the intention of tying fastners to it or the associated floor? You are the clever one!
 Mind if I steal that one? Do you pland on hinged seats or fixed?

-
19th April 2013, 11:47 AM #177
Senior Member
- Join Date
- Dec 2007
- Location
- Toowoomba
- Age
- 72
- Posts
- 373
84 Seat Framing Cont
Hi Greg the decision on the placement for the Frames and Floors, way back when, was made after considering all the factors involved and yes, that included the Seat Support structures. There was room for lots of leeway because of the strip construction decision. In reality you could get away with no frames at all if desired but I went down the conservative route because of the use of Paulownia as my strip material and I have used 435 gsm bi axial cloth inside as well as outside. Many would class that as overkill. Bottom line is the Seat Support structure influenced the placement of the Floors and Frames.
As far as the hinged seat is concerned I have decided not to do that (at the moment). After completing the Flooring and then lying down on them to see if I can fit for sleeping I didnt see the need. Then again Im not a big guy! The other consideration for the hinged scenario was the fixing of the stanchion so it didnt all of sudden part company with the bottom of the boat or Flooring in a rough situation. I couldnt come up with a solution without using some sort of cabinet ware! Bill just slotted the base into a hole in the Floor and me being the conservative kind wanted much more than that. As they say, nothing is finished until its finished!
Nearly forgot....the other consideration is the width and placement of the Floor Boards to account for the placement of the Stanchions so it all gels together.
This post is the final wrap of the Seat Support (almost!). All the pieces have been made and as you can see by the pics they just need installation. However, Im leaving that until I have made the actual Seat Boards. The reason is I want to be able to paint the interior prior to putting everything together. I will review the requirement for the extra athwartships Seat Support when I have all the Boards available.
The other little job that has been finished was the gluing in the plugs for all the screws in the Floor Margins and the side Seat Supports.
So getting closer to the painting. I will need to glue in the Breasthook and Quarter Knees before commencing but first the Seat Boards need doing.
-
20th April 2013, 02:54 AM #178
Member
- Join Date
- Jan 2013
- Location
- Pennsylvania, US
- Posts
- 73

Just Outstanding Laurie! Dadoes! Don't think I've cut one in the last 40 years but your standard....! I also plan on sheathing hull inside and out with same frame schedule. Frames and floors add good places to build off of and, wide as these boats are, a little weight add gives stiffness. We get the clamp stiffness offset by frame end 3/4" with them which I think is much better as well. Any who, thanks again for your excellent posts! You'll zoom ahead with the coming fall and I'll slow down with the comong summer...

-
20th April 2013, 04:17 PM #179
Yacht Designer & Builder
- Join Date
- Feb 2008
- Location
- Eustis, FL, USA
- Posts
- 2,270
Agreed, I look forward to progress photos on this project, just because of the build quality. I just wish he'd hit the lottery, so he could hurry up and finish, the suspense if killing me.
-
25th April 2013, 09:53 AM #180
Senior Member
- Join Date
- Sep 2012
- Location
- NSW, Australia
- Posts
- 474
I was just reading this thread for fun (very nice work, BTW) and noticed something here. Originally Posted by Dry Water
Graphite is a lubricant. Colloidal silica is an abrasive. Combining the two in a bearing does not seem logical to me. Not that it wont work in practice. It just seems a bit funny.
The other thing to watch with graphite is that it is an excellent cathode. This can acclerate crevice corrosion, which stainless steel is already prone to in low oxygen conditions. An example paper here.
I wouldn't necessarly panic about this for a dry-sailed catboat, but it is something to bear in mind. If using a stainless pivot in through a graphite bearing, I'd be inclined to do reasonably frequent checks (six monthly, maybe?) on the condition of the pin.Abstract: Experimental results show that when carbon fiber/epoxy resin composite materials are joined with high-strength titanium alloys, aluminum alloys, lCrl8Ni9Ti stainless steel, or other structural materials, galvanic corrosion and crevice corrosion take place on the contact boundaries.


 Reply With Quote
