

 Thanks: 0
 Likes: 0
 Needs Pictures: 0
 Picture(s) thanks: 0
Results 1 to 15 of 20
Thread: box with a secret compartment
-
31st March 2006, 06:30 PM #1
 GOLD MEMBER


- Join Date
- Sep 2002
- Location
- Paignton. Devon. U.K.
- Posts
- 6,062
 box with a secret compartment
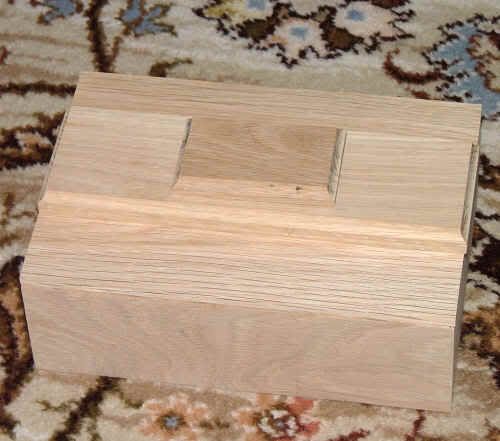
A new jewellery box with a secret compartment is to be a gift for a daughter.
After a glorious restart in the workshop yesterday the weather up here has gone very damp and depressing.
However I have a fair number of oak off cuts to use so I have decided to make another jewellery box this time for a daughter.
Ripped up the widths and put through the P/T in the morning session. But did put the pieces through the band saw which for some reason is behaving itself in a most admirable way, its cutting veneer slices of the oak which saves me wasting my planer blades when reducing the thickness necessary for the box.
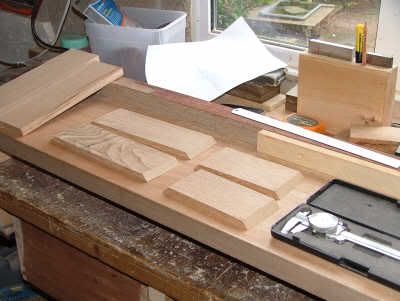
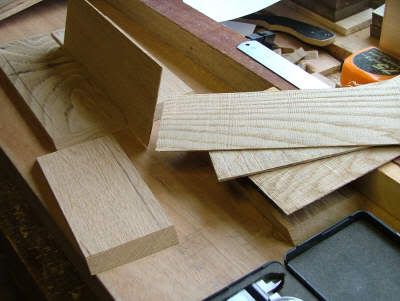
The veneers.
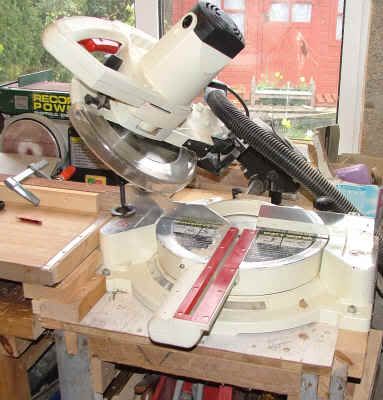
I have cut the corner mitres using the SCMS saw as per picture and when checking the cuts after coming of the machine they appeared to be very satisfactory. However later in the afternoon when I came to set them up on my box gluing jig things were very much amiss. I don't know if its possible for mitre cuts to change with timber tension or some kind of drying out process but I had to put all the joints to the sander to get a decent 90 degree fit at all corners.
Before putting in to the gluing up jig I did a top rebate on all pieces to accommodate the lid (which will drop in) and also cut a 3.8mm dado on the bottom pieces for the base. These were all done on the router table using a rebate & a fine trenching bit.
My gluing up jig.
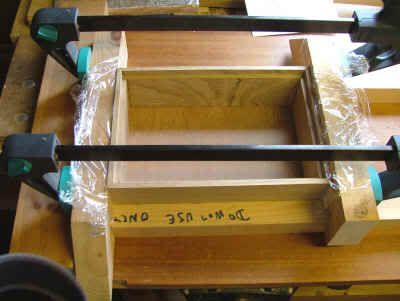
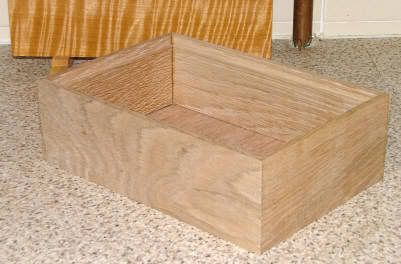
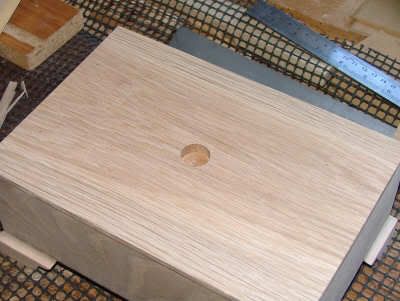
Final picture today shows the box glued and awaiting another session tomorrow making the lid.
.woody U.K.
"Common looking people are the best in the world: that is the reason the Lord makes so many of them." ~ Abraham Lincoln
-
31st March 2006 06:30 PM # ADSGoogle Adsense Advertisement
- Join Date
- Always
- Location
- Advertising world
- Posts
- Many
-
31st March 2006, 08:20 PM #2
GOLD MEMBER
- Join Date
- Oct 2005
- Location
- Adelaide
- Posts
- 1,024
Looking good.
Finally I can see a use for a routing table
So where is the secret compartment going to be?
I've heard others complain about the mitre accuracy on their SCMS, but not from personal experience...
woodbe.
-
31st March 2006, 09:43 PM #3
GOLD MEMBER
- Join Date
- Sep 2002
- Location
- Paignton. Devon. U.K.
- Posts
- 6,062
Woodbe, that's the secret

All will be revealed at a later date.woody U.K.
"Common looking people are the best in the world: that is the reason the Lord makes so many of them." ~ Abraham Lincoln
-
1st April 2006, 12:06 PM #4
Dehydrated Hydrographer
- Join Date
- Jun 1999
- Location
- Westleigh, Sydney
- Age
- 77
- Posts
- 9,550
It sure is possible John, especially if there's been a sudden humidity or temperature change as it seems in your case. It's one of the reasons I'm not too keen on mitres unless they are on quite thin stock. Originally Posted by jow104
Looking forward to seeing progress shots, glad the b/s is behaving itself.
-
1st April 2006, 06:52 PM #5
GOLD MEMBER
- Join Date
- Sep 2002
- Location
- Paignton. Devon. U.K.
- Posts
- 6,062
Thank y9ou Alexs for that confirmation re joint movement after cutting, I thought I might be getting sloppy in my old age.
Day 2
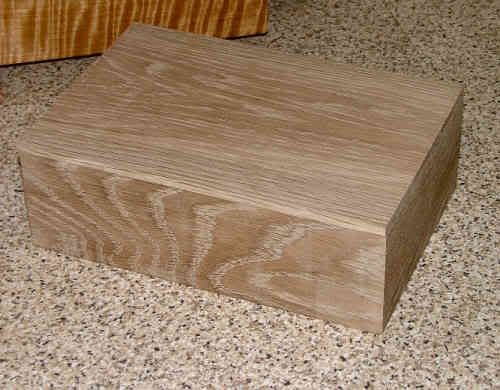
I had a reasonably successful day in the workshop yesterday, I found another oak offcut that was large enough to make the top lid. The last occasion I made this box the lid was made up with 3 boards and I had trouble with warping. However I am pleased to say after cutting and bringing into the home for the night no bowing has occurred and looks like I am going to be lucky with a flat fit. The secret compartment has had some preparation done in that I have fretted out the aperture and will clean up later today with a chisel using that shoulder cutting jig of Australian fame (a la David Cohen).
It also looks like I have some more sanding to do as I can now spot some snipe on the lid also the front board looks a little suspect in the photographs.
Also Janet has now finished her project, this was started the 1st December and with many interruptions over the last three months was completed yesterday. The design was purchased at the Victoria House, Mittagong.NSW.

.woody U.K.
"Common looking people are the best in the world: that is the reason the Lord makes so many of them." ~ Abraham Lincoln
-
1st April 2006, 07:23 PM #6
Senior Member
- Join Date
- Aug 2004
- Location
- Brisbane
- Posts
- 116
Congratulations Janet - so cute. Are they earmarked for the grandchildren
perhaps?J. Stevens
-
1st April 2006, 11:42 PM #7
GOLD MEMBER
- Join Date
- Jul 2004
- Location
- Laurieton
- Posts
- 2,251
I distinctly remember from an earlier post that you don't do sanding!:confused: Have you now changed in your old age? BTW, the box is coming along nicely.It also looks like I have some more sanding to doBob
"If a man is after money, he's money mad; if he keeps it, he's a capitalist; if he spends it, he's a playboy; if he doesn't get it, he's a never-do-well; if he doesn't try to get it, he lacks ambition. If he gets it without working for it; he's a parasite; and if he accumulates it after a life time of hard work, people call him a fool who never got anything out of life."
- Vic Oliver
-
1st April 2006, 11:57 PM #8
GOLD MEMBER
- Join Date
- Sep 2002
- Location
- Paignton. Devon. U.K.
- Posts
- 6,062
You've got a good memory BobR.
but when needs must!woody U.K.
"Common looking people are the best in the world: that is the reason the Lord makes so many of them." ~ Abraham Lincoln
-
2nd April 2006, 06:45 PM #9
GOLD MEMBER
- Join Date
- Sep 2002
- Location
- Paignton. Devon. U.K.
- Posts
- 6,062
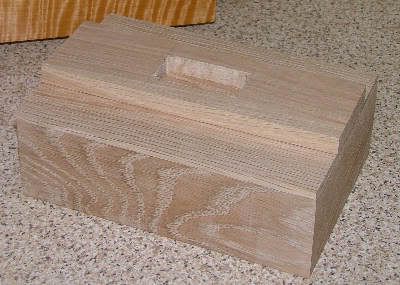
Day 3
Everything seems to be going well. The lid has remained stable, so a secondary lid to accommodate the secret compartment has been prepared together with its top short piece which covers the aperture. The photo studio has moved from the kitchen to the living room to avoid any kitchen duties that could crop up at the moment.
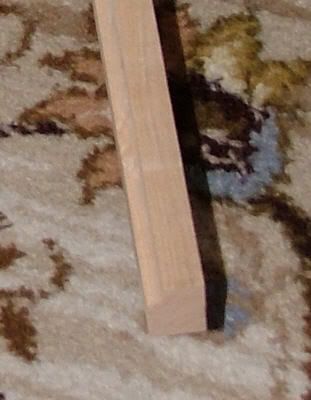
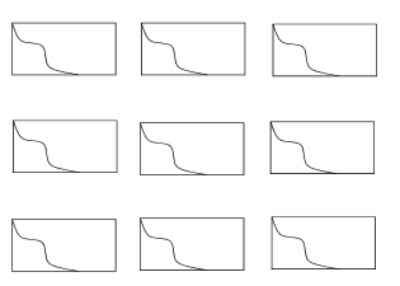
A length of sycamore has been machined on the router table which will provide the feet. The feet will have to be cut to shape use a fret saw and then put to the mitre chop saw for fitting to the base of the box.
So had a good day and to finish off the wife brought me in a large double whisky just before bedtime, she won't get away with that one much longer, they are going to change the law on consent here in the UK.woody U.K.
"Common looking people are the best in the world: that is the reason the Lord makes so many of them." ~ Abraham Lincoln
-
3rd April 2006, 06:42 PM #10
GOLD MEMBER
- Join Date
- Sep 2002
- Location
- Paignton. Devon. U.K.
- Posts
- 6,062
Day 4.
Had to remake the small closure lid of the box, the first one is doing the twist! However pleased to say the replacement was quickly remade and brought indoors for the night and is laying flat this morning.
In the meantime I cut out the bracket feet using a hand fretsaw and these templates which I knocked up to actual size on my computer using one of those draw programs and the printed out and then affixed to the batten.
Hope to report some more progress in 48 hours.woody U.K.
"Common looking people are the best in the world: that is the reason the Lord makes so many of them." ~ Abraham Lincoln
-
3rd April 2006, 06:53 PM #11
Intermediate Member
- Join Date
- Jan 2005
- Location
- Morphett Vale, S.A.
- Posts
- 42
re Jewellery box
////And they say carvers are patient. I admire your patience and perseverance with the timber moving all the time - bloody 'ell (hey will that be censored by your lot???@@@****:eek:
Have another whiskey before you get that secret compartment all squared up.
Chheersshh, hic
Insp. GadgetInsp. Gadget
-
4th April 2006, 06:34 PM #12
GOLD MEMBER
- Join Date
- Sep 2002
- Location
- Paignton. Devon. U.K.
- Posts
- 6,062
day5
Only little progress to report today owing to my attendance required for shopping duties.
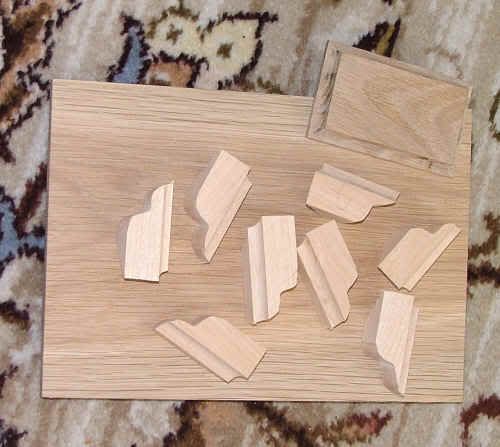
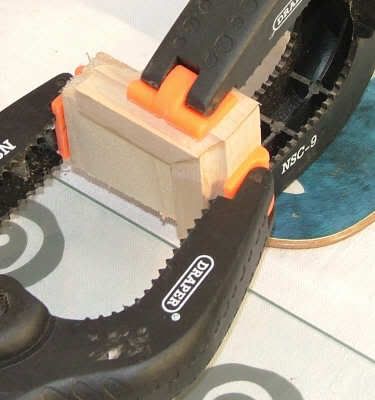
However I did get the bracket feet glued up using some clamps as per picture below.
Also I got some .025 brass bar out of my model railway kit and soldered some pieces up to make a brass plate which will be used to secure the secret compartment.
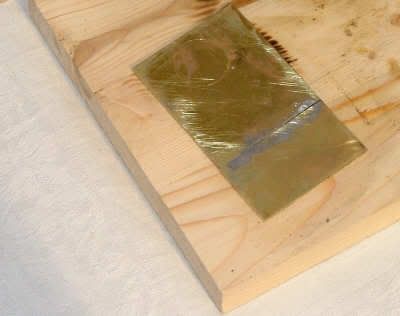
Now I have got to go in search of a long brass bolt or brass rodding.
.woody U.K.
"Common looking people are the best in the world: that is the reason the Lord makes so many of them." ~ Abraham Lincoln
-
4th April 2006, 07:01 PM #13
Life is good with wood!
- Join Date
- Oct 2001
- Location
- Melbourne, Australia
- Posts
- 1,652
Thanks for sharing this journey with us, John. I look forward to future instalments.
-
5th April 2006, 06:53 PM #14
GOLD MEMBER
- Join Date
- Sep 2002
- Location
- Paignton. Devon. U.K.
- Posts
- 6,062
Day 6.
One of those mess about days.
The day started off making a decision to remove the alignment plate under the top lid because of more twist. The replacement also proved troublesome so the alignment plate was made up of two thin veneers.

Next job was sourcing some M3 brass bolts and nuts in town, third telephone call located some around 1 mile away, that was a bit of luck. So purchased 6 bolts which should mean there will be enough stock for all the female members of the family to have a box each over the coming months.
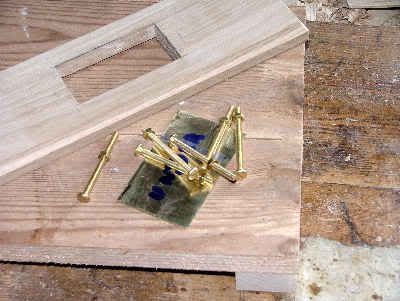
I then chopped out a recess for the brass holding plate to drop in under the secret compartment.
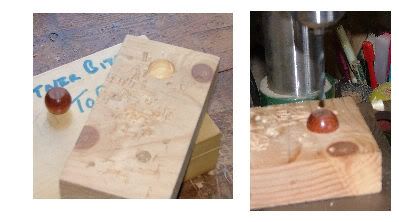
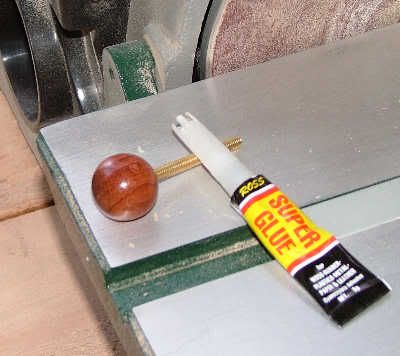
The next task was to locate a turned knob which a UK forum member turned for me a couple of months ago, when found I constructed a jig so a centre hole could be drilled into the knob to take one of those brass bolts (head removed)
The photographs should explain the steps taken. The brass roding was then secured into the knob with a dab of superglue.
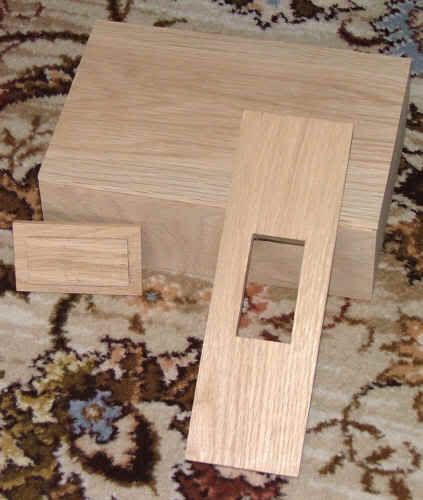
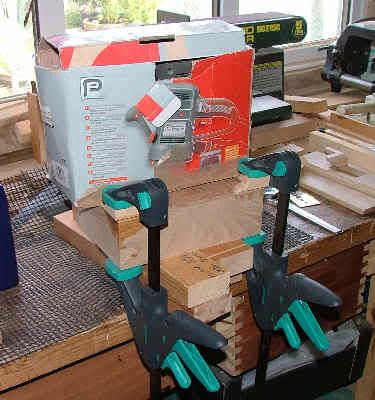
The bracket feet were next fitted which were made up a couple of days ago and secured with glue to the base of each corner of the box as per picture showing counter balance weight to stop the collapse of glue up.
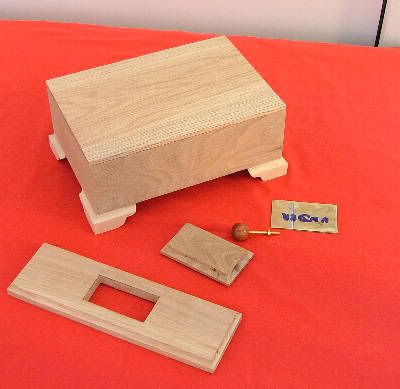
Final photograph today shows all the external parts of this box ready, with just a hole and nut tobe soldered onto the brass plate and secret compartment to be glued to the lid and another job then just awaiting the internal compartments to be constructed.
.woody U.K.
"Common looking people are the best in the world: that is the reason the Lord makes so many of them." ~ Abraham Lincoln
-
6th April 2006, 06:22 PM #15
GOLD MEMBER
- Join Date
- Sep 2002
- Location
- Paignton. Devon. U.K.
- Posts
- 6,062
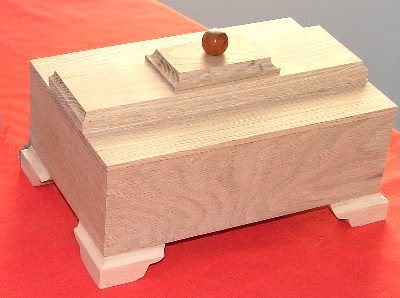
Day 7 (the finish)
Final day, except for that sanding and a finish. Nothing needed remaking today. The secret compartment was glued to the top lid and closure lid with brass work was finished off. Inside two layers of compartments were constructed from the off cut box in sycamore. The wife will make some velvet cushions to line the inside compartments and I will deliver to a daughter with a finish of shellac and wax polish at the end of the month. The large drop on lid has shrunk around 1mm in width over the week, so the next box the timber is going to be brought indoors to season hopefully avoiding this problem. In fact if I make another box before the end of the month I might try substituting lids to match apertures.
The nut soldered under brass plate:
Hole drilled on main lid to accomodate the nut shown above:
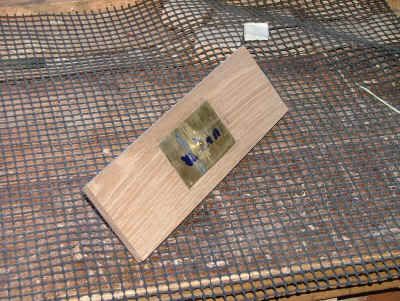
Sycamore pieces from the offcut box for the compartment dividers:

All parts on display:

The box finished (will be treated with shellac and wax at a later time)
 woody U.K.
"Common looking people are the best in the world: that is the reason the Lord makes so many of them." ~ Abraham Lincoln


 Reply With Quote


Similar Threads
-
Xmas Box
By jow104 in forum WOODWORK PICSReplies: 4Last Post: 23rd December 2005, 08:15 PM -
Our first attempt at a box - a cutlery box
By dan_tom in forum WOODWORK PICSReplies: 19Last Post: 20th October 2005, 10:48 AM -
what hand plane to choose?
By EMistral in forum WOODWORK - GENERALReplies: 19Last Post: 19th February 2005, 08:29 AM -
Cypress Gold - Bandsaw Jewelry Box
By barrysumpter in forum TIMBERReplies: 4Last Post: 25th August 2002, 11:39 AM -
vac box for template routing
By soundman in forum ROUTING FORUMReplies: 4Last Post: 27th July 2002, 11:56 PM
