

 Thanks: 0
 Likes: 0
 Needs Pictures: 0
 Picture(s) thanks: 0
Results 16 to 21 of 21
Thread: The Coopered End Table completed
-
11th January 2011, 02:12 AM #16
 Be inspired. Be creative. Be bold.


- Join Date
- Apr 2001
- Location
- Perth
- Posts
- 10,872

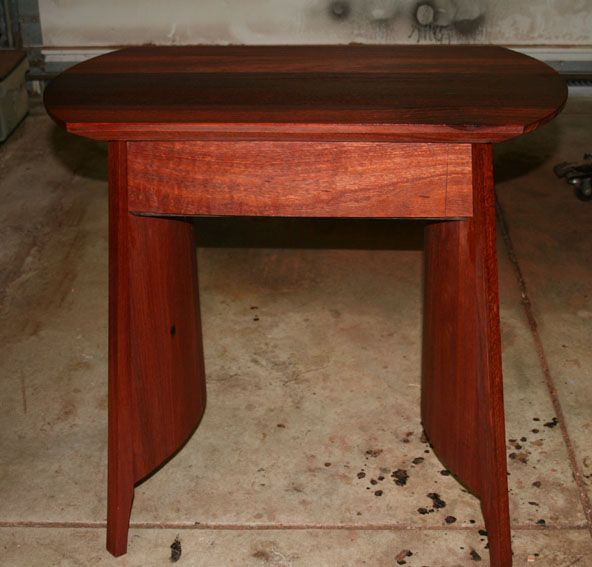
Hi Mark
That's an excellent idea. I did consider something along that line early on. The difficulty that arose came from the construction. Firstly, there is the frame around the top to support and stabilise all ...

The top rail is a match for the side top rails (although the colour in the later pictures does not reflect it). In other words, the rail continues a theme. I like the idea of a single panel below it, and that is why the drawer is cut from a single board - the next best thing. It did not occur to me to use a false panel across the front, partly because I had my hands full shaping the panels below the rails to fit the curve and compound angles. All I could think of was attaching something permanently at those spots so that there were no gaps remaining.
What I shall be doing, on my return home, is altering the angle of the bevels - I think you are spot on there. They will become shallower, and this will lighten the top further.
Thanks for the ideas. I think of this table as Mk I - there are several design aspects I would do differently if I could start over. Next time.
Regards from Cape Town
DerekVisit www.inthewoodshop.com for tutorials on constructing handtools, handtool reviews, and my trials and tribulations with furniture builds.
-
11th January 2011 02:12 AM # ADSGoogle Adsense Advertisement
- Join Date
- Always
- Location
- Advertising world
- Posts
- Many
-
13th January 2011, 04:22 PM #17
GOLD MEMBER
- Join Date
- Mar 2007
- Location
- Munruben, Qld
- Age
- 83
- Posts
- 10,027
Great workmanship Derek. The quality of that work must be really terrific because as most of us know, photography highlights every imperfection in woodworking and for it to look so beautiful and without any imperfections showing in the workmanship under such close up photography; it really has to be 100% perfect to look like that. Congratulations, I love to see quality work such as that. Thanks for sharing with us.

BTW if you are not happy with it and feel like giving it the boot, You want my address? Reality is no background music.
Cheers John
-
19th January 2011, 02:02 AM #18
Be inspired. Be creative. Be bold.
- Join Date
- Apr 2001
- Location
- Perth
- Posts
- 10,872
Changing my mind again!
I received many valuable comments when I posted pictures of the coopered end table, one of which I have definitely decided to impliment, and the others I am in the process of testing out.
The main criticisms were that the top looked a little thick, that the front rail was a different colour to the drawer (it came from the same board as the side rails, but turned out lighter than expected), and that the drawer was too small for the design.
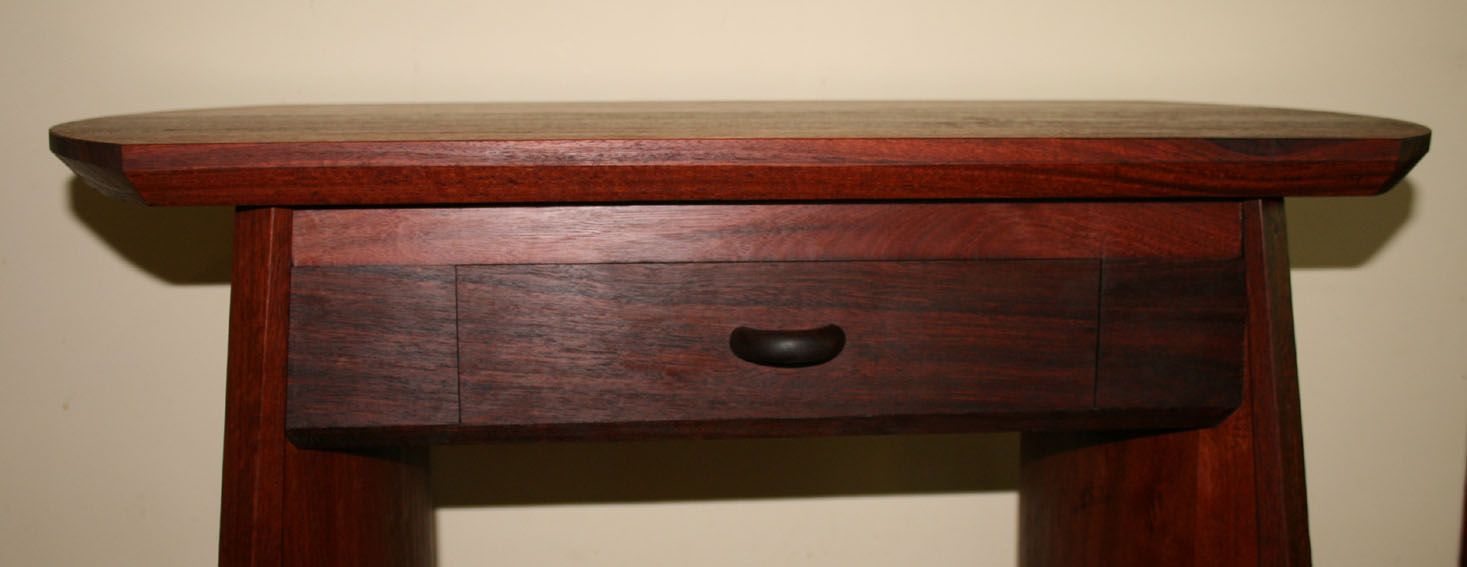
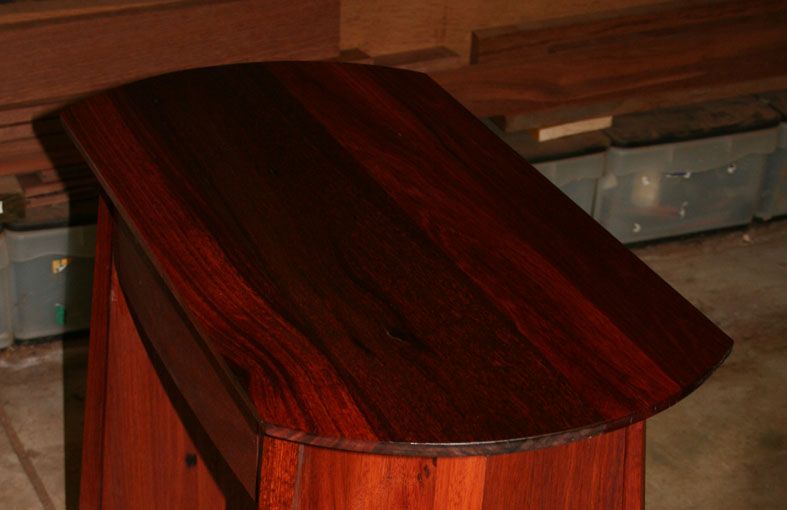
The first modification was to increase the bevel to the sides of the top. There was no point in altering the front and rear bevels as there was not enough area to make a difference (and in any event it probably would not show when looking down).

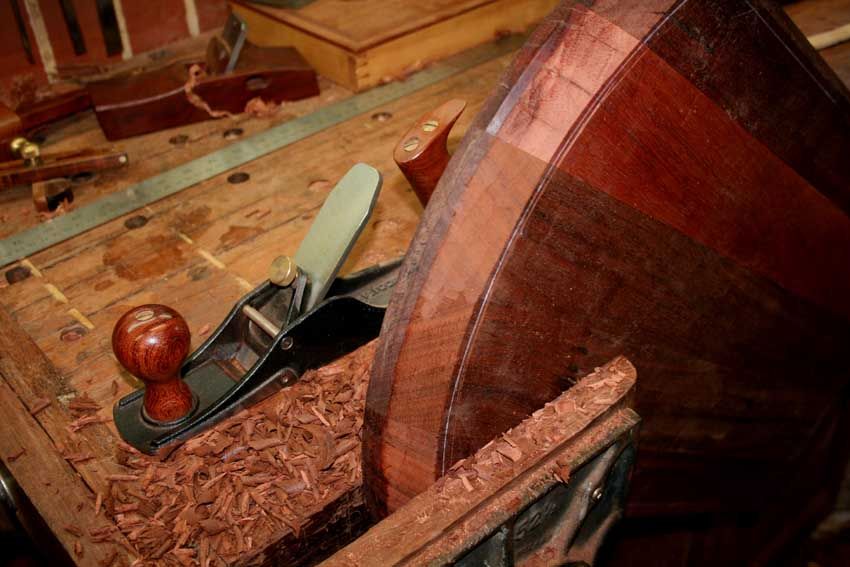
A sharp A2 blade in a scrub plane works amazingly well ...
The second modification aimed to kill two birds with one stone. I would add a false panel to the front of the table. This would cover the rail and drawer. Instead of a drawer pull, the drawer would open from the underside, thus leaving a clean front to the table. In addition, I decided to create a curved front panel. This would be a subtle curve, but should add a softness that I felt was lacking in the original front panel.
Note that the following is a work-in-process and, therefore, I am looking for comments - a good idea or not, and why?
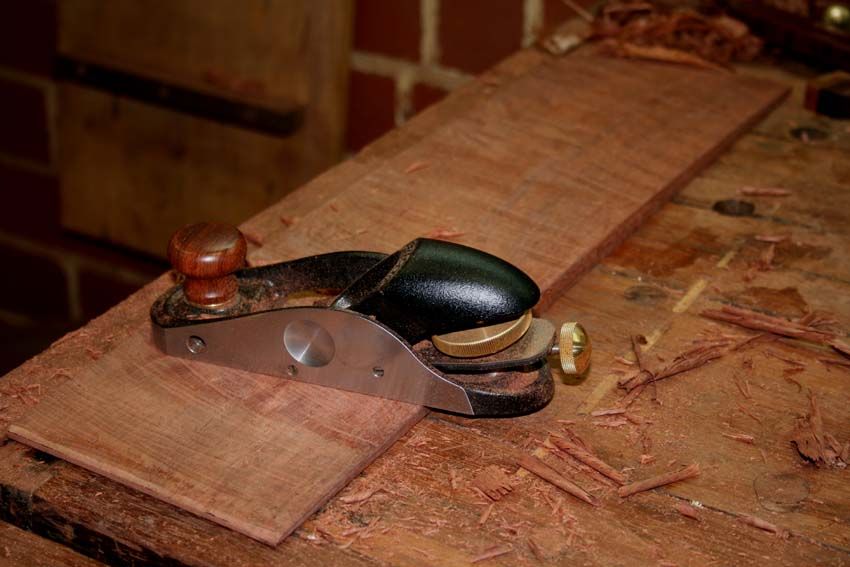
The curved front panel was roughed out on the bandsaw and then shaped with a skew block plane (across the grain) ...
The front panel is attached with hot glue, so this area can be reversed.
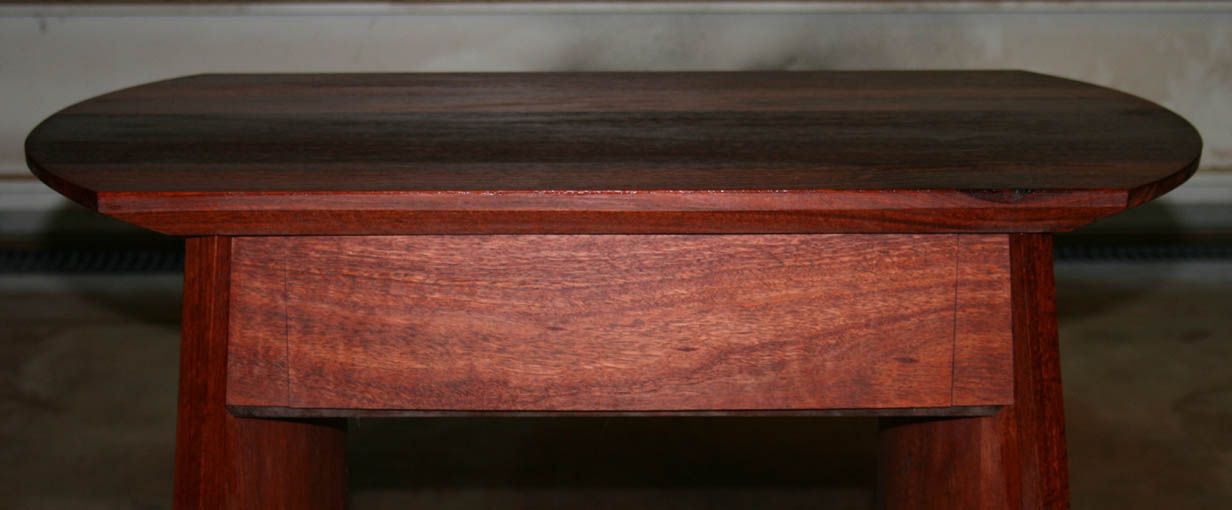
So, smoothed and oiled, this is the result of reshaping.
A couple of full size pics:
In the first, the panel is sawn for the drawer front ...
In the next one you can see the subtle curve to the front.

And a last one of the top ..
Another question: what is your opinion whether the drawer needs a pull, as in the original, or a recess for a grip as I suggest.
Regards from Perth
DerekVisit www.inthewoodshop.com for tutorials on constructing handtools, handtool reviews, and my trials and tribulations with furniture builds.
-
19th January 2011, 06:59 AM #19
GOLD MEMBER
- Join Date
- Feb 2003
- Location
- back in Alberta for a while
- Age
- 68
- Posts
- 12,006
hi Derek
The curved front to the drawer looks much better than the original -- please keep it.
Being an applied front, the "pull" can be the underside of the panel, and the "finger space" can be a gap between the packing (to the drawer front) and the original drawer. I'm not sure how thick the false front is, but you may like to consider cock beading to protect the edge from too much wear and tear and/or to conceal the addition.regards from Alberta, Canada
ian
-
20th January 2011, 05:08 PM #20
GOLD MEMBER
- Join Date
- Nov 2004
- Location
- Redlands area, Brisbane
- Posts
- 1,500
Mate, you've nailed it this time! I think a drawer pull would make this.
As usual, an outstanding job. Far nicer than anything I've made.
-
21st January 2011, 10:06 AM #21
Intermediate Member
- Join Date
- Aug 2007
- Location
- Brisbane
- Age
- 43
- Posts
- 45
Hi Derek,
I agree, the new panel on the front is a great improvement. You've done a great job.
It certainly bugs me when the colour match doesn't turn out quite right after the finish goes on (though photos don't always reflect reality).
Will


 Reply With Quote


Similar Threads
-
Derek Cohen Coopered Box
By Jim Carroll in forum BOX MAKINGReplies: 6Last Post: 14th May 2009, 06:27 PM -
coopered vessel
By son_of_bluegras in forum WOODWORK - GENERALReplies: 10Last Post: 14th July 2008, 05:27 PM -
Completed Korean Dining Table for Two
By rodney in forum WOODWORK - GENERALReplies: 5Last Post: 21st March 2008, 11:50 PM -
Coopered Box Lids - a WIP
By watson in forum BOX MAKINGReplies: 13Last Post: 15th January 2008, 01:32 PM -
Coopered box lid question
By watson in forum BOX MAKINGReplies: 16Last Post: 9th January 2008, 03:28 PM
