

 Thanks:
  Likes:
  Needs Pictures: 0
 Picture(s) thanks:
Results 16 to 26 of 26
-
4th November 2021, 05:12 PM #16
 SENIOR MEMBER


- Join Date
- May 2019
- Location
- Brisbane
- Posts
- 836
 Hi Paul,
 Originally Posted by Bushmiller

I had studied the Blackburn one as well and searched their pictures to how they attached the bubble level. They are using two screws from below at either end of that octagonal casing.
I am glad you like my version. Thank you
CK
Sent from my SM-G781B using Tapatalk
-
4th November 2021 05:12 PM # ADSGoogle Adsense Advertisement
- Join Date
- Always
- Location
- Advertising world
- Posts
- Many
-
4th November 2021, 06:14 PM #17
GOLD MEMBER

- Join Date
- Nov 2011
- Location
- Melbourne
- Posts
- 7,013
I�m just Personally glad too see some spirts have finally arrived in the Tool making world,selling my soul has obviously payed off.
I can put my taro cards away now,an stop howling at full moons,the neighbours didn�t appreciate the howling.
Cheers Matt.
-
4th November 2021, 06:39 PM #18
GOLD MEMBER
- Join Date
- Nov 2004
- Location
- Millmerran,QLD
- Age
- 73
- Posts
- 11,135
Matt Originally Posted by Simplicity
You don't happen to live near Crunchie do you as he is having an issue?
Regards
PaulBushmiller;
"Power tends to corrupt. Absolute power corrupts, absolutely!"
-
4th November 2021, 07:01 PM #19
GOLD MEMBER
- Join Date
- Nov 2011
- Location
- Melbourne
- Posts
- 7,013
No, but his dog is a bit off a howler [emoji6] Originally Posted by Bushmiller
Sent from my iPad using Tapatalk Pro
-
4th November 2021, 08:36 PM #20
Be inspired. Be creative. Be bold.
- Join Date
- Apr 2001
- Location
- Perth
- Posts
- 10,824
Here are mine - very basic vials from Bunnings. But they work


You will be surprised how much one loses the angle without appearing to move the hand. The aim here is not to be ultra precise, but rather to be as consistent as possible.
Regards from Perth
DerekVisit www.inthewoodshop.com for tutorials on constructing handtools, handtool reviews, and my trials and tribulations with furniture builds.
-
4th November 2021, 08:44 PM #21
GOLD MEMBER
- Join Date
- Mar 2004
- Location
- Brisbane (western suburbs)
- Age
- 77
- Posts
- 12,127
Wrong again! Originally Posted by IanW
 I should spend more time thinking & less typing!
When you switch to side 2 and start from the same end of the saw, you do have to change both rake and fleam angles just as the bloke in your video sez. I got so confused trying to think it out in my head, I went to the shed, set up a file in my Veritas guide, & tested each approach.
However, it is correct that if you turn around & start side 2 from the opposite end from which you started on side 1 (i.e. keep filing in a 'circle'), you don't need to change the fleam angle on the guide, but you do need to change the rake angle.
So both videos are correct......
Cheers,IW
-
5th November 2021, 07:06 AM #22
GOLD MEMBER
- Join Date
- Oct 2018
- Location
- Dandenong Ranges
- Posts
- 1,892
Hi CK. IanW has a link to a good sharpening guide that taught me enough to get started. It did however have a confusing way of setting fleam. I just cut the angle on my guide block twice, forming a point which lines up for both sides.
Something which I have also wondered about was the need to shape teeth. I have found in practice that I joint, sharpen and set on saws with reasonable teeth, skipping the shaping step. This seems to work but....what do others do?
-
5th November 2021, 12:14 PM #23
GOLD MEMBER
- Join Date
- Mar 2004
- Location
- Brisbane (western suburbs)
- Age
- 77
- Posts
- 12,127
Same as you, MA., though I don't joint every time I sharpen. For my own saws I do a light 'topping' every half dozen sharpenings or so. My normal routine is to do two light touch-ups, maybe three, after a full sharpen & set. By then the teeth have lost too much set, so as long as the teeth are in otherwise good shape, I re-set, sharpen & its good to go for another round or three. Originally Posted by Mountain Ash
I only re-form saws that come to me in very bad shape (& there've been a few of those over the years!), or if someone wants a different tpi than what's on the saw currently. If extensive re-forming is required, it's almost as hard on a file as cutting new teeth from scratch & I've had some so bad they needed jointing two or three times before I could get the teeth even again. Cutting new teeth from scratch is the hardest on files, even with great care, the pressure on the sharp corner as the tooth is started is testing the limits of the steel. Most files nowadays seem to be a bit more brittle than the files of 30-40 years ago, too, which doesn't help. If you are trying to make regular, even strokes & the file keeps catching on broken teeth, it's very difficult to make even teeth. I should ditch the file immediately it starts to catch & break out a new one, but my Scottish heritage forces me to keep going 'til it stops cutting at all . P'raps it's just nostalgia & wishful-thinking, but I swear files never lost teeth the way they seem to now......
Cheers,IW
-
6th November 2021, 07:35 PM #24
SENIOR MEMBER
- Join Date
- May 2019
- Location
- Brisbane
- Posts
- 836
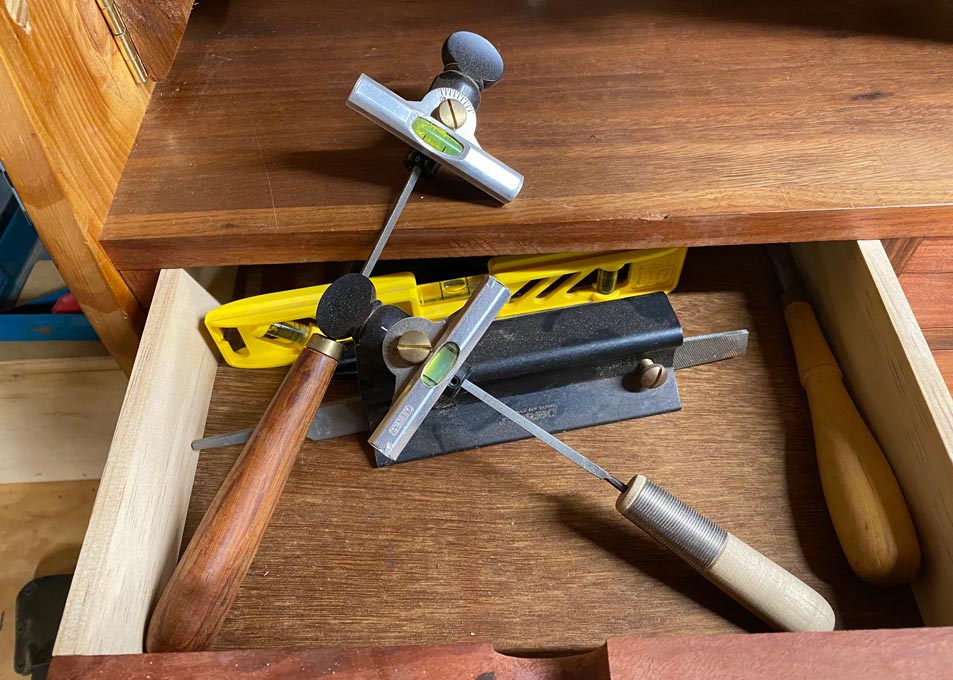
Finally got to sharpen some saws. I touched up two rip saws and converted two saws to cross cut teeth (25 degrees fleam). That took a while as I had to reshape the teeth.
For the reshaping I did not want to flip the saw around and so on. But to avoid having to reset the fleam fence all the time I thought I test out a split fence. Like this:


I don't know if this is a good idea or not. Just gave it a go. I thought this way I can go back and forth if I need to reshape a tooth and don't get it quite right first time. I set the fence so that one half is only help parallel to the saw.
I used that for the reshaping of the teeth. Then I set the teeth and for the final sharpen I then went from both sides like to have the bur equally left and right.
Anyway, I think I got it OK. Both cross cut saws did cut afterwards alright and I am satisfied for the moment. Although I am sure there is still room for improvement. But they cut straight and in cross cut a tad faster than the rip cut saws.

The little blocks in the picture show some comparison cuts.
I also found setting the fleam angle works quite good when you lay some lines on paper and then adjust to that.

Sent from my SM-G781B using Tapatalk
-
6th November 2021, 08:50 PM #25
GOLD MEMBER
- Join Date
- Mar 2004
- Location
- Brisbane (western suburbs)
- Age
- 77
- Posts
- 12,127
All good, CK., whatever works, works.
Interesting that you are reluctant to file from each side, which is the time-honoured method. However, I do empathise with your reluctance, the most difficult lesson I've had to learn (& still learning!) is keeping te oposite set of teeth consistent when I turn a crosscut saw around. I have a tendency to apply a little more pressure on the right side of the file unless I concentrate very hard not to. That causes me to cut a bit more from the leading edge on one side & the trailing edge on the other which creates a small error that is doubled by turning the saw around.
Practice, practice, practice is the solution, but even with the silly number of saws I own, I don't get enough to become as competent as I'd like to be. So when you only sharpen saws once every 3-6 months (which is probably more than average!), I think it's sensible to stick with a method that you find gives you good results. If your saws cut reasonably quickly & follow a line accurately, I reckon you're travelling well...
Cheers,IW
-
6th November 2021, 09:45 PM #26
SENIOR MEMBER
- Join Date
- May 2019
- Location
- Brisbane
- Posts
- 836
I actually only filed from one side only during reshaping the teeth before setting and final sharpening. Originally Posted by IanW
I find that I am not yet consistent enough and so I had to switch between teeth and direction to get the shape right and maintain tooth size and alignment. And that is easier when not having to flip the saw around continuously or so.
But after that I did set the teeth and when I did a final sharpen I followed the approach in the Wood by Wright video.
I sure with practise I will get more consistent and really only need to go through once on each side or something like that.
I still have two more saws I want to put a cross cut pattern on. Will see how that goes [emoji6]
Sent from my SM-G781B using Tapatalk


 Reply With Quote


Similar Threads
-
Chainsaw sharpening, file or grinder?
By Old Hilly in forum SMALL TIMBER MILLINGReplies: 22Last Post: 22nd June 2017, 09:03 PM -
Saw sharpening file holder.
By planemaker in forum HAND TOOLS - UNPOWEREDReplies: 2Last Post: 30th August 2013, 12:55 AM -
Backyard slabbing and File-o-plate sharpening
By Sigidi in forum SMALL TIMBER MILLINGReplies: 10Last Post: 11th August 2009, 11:13 PM -
sharpening guide for idiots
By mhewitt in forum SHARPENINGReplies: 10Last Post: 20th December 2008, 05:36 PM -
Modding the Oregon file guide for Square Ground filing
By BobL in forum SMALL TIMBER MILLINGReplies: 32Last Post: 14th September 2008, 11:10 PM
