

 Thanks:
  Likes:
  Needs Pictures: 0
 Picture(s) thanks:
Results 1 to 10 of 10
Thread: Hand sander with dust extraction
-
7th July 2022, 07:47 PM #1
 .
.


- Join Date
- Feb 2006
- Location
- Perth
- Posts
- 27,791
 Hand sander with dust extraction
Now I know that these gizmos can be purchased for not much but I wanted a project to help me learn to improve my 3D printing CAD software skills and if the final product is not vaguely useful I won't be interested in finishing it. Actually printing the components which have to fit together neatly is a major second challenge.
So this was the plan I came up with.
The perforated base is 198 x 70 to fit a standard type of Abranet sheets.
Attachment 514190 Attachment 514191
The idea is to line the perforated base with hook and loop material and to have multiple inter-changeable bases that should reduce the number of times the abrasive is put on and removed from the hook and loop surface. So you might have say 4 or 5 bases with different grits and just swap the bases around until the abrasive has had it and only then change the abrasive on that base. Could even have colour coded bases for different grits?
In this business it's rare to design and print and it all goes together first time like clockwork. The vagaries of the materials and the printing process will not always generale sub-mm perfect components that all fit together as desired. So prototype's are usually required.
So I started by printing Prototype 1.
I'm using a roll of cheap PLAF (A mix of PLA and ABS) printer filament material which cost me $10 on special so I'm not fussed about the cost of printing prototypes with it.
The final product (especially the base) might be printed in PETG as its stronger and more flexible than PLA - you will see why shortly.
As well as fit, this also gave me a chance to test out ergonomics before I start sticking loop and hook material onto it.
1 in the photo below is the first prototype I printed, the egg handle did not feel quite right so I rotated the egg and sloped the egg down at the front
Also i dropped the height at the front so the slope is a bit steeper and this is shown in prototype 2.
Prototypes.jpg
Prototype 1 was printed with 0.2mm line spacing while prototype 2 was with 0.1mm spacing so it took lot longer (37 hours!) to print!.
I go and do something else while its printing.
The remainder of the parts look like this
Protype2.jpg
I added a sloped edge to the inside of the RHS of the base for the RHS of the top to wedge under and the clip/tab thing on the LHS of the base holds the LHS of the top onto the base. This works much better than I thought it would.
The spigot for the vacuum cleaner took a couple of goes to get right, first time I printed the collar too large and second time the ID was still too small for my vac. So 3rd time lucky.
The base I had to print twice because I printed it too narrow.
So this is what it looks like assembled so far.
Protype2assemb.jpg
Now I knew that little tab thing at the front of the base was going to eventually snap off (in fact it did about 5 minutes after I took the photo) and this is one reason for eventually printing the base out of PETG. The spigot is just sitting there at the moment - haven't sorted out how to hold it there more permanently - I could glue it in , or use small screws or maybe even a bayonet fit.
To print the top with the embedded egg handle is pretty tricky. The top and egg could be printed separately and then glued together but I wanted a really strong bond so I had to print them together and this means right way up and so supports need to be printed to create the internal cavity otherwise it would collapse while printing across the void. The slicer programs which turns the STL file into gcode takes care of all this
However te result is the underneath of the top prints like this.
That large perforated block in the middle of the cavity is loosely bonded to the rest and has to be removed and that plastic gets chucked out.
Protype2support1.jpg Protype2support2.jpg
The support plastic weighs 34g compared to the weight of the top including the egg handle which weighs 78g.
The value of plastic wasted by this process work's out to be a whole ~34c so it's no different to most timber wastage.
Here's view from underneath
I'm going eventually line the base with 6mm thick neoprene tape before I add the hoop and loop material.
The some of the holes will be punched through the two materials.
Protype2under.jpg
All up I've used <$3.50 worth of plastic to get this far. When I print out the final product I'll be using plastic filament material that costs 3-4x more than this budget level PLA but even so the cost to print one unit should only be ~$6.50 and extra bases should cost around $2 each.
I learned a fair bit doing this - the design/plans are almost fully parameterised - so can easily change height, lengths widths, wall thicknesses, diameters of egg ends etc with little effort and it all (mostly) looks after itself.
It fair got my old brain cells working, translating between code and additive and subtractive 3D structures, plus with a bit of program loop control, and minor trigonometry that I used to use a lot at work.
The current program has about 200 lines of code and once I get it finalised I'll put the plans on Thingiverse.
-
7th July 2022 07:47 PM # ADSGoogle Adsense Advertisement
- Join Date
- Always
- Location
- Advertising world
- Posts
- Many
-
8th July 2022, 10:05 AM #2
The prize lies beneath - hidden in full view
- Join Date
- Oct 2010
- Location
- 1017m up in Katoomba, NSW
- Posts
- 10,662
Good job Bob, it'll be interesting to see how this pans out. How's the position and feel of the egg? To my eye, it looks a little bit forward for balance with hose weight, but you're the guy handling it.
-
8th July 2022, 12:55 PM #3
.
- Join Date
- Feb 2006
- Location
- Perth
- Posts
- 27,791
That's a good point - I won't know until I actually try it out. Originally Posted by FenceFurniture

Thats what prototypes are about.
I've just finished diddling the base for tighter fit wedged ends and a small cut away for the flange - I'll print that out and if all OK I'll print out a PETG base.
The beauty of aNY design in parts is if one part is not quite right I can diddle THE design and print out a new one. The price in plastic for a new top in plastic is about $1.20/
-
8th July 2022, 02:28 PM #4
The prize lies beneath - hidden in full view
- Join Date
- Oct 2010
- Location
- 1017m up in Katoomba, NSW
- Posts
- 10,662
A brief OT comment - I have often wondered what will happen to the plastics industry once the oil for fuel industry is dead - and that's not too far away (at least from becoming VERY expensive to due plummeting demand). As I understand it, plastics are produced from waste and/or by-products from the fuel industry, so to refine oil just for plastics is going to make it mighty expensive I'd say. Originally Posted by BobL
-
8th July 2022, 03:08 PM #5
.
- Join Date
- Feb 2006
- Location
- Perth
- Posts
- 27,791
Well yes and no. Originally Posted by FenceFurniture
For a start we have to stop burning fossil fuels for transport and electrical power generation. The expectations are the move to majority renewable power/fuels will happen before we run out of fossil fuels, so this may even end up providing a glut of fossil fuels so plastics might even be cheaper. In 2-300 years time our descendants will decry that we burnt most of the non-renewable het-hydrocarbon.
With enough energy you can even make plastics out of just about anything even seawater, well certainly seaweed AND they are biodegradable.
FWIW the PLA plastics used for 3D printing are made from corn starch! Unfortunately it's not that biodegradable - YET!
-
15th July 2022, 09:13 AM #6
.
- Join Date
- Feb 2006
- Location
- Perth
- Posts
- 27,791
Now with PETG plastic baseplate.
PETBaseplate.jpg
-
7th October 2022, 08:04 PM #7
.
- Join Date
- Feb 2006
- Location
- Perth
- Posts
- 27,791
Finally did some more on the 3D printed hand sander.
Allup.jpg Allup0.jpg
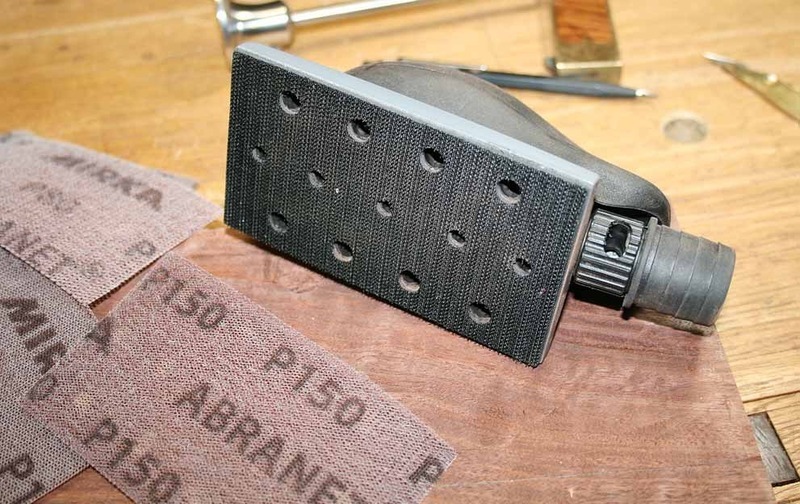
Removable PETG (white plastic) platten lined with 6mm thick neoprene foam and a layer of Velcro and holes punched through from the other side.
As I mentioned previously the side is to have a number of plattens each with a different grit as changing the platten is less damaging to the velcro.
I made 3 custom punches 9.5 and 8 mm, and 1/4"
The smaller punches have Al collars to provide concentricity with the 9.5mm holes in the PETG platten
Punches.jpg
So far have just tried out this arrangement of 1/4" holes.
Holes.jpg
Very effective in terms of duct control but still a bit "sticky" ie wants to suck hard onto the wood, so a few more, or bigger, holes will be required.
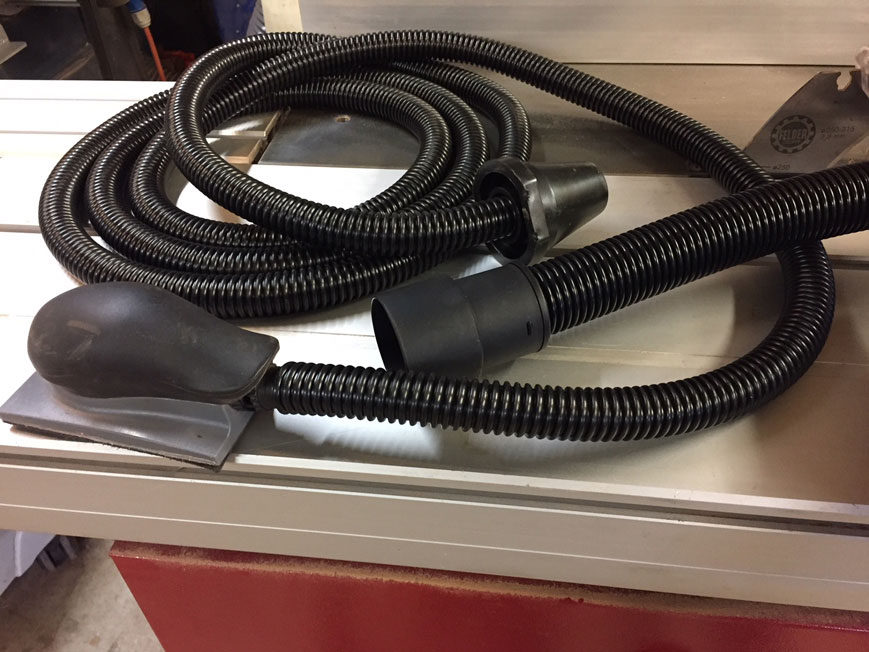
Still not happy completely with the dust port.
Rear.JPG
The port fitting was a bit too flexible and I was worried it would eventually break so added an Al support collar and bolted it onto the back sanders body but I don't think that's going to work long term either.
I might print a thicker port in carbon fibre PLA and bolt that to the body.
Better still would be to print the whole body in Carbon fibre PLA but that would be too expensive.
Other than that it works really well.
-
7th October 2022, 09:15 PM #8
Be inspired. Be creative. Be bold.
- Join Date
- Apr 2001
- Location
- Perth
- Posts
- 10,821
Bob, excellent work.
One main observation and recommendation: for sanders, less suction is needed. Too much suction creates stiction. Generally, these work best on a low (lowest) level.
I have a couple of Mirka hand sanders. You are welcome to borrow one for comparison ... or just come over for a testing .. along with the requisite couple of beers or coffees!
Regards from Perth
DerekVisit www.inthewoodshop.com for tutorials on constructing handtools, handtool reviews, and my trials and tribulations with furniture builds.
-
7th October 2022, 10:28 PM #9
.
- Join Date
- Feb 2006
- Location
- Perth
- Posts
- 27,791
Thanks Derek.
Good tip on the situation/suction. Will experiment wth some more holes.
-
7th October 2022, 11:00 PM #10
Be inspired. Be creative. Be bold.
- Join Date
- Apr 2001
- Location
- Perth
- Posts
- 10,821
Oh, and I use a 20mm Mirka hose with mine (27mm alongside) ...
Suction turned down.
Regards from Perth
DerekVisit www.inthewoodshop.com for tutorials on constructing handtools, handtool reviews, and my trials and tribulations with furniture builds.

 Reply With Quote

Similar Threads
-
Dust Extraction for Drum Sander
By Putty in forum DUST EXTRACTIONReplies: 1Last Post: 5th May 2018, 12:08 AM -
spindle sander dust extraction
By mase in forum DUST EXTRACTIONReplies: 2Last Post: 2nd June 2017, 08:20 PM -
Drum sander dust extraction and guard
By BobL in forum HOMEMADE TOOLS AND JIGS ETC.Replies: 1Last Post: 13th June 2015, 09:54 AM -
Advice on sander/dust extraction combo
By scottbr in forum GENERAL & SMALL MACHINERYReplies: 5Last Post: 24th February 2012, 09:12 AM -
Dust extraction #2 hand-tools
By John Saxton in forum DUST EXTRACTIONReplies: 6Last Post: 29th August 2000, 03:27 PM
