

 Thanks: 0
 Likes: 0
 Needs Pictures: 0
 Picture(s) thanks: 0
Results 1 to 15 of 49
Thread: low angle 4-1/2 Stanley WIP
-
7th March 2007, 10:09 PM #1
 GOLD MEMBER


- Join Date
- Apr 2006
- Location
- near Mackay
- Age
- 59
- Posts
- 4,635
 low angle 4-1/2 Stanley WIP
After seeing Dereks low angle stanley infill, I was inspired to try one of my own.
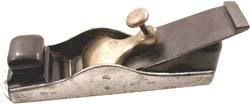
I decided to use a Australian made 4-1/2 Stanley that was gathering dust.
I made the bed angle at 20 deg. I will start with a bevel angle of 30 deg, to give a cutting angle of 50 deg, and see how it goes.
I started making the blade out of an old chainsaw cutter bar, when I tried to harden it by heating and quenching in oil, it wouldnt play the game, after contacting Andy Mac, (he has used chainsaw bar for blades before), it was decided that my cutter bar seemed to be made of mild steel.
Mk11 blade is made out of a new Toyota Landcruiser leaf spring, 8mm thick. This hardened up a bit better, though I'm not sure if it's as hard as I would like, as I can still mark it with a file.

Pic 1 shows the bed at 20 degrees, I had to file down the high bits, then fill the gaps with 2 pack metal epoxy, I used the blade wrapped in 'glad wrap' to get the flat surface.
The blade adjuster I made out of some 1/4" stainless rod. I used a UNC thread to screw into the body, and a UNF thread for the adjuster to run up and down, this gives a good slow movement of the blade.
Pic 2 shows the old rear handle beside the new one made out of Cooktown Ironwood, I made the new one a bit bigger and more of a upright stance, I thought this would suit the blade angle better.
Pic 3 is the underside of the lever cap, I used 1/4" stainless as I dont have any brass to suit. I welded a pair of trunions on the bottom for 1/4" rod to go through for the pivot, and a 3/8 UNC nut for the screw.
Pics 4&5 show the blade sitting in place with the lever cap fitted, the screw is some 3/8 UNC brass rod with a Knob off a oxy/acetylene mixer
Still to do, is the rear infill and front infill, both will also be made out of Cooktown Ironwood.
-
7th March 2007 10:09 PM # ADSGoogle Adsense Advertisement
- Join Date
- Always
- Location
- Advertising world
- Age
- 2010
- Posts
- Many
-
7th March 2007, 11:57 PM #2
SENIOR MEMBER
- Join Date
- Jul 2003
- Location
- sunshine coast
- Posts
- 852
That looks real smiko!!!!!! Cant wait for the final result.
I'm a dancing fool! The beat goes on and I'm so wrong!!!!
-
8th March 2007, 12:14 AM #3
.
- Join Date
- Feb 2006
- Location
- Perth
- Posts
- 27,796
Real nice job Ironwood. I'll be interested to see the shavings.
Cheers
-
8th March 2007, 10:35 PM #4
Be inspired. Be creative. Be bold.
- Join Date
- Apr 2001
- Location
- Perth
- Posts
- 10,828
Looking GOOD!
Regards from Perth
DerekVisit www.inthewoodshop.com for tutorials on constructing handtools, handtool reviews, and my trials and tribulations with furniture builds.
-
9th March 2007, 09:36 AM #5
Bricoleur
- Join Date
- Jul 2005
- Location
- Toowoomba Qld.
- Age
- 65
- Posts
- 2,792
Looks great so far! Thanks for posting the WIP pics.
Cheers,Andy Mac
Change is inevitable, growth is optional.
-
9th March 2007, 06:38 PM #6
GOLD MEMBER
- Join Date
- Apr 2006
- Location
- near Mackay
- Age
- 59
- Posts
- 4,635
Well heres the next installment in the 4 1/2 saga.
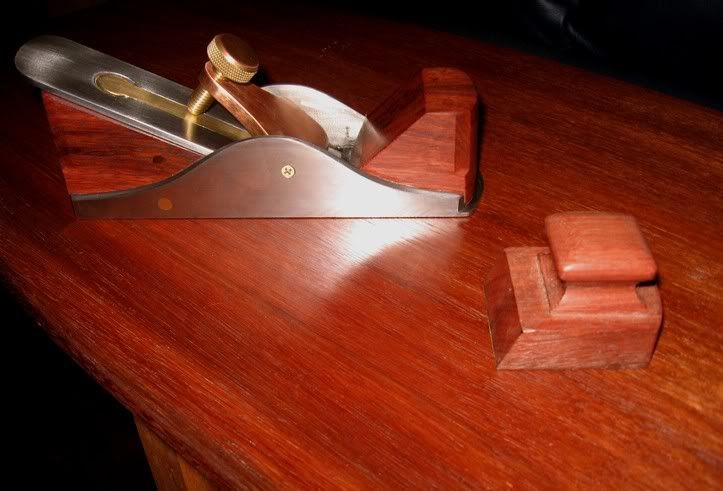
I have made the front and rear infills. The front one is a slightly different colour than the rear one and the tote, as it came out of a different tree (still Cooktown Ironwood of course).
I had to change the adjuster screw knob to one with a smaller diameter as the first one rubbed on the rear infill when screwed right in. So both knobs are now oxy/acetalene hand piece knobs.
The last pic I swapped the infill that I made with the original stanley front knob. Which one do you think looks the best?
The plane now weighs in at 2.6 kg.
All thats left now is a final sand for the wooden bits, and epoxy them in, drill some holes for the pins to hold them in. Cut the pivot rod for the lever cap to length and secure it in position, then a final clean up, some shellac and wax, then time to make some shavings and see if it was all worth it.
-
9th March 2007, 06:44 PM #7
GOLD MEMBER
- Join Date
- Apr 2006
- Location
- near Mackay
- Age
- 59
- Posts
- 4,635
Any critisism for and against the shape of the front infill/knob, will be appreciated. I will be epoxying it in tommorow or the next day, after that it will be to late to change it.
I'm just not sure on the shape of it, thats all.
-
9th March 2007, 06:55 PM #8
Moderate Moderater
- Join Date
- Feb 2006
- Location
- Lindfield N.S.W.
- Age
- 62
- Posts
- 5,643
I prefer the Stanley knob for looks. But the question is really what feels best when you use it!!

BTW I assume the rear infill is needed for the locking screw to bear against, is that right?
I love the idea and I can see an old #4 and a possible old iron that are begging for this treatment - all I need is time....Cheers
Jeremy
If it were done when 'tis done, then 'twere well it were done quickly
-
9th March 2007, 07:16 PM #9
GOLD MEMBER
- Join Date
- Apr 2006
- Location
- near Mackay
- Age
- 59
- Posts
- 4,635
Well the Stanley knob gives you someting positive to hang onto, but my infill gives the plane a more solid feel. Of course I havent done any planning yet to get a real feel for what feels best. Originally Posted by jmk89

I am leaning towards the infill, but may still modify the shape of it.
Yes the rear infill is needed for the lever cap screw to bear against.
I've also got an old derelict #4 that will be the next project, I think it will get a 12 degree bed, and maybe a wedge, instead of the lever cap and adjuster screw.
-
9th March 2007, 07:40 PM #10
Be inspired. Be creative. Be bold.
- Join Date
- Apr 2001
- Location
- Perth
- Posts
- 10,828
I would use an infill-type front knob, not the Stanley knob.
The one you have is too "heavy" for your design - with the tote you have, there is a "lightness". This needs to be carried through now. So slim it down.
Here are a couple of options:
from a traditional mitre plane ...
I almost did this on mine:
and one from my Spiers ...

Regards from Perth
DerekVisit www.inthewoodshop.com for tutorials on constructing handtools, handtool reviews, and my trials and tribulations with furniture builds.
-
9th March 2007, 08:10 PM #11
GOLD MEMBER
- Join Date
- Apr 2006
- Location
- near Mackay
- Age
- 59
- Posts
- 4,635
Originally Posted by derekcohen
Thanks Derek, thats the sort of thing I am after.
I'll have a play with it tommorow if I get time.
-
9th March 2007, 08:55 PM #12
Moderate Moderater
- Join Date
- Feb 2006
- Location
- Lindfield N.S.W.
- Age
- 62
- Posts
- 5,643
I am not so far away from Derek, I just take it to a different place. I reckon that with the 'Lightness' of the low profile rear infill and the rear tote, the Stanley front knob looks right (at least when compared with your current front infill).
But for me, the issue is less one of aesthetics and more one of how it feels when you use it. If the front infill (or the Stanley knob) makes it feel right when you are planing then it doesn't matter what it looks like. In my book, what works best in a tool is best and 'beauty' (which after all is in the eye of the beholder) comes a long way behind.
So I would see if there is a way to attach your front infill that isn't irrevocable and experiment with shapes and styles 'till you find what works best.
What would I do?
I would try to drill out the infilll (and recess the base) so that it can be solidly attached using a bolt into the standard front knob thread and see what suits you. And keep on experimenting until it feels 'right'. The plane deserves to be one that you feel that you want to use and, if you are at all like me, it won't unless the feel is right.
All of which probably means that I was brought up using my Dad's #4 and a plane that doesn't have a 'proper' lnob doesn't feel right to me. If he had had a Norris, I probably would think differently.....
So there is no objectively right or wrong answer, just the solution that is 'right' for you...
[rave ends]
Cheers
Jeremy
PS Best of luck with the decision....Cheers
Jeremy
If it were done when 'tis done, then 'twere well it were done quickly
-
9th March 2007, 10:42 PM #13
GOLD MEMBER
- Join Date
- Apr 2006
- Location
- near Mackay
- Age
- 59
- Posts
- 4,635
[quote=jmk89;476463]I am not so far away from Derek, I just take it to a different place..........
I would try to drill out the infilll (and recess the base) so that it can be solidly attached using a bolt into the standard front knob thread and see what suits you. And keep on experimenting until it feels 'right'. The plane deserves to be one that you feel that you want to use and, if you are at all like me, it won't unless the feel is right.
So there is no objectively right or wrong answer, just the solution that is 'right' for you...
[rave ends]
Cheers
Jeremy [quote]
Thanks for the responce Jeremy, after your last post I went back down to the shed and had a bit of a play with both front ends.
I definitely prefer the feel of the infill type over the Stanley knob,the Stanley knob just didnt feel right, I think I will be going with the infill, but I will try and make it look a bit lighter as Derek has pointed out.
-
9th March 2007, 11:38 PM #14
Banned
- Join Date
- Apr 2005
- Location
- kyogle N.S.W
- Age
- 50
- Posts
- 4,844
Interesting stuff ........ Personally, something that bothers me about the smoothers around that size, is that my supporting hand on the knob often fouls the shavings......so when your hard at it, all the shavings compress up under my hand, to the point it jams.....gota stop and clear..etc.
That be my only concern when choosing the leading hand grip.
So, maybe consider some design that has the palm of your supporting hand pushing further away from the mouth....?
Interested to see how the plane performs. Goodluck.
-
9th March 2007, 11:56 PM #15
.
- Join Date
- Feb 2006
- Location
- Perth
- Posts
- 27,796
Ironwood, I like the look of the knob but agree that feel has to overide looks.
What about de-chunky-ing the infill along the lines of the attachment. This will give it a lighter look but shouldn't change the feel, it may even feel better.
If it were me I'd dechunk about another 1/3rd more than I have shown.
Cheers


 Reply With Quote


Similar Threads
-
The Veritas Skew Jig
By derekcohen in forum HAND TOOLS - UNPOWEREDReplies: 6Last Post: 28th April 2006, 10:01 PM -
Spokeshaves - Low Angle or not low angle, that is the question
By Slavo in forum HAND TOOLS - UNPOWEREDReplies: 10Last Post: 6th June 2005, 09:36 AM -
Stanley #62 (low angle jack) renovation (long)
By derekcohen in forum HAND TOOLS - UNPOWEREDReplies: 27Last Post: 3rd March 2005, 04:42 PM -
Low Angle vs Standard Block Planes
By Roberto Perez F in forum WOODWORK - GENERALReplies: 3Last Post: 18th September 2004, 07:23 PM
