

 Thanks: 0
 Likes:
  Needs Pictures: 0
 Picture(s) thanks: 0
Results 1 to 15 of 24
-
24th February 2013, 02:03 PM #1
 Member


- Join Date
- Feb 2013
- Location
- Picton NSW
- Posts
- 71
 Making Your Own Knife from Scrap and off cuts
I started forging my own blades back in 2007 but I have been making hidden tang handles for the blades of others for about ten years. Knifemaking is a great thing to have a go at I highly recommend! This is a description of how I made this knife, their are lots of ways to go about it, feel free to have a go and use whatever methods you like.
I tried to make this knife using as much found material and timber off cuts as possible.
OK so to kick this one off, I started with a bearing from an electric motor. I really recommend this steel for beginners, for a few reasons.
1) it is free in any qty you want. Electric motor re-conditioners throw these away in huge quantities, super high quality bearings from Germany, USA, Japan... I have never been asked to pay, just a please and thank-you and an explanation of why I want them is all it takes.
2) The steel is excellent normally 52100, or of similar quality. really great stuff for hardening and edge holding.
3) and lastly the extra hammering to flatten it out gives excellent opportunity to work on your technique/muscles
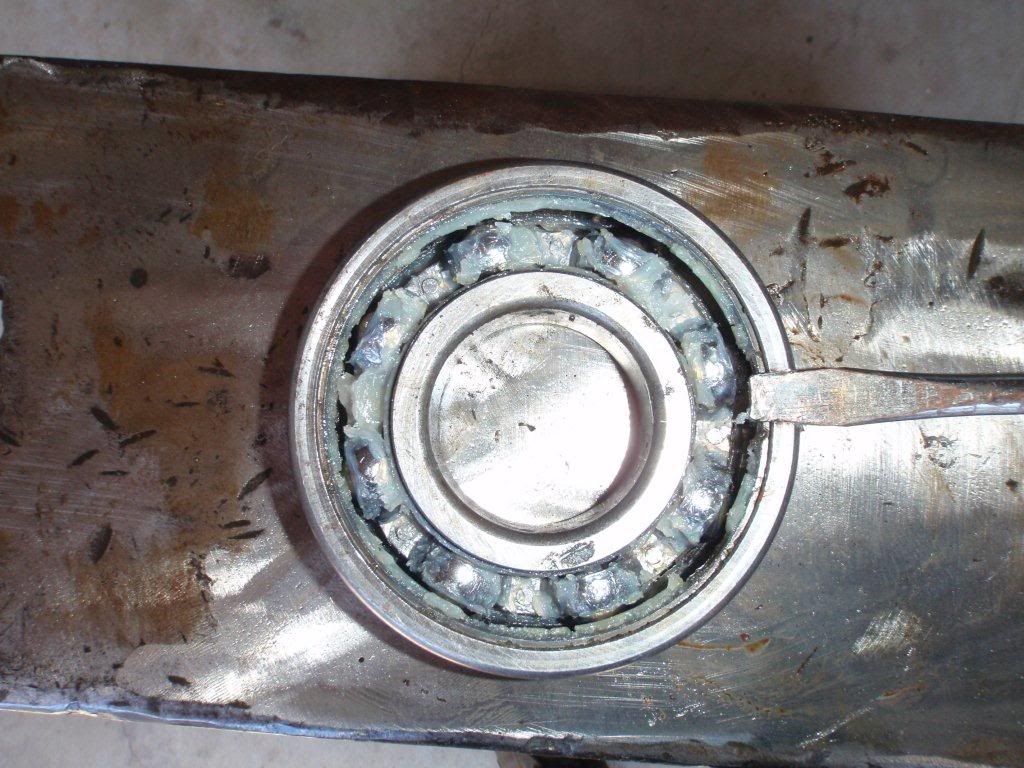
First up slit the outer case with the angle grinder.
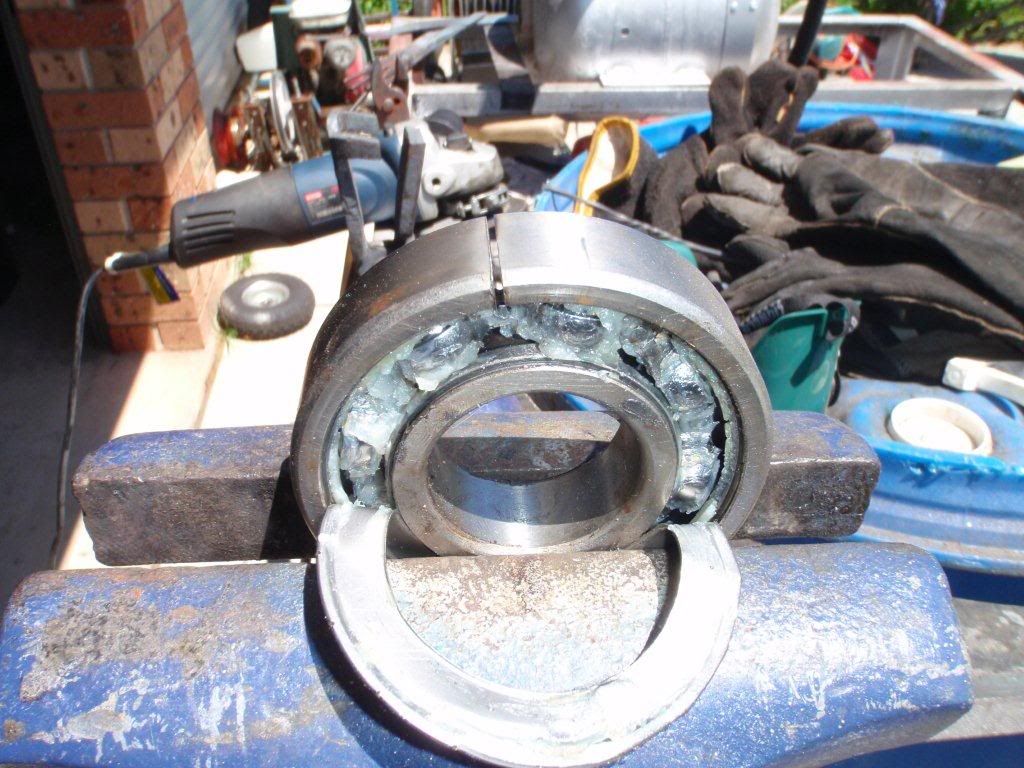
Then open it up and knock out the ball race and inner case.
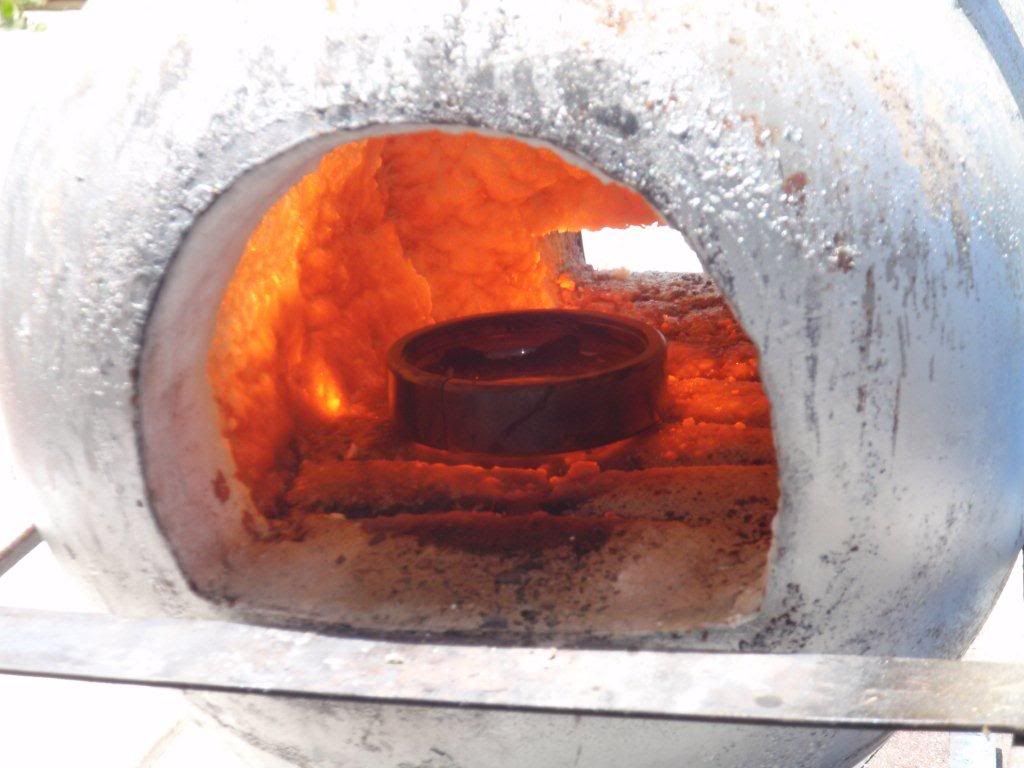
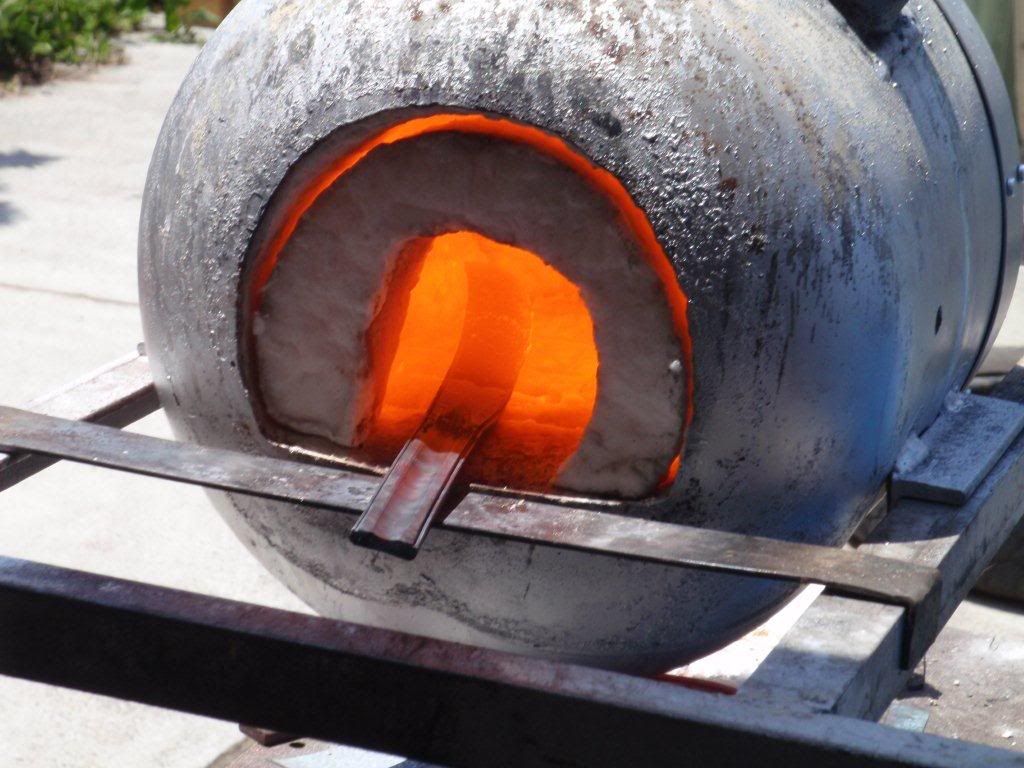
Heat it up in the forge (be careful not to over heat 52100 when forging... )
Hook it over the horn of the anvil, and open it up.
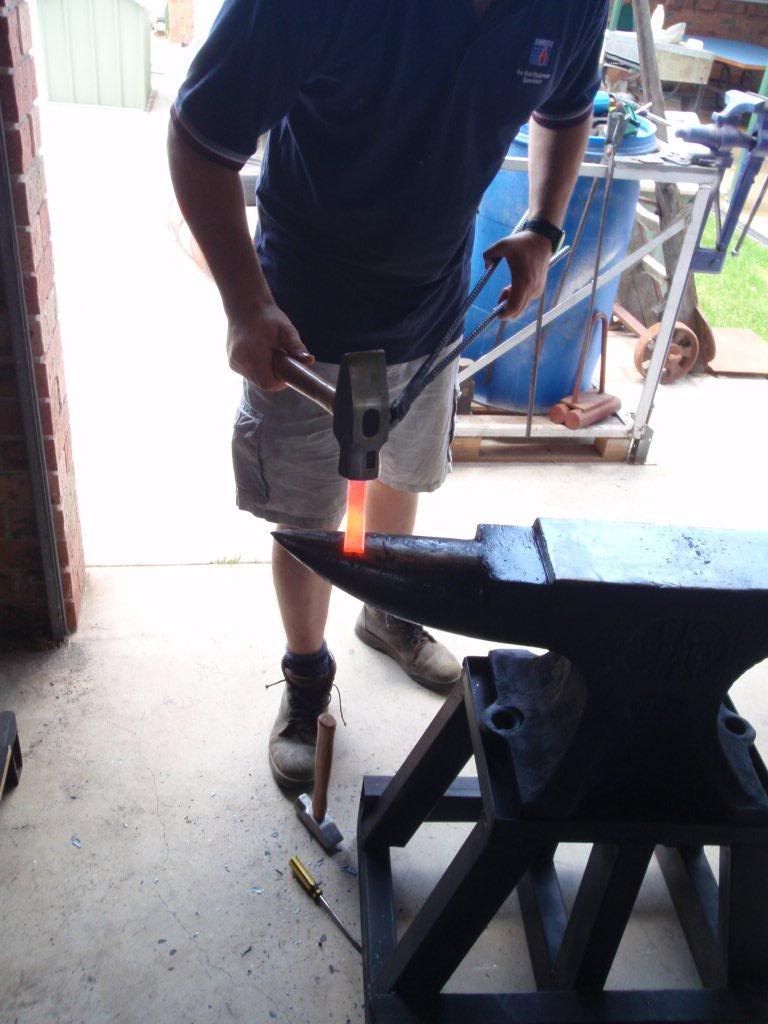
Next you will want to start hammering out the grooves where the balls ran...
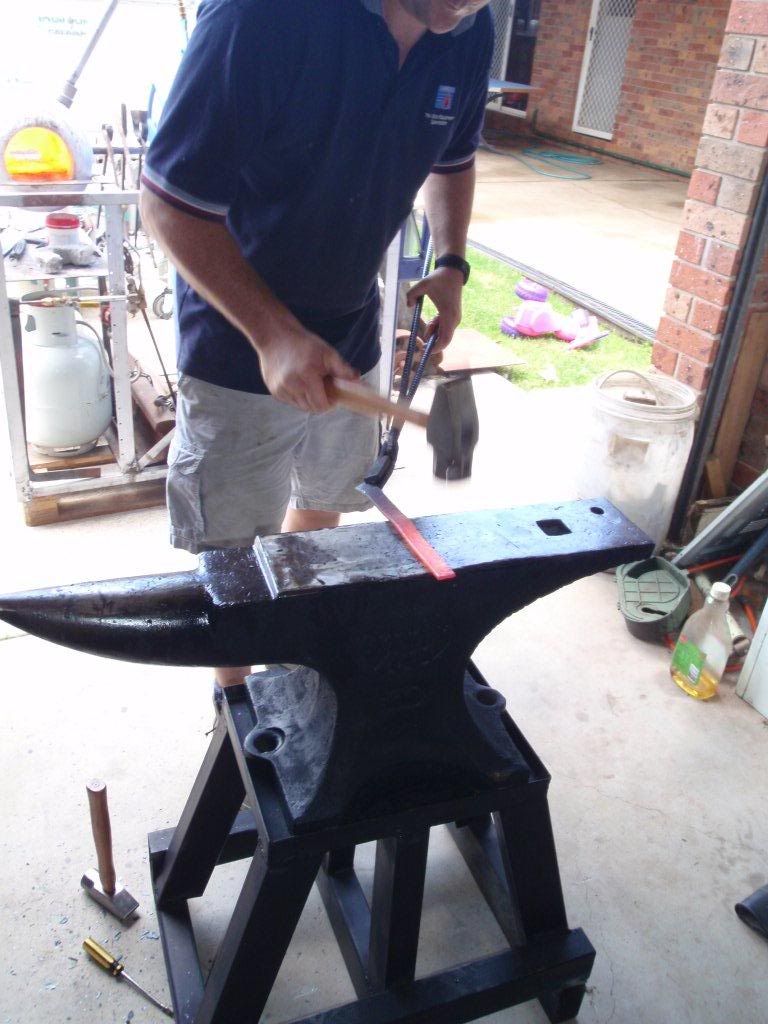
And shape the tip, drawing it out as you go to give a nice distal taper if desired....
After a few heats you should have something that looks more or less like this, at this stage the bevel can be roughly hammered in,
Next I heat the other end and draw out the tang... I forgot to take pictures while I did this, it takes a long time, and a lot of hammering over the horn and with the cross pien, but eventually you will have something that looks like this,
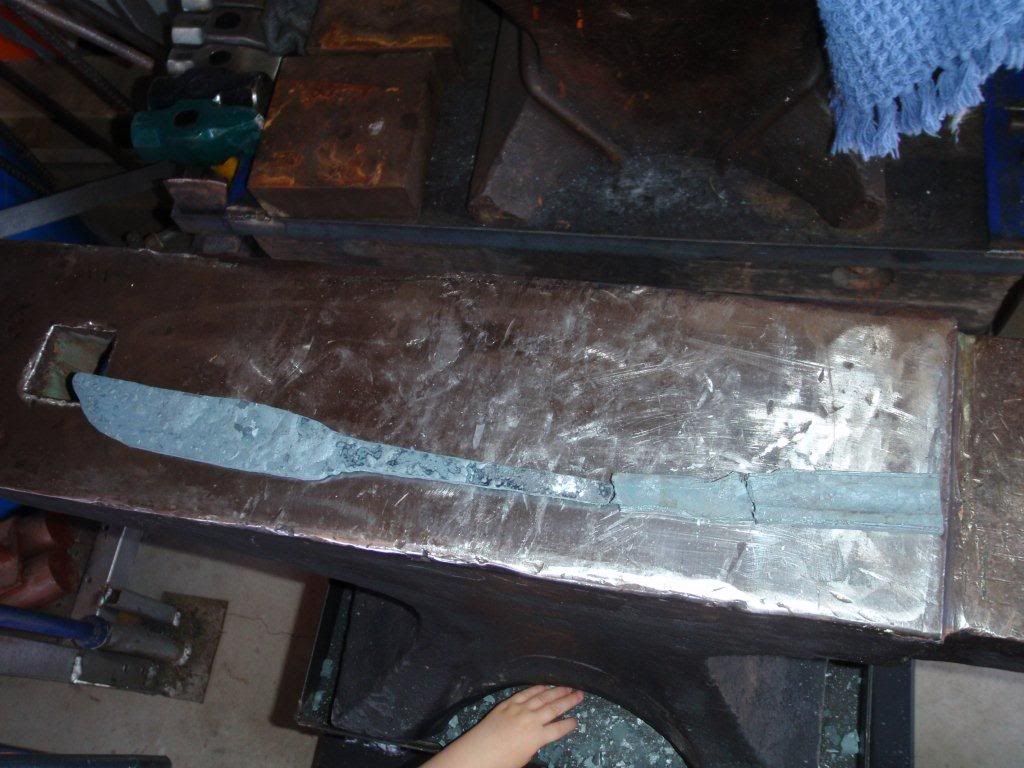
OK now back to the forge. Get it hot and pack up all the openings with ceramic wool or similar, and leave to cool. When cooled the steel will not be truly annealed, but normalized and not too hard on the grinder.
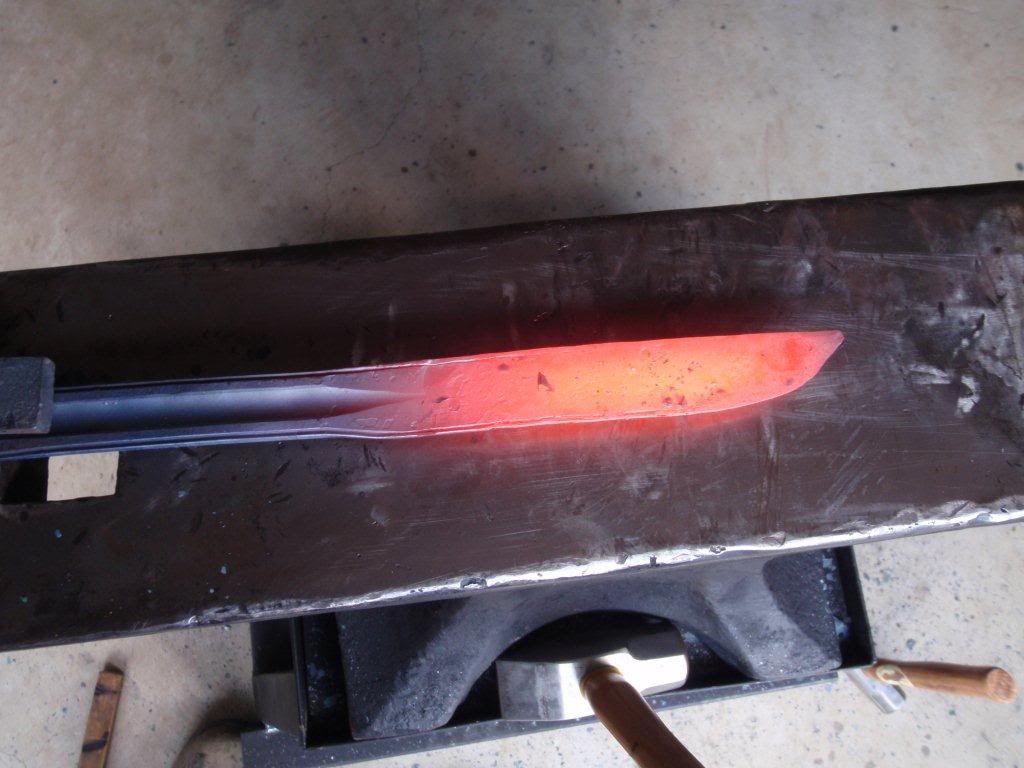
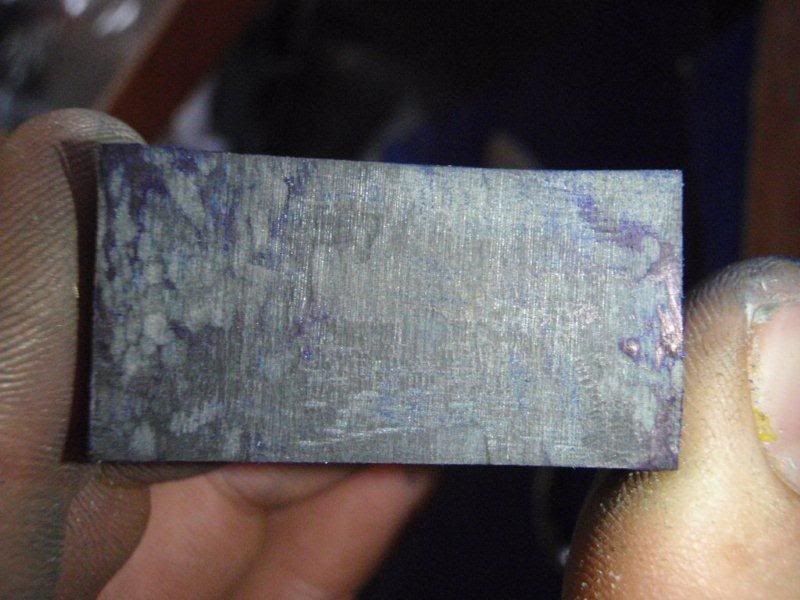
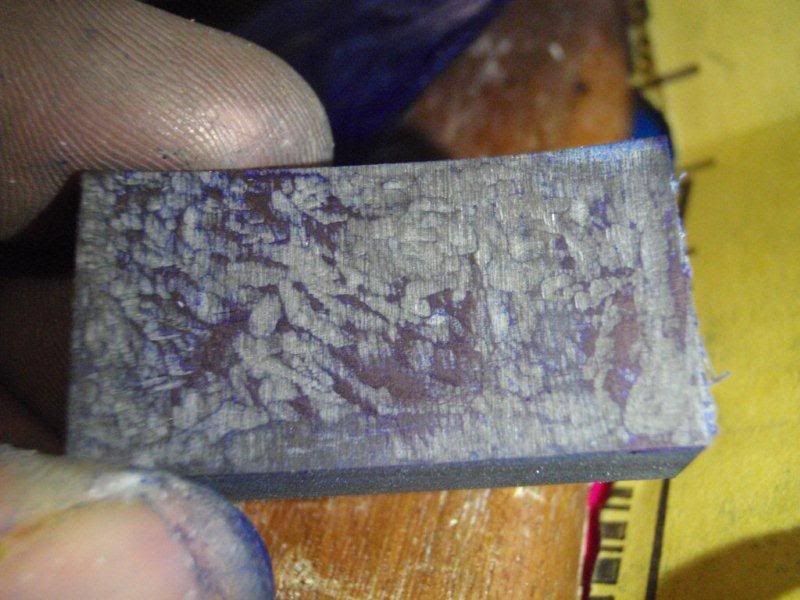
When it is cool to the touch, it is time to start the grind. First profiling,
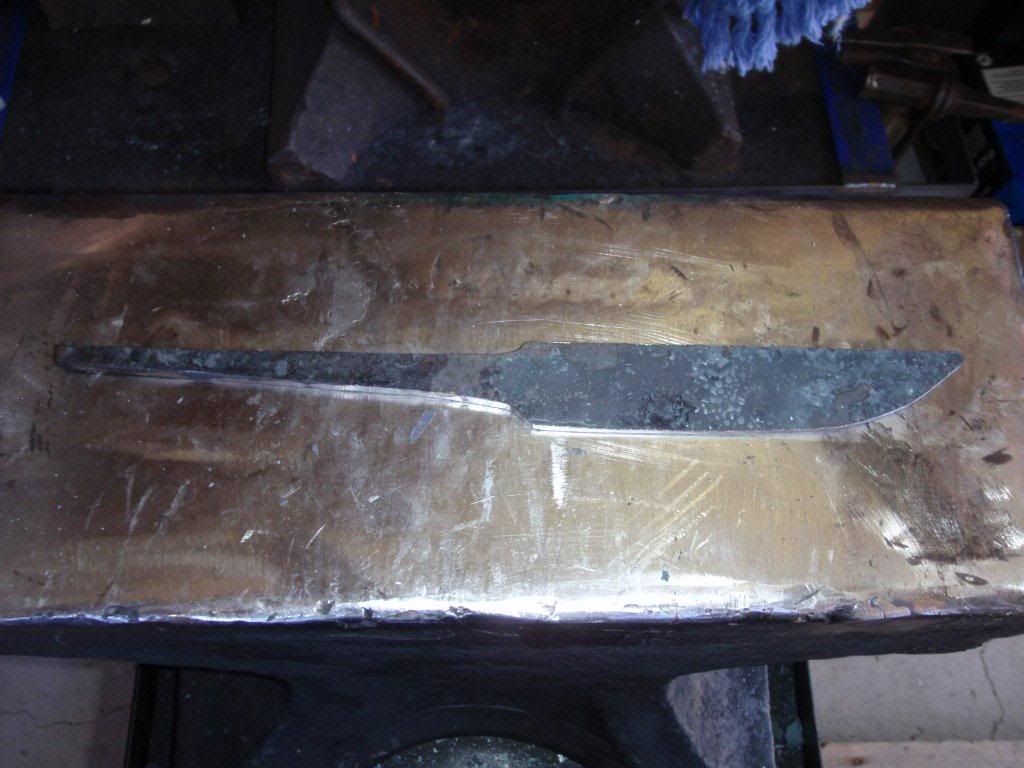
Then facing, here you can see the grind has been roughly hammered in.
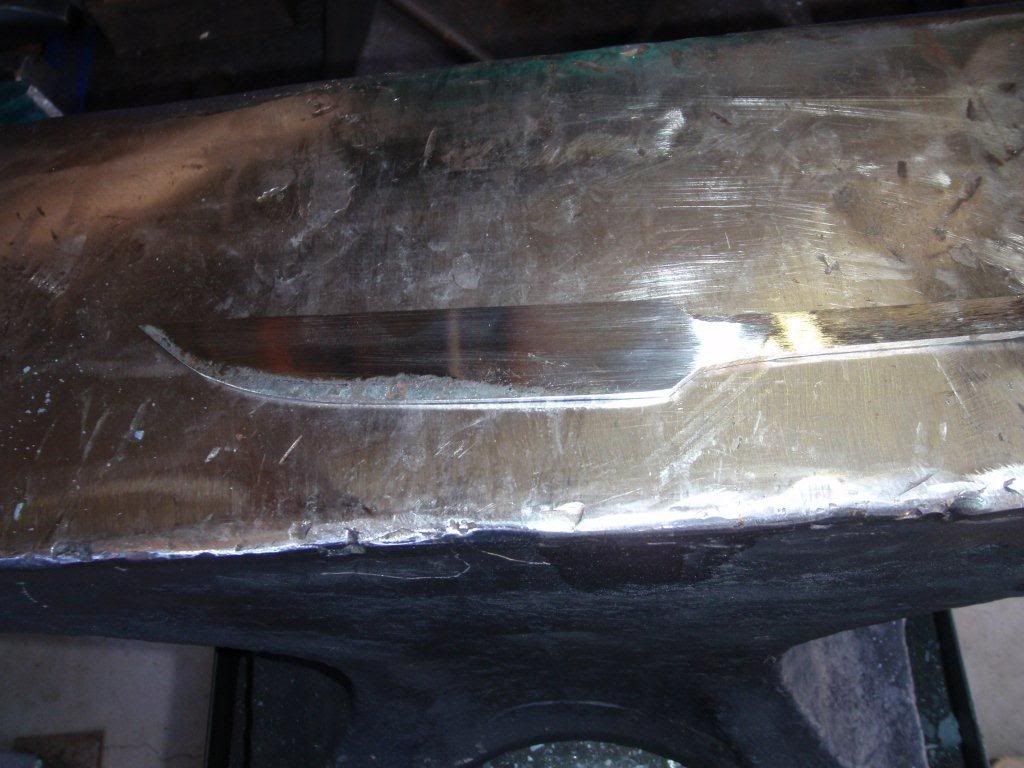
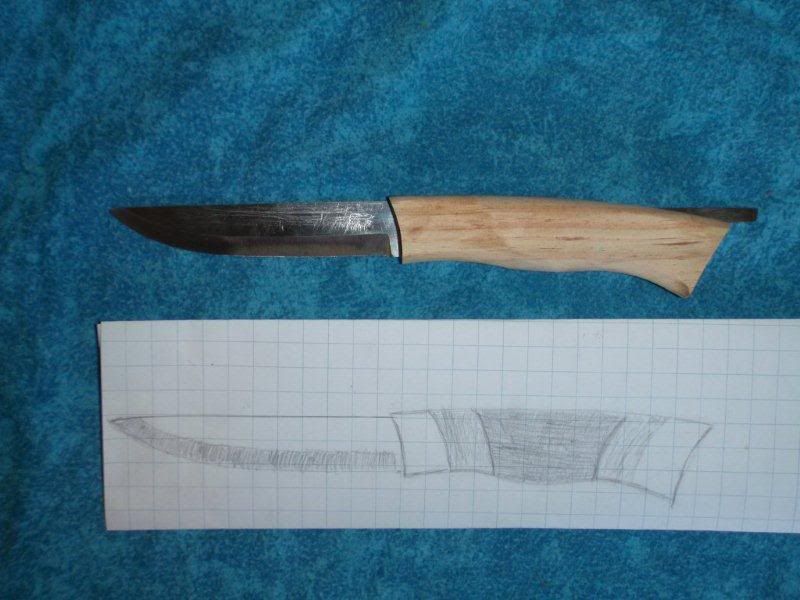
I then grind my flat scandi grind to a thickness of about 0.5mm ready for heat treat,
Before I heat treat though it is important to make sure that the handle design will work with the blade. More on this in the next installment...
-
24th February 2013 02:03 PM # ADSGoogle Adsense Advertisement
- Join Date
- Always
- Location
- Advertising world
- Posts
- Many
-
24th February 2013, 03:00 PM #2
The Laird
- Join Date
- Jan 2007
- Location
- Katoomba NSW
- Posts
- 4,774
Great work Corin

Keep it coming.
-
24th February 2013, 03:08 PM #3
Member
- Join Date
- Feb 2013
- Location
- Picton NSW
- Posts
- 71
I start the handle design process by tracing the blade a number of times and trying out different handle shapes, and materials on the tracings.
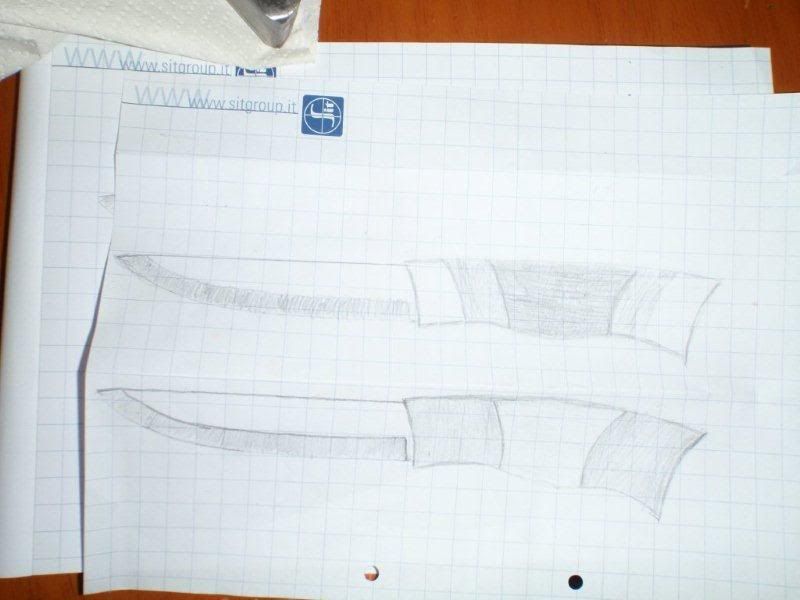
I have settled on a design that is a bit different from the traditional Scandinavian style knife, mainly as both the bolster and butt will be concave rather than convex in profile. I was not sure how this was going to look, and feel in the hand, nor the optimum length. so to solve this I cut a piece of roofing baton, and in about 20 minutes on the radius master I had fashioned a handle, that answered these questions for me. At this point it is also clear that the tang will need to be bent down to conform with the design.
Next I scanned it into the computer and coloured it in, and played with the proportions until I was satisfied

ending up with a design I was happy with.

So now its time to select materials... like most knifemakers I have a little box of treasures to choose from.
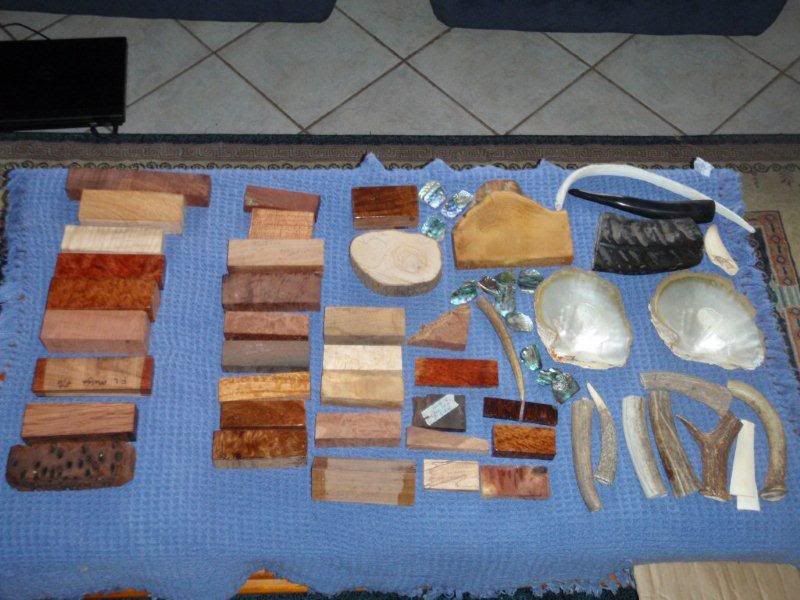
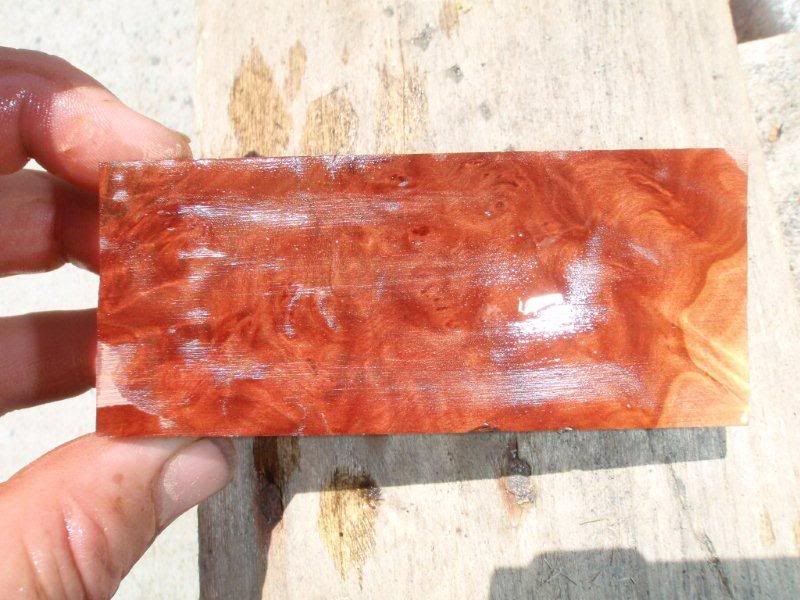
I also have a collection of small undersized blocks and off cuts, the piece of Mallee root ball top right of the following pic was thrown in with a wood order, it has a bad inclusion and is too short for a knife handle on its own, but is perfect for this project,
Once cleaned up the figure proves to be very acceptable.
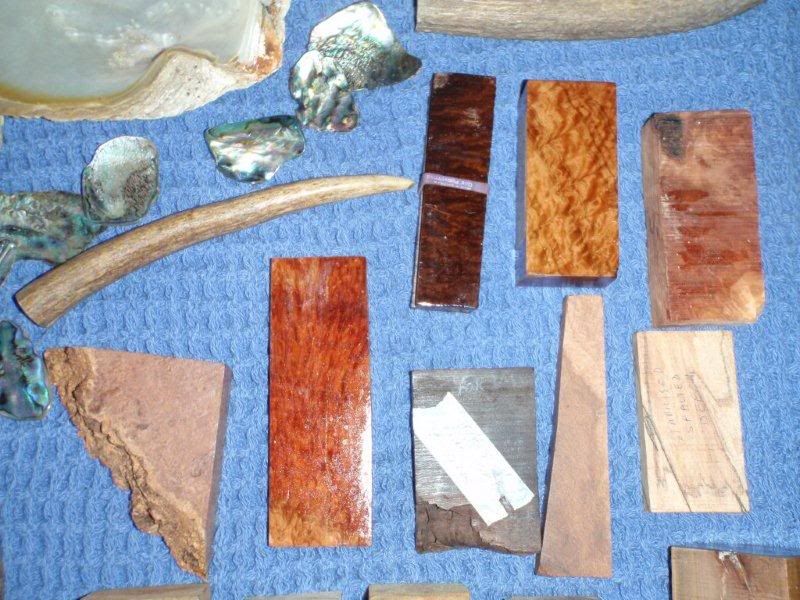
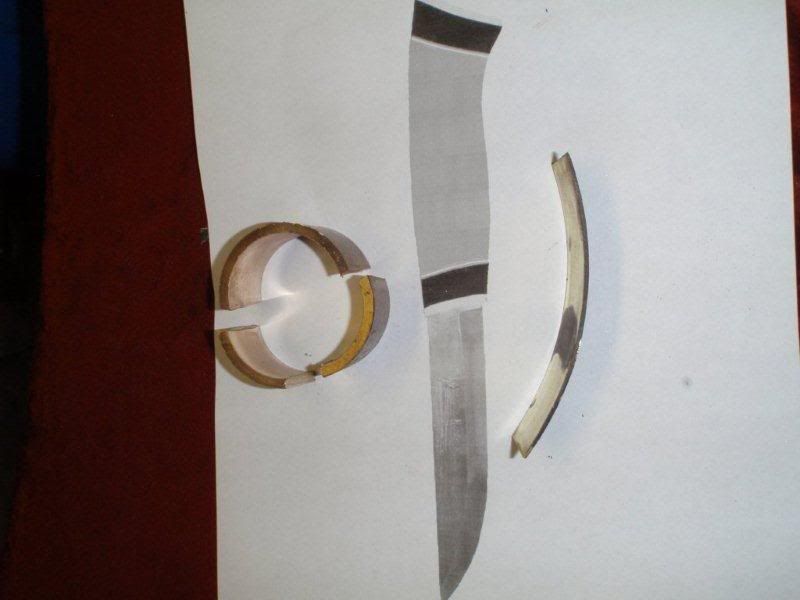
Also picked out some Buffalo horn.
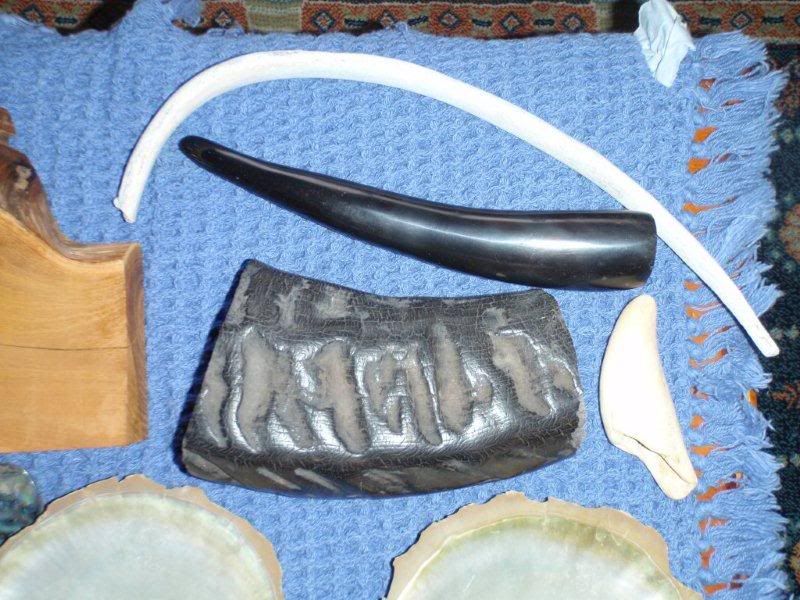
Then out to my brass bin to find some suitable bits, in case you were wondering brass and bare feet is a bad idea...
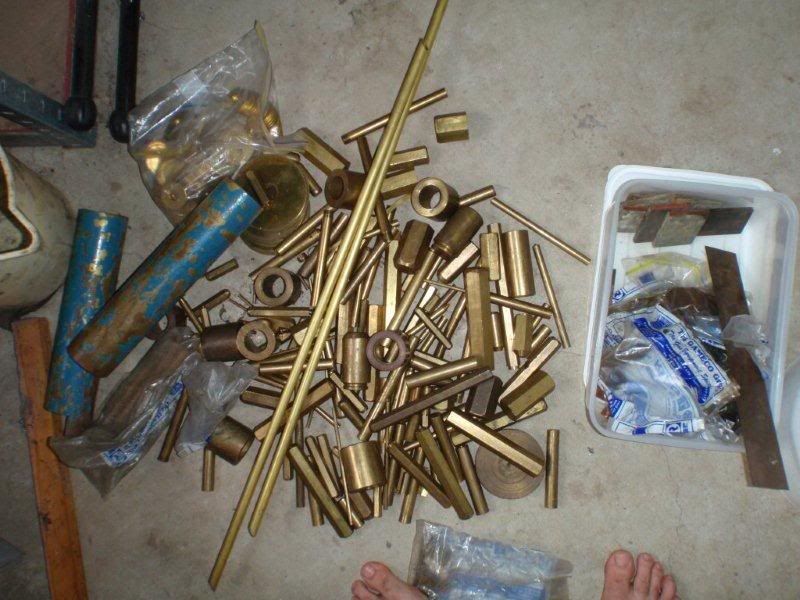
So then I cut out a section from a piece of old thin walled tube. it has too tight a radius but we can easy fix that.
-
24th February 2013, 03:09 PM #4
Member
- Join Date
- Feb 2013
- Location
- Picton NSW
- Posts
- 71
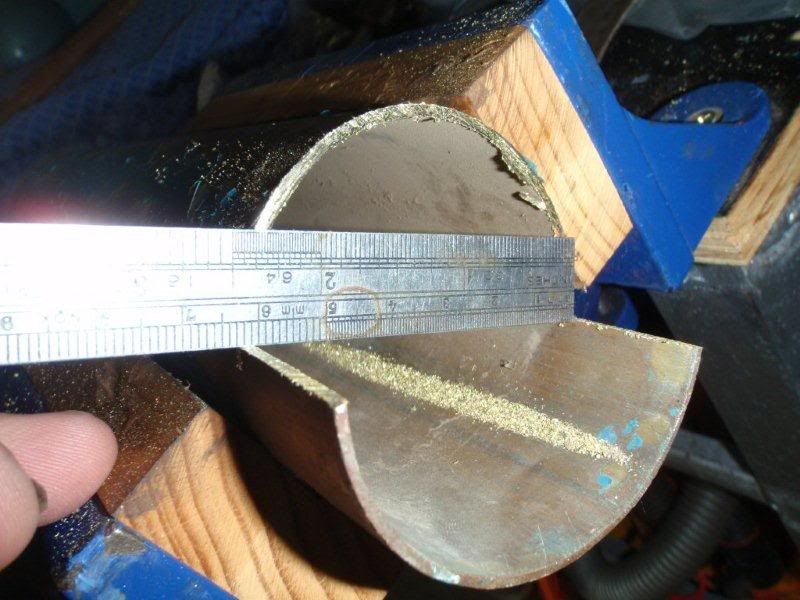
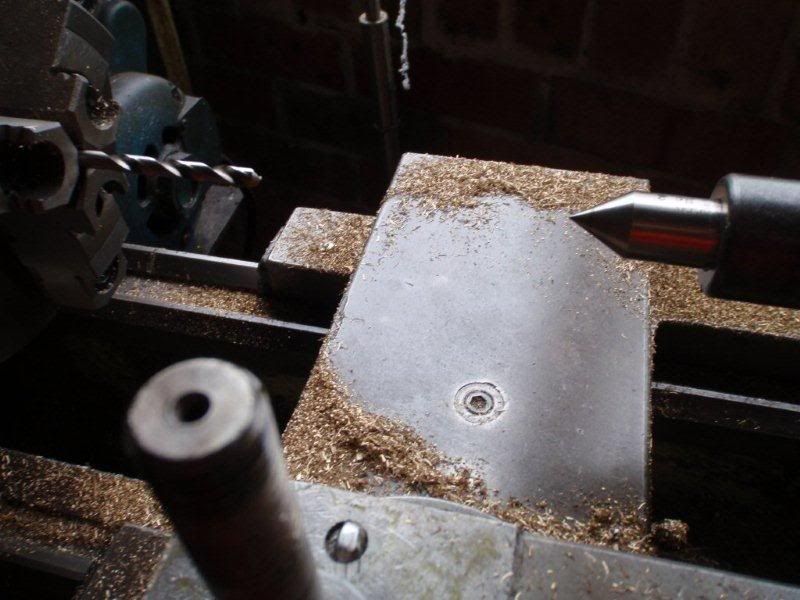
I do not have a bit the correct thickness, but I have a number of big bits like this and I can easy thin them down.
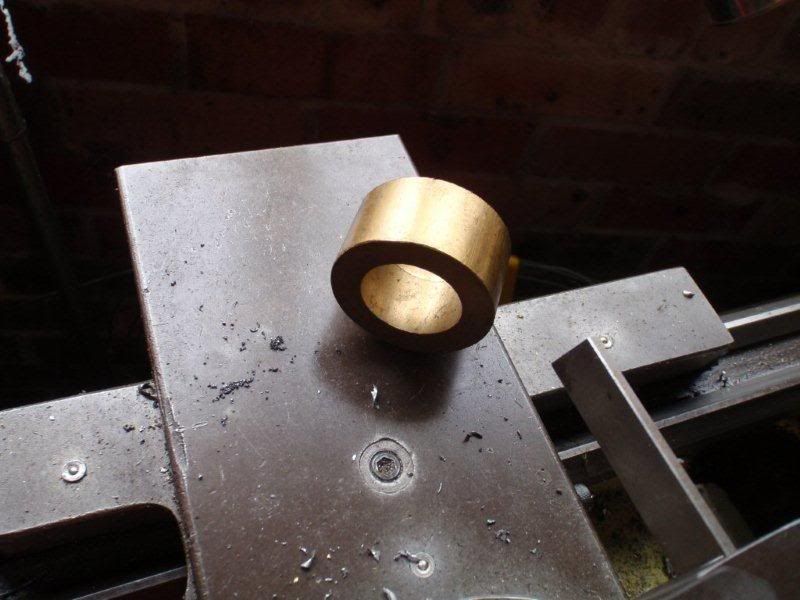
So chuck it up in the lathe and bore to size, again the radius is too small, but we will get too that...
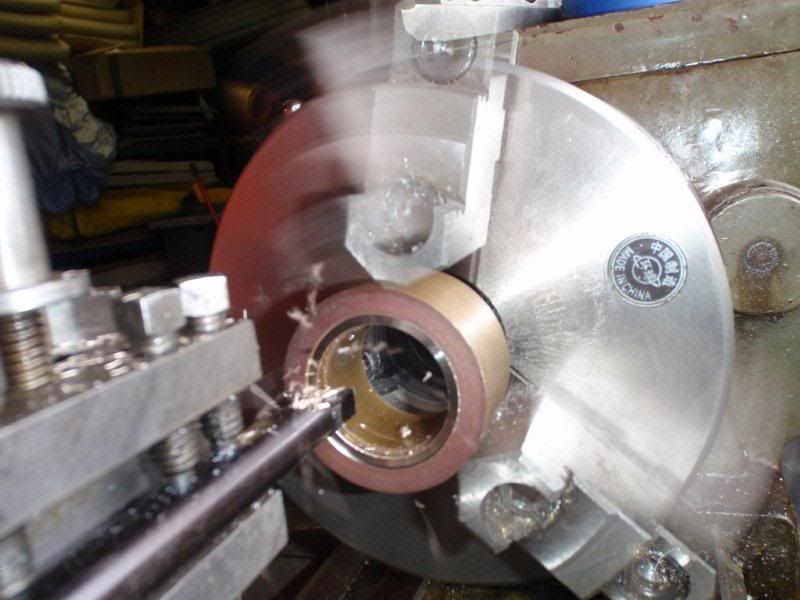
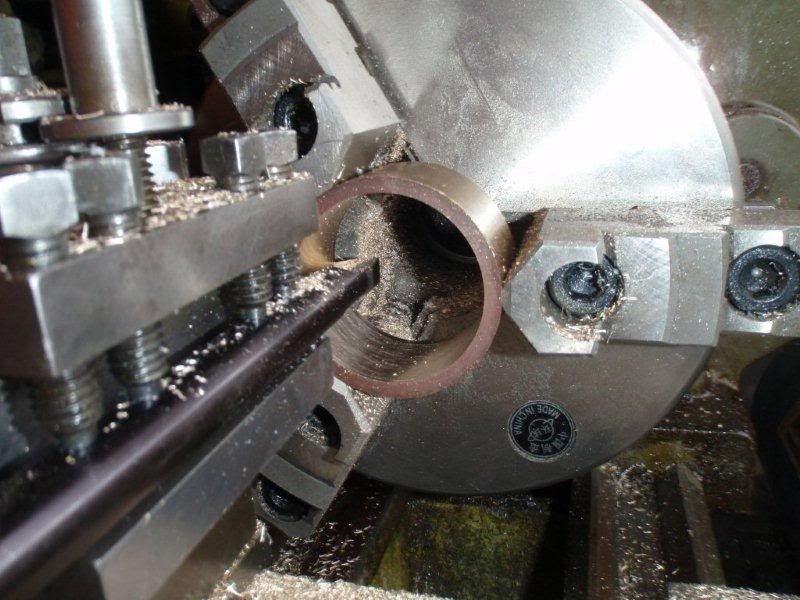
Just like steel copper based alloys can be annealed. Well sort of like steel... all you do is heat to red, and cool. air cool is fine, or quench, it does not really matter.
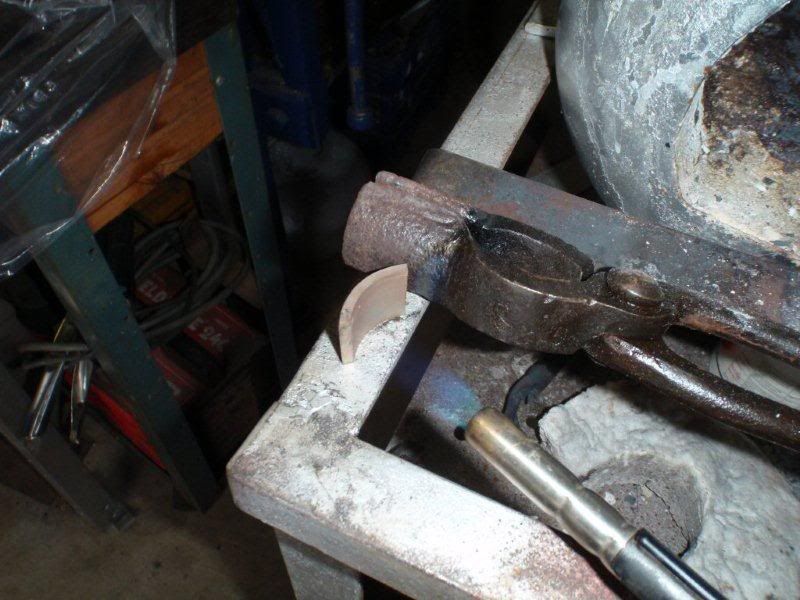
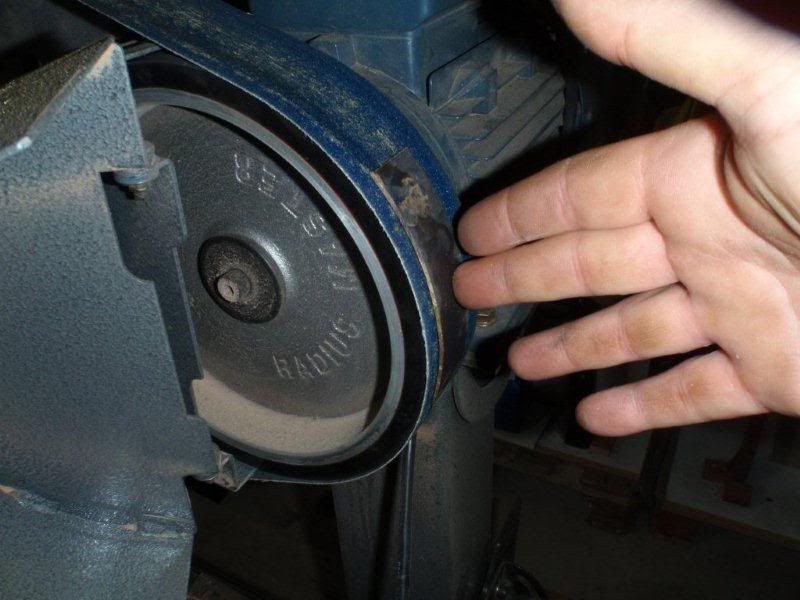
Once annealed you can cold form around a suitable anvil, in this case an old lathe chuck.
Once shaped finish on the linisher.
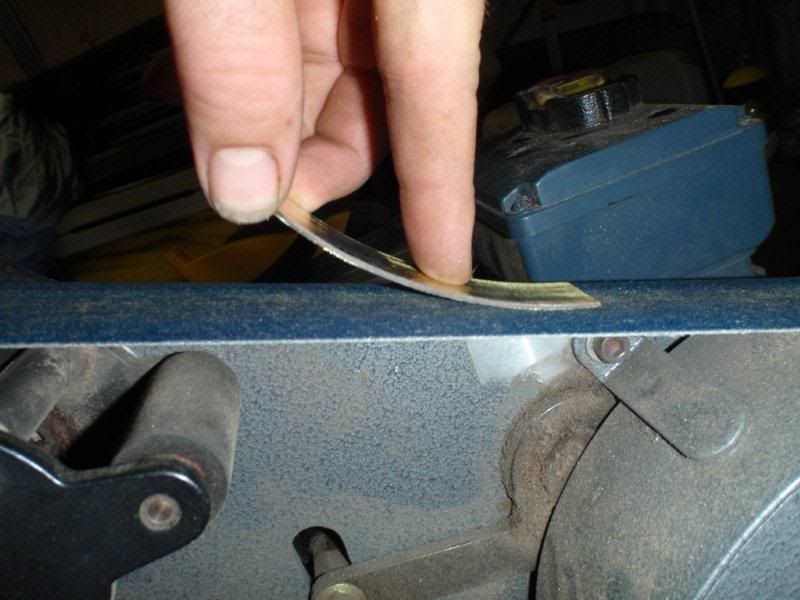
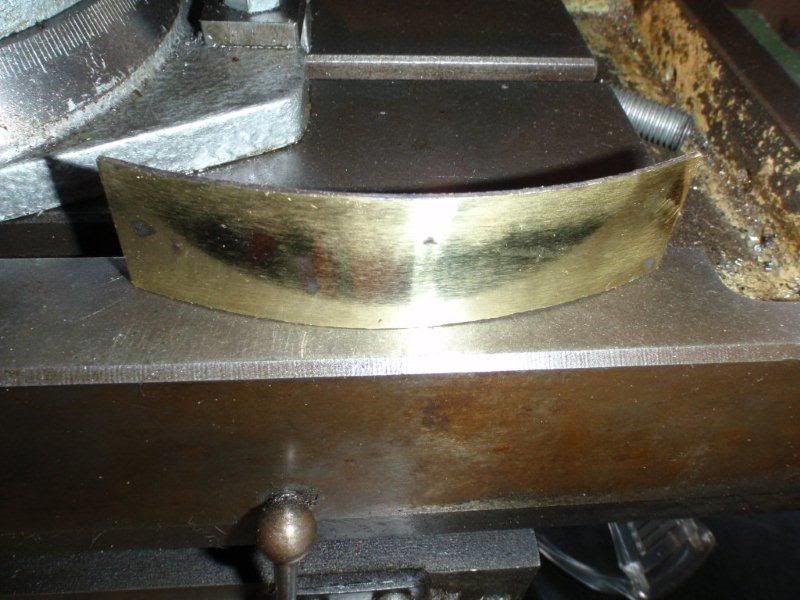
Then trim to size.
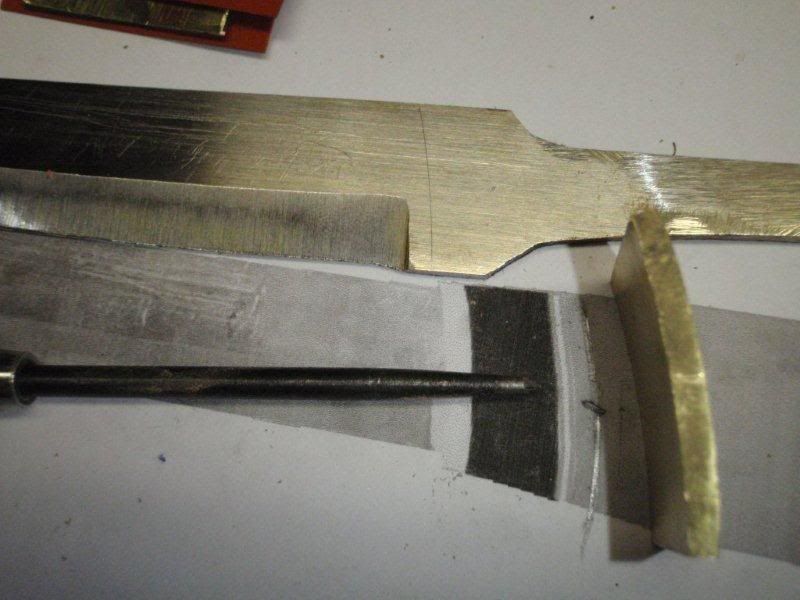
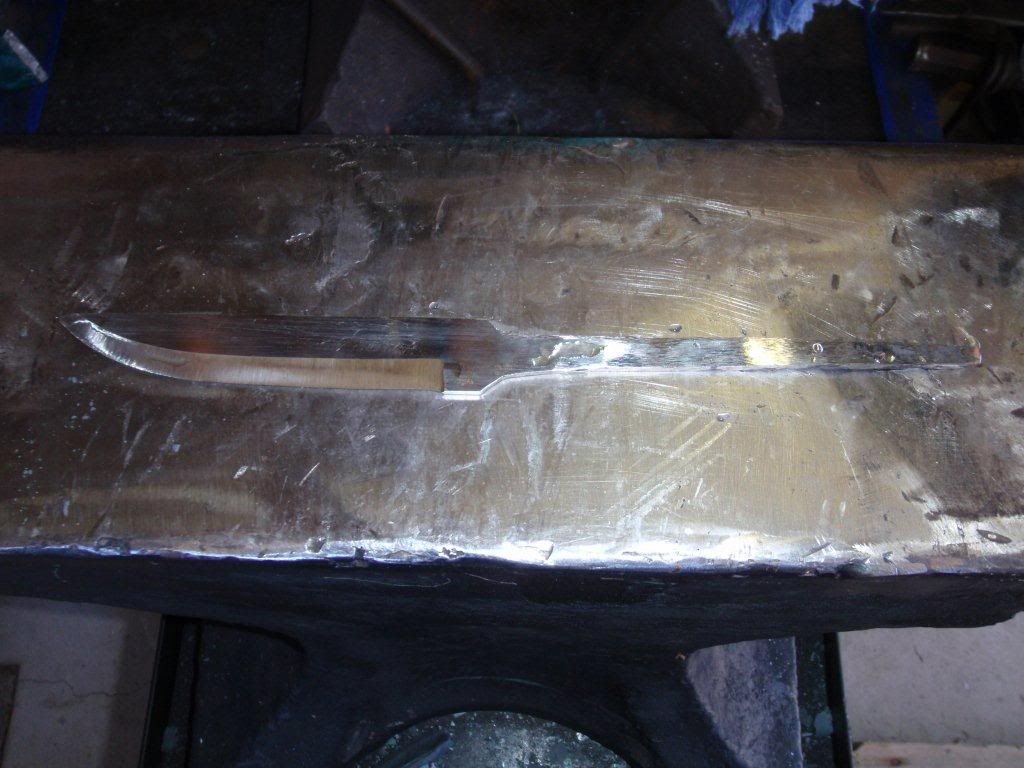
Now the blade can be scribed and the tang ground to its final shape.
-
24th February 2013, 03:11 PM #5
Member
- Join Date
- Feb 2013
- Location
- Picton NSW
- Posts
- 71
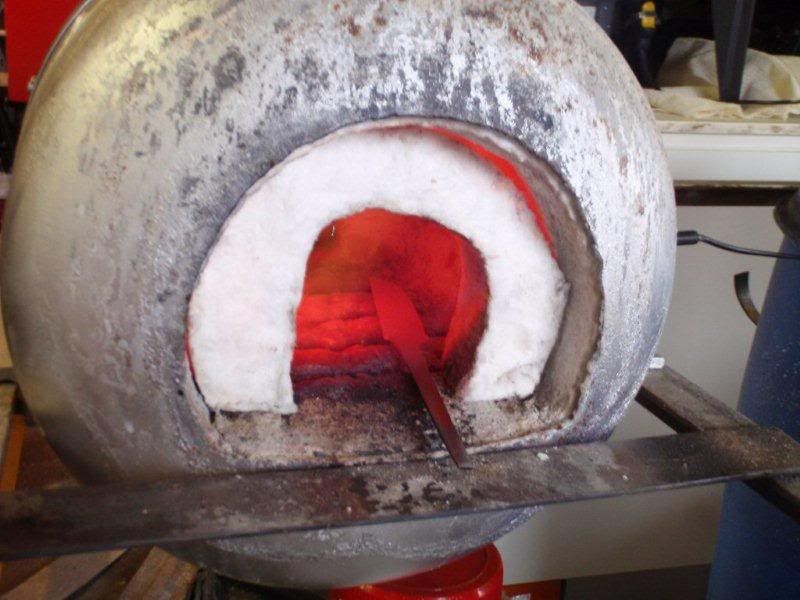
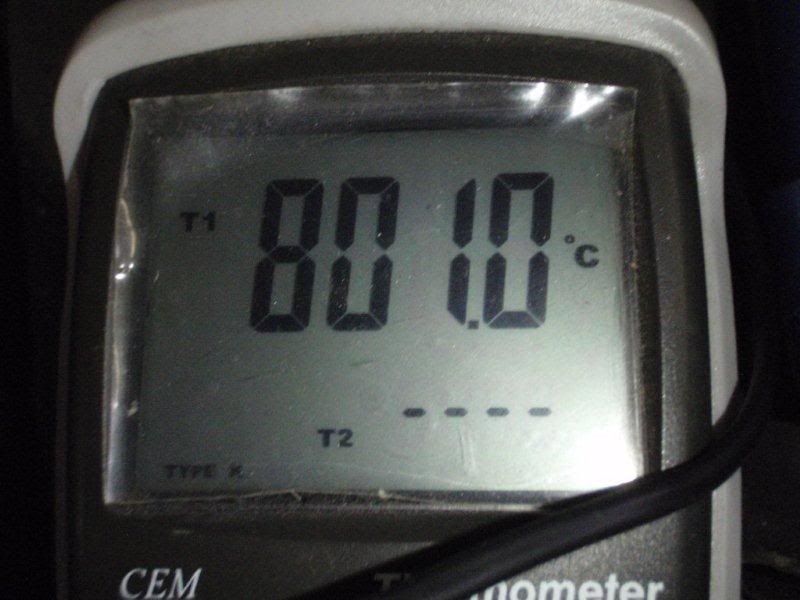
Next comes the heat treat. You will see a black wire exiting the right hand side of the forge. This is the thermocouple I use for temp sensing. I control oxidization by making the flame rich in the forge, and I can control temperature very very satisfactorily for a soak time of about 10 minutes before oil quench. I heat treated this bearing at 800c I learnt later that 830 C would have been better (I measured hardness with rockwell files after tempering as being between 55 and 60, closer to 60 . I can live with that)
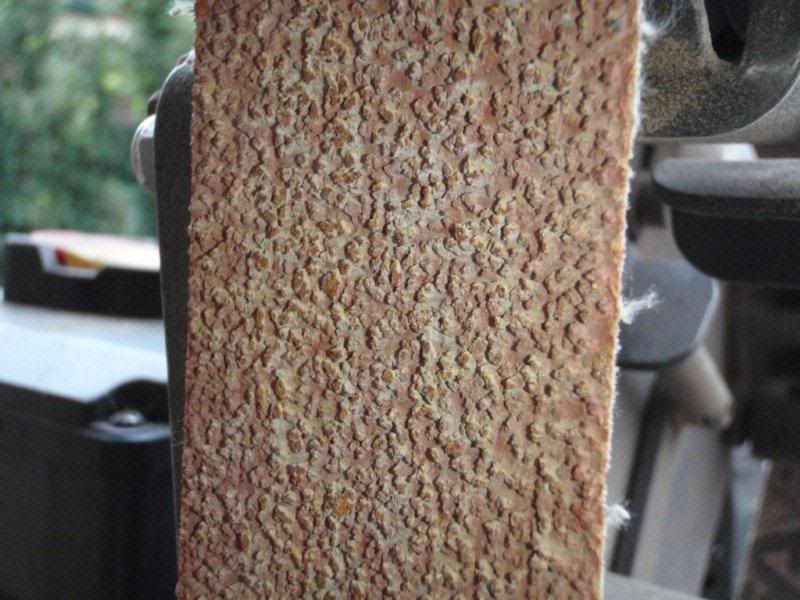
Then comes final bevel and polish. I work throught the belts on the radius master to #6 trizact and then finish with the polishing belt.

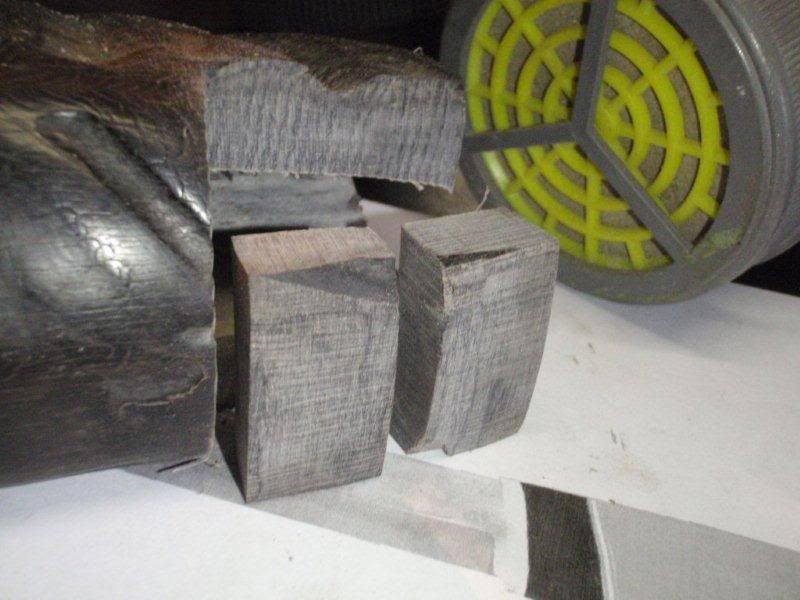
next cut out a bit of horn at appropriate thickness on the bandsaw and clean up on the radius master.
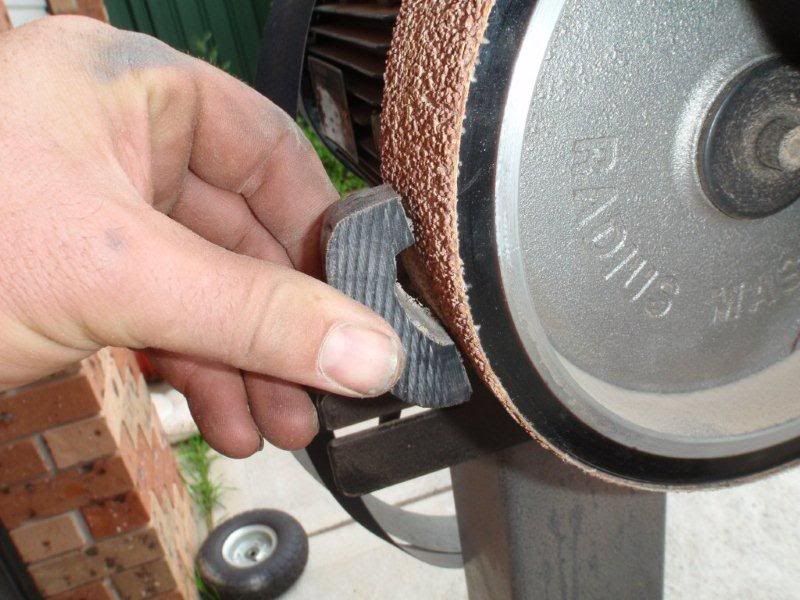
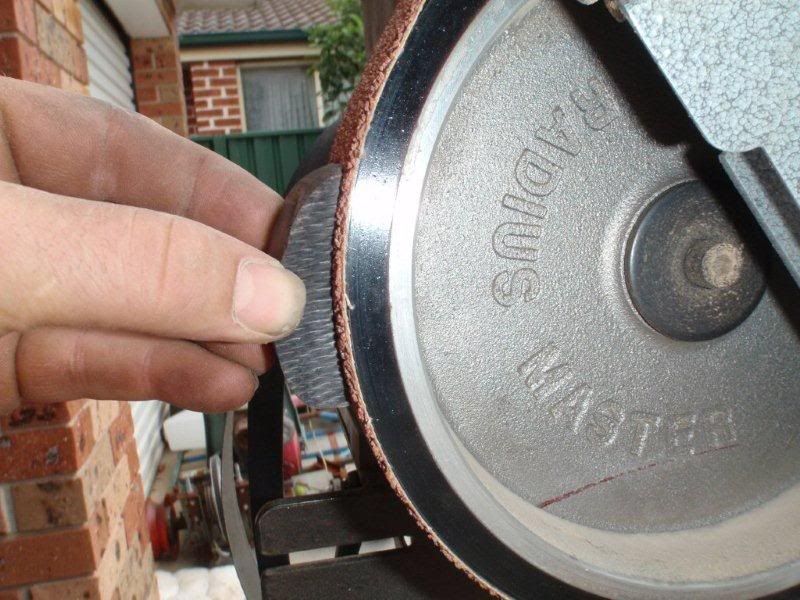
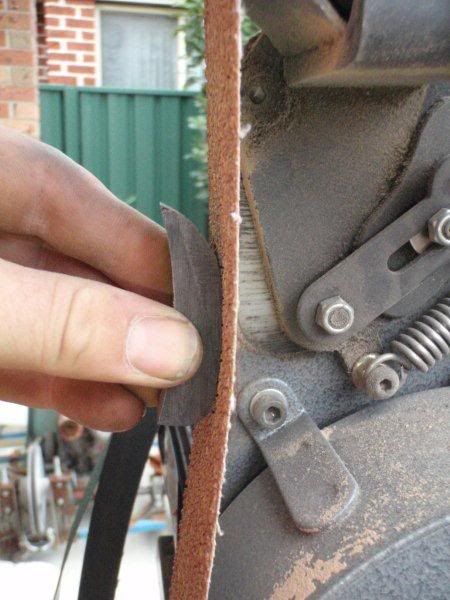
Thats not a normal aluminium oxide belt, but a really great block pattern that is awesome for wood and does not block up.
Anyhow, that is enough for now... more soon
-
24th February 2013, 03:43 PM #6
Member
- Join Date
- Feb 2013
- Location
- Picton NSW
- Posts
- 71
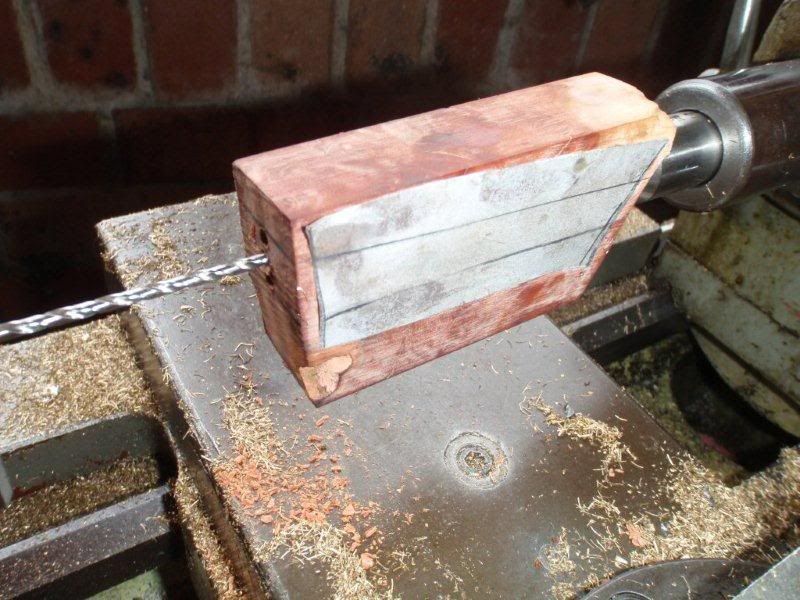
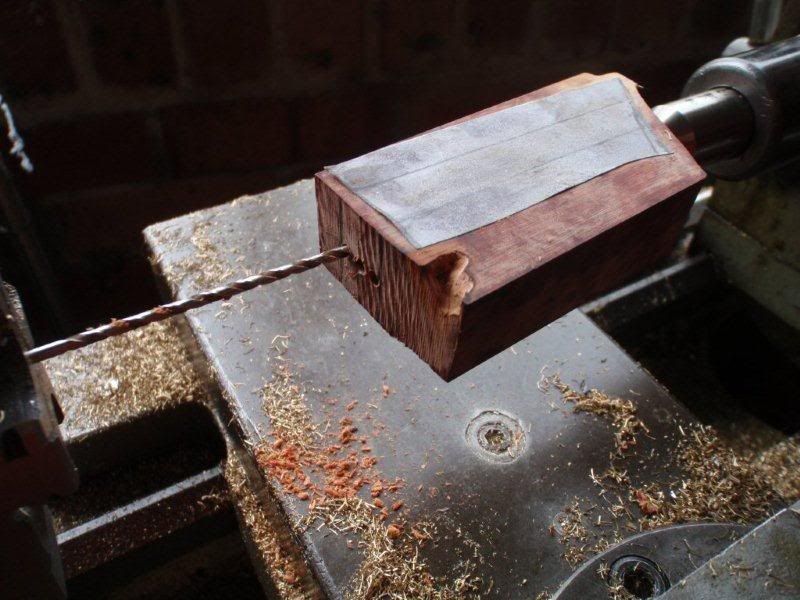
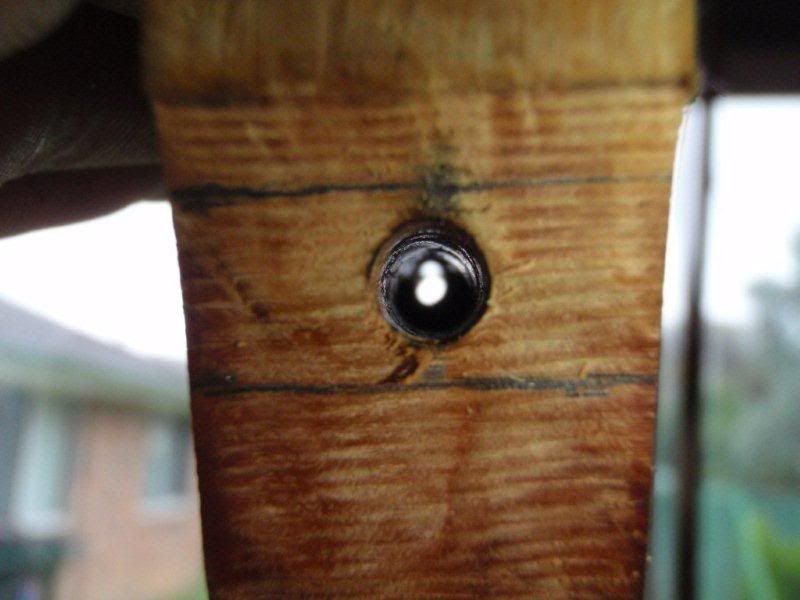
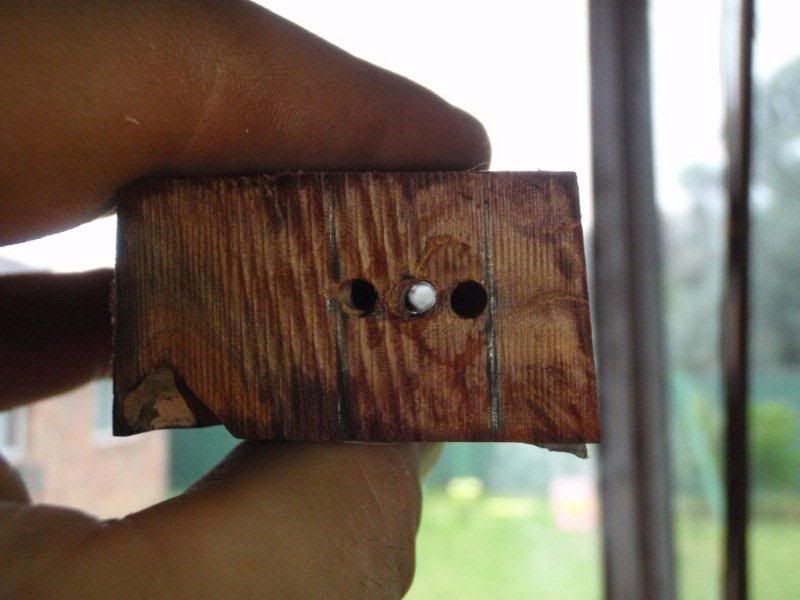
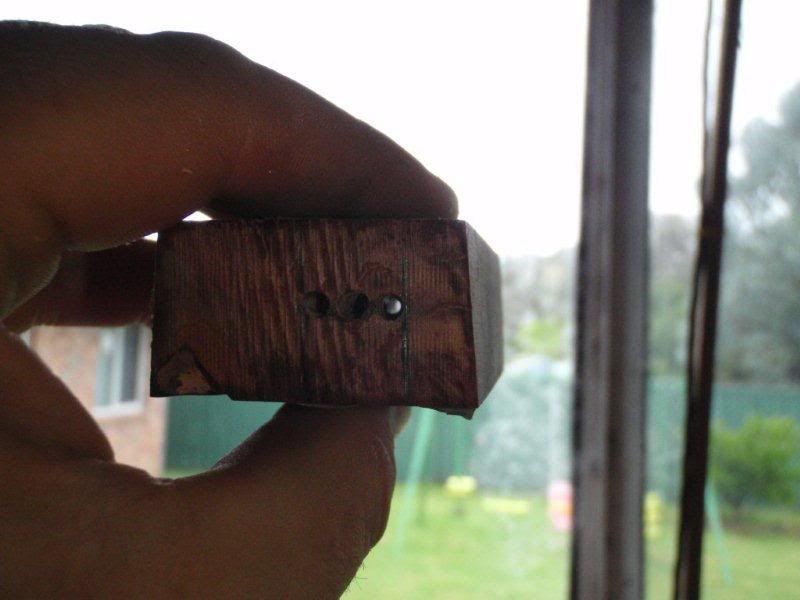
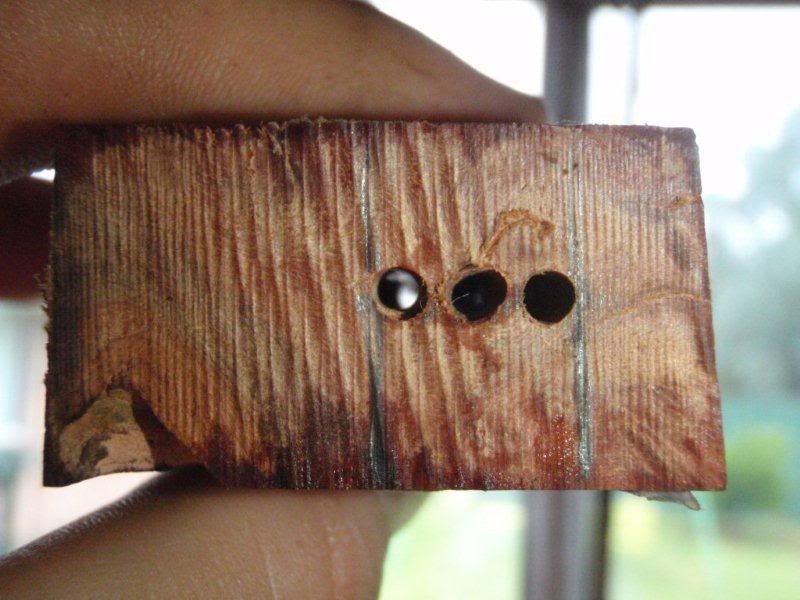
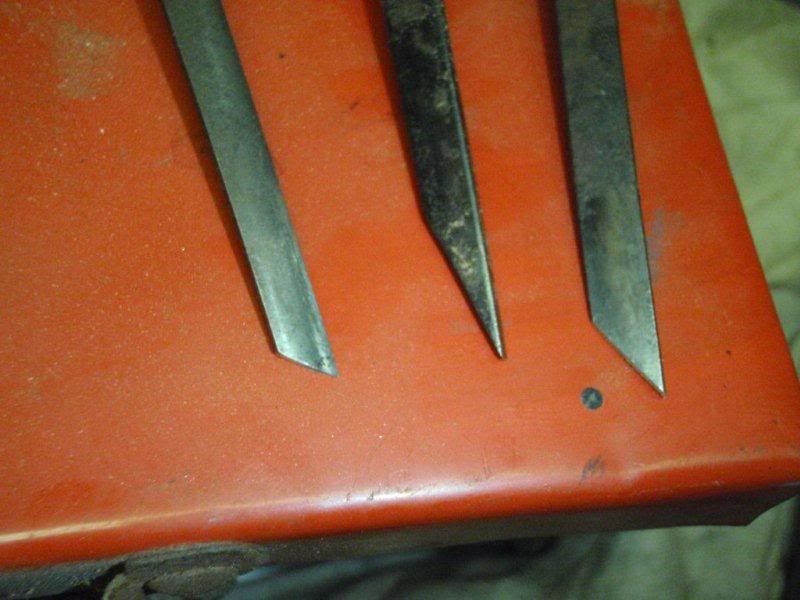
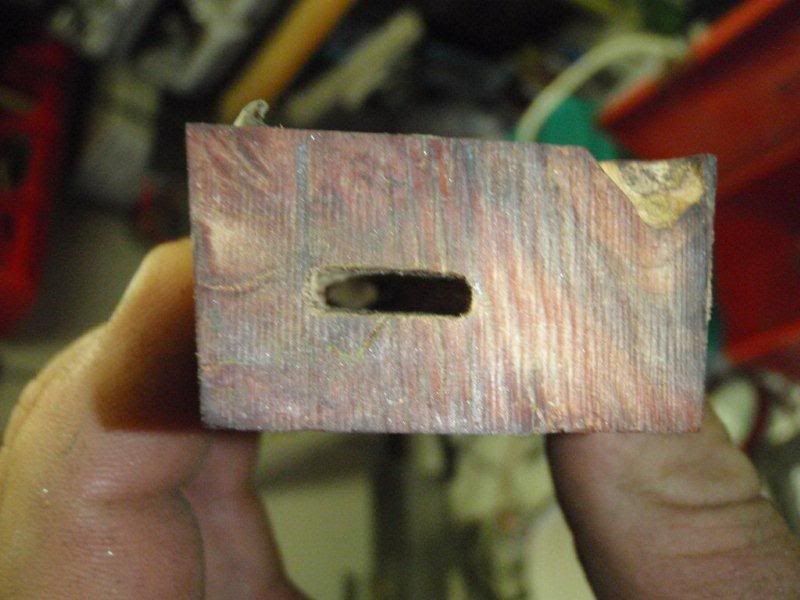
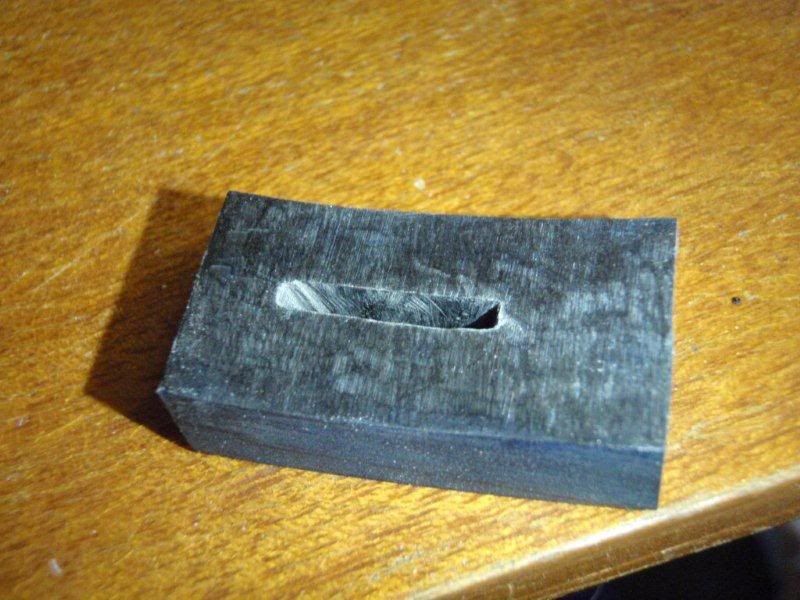
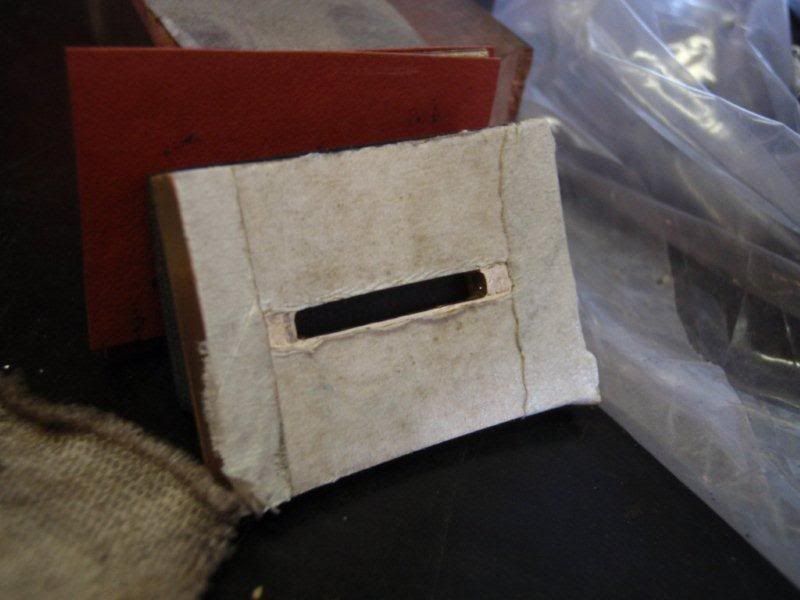
OK, now to drill the handle. I start by using the center drill to put three holes, just under the width of the tang. at the front of the handle, and one centre drilling where the tang exits at the rear.
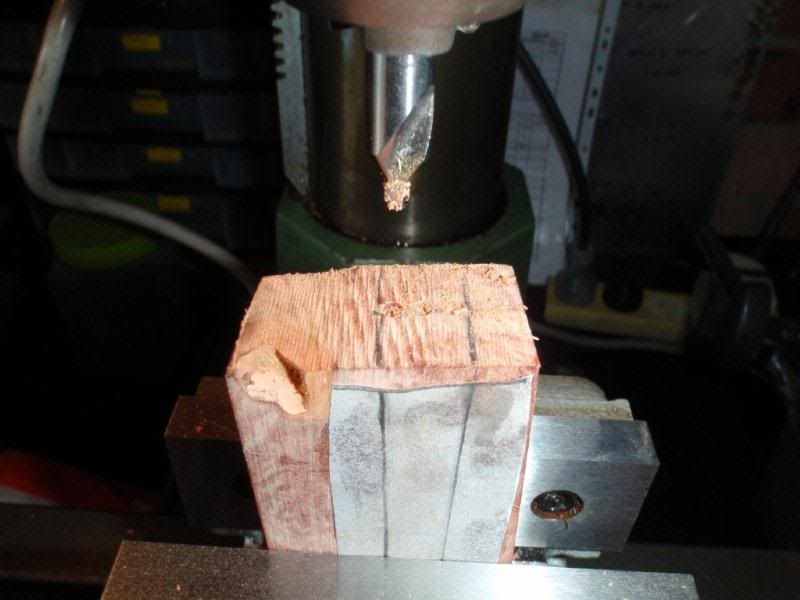
I use the lathe for the next step, because it has heaps of travel, and accurate. I set up as follows, with the drill in the chuck, and a center in the tailstock.
The wood then goes in between will the centre on the midle hole at the front and the drill at the back I drill about 1/3 of the way through.
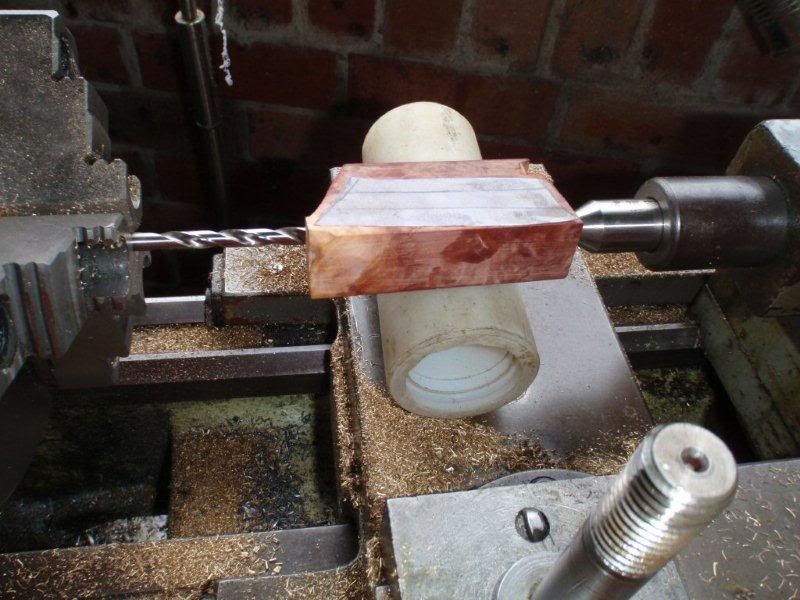
I then put a thiner drill in the chuck, turn the wood around and drill first the middle hole and then the side holes until they meet with the hole coming from the back.
-
24th February 2013, 03:45 PM #7
Member
- Join Date
- Feb 2013
- Location
- Picton NSW
- Posts
- 71
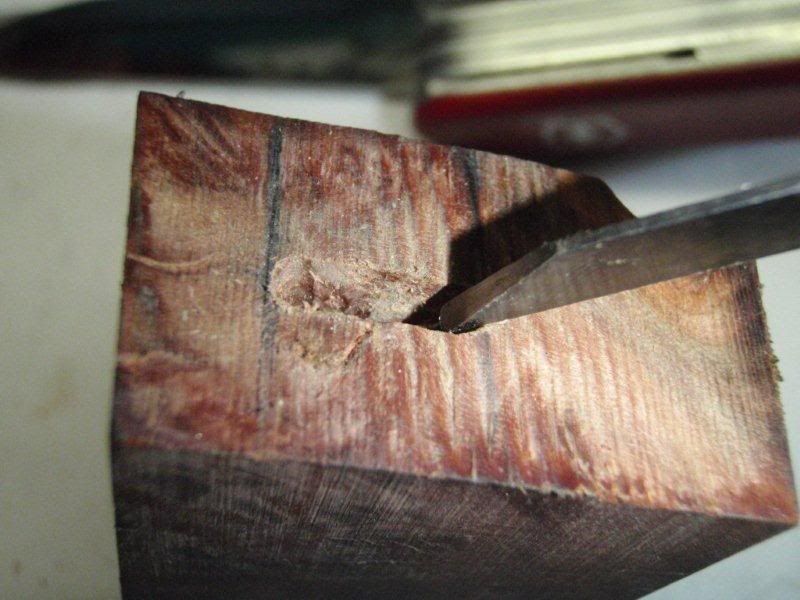
Then I chisel out the bridges between the holes
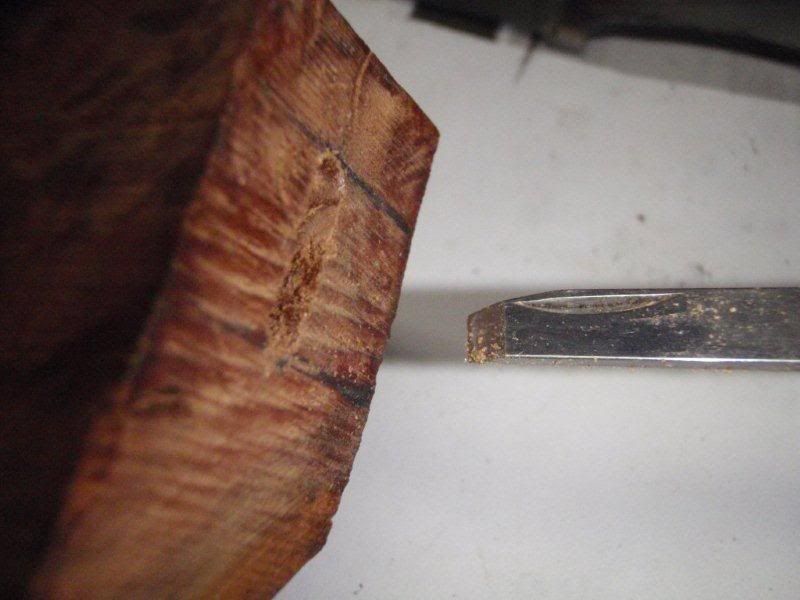
and then using gravers, I carve it out from both sides to take the tang.
-
24th February 2013, 03:46 PM #8
Member
- Join Date
- Feb 2013
- Location
- Picton NSW
- Posts
- 71
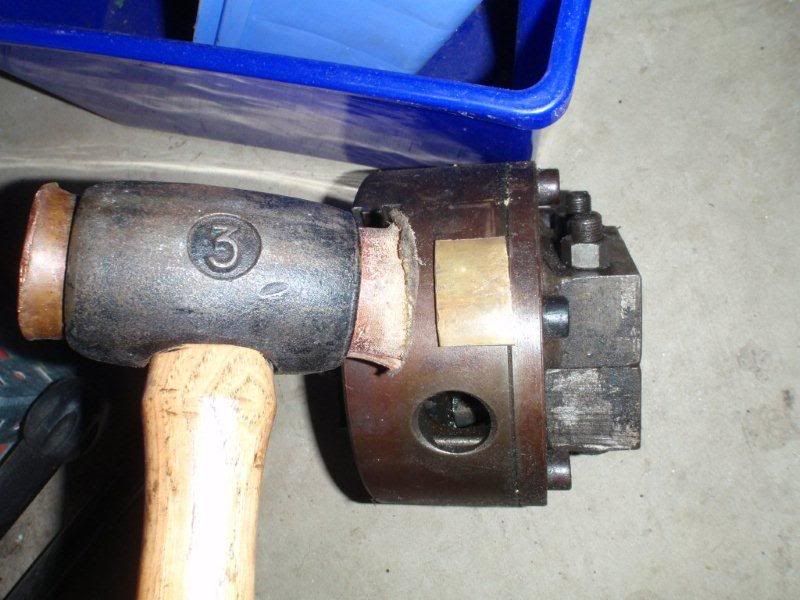
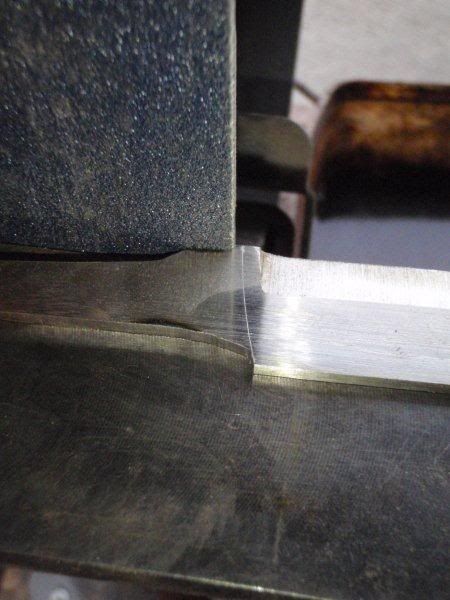
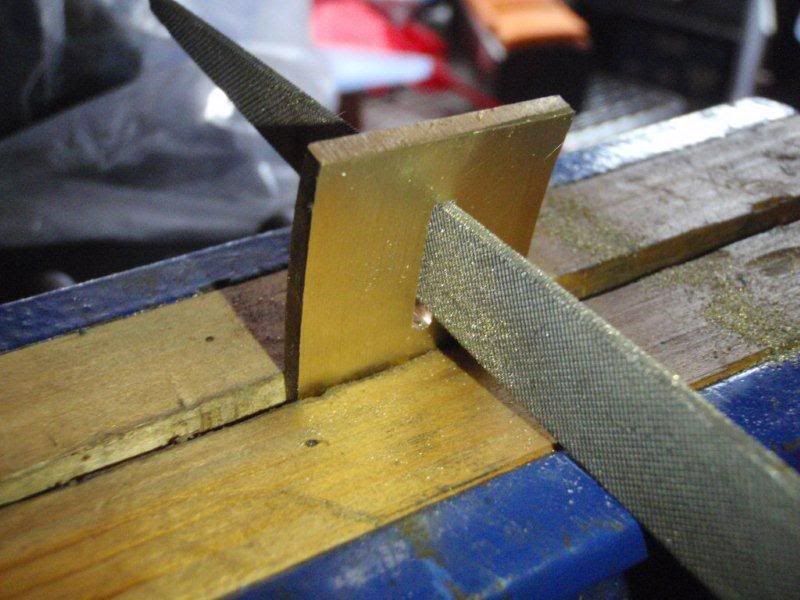
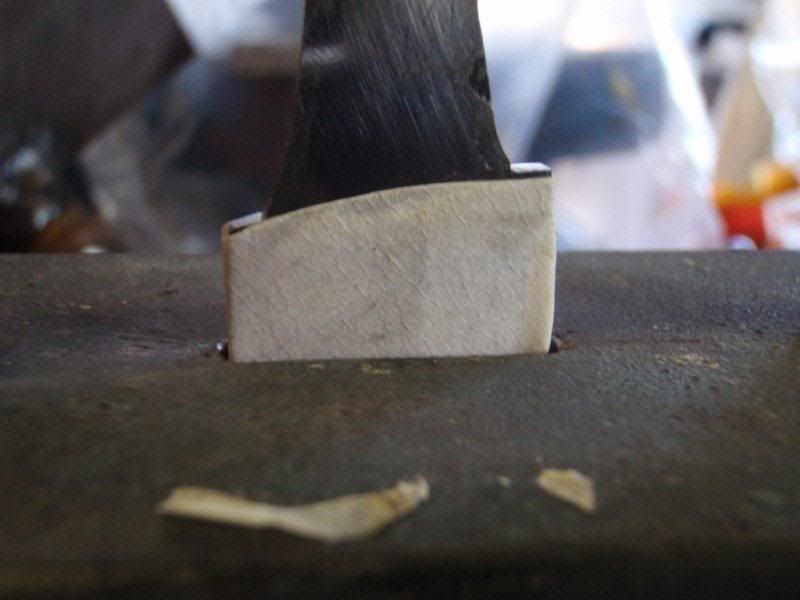
OK so next the Bolster piece is measured up and taken over to the mill, where I mill the slot to near final size. I used to do these by drilling a rowe of holes and filing them into a slot, but well, milling is just so much easier!!!
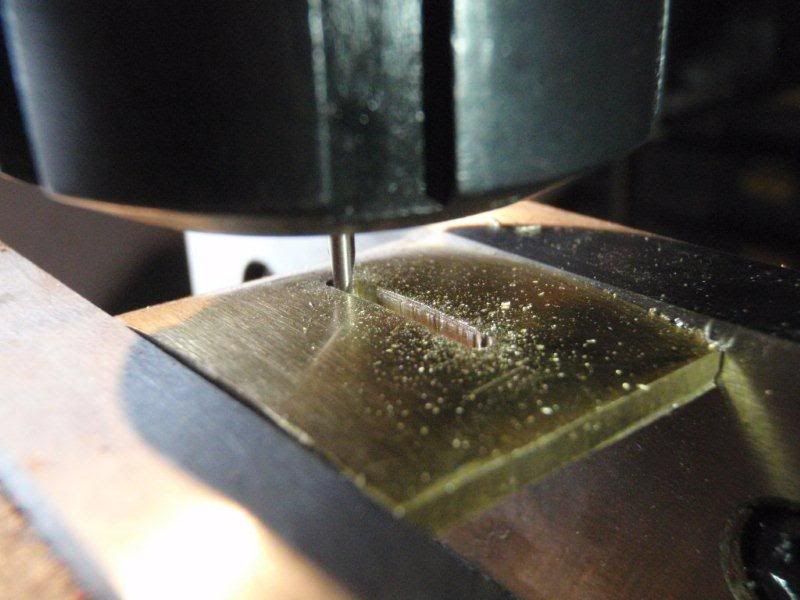
Once the slot is milled only a few strokes of the file are required to get a perfect fit onto the blade
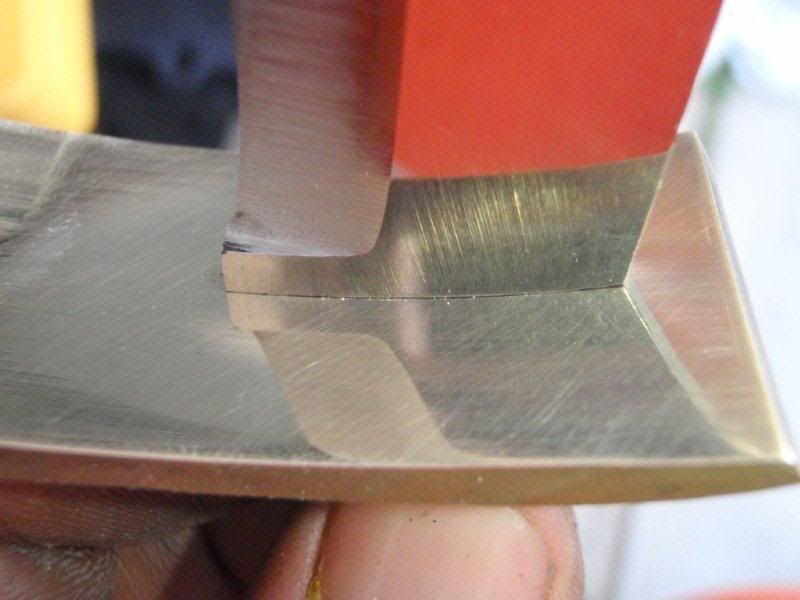
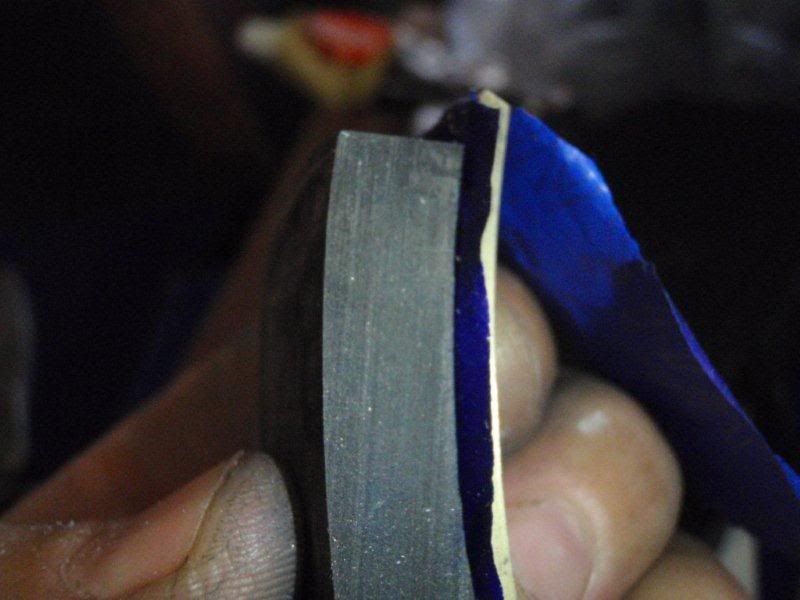
Next the horn and brass is sandwiched together with a piece of carbon paper between. Whilst the fit looks good in fact the blue marks on the horn show that it was only touching in two places. using a sander on the dremel, I sand off these spots and repeat, until the whole piece is marked with blue.
nearly there!
Once fitted perfectly the slot for the tang is milled and filed.
all pieces are prepared in this manner.
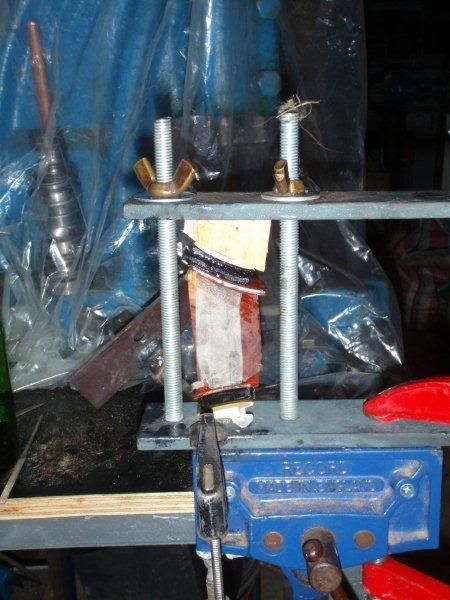
Next the blade and bolster are carefully masked up.
The blade is held in the soft wood jaws of my vice, my clamp is held with a g clamp to the top of the vice. The bolster is carefully positioned and the each layer goes on, all held together by 24hr super strength epoxy. a spacer goes on the back. The clamp is tightened which pulls all the material down onto the bolster, and the bolster hard onto the blade.
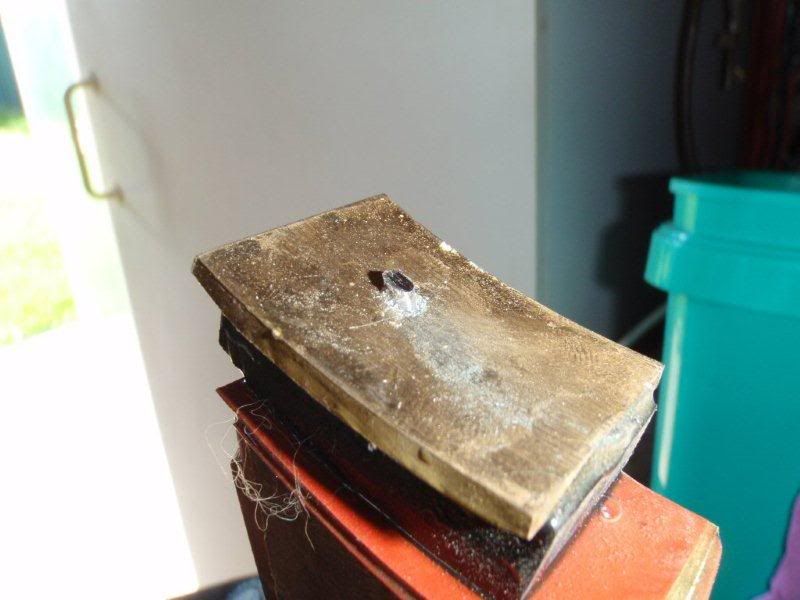
Next the tang is is carefully riveted to the Butt piece.
-
24th February 2013, 03:48 PM #9
Member
- Join Date
- Feb 2013
- Location
- Picton NSW
- Posts
- 71
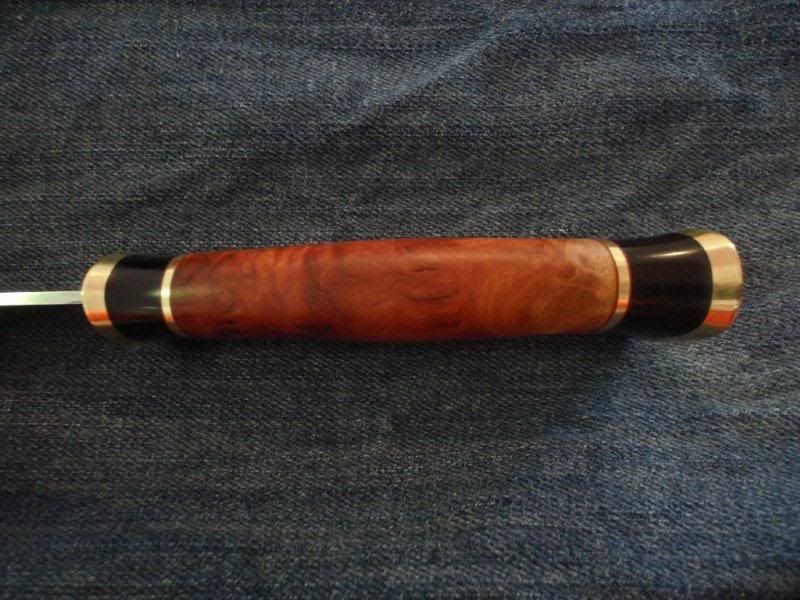
The handle is squared off on the radius master.
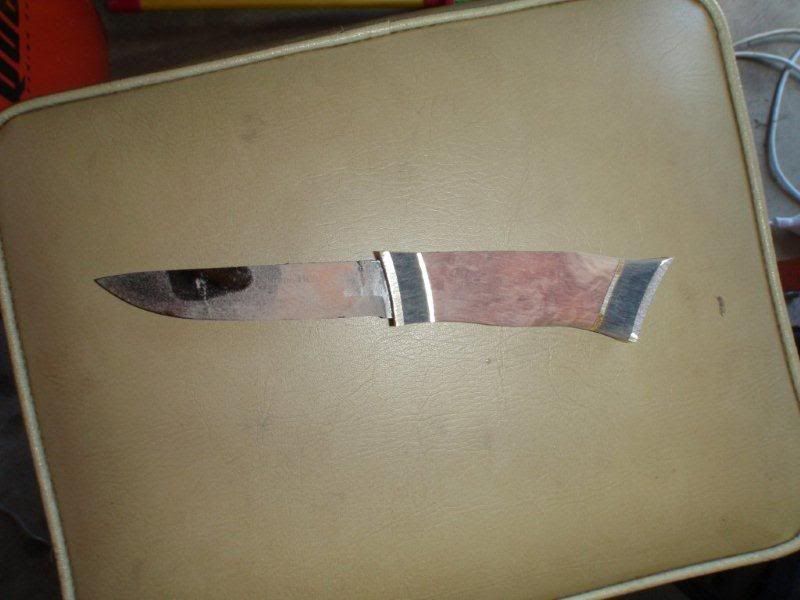
Then the corners are rounded off and the handle is worked through the grits of wet and dry.
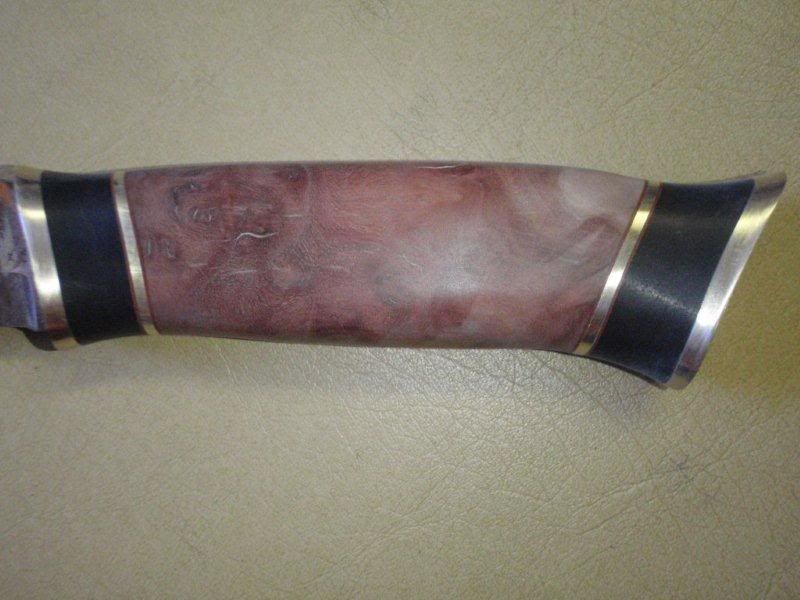
It is then oiled with a mix of turps and boiled linseed.
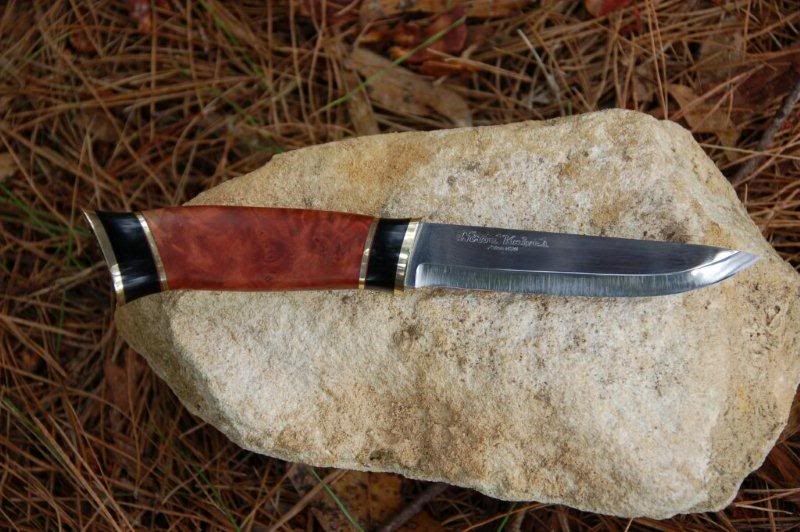
I hope somebody out there finds this tutorial useful to get into knife making, they don't have to be this complicated, but the designs are limited only buy your imagination. Making knives involves working with so many different materials and skill sets and is very rewarding.
If there is something there you want more info on, ask away. if you know a better way, please feel free to share it too!
Corin
-
24th February 2013, 04:09 PM #10
Retro Phrenologist
- Join Date
- Oct 2009
- Location
- Springfield NSW
- Age
- 70
- Posts
- 1,007
Great tutorial Corin!
A wonderful set of skills used in makingthat.____________________________________________________________
there are only 10 types of people in the world. Those that understand binary arithmetic and those that don't.
-
24th February 2013, 04:52 PM #11
GOLD MEMBER
- Join Date
- Jan 2010
- Location
- Melbourne
- Posts
- 2,636
Wow, what an amazing tutorial. Thank you for sharing.
-Scott
-
24th February 2013, 05:07 PM #12
Dances with splinters
- Join Date
- Jul 2005
- Location
- Oberon, NSW
- Age
- 63
- Posts
- 13,360

Very nicely done... both the knife and the WIP.
I notice that you shape the handle 'as one piece' so I gather that you don't have any major problems with the brass filings contaminating the horn and/or wood during sanding? Any tips or hints? 'Cos that's one of my main problem.
(I've always found it best to pre-shape any metal, then shape the "organics" to suit... but that can be a right PITA if you don't get the profiles right in the first place. )
)
- Andy Mc
-
24th February 2013, 05:46 PM #13
Member
- Join Date
- Feb 2013
- Location
- Picton NSW
- Posts
- 71
That can really suck, but some materials are better than others. Anything porous, soft or both will give you grief. Originally Posted by Skew ChiDAMN!!

Porous, soft and knife handle rarely go together, so stabilized material is better. This Mallee root burl was dense and solid so created no big issues, just being careful to sand the segments without crossing between more than necessary, that is a key point, rub along them, and sand the wood without crossing past the fiber into the brass or whatever else you are using. If you sand them all together the wood sands faster than the brass and you get ridges. It is fiddly, but that's knife making.
The buffalo horn is very resistant to brass and metal also. A good sharp belt on the grinder works wonders also, cutting rather than rubbing.
Compressed air is you friend (with dust protection) to regularly clear away the dust. Sometimes there is nothing for it but to dry assemble, shape all the parts, then dismantle, finish all the parts and reassemble and glue, but it is easier if you can avoid it. And I am all for easy
I have never attempted shaping the pieces individually.
-
25th February 2013, 10:13 AM #14
SENIOR MEMBER
- Join Date
- Mar 2004
- Location
- Central Coast
- Age
- 77
- Posts
- 824
Great post on knife making Corin I have really enjoyed your journey with it thanks for sharing it with us. Originally Posted by Corin
I have made some fishing and oyster knifes over the years but had never thought of putting them up on the forum.
My process is very simple and straight forward and is certainly not at the skill level as your knife making.
They all made from old bread and butter knifes which is Sheffield Steel I believe.
Any way here is picture of the oyster knife that I had in the boat I am at Soldiers Point Port Stephens at the moment weather is no good so I find my self here with all you good people.
Colbra May your saw stay sharp and your nails never bend
-
25th February 2013, 10:46 AM #15
Deceased
- Join Date
- May 2008
- Location
- BELL POST HILL, 3215
- Age
- 87
- Posts
- 2,332
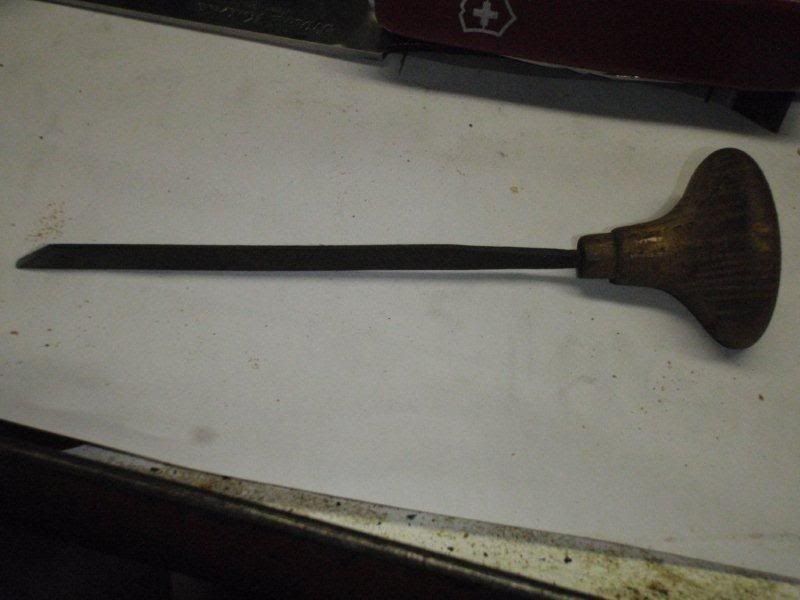
Beautiful Knife.
Hi Corin,
Hey, that is a great job.
2 things, it seems it wood be better to have the use of an Anvil.
I see you signed the finished Blade. How did you do that.
Do you sell your Knives ?. PM me if you like.
Keep up the good work.Regards,
issatree.
Have Lathe, Wood Travel.

 Reply With Quote


Similar Threads
-
Options for making long bevel cuts?
By Jonesy_SA in forum WOODWORK - GENERALReplies: 5Last Post: 17th July 2012, 09:54 PM -
Robin Scrap
By Brickie in forum METALWORK FORUMReplies: 4Last Post: 5th February 2008, 09:26 PM -
Scrap Aluminium anybody ???
By Beerbotboffin in forum METALWORK FORUMReplies: 23Last Post: 1st June 2006, 09:33 PM -
Toys from Scrap II
By Dirty Den in forum WOODWORK PICSReplies: 2Last Post: 13th January 2004, 10:31 PM -
Toys from Scrap
By Pablo in forum WOODWORK PICSReplies: 11Last Post: 13th January 2004, 10:31 PM
