

 Thanks: 0
 Likes: 0
 Needs Pictures: 0
 Picture(s) thanks: 0
Results 1 to 8 of 8
-
1st July 2011, 07:12 PM #1
 Member


- Join Date
- Jul 2009
- Location
- Gold Coast, Australia
- Age
- 55
- Posts
- 72
 Opinions needed on detailing a box
Heyas.
I've been working on a set of pens and a custom box for a mates upcoming wedding.
My first Bandsawn box too - well. First box full stop really.
And I need an opinion.
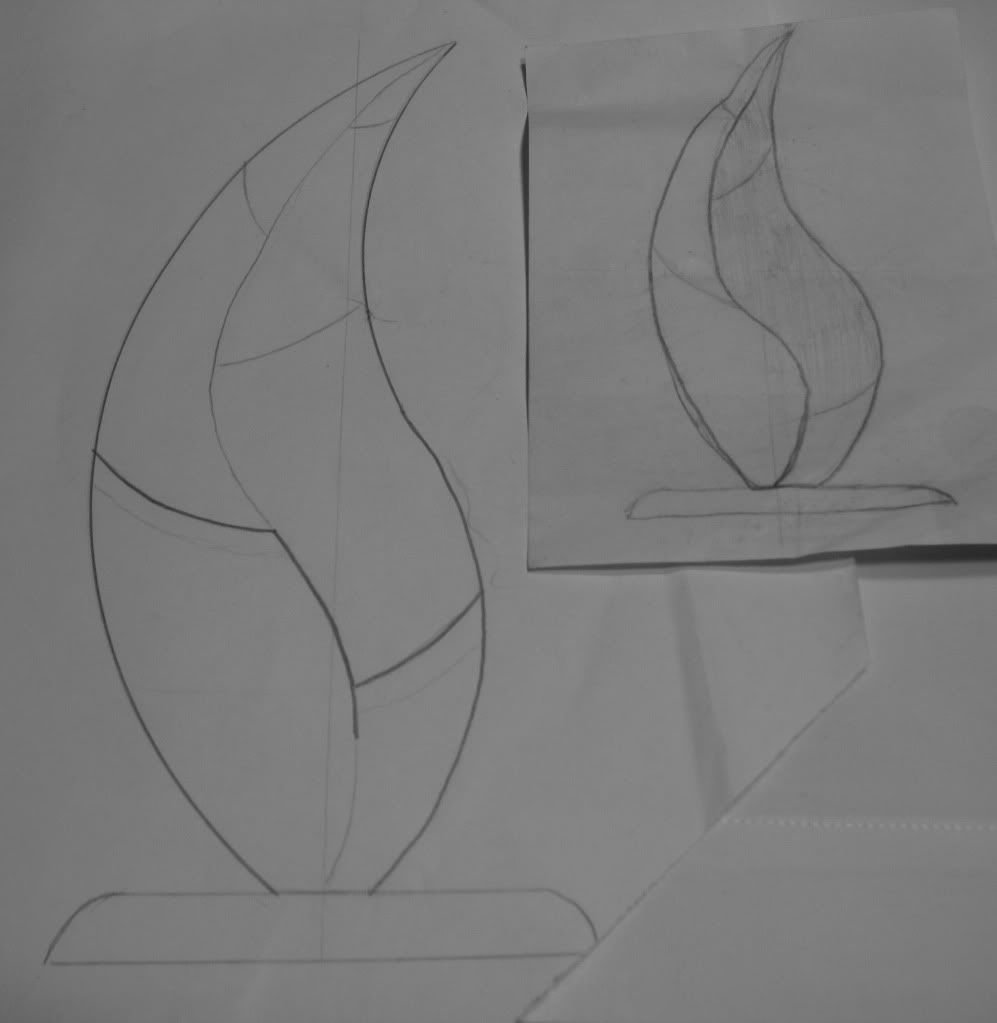
I originally conceived the design as a leaf shape with the front panel detailed with the leaf veins, stem etc.
See the concept sketch below.
(sorry bout the oversized photos. didn't want to loose any detail by sizing them down)
Now the box has taken shape really nicely and is mostly complete.
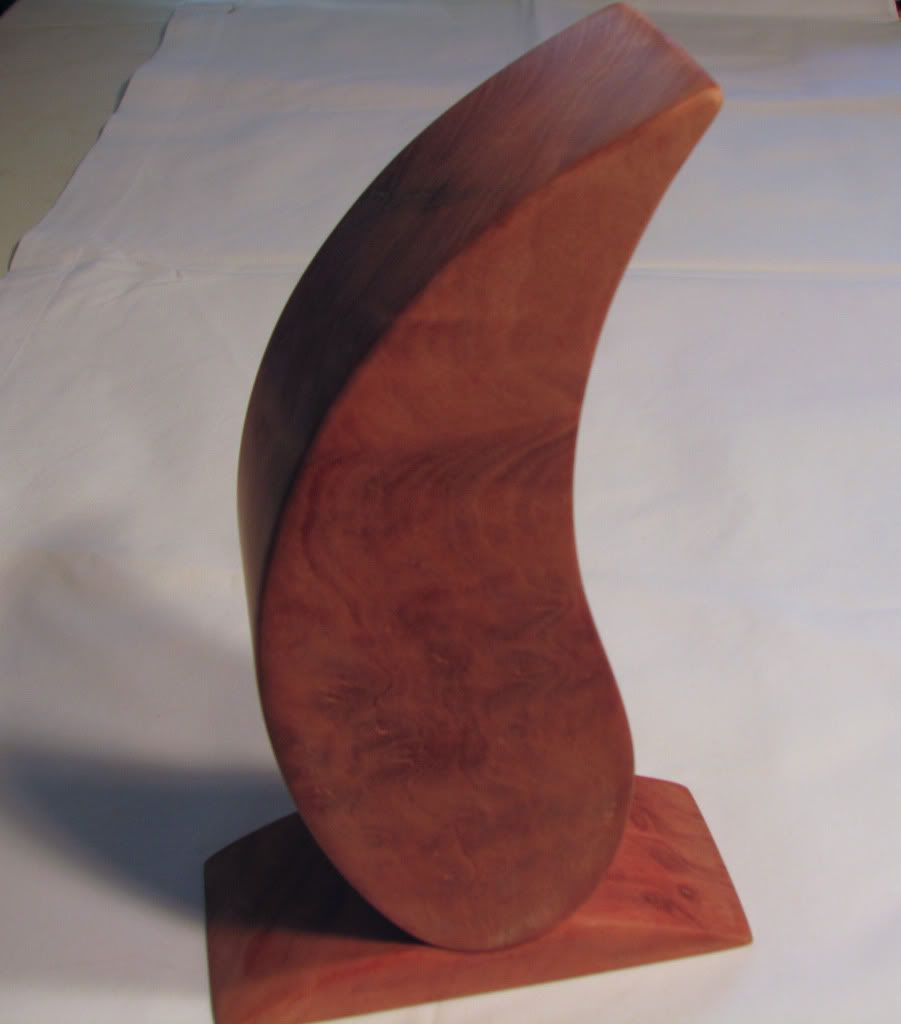
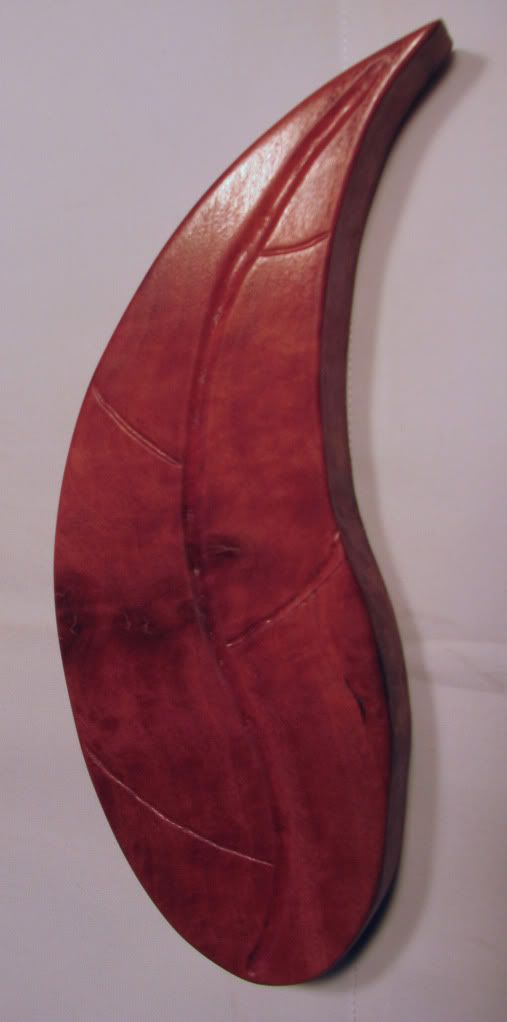
I just need to finish detailing and seal/finish it. I did a trial run based on what I had in mind with a sheet I cut off originally to reduce the thickness of the box. I ALWAYS do a dry run when approaching a step that can't be taken back.
I carved the lines with a dremmel + flexible shaft and a small, spherical carbide carving bit.
However I have a few issues with this.
* The resulting detail work is barely visible and may not be worth the effort.
* Artistically the detailing work breaks up the otherwise flawless face of the box.
* Hand carving the detail work like this has a high risk of catastrophic failure. ie. If I slip even once, I've screwed it up. The gouges will be hard to remove once ploughed in.
The rest of the photos are here if to want to see them.
Boxes pictures by ppofandt - Photobucket
So I wanted a few opinions from the more experienced boxers here.
First - what do you think of the box so far? It's not a good overview and I'll do a full photo write-up for posting here once I've finished.
Second - is the detailing work worth doing? Will it look ok without it or do you think that it'd come out a bit too plain?
Third - If I continue to detail a leaf vein/stem pattern, is there a better way to do it? One less risky?
Any suggestions or ideas? I'm looking for artistic opinions as well as technical suggestions.
-
1st July 2011 07:12 PM # ADSGoogle Adsense Advertisement
- Join Date
- Always
- Location
- Advertising world
- Age
- 2010
- Posts
- Many
-
2nd July 2011, 11:33 AM #2
Head Moderator
Sister of the DarkSide
- Join Date
- Dec 2004
- Location
- Toowoomba Q 4350
- Posts
- 9,217
What a great idea!!!
Love the design of the box.
I like the leaf veins, I too, would carve them as you've done, with a dremel.
If you are able, why not try colouring in the lines on the picture on the computer to see what it looks like so that you don't have to redo anything on the piece itself.
I think a bandsawn box like that is just a shape without some detail carving and for me, the detail carving of the leaf veins makes it take on character and life.
cheers
Wendy Box Challenge 2011 - Check out the amazing Boxes!
Twist One - Wooden Hinge/Latch/Catch/Handle
Twist Two - Found Object
Twist Three - Anything Goes
-
2nd July 2011, 03:47 PM #3
GOLD MEMBER
- Join Date
- Aug 2010
- Location
- ACT
- Age
- 84
- Posts
- 2,580
Hi,
What a fantastic concept and so well done so far.
A couple of ideas to play with, and that's all they are, they are not something I have tried.
1) Deepen the groves and super glue some wire in them to give a lead light effect. Copper, brass brazing rods, lead fuse wire or silver come to mind.
2) Fill the grooves with a contrasting wood putty/filler and re sand. You would probably need to seal it before applying the filler to stop it highlighting the grain.
I am afraid neither of those fit your main wish of removing the risk of a slip up with the Dremmel.
For what it's worthHugh
Enough is enough, more than enough is too much.
-
2nd July 2011, 05:06 PM #4
Member
- Join Date
- Jul 2009
- Location
- Gold Coast, Australia
- Age
- 55
- Posts
- 72
One option that might do the job but remain relatively risk free is to use a CNC machine.
Alas. An option not available to me
I still like the idea of detailing the face with a leaf/vein pattern. I'm still not sure that the result is sufficiently noteworthy to risk a screwup. This is my first attempt at this after all. Risk is relatively high.
Please continue with the opinions. Enough one way or the other will certainly help me make my mind up.
Oh. And thanks for the accolades. Appreciated.
-
2nd July 2011, 06:24 PM #5
Senior Stinkologist
- Join Date
- Nov 2001
- Location
- Parkside - South Australia
- Age
- 45
- Posts
- 3,318
Great idea and like the others I like the concept. My comments below are simply to generate some ideas and not an attack on what you have done so far.
I can see that there is something missing from the leaf design. Its hard to put my finger on it but it seemed to go from almost finished (although perhaps a little bland) in the second photo, to a further advanced form with the leaf but further away from a finished product (if you get my meaning).
I see the Dremmel work so far as distracting from the smooth design of the box. Mainly due to the slightly wonky lines that has resulted from I guess freehand work where it is slightly wider and perhaps deeper in some areas than others.
If it was mine I would be getting a router bit with a sharp point (45deg) and creating templates from mdf of the curves so you can get smooth flowing lines with the router. The depth of the cut should be fairly deep as to create strong shadow lines. I also like the idea by A Duke of a wire inlay (I would only go silver against the red but that is just a personal thing).
If this still is not enough I would try and get the shading on one side of the leaf as per your initial sketch. It would be a black dye or even better a black dye with a textured finish (like you sometimes see on the edge of turned bowls). The dye should not be too dark, just enough to create a contrast and still allow the grain to come through. (example of textured edge The Woodworkers Institute - Sculptural Wide Rim Bowl (Print))
Best of luck with it. No matter what you do there will be a chance that you stuff it up, on the other hand however if you take the leap you can end up with something fantastic. I look forward to seeing how it finishes up.Now proudly sponsored by Binford Tools. Be sure to check out the Binford 6100 - available now at any good tool retailer.
-
2nd July 2011, 07:20 PM #6
Member
- Join Date
- Jul 2009
- Location
- Gold Coast, Australia
- Age
- 55
- Posts
- 72
Perfectly fine with me. I understand and certainly won't take offence at ANY suggestions or comments. Originally Posted by Sir Stinkalot

The 2nd photo is the almost finished box - just awaiting detailing or sealing and is currently just as the photo shows.I can see that there is something missing from the leaf design. Its hard to put my finger on it but it seemed to go from almost finished (although perhaps a little bland) in the second photo, to a further advanced form with the leaf but further away from a finished product (if you get my meaning).
The 'leaf' photo is a trial attempt on a bit of scrap cut from the original block of wood. When approaching steps that are irreversible I prefer to have a few practice runs under my belt. And, yes. I messed it up a bit (a lot). The cuts were sloppy and ill formed.
That's part of my worry. I can't afford to have something go badly like that on the work-in-progress.
Ya. Freehand. Part of the reason for the variations is that I was experimenting with different tips and cut styles. Some I used a spherical carving bit. Others with a conical one and used only the tip. Also. Given that it was just a practice run I was more sloppy than I might normally be. That's a bad habit of mine I'm trying to break myself of. Taking shortcuts.I see the Dremmel work so far as distracting from the smooth design of the box. Mainly due to the slightly wonky lines that has resulted from I guess freehand work where it is slightly wider and perhaps deeper in some areas than others.
Before I commit I'll resaw the scrap wood into 3 equal thickness plates. That will give me enough surfaces to practice twice more. It's thick enough (15mm or so). 5 more times if I use both sides.
I love that idea. I also need a router but personal philosophy prevents me from buying any tools unless I actually have a need for one - otherwise I'd be spending ALL my cash on tools I like the look of.If it was mine I would be getting a router bit with a sharp point (45deg) and creating templates from mdf of the curves so you can get smooth flowing lines with the router. The depth of the cut should be fairly deep as to create strong shadow lines. I also like the idea by A Duke of a wire inlay (I would only go silver against the red but that is just a personal thing).
Thinking of getting a Triton JOF001 - small enough to be hand manipulated but still capable of mounting on a table and height adjusted with the Triton "above table" height adjust.
With a few more plates resawn from the scrap/practice piece I may be able to try that.If this still is not enough I would try and get the shading on one side of the leaf as per your initial sketch.
Thanks for the advice. Keep the suggestions coming if you can.
-
2nd July 2011, 10:39 PM #7
Dances with splinters
- Join Date
- Jul 2005
- Location
- Oberon, NSW
- Age
- 63
- Posts
- 13,360
I like!
Another way to "enhance" the grains would be to make a couple of curved templates and rout the veins in, instead of carving.
Then you could make up some inserts in a contrasting timber (or maybe japanned?) to inlay into the routed slots.
Edit: Ahhh... buggrit. I shoulda read Stinky's thread all the away through!
- Andy Mc
-
3rd July 2011, 08:01 AM #8
 SENIOR MEMBER
- Join Date
- Jul 2005
- Location
- Orange N.S.W.
- Posts
- 165
Good idea ,well executed(might have to pinch it,one day
 )
)
Just a thought
Why not try a little pyrography ,may be easier to do,and would look much better IMPO.
cheers
gidgee 1

 Reply With Quote


Similar Threads
-
Opinions Needed
By Les in Red Deer in forum WOODTURNING - PEN TURNINGReplies: 8Last Post: 5th March 2010, 07:22 PM -
Custom Pen Boxes-Opinions needed
By PenTurner in forum WOODTURNING - PEN TURNINGReplies: 8Last Post: 14th November 2008, 06:35 AM -
Opinions needed on these.
By Tiger in forum HAND TOOLS - POWEREDReplies: 4Last Post: 9th October 2005, 12:01 AM -
Opinions on Dawn Vice, Clamps needed
By Ben from Vic. in forum HAND TOOLS - UNPOWEREDReplies: 23Last Post: 11th July 2005, 01:00 PM
