

 Thanks:
  Likes:
  Needs Pictures: 0
 Picture(s) thanks: 0
Results 31 to 45 of 88
Thread: 17 Leblond restoration?
-
6th March 2012, 09:27 PM #31
 GOLD MEMBER


- Join Date
- Jun 2008
- Location
- Victoria, Australia
- Age
- 74
- Posts
- 6,132

Hi Ewan,
Congratulations on the new lathe, as far a project machines go, you've got a ripper!
Not only a great bit of history that's worth preserving, but a machine that will do well at everything within it's scope.
Now, just practice the mantra... "they don't make em like that anymore"... and repeat...
I'm looking forward to watching the restoration process.. (are you down for the scraping course?)... you might need some of those skills...
Regards
Ray
-
6th March 2012 09:27 PM # ADSGoogle Adsense Advertisement
- Join Date
- Always
- Location
- Advertising world
- Age
- 2010
- Posts
- Many
-
7th March 2012, 09:39 PM #32
Blacksmith, Cabinetmaker, Machinist, Messmaker
- Join Date
- Dec 2011
- Location
- Canberra
- Age
- 40
- Posts
- 4,467
Ray, Originally Posted by RayG

Unfortunately, as much as I'd love to come down for the course, I've just blown my spending money, and running a business and having 2 kids under 2 doesn't leave me with many opportunities to duck away for a weekend. One day.....
Ewan
-
8th March 2012, 07:51 PM #33
Blacksmith, Cabinetmaker, Machinist, Messmaker
- Join Date
- Dec 2011
- Location
- Canberra
- Age
- 40
- Posts
- 4,467
I pulled the apron to bits today. Everything came out relatively easily (once i worked out how it was held in anyway).
Pics of the parts, the rule is 6" long


The half nuts appear to have been replaced before and are in pretty good shape. The two small bevel gears that allow the feed to be reversed also appear to be non original. The main bevel gear is still in good shape, as is the clutch facings(other side of bevel gear and the large disk and shaft directly above bevel gear) as you can see the clutch has a very steep angle.
The only thing i want to know is how on earth did all that fit in the apron
The plunger that gives you surfacing or sliding still bears the stamping "Cross feed" (partly visible in pic) "Chasing" and "Length feed" It will take some careful cleanup to preserve the Length feed stamping, but i will try my darnedest! As you can see by the knurling, this old girl has seen some use.

Ewan
-
15th March 2012, 08:07 PM #34
Blacksmith, Cabinetmaker, Machinist, Messmaker
- Join Date
- Dec 2011
- Location
- Canberra
- Age
- 40
- Posts
- 4,467
Ok, so i've spent 10 min here, 20 min there over the last week and got some more stuff done.
I've cleaned all the apron parts, and put them with their "close friends" in snap lock bags with a bit of thin oil. Its the best way i could think of to keep the parts in groups and to stop rust.(anyone got any better ideas?)
Clean parts in baggy

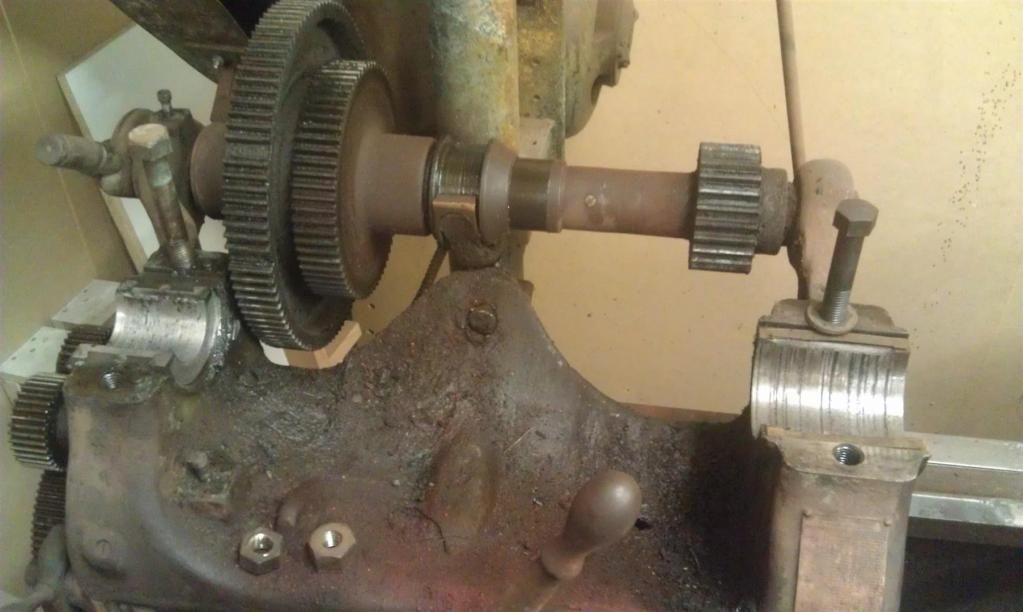
Gearbox- from the rear with 2 shafts already removed (its upside down aswell)

the 2 shafts

All the gearbox parts in order- top left is the gear driven from the main spindle, this then drives the long gear, selector gear and cluster of 8 gears. This then drives either one of 3 conventional gears, or the slowest speed, which is always meshed and engages via dog clutch. the "lump" at the very end of the final shaft is the clutch that drives the feed shaft. The gear that drives the leadscrew can be slid out of mesh so the screw doesn't turn during regular work. (i think that all made sense)
It was quite a PITA to get the barrel selector out, as everything had to be removed off it before it could come out of the casting.
the rule is 30cm

Finally, the main selector gear, the only single width gear in the box that is driving at all times. Well I call it a gear. It looks more like a throwing star.....

I really do wonder how many millions (or more?) times that gear has gone round.Its definitely time for retirement.
Ewan
-
15th March 2012, 09:33 PM #35
Senior Member
- Join Date
- Dec 2011
- Location
- South East Queensland, Australia
- Posts
- 354
Tis coming along good Ueee, keep up the good work.
Hope your apprentice keeps you on the ball.
Cheers.
If I'm not right, then I'm wrong, I'll just go bend some more bananas.
-
15th March 2012, 10:21 PM #36
Blacksmith, Cabinetmaker, Machinist, Messmaker
- Join Date
- Dec 2011
- Location
- Canberra
- Age
- 40
- Posts
- 4,467
Yes, my apprentice is being a great help, he usually runs off with the next thing i need- just like a typical first year! Originally Posted by Log
I drew the line at letting him sniff petrol, oops i mean cleaning parts with me, hey i have to be a responsible parent occasionally.
He is great to have around, i was cutting dovetails today (by hand) and he went round afterwords and picked up all the chunks and put them in a neat pile on the bench. I didn't have the heart to try to explain to him that i didn't need those bits.
Ewan
-
18th November 2012, 05:14 PM #37
Blacksmith, Cabinetmaker, Machinist, Messmaker
- Join Date
- Dec 2011
- Location
- Canberra
- Age
- 40
- Posts
- 4,467
All this talk with Mark about his planner has got me a little motivated......
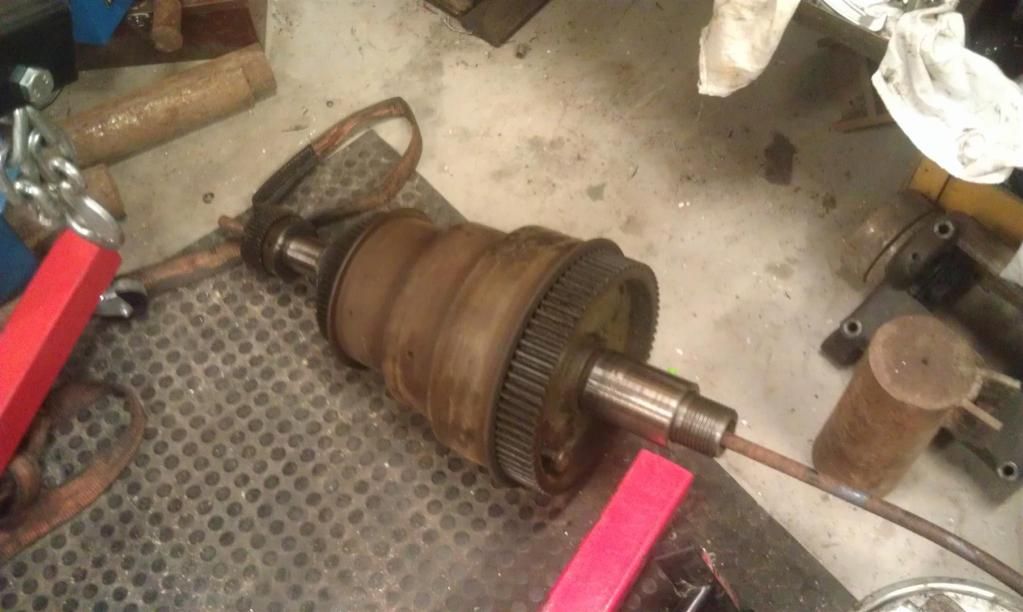
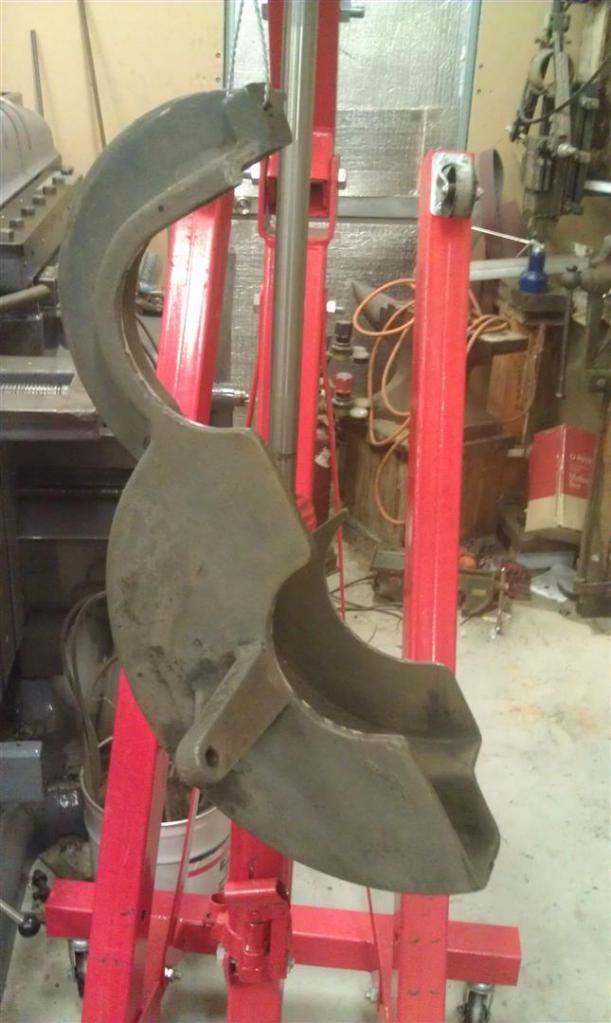
So i spend a few hours this arvo with the engine crane and removed her main spindle, back gear assembly and finally the head casting itself.
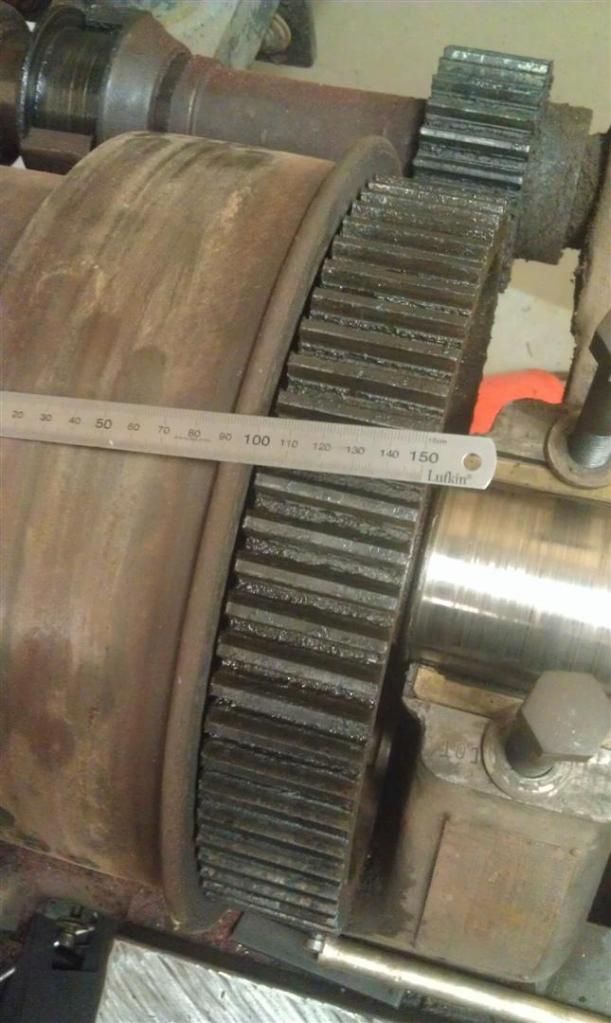
Firstly i removed the guards, they are cast iron and a lot heavier than i expected. This revealed the 6dp back gear's, all 6 of them. The bull has 74 teeth so comes in at 12.333" PCD. They are all in good shape except there are 2 teeth missing from the largest of the 2 rear gears, and the smallest driving gear is very worn, but it is brass/bronze, i'm not sure if maybe its a replacement after whatever caused the 2 teeth on its driven gear to go missing may have destroyed the original?
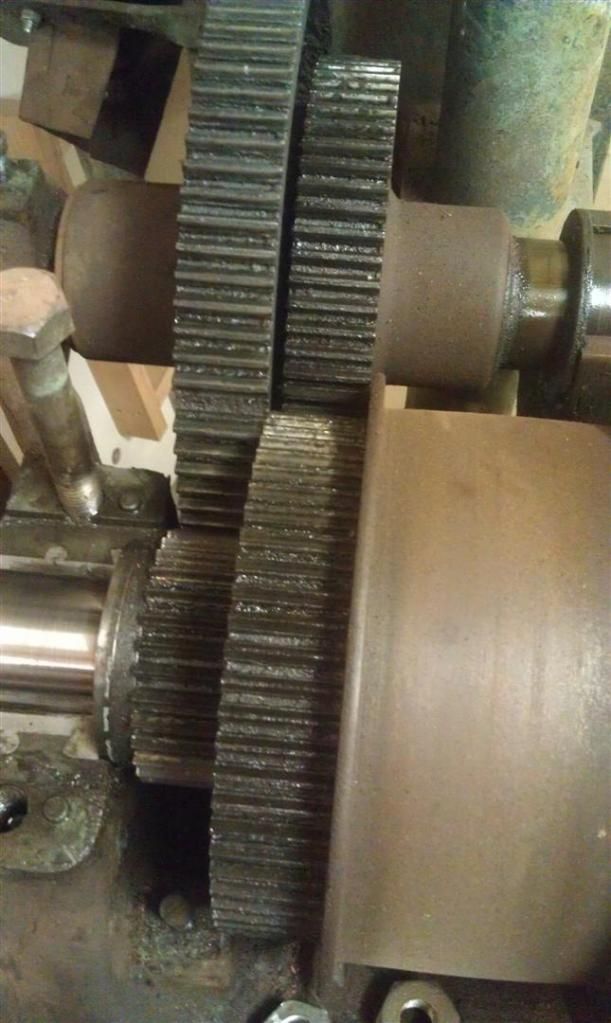
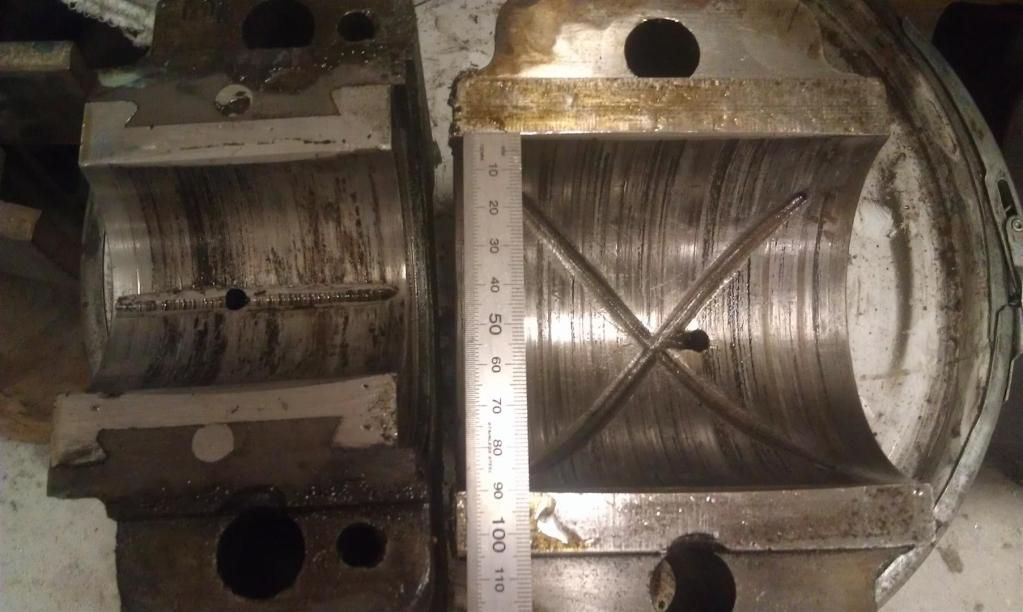
The bearing journals are scored a fair bit, even the babbitt (rear) one, even though the spindle is like a mirror. Like everything they are BIG....
More pics.....
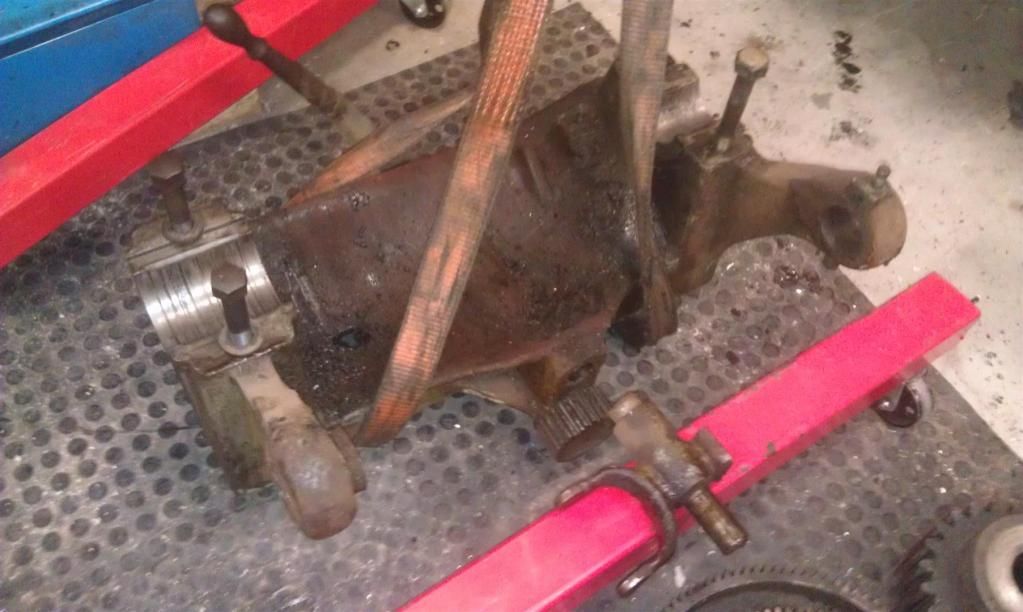

The bed looks very naked with no head....
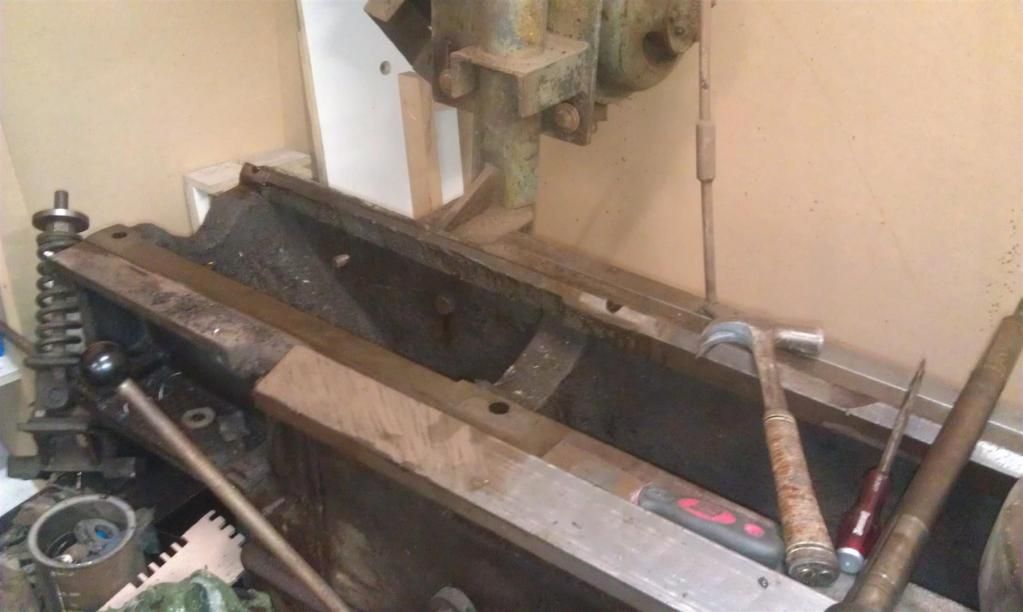
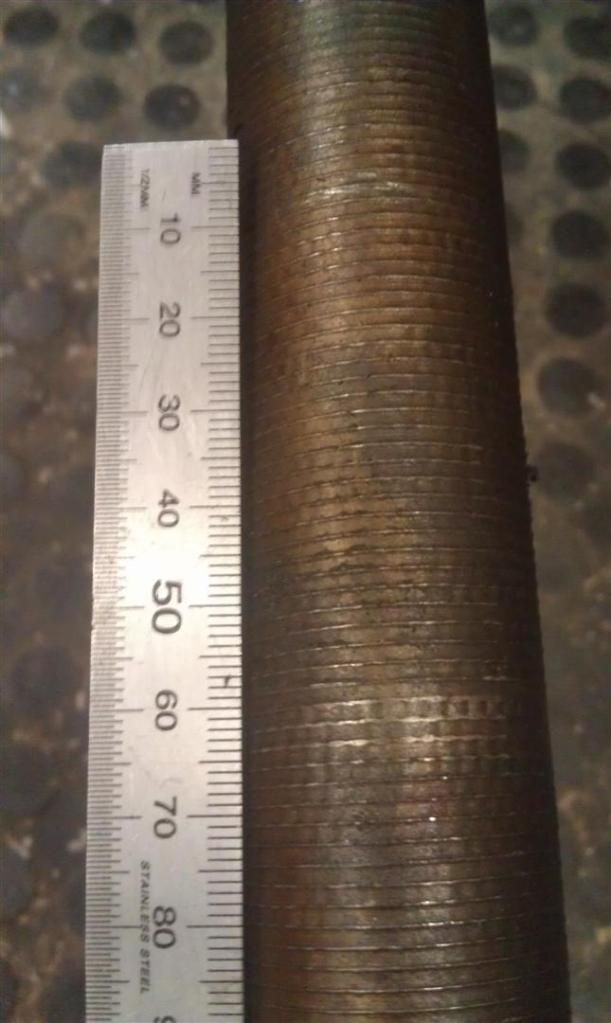
The machining on the back gear spindle between bearing surfaces was cut at quite a rate...
Now to clean up all the grease and scum....1915 17"x50" LeBlond heavy duty Lathe, 24" Queen city shaper, 1970's G Vernier FV.3.TO Universal Mill, 1958 Blohm HFS 6 surface grinder, 1942 Rivett 715 Lathe, 14"x40" Antrac Lathe, Startrite H225 Bandsaw, 1949 Hercus Camelback Drill press, 1947 Holbrook C10 Lathe.
-
18th November 2012, 05:34 PM #38
SENIOR MEMBER
- Join Date
- Sep 2011
- Location
- Ballarat
- Age
- 65
- Posts
- 2,659
Great pics Ewan.
Still watching this one with interest
Phil
-
30th November 2012, 05:03 PM #39
Blacksmith, Cabinetmaker, Machinist, Messmaker
- Join Date
- Dec 2011
- Location
- Canberra
- Age
- 40
- Posts
- 4,467
Rather than hijacking Ken's electrolysis thread, i thought i had better put this here where it belongs. Thanks again Ken for bringing up the idea of electrolysis, it may take some time but it will save me from some nasty messy work.
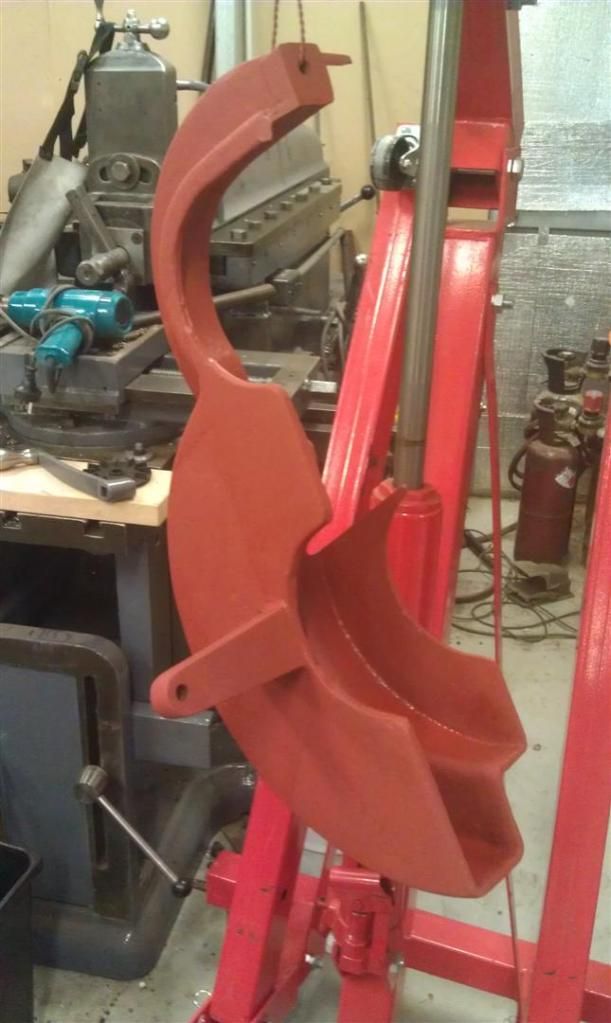
Here is the first guard once cleaned. I soaked it in a weak vinegar solution overnight as suggested in Kens thread. I then washed it with a brush and the hose (perfect job for a 35deg day) and finally dried and undercoated it. Having a fully insulated shed means its still in the low 20's inside so painting is no problem..
Now i will need to bog, sand etc before finishing. I was thinking of trying a spray putty, anyone have any suggestions or experience with the stuff?
In the stripping process i may have found the original colour, a dark gray, underneath the rather bad green spray job. I am still tilting towards semi gloss black though.....i might send another email to leblond and see if they have any colour records from the time.
 1915 17"x50" LeBlond heavy duty Lathe, 24" Queen city shaper, 1970's G Vernier FV.3.TO Universal Mill, 1958 Blohm HFS 6 surface grinder, 1942 Rivett 715 Lathe, 14"x40" Antrac Lathe, Startrite H225 Bandsaw, 1949 Hercus Camelback Drill press, 1947 Holbrook C10 Lathe.
-
30th November 2012, 05:59 PM #40
 GOLD MEMBER
- Join Date
- Jul 2008
- Location
- near Warragul, Victoria
- Posts
- 2,500
Gray
I'd go for dark gray myself

-
30th November 2012, 10:07 PM #41
GOLD MEMBER

- Join Date
- Mar 2011
- Location
- Dural NSW
- Age
- 82
- Posts
- 1,120
Babbit Bearings
Ewan
The Babbit bearings are interesting from a wear point of view.
The shaft appears to be in good condition, polished, yet the babbit bearings are scored.
What are your thoughts on the restoration of the bearings?
Its amazing how well they have stood up through such a long life.
Interesting stuff, babbit metal.
regards
Bruce
-
30th November 2012, 10:34 PM #42
Blacksmith, Cabinetmaker, Machinist, Messmaker
- Join Date
- Dec 2011
- Location
- Canberra
- Age
- 40
- Posts
- 4,467
Hi Bruce,
Yes it is amazing to think how well the bearings have lasted, but originally the lathe was made to use carbon steel tooling, so the top speed was only 300rpm. I have spent some time on the LeBlond Yahoo group and many guys are running the same bearings at 600+rpm, and they will do so just fine as long as they stay well oiled. I don't really plan on using carbide on this machine, so 600rpm gets me down to 3/4" at 100FPS. Any smaller and i have the little lathe.....
As for the scored bearings, i am hoping to pick Phils babbit knowledge when the time comes, but i think i will scrape both bottom halves of the bearings in, ensuring that the spindle remains level, and then scrape the top halves to fit. The other option of course is to re-pour the babbit, but i honestly haven't started looking into what method will be more suitable.
On another note the 2nd guard is stripped after only 24hours, much faster than the first one.....now the change gear banjo is in and bubbling away 1915 17"x50" LeBlond heavy duty Lathe, 24" Queen city shaper, 1970's G Vernier FV.3.TO Universal Mill, 1958 Blohm HFS 6 surface grinder, 1942 Rivett 715 Lathe, 14"x40" Antrac Lathe, Startrite H225 Bandsaw, 1949 Hercus Camelback Drill press, 1947 Holbrook C10 Lathe.
-
1st December 2012, 07:47 AM #43
SENIOR MEMBER
- Join Date
- Sep 2011
- Location
- Ballarat
- Age
- 65
- Posts
- 2,659
Hi Ewan, Originally Posted by Ueee
I am more than happy for you to pick away, limited as my knowledge is. Don't forget that previous scoring can sometimes be known as oil grooves, not good ones, but grooves just the same .
.
I would even consider coming up to give you a hand if you choose to go down that path. I also have a heap of books on the subject if you are up for some 'light' reading.
I just happen to be coming your way for a short holiday in January. If you like I can bring the books with me.
Phil
-
1st December 2012, 01:40 PM #44
Product designer retired
- Join Date
- Nov 2006
- Location
- Heidelberg, Victoria
- Age
- 79
- Posts
- 2,251
Struth
Oh my god UEEE, I don't envy the job you have in front of you, it's a monster. I started my Hercus restoration years ago, and I'm still working on it.
How do you propose to repair the gears with broken teeth?
Have you got any pics of parts that went through the electrolysis process?
Good luck,
Ken
-
1st December 2012, 08:09 PM #45
Blacksmith, Cabinetmaker, Machinist, Messmaker
- Join Date
- Dec 2011
- Location
- Canberra
- Age
- 40
- Posts
- 4,467
Thank you Phil, that is a very generous offer. Any info on babbit bearings would be great, i really don't know anything about the stuff. I'll really need to get the bed done and leveled, reinstall the head and then get to work work on the spindle. I'm still waiting on my copy of MTR but i hope it has some info in it. I've just got R.C's plan plan plan echoing in my head so i'm trying to give myself lots of time to think things through..... Originally Posted by Steamwhisperer
Hi Ken, Originally Posted by neksmerj
Right now if someone asked me what my perfect job would be i would have to say bringing old machines back to life.....especially when i am doing it at a leisurely pace as i don't need a second lathe.....i just wanted one
The first of the 2 pics of the guard above is after the vinegar rinse, a wash and scrub with a brush. The raw cast surfaces stay black, only the places where the casting has been cleaned up are shiny. I'll take a few snaps of the banjo when it is done, it has machined surfaces so they will hopefully come out bright.
As for the damaged gears, i'm thinking along the lines of brazing in a row of pins where the tooth should be and then building the tooth back up with braze. Some time spent with some blue on another gear and a file should give me a good involute profile.1915 17"x50" LeBlond heavy duty Lathe, 24" Queen city shaper, 1970's G Vernier FV.3.TO Universal Mill, 1958 Blohm HFS 6 surface grinder, 1942 Rivett 715 Lathe, 14"x40" Antrac Lathe, Startrite H225 Bandsaw, 1949 Hercus Camelback Drill press, 1947 Holbrook C10 Lathe.


Similar Threads
-
260 restoration
By Finnowa in forum THE HERCUS AREAReplies: 7Last Post: 18th October 2010, 12:14 AM -
restoration and goo
By the Padma in forum RESTORATIONReplies: 13Last Post: 4th February 2009, 08:49 PM -
Help with Restoration
By Vasco in forum WOODWORK - GENERALReplies: 7Last Post: 3rd October 2005, 09:02 PM -
Saw Restoration
By arose62 in forum HAND TOOLS - UNPOWEREDReplies: 5Last Post: 9th February 2005, 10:15 AM -
Restoration
By Peter R in forum WOODWORK - GENERALReplies: 7Last Post: 3rd December 2004, 08:37 AM
