

 Thanks: 0
 Likes:
  Needs Pictures: 0
 Picture(s) thanks: 0
Results 1 to 8 of 8
Thread: Drilling Cast Iron
-
8th September 2013, 01:21 AM #1
 Banned


- Join Date
- Jul 2013
- Location
- Perth
- Posts
- 665
 Drilling Cast Iron
Anything I need to know in advance about drilling cast iron?
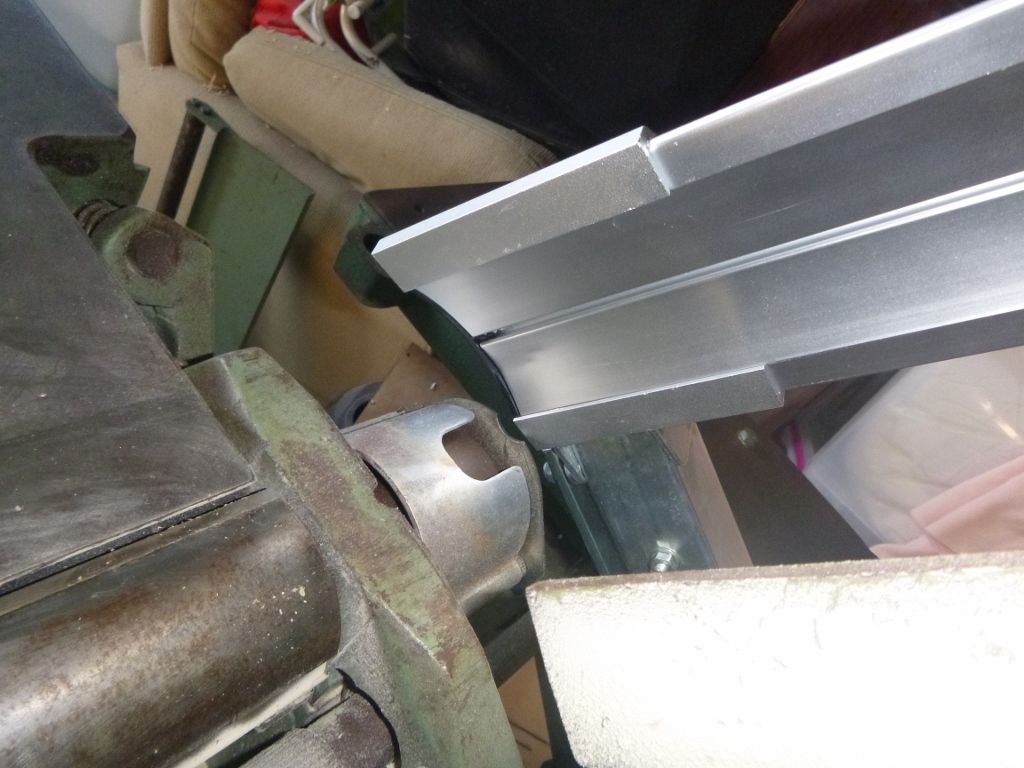
My new to me X 31 Robland combination wood working machine, came with a old spring loaded, twin arm, yellow plastic safety guard, for the jointer / thicknesser head, that was broken.
.JPG)
I repaired it (Epoxied the plastic back together & reinforced from behind with a piece of flat steel cut from a piece of thin flashing tin) and at the moment it's working OK.
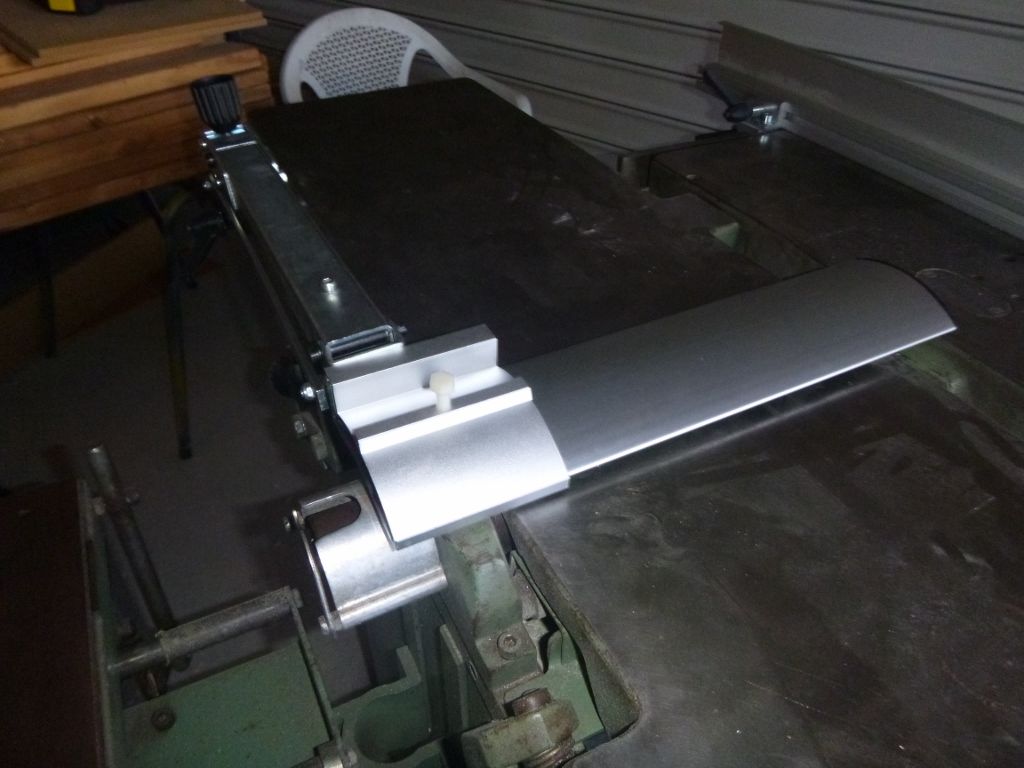
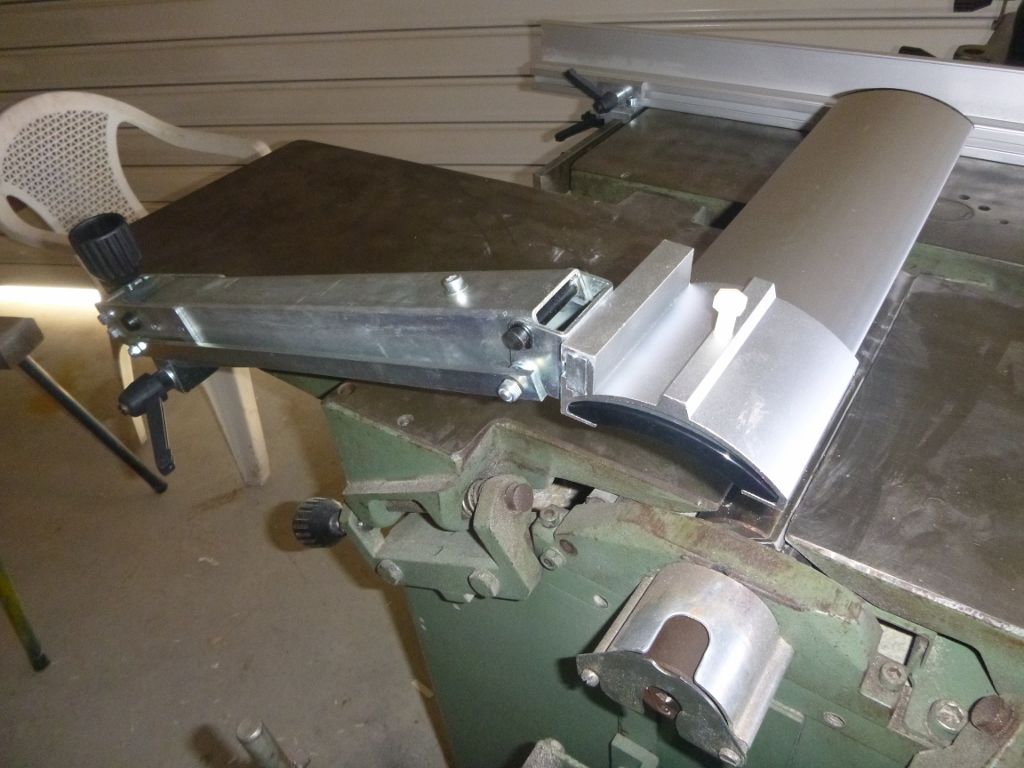
I ordered and just received a new planer guard from Robland in Belgium (via the UK).

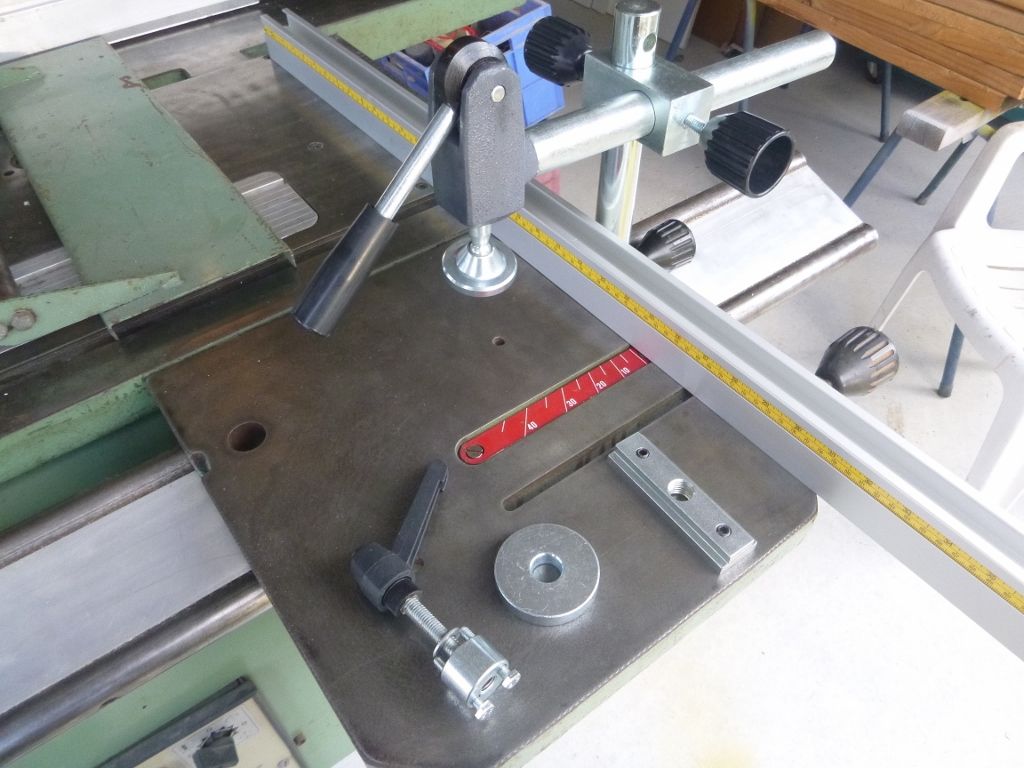
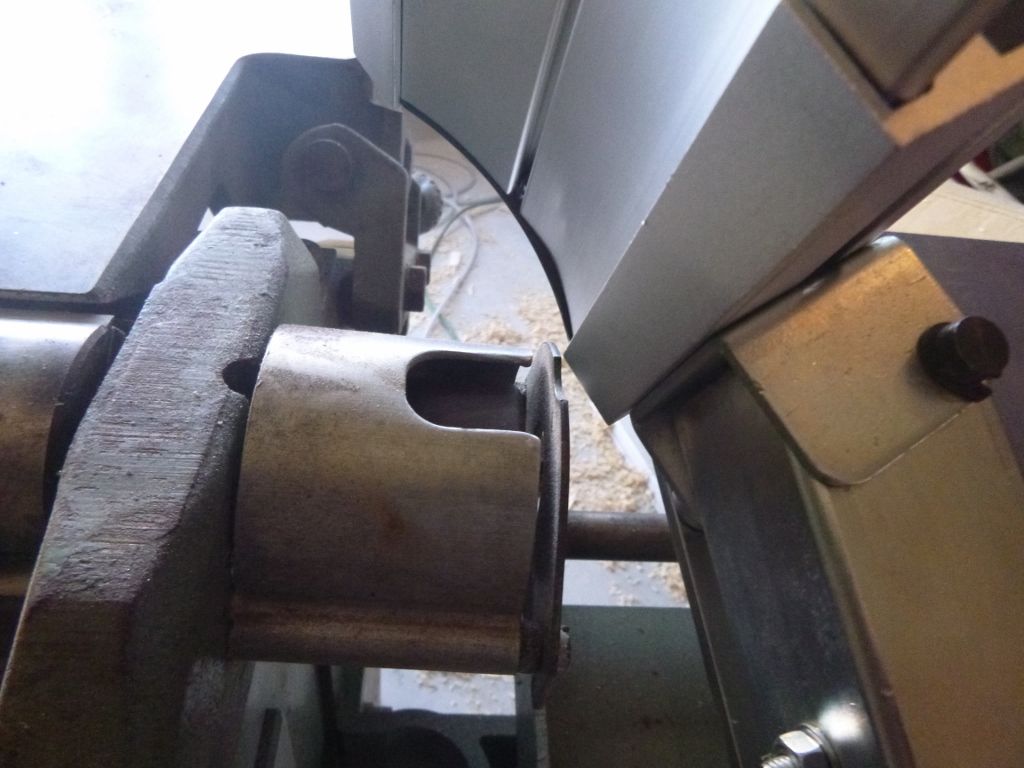
In order to instal it on my older model X 31 - I have to drill two ~ 4mm holes thru the cast iron skirt for that little round "do hickey" with black plastic crank handle and two bolts sticking out of it which goes between the base of the guard and the skirt of the out feed table to mount the guard and lock it in place.


When attached, it should look / work like this.
So I was thinking to just start with a center punch to mark the centers of the 2 holes - then use a battery drill and small drill bits and slowly drill thru with some lube... and keep reaming the holes out with slightly larger drills each time...
But the idea of center punching a 4 or 5 mm cast iron skirt, worries me in case I break part of the skirt out...

 and what if the drill bits jam & break off inside the cast iron etc etc?

Is there a proper way that this should be done? - that isn't the way a rough batsurd like me just described, that is safer, does it properly, and doesn't risk destroying a good machine?
I thought I'd ask before I screw it up being "ham-fisted" and not knowing how to do it properly.
(I considered throwing myself on the mercy of Bob L to help do this.... but if it's easy, then I'm game to have a go).
Someone drilled a single hole thru this skirt for the guard that's presently on there, so I am guessing its not impossible....to drill 2 more holes. Just not sure I have the patience, tools and skills is all if it's harder than I imagine.
-
8th September 2013 01:21 AM # ADSGoogle Adsense Advertisement
- Join Date
- Always
- Location
- Advertising world
- Posts
- Many
-
8th September 2013, 01:41 AM #2
Blacksmith, Cabinetmaker, Machinist, Messmaker
- Join Date
- Dec 2011
- Location
- Canberra
- Age
- 40
- Posts
- 4,467
Hi TT,
Venturing to the dark side are we??
Drilling cast iron is somewhat similar to drilling cheese.....
Firstly i wouldn't center punch it. If your worried about the drill bit slipping and sliding mark it with a small rotary burr first (you know dremel (shudder) style)
Don't use any lube, cast is best machined dry. Start with a 3mm/ 1/8" bit and then take it to size. At that small size you could run the battery drill flat out no problem.
Cheers,
Ew1915 17"x50" LeBlond heavy duty Lathe, 24" Queen city shaper, 1970's G Vernier FV.3.TO Universal Mill, 1958 Blohm HFS 6 surface grinder, 1942 Rivett 715 Lathe, 14"x40" Antrac Lathe, Startrite H225 Bandsaw, 1949 Hercus Camelback Drill press, 1947 Holbrook C10 Lathe.
-
8th September 2013, 08:44 AM #3
GOLD MEMBER
- Join Date
- Jun 2007
- Location
- sydney
- Age
- 64
- Posts
- 3,566
If the centre distance of your mounting holes is critical, then I would be marking out first and then centre punching ( don't use a sledge hammer) a small tap with a light hammer will be all you need.
Then you can use a small drill to enlarge the centre pop mark only before drilling to the correct clearance hole if needed or to 4mm.
Depending on the thickness of your plate you may have to remove you drill every so often to clear it of swarf (dust).
If you are going to sneak up on the hole with different sized drills be careful that they are not to sharp as they will grab and you run the chance of them breaking.
For this diameter hole a single pass with the correct size will be fine.
Speed wise a cordless should be fine, if it was electric variable would be better as cast will sometimes work harden when drilling at high speed.
-
8th September 2013, 09:55 AM #4
GOLD MEMBER
- Join Date
- Jul 2010
- Location
- Melbourne
- Posts
- 7,775
If you can find a drill thas a nice sliding fit in the bolt holes in the new block, clamp it in place and run the drill through one hole to get started then remove block. drill to size. .Bolt the block in place and repeat for second hole.
Stuart
-
8th September 2013, 02:19 PM #5
Banned
- Join Date
- Jul 2013
- Location
- Perth
- Posts
- 665
Two
A few really good
 (two thumbs up) helpful suggestions there fellas - thanks heaps for that!
Will have a crack at it today with any luck.
Cheers!
-
8th September 2013, 04:42 PM #6
Banned
- Join Date
- Jul 2013
- Location
- Perth
- Posts
- 665
And
And its on (like Donkey Kong).
Pics to come in a minute or 3!
The issues now arising?
When I tilt the outfeed table (for thicknessing) - the guard interferes with the morticing table and cover for the morticing chuck.
I've been "fiddling" to see what I can do adjustements wise to get a clearance fit bye pushing the mortice table this way and that to clear the support arm thru the arc that tilting the outfeed table thru its pivot arc creates... and adjusting the guard head cover across sideways to clear the chuck guard in its fully tilted position.
I'm close but no cigar - yet!
I am thinking the guard has to come off with that crank handle screw every time i tilt the tables... which will be a bit of a PIA - because the old yella one could stay on during that frequent operation.
Also.... apart from raising or lowering the guard height with the pinch bolt at the rear - and sliding the cover sideways in its holder.... how the heck do you get lumber over the jointer without having to manually adjust the guard every time? (The old one being spring loaded just slid sideways out the way and back behind the piece of wood to protect fingers).
I've worked a jointer 20 years without a guard (because being a joiner you rebate on the jointer all the time, requiring the old leg of mutton guard to come off - so in the end you just leave it off full time). (Don't do as I do).
So anyway.... exactly how this guard works (and is purportedly so much better than the old one) I have no idea as yet...
BUT
It is ON at least - I guess I will work around all the other "interference fit issues" as I go forward.
Why is it nuthin's ever easy?
-
8th September 2013, 11:32 PM #7
Blacksmith, Cabinetmaker, Machinist, Messmaker
- Join Date
- Dec 2011
- Location
- Canberra
- Age
- 40
- Posts
- 4,467
The suggestion that came to my mind as i was reading was simply to leave it off like i do......
The old jointer thicknesser i used when i worked full time had a very simple guard, a length of timber blocks hinged together that you could flip over the cutter to cover as much or as little as you wanted. But of course the section of blade you were using was still uncovered. Personally i prefer the mutton guards over the floating type.
As our machine was 650 wide, we used the close side for jointing and roughing, and the far side for the finishing cuts, so we rarely had much extra blade showing past the fence other than what we were using.
Ew1915 17"x50" LeBlond heavy duty Lathe, 24" Queen city shaper, 1970's G Vernier FV.3.TO Universal Mill, 1958 Blohm HFS 6 surface grinder, 1942 Rivett 715 Lathe, 14"x40" Antrac Lathe, Startrite H225 Bandsaw, 1949 Hercus Camelback Drill press, 1947 Holbrook C10 Lathe.
-
9th September 2013, 04:28 PM #8
Banned
- Join Date
- Jul 2013
- Location
- Perth
- Posts
- 665
I managed
I managed to find a more modern manual than mine which has instructions for using the planer guard!
In essence I raise the guard just enough to allow the timber to slide under for face planing, and slide the cover away from the fence just enough to let the board pass thru for edge planing.
I can see this coming off in time and me reverting to the old yellow plastic spring loaded guard I think - but I will give it a go and see how it works out first!.
Cheers


Similar Threads
-
Cast iron fireplace - Question for restoring using Penetrol & Liberon Iron Paste
By mookschank in forum METALWORK FORUMReplies: 8Last Post: 19th June 2013, 06:32 PM -
Cast iron VS Cast steel lathe compound slide
By Ueee in forum METALWORK FORUMReplies: 10Last Post: 23rd December 2012, 11:40 PM -
Cast Iron
By RayG in forum METALWORK FORUMReplies: 17Last Post: 30th April 2011, 02:27 PM -
Repairing Cast iron
By Godzilla98 in forum METALWORK FORUMReplies: 6Last Post: 6th April 2010, 11:03 PM -
Cast Iron vs Cast Alloy Wheels
By TerryG in forum BANDSAWSReplies: 4Last Post: 25th February 2003, 10:42 PM
