

 Thanks: 0
 Likes: 0
 Needs Pictures: 0
 Picture(s) thanks: 0
Results 136 to 150 of 196
Thread: All hail the shaper gods!!
-
1st June 2012, 12:05 AM #136
 Blacksmith, Cabinetmaker, Machinist, Messmaker


- Join Date
- Dec 2011
- Location
- Canberra
- Age
- 40
- Posts
- 4,467

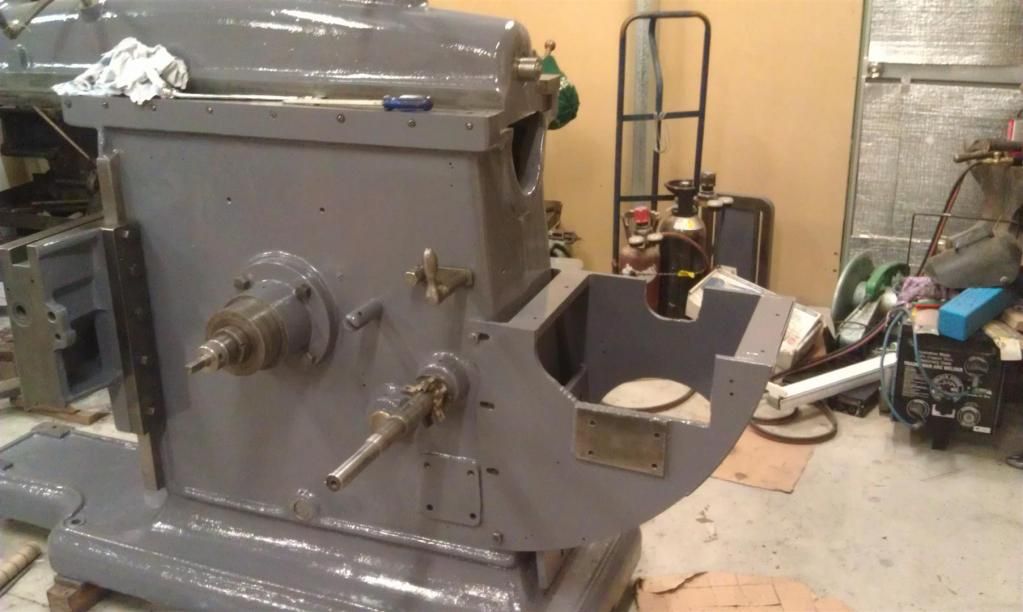
She is starting to look more like a shaper than ever now!
I found the serial # again this time on the knee rise and fall gib and on the way plates.
I also drilled and tapped some holes for wipers while i could get still get in easily.
I made a guard up for the rise and fall gears, i thought i had some .6mm gal but couldn't find it, so i used some 1.2mm ally. It's not as pretty as it could be but it should do the job.
The knee then went on....Damn its heavy!
Then i got the gear shifter in and adjusted not sure if the handle will stay pointing up, i need to get the clutch in to see haw much space i have. Maybe another one finger salute...? Not from the queen, surely!
 1915 17"x50" LeBlond heavy duty Lathe, 24" Queen city shaper, 1970's G Vernier FV.3.TO Universal Mill, 1958 Blohm HFS 6 surface grinder, 1942 Rivett 715 Lathe, 14"x40" Antrac Lathe, Startrite H225 Bandsaw, 1949 Hercus Camelback Drill press, 1947 Holbrook C10 Lathe.
-
1st June 2012 12:05 AM # ADSGoogle Adsense Advertisement
- Join Date
- Always
- Location
- Advertising world
- Age
- 2010
- Posts
- Many
-
2nd June 2012, 01:17 AM #137Dave J Guest
I checked the Alba and no provision for a knee lock, but you can just tighten a gib bolt up. Also it looks like they have been using the centre gib bolt for a lock on the tool slide.
My knee gib is totally different to yours.
Dave
-
3rd June 2012, 08:49 PM #138
Blacksmith, Cabinetmaker, Machinist, Messmaker
- Join Date
- Dec 2011
- Location
- Canberra
- Age
- 40
- Posts
- 4,467
Despite my killer man flu i managed to get out to the shed for an hour or so this arvo. A quick lick of paint to the motor/gearbox mount, and then i thought i'd have a go at brazing. I sold a kidney earlier in the week for a 1kg pack of fluxed nickel bronze rods, and the thought of a nice hot flame was a good one!
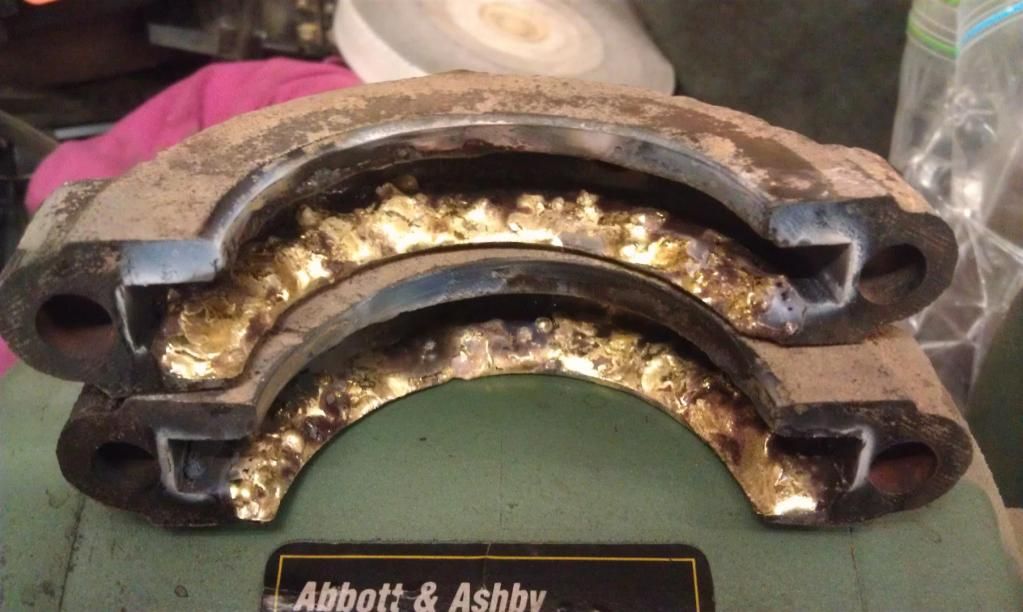
I seem to have done an o.k job with the clutch engager thingy, i whacked it with some pliers after it had cooled and it sounds ok, only one other way to tell really.....

The blocks that fit around the engager (and attach to the clutch lever) also got some attention, they where worn down to a sharp edge presumably from running dry. I built these up with the braze as well, hopefully i can just bolt them together and re-machine them on the lathe.
Brazing wit ha cold wasn't the best idea though, a bit of heat and my nose pretty well run off my face........1915 17"x50" LeBlond heavy duty Lathe, 24" Queen city shaper, 1970's G Vernier FV.3.TO Universal Mill, 1958 Blohm HFS 6 surface grinder, 1942 Rivett 715 Lathe, 14"x40" Antrac Lathe, Startrite H225 Bandsaw, 1949 Hercus Camelback Drill press, 1947 Holbrook C10 Lathe.
-
5th June 2012, 11:31 PM #139
Blacksmith, Cabinetmaker, Machinist, Messmaker
- Join Date
- Dec 2011
- Location
- Canberra
- Age
- 40
- Posts
- 4,467
Well it seems the man flu hasn't killed me.....i started getting real bored today so i decided it was time to do some real work....
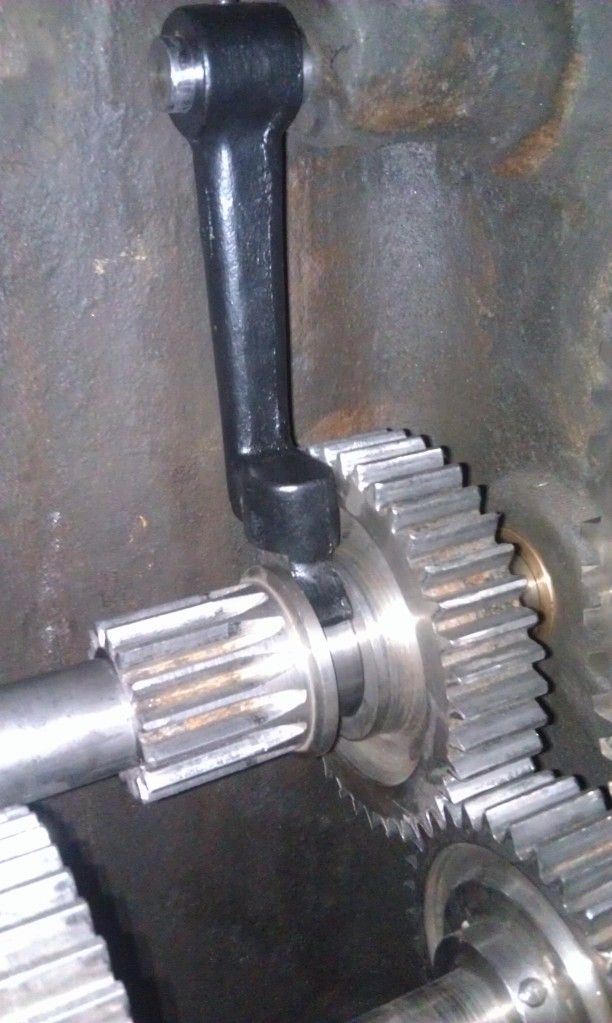
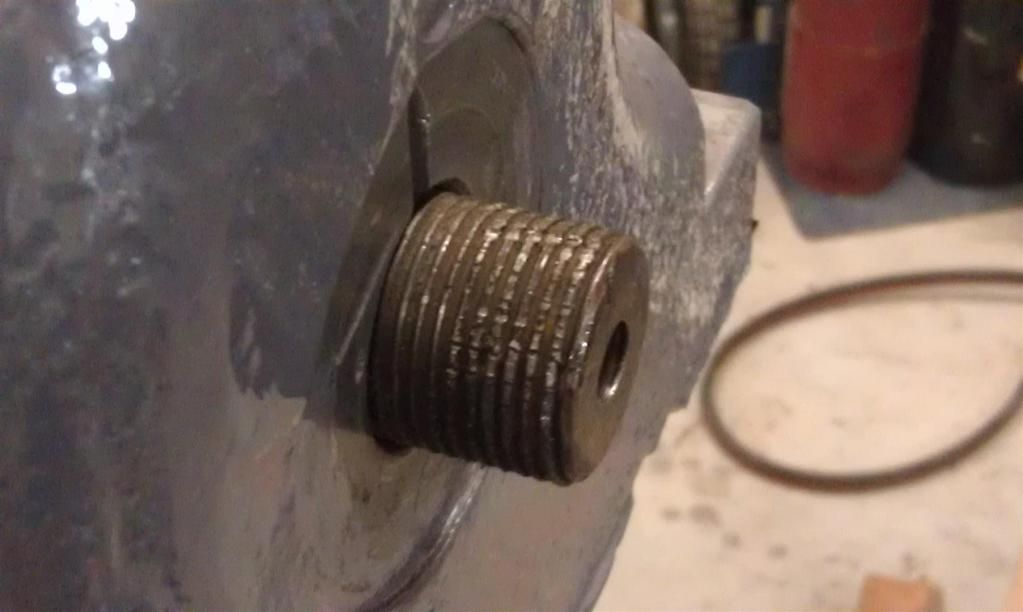
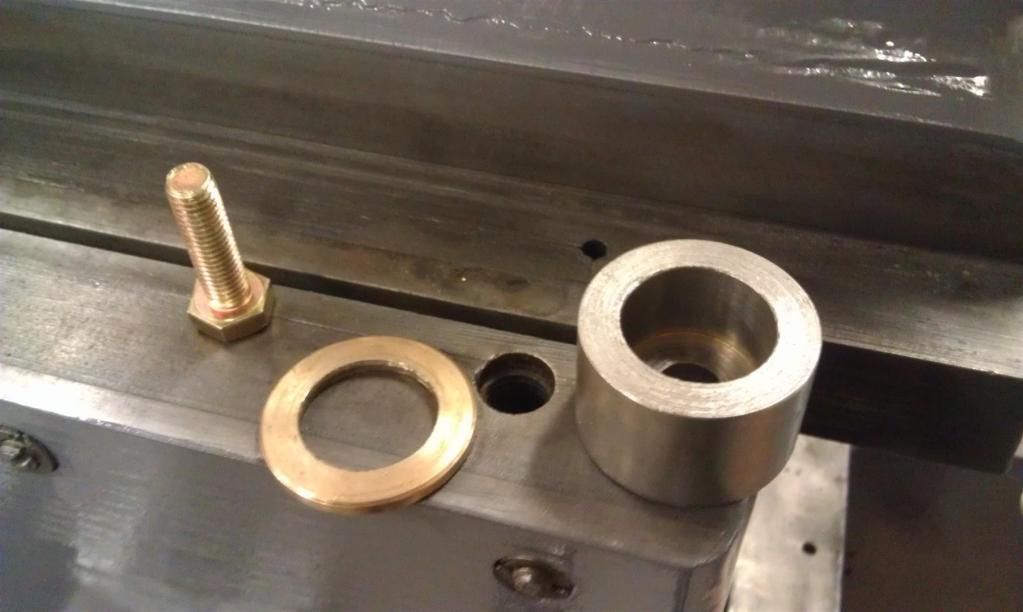
I finished off the bearing that was on the lathe(for the table feed crank), then set to fixing something to the rear of the stroke position adjustment. There are no nuts to be seen, and the thread has been gripped with pliers or vice grips in the past and is pretty well ######
So i tapped a 3/8 hole down the center of the shaft and made a piece to bolt on over the shaft and thrust on the bearing surface.
I also got the motor/gearbox mount on, as well as stripping the motor down. The poor old thing runs fine, but the gearbox was leaking into her and she is full of dusty dried oil.....
 1915 17"x50" LeBlond heavy duty Lathe, 24" Queen city shaper, 1970's G Vernier FV.3.TO Universal Mill, 1958 Blohm HFS 6 surface grinder, 1942 Rivett 715 Lathe, 14"x40" Antrac Lathe, Startrite H225 Bandsaw, 1949 Hercus Camelback Drill press, 1947 Holbrook C10 Lathe.
-
5th June 2012, 11:59 PM #140
Blacksmith, Cabinetmaker, Machinist, Messmaker
- Join Date
- Dec 2011
- Location
- Canberra
- Age
- 40
- Posts
- 4,467
Also, i had a look at the feed ratchet and pawl. It looks like i will have to make a new pawl, but am unsure of what i should use. I like the idea of MS as it will not damage the gear, but i am worried it will not last very long. Otherwise i could use silver steel and harden the point.
Suggestions??1915 17"x50" LeBlond heavy duty Lathe, 24" Queen city shaper, 1970's G Vernier FV.3.TO Universal Mill, 1958 Blohm HFS 6 surface grinder, 1942 Rivett 715 Lathe, 14"x40" Antrac Lathe, Startrite H225 Bandsaw, 1949 Hercus Camelback Drill press, 1947 Holbrook C10 Lathe.
-
6th June 2012, 01:29 AM #141
GOLD MEMBER
- Join Date
- Jul 2010
- Location
- Melbourne
- Posts
- 7,775
I'm starting to wish I'd painted mine.
Its sarting to look huge again. Keep it up
Stuart
-
6th June 2012, 03:09 AM #142Dave J Guest
Coming together nicely Ewan, it's a pity there where so many things wrong with it on the way through, but it looks like your sorting them out as you go.
At least once she is back together you will know it's not going to break down any time soon.
It must be a relief to see it looking like a shaper again after all the work and then being laid up with the flu on top of that.
Keep up the good work.
Dave
-
7th June 2012, 01:14 AM #143
Blacksmith, Cabinetmaker, Machinist, Messmaker
- Join Date
- Dec 2011
- Location
- Canberra
- Age
- 40
- Posts
- 4,467
Thanks Guys,
Not really so many things wrong (well thats not how i think of it) more like some many things needing a bit of TLC. I've really enjoyed the work as it is in no way repetitive, some painting, turning, milling, cleaning.....etc.
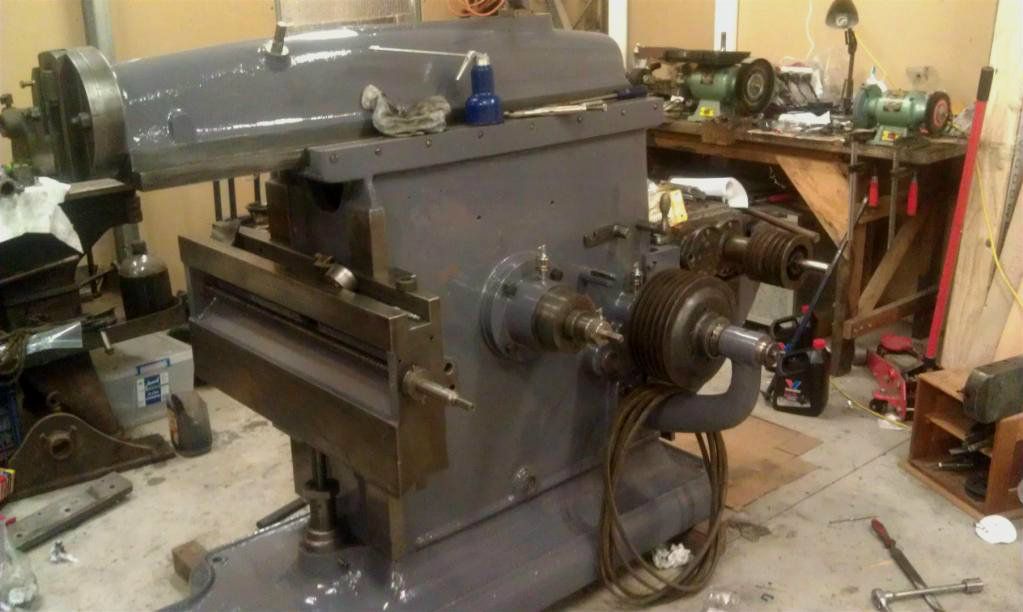
I did well this arvo and got the gearbox back together and in place. I have filled it with some super cheap hydrolic oil to "flush" the box for the first 10 hours or so. The red ATF just doesn't seem to wash out easily.
This evening i thought i would put the clutch together and get the drive pulley and outrigger bearing on. This turned out to be one of those comedy of error's moments where nothing would go right. I culminated with me having to pull the whole lot apart again to flip the clutch plate around as it would only fit into the pulley one way!
She really is starting to look big now, and although my pallet jack should be able to move her i'm getting a bit worried......as usual every horizontal surface seems to be gathering tools.....
 1915 17"x50" LeBlond heavy duty Lathe, 24" Queen city shaper, 1970's G Vernier FV.3.TO Universal Mill, 1958 Blohm HFS 6 surface grinder, 1942 Rivett 715 Lathe, 14"x40" Antrac Lathe, Startrite H225 Bandsaw, 1949 Hercus Camelback Drill press, 1947 Holbrook C10 Lathe.
-
7th June 2012, 07:00 AM #144Dave J Guest
That repetitious comment, I am hearing you, LOL Cant wait to get back into the little Douglas mods.
Just finished the adjusters last night, and blackened then all as well because I am sick of looking at them, LOL Now where are those grub screws??? UK post is so slow.
I don't think your pallet jack will have any problems moving it. I have moved mine around a few times now, and although the pallet jack feels the weight, it handles it fine. Just be careful (as I know you will be) with it being top heavy on the pallet jack and only one wheel on one end.
Dave
-
9th June 2012, 09:20 PM #145
Blacksmith, Cabinetmaker, Machinist, Messmaker
- Join Date
- Dec 2011
- Location
- Canberra
- Age
- 40
- Posts
- 4,467
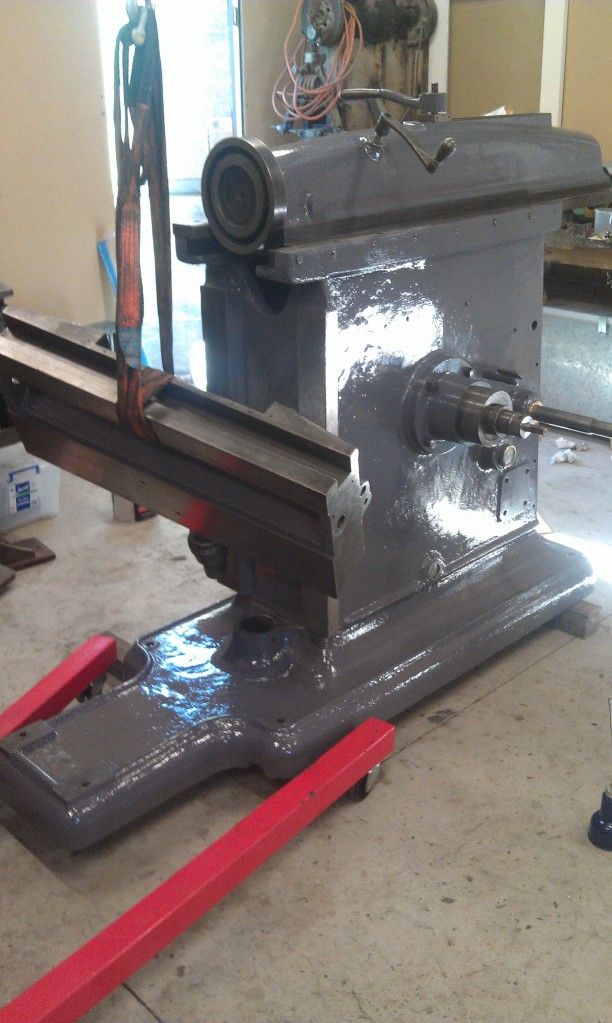
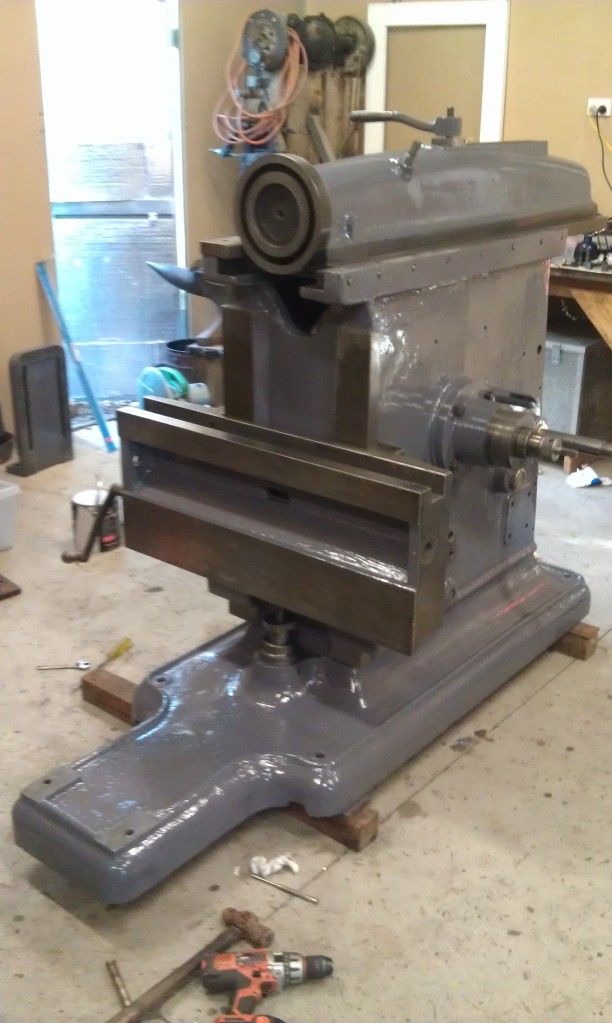
Wow, now she looks real BIG!
I nearly left the motor "as is" internally but decided against it. Glad i did, this was the muck i cleaned out of it.
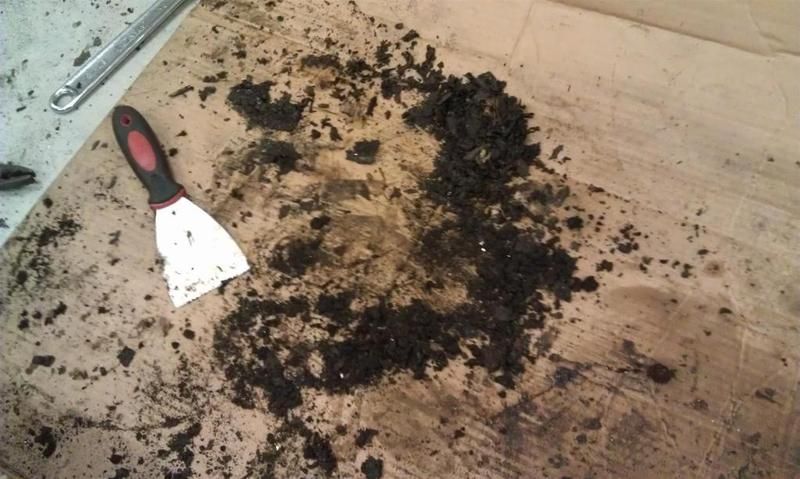
The bearings are in great shape so i just cleaned an re-lubed them, and cleaned as much of the dusty muck out as i could.
The motor all clean and ready for paint
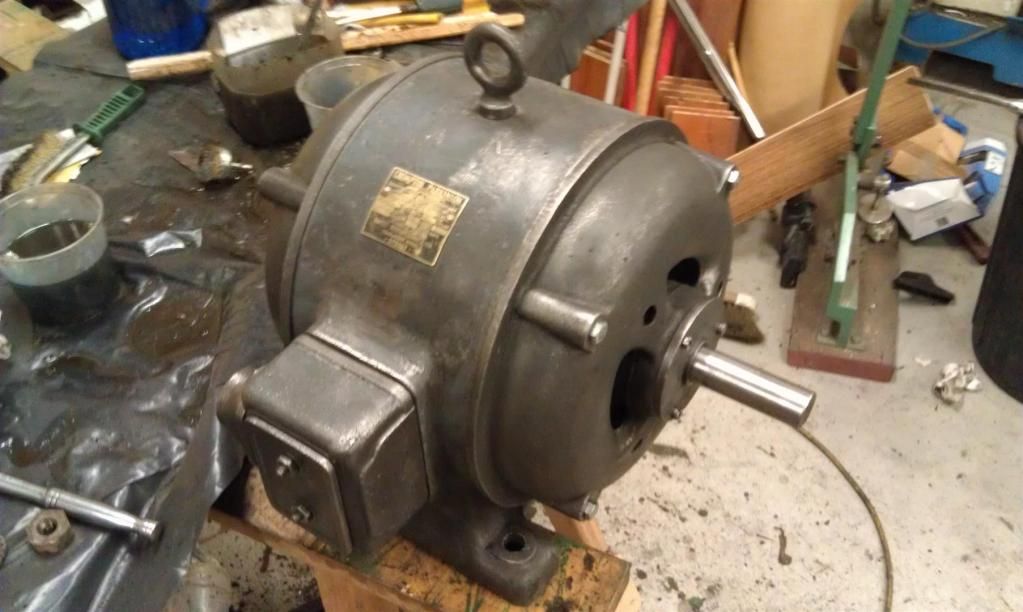
Table on and lookin good....
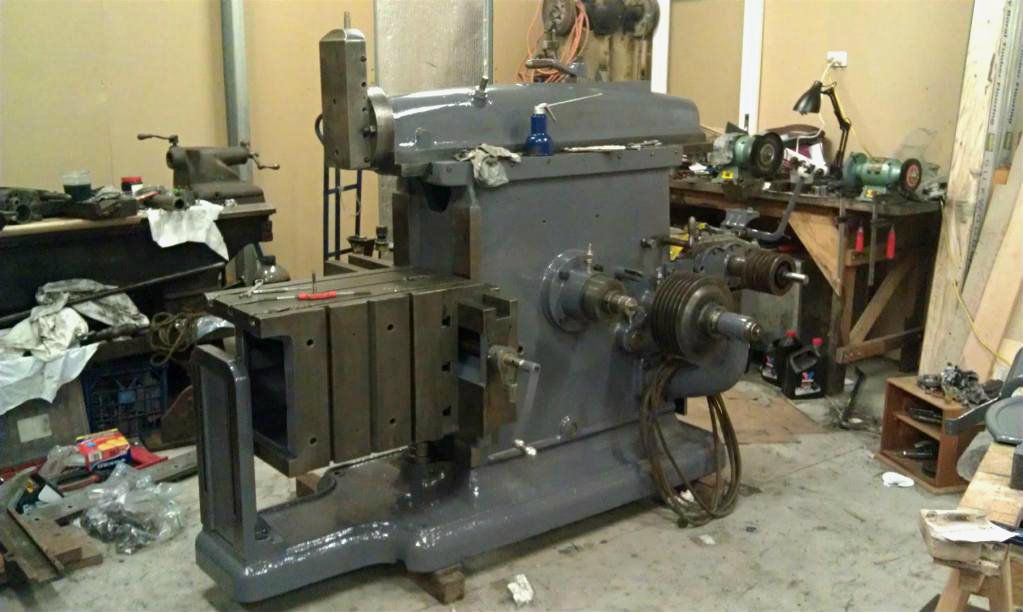
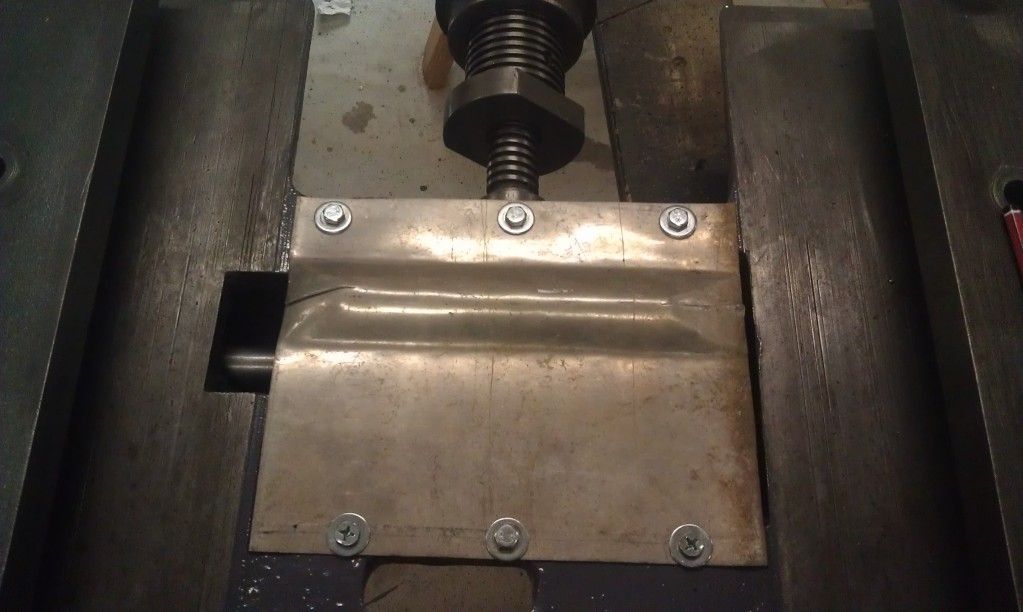
Shot of the table gib. I didn't pull any shim out of here but i had to shim 10thou and i'm still nearly out of adjustment. Even with the weight of the table on with no support yet, it moves so easily across the knee. you can just make out a few scrape marks on the vertical ways, actually the pic makes them look more pronounced than in real life.
 1915 17"x50" LeBlond heavy duty Lathe, 24" Queen city shaper, 1970's G Vernier FV.3.TO Universal Mill, 1958 Blohm HFS 6 surface grinder, 1942 Rivett 715 Lathe, 14"x40" Antrac Lathe, Startrite H225 Bandsaw, 1949 Hercus Camelback Drill press, 1947 Holbrook C10 Lathe.
-
9th June 2012, 10:50 PM #146
Senior Member
- Join Date
- Dec 2011
- Location
- South East Queensland, Australia
- Posts
- 354
Hi Ueee,
Getting there sure and steady.
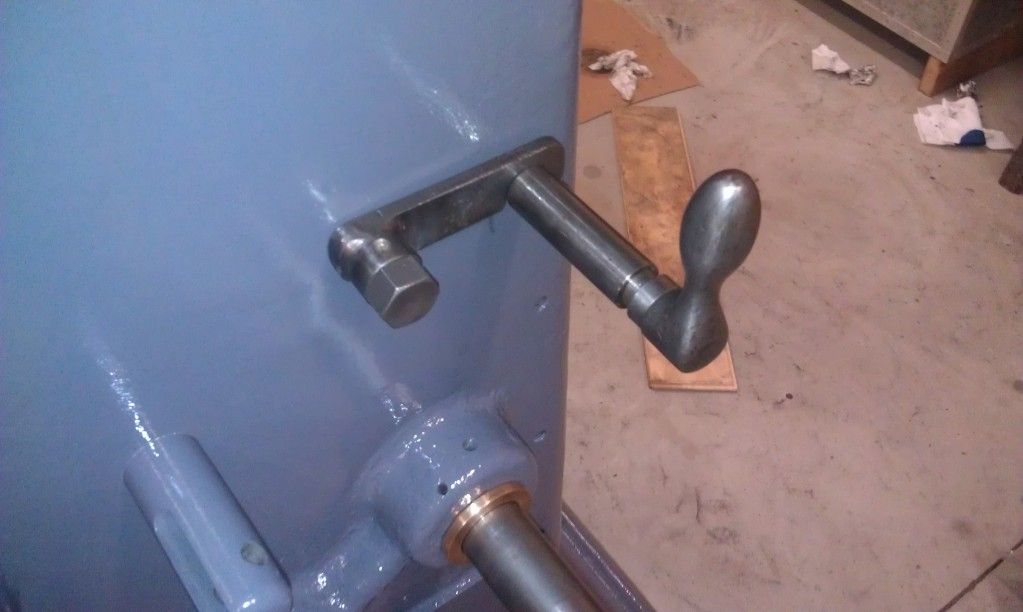
I'm intrigued by that thread sticking out of the back end of the ram that you have so sneakily camouflaged . Did you figure out what it's purpose is, I wouldn't be able to sleep if I didn't know . One way to repair threads like that is with a slim triangular file, works great with a bit of care and patience.
The brazing repairs look good. You could build up the grooves in the clutch lever engager blocks (or what ever they are) a bit more, the built up faces look a bit tapered still and thin on the minor diameter of the grooves. I'm not trying to be picky and I know you were crook on the day you did them. Do you think they need more braze, maybe it's just the pic?.
Tally ho, carry on and all that, eh what.
Cheers.If I'm not right, then I'm wrong, I'll just go bend some more bananas.
-
9th June 2012, 11:07 PM #147
Blacksmith, Cabinetmaker, Machinist, Messmaker
- Join Date
- Dec 2011
- Location
- Canberra
- Age
- 40
- Posts
- 4,467
Hi Log,
The thread i covered up is the end of the ram positioning screw. On the inside of the casting there is a pinned on collar and bronze washer that the rod thrusts against when you adjust the ram backwards. I am guessing there was a double nut ans washer on the threads for the thrust when moving the ram forwards. It seemed to just be thrusting on the bevel gear when we first tried to pull it apart. I would have fixed it and made new nuts, however the thread was something like 1 1/4" 16tpi and of course whatever tpi it was i couldn't get with my selection of gears on the little lathe.
After machining the bronze in the clutch thingy i did go back and add some more. Its not the easiest place to be brazing when you have only just started learning but i got there in the end.
Hopefully she will be making chips by weeks end, the only big job left is the table feed crank, the bearing is f##### and its because when the old repair was done they didn't braze the thing together flat, and the crank has been running at an angle to the rest of the machine.
Still no action on the planner?1915 17"x50" LeBlond heavy duty Lathe, 24" Queen city shaper, 1970's G Vernier FV.3.TO Universal Mill, 1958 Blohm HFS 6 surface grinder, 1942 Rivett 715 Lathe, 14"x40" Antrac Lathe, Startrite H225 Bandsaw, 1949 Hercus Camelback Drill press, 1947 Holbrook C10 Lathe.
-
11th June 2012, 11:43 AM #148
Senior Member
- Join Date
- Dec 2011
- Location
- South East Queensland, Australia
- Posts
- 354
All good then Originally Posted by Ueee
 , Shiver-me-timbers, you might have her spitting chips by weeks end. Seems I'm a gonna have to up my game on trying to get projects finished, I'm trying to, at the moment, get enthused again on my surface grinder
 . It's a project that now doesn't need any moolah spent on it so that bodes well for a telly-ho, carry on, eh what, plus there's not a hell of a lot left to do, fair bit though
 .
.
The long awaited move of the planer into the shop is now a notch closer as the King Rich mill has now moved out as my brother-in-law sorted his shed and has 3 phase connection well underway, almost connected actually.
Pic shows intended landing zone area for the planer, will have to move Victoria the mill and Manley the press.
Cheers.Last edited by Log; 11th June 2012 at 12:03 PM. Reason: It's a Manley press not what I first said
If I'm not right, then I'm wrong, I'll just go bend some more bananas.
-
11th June 2012, 07:49 PM #149
SENIOR MEMBER
- Join Date
- Apr 2012
- Location
- Healesville
- Posts
- 602
I'm sitting here with potato chip's, peanut's and beer waiting to see the chip's spittin' outta Ueee's shaper

Howz it goin Ueee ?
john
-
12th June 2012, 11:56 PM #150
Blacksmith, Cabinetmaker, Machinist, Messmaker
- Join Date
- Dec 2011
- Location
- Canberra
- Age
- 40
- Posts
- 4,467
Up and running!!!!
Standby John....... Originally Posted by shedhappens
No chips but she is moving under her own power!
After a pretty productive arvo and evening, i got the motor in (no mean feat i tell you!) I should have done it BEFORE putting the mount on the machine but now i know for next time......
Then i re-wired the lot, added the belts and.......
[ame=http://www.youtube.com/watch?v=dHjiaif8dTI]24" Queen City shaper test run - YouTube[/ame]
O.k I know what you are going to say. My jumper looks really close to the belts......it never got closer then about a foot. My guess at a 10" stroke is a bit out, it was more like 12 or 14". There is also some clutch slip at a couple of stages. Finally, i have found a really good use for the mill.....as a camera stand!1915 17"x50" LeBlond heavy duty Lathe, 24" Queen city shaper, 1970's G Vernier FV.3.TO Universal Mill, 1958 Blohm HFS 6 surface grinder, 1942 Rivett 715 Lathe, 14"x40" Antrac Lathe, Startrite H225 Bandsaw, 1949 Hercus Camelback Drill press, 1947 Holbrook C10 Lathe.


Similar Threads
-
Gippsland, Gods own country one day, pretentious the next!
By AussieOzBorn in forum WOODWORKERS WITH DISABILITIESReplies: 8Last Post: 12th September 2012, 01:26 AM -
Hail storm
By PenTurner in forum WOODTURNING - PEN TURNINGReplies: 8Last Post: 10th March 2010, 03:49 AM -
just had some hail
By underfoot in forum NOTHING AT ALL TO DO WITH WOODWORKReplies: 5Last Post: 24th October 2008, 02:41 AM -
HAIL TRITONEERS
By DPB in forum TRITON / GMCReplies: 23Last Post: 12th December 2002, 05:41 PM
