

 Thanks: 0
 Likes: 0
 Needs Pictures: 0
 Picture(s) thanks: 0
Results 16 to 30 of 38
-
10th April 2009, 04:06 PM #16
 Support your kids ... buy Australian made


- Join Date
- Jun 2004
- Location
- Outback, Western Australia
- Posts
- 319

Great Tutorial Ed. Splendid great looking pen and your dipping method with the lacquer looks much simpler than the CA method that I'm trying to learn. Couple of questions please -
- Do I understand you correctly, that you just dunk (a la donut, sorry humour is dry .. its been nearly 100F in the shed today) the pen into the premixed jar, then put the top back on the jar, cover the pen stand with the box and let it cure. [You don't actually brush or spray the lacquer on ... sorry I'm a little slow today]
- Do you have to keep topping the mixture up with thinners to keep it in the same 1:1 ratio due to evapouration?
- Do you have a problem with the lacquer coating on the bushing "glueing" the bushing to the coating on the pen blank. Does this cause problems when you separate them? that is - tear the finish on the blank?
- You mentioned that the finish can also be easily repaired. Is it fairly durable?
Thank you for posting your pen and this new (for me) method of finishing.
I think I'll be calling the local panel shop after Easter
Have a great Easter.
Best regards,
Chris
-
10th April 2009 04:06 PM # ADSGoogle Adsense Advertisement
- Join Date
- Always
- Location
- Advertising world
- Posts
- Many
-
10th April 2009, 09:38 PM #17
Lignum Vexator
- Join Date
- May 2007
- Location
- North of the coathanger, Sydney
- Age
- 68
- Posts
- 9,417

Ed
thanks for posting that
looks fairly easy - now just watch me bugger it up!
I've similar questions as Interwood
thanks againregards
Nick
veni, vidi, tornavi
Without wood it's just ...
-
10th April 2009, 11:05 PM #18
SENIOR MEMBER
- Join Date
- Nov 2008
- Location
- Houston Texas USA
- Age
- 65
- Posts
- 839
Yup, you simply dunk the blank in the jar, hang it up and go away for an hour.
Repeat as needed.
I use a mason jar because it is tall and lets me dunk long blanks, and because it reseals easily...evaporation is not a problem, the jar is only open for a few seconds each dip.
If you have an automotive paint supply in your town, they sell metal paint can in quarts sizes for a few cents, but like any can, after being opened and closed a bunch of times it gets to be a pain to use.
The finish is really durable, but it will scratch, just as any finish will...if that happens, take the pen apart, gently sand down the scratch as best you can, and re dip as needed.
To seperate the blank from the bushing after drying, simply score the edge where the two meet with a hobby knife...the lacquer will snap when you gently rock or twist the bushing, and you can flush up the edge with the hobby knife...remember, these lacquers are acrylic based, they are simply liquid plastic.

 Originally Posted by Interwood

-
11th April 2009, 01:11 PM #19
Senior Member
- Join Date
- Aug 2003
- Location
- Perth WA
- Posts
- 357
Beautiful pens Ed, thanks for showing. I too like the finish that dipping lacquer gives and I have used it. However, because I usually work in batches of 10 to 12 pens of any style at once, I really need to set up properly, which means buying a heap more bushings.
The only difference I note, is that instead of threaded rods, I used 6mm wooden dowel (readily available here in Australia) to mount the blanks for dipping and hanging to dry. Its a good snug fit in the bushings, but a small hole drilled through the dowel with a turn of wire through it secures it totally.
I suspect that metal rods would be better as the build up of laquer on wood is lot harder to remove than from metal. But, if anyone just wants to try dipping, the dowel is a simple solution with minimal outlay and time.
-
11th April 2009, 02:36 PM #20
SENIOR MEMBER
- Join Date
- Nov 2008
- Location
- Houston Texas USA
- Age
- 65
- Posts
- 839
Got to thinking, (dangerous thing for me to do at the best of times!)
After a few emails with good questions, I realized that I need to clarify some points.
First, I use the PPG automobile lacquer because I happen to have a large supply left over from a auto painting project...it is not essential to use this brand.
You may know this product as the "Clear Coat" applied over custom car paint jobs.
I thin the PPG because it is designed to thin or reduce to the tempature the paint booth is at and because it dries faster and harder that way.
If you use a funiture lacquer, you may not need to thin it at all...the PPG is a very thick lacquer, designed to be thinned, Watco, Belhen and other funiture lacquer is designed to be brushed on straight out of the can, and you can dip pen blanks in it directly in the can mix if you choose...I thin it because I prefer it that way, but it is not a requirement.
To show you the results of both thinned and straight from the can, I decided to shoot a series of photos with a side by side demo.
Before this goes any further, I need to post a warning.
I know the old heads here already know this, but there are some new turners here who may not understand how dangerous this stuff can be, so..
Lacquer thinner is a class 3 Hazardous material, which means the fumes are combustible...if concentrated and exposed to an ignition source, like a gas hot water heater, the fumes will explode.
The liquid burns with a clear flame, you can not see it.
The lacquer itself is not a hazardous material, it is simply acrylic plastic rendered into a liquid form by a solvent (the thinner) but skin and eye contact should be avoided.
Do all your mixing outdoors if possible, or in a well ventilated area, the dipping itself does not produce much in the way of fumes or vapor, but it does have a distinct odor to it, which fades away quickly.
Again, use all the precautions you can think of...treat the thinner with the same respect you would treat gasoline (petrol) do not store it in anything but the can it came in, and do not allow the fumes to concontrate...above all, do not expose it to any ignition source, if it catches fire, you will not see the flames.
The thinned lacquer poses less of a problem, but it is flammable, so excerise caution.
(whew)
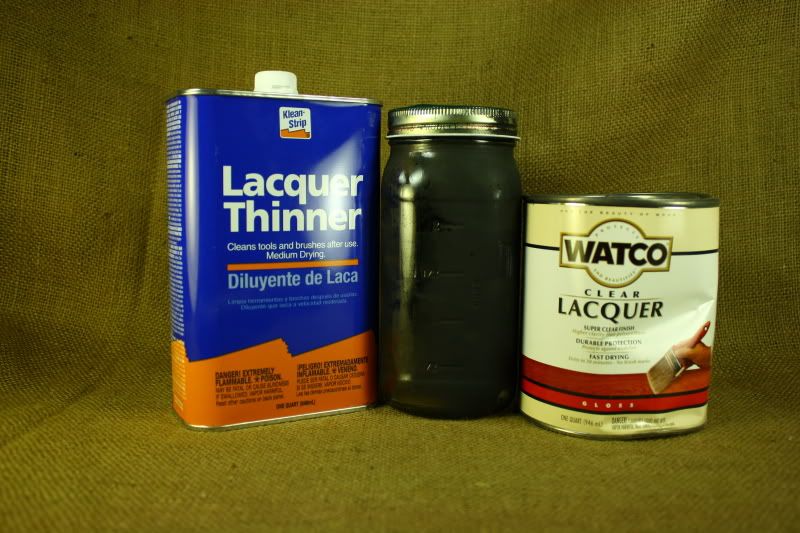
Products used, Watco Lacquer, and plain cheap lacquer thinner.
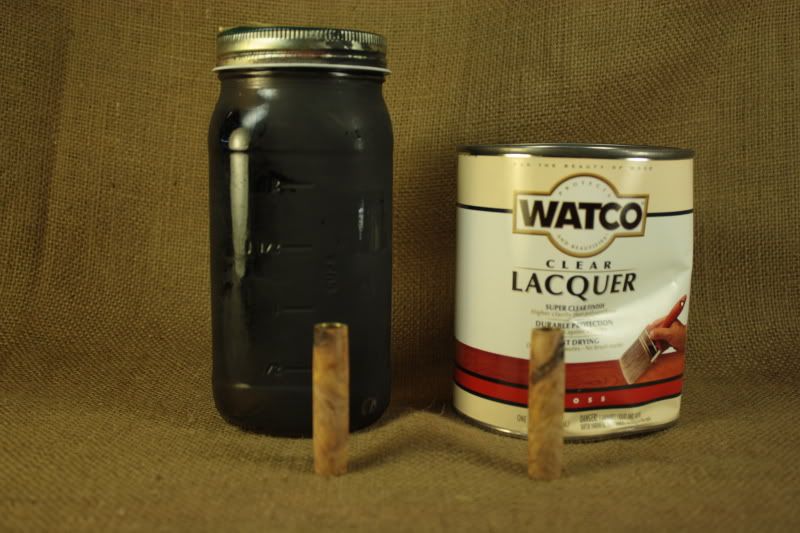
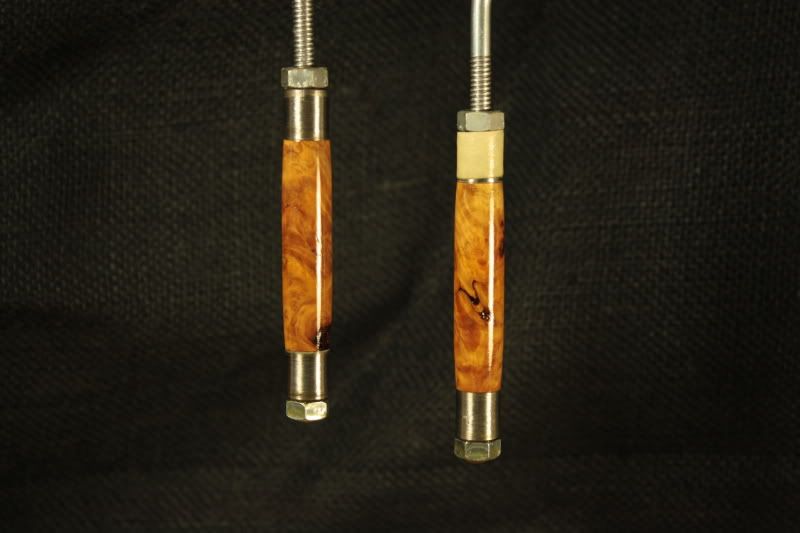
Two Sierria blanks out of the same stick of Mallee (sp?)..the one on the left will be dipped in a thinned mix of 2 parts Watco and one part thinner, the one on the right straight from the can.
I thinned the Watco 2 to one because it dries faster that way..(PPG uses a different type of thinner, so 1 to 1 is recommended)
Dip one...the blank with the masking tape on the top bushing is the one straight from the can.
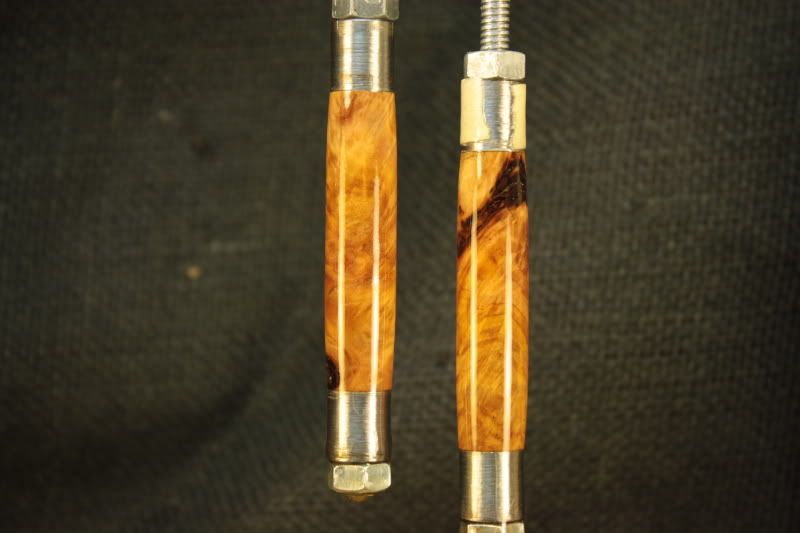
Dip two...
Dip three
Close up on dip four straight from the can.
Close up dip four thinned 2 to 1...
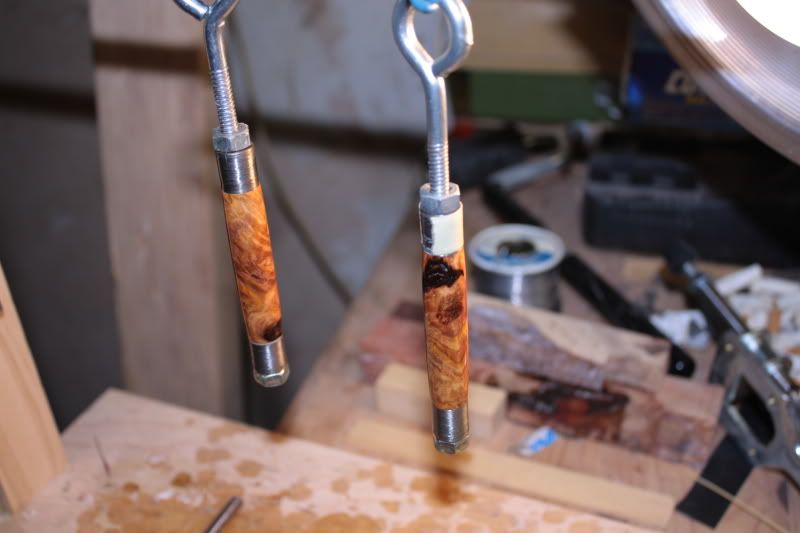
Side by side on dip 5...note both are filling in the voids and the knots and are glossing up quite nicely, but the straight dip is still a little soft, while the thinned one is hard enough to handle carefully...you can test the hardness by pressing your fingernail into the coating on the bottom bushing, if it leaves a mark, it is still too soft to handle.
Total time invested so far is 4 hours and 10 minutes, including turning the blanks and mixing the lacquer, setting up the project and getting everything ready, plus it is 80 degrees F in my shop, so the lacquer is drying fairly fast...normaly I dont have a set time frame to finish a pen, so I just dip the blank, go play on the computer or work on another project, and when I think about it or remember, I go dip the blank again.
To sum it up, using automotive lacquer more often than not requires it to be thinned according to the brands instructions, using funitue lacquer most often does not require thinning, you can use it directly from the can, or thin to suit your likes.
Depending on time I have left tomorrow, (I have 2 teenage daughters who both play exhibition softball) I will finish dipping these to the final finish...
(Chris, I use the eye bolts because I had them already, and because I have a mason jar full of straight thinner I toss them in when done, clean up is a snap)
-
11th April 2009, 04:33 PM #21
GOLD MEMBER
- Join Date
- Mar 2007
- Location
- Munruben, Qld
- Age
- 83
- Posts
- 10,027
Very interesting thread and informative. Thanks for that.
Reality is no background music.
Cheers John
-
12th April 2009, 02:29 PM #22
SENIOR MEMBER
- Join Date
- Nov 2008
- Location
- Houston Texas USA
- Age
- 65
- Posts
- 839
Ok,
Dip number eight...
Side by side, the thinned one on the left.
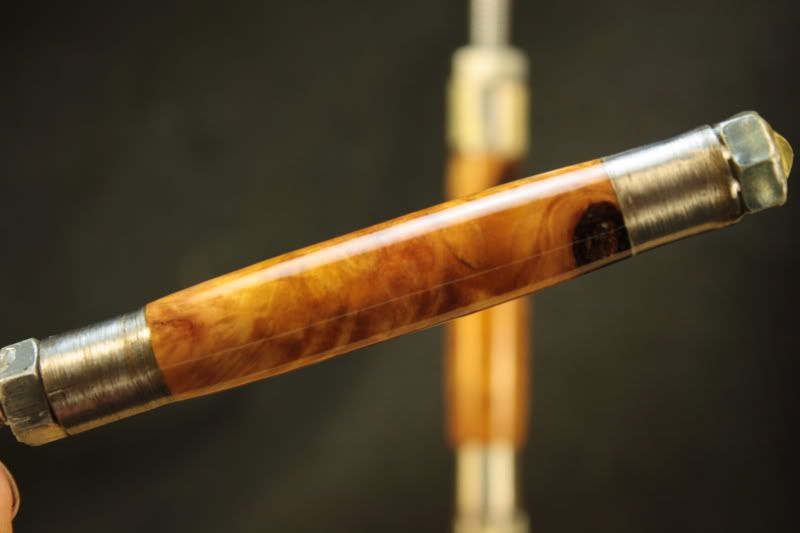
Close up of the thinned dip...not to shabby for no polishing...
-
12th April 2009, 02:46 PM #23
SENIOR MEMBER
- Join Date
- Nov 2008
- Location
- Houston Texas USA
- Age
- 65
- Posts
- 839
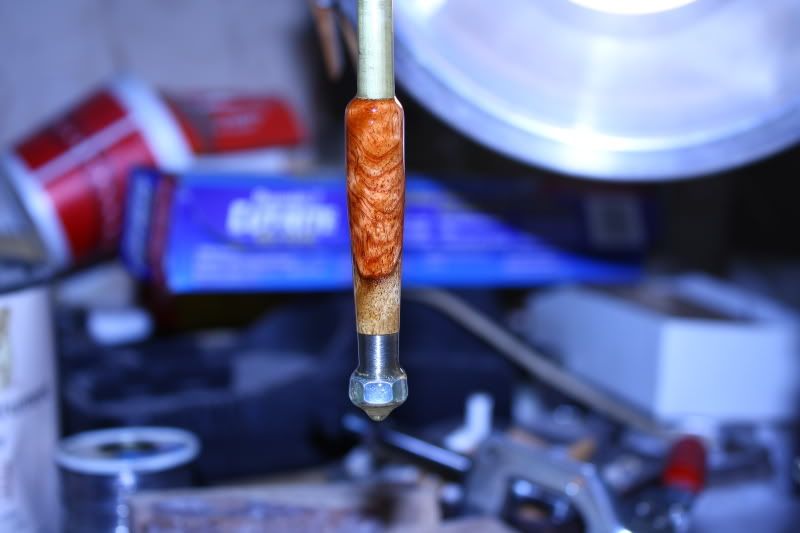
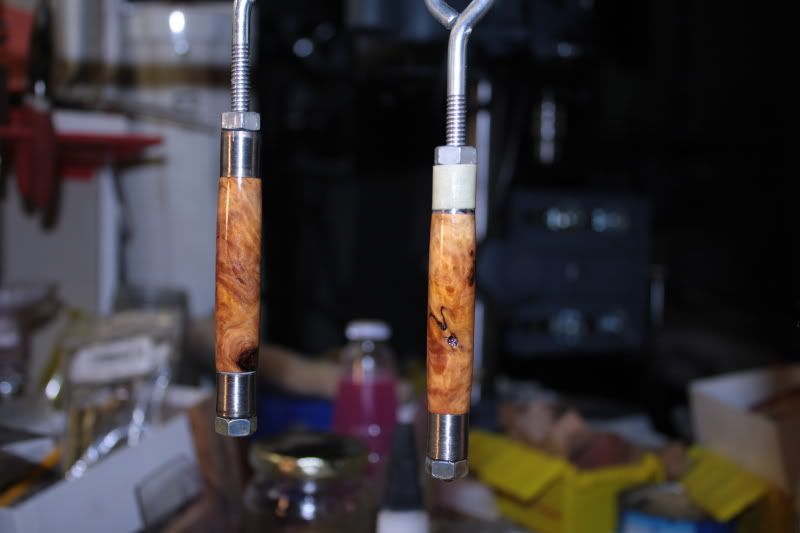
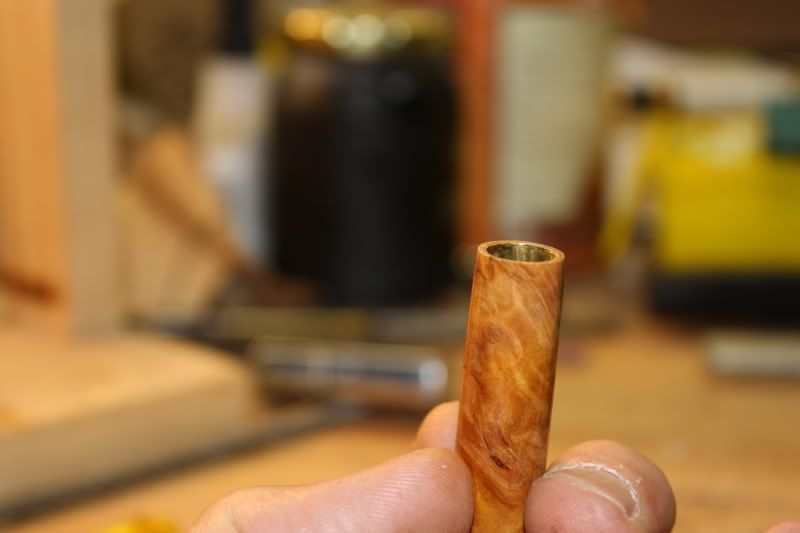
From earlier in the thread, the finished 7mm slimline used to show the threaded rod and bushing set up..
No sanding, no polish, 10 dips in thinned Watco lacquer.
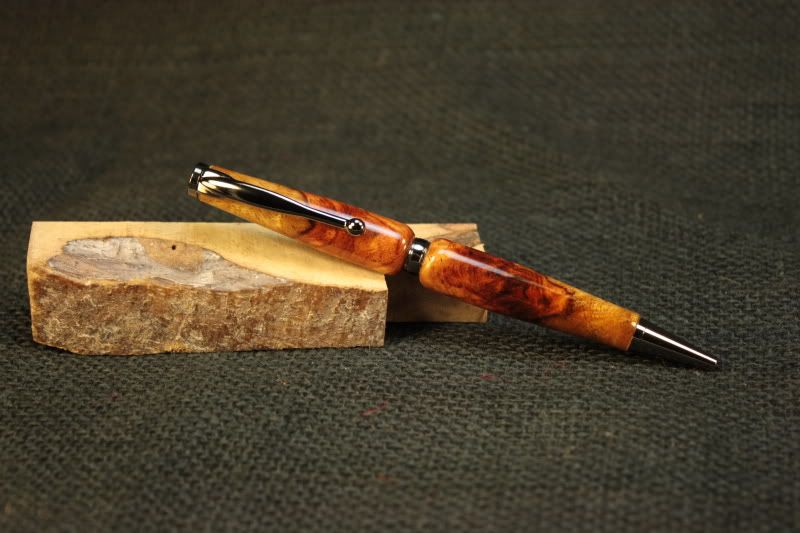
Ambonia with some sapwood...posed on the chunk it was cut from...never throw out scraps!
-
14th April 2009, 10:59 AM #24
Lignum Vexator
- Join Date
- May 2007
- Location
- North of the coathanger, Sydney
- Age
- 68
- Posts
- 9,417
Ed
thanks very much for that
very helpful and informative - have a greenieregards
Nick
veni, vidi, tornavi
Without wood it's just ...
-
18th April 2009, 06:11 PM #25
Deceased
- Join Date
- Oct 2003
- Location
- Kentucky NSW near Tamworth, Australia
- Age
- 85
- Posts
- 3,737
I would also like to thank you Ed for the very informative thread.
I have set up to do this and have made six pens for my daughter as gifts for her bridal party members although much slower to do but after just three dips I have obtained a finish far superior to the CA finish that I have been trialing also it is much smoother and glossier.
From now on this is going to be my preferred method of finishing pens.
Thank you once again for the post.
I will post some pictures in a separate thread when I have finished them.
-
18th April 2009, 08:50 PM #26
Skwair2rownd
- Join Date
- Nov 2007
- Location
- Dundowran Beach
- Age
- 76
- Posts
- 19,922

Super stuphph Ed and many many thanks for the tutorial and extra information.
 bravakiss:
Greenie coming your way.
-
19th April 2009, 03:34 PM #27
GOLD MEMBER
- Join Date
- Apr 2005
- Location
- Aberglassly,NSW
- Age
- 80
- Posts
- 4,983
Excellent stuff Ed, you are the king of the tutorials
BTW great pens
-
19th April 2009, 07:28 PM #28
Novice
- Join Date
- Sep 2008
- Location
- UK
- Posts
- 18
What a lovely pen - great work.
Must try lacquer as I seem to cough me guts up after a heavy CA session...
Cheers
Stewart
-
20th April 2009, 10:17 AM #29
 AKA luvjohnnydees
- Join Date
- Jan 2009
- Location
- Nhill Victoria Australia
- Age
- 52
- Posts
- 85
Great photos Ed. And great tutorial. One quick question, do the blanks get thicker at the bottom than at the top or does it manage to all run off evenly and leave a uniform coating? Mallee (pronounced mal ee) is the correct spelling and great to see the blanks aren't wasted. Your finish really brings the colors out.
Kim
-
20th April 2009, 12:25 PM #30
SENIOR MEMBER
- Join Date
- Nov 2008
- Location
- Houston Texas USA
- Age
- 65
- Posts
- 839
Kim,
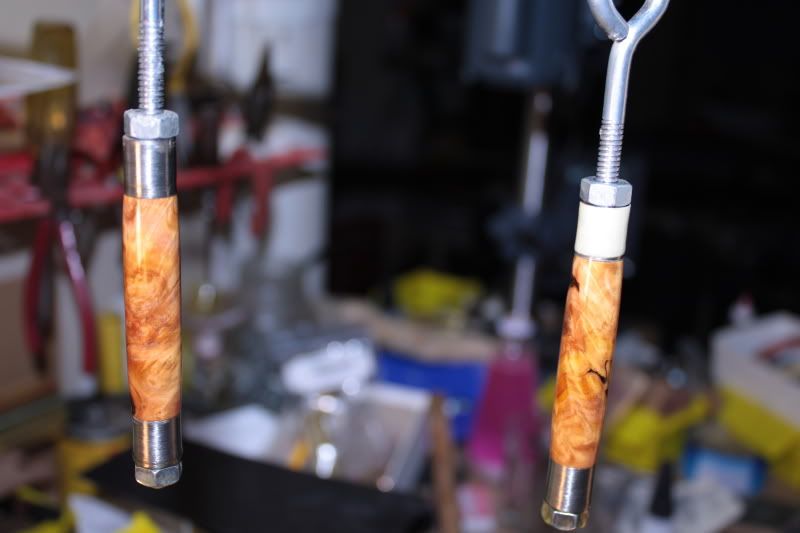
The bottom bushing gives the lacquer some place to run off to...it collects on the bushing and nut, not the pen blank, so the finish is uniform end to end.
Final photos..

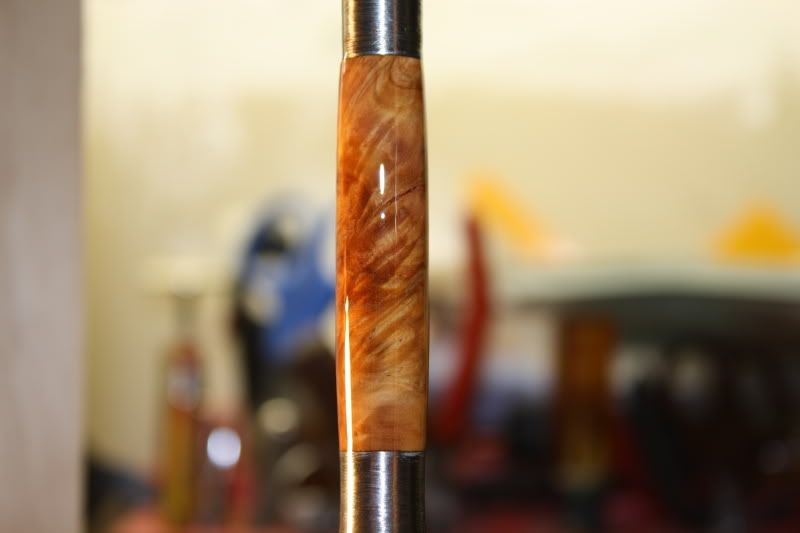
Scoring the lacquer with a hobby knife...gives a break line for the lacquer.
Rocking the bushing side to side and a little twist snaps the bushing loose, leaving this end...on occasion, you made need to clean up the end with the hobby knife, these snapped cleanly.
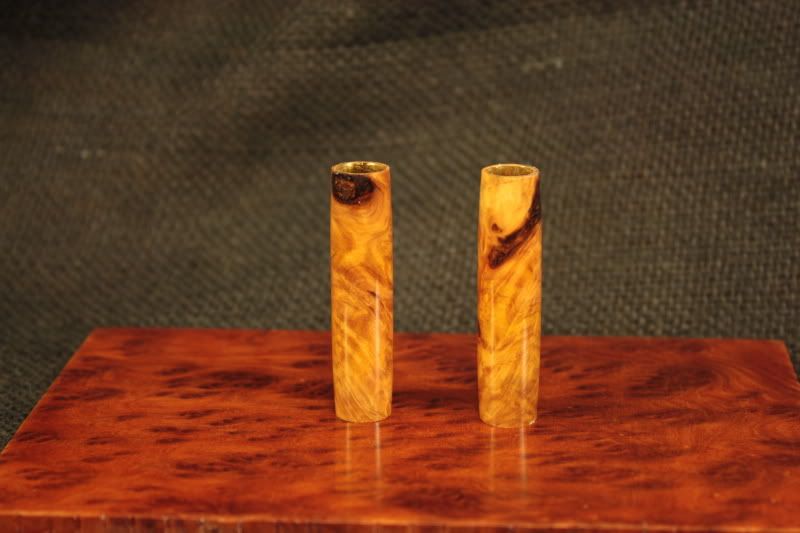
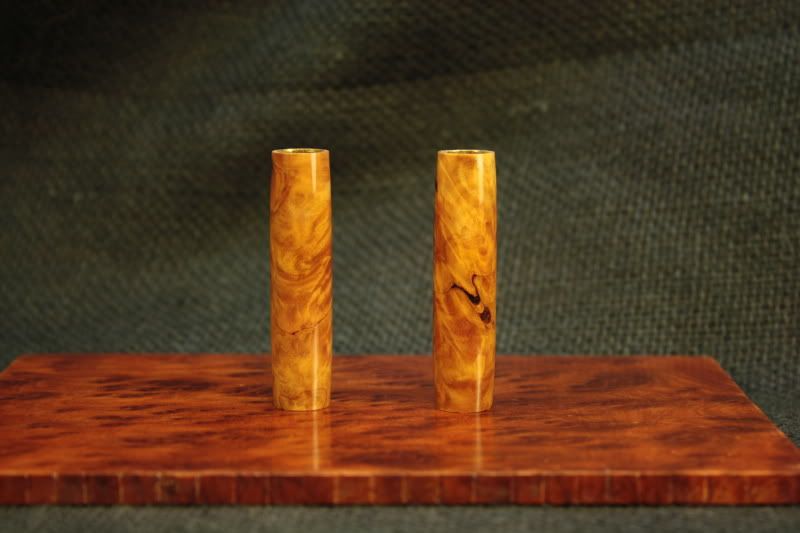
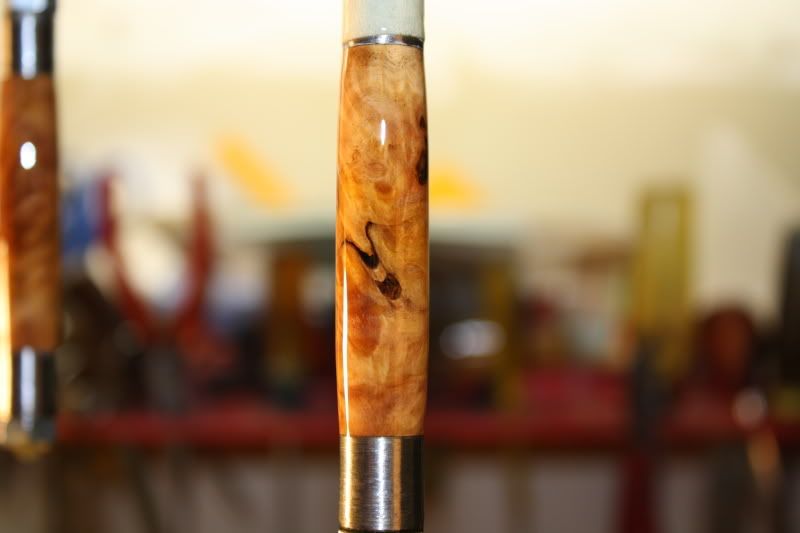
Both sides of the finished blanks...no sanding or polish, although you could polish them with Hut Ultra polish or a fine plastic polish if you choose to.
This finish takes a little longer than CA and the wipe on poly, I think...but for me, the results are better...the lacquer is harder than poly when dry, easier to repair, and un-like CA, I doubt you would have any reaction to the fumes.


 Reply With Quote


