

 Thanks: 0
 Likes: 0
 Needs Pictures: 0
 Picture(s) thanks: 0
Results 1 to 15 of 38
-
9th April 2009, 03:25 PM #1
 SENIOR MEMBER


- Join Date
- Nov 2008
- Location
- Houston Texas USA
- Age
- 65
- Posts
- 839
 Now for something completly different
A very spalted maple blank, full of beetle larva holes, dressed in a Cambridge kit.
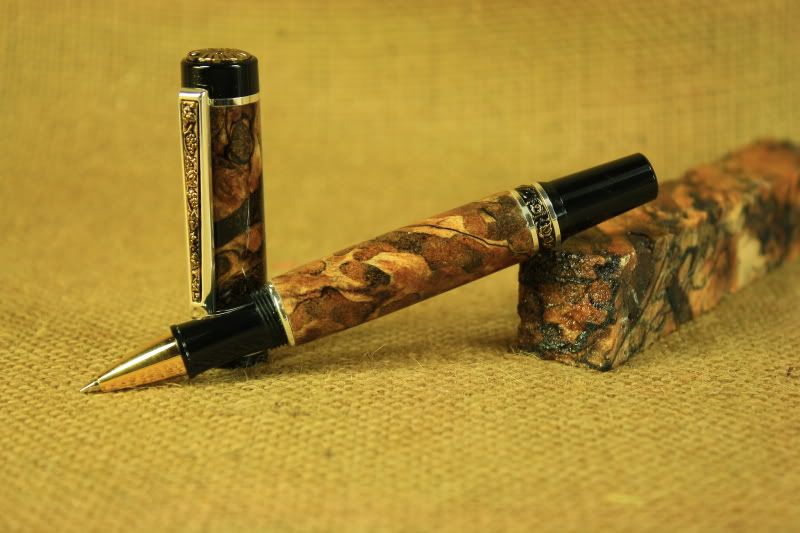
Lacquer dipped times 10, no sanding or polishing.
Comments welcome.
-
9th April 2009 03:25 PM # ADSGoogle Adsense Advertisement
- Join Date
- Always
- Location
- Advertising world
- Age
- 2010
- Posts
- Many
-
9th April 2009, 03:28 PM #2
Lignum Vexator
- Join Date
- May 2007
- Location
- North of the coathanger, Sydney
- Age
- 68
- Posts
- 9,417
Very very nice pen. Absolutely stunning
Reminds me of autumn leaves
Superb!regards
Nick
veni, vidi, tornavi
Without wood it's just ...
-
9th April 2009, 04:04 PM #3
SENIOR MEMBER
- Join Date
- Jul 2008
- Location
- gold coast
- Posts
- 3,956
Make a nice "camouflage" end for a rifle pen hehe, nice kits the cambridge ,must have been a delicate turning job that one
 cheers ~ John
G'day all !Enjoy your stay !!!
cheers ~ John
G'day all !Enjoy your stay !!!
-
9th April 2009, 07:11 PM #4
Skwair2rownd
- Join Date
- Nov 2007
- Location
- Dundowran Beach
- Age
- 76
- Posts
- 19,922

It looks OK but failing eyesight means you need to send it to me for closer inspection.

Would you like me to PM my postal address

-
9th April 2009, 07:49 PM #5
Senior Member
- Join Date
- May 2008
- Location
- Liberty Lake, WA USA
- Posts
- 446
That is very very nice ... I think, Originally Posted by edblysard

I would never ask for such a nice pen kit as that ...
However, that being said, feel free to send me the rest of the left over timber to me as it may just fit a EB and
I could see first hand the wood!
Did you stabelize the wood yourself Ed? Very nice!
-
9th April 2009, 08:13 PM #6
Lignum Vexator
- Join Date
- May 2007
- Location
- North of the coathanger, Sydney
- Age
- 68
- Posts
- 9,417
Ed
I've seen you mention a few times that you lacquer dip your pens
So I've the usual series of questions: what, how, why, product used, problems etc
Thanks in anticipationregards
Nick
veni, vidi, tornavi
Without wood it's just ...
-
9th April 2009, 09:54 PM #7
GOLD MEMBER
- Join Date
- Dec 2006
- Location
- Virginia, USA
- Age
- 63
- Posts
- 1,904
Yes, I second that. I think a small tutorial on lacquer dipping is in order.
Oh, yeah, nice pen.
When all is said and done, there is usually a whole lot more said than done.
-
9th April 2009, 11:32 PM #8
GOLD MEMBER
- Join Date
- Oct 2006
- Location
- Trinity Beach, Qld.
- Age
- 76
- Posts
- 5,313
Very unsual and beautiful, Amos
Good, better, best, never let it rest;
Til your good is better, and your
better, best.
-
10th April 2009, 07:41 AM #9
SENIOR MEMBER
- Join Date
- Sep 2008
- Location
- Maryvale, Queensland
- Posts
- 2,338
Yeah it does too! Great looking pen, especially when you consider it is a "natural" finish. Originally Posted by Sawdust Maker
Russell.Pen Affair Craft Supplies - Cheapest Pearl Ex & Pemo Polymer Clay in Australia
http://craftsupplies.penaffair.com
-
10th April 2009, 07:53 AM #10
Member
- Join Date
- Apr 2007
- Location
- Melbourne
- Posts
- 73
That's stunning. I hope I can make something as nice one day.
-
10th April 2009, 08:05 AM #11
Retired Member
- Join Date
- Nov 2006
- Location
- Bendigo Victoria
- Age
- 80
- Posts
- 16,560
Very nice indeed
-
10th April 2009, 08:41 AM #12
Enemy of mediocrity
- Join Date
- Jun 2004
- Location
- Mornington Peninsula
- Age
- 48
- Posts
- 2,825
I really thought that was an acrylic blank until I read the text. Love it
It's only a mistake if you don't learn from it.
-
10th April 2009, 10:24 AM #13
SENIOR MEMBER
- Join Date
- Nov 2008
- Location
- Houston Texas USA
- Age
- 65
- Posts
- 839
Thanks for the comments...if you look again, you can see one of the blanks I still have, the pen is propped up on one.
Dipping is easy...just sand as you normally would, and..
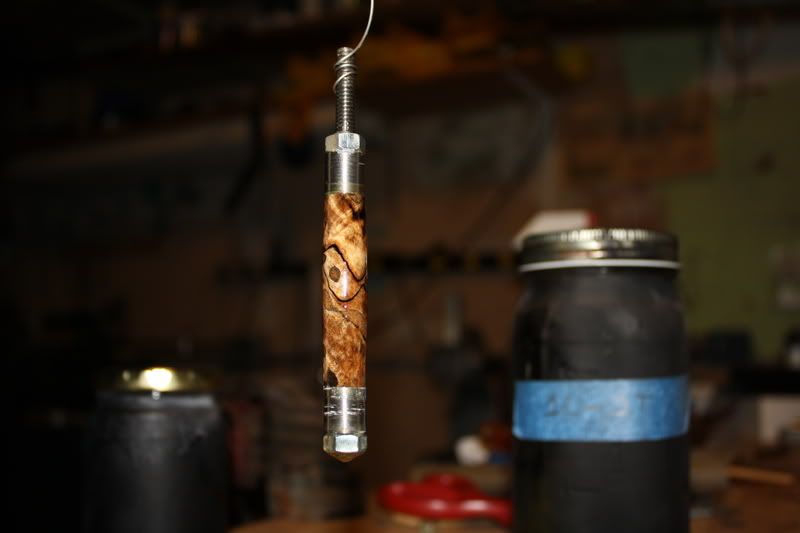
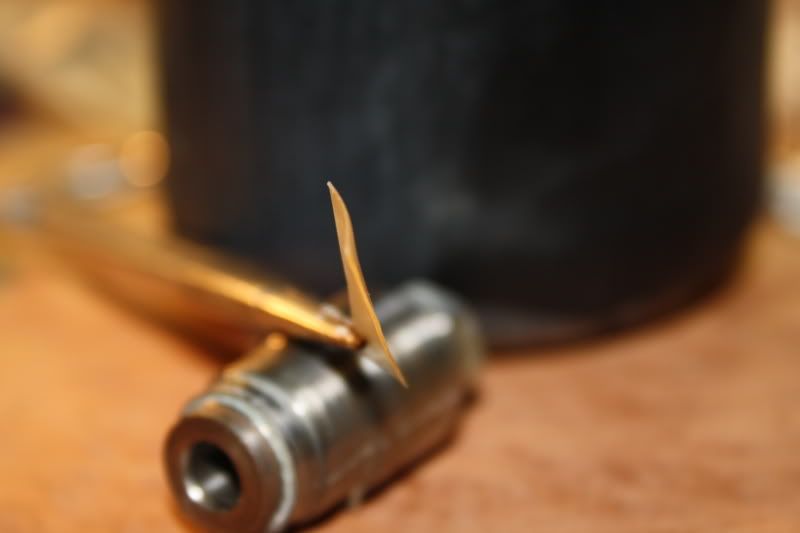
You can see the bushings allow the lacquer to run off and pool on the bushing instead of the pen blank...I use PPG Duracryl automotive lacquer, but I have also used Deft and Behlen's funiture lacquer with the exact same results.
Lacquer "cuts" back into itself in that every time you dip the blank back in the lacquer, it dissolves a little on the surface and rehardens as it dries...un like poly or CA, you are not building up thick coats, but thin, very thin coats, each one "melted back" into the previous one...around dip 5 or so, you will see it begin to fill the voids and pores of the wood, you just keep dipping till you notice the glass like finish...again, the number of dips depends on how porous the wood is, the rooms tempature and the humidity...I have had Cocobola finish out in 3 dips, and oak take 15 or so....
I reduce or thin the lacquer 1 to 1 with the thinner...simply my choice and PPGs reccomendation for spraying...it dries quicker and harder that way...the thinner is actualy a solvent that melts the acrylic lacquer and keeps it liquid, it evaporates or flashes off fast...the more thinner you add to the mix, the faster the lacqure dries and hardens, but...
Too thin means more dips to achieve the desired results...to thick means several hours dry time between dips and several days before it is hard enough to handle...1 to 1 is what works best for me.
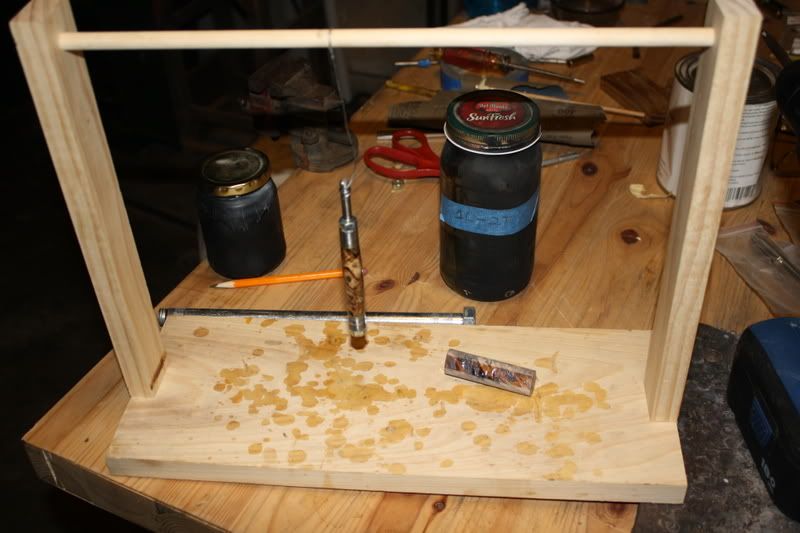
In the photos you can see a mason jar in the background painted black...I mix my lacquer and thinner in that..(stirred, not shaken)...the jar is painted black because in the liquid form, if exposed to UV, it will yellow...once dry this reaction does not occure...I painted the jar to keep the mix in the dark so to speak...and this jar full is about 2 years old.
I simply put a mark half way up the jar, fill with lacqure to that mark, and top off with thinner, stir then use...once mixed you don't have to re stir it, it will stay mixed.
Last thing, the 1 to 1 ratio dries fast enough that dust is not much of a problem...I place a cardboard box over the rack for a few minutes to allow it to set, then remove the box and use a shop lamp to keep the tempature around 80 degreesF. which is the recomended temp for this ratio.
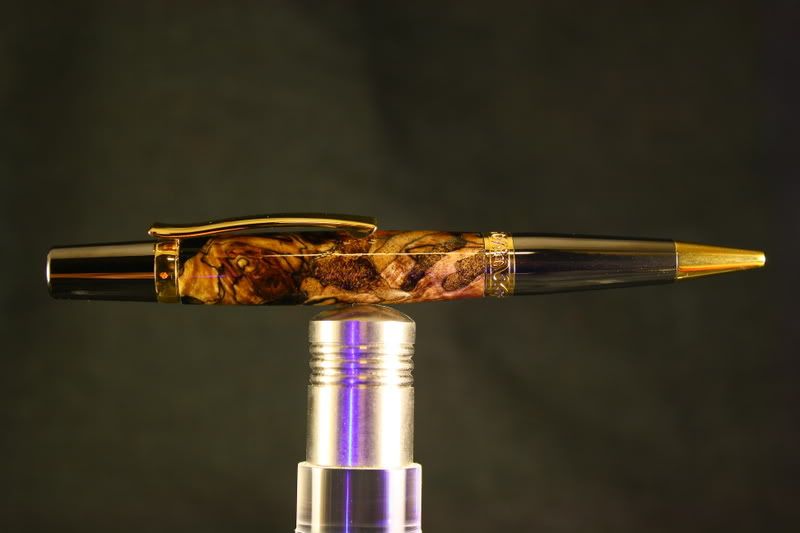
Oh, rhossack, no I did not stablize these blanks, we got them from a guy in Arkansas...they are pretty well impregnated through and through, it is my understanding he has an industrial vacuum chamber he does these in...plus he does knife handle scales too...but they are very brittle, more so than any acrylic blank I ever turned.
And I think it looks good on a Elegant Beauty too...
-
10th April 2009, 11:14 AM #14
SENIOR MEMBER
- Join Date
- Nov 2008
- Location
- Houston Texas USA
- Age
- 65
- Posts
- 839
Decided to see how thick the finish really is, so I when out to the shop and peeled a slice off the top bushing from this dip on the Cambridge...
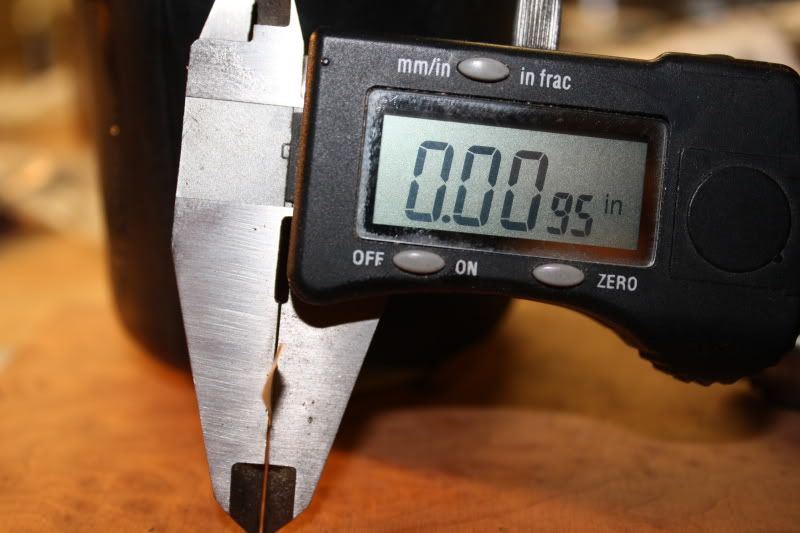
0.0095...pretty good for this smooth a finish, and the plus side is if it scratches, you can dissamble the pen and sand it lightly, then re-dip it to repair...
-
10th April 2009, 03:12 PM #15
GOLD MEMBER
- Join Date
- Aug 2008
- Location
- Tennant Creek, Aust
- Age
- 61
- Posts
- 1,320
A very beautiful pen, thank you for the tutorial.


 Reply With Quote


