

 Thanks: 0
 Likes: 0
 Needs Pictures: 0
 Picture(s) thanks: 0
Results 1 to 15 of 15
-
25th August 2007, 05:20 AM #1

 Member


- Join Date
- Jan 2007
- Location
- Erkrath/Germany
- Age
- 79
- Posts
- 57
 Second attempt to work with veneer
Here is my second attempt to master the working with veneer. To be honest: it was not a successfull attempt. But at least I can say:I have learned a lot!

O.K I had prefered a box without failures, but you can't always get what you wa-a-ant.
After making the finger joints for the box sides, I detected a timber worm in the wood. First I tried it with chemical weapons (Holzwurmtod = timber worm death is a liquid which shall kill the worm). I coated the wood several times with the chemical hammer, but only to detect after three days that the damned worm survived.
Next I searched for a solution in the German woodworking forum. One woodworker suggested to put the wood in the kitchen stove and to heat it above 60 degrees. This should kill any timber worm.
I put the boards in the stove and heated it up to about 80 degrees. This was not such a good idea, because the wood has had still some rests of my chemical liquid inside. When I looked half an hour later for my boards in the stove, I got a severe coughing fit, let alone the stink in the kitchen. SWMBO told me, if I try it once more to use her stove for woodworking purposes she will burn my wood
After bathing the wood once more in Holzwurmtod I was sure that I had killed the timber worm. The only small problem now was, that the holes from the worm appeared on both sides of the board. Because the boards were already prepared with finger joints and grooves for the bottom, I decided that this would be a good reason to practice my veneering skills. Finger joints and grooves had been done on the woodrat. Please notice that a woodrat is not another wood pest, but a ingenious English woodworking jig.
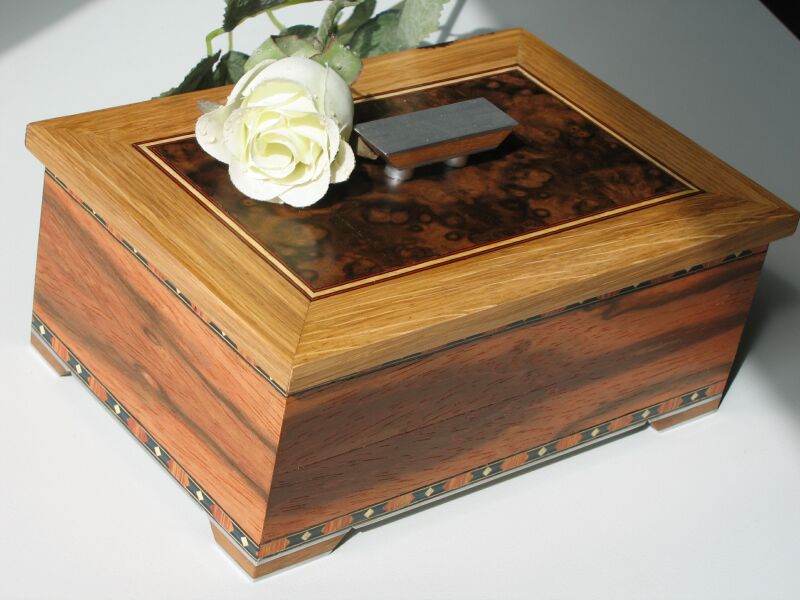
I chose kingwood veneer for the box sides. At the upper and lower box side I applied ready made inlay stripes to frame the kingwood veneer. The lid basis was made of plywood. The upper side is veneered with walnut burl. For the inner side I hve chosen oak burl veneer. The plate was framed with a mitred oak frame and an inner inlay stripe.
Although I tried carefully to glue the mirrored oak veneer to the downside of the lid, the result was not good. One can see clearly where the book matched pieces are glued together. Any hints how to avoid this in the future?

For the lid handle and the feet I used a solution which I already had used on my last box. I sandwiched a stick of dark wood with aluminium on both sides. This piece was glued on two small pieces of aluminium rods. The result was this:


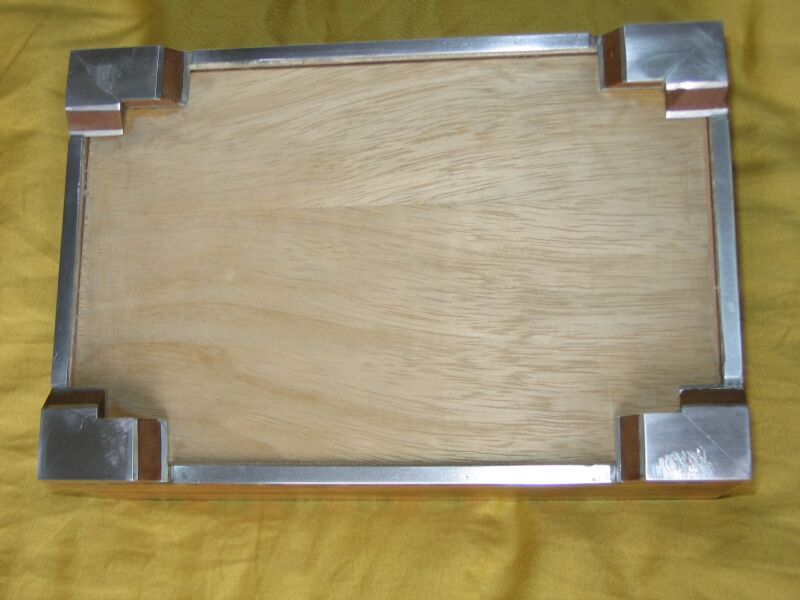
The feet were made from the same sandwiched piece which I had used for the lid handle. The stick was mitred on the table saw and the single pieces glued together. Because the sides of the feet are cut in 45 degree angle too, clamping them for glueing was a time consuming task. Next time I will glue the pieces when they still have a right angle and clamping is much easier. Because I found that the bright alu contrasted very well with the dark king wood, I attached a small alu stripe under the box side walls. Here is a view to the bottom of the box.
Now the next experience was waiting for me: First use of shellac! In the forum I found that the success of a gleaming surface lies in sanding. Did I say already that I hate sanding? I started with a 100 sand paper. Going up to 150, 180, 240 and stopped with 400. After cleaning the dust from the wood I started the shellac treatement.
After 8 layers of shellac I found: enough is enough.
Now the box looked like this:

The box will be used for keeping jewellery. Here is the tray.

And here a glimpse how it looks like with jewellery

I hope our friend will like the box despite the the failures I made.
Detlef
-
25th August 2007 05:20 AM # ADSGoogle Adsense Advertisement
- Join Date
- Always
- Location
- Advertising world
- Age
- 2010
- Posts
- Many
-
25th August 2007, 08:19 AM #2
Deceased
- Join Date
- Sep 2006
- Location
- Avoca Victoria
- Age
- 81
- Posts
- 10,501
May all my boxes fail as badly as this one

-
25th August 2007, 08:44 AM #3
SENIOR MEMBER
- Join Date
- Feb 2003
- Location
- Garvoc VIC AUSTRALIA
- Posts
- 11,464
-
25th August 2007, 09:08 AM #4
Head Moderator
Sister of the DarkSide
- Join Date
- Dec 2004
- Location
- Toowoomba Q 4350
- Posts
- 9,217
Wow - what a journey you've had! To be honest, I think the journey is as important as the finished box. And to me, your beautiful box is more than 'just a box', it's already near filled with tears and joy and all the ranges of what you experienced and learnt building it.
Yes, I love the box, not only for the end result, the well-matched and interesting use metal and timber, but for what it represents as well.
Cheers
Wendy Box Challenge 2011 - Check out the amazing Boxes!
Twist One - Wooden Hinge/Latch/Catch/Handle
Twist Two - Found Object
Twist Three - Anything Goes
-
25th August 2007, 09:47 AM #5
GOLD MEMBER
- Join Date
- Oct 2005
- Location
- Adelaide
- Posts
- 1,024
Nice box Detlef!
I think I would have tried the microwave on that worm. Less risk to the timber, and microwaves work strongest on anything containing moisture: that worm would be the first thing to heat up
woodbe.
-
25th August 2007, 10:52 AM #6
SENIOR MEMBER
- Join Date
- Nov 2006
- Location
- t
- Posts
- 961
Is it just me ?
I only see 2 pictures, the finished product and the feet.
From what I can see ...... Wow !!!!
Would a microwave work on something as small as a woodworm???
I ask because during my mis-spent youth, I discovered you can't microwave very smal things like ants, they wander around with impunity....Last edited by Cruzi; 25th August 2007 at 10:56 AM. Reason: Microwave Question Added
-
25th August 2007, 12:36 PM #7
GOLD MEMBER
- Join Date
- Mar 2007
- Location
- Munruben, Qld
- Age
- 83
- Posts
- 10,027
Some failure. good work I would be very pleased with that.
Reality is no background music.
Cheers John
-
25th August 2007, 07:22 PM #8
Dehydrated Hydrographer
- Join Date
- Jun 1999
- Location
- Westleigh, Sydney
- Age
- 77
- Posts
- 9,562
-
25th August 2007, 07:31 PM #9
Member
- Join Date
- Jan 2007
- Location
- Sydney
- Posts
- 76
Too many //// in the picture path. Originally Posted by Cruzi

You can see them by right clicking the redX copy & paste the file path into browser removing 2 //
Beautiful looking box - I _am_ impressed.
As for using the oven... err yup I used the oven to heat up a head unit on a set of front forks from an old motorbike I was restoring to get the bearing race out.
It worked BUT the next baked dinner had a distinct taste of 'old bike'
-
25th August 2007, 08:45 PM #10
Member
- Join Date
- Jan 2007
- Location
- Erkrath/Germany
- Age
- 79
- Posts
- 57
Ah, lucky to see that I am not the only one who misused an oven. Originally Posted by batcat
-
25th August 2007, 08:56 PM #11
Member
- Join Date
- Jan 2007
- Location
- Erkrath/Germany
- Age
- 79
- Posts
- 57
Did I something wrong in posting the images? Strange to see that it happened to CRUZI who has difficulties to see the images, because it was CRUZI who helped me to get the pictures loaded. Originally Posted by batcat
I can see all images and hpoefully the other woodworkers too. Is there something I should change if I append images?
-
25th August 2007, 09:55 PM #12
Senior Member
- Join Date
- Jul 2006
- Location
- Hoppers Crossing
- Posts
- 181
Fantastic box and tale, but the climax is ,is that stubborn little bugger still alive.
-
26th August 2007, 01:53 AM #13
Member
- Join Date
- Jan 2007
- Location
- Erkrath/Germany
- Age
- 79
- Posts
- 57
Billylad, Originally Posted by Billylad
you brought me to the idea, that I will give a big hammer as an additional present to our friends. Just for the case that the worm still survived.
-
27th August 2007, 11:52 PM #14
Senior Member
- Join Date
- Sep 2006
- Location
- Blackheath NSW
- Posts
- 203
Great box Detfall. I love the way you use aluminium in your work. It blends so well with the wood. How do you cut it?.
I'm just about to do my first box with veneer. Hope if works out half as well as yours.
Regards
DIY DAN"Life is what happens while you are busy making other plans" (John Lennon)
-
28th August 2007, 03:21 AM #15
Member
- Join Date
- Jan 2007
- Location
- Erkrath/Germany
- Age
- 79
- Posts
- 57
Thank you DIY DAN for your recognition. Originally Posted by DIY DAN
Working with aluminium is rather easy. You can even saw it on your table saw if you have blade with carbide teeth. But be sure that you protect your eyes and don't hesitate to push it in the blade rather fast! The small stripes under the box walls I have sawn from a standard aluminium angle profile which you get from your local DIY store. The problem with glueing them together with wood is, that their surfaces are usually anodised and very smooth. You have to get rid of this very thin surface and rough it up with the help of a metal rasp. Now you can use a two component glue or similar to glue the different materials together.
Before I saw aluminium the first time on my table saw I had strongest doubts that this would work. I was afraid that the fast running blade would crash. So I started with a thin aluminium stripe (2x10mm) and did all possible precautions. (wear eye protection, holding the workpiece strong against the fence, beeing prepared to push the emergency stop etc.) But everything worked fine. Only the feed speed was too low.
And one thing more you should consider. The swarfs can get rather hot, so protect your arms and legs.
Detlef

 Reply With Quote


Similar Threads
-
Veneer and Forest Oak boxes
By Scally in forum BOX MAKINGReplies: 8Last Post: 8th May 2006, 09:08 PM -
Help! for the market of dyed veneer
By chen in forum WOODWORK - GENERALReplies: 1Last Post: 18th August 2005, 04:53 PM -
Best tool for trimming veneer.
By joez in forum HAND TOOLS - UNPOWEREDReplies: 4Last Post: 27th July 2005, 10:26 PM -
Prison or Work
By Geoff Dean in forum WOODIES JOKESReplies: 0Last Post: 14th June 2005, 12:36 PM -
Any secrets to finishing natural edged work?
By Glenn M in forum WOODTURNING - GENERALReplies: 4Last Post: 25th June 2001, 08:48 PM
