

 Thanks: 0
 Likes: 0
 Needs Pictures: 0
 Picture(s) thanks: 0
Results 31 to 45 of 50
Thread: W.I.P. - Building Basic Boxes
-
10th July 2011, 09:28 PM #31
 Senior Stinkologist


- Join Date
- Nov 2001
- Location
- Parkside - South Australia
- Age
- 45
- Posts
- 3,318
 Days 13 & 14
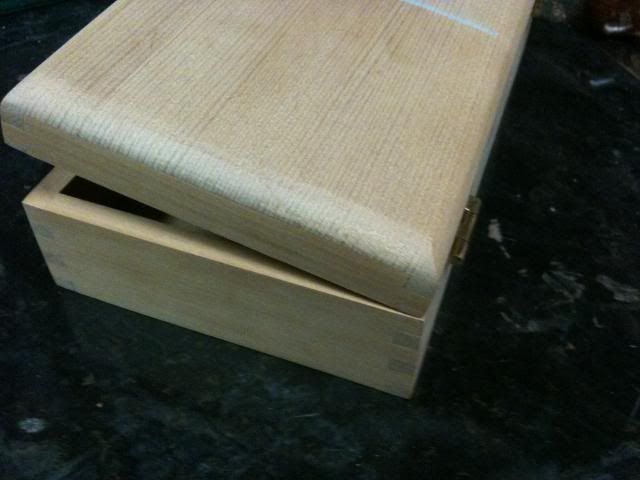
Getting close to the end now. Do to a family visit the weekend was cut short to half a day. Moving on from last time I cut the lids off about 10 or so of the boxes. This worked well and I took the 300mm sanding disk off the Shopsmith to use it as a big flat sanding platform to clean up the lid and base:
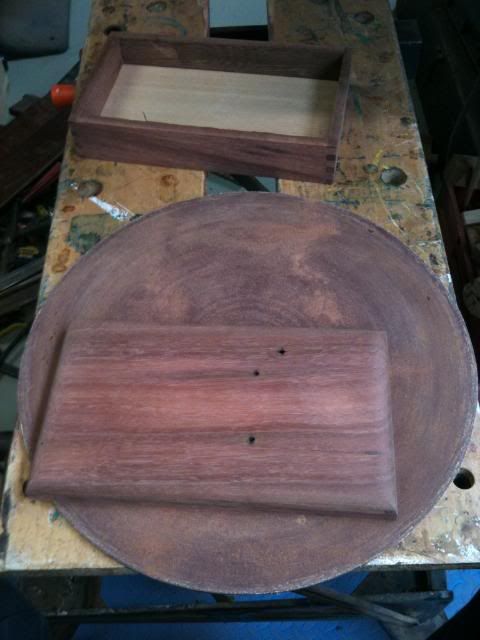
As you can see there was a little lip where the table saw cuts did not meet up 100%. Generally they were fairly good and didn't take long to sand flat:

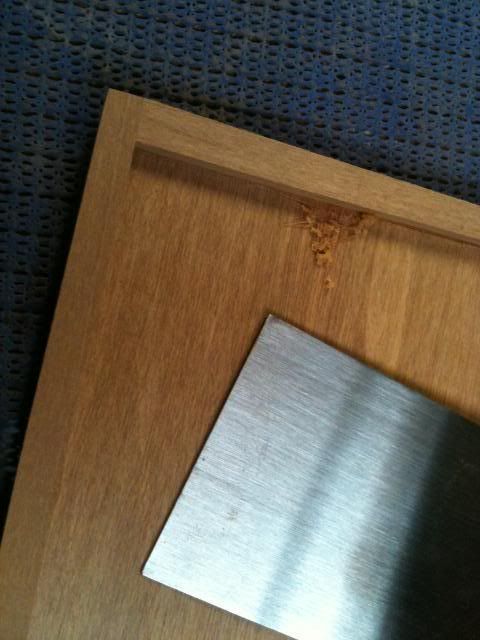
I took the opportunity to take the scraper to any glue that came through after gluing the lid on. Most of the trouble came when the lid moved when clamping. Not a big job to clean it up through. The scraper is proving to be well worth the few dollars they cost:
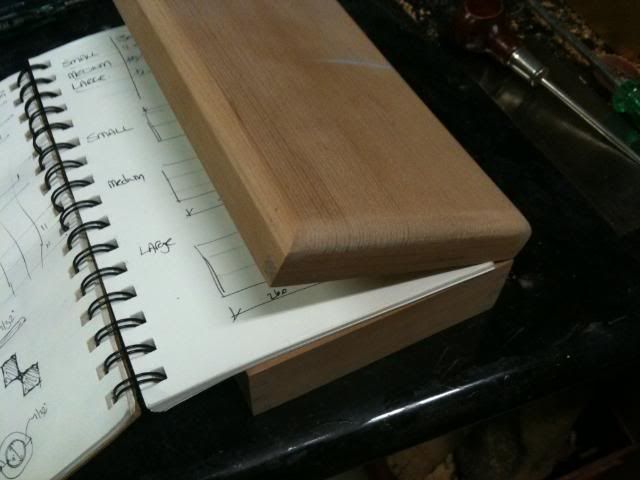
The next step was to set up the router table to cut the hinge rebates. The Incra is really coming into is own as a great router fence. Sure there may be easier jigs for cutting dovetails and the like but I went with the Incra as it doubled as a very accurate and easy to use fence. The back of the box was marked with chalk so that I made sure the rebates were all in the right spot.
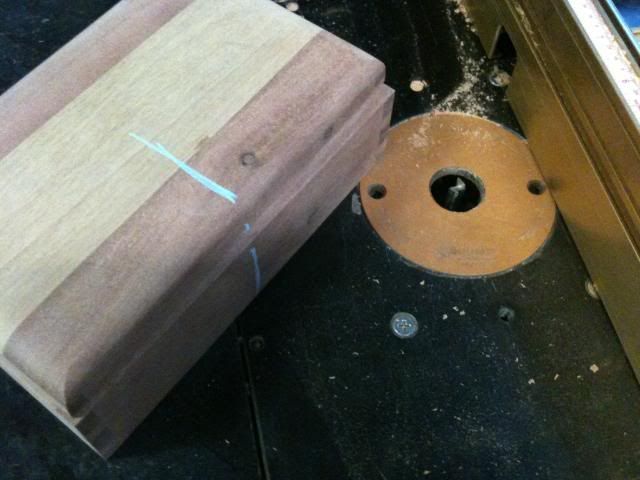
As you can see here the first cut was made and then the fence moved to make the 25mm rebate for the hinge. In order to keep the rebates in the same position the top and bottom (and left and right) were all cut before moving the fence. This gave the hinges the same spacing in from the edge without having to measure or mark. In this image the lid is placed over the router bit and then pushed through (the stock was always moved from right to left never left to right):
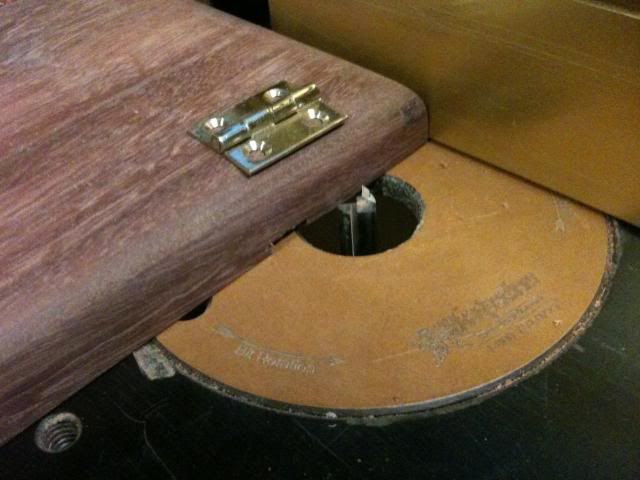
After making the first cut the fence was moved to cut the second edge of the hinge. Then it was just a matter of moving the stock to clear the middle waste:
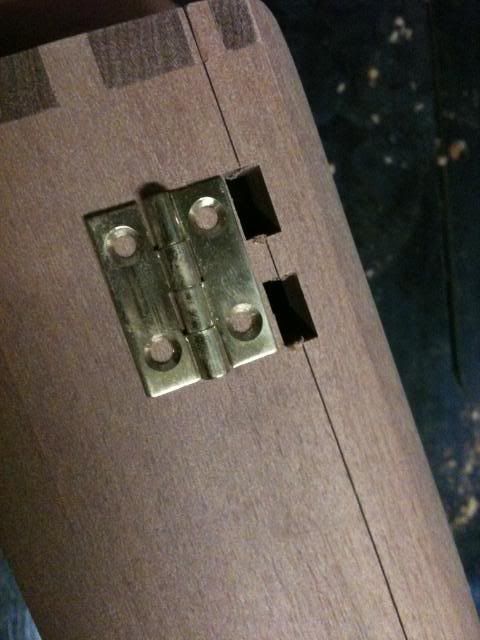
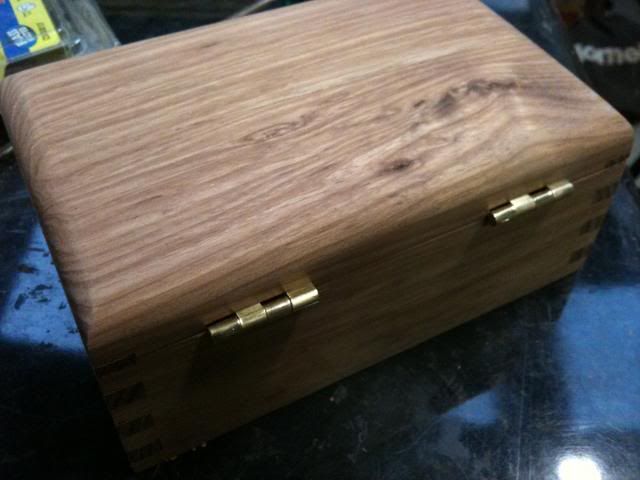
The next few images show the hinges fitted. They are just the 25mm hinges from Bunnies and perhaps not the best quality. When they are first fitted they are quite stiff and don't close, they simply stay open. Nine Fingers showed me the trick about how to get around it a few years ago on the completed box above:
The hinges need to be stressed a little by placing some paper to act as a block to free up the hinge:
A few seconds later and all is good:
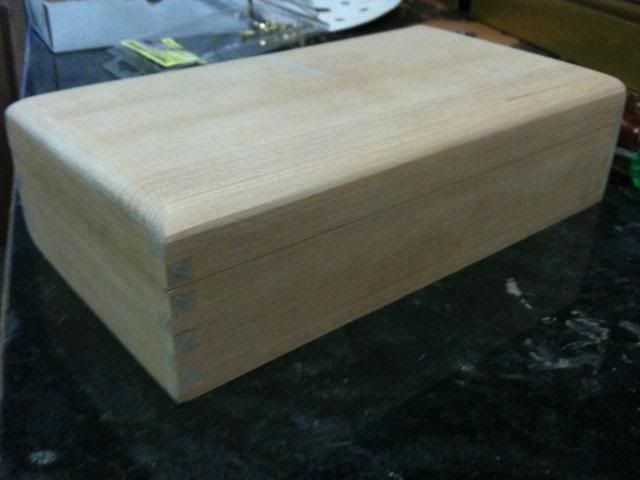
So almost there on this one. Just needs a final sand and then some finish:
As of tonight at least five are up to this level which is pleasing. Although I was confident of what needed to be done I had a feeling something was going to derail the process. It is pleasing to get a few across the line and now just have to follow through for hopefully drop off early next week (might need to spend a few nights in the cold this week ).
).
Cheers
Stinky.Now proudly sponsored by Binford Tools. Be sure to check out the Binford 6100 - available now at any good tool retailer.
-
10th July 2011 09:28 PM # ADSGoogle Adsense Advertisement
- Join Date
- Always
- Location
- Advertising world
- Age
- 2010
- Posts
- Many
-
11th July 2011, 01:47 PM #32
Mildly Moderate
- Join Date
- Nov 2007
- Location
- Albury Well Just Outside
- Posts
- 13,315
I was going to say cool but not if you are going to be cold. Well done so far.
-
11th July 2011, 03:05 PM #33
Splinter
- Join Date
- Aug 2008
- Location
- Texas, Houston, USA
- Posts
- 26
Howdy Sir,
Great job on the boxes and the posts. One quick comment about the glue up. From here it looks like you glued the end grains on the finger joints. I usually put the glue on the edge grain for finger joints. By that I mean, if you consider each "innie" part of the joint to be in the shape of a "U", then I put the glue on the left side of the "U" and the right side of the "U". Those two sides match up with the edge grain on the "outie" part of the joint to make a edge grain to edge grain glue up if you will. Also, if you push the "outie" through the "innie" part the right way, you only get squeeze out on the outside of the box. Then you don't have that frustrating glue line, no finish in the corner look on the inside of the box either. Do you ever have that problem? ;-)
Best,
Jim
-
11th July 2011, 03:30 PM #34
 Senior Member
- Join Date
- May 2011
- Location
- Blackbutt QLD
- Age
- 30
- Posts
- 172
some nice boxes there i bet you could teach me a thing or two haha
-
11th July 2011, 11:45 PM #35
Senior Stinkologist
- Join Date
- Nov 2001
- Location
- Parkside - South Australia
- Age
- 45
- Posts
- 3,318
Hi Jim,
After reading your method, checking my photos, reading your method, checking my photos, reading your method and then reading your method again I think I get it
I don't really have a method. I found that the way shown (sort of unfolding the box) was quite quick for the number of boxes I was doing as I didn't need to try and get glue inside the finger. I think your method of gluing the long grain to long grain would produce a stronger joint that my long grain to end grain. For such small boxes I don't think it makes much difference but it is best to stick with the better method as a standard and something I will look out for in the future.
Now I think about it a little further the way I would generally do it for a box or two would be: holding your hands at 90deg with thumbs up, I would apply glue to the top face of each finger (which I think is your method).
The glue squeeze didn't really cause much of an issue with the fingers. The photo below perhaps has a bit too much glue and did create some squeeze but generally it wasn't an issue.
My main glue squeeze issue came when I put glue around the top edge of the box and then glued the lid on. To get the best clamping pressure I put the lid down on the bench first and then inverted the base over the top before clamping. The main issue was that when I put the first clamp on the box would often twist or move smearing glue across the inside face of the lid. This is what I was cleaning up yesterday with the scraper. It wasn't too bad but I wanted to get rid of it before applying a finish.Now proudly sponsored by Binford Tools. Be sure to check out the Binford 6100 - available now at any good tool retailer.
-
12th July 2011, 01:55 AM #36
GOLD MEMBER
- Join Date
- Sep 2002
- Location
- Paignton. Devon. U.K.
- Posts
- 6,062
I like to put wet glue to two faces, if it is only applied to one face and there is a lot of gluing to do, its amazing how quickly any end grain can be dry before finishing joints and clamped up.
woody U.K.
"Common looking people are the best in the world: that is the reason the Lord makes so many of them." ~ Abraham Lincoln
-
12th July 2011, 07:02 AM #37
Heavy Machinery
- Join Date
- Mar 2008
- Location
- Lambton, Newcastle, NSW, Australia
- Posts
- 4,957
Speeking of glue SS, I noticed on the first page where you have your dots of glue, you are only gluing to end grain. Wouldn't it be stronger to put your dots on the cheeks so you get long grain to long grain? I guess they are only small boxes and don't need a lot of strength. Nice WIP
 , no way I could make that many things in a line, I struggled the other week with 20 little boxes that drove me insane
-
12th July 2011, 09:03 AM #38
GOLD MEMBER
- Join Date
- Mar 2009
- Location
- Sydney
- Age
- 37
- Posts
- 2,707
Great work on the boxes
So what are you going to do with the boxes once completed?
Andy
-
12th July 2011, 10:03 AM #39
Senior Stinkologist
- Join Date
- Nov 2001
- Location
- Parkside - South Australia
- Age
- 45
- Posts
- 3,318
Yep ..... gluing the long grain to long grain on the fingers would be stronger than the long grain to end grain. Sitting back and thinking about it this is the way it should be done. To be honest I cant see it making much difference in boxes of these sizes. With the Incra the finger joints are generally so tight that it is a bugger to get them apart even without glue, by the time you put in the base and glue on the lid they are a secure little unit. That being said however even through they don't particularly need the additional strength I should be doing the correct long grain to long grain method as a standard practice as it doesn't require anything different other than where the glue is placed. Originally Posted by Claw Hama

The only problem with doing big batches is that some days it feels like you are not making any progress at all. A task that would take a few minutes on one box suddenly takes a block of time for multiples. Then there is the issue of trying to keep the same components together! Still 20 boxes is better than none!
Andy, Originally Posted by groeneaj
They are for another forum member for a business venture that he is kicking off. This determined the constraints for the project a little, sizes etc and then to a small extent the budget has controlled the design as well. I would have thought that the standard for small boxes like this would have been mitred corners (or perhaps butt joint ) but I wanted to use the finger joints to add a little more visual interest into the box (although there is nothing wrong with a mitre and some contrasting keys!).
The visiting family have headed off this morning so I will be back in the garage tonight!Now proudly sponsored by Binford Tools. Be sure to check out the Binford 6100 - available now at any good tool retailer.
-
19th July 2011, 09:29 PM #40
Senior Stinkologist
- Join Date
- Nov 2001
- Location
- Parkside - South Australia
- Age
- 45
- Posts
- 3,318
The Final Countdown
I think my good friends Europe said it best .....
‪Europe - The Final Countdown‬‏ - YouTube
Its the final countdown ..... da da da ..... da da da da da da da ..... da da ..... (I think you get the point).
With the deadline of today fast approaching I had to put a bad cold behind me and forge on to get the boxes done. In our last installment we had basically finished except for the final sand and oiling.
One thing I had in my mind from day one was to insert an inlay in the top of some of the boxes. I had seen a You Tube video (whilst searching for Europe) and it looked easy enough, so on day one of this project I forked out some hard earned at Carbatec and purchased and inlay kit.
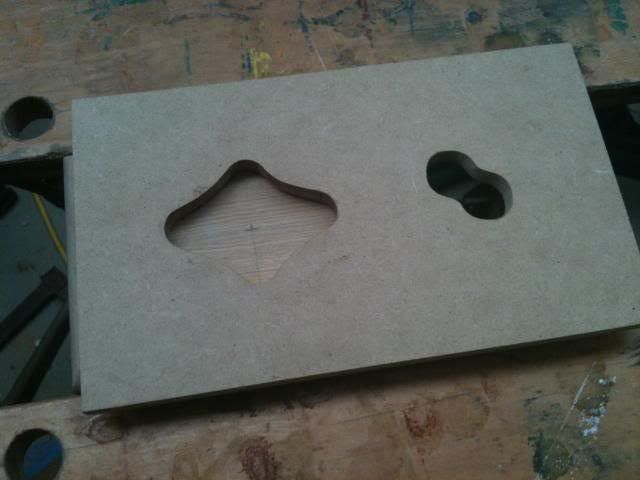
The first step was to make up some templates out of MDF:
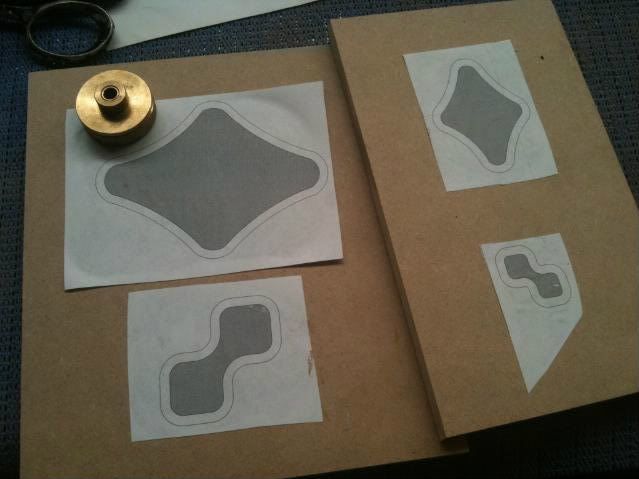
still making the templates:
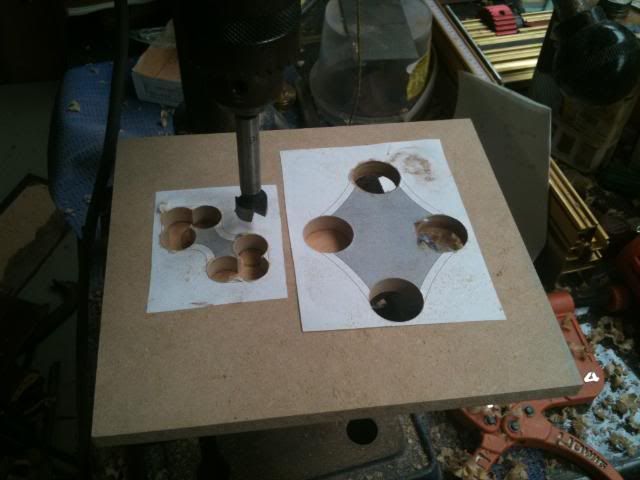
It was quite fortunate as after purchasing the inlay kit I quickly realised that it didn't fit in either of my routers .... that was until I found my old Skill which would be perfect. I did a quick trial before starting on the almost finished boxes:
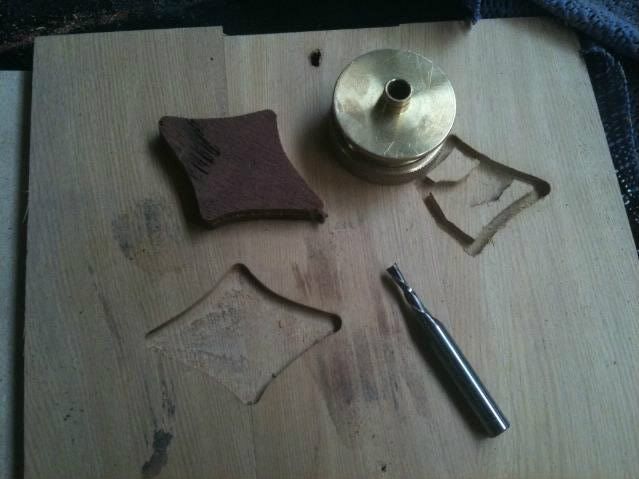
I was quite happy with the results although the positive (the jarrah component) didn't quite fit. A quick look at the router uncovered that the bit was not 100% central to the guide. There is an alignment piece that you can use to get it central however as it was a fixed base router I couldn't work out how to get the bit in after running through the alignment process. In the end I was quite happy just with the negative and given time was short it would be fine.
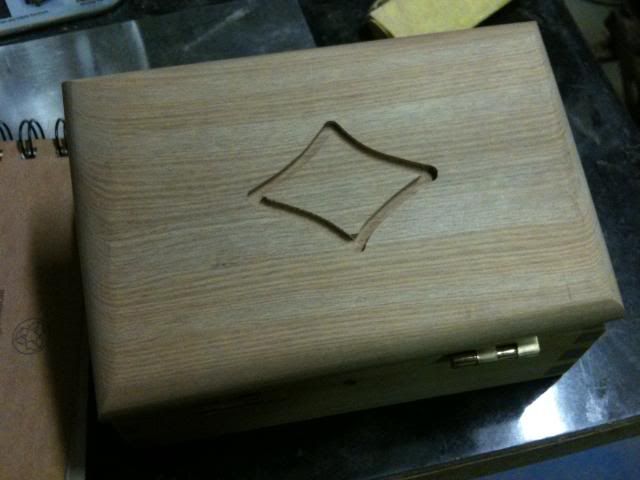
Lining up the template on the box lid:
So all was going well. I completed the perimeter of the shape. Unfortunately the router then died and kept tripping the safety switch of the house ..... now I know why I didn't use it much. Although I was quite happy with just the outline this box did not make the final 20:
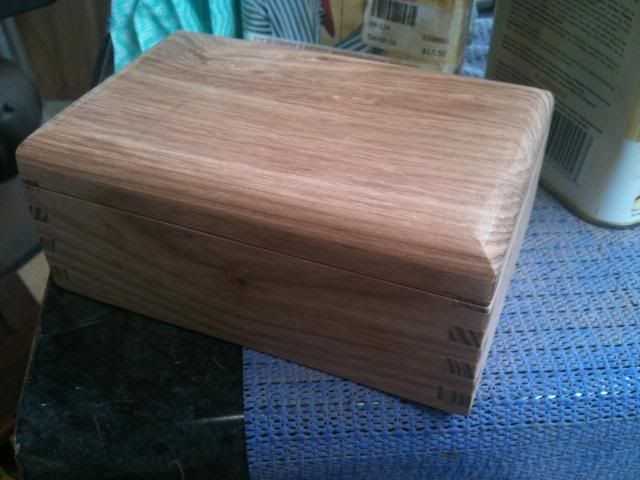
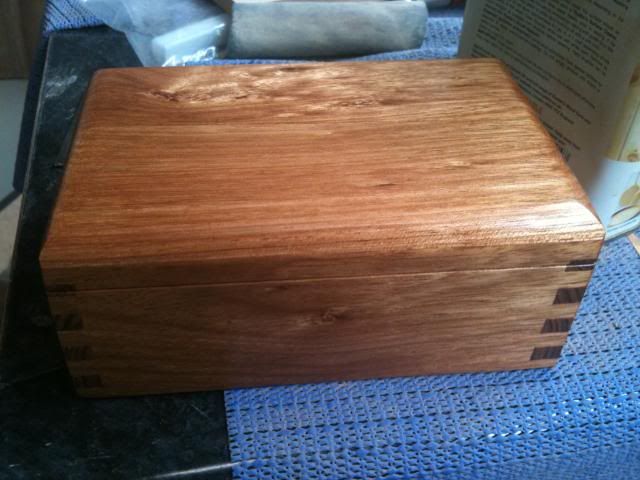
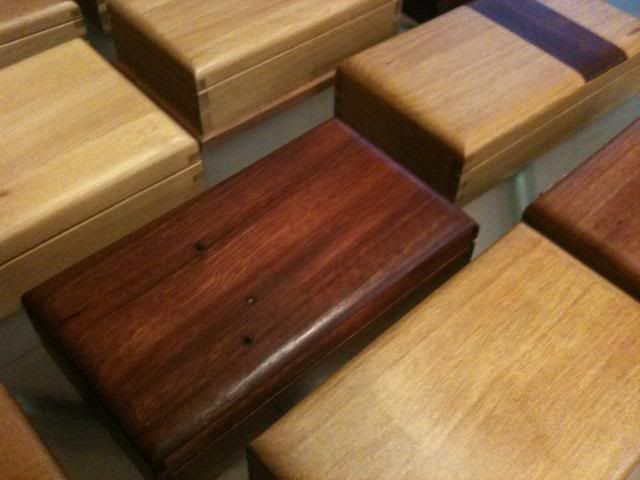
So that was a couple of hours I still needed down the drain. The next images show the Silver Wattle box after its final sand and then with the first coat of Rustins danish oil. It is the best part of the project when you see the colours and depth just jump out. The danish oil might be a little old as it was quite thick and changed the colour more than it would regularly:
Before:
After:
 Now proudly sponsored by Binford Tools. Be sure to check out the Binford 6100 - available now at any good tool retailer.
-
19th July 2011, 09:31 PM #41
Senior Stinkologist
- Join Date
- Nov 2001
- Location
- Parkside - South Australia
- Age
- 45
- Posts
- 3,318
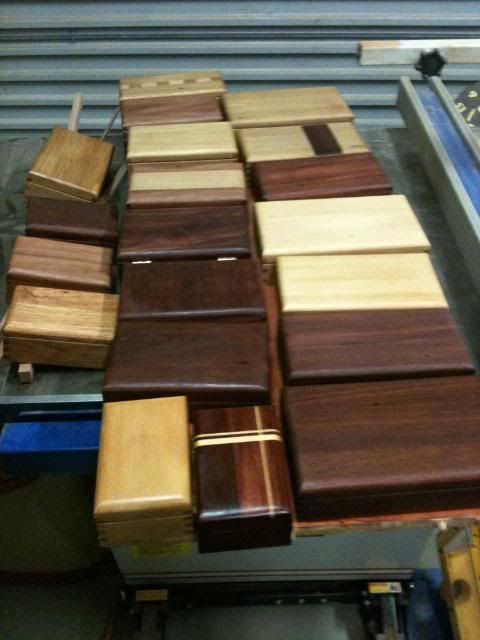
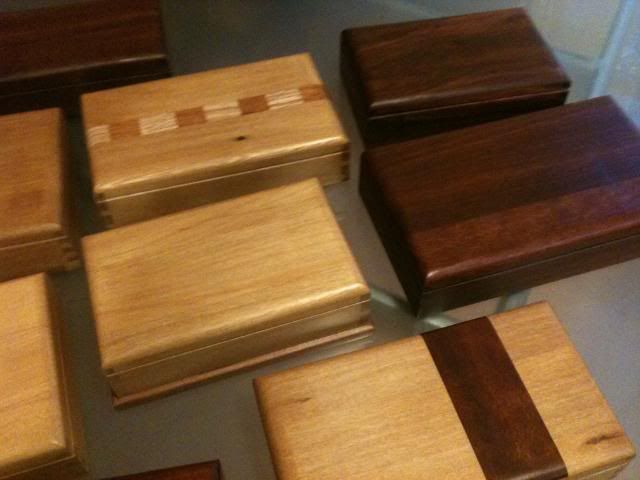
Lots of boxes all finished with a coat of danish oil. I simply use a rag to wipe on the oil, keeping it very simple. Generally I would do 2 coats but time didn't allow it here and as mentioned earlier the oil seemed to be thicker than normal:
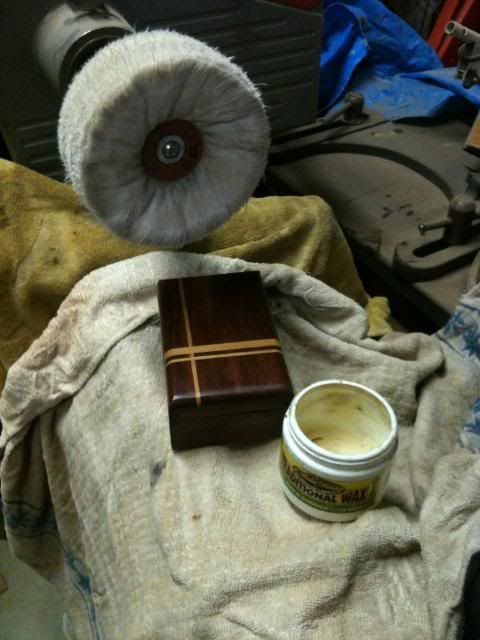
After a day drying the boxes where then given a coat of Ubeaut traditional wax applied on the lathe with the Ubeaut Swansdown mop. This is such an easy finish I cant see how you can go wrong. Using the mop makes light work of applying the wax especially when it is so cold. The only problem is I still get covered in fluff even after breaking it in for a number of years!
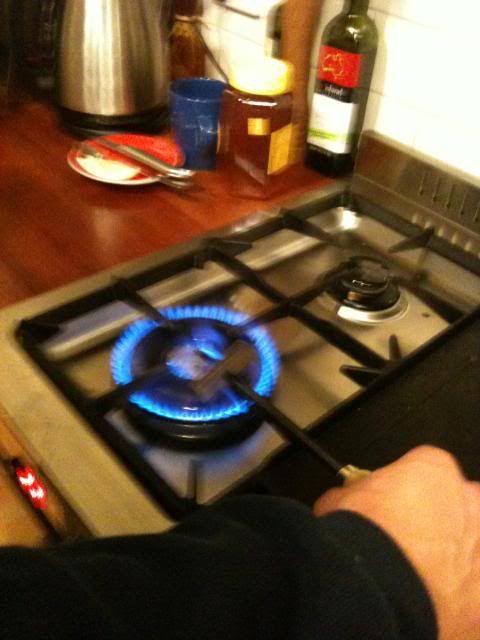
Then it was off to the kitchen. I normally use a gas torch to heat up the branding iron however for some reason the air/gas mix seems to be off and it wasn't heating quickly enough. While the Stinkette was trying to cook tea I took over one of the burners:
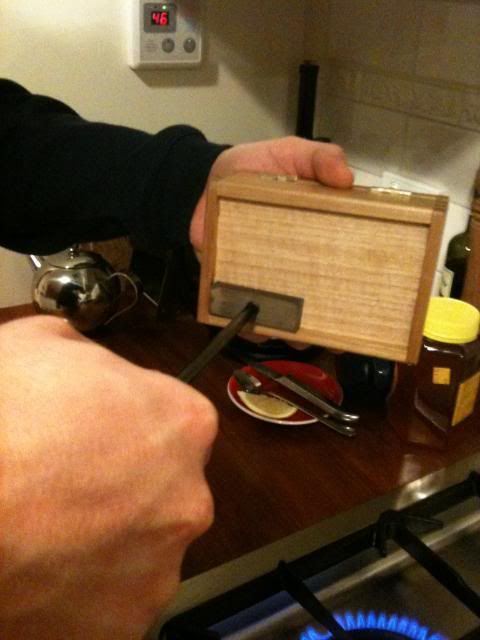
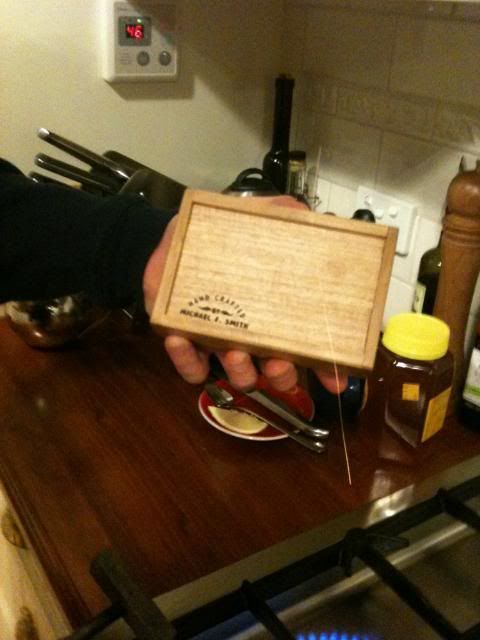
No I don't have three arms ..... Stinkette took the photos. I was a little unsure about branding them given they will be on sold but at the end of the day they were made by me in my shed and I am generally quite proud of what goes out.
So there you have it ..... the completion of 20 boxes in almost 8 weeks. I cant see myself giving up my day job to do it but it will help fund the jointer restoration and that is what it is all about. I felt that I have learnt plenty during the process and know where I need to improve. I am keen to get the shed unpacked and setup completely before stating another project as it is frustrating having to constantly look for things.
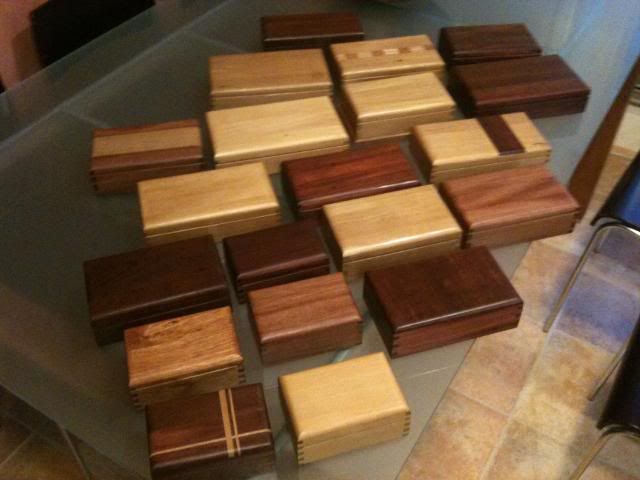

Not the most exciting boxes that you are likely to see on the forums, or perhaps the most interesting WIP, but just a quick insight into the process of making 20 boxes.
Cheers
Stinky.Now proudly sponsored by Binford Tools. Be sure to check out the Binford 6100 - available now at any good tool retailer.
-
19th July 2011, 10:30 PM #42
GOLD MEMBER
- Join Date
- Sep 2006
- Location
- Sydney
- Age
- 83
- Posts
- 1,474
 bravaclap2:
Enjoyed your posts Stinky.
Lovely work and thanks for showing us how it is doneAnd my head I'd be a scratchin'
While my thoughts were busy hatchin'
If I only had a brain.
-
21st July 2011, 09:17 PM #43
Senior Member
- Join Date
- Feb 2008
- Location
- Scotland
- Posts
- 155
Agree with Ruddy, a really interesting post Stinky. I've enjoyed it. Good Job!
Maxine
-
21st July 2011, 09:27 PM #44
GOLD MEMBER
- Join Date
- Jun 2007
- Location
- North Of The Boarder
- Age
- 68
- Posts
- 16,794
Howd I miss this one well done will be back to read fully
-
21st July 2011, 09:28 PM #45
Senior Member
- Join Date
- Nov 2010
- Location
- Eatons Hill Queensland
- Posts
- 445
Agree with all the above
 great job Stinky and very interesting reading Cheers Kerry


 Reply With Quote


Similar Threads
-
Basic Pen Press
By Penpal in forum WOODTURNING - PEN TURNINGReplies: 1Last Post: 22nd May 2008, 11:22 PM -
Building a basic desk for office
By ED4PADDO in forum WOODWORK - GENERALReplies: 5Last Post: 15th February 2008, 08:19 PM
