

 Thanks: 0
 Likes: 0
 Needs Pictures: 0
 Picture(s) thanks: 0
Results 16 to 30 of 31
Thread: My dotty tissue box
-
19th July 2010, 04:08 AM #16
 GOLD MEMBER


- Join Date
- Sep 2002
- Location
- Paignton. Devon. U.K.
- Posts
- 6,062

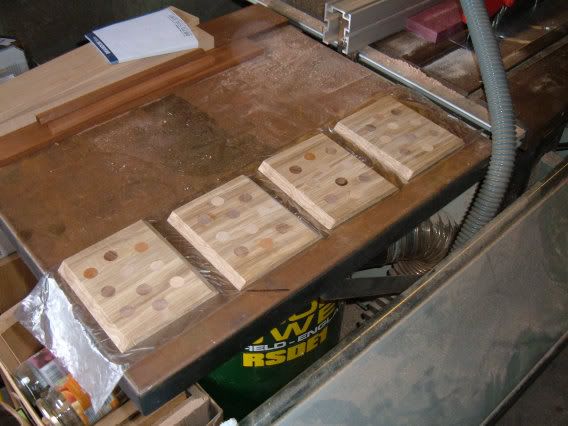
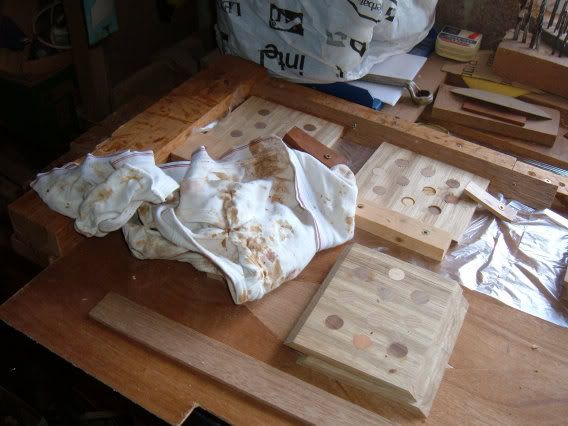
Its been a hectic day in the W/S.
The broken piece glued up OK and I also roughly cleaned up all the plugs on both faces.
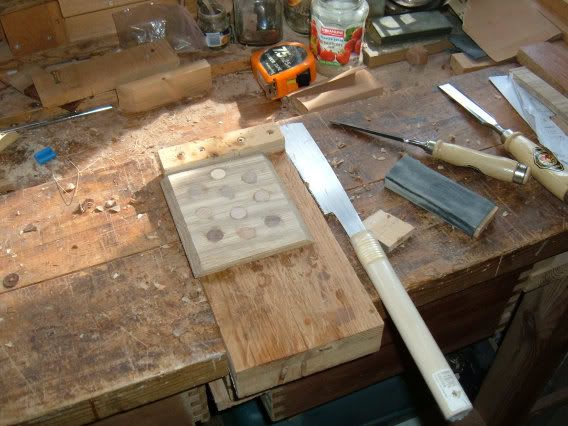
using saw, chisels and sander.
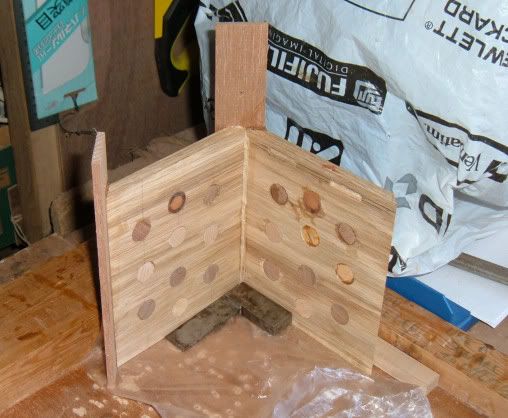
commenced the glue up of corners which is a slow process with this joint.

Having trouble with the misses, she is refusing to wash my underwear.
 woody U.K.
"Common looking people are the best in the world: that is the reason the Lord makes so many of them." ~ Abraham Lincoln
-
19th July 2010 04:08 AM # ADSGoogle Adsense Advertisement
- Join Date
- Always
- Location
- Advertising world
- Posts
- Many
-
19th July 2010, 05:44 PM #17
GOLD MEMBER
- Join Date
- Sep 2002
- Location
- Paignton. Devon. U.K.
- Posts
- 6,062
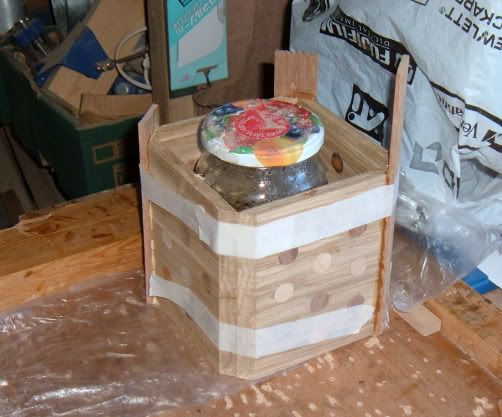
Third and final corners have glued up OK, nearly took the box to bed with me, superglue must have leaked on to my fingers.
 woody U.K.
"Common looking people are the best in the world: that is the reason the Lord makes so many of them." ~ Abraham Lincoln
-
20th July 2010, 04:13 AM #18
Novice
- Join Date
- Jun 2010
- Location
- Heritage Park
- Posts
- 18
Thanks for that, they are so neat! Originally Posted by chrisb691

-
20th July 2010, 05:40 PM #19
GOLD MEMBER
- Join Date
- Sep 2002
- Location
- Paignton. Devon. U.K.
- Posts
- 6,062
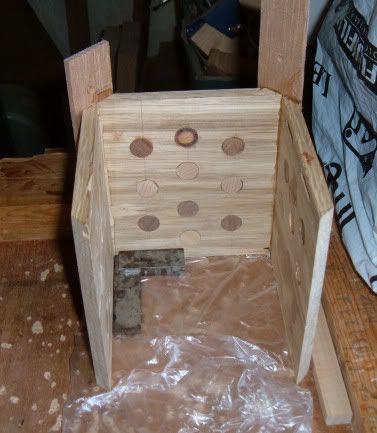
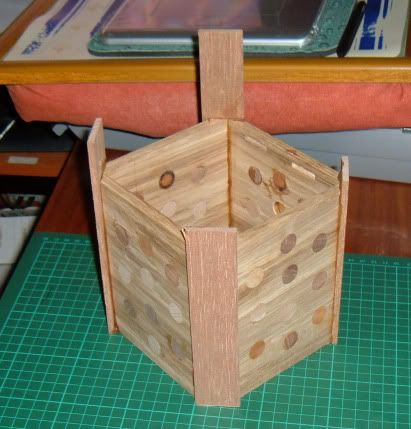
I think it is going well.
Cleaned up the corners, did some handwork for a change, I must recommend the Tormek wet sharpening system, I suspect the others are good as well, I have never had such pleasure with a plane after the last sharpening session, I just stroked the work and it was really smooth.
Hoping to fit on the lid aperture today, debating whether to go for a dark top with white spots or give it a rest?
 woody U.K.
"Common looking people are the best in the world: that is the reason the Lord makes so many of them." ~ Abraham Lincoln
-
20th July 2010, 06:08 PM #20
 Senior Member
- Join Date
- Mar 2006
- Location
- NSW
- Age
- 68
- Posts
- 283
HI Jow
I think a dark timber would look classy, with a 50mm round aperture for the tissues.
Looking great
Cheers Wardy
-
20th July 2010, 07:58 PM #21
SENIOR MEMBER
- Join Date
- Feb 2007
- Location
- Adelaide
- Posts
- 595
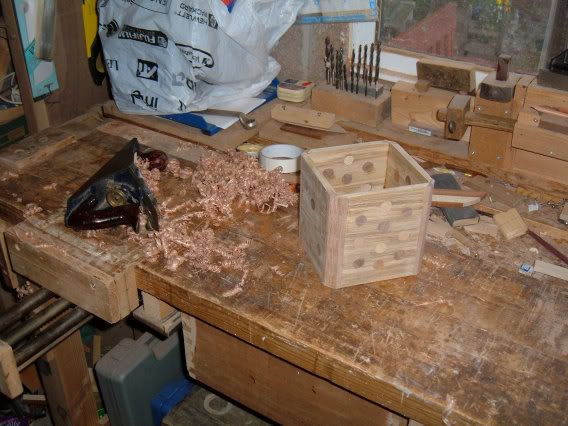
Lovely to see all those thing curly shavings. I think a plain dark top would look fantastic, but it depends on what you have in the bin.
-
20th July 2010, 08:57 PM #22
GOLD MEMBER
- Join Date
- Sep 2002
- Location
- Paignton. Devon. U.K.
- Posts
- 6,062
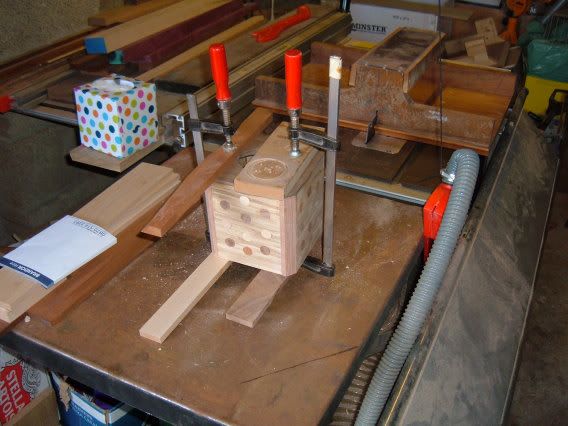
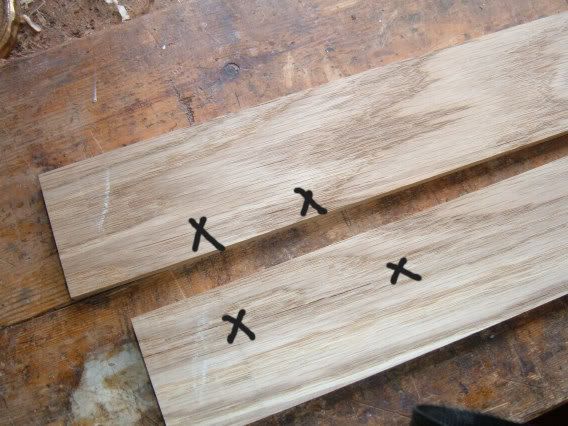
Found a reject piece of black walnut, marked it up with gauge at 1/2" from both sides and got a nice cutting line guide to run using the bandsaw, just keep the blade within those gauge lines and I have two very usable bits of timber.

Went to clean up on the thicknesser and I got some snipe, but I was happy to hand plane it out after last nights experience with the newly sharpened blade. BTW the snipe was caused I think because the thicknesser table was dirty, wiped some beeswax over the table and the next sample piece of timber planed without snipe, so there you are.
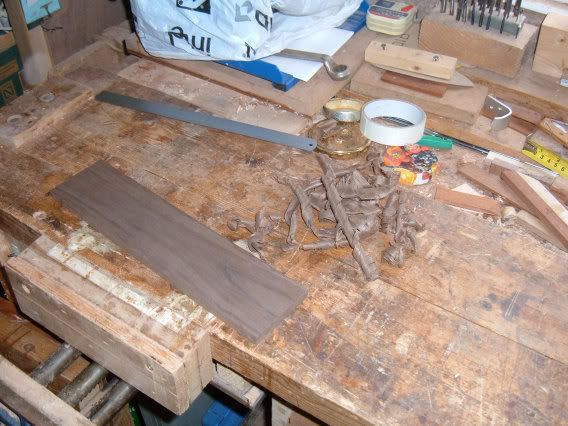
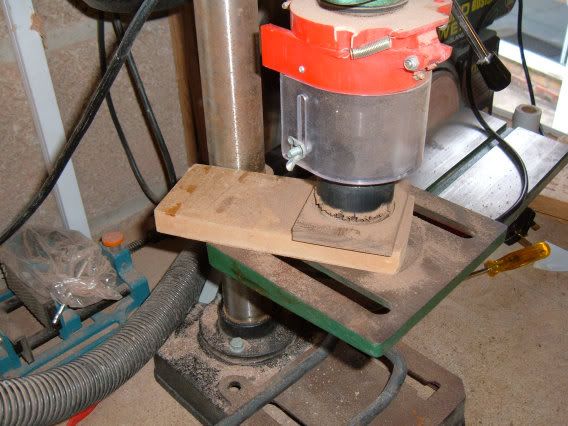
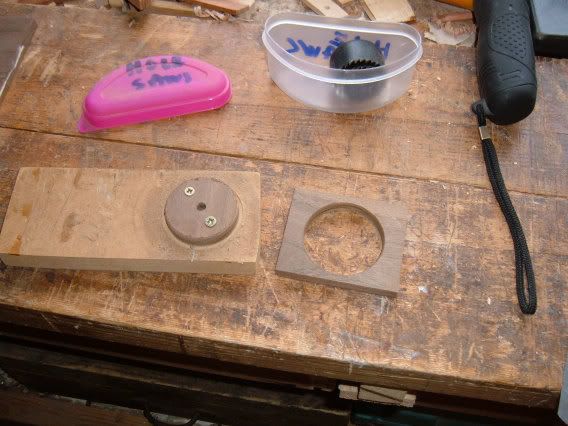
Took me half an hour at least to find this set of free hole saws (came in one of those free drill sets on a purchase). Never used one before so did a trial run, glad I did, double sided tape would not hold in place.
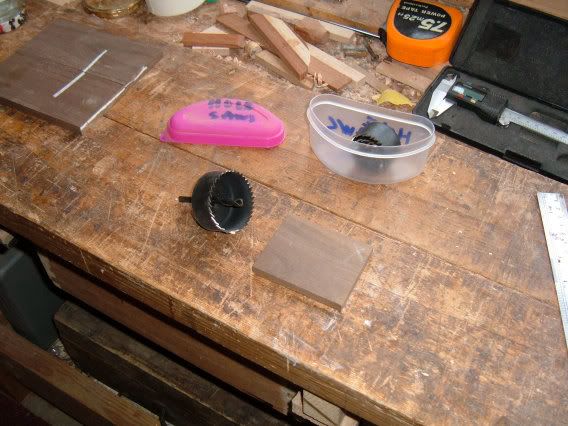
So I screwed the waste internal cut down.
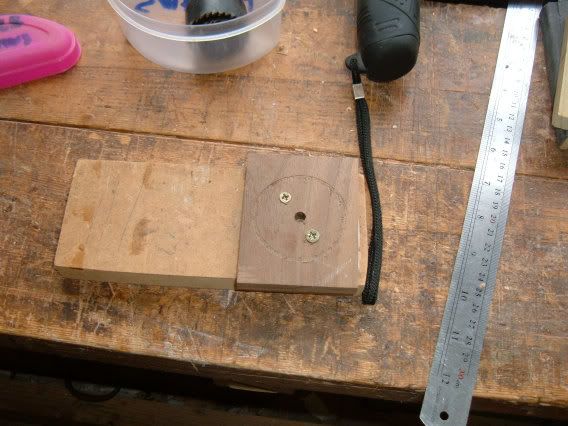
Got a nice cut out on this trial run. However I will have to elongate the lid piece with a jig saw.
Back tomorrow.woody U.K.
"Common looking people are the best in the world: that is the reason the Lord makes so many of them." ~ Abraham Lincoln
-
21st July 2010, 09:39 AM #23
Mildly Moderate
- Join Date
- Nov 2007
- Location
- Albury Well Just Outside
- Posts
- 13,315
So will I. Originally Posted by jow104

-
21st July 2010, 05:59 PM #24
GOLD MEMBER
- Join Date
- Sep 2002
- Location
- Paignton. Devon. U.K.
- Posts
- 6,062
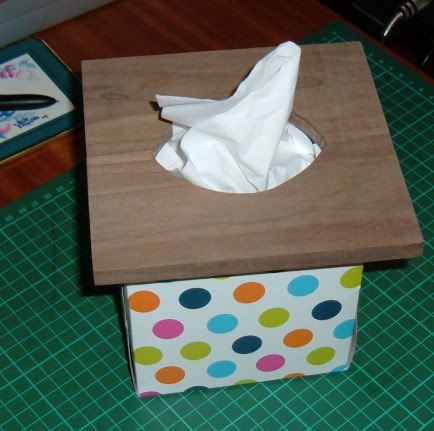
Enthusiasm got the better of me and I went out to the W/S again in the evening when the lid timber glue up was set.
Cut the 2" hole as per trial run earlier in the day, and then had to go hunting for my jig saw blades, last used I think 12 years ago when doing the kitchen worktop with primitive tools.
So cut the elongated hole free hand and it seems to work on a tissue box.
Going back today to fit lid in carcass and the final sand, might even get the shellac and wax on today.
 woody U.K.
"Common looking people are the best in the world: that is the reason the Lord makes so many of them." ~ Abraham Lincoln
-
22nd July 2010, 01:37 AM #25
GOLD MEMBER
- Join Date
- Sep 2002
- Location
- Paignton. Devon. U.K.
- Posts
- 6,062
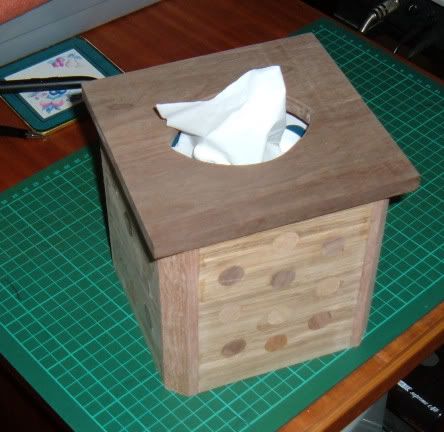
Got the lid glued on, did a cleanup of all faces and put a roundover bit on lid and aperture.
Gave it a coat of shellac outside because of the sanding earlier and will then wax tomorrow.

I have started another T/B using the same oak but it has got some check cracks, do you think I can fill cracks later and the timber remain stable?
 woody U.K.
"Common looking people are the best in the world: that is the reason the Lord makes so many of them." ~ Abraham Lincoln
-
22nd July 2010, 11:52 AM #26
GOLD MEMBER
- Join Date
- Mar 2007
- Location
- Munruben, Qld
- Age
- 83
- Posts
- 10,027
The dotty box looks great, the timbers really contrast nicely.
 Reality is no background music.
Cheers John
-
22nd July 2010, 06:03 PM #27
GOLD MEMBER
- Join Date
- Sep 2002
- Location
- Paignton. Devon. U.K.
- Posts
- 6,062
OK here it is with applied photographic composition.
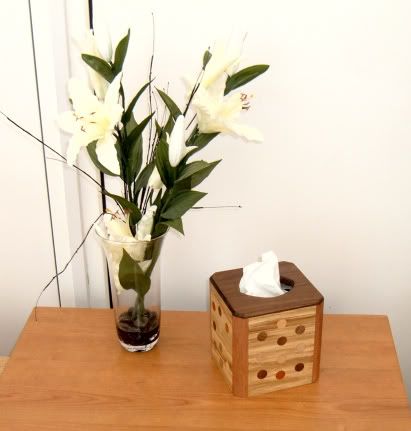
Put the last two together.
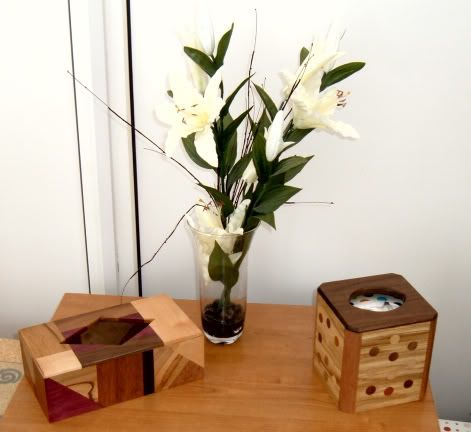
(My get my tripod out and the 10mp camera set up and try again)woody U.K.
"Common looking people are the best in the world: that is the reason the Lord makes so many of them." ~ Abraham Lincoln
-
22nd July 2010, 06:43 PM #28
Skwair2rownd
- Join Date
- Nov 2007
- Location
- Dundowran Beach
- Age
- 76
- Posts
- 19,922

-
22nd July 2010, 06:50 PM #29
Dehydrated Hydrographer
- Join Date
- Jun 1999
- Location
- Westleigh, Sydney
- Age
- 77
- Posts
- 9,550
-
22nd July 2010, 09:10 PM #30
Mildly Moderate
- Join Date
- Nov 2007
- Location
- Albury Well Just Outside
- Posts
- 13,315
Very nice work.


 Reply With Quote


Similar Threads
-
veneered tissue box
By jow104 in forum BOX MAKINGReplies: 9Last Post: 7th July 2010, 09:19 PM -
two day tissue box
By jow104 in forum BOX MAKINGReplies: 10Last Post: 15th May 2010, 12:31 AM -
tissue box ASP
By jow104 in forum BOX MAKINGReplies: 25Last Post: 1st October 2009, 05:51 PM -
Tissue box mark 2
By jow104 in forum BOX MAKINGReplies: 12Last Post: 20th July 2009, 08:24 PM -
Tissue box
By ciscokid in forum BOX MAKINGReplies: 14Last Post: 23rd December 2006, 12:08 AM
