

 Thanks: 0
 Likes: 0
 Needs Pictures: 0
 Picture(s) thanks: 0
Results 1 to 8 of 8
Thread: A little Tiger Myrtle and Olive.
-
6th June 2011, 11:23 PM #1
 Be inspired. Be creative. Be bold.


- Join Date
- Apr 2001
- Location
- Perth
- Posts
- 10,826
 A little Tiger Myrtle and Olive.
A few months ago a good friend of mine surprised me with a couple of pieces of Olive wood after hearing me say I admired the figure and texture of the wood, but how difficult I found it to come by. Thanks again Ian!
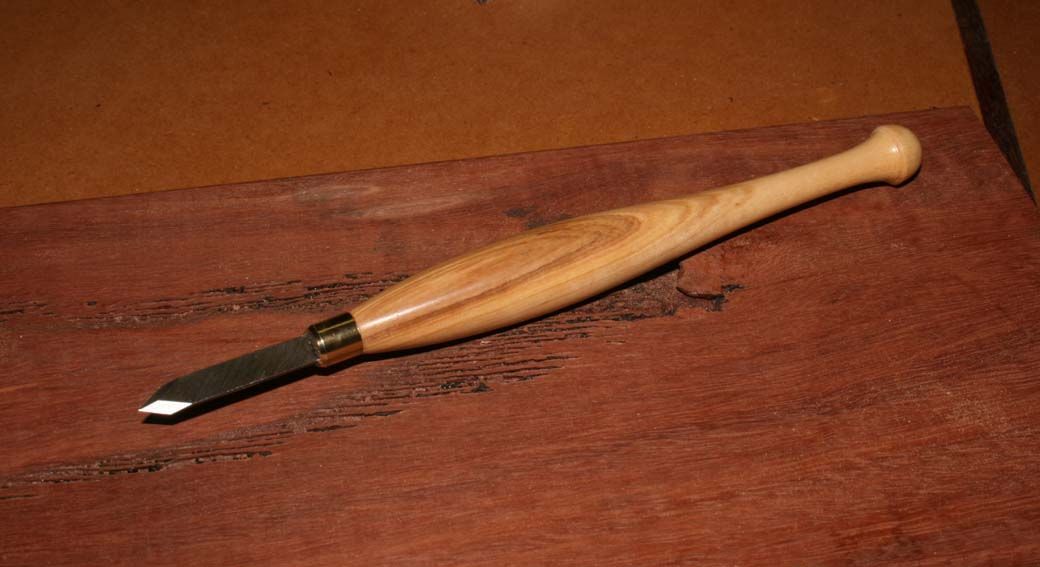
One of the pieces was self-selecting as it was large enough for the handle of a marking knife. It became this one ..
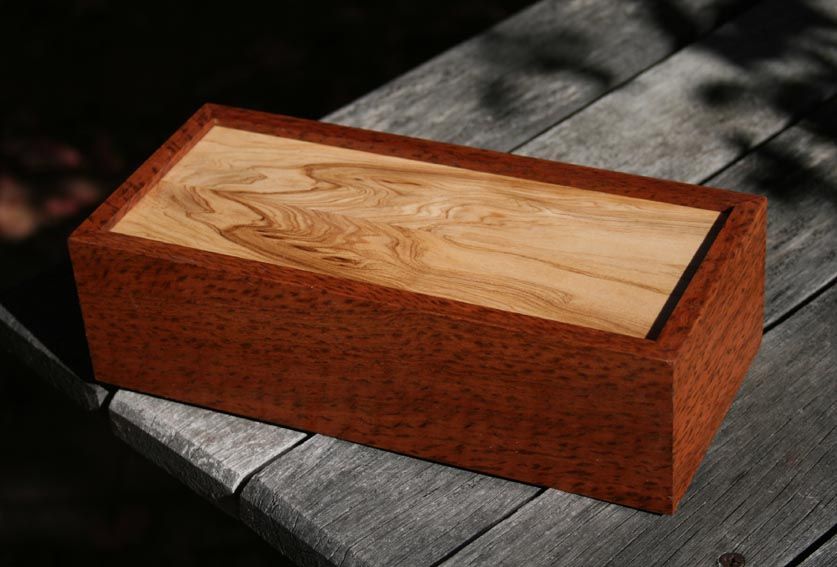
The other was a small board, quite cupped, however I managed to rescue a section, handplane it flat, resaw it, and created a book matched piece about 10" long, 4" wide and 1/4" thick. This I ear-marked for a lid of a box.
I enjoy building boxes as a quick-fix when a longish furniture build begins to become work. My family and friends have several each. These days they run and hide if they see me carrying one. So I decided this one was for me (I don't have any), and it would be a pencil box for my desk. I had just the piece of wood for this.
A couple of years ago I brought back a suitcase of wood from a visit to Tasmania. Mostly Huon Pine (very precious), some Sassafras, and a little Tiger Myrtle. The light Olive would be highlighted best by dark Tiger Myrtle.
This short project (in all it took about 2 hours, excluding time for glue to dry) was also an opportunity to finish the Donkeys Ear I needed for the ramped shooting board I built recently as I had given my last one to a friend. I think that it is more traditional for pencil boxes to be mitred. Anyway, I did not want dovetails as they would make the busy Tiger Myrtle even busier.
Now even before I added the Donkeys Ear, the shooting board needed a modification (does this happen to you - start one thing, then you need to do something else first, and something before that ...?!). The initial mod was to add a rail, ala the Stanley #52, which would prevent the plane moving away from the edge of the work piece. These mitres must be planed accurately otherwise the joining edges will have gaps. It is difficult enough to hold the work still; it is a complication when the plane moves as well. So this is what I did ...
Set up with the LN #51: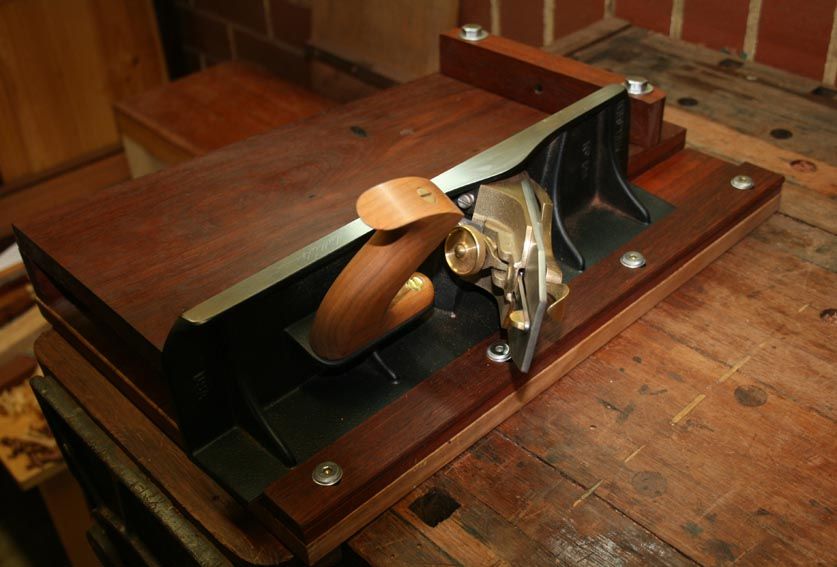
Set up with the LV LAJ and hotdog handle: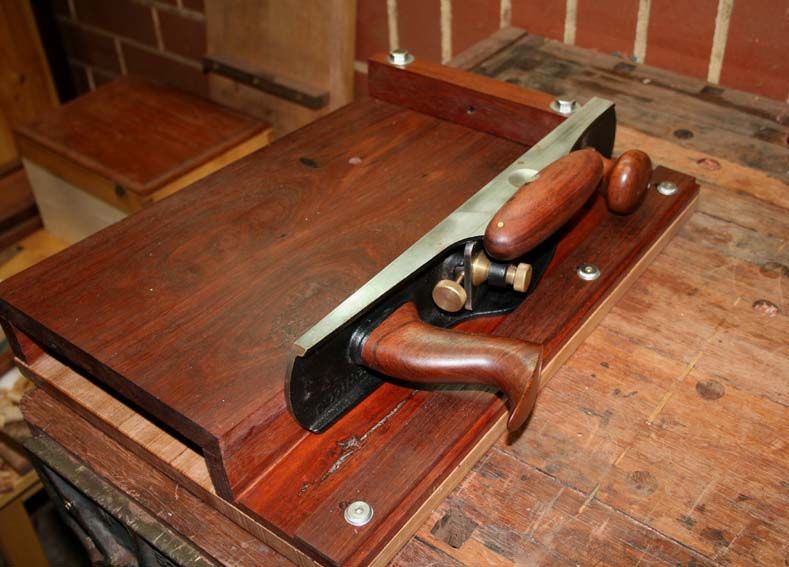
Details ...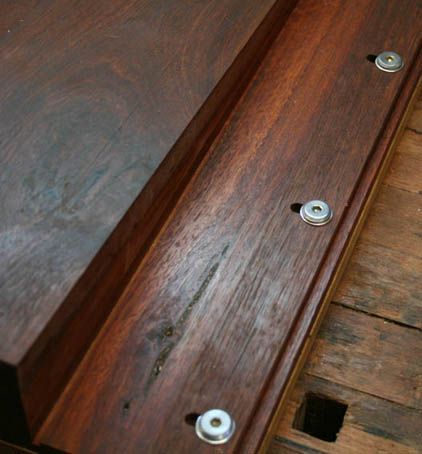
The completed Donkey's Ear ...
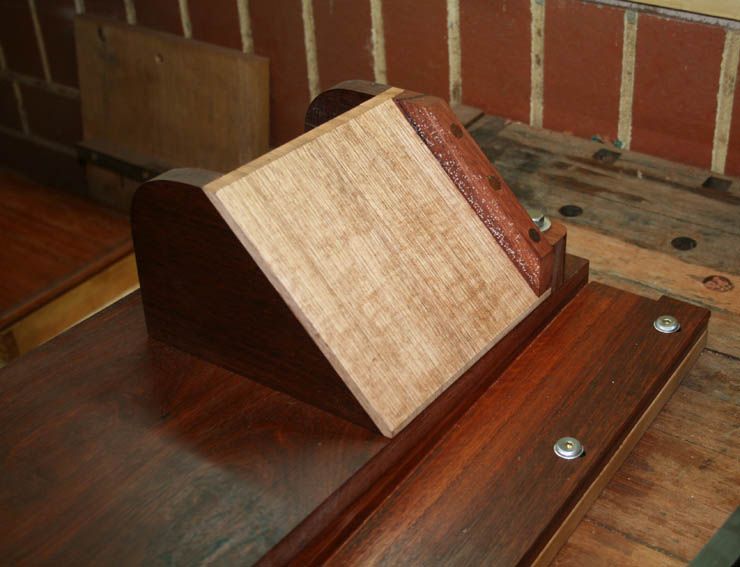
Note that the fence has non-slip (salt sprinkled over varnish).
More details. Dovetailed support at rear (for fun), and secured to the main fence with a bolt. The fence has micro-adjustability, the board has levelling feet underneath, so the Donkey's Ear is adjustable in 3 dimensions.
In use ..
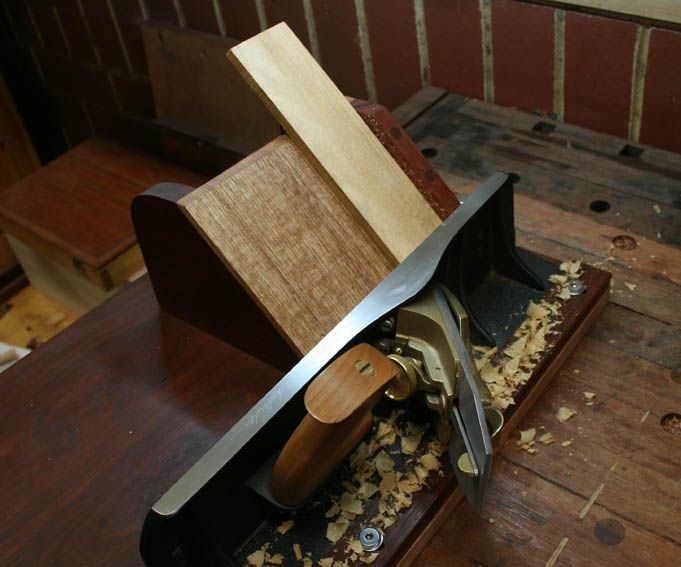
Actually, I deliberately did this the long way. Generally I first saw the mitres with a mitre box. The Myrtle is medium hard and I simply planed away the waste.
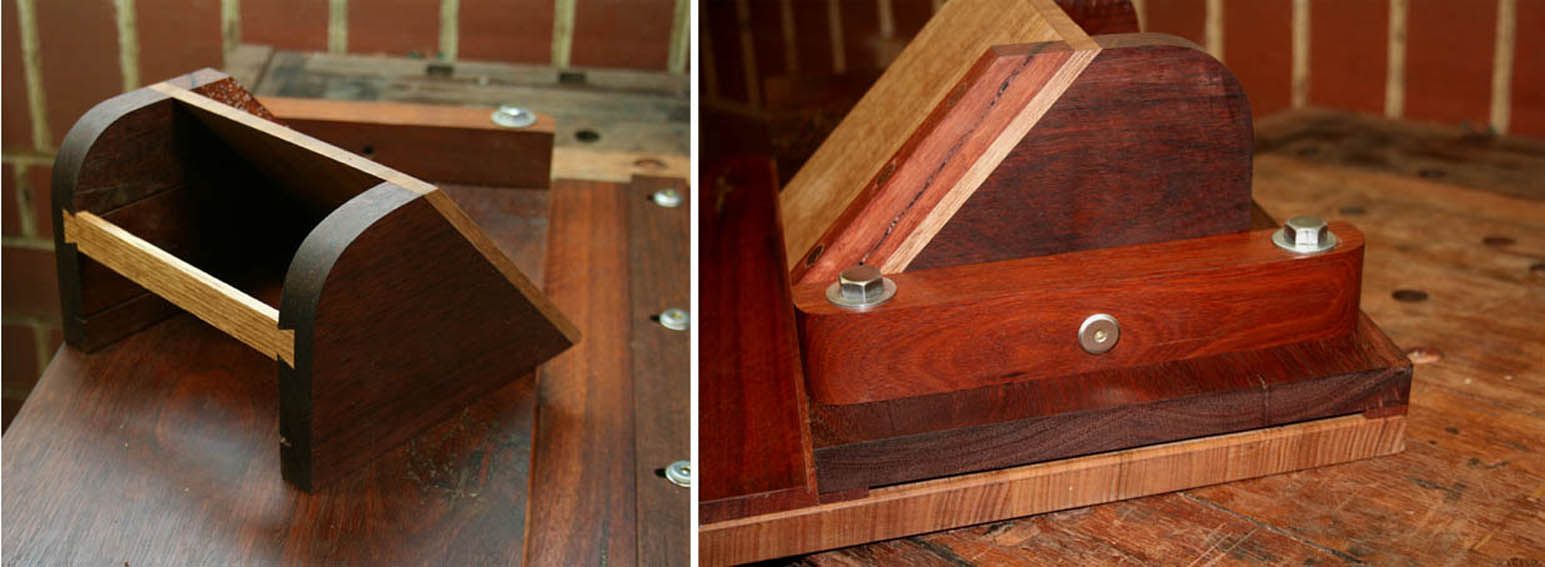
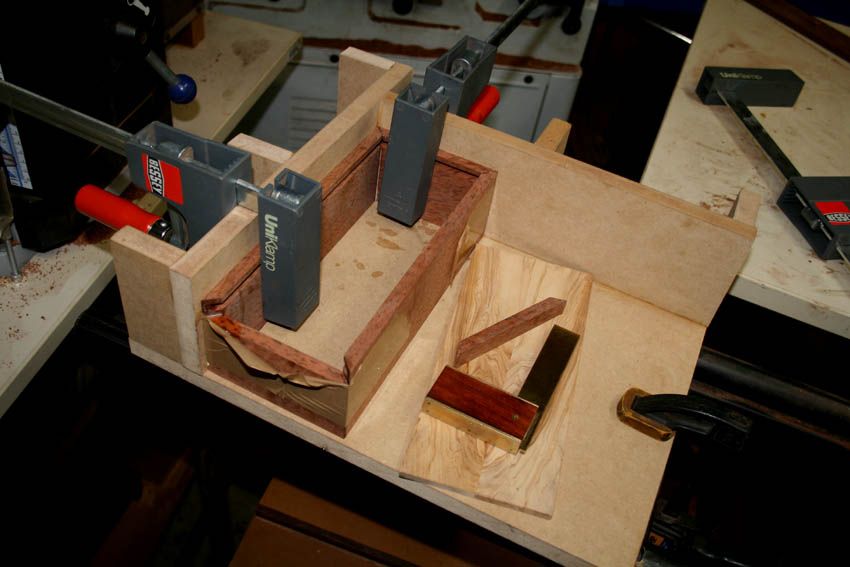
Once the ends of the board sides were mitred, the pieces were taped together from the rear (in lieu of using clamps), and glued. The jig used here was one I learned from Andrew Crawford (on a box-making course of his). It is the best way to ensure everything is square. I use it for drawers as well. No fussing with measuring diagonals.
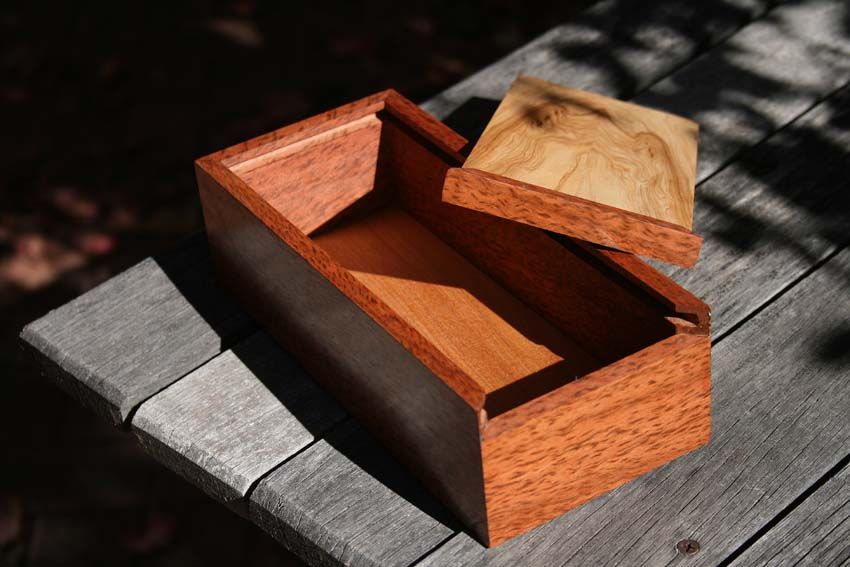
And the result (9 1/4" long x 4 1/4" wide and 2 1/2" high) ...
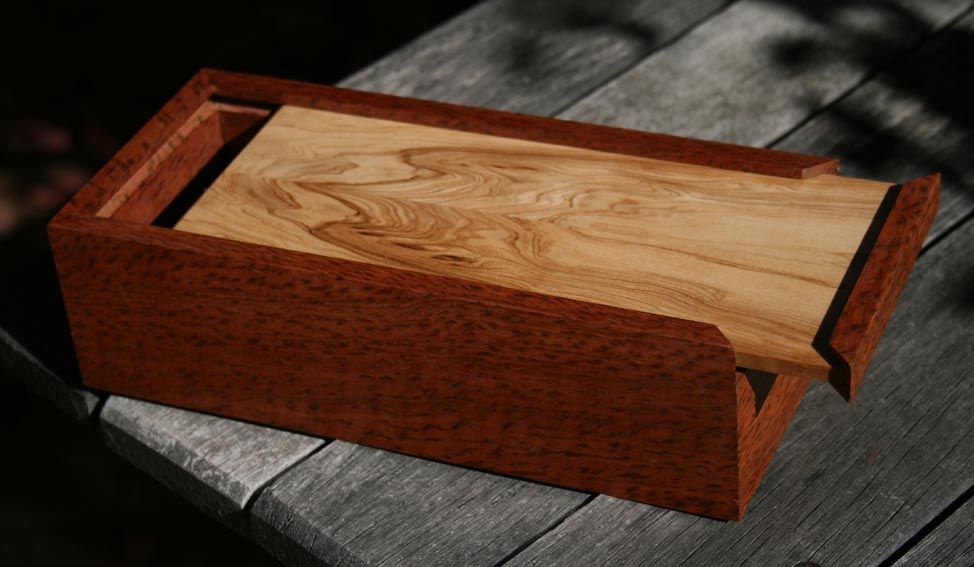
The front: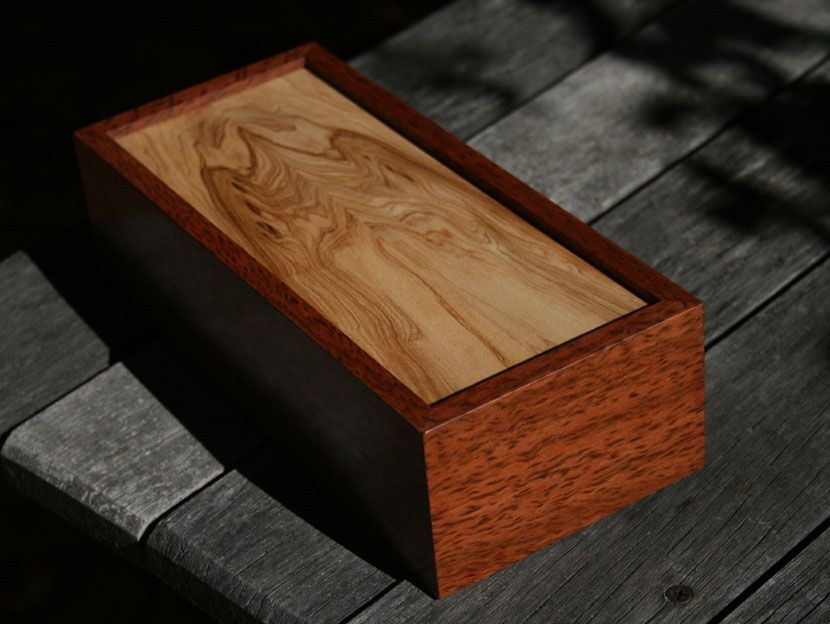
The base is Kauri Pine from New Zealand:
 Visit www.inthewoodshop.com for tutorials on constructing handtools, handtool reviews, and my trials and tribulations with furniture builds.
-
6th June 2011 11:23 PM # ADSGoogle Adsense Advertisement
- Join Date
- Always
- Location
- Advertising world
- Posts
- Many
-
6th June 2011, 11:24 PM #2
Be inspired. Be creative. Be bold.
- Join Date
- Apr 2001
- Location
- Perth
- Posts
- 10,826
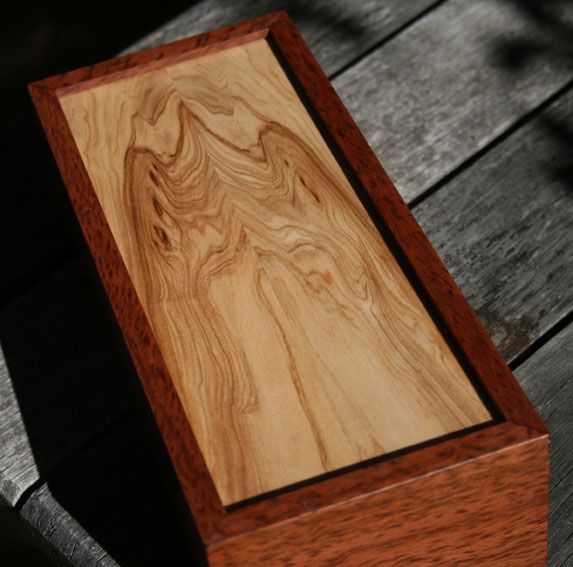
And a close-up of the Olive wood figure ..
Thanks for looking.
Regards from Perth
DerekVisit www.inthewoodshop.com for tutorials on constructing handtools, handtool reviews, and my trials and tribulations with furniture builds.
-
6th June 2011, 11:43 PM #3
GOLD MEMBER
- Join Date
- Feb 2003
- Location
- back in Alberta for a while
- Age
- 68
- Posts
- 12,006
Lovely box Derek
Three questions if I may
what is the finish?
How did you insert the bottom of the box?
in this photo it looks like the box is being glued up without a base
and
I notice that the box just has glued mitres
at what size box would you consider reinforcing the corners with mitre keys ?
regards from Alberta, Canada
ian
-
6th June 2011, 11:51 PM #4
Be inspired. Be creative. Be bold.
- Join Date
- Apr 2001
- Location
- Perth
- Posts
- 10,826
Hi Ian
The bottom panel is simply glued. This box is not going to be carrying any weight. Lots of glue area.
Ditto on the corners. These are essentially long grain, not end grain. I think that keys here would be overkill. The wood is stable and the box will remain in a climate controlled office. When to use keys? My logic says when the boards are more likely to be moving, that is, if not well seasoned and when using different adjoining timbers. For mitred chests I would add splines for reinforcement.
The finish is white shellac. Three coats, then waxed.
Regards from Perth
DerekVisit www.inthewoodshop.com for tutorials on constructing handtools, handtool reviews, and my trials and tribulations with furniture builds.
-
7th June 2011, 12:17 AM #5
GOLD MEMBER
- Join Date
- Feb 2003
- Location
- back in Alberta for a while
- Age
- 68
- Posts
- 12,006
Thanks Derek
the reason I ask is I want to make a box that's 390 x 260 x ~ 120 (high) to hold foolscap papers.
In terms of compressing the construction time, I'm planing on using mitre corners reinforced with veneer keys.
Where I'm currently stuck is the lid -- I'm leaning towards a solid panel hinged to the backregards from Alberta, Canada
ian
-
7th June 2011, 12:29 AM #6
Be inspired. Be creative. Be bold.
- Join Date
- Apr 2001
- Location
- Perth
- Posts
- 10,826
Hi Ian
For a box such as yours, which will carry some weight (mine will not carry more than a few fountain pens and a bottle of ink, and rest on a desk), I would secure the bottom panel within a groove. Having said this, one of the traditional way of holding on drawer bottoms was simply to nail them on - but that is not very pretty.
I would also be looking at keys or a spline to support the corners as there may be some twisting force caused by that weight.
Regards from Perth
DerekVisit www.inthewoodshop.com for tutorials on constructing handtools, handtool reviews, and my trials and tribulations with furniture builds.
-
7th June 2011, 12:40 AM #7
GOLD MEMBER
- Join Date
- Feb 2003
- Location
- back in Alberta for a while
- Age
- 68
- Posts
- 12,006
yes
I was intending to capture the base in a groove
thanks for the helpregards from Alberta, Canada
ian
-
7th June 2011, 06:56 PM #8
GOLD MEMBER
- Join Date
- Mar 2004
- Location
- Brisbane (western suburbs)
- Age
- 77
- Posts
- 12,132
Nice! You seem to have found the perfect use for that bit of Olive. And I do like the book-matching - a ghostly figure....
And I know all too well, this business of needing to do X before I can do Y, and spending all day preparing, just so I can do a 5 minute job. But try explaining it to the significant other!
Cheers,IW


 Reply With Quote

Similar Threads
-
Tiger Myrtle
By Pariss in forum WOODTURNING - PEN TURNINGReplies: 10Last Post: 8th March 2011, 07:30 AM -
Myrtle you're a Tiger
By PenTurner in forum WOODTURNING - PEN TURNINGReplies: 13Last Post: 25th June 2007, 11:35 PM -
Desperate for tiger myrtle!
By Cam5 in forum WOODTURNING - GENERALReplies: 18Last Post: 6th April 2007, 06:51 PM -
tiger myrtle
By Evan Pavlidis in forum WOODTURNING - GENERALReplies: 14Last Post: 5th March 2007, 09:07 AM
