

 Thanks: 0
 Likes: 0
 Needs Pictures: 0
 Picture(s) thanks: 0
Results 31 to 45 of 49
Thread: Ornamental Joints
-
18th May 2006, 04:07 AM #31

 Senior Member


- Join Date
- May 2006
- Location
- Taiwan
- Age
- 55
- Posts
- 184
 Thank you for the warm welcomes.
Let me try to introduce myself. Hmm... Where to start?
I began my life with tools when I was five years old and figured out how to use a screwdriver to take my toys apart. I even managed to get them back together again. Sometimes.
As a kid I made a few treehouses and dog houses and managed not to break any bones in the process. In high school I took a semester of Woodshop as an elective where I made a simple end table for my project. I barely passed that class since fifty percent of our grade was based on our weekly quizes: two pages of math problems based on how to figure out board feet. Didn't really learn a whole lot there besides how to read an imperial ruler,to hold a rip saw properly, and how to swing a hammer.
Fast forward twenty years later and I finally have a small garage of my own to play in. Last summer my wife and I drove down from Canada to Mexico. Along the way we stopped at every antique store we passed where I picked up a few old Stanley planes and a couple of chisels. I also stopped at an Ace Hardware store and picked up a cheap dovetail saw for under ten dollars U.S.
Once we got back to Taiwan (where I run a English language cram school with classes in the afternoons and evenings after the kids get out of regular school) I set to work on trying to figure out how to sharpen the tools and use them. My first shavings with the planes were very satisfying, though the undulating lumber left over was not good for much.
Then I started trying to figure out how to cut through dovetails with my saw. I made every mistake possible along the way from setting out my sockets with the V pointing out, to others that looked like they had been gnawed out by a demented rat with bad teeth.
I looked up every article I could find on how to layout and cut dovetails. So many of them make it seem so complicated. Which it really isn't. Why just yesterday I picked up a Good Woodworking magazine which had part 2 of a three part article on how to lay out dovetails. If I remember right the exciting conclusion "How to lay out and cut the pins," or something like that, is due next month.... It really is not that complicated at all. Frank Klause's technique covered in a recent copy of Fine Woodworking is what got me pointed in the right direction. Mr. Klause's technique does not involve any layout lines at all. Skipping that step saves me so much time! He stresses learning how to master three basic cuts: Straight, left slanting, and right slanting.
After A LOT of practice I started to manage to cram my pins into the sockets (with a lot of help from my hammer and some strong clamps). Then eventually I made my first box. It was very satisfying, though it is quite rough to look at now...
Then one day a few months ago while surfing the internet I came across this article by Richard Jones which introduced a seemingly "impossible...unworkable" joint: the double twisted dovetail, which he reckoned could not be used to make a box since there was too much wiggling needed to get the joints together.
http://www.woodcentral.com/cgi-bin/r...icles_442.shtm
Seemingly Impossible? My curiosity was peaked.
Then I came across another article by John Buller which explains how he did manage to do a small box with the joint:
http://www.individualfurniture.com/m...tail-Maker.htm
I then came across a program that would lay out a template for a simple twisted dovetail. Looking at the lines on the template helped me get my head around how the angles of the joint interact.
http://www.blocklayer.com/Woodjoints/DovetailTwist.aspx
After that I managed to make a couple of rough versions of the joint:
http://pg.photos.yahoo.com/ph/laboll...cd.jpg&.src=ph
Eventually, I came across Master Kintaro Yazawa's monstrously large version of the double twisted joint in a coffee shop shown here: http://www.eurus.dti.ne.jp/~k-yazawa/publicspace.html
and his Original Joint Work page http://www.eurus.dti.ne.jp/~k-yazawa/jointwork.html
Which everyone has been discussing here in this thread.
Master Yazawa's work has touched me deeply. It inspires me to strive for an impossible perfection of technique and vision, for that is what I see in his joints. Even the simplest of his joints, the stamp box with paper thin joints, has a zen like quailty to its sublime perfection.
I have saved different versions of his joints as screen savers and desktop backgrounds on different computers around the house and find myself staring at them and losing track of time as I try to figure out how they were done. I try to picture how I would try do each joint. I try to understand what kind of person could create such things in his mind that are so unlike anything else anyone else has ever done with wood. It is even more awe-inspiring that Master Yazawa could then take those mental musings and make them reality. It boggles my mind and inspires me to try to break beyond the boundries of my own mundane wood working craft.
It is with this frame of mind that I yesterday tried to re-create a joint he had posted on his website the day before.
(middle row, far right) http://www.eurus.dti.ne.jp/~k-yazawa/jointwork.html
Here is my attempt, which for some reason in hindsight feels like sacrilege in it audacity:
http://pg.photos.yahoo.com/ph/laboll...cd.jpg&.src=ph
Tomorrow I will try to use that joint to make a four sided box. I think it will be a challenge.
Wish me luck.
David L.
-
18th May 2006 04:07 AM # ADSGoogle Adsense Advertisement
- Join Date
- Always
- Location
- Advertising world
- Age
- 2010
- Posts
- Many
-
18th May 2006, 10:12 AM #32
Life is good with wood!
- Join Date
- Oct 2001
- Location
- Melbourne, Australia
- Posts
- 1,652
Of course, you don't have to answer this, but I'm very curious. Based on your excellant command of the English language and your nice 'turn of phrase", I conclude that Taiwan is not your native land. You write like a Canuck - have I got that correct?

-
18th May 2006, 01:13 PM #33
Senior Member
- Join Date
- May 2006
- Location
- Taiwan
- Age
- 55
- Posts
- 184
A little further south.... Originally Posted by DPB
California: swimming pools and movie stars....
-
18th May 2006, 03:38 PM #34
Ox and Herdsman Vanished
- Join Date
- May 2005
- Location
- Eden Hills, South Australia
- Age
- 63
- Posts
- 3,458
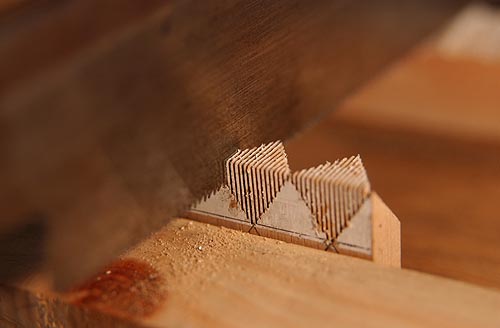
Nice extensive post labolle. My reaction is similar to yours in being somewhat gobsmacked (if not obsessed) by these joints. I noticed a couple of new pics on Yazawa's website, and one shows the dude actually handsawing the triangular profile paper thin finger joints:eek::
I think I'm converging on a possibility for the keyhole joints. The pic shows the general idea, though some details are not accurate. For example, the website photo with the open lid shows a lap joint at the top, and also, I would imagine the fingers themselves would be mitred at the interior, not bent out as they are in the pic, but that's a bit harder to draw.
A full box could be made by joining two L-shaped sub-assemblies.
My previous pic was not workable because the 'plain' finger directly underneath the keyhole would need a round slot cut in it to accomodate the keyhole. Hence the need to have the whole thing aligned along the "other" 45 degree direction.
If something like this is the method, I have no idea how you would cut these fingers.
BTW: no need to flagellate yourself about committing sacrilege: imitation is the sincerest form of flattery.Last edited by zenwood; 18th May 2006 at 06:03 PM. Reason: Correction to drawing
Those are my principles, and if you don't like them . . . well, I have others.
-
18th May 2006, 05:15 PM #35
Senior Member
- Join Date
- May 2006
- Location
- Taiwan
- Age
- 55
- Posts
- 184
WOW! Great auto Cad drawing!
YEs. That is exactly how I imagine he did it too. How to cut out the fingers? THat is the mystery. Have you seen the joints of the sewing box on Master Yazawa's Original Joint Work page? Cutting out the pins for those joints seem to be even more technically challenging.
Nice work on that drawing! I would like to learn how to do that some day. WHat program did you use and how much time did it take?
I have been thinking of making simple practice box with four pieces of wood with simple miters at the edge. Then drilling a hole at 45 degrees from one face to another for a round peg to slide into. THen dissasembling the box which has not been glued yet. Glue the pegs into one edge of each board and letting it set. Finally with the protruding pegs at 45 degrees try to assemble the box. I believe the exercise could help to figure out how trick joint box his was assembled. Figuring out how he cut the joints is another matter altogether.
BUt that exercise will have to wait for me to finish the double twisted joint box I have begun first.
-
18th May 2006, 05:53 PM #36
Ox and Herdsman Vanished
- Join Date
- May 2005
- Location
- Eden Hills, South Australia
- Age
- 63
- Posts
- 3,458
labolle:
I had a look at the scissors joint on the sewing box: yes, if you can do the scissors, the keyholes would be easy. In principle, I think the scissors joint could be made according to the same mitre method as my drawing. In fact, I believe that any pattern of endgrain wood either side of the mitre could, by back-projection along the line of the mitre, be theoretically made into a joint. How to practically cut the back-projected shapes is another matter.
I used CorelDraw to draw the joint. Took an hour or so I guess.
Your round-pegged mitre practice joint sounds like fun. I'd be careful drilling the holes from one face to the other though: you'll need to use pieces of scrap to backup the faces so you don't tear the fibres out of the faces when drilling a hole at 45 degrees. The Ozziejig can be configured to do a version of this joint by drilling holes in from the face of the mitre - though you'd still need backing pieces on the exit side:
 Those are my principles, and if you don't like them . . . well, I have others.
-
18th May 2006, 07:21 PM #37
Senior Member
- Join Date
- Nov 2004
- Location
- Adelaide
- Posts
- 304
I am sorry to ruin the fun, but it seems that this is not the way the joint is constructed. This method would leave visible entry holes on the inside of the joint. The photos of the inside of the box do not show these. It just seems impossible...
-
18th May 2006, 07:30 PM #38
Senior Member
- Join Date
- May 2006
- Location
- Taiwan
- Age
- 55
- Posts
- 184
An exercise in the mechanics of the assembly
WHat I proposed was meerly an exercise in the mechanics of the assembly, and was in no way meant to infer that that is the way Master Kintaro Yazawa CUT his joint. LIke you pointed out, the pics speak for themselves as far as the lack of unnecessary entry or exit holes. Originally Posted by javali
-
19th May 2006, 10:56 AM #39
Ox and Herdsman Vanished
- Join Date
- May 2005
- Location
- Eden Hills, South Australia
- Age
- 63
- Posts
- 3,458
Good point, javali. Back to the drawing board!
Those are my principles, and if you don't like them . . . well, I have others.
-
20th May 2006, 03:43 PM #40
.
- Join Date
- Jul 2005
- Location
- Victoria
- Posts
- 5,215
Zen, im thinking that its basicly a finger join and the round exposed ends are paired back sharply a mill or so into the box. That way it can be assembled all four sides in one motion just with minimal moderate force. Originally Posted by zenwood
Like all "magic" its all deception and very simple. Maybe that explaines the reluctance of the Japaneese guy wanting to come into the forum and explain his methods, as we would all look and say 'gee its so simple, why didnt i think of that" If i can get a bit of time soon ill have a go and see if i can make one.
Midge is good at lateral wood thinking, maybe he can get his brain power into gear and see what he thinks.
-
20th May 2006, 06:46 PM #41
Ox and Herdsman Vanished
- Join Date
- May 2005
- Location
- Eden Hills, South Australia
- Age
- 63
- Posts
- 3,458
Look forward to the WIP shots, Lignum.
Yes, I'm sure it's obvious once you know... Those are my principles, and if you don't like them . . . well, I have others.
-
20th May 2006, 09:10 PM #42
Senior Member
- Join Date
- May 2006
- Location
- Taiwan
- Age
- 55
- Posts
- 184
I belive we are on the right track...
I believe that using the jig would create a realistic model of how the joint slides together. Even using the jig as shown, there would be no visible holes inside the box, only at the outside edges. Though, I'm sure Master Yazawa did not use a jig like yours.
-
20th May 2006, 10:11 PM #43
SENIOR MEMBER
- Join Date
- Aug 2002
- Location
- Boyne Island, Queensland
- Age
- 51
- Posts
- 929
I don't see why your original idea wouldn't work.:confused: Originally Posted by zenwood
Dan
-
21st June 2008, 07:11 PM #44
New Member
- Join Date
- Jun 2008
- Location
- az
- Posts
- 1
My grandpa taught me something like that. imagine two boards lying on top of each other mitered and ready to be put together. both ends are lined up and are pulled away from each other locking them together at 90 degrees the key lock in it is not a true key lock. the round part you see is the bottom of a cone shape key not a barrel shape it locks into a bowl of equal shape. that way the corner can pivot together. -K-

-
9th July 2008, 03:10 AM #45
New Member
- Join Date
- Jul 2008
- Location
- calgary,alberta,canada
- Posts
- 1
I believ that the joint shown can be done without inlaying. Just because some people cant figure out a way doesnt mean others cant. Think outside the box ( or inside the joint )

 Reply With Quote


Similar Threads
-
Joints for new TV/Display unit
By dai sensei in forum WOODWORK - GENERALReplies: 43Last Post: 26th June 2006, 10:17 AM -
Oblique drawbored mortice and tenon joints
By javali in forum WOODWORK - GENERALReplies: 5Last Post: 10th June 2005, 09:45 PM -
Joints in chipboard - are biscuit joints suitable?
By kwilliamszaf in forum WOODWORK - GENERALReplies: 3Last Post: 26th April 2005, 02:03 PM -
mitre joints
By ash in forum TIMBERReplies: 12Last Post: 8th March 2004, 11:39 PM -
Ornamental Lathe Equipment
By Tim Elliott in forum WOODTURNING - ORNAMENTAL TURNINGReplies: 1Last Post: 26th August 2003, 01:51 PM
