

 Thanks: 0
 Likes: 0
 Needs Pictures: 0
 Picture(s) thanks: 0
Results 46 to 52 of 52
Thread: Tissue boxes 2011
-
18th June 2011, 05:40 PM #46
 GOLD MEMBER


- Join Date
- Sep 2002
- Location
- Paignton. Devon. U.K.
- Posts
- 6,062

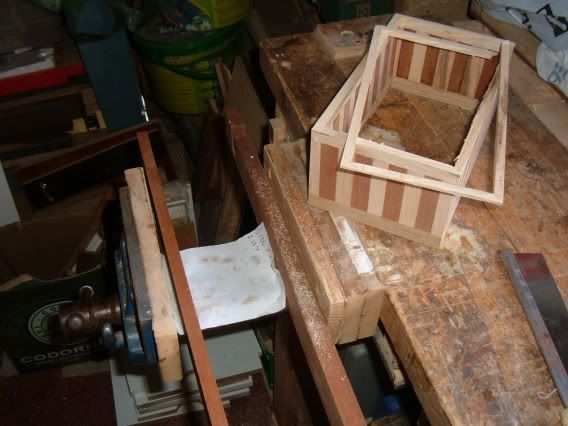
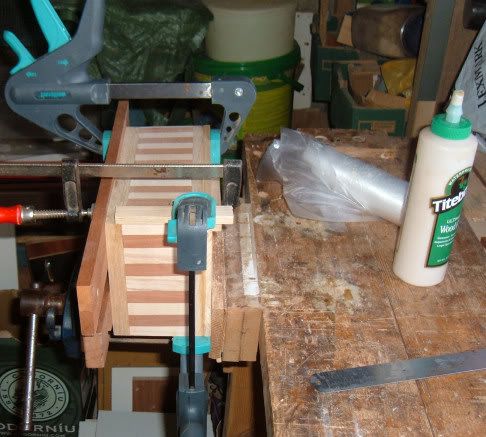
The lid in its basic unprepared state together with the carcass.


I am inclined to have the top lid overhanging this time so that top does not conflict with frame, also the carcass is twisting or warping. This happened a couple of years ago on another design, I think it has something to do with the grain directions and glue pulling it out of shape. I did avoid similar action when I glued pieces to a plywood former.woody U.K.
"Common looking people are the best in the world: that is the reason the Lord makes so many of them." ~ Abraham Lincoln
-
18th June 2011 05:40 PM # ADSGoogle Adsense Advertisement
- Join Date
- Always
- Location
- Advertising world
- Posts
- Many
-
19th June 2011, 05:56 PM #47
GOLD MEMBER
- Join Date
- Sep 2002
- Location
- Paignton. Devon. U.K.
- Posts
- 6,062
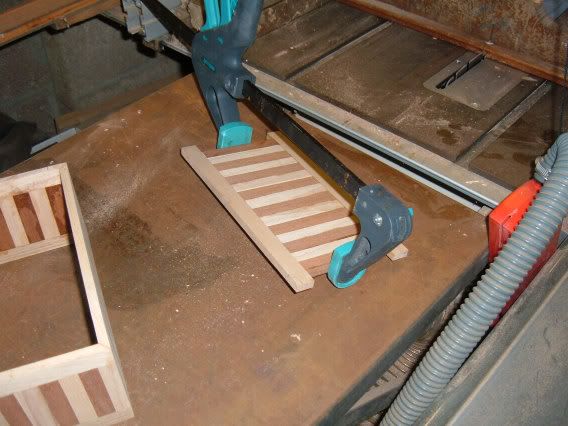
The harlequins have sanded up quite nicely and you might note I have added runners instead of dadoes for the bottom sliders.

The carcass sides as mentioned previously did bow slightly but not enough to worry about imo.

The lid on this occasion has been glued with overhang and also shows a box referred to as the parthenon awaiting completion of a lid.
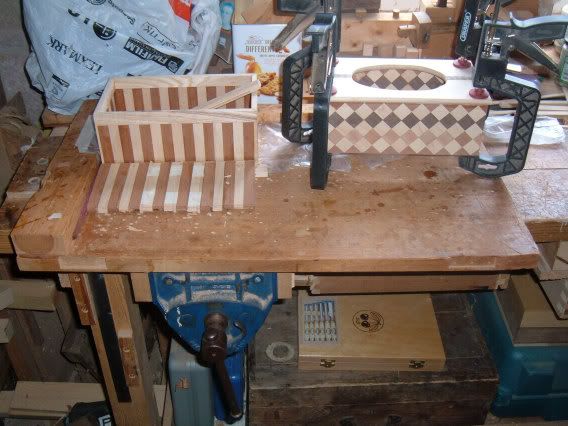
Back to the harlequin awaiting a sanding sealer and then a wax and my wife has bagged this one.
 woody U.K.
"Common looking people are the best in the world: that is the reason the Lord makes so many of them." ~ Abraham Lincoln
-
19th June 2011, 09:57 PM #48
Mildly Moderate
- Join Date
- Nov 2007
- Location
- Albury Well Just Outside
- Posts
- 13,315
How much of an overhang is on this?
-
20th June 2011, 05:24 PM #49
GOLD MEMBER
- Join Date
- Sep 2002
- Location
- Paignton. Devon. U.K.
- Posts
- 6,062
Around 3mm. Originally Posted by Christos

The parthenon box is also nearing completion, I will cut a diamond shaped aperture with lapping for this one.

The wife also keeps herself busy on her embroidery and we compete for wall space.

Anticipating delivery of around 2 cubic feet of maple and black walnut today before the price goes up again.woody U.K.
"Common looking people are the best in the world: that is the reason the Lord makes so many of them." ~ Abraham Lincoln
-
21st June 2011, 04:43 AM #50
GOLD MEMBER
- Join Date
- Sep 2002
- Location
- Paignton. Devon. U.K.
- Posts
- 6,062
Everything does not always go smoothly for me, cleaning up the lid on the P/T smashed up one of those short lengths going across the grain so I did the following repair.
Inserted a new piece.

Then had a timber delivery, would you like to price it. nearly 12 feet of 9x2" maple.
and 9ft. of 10 x2 black walnut.

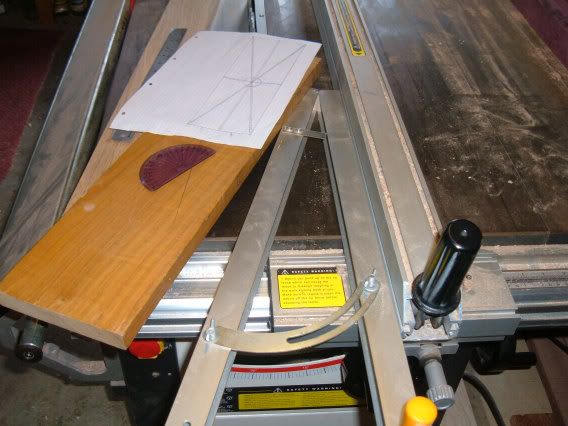
The sunburst box is giving me a problem, I cannot cope with cutting the angles required on my original sketch and don't want to cut the pieces small on the tablesaw.
Any ideas?
 woody U.K.
"Common looking people are the best in the world: that is the reason the Lord makes so many of them." ~ Abraham Lincoln
-
22nd June 2011, 05:46 PM #51
GOLD MEMBER
- Join Date
- Sep 2002
- Location
- Paignton. Devon. U.K.
- Posts
- 6,062
Back to the pathenon box, I instigated some changes, first I reduced the height of the carcass because I have decided on a flush fitting lid and I wanted to maintain proportions of horizontal lines and also thought a triangular aperture would be more appropriate to this design.

The carcass height was reduced the same way box makers create their lids, it went well.
The diamond aperture was lipped after making the beading on the router.

The lid glued flush with box and then it will be sanded but no round overs this time to maintain the cubic feel.
Now to the sunburst which I will start a new thread because those that are on dial up might find things slowing down.woody U.K.
"Common looking people are the best in the world: that is the reason the Lord makes so many of them." ~ Abraham Lincoln
-
22nd June 2011, 07:37 PM #52
Dances with splinters
- Join Date
- Jul 2005
- Location
- Oberon, NSW
- Age
- 63
- Posts
- 13,360
What's the problem? It looks like you can cut the diagonal OK? Originally Posted by jow104
You could make the rip- and cross-cuts to quarter it, then stack the four pieces on top of each other, wrapped tightly in tape, to make the diagonal cut in one pass.
(Or build them up into a laminate using PVA and a sheet of brown paper between each layer. This can be easily split apart again using a thin blade and a mallet. )
)
If you simply don't want to cut pieces that small, you could cut along the diagonal and place the two pieces back together, joining them with masking tape on both sides. Rinse and repeat for all cuts, although you'd have to be pretty damned careful to get them to align properly in the centre.
Doing similar work with a scrollsaw, I've glued sheets of A4 paper on each side at times, to hold really little and fiddly pieces exactly where I want them for cutting. And would probably need to allow for the kerf, I think.
Just throwing a few ideas at ya!
- Andy Mc


 Reply With Quote

Similar Threads
-
Tissue boxes album of 2010
By jow104 in forum BOX MAKINGReplies: 4Last Post: 24th September 2010, 05:59 PM -
The last three tissue boxes
By jow104 in forum BOX MAKINGReplies: 6Last Post: 21st September 2010, 05:12 PM -
Dovetail Tissue Boxes
By Billyboydes in forum BOX MAKINGReplies: 10Last Post: 24th June 2010, 05:51 PM -
Coffee & cream tissue boxes
By jow104 in forum BOX MAKINGReplies: 17Last Post: 12th June 2010, 08:24 PM -
tissue box ASP
By jow104 in forum BOX MAKINGReplies: 25Last Post: 1st October 2009, 05:51 PM
