

 Thanks:
  Likes:
  Needs Pictures: 0
 Picture(s) thanks:
Results 1 to 7 of 7
-
6th October 2020, 09:03 PM #1
 GOLD MEMBER

- Join Date
- Nov 2018
- Location
- Newcastle
- Posts
- 1,018
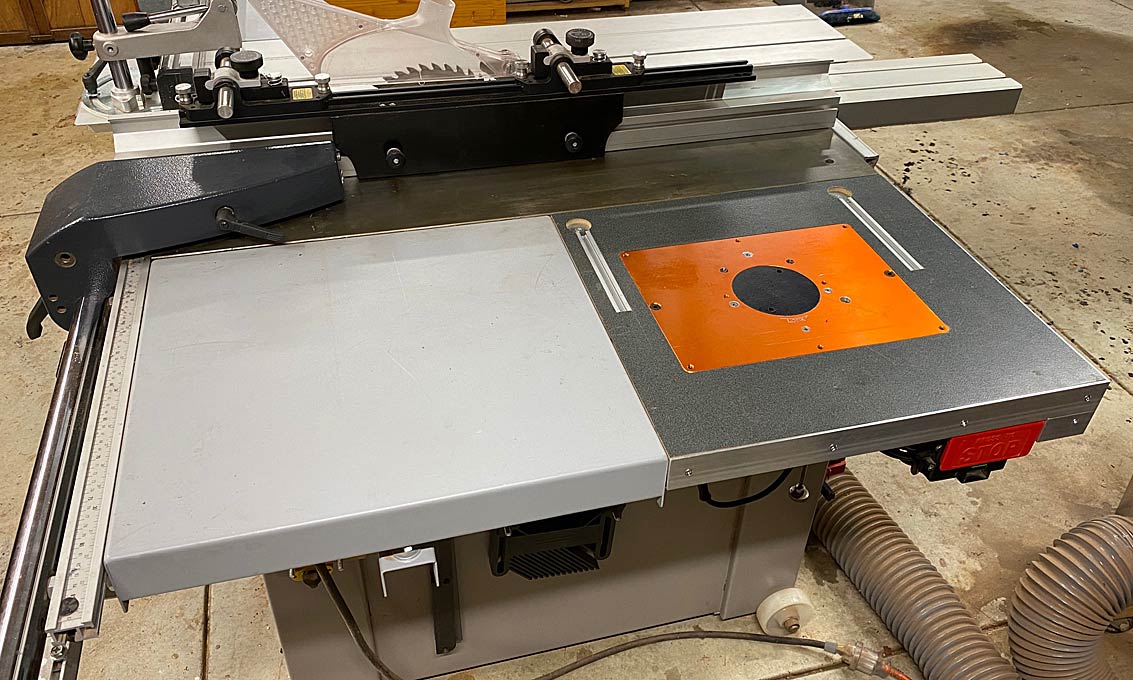
 Hammer K3 router table build (another one!)
[edit - not sure what's up with some of the pics... no idea why some are showing as links rather than inline - they're there if clicked. Maybe a mod can fix]
My workshop build has been slowed by the lack of a decent router table, and Ive been finding myself doing slightly dodgy things with upside down routers so I decided it was time to do something about it.
I have a Hammer K3, so the choice was to take inspiration from Derek and the boys whove added a router table to the usual gap in the K3 table or, build a dedicated table. In the end I decided that adding it to the K3 was going to be easiest, and a good temporary measure if I decided that Id need a dedicated table later.
Ive had a tendency to build overly complex things, and then need to go back and redo it all because what I actually needed differed from what I thought I needed, so this time my aim was to build something simple, use what I had lying around the shop and then see what I really needed as I used it.
Id been eyeing out Jessems router lifts I have their TS guides and know that they make excellent stuff. Their lifts werent much more than the generic carbatec/timbecon stuff either. I confess to panic-buying their Rout-R-lift when COVID hit the world was going crazy, the US had an idiot in charge, and I thought America might shut down completely.
Jessem Rout-r lift.jpg
I bought the pre-drilled lift to take my Festool OF1400. I didnt really think this through firstly, getting a router in and out of the lift is not a 2 minute job, and the OF1400 is far too good a router to leave stuck in a lift. Secondly, the little Festool routers are an odd shape with that loooong arm poking out the side, making boxing it in an awkward task.
OF1400.jpg
I did have an older OF2000 bought off a forum member here, so I thought Id see if I could get it to fit. Unfortunately, despite having 7000 different mounting holes in the plate, I couldnt find any that matched up with the OF2000. I shook my fist at the heavens and screamed why? Why? Why? at the gods: No reply. I tried emailing Jessem to see if they would send me a blank plate, or even drill one to fit the OF2000. Like the gods, the did not deign to reply. Rude.
jessem router plate.jpg
So, armed with some crayons and a piece of transparency, I decided to have a crack at making an adaptor out of 3mm looomininiminum.
setting up the template.jpg template on.jpg
Rough cut on the Kapex a chance to use that aluminium-chopping blade. A couple of test fits along the way as I shaped and then drilled, and then it was time cut the centre out and make rocket fuel with a file. After a lot of eyeballing and drawing, I ended up with a template that would allow me to mount the router and lift to the adaptor without the various screws interfering with each other.
Attachment 482394Attachment 482384 Attachment 482385 Attachment 482386Attachment 482387 adaptor fitted to router.jpg
Surprisingly, it eventually all came together. I tapped directly into the aluminium plate. The clearance meant that I could add nuts as well if it didnt seem strong enough, but it all appears nice and rigid.
Eagle-eyed viewers will notice that Ive left the copying ring in the Festool. This was not a mistake or omission I just wanted to pull the whole damn thing apart again when I thought Id finished the build, just so I could be a bit more intimate with my creation.
Attachment 482390 in the lift.jpg
So, onto the top. Ive got a stack of kitchen counter offcuts destined for various bench and workstation tops, so I hacked at a piece for the router table.
I had some threaded inserts from forum sponsor Scrooz, so decided to give them a try. Theyre aimed at concrete just drill and screw in, so the thread is less aggressive than the traditional woodwork inserts, but theyre quite a bit longer. They worked extremely well really strong despite the shallow thread. You just have to take the length into account at the corners. Do NOT ask me how I know this.
Attachment 482391
I used the traditional four-bits-of-wood router template guide method to make the recess for the lift plate. I didnt take the corner radiuses into account, so there are gaps. Lucky I planned to make it again sometime then eh!
Attachment 482393 Attachment 482392 top done.jpg
I had a piece of ali angle lying about picked it up off the side of the road some time back, so that went into the kapex too, and formed the frame that bolted to the K3. The Kapex does cut ali nicely!
Aluminium angle.jpg cut angle.jpg
I was quite concerned about the dirty great router hanging off the table causing flex, so I probably put twice as many bolts in the frame and table as needed, but I figured Id rather be safe.
frame done.jpg
Ive been using the Domino as much as I can, just to get used to its quirks. Such a nice machine, and for enabling savages like me to build things square, or for pulling warped bits of cheap plywood into straight, its unbeatable.
As I planned on re-doing the top sometime, I glued the dominos into the top, and left them unglued but screwed in the box.
box and domino top.jpg domino screws.jpg
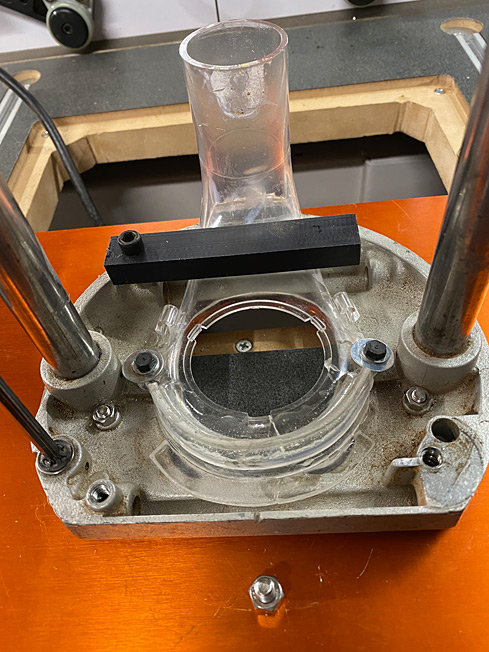
The black port is a 3D-printed dust port I made to take the standard 2¼ inch flexi hose to attach to the fence dust collection.
I also 3D-printed a bell-mouth wotsit for the bottom of the box. It takes a standard 120mm (6 inch) hose fitting. The zany colour scheme is because I was trying to use up some filament remnants I had lying around.
bottom dust port.jpg
I had a big stop button left over from my VFD bandsaw conversion, so that got combined with a standard light switch for the juice. You should note that if you are Australian, you are too stupid to deal with electricity and should pay someone $1000 to do wiring or you will die. Horribly. And then your wife will have to be a prostitute and your children will work in a sweatshop rolling spliffs and cutting cocaine.
front panel.jpg electrics.jpg
3D-printed box for the deadly electrics.
electrical box printed.jpg electrical box installed.jpg
Bit of glue, lots of sweat and even more swearing, and the box came together.
box done.jpg
Of course, I didnt take the K3's metal frame into account when I brought the wire out, but that just gave me an excuse to use the Vecturo possibly my 2nd favourite tool at the moment.
vecturo.jpg
Finally, into the frame and bolted to the K3.
installed.jpg
Despite my crayons and careful attempts to be accurate with the adaptor, I still ended up slightly off centre.
offset error.jpg
Its out by 1mm across and 1.5mm down. I know this because I could create a 3D print in Fusion 360 with a couple of parameters for the offset, and spit out a set of accurate router table inserts.
Screen Shot 2020-10-06 at 20.43.09.jpg3D printed offset insert.jpg
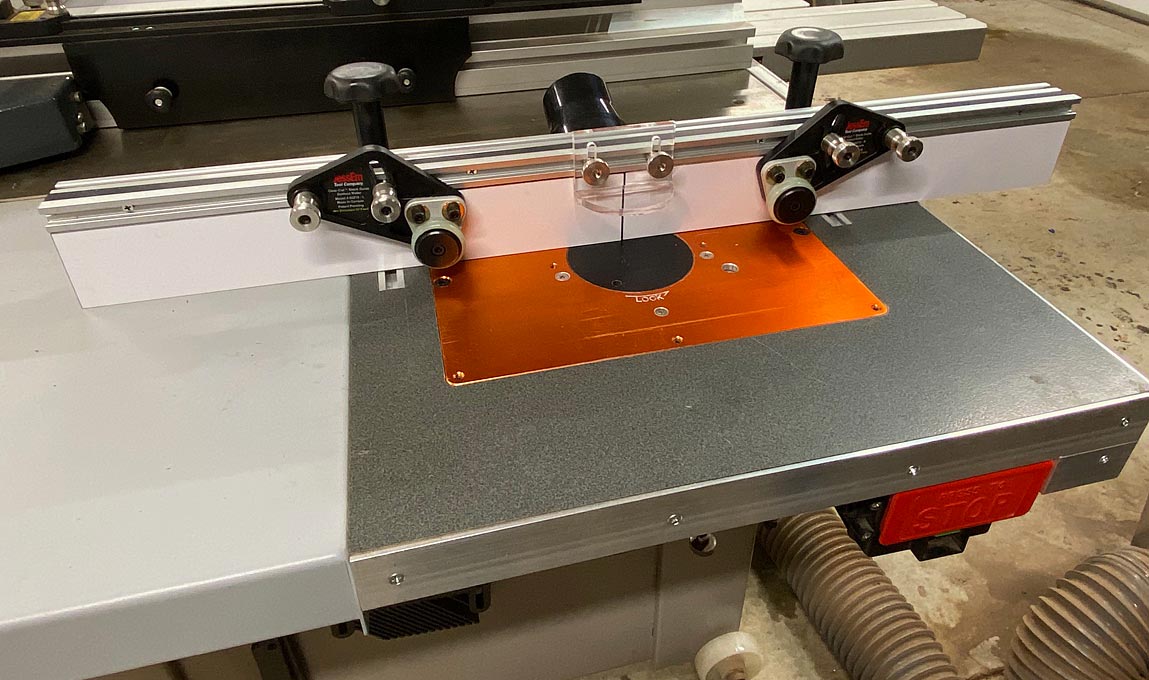
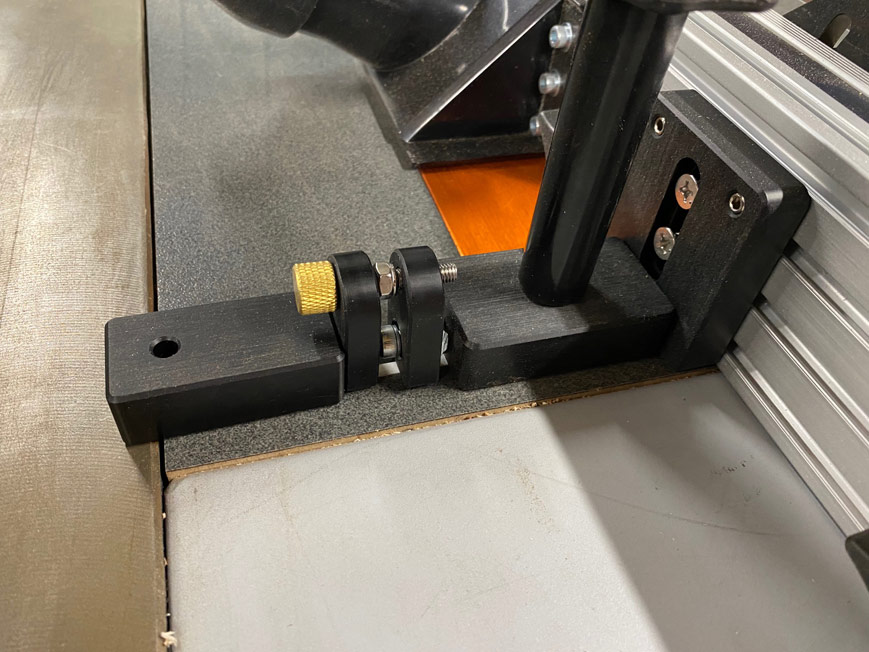
Ive gone for a simple router fence for now, attached to the saw fence. I had some bits of mitre track hardware lying about, but had to turn some bolts into screws. Piece of recycled hardwood at the back, and some sacrificial pine on the front for now. Im not sure if Ill stick with this setup long term theres potentially a bit of flex in the TS fence at that distance (although thats easily rectified with a single T-track at the other end of the fence), and its a bit of a pain in the unmentionables taking it on and off when switching between the router and saw. And fence dust collection will be a bit awkies.
screws from bolts.jpg mitre hardware.jpg fence part 1.jpg fence done.jpg
So, lots learned as is the case with everything I make at this stage; some things to redo and change, but Ill hold off until Ive used it a bit and settled on whats missing.
whiteside template.jpg
-
6th October 2020 09:03 PM # ADSGoogle Adsense Advertisement
- Join Date
- Always
- Location
- Advertising world
- Posts
- Many
-
6th October 2020, 11:30 PM #2
GOLD MEMBER


- Join Date
- Jun 2005
- Location
- Helensburgh
- Posts
- 7,696

Lookiing good Bernard, now mark the top with two lines through the chuck centre, one parallel to the fence and one perpindicular to the fence. These lines can then be used to measure offsets from, setting up stops on the fence etc.
CHRIS
-
7th October 2020, 12:26 AM #3
Be inspired. Be creative. Be bold.
- Join Date
- Apr 2001
- Location
- Perth
- Posts
- 10,851
Bern, it's looking very good so far!

Bern, how do you get the router fence to connect to the saw rip fence, and still have clearance on the left side?Ive gone for a simple router fence for now, attached to the saw fence.
You can see here that the rip fence I have would get in the way ...
My router cut out is also further forward than yours as space is needed at the rear - dust exhausts from the router base, as well both the rear of the router fence. My router is an Elu 177e on a Router Raiser (which is really excellent) ...
The dust is collected via the Festool split hose ....
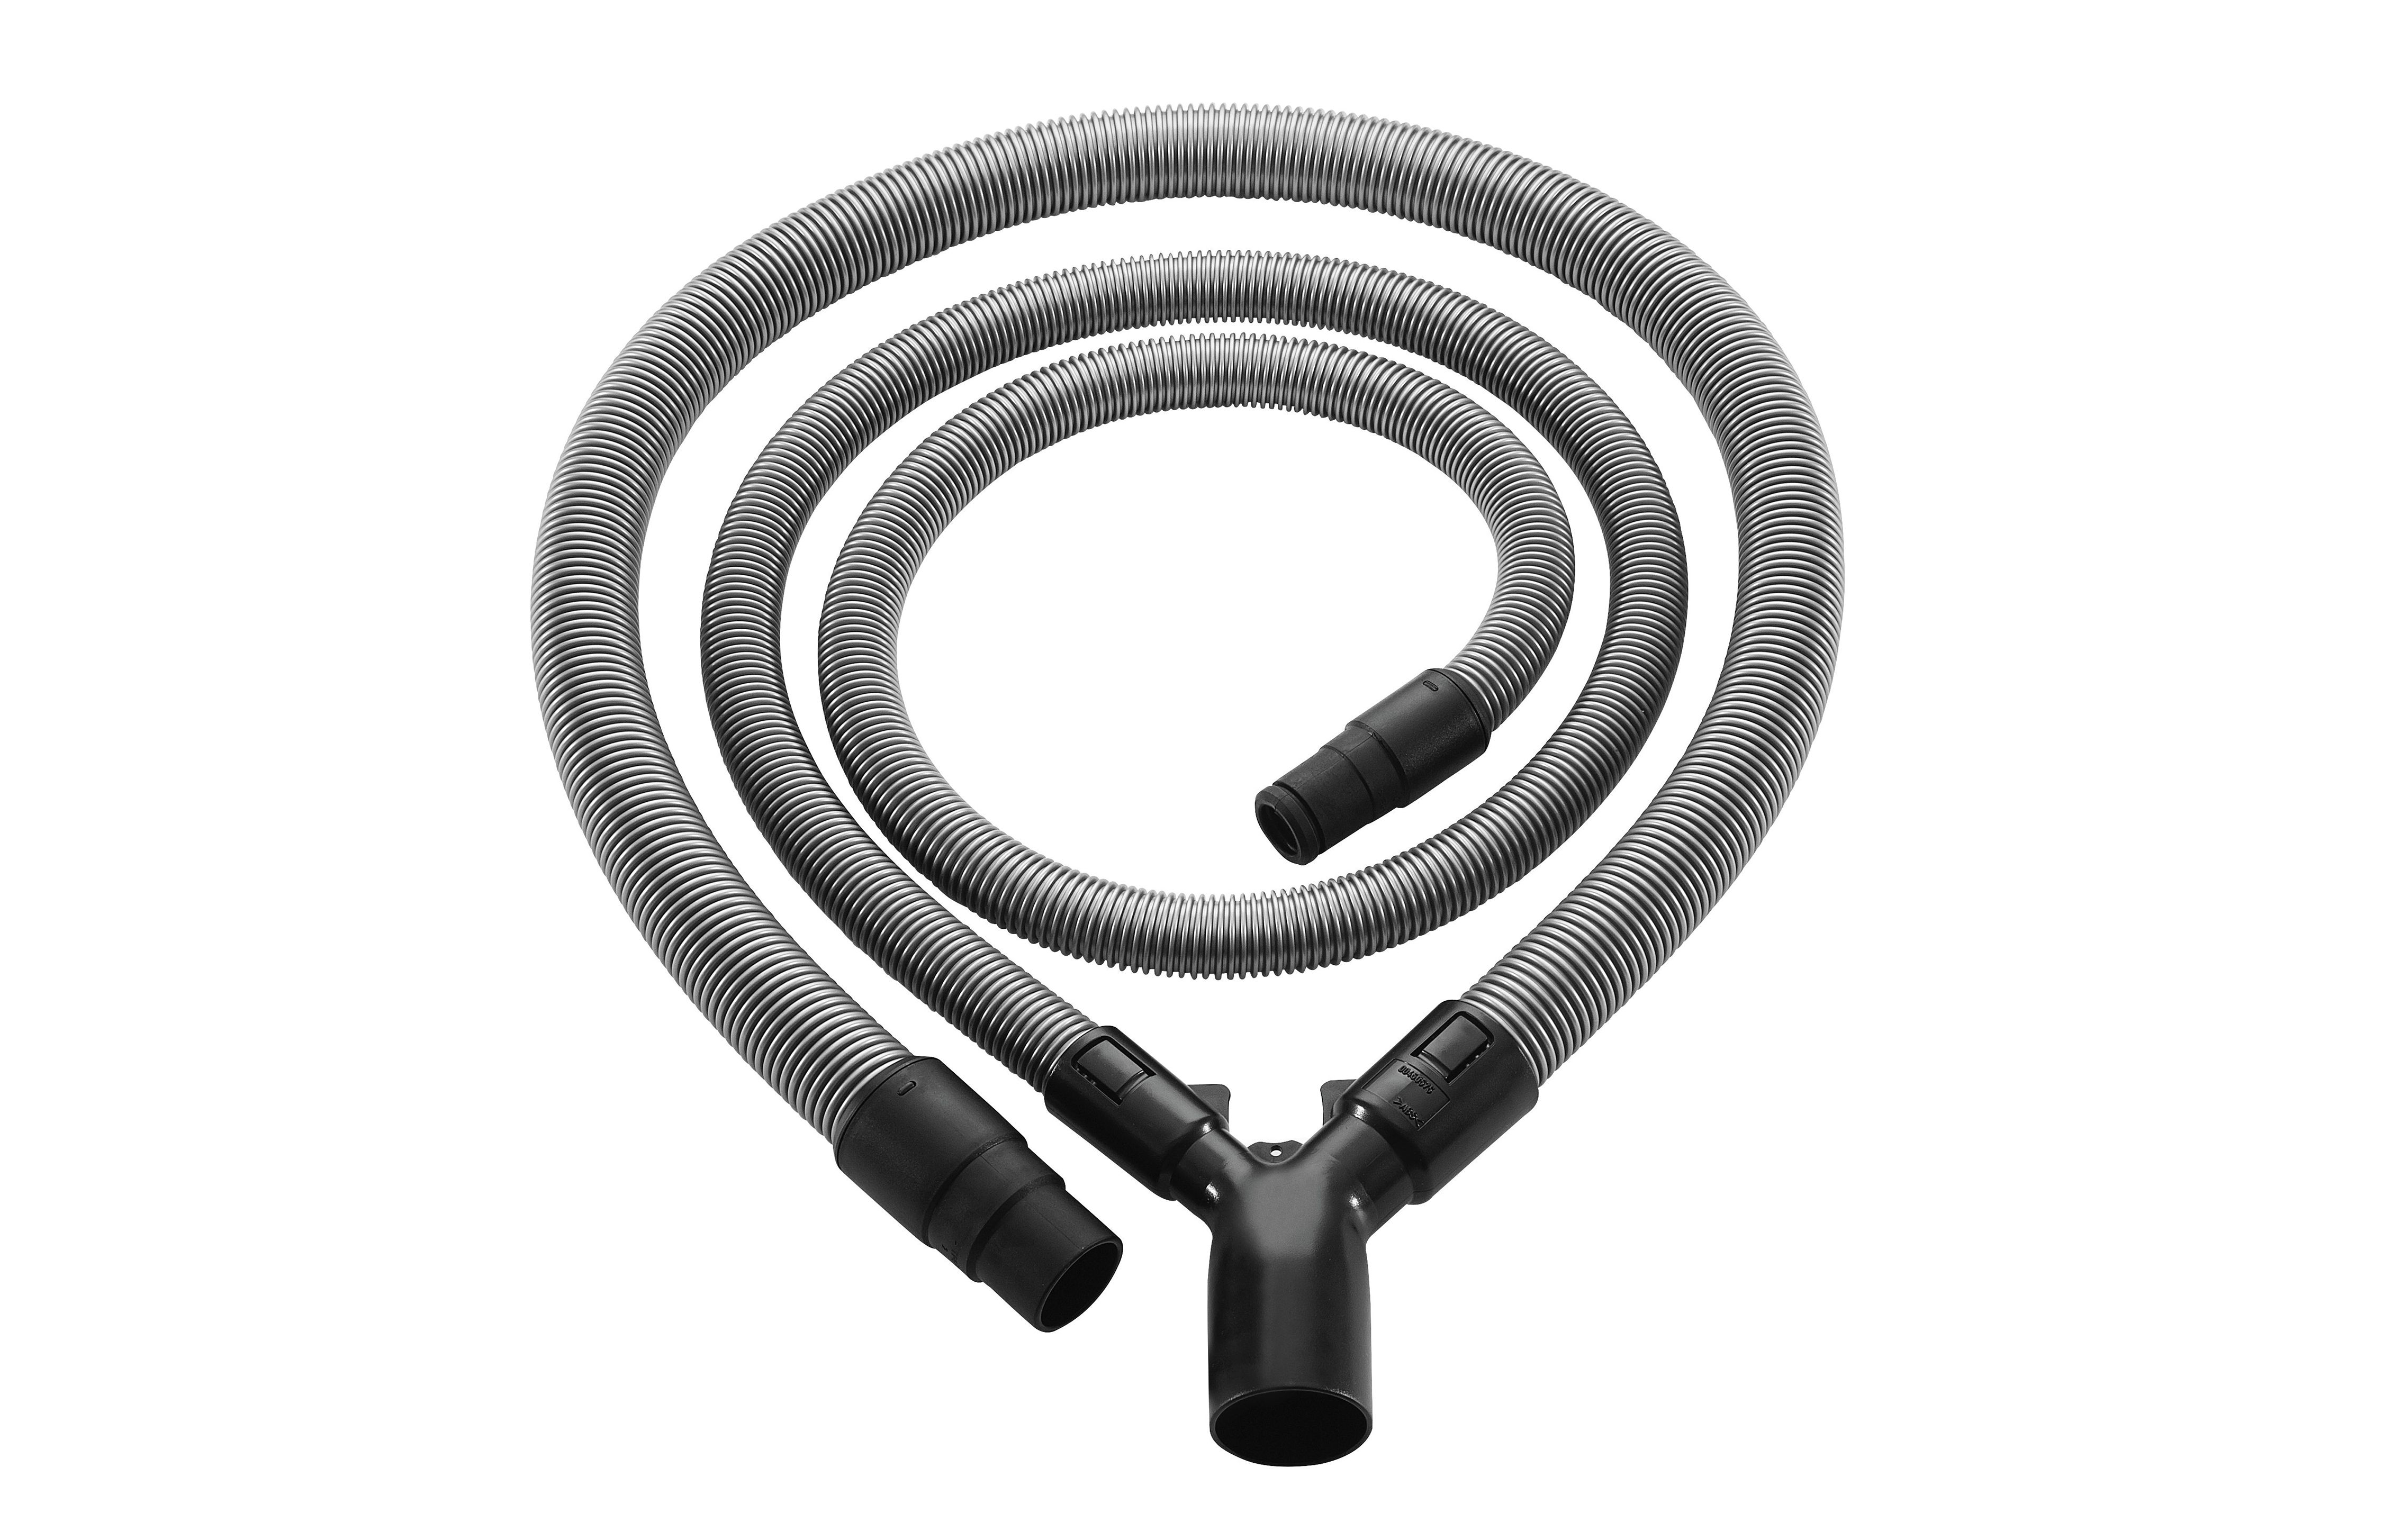
... into a Festool CT26e.
If interested, have a look at the thread of mine where I built this fence ....
Regards from Perth
DerekVisit www.inthewoodshop.com for tutorials on constructing handtools, handtool reviews, and my trials and tribulations with furniture builds.
-
7th October 2020, 07:50 PM #4
GOLD MEMBER
- Join Date
- Nov 2018
- Location
- Newcastle
- Posts
- 1,018
Derek, I've just moved the fence into the traditional slider infeed-only position. From memory I gave myself around 17cm to attach the wooden fence to. The pain in the butt factor would be much higher for yours as you'd have to take the Jessem bits off. Originally Posted by derekcohen

saw fence.jpg
I had hoped to be able to use the saw's fence with the DRO and micro-adjust to get accurate router fence positioning, but I don't think it's going to work out - the K3's fence just isn't designed to work way out that side of the table. So I'm edging towards something more like yours (which AliExpress sweatshop is supplying your micro adjust?)
I've also got the wider table and fence on mine, so the router addition is hanging a lot further out. I wanted to get the heavy bits as close to the metal as I could to limit sagging, which is why mine doesn't have as much wood around it as yours. I may just put an extra leg under the box, and put the plate a bit more centrally in the next version.
Dust collection is super simple - dirty great 120mm port at the bottom of the box, to the big DC. The fence DC pipe goes to the fitting on the box - so it all ends up going through that 120mm port. Once I've sorted the ducting in the shop out, a single pipe will collect from the saw and router box. So one pipe to rule them all. Plus a blast gate to isolate the router.
-
7th October 2020, 09:04 PM #5
Be inspired. Be creative. Be bold.
- Join Date
- Apr 2001
- Location
- Perth
- Posts
- 10,851
Hi Bern
A couple of thoughts ...
Your rip fence has a micro adjust. This was not available when I purchased my K3, and I have now got used to the tap-tap micro adjustment method. The DRO helps considerably. I have not used the AliExpress micro adjust. When it arrived, it turned out to take up too much space ....I had hoped to be able to use the saw's fence with the DRO and micro-adjust to get accurate router fence positioning, but I don't think it's going to work out - the K3's fence just isn't designed to work way out that side of the table. So I'm edging towards something more like yours (which AliExpress sweatshop is supplying your micro adjust?)
Here is the fence support from AE ...


I like it as it is wider and more solid than the one I made. However, it is longer, and the micro-adjust makes the whole fitting even longer still ...
You can see that it runs off the track ...

I have a choice at this point - let me have your impression - either to tack it on at the end of the fence ...

And add a switchable magnet (since the table top here is steel) ...

... or just continue with tap-tap, aided by the graduations I glued to the T-track ...
This is on both sides, but only one side is used for micro adjustments. the other side is fixed.

Yes, with your box, you have more weight to support. My idea was to keep it skeletal, hence the dust collection from the underside via the base (ala Festool).I've also got the wider table and fence on mine, so the router addition is hanging a lot further out. I wanted to get the heavy bits as close to the metal as I could to limit sagging, which is why mine doesn't have as much wood around it as yours. I may just put an extra leg under the box, and put the plate a bit more centrally in the next version.
Check out the supports I used, nevertheless, as they may help. This was the old router table (same principle) ...
.. or just block it up.
Regards from Perth
DerekVisit www.inthewoodshop.com for tutorials on constructing handtools, handtool reviews, and my trials and tribulations with furniture builds.
-
7th October 2020, 09:12 PM #6
GOLD MEMBER
- Join Date
- Jul 2011
- Location
- In between houses
- Posts
- 1,784
Just buy the big V8 one, I have mine in the cms table, it’s perfect and gets used every day. Great fence, all the hold downs, and easy up and down adjustment, sorted.
-
9th October 2020, 08:50 AM #7
GOLD MEMBER
- Join Date
- Nov 2018
- Location
- Newcastle
- Posts
- 1,018
I like the magswitch idea, but would the adjust move the fence accurately set that far to one side? Looks like it might cause a bit of twist if the other side doesn't move perfectly freely?
I'll have to block up the end of my table - as I already have steel extension tables on, there's nothing for bolt supports to rest on - the router table just hands off the extension
River man, do you have a pic of that fence? a search for V8's just brings up bogan-mobiles!

 Reply With Quote
Similar Threads
-
New Router Table Build
By Chris Parks in forum ROUTING FORUMReplies: 49Last Post: 15th January 2022, 11:40 PM -
Router table build
By Fumbler in forum ROUTING FORUMReplies: 3Last Post: 19th August 2020, 07:14 PM -
Yet another Router table build.
By MandJ in forum ROUTING FORUMReplies: 263Last Post: 9th April 2019, 10:07 AM -
Just one more router table build
By PJM16 in forum ROUTING FORUMReplies: 6Last Post: 15th January 2019, 12:19 PM -
Want to build a table for router and cms
By Guy in forum HAND TOOLS - POWEREDReplies: 3Last Post: 23rd June 2004, 12:31 AM
