

 Thanks: 0
 Likes: 0
 Needs Pictures: 0
 Picture(s) thanks: 0
Results 46 to 60 of 64
-
22nd November 2008, 07:31 AM #46
 Tinkerer


- Join Date
- Jul 2000
- Location
- Sydney, NSW, Australia
- Posts
- 61

I started with a 1/3 sheet BOSCH orbital sander which was fine for average sanding work, though it didn't remove as much as I thought it would. I then added a Makita belt sander to really cut away and do heavy stock removal and finish off with the 1/3 sheet and then finish by hand but the final finsh still had swirl marks on it.
After a few years and much deliberation I bought a Festool ETS150/5 (random orbital sander with 5mm orbit) and the following grits 80/120/240/400. And it is by far the most usefull sander of them all - it is smooth to use, and gives a finish that I only thought possible by professionals. If you use the grits and a vacume to suck up all the dust and make sure that you keep moving it around and progressivly up the grit to the next level you will find yourself with a fantastic finish. Once I get past the 400 I use oregan oil hard burnishing oil and let it soak in, this raises the grain and then after 1 hour or so I sand (slightly wet) at 400 and then progress up to 800. -apply another coat - let it dry, give it another coat the next day, let it dry and then with a lambswool pad on a drill buff it with some wax and you will have a lovely shiny surface.
The Random orbital sander was something I thought I could do without but after using one and seeing the results it was clearly worth having and something I would hightly recommend!
Hope this helps!
-
22nd November 2008 07:31 AM # ADSGoogle Adsense Advertisement
- Join Date
- Always
- Location
- Advertising world
- Posts
- Many
-
22nd November 2008, 12:28 PM #47
SENIOR MEMBER
- Join Date
- Nov 2006
- Location
- NSW
- Posts
- 774
I just won one of these on ebay. I hope it improves my sanding jobs.... see how it goes anyway. I'll be making sure that I finish off the last few grit by hand though.
http://cgi.ebay.com.au/5-Random-Orbi...1%7C240%3A1318
-
23rd November 2008, 06:25 PM #48
Dehydrated Hydrographer
- Join Date
- Jun 1999
- Location
- Westleigh, Sydney
- Age
- 77
- Posts
- 9,550
The way I finish depends on what I'm making. As I do a lot of boxes & smaller stuff, this is what I do on them. A good finish depends on good preparation.
1. Scrape & oil your bench. Those little blobs of glue will leave dings that you won't see 'till it's too late.
2. Plane to size and remove any machine marks.
3. If there's any tear out, remove it using a scraper.
4. Sand through the grits to 800. If it's a large surface I use the ROS to 400. Let the weight of the ROS do the work, not you.
5. Vacuum the dust off the piece.
6. Use paper towels soaked in methylated spirits to clean the remaining dust off. Wipe each surface twice.
7. Check all surfaces very carefully for any small dings. They can be removed by steaming with an iron and damp towel if the fibres aren't broken, otherwise they will need to be scraped out. Lightly sand again after steaming or sanding
8. When the metho has dried off, apply a sealing coat of thinned shellac.
9. Give the shellac about an hour, then sand very lightly with 800.
10. Remove the sanding dust using a rag damped with white spirits.
11. When the white spirits has dried off, you are ready to start applying your finish. My preference is Kunos oil cut 50/50 with Bio thinners (both available from the Natural Paint place, Newtown NSW). Wear white cotton gloves while finishing, to prevent fingermarks.
12. Apply the first coat as a flood coat using a soft cloth. Leave it for 10-15 minutes, then wipe off any excess. Always wipe the oil on and off along the grain.
13. Allowing at least 12 hours between each coat, apply two more light coats. The cloth just needs to be damp with oil. Rub these coats in briskly.
14. Apply a final coat using 0000 steel wool. Don't rub too hard with the steel wool, and don't use too much oil. After 10 minutes, rub briskly with a clean cloth.
15. After about 12 hours, buff with a soft cloth. For a glossier finish apply a thin coat of UBeaut trad. wax and buff.
-
24th November 2008, 12:15 PM #49
SENIOR MEMBER
- Join Date
- Nov 2006
- Location
- NSW
- Posts
- 774
Thanks for the input Alexs.
-
24th November 2008, 02:24 PM #50
SENIOR MEMBER
- Join Date
- Nov 2006
- Location
- NSW
- Posts
- 774
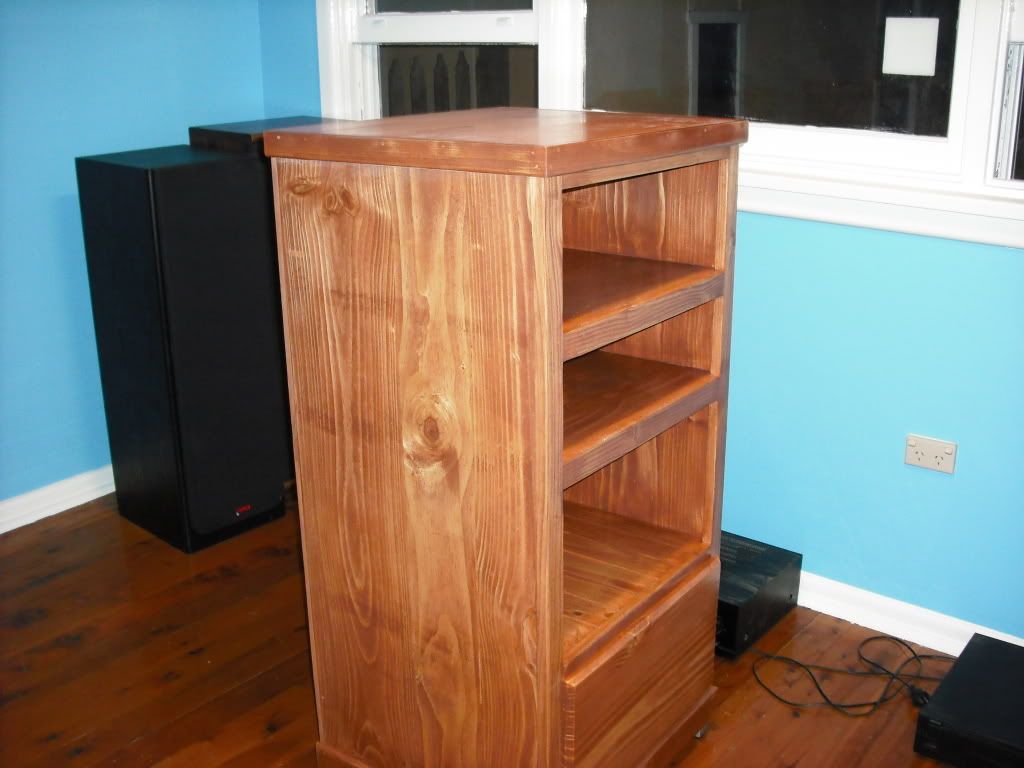
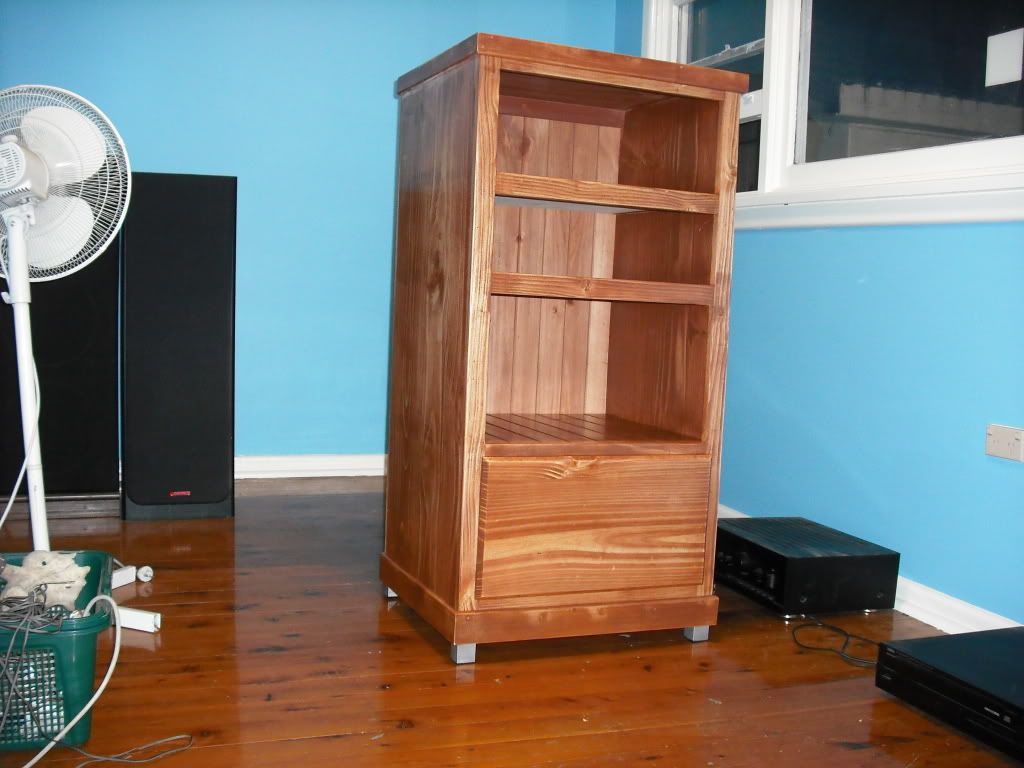
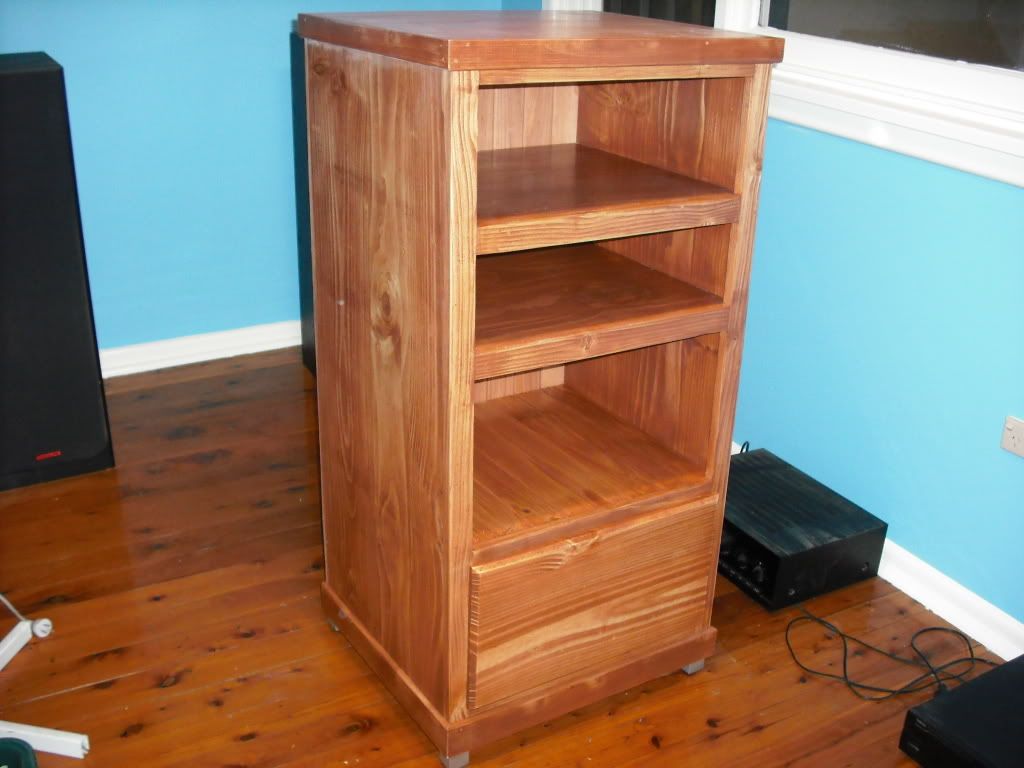
Here's the pics Wendy. I'm really disappointed how the finish turned out but will know better next time.
Thanks
Geoff

-
24th November 2008, 04:19 PM #51
Deceased 18/12/2020
- Join Date
- Aug 2007
- Location
- Melbourne
- Posts
- 2,178
Hi Garfield,
Just looking at the pics, it appears you need to do more preparatory sanding before even thinking about the finish. Those dark ridges on the sides shouldn't be there. Also, you will probably find it easier if you finish the panels before gluing up, then you won't end up with a "bald patch" at the top.
Regards,
Rob
-
24th November 2008, 06:37 PM #52
Head Moderator
Sister of the DarkSide
- Join Date
- Dec 2004
- Location
- Toowoomba Q 4350
- Posts
- 9,217
Hi Garfield, thanks for the pictures.
 Don't worry about being disappointed. In fact, be glad you can recognise this and know you are SOOO going to improve your finishing. (you have already started by reading through this thread) There is nothing so motivating as looking/using a woodwork project of your own where the finish is not what you were wanting (
  yes, speaking from experience
 and lots of it)
Don't be disappointed, be glad that you are learning and that you can learn and your next project will be so much better for it. (I guess everyone knows now I'm a Glass Half Full girl )
)
You've made a good start, I can't wait to see your next project
cheers
Wendy Box Challenge 2011 - Check out the amazing Boxes!
Twist One - Wooden Hinge/Latch/Catch/Handle
Twist Two - Found Object
Twist Three - Anything Goes
-
24th November 2008, 09:03 PM #53
SENIOR MEMBER
- Join Date
- Nov 2006
- Location
- NSW
- Posts
- 774
Yeah I've had a shocker Rob. I learnt some valuable lessons from this thread but jumped the gun a bit and started on the finishing just before I started this thread. Originally Posted by LGS

-
24th November 2008, 09:06 PM #54
SENIOR MEMBER
- Join Date
- Nov 2006
- Location
- NSW
- Posts
- 774
Thanks for the encouragement Wendy, and thanks for your post on this thread got the ball rolling and I've taken a lot more knowledge out of it. Originally Posted by RufflyRustic
Geoff
-
24th November 2008, 10:35 PM #55
Happy Feet
- Join Date
- Sep 2007
- Location
- Armadale
- Posts
- 1,150
i suspect that there is a leg pull going on somewhere.
If this is radiata, it is notoriosly difficult to stain.
dont sand over 240 or it wont take a stain at all well.
as for the advise re the finish, seal with shellac and then whatever.
i sugest that you buy better timber for your next job or salvage some off the hard rubbish.
different timbers take different finishes and techniques differently, there are many books written on the subject
depends on the tighness of the grain, the oil in the wood and heaps of other things.
If you want to make a pine bookshelf, stain the timber before you assemble it.
treat with 2-3 coats of shellac, cut back with 0000 steel wool and wax it.
-
24th November 2008, 11:44 PM #56
SENIOR MEMBER
- Join Date
- Nov 2006
- Location
- t
- Posts
- 961
Just started spraying spirit stains on radiata and the effect is amazing.
The person who is teaching me has many years of commercial furniture finishing experience.
With radiata he says, spray stain onto bare timber, spray sanding sealer on, adjust colour and and problem areas with spray stain again (very low pressure and volume is key here), then spray with pre-cat laquer.
For a more "grainy" look he recommends rubbing on the stain by hand in first step.
Very fast, durable finish, can be done within a day, does take a week or two to fully harden though and not suitable for table tops. .
.
-
25th November 2008, 09:27 AM #57
SENIOR MEMBER
- Join Date
- Nov 2006
- Location
- NSW
- Posts
- 774
I think I had a lot to do with the finish though Astrid. I'd be more confident of a better finish next time - even using the same pine. Originally Posted by astrid
-
25th November 2008, 09:30 AM #58
SENIOR MEMBER
- Join Date
- Nov 2006
- Location
- NSW
- Posts
- 774
Any chance of seeing some pics of this amaizing finish Cruzi? Originally Posted by Cruzi
-
25th November 2008, 12:02 PM #59
SENIOR MEMBER
- Join Date
- Nov 2006
- Location
- t
- Posts
- 961
This is sprayed spirit stain, but final coats are 2 pac poly

Pre-cat laquer finish over spirit stain

Will get some pics later of some radiata stuff..
-
25th November 2008, 12:34 PM #60
SENIOR MEMBER
- Join Date
- Nov 2006
- Location
- NSW
- Posts
- 774
So does the grain of the wood show through the spray stain? Originally Posted by Cruzi
Nice looking pieces there by the way


 Reply With Quote


Similar Threads
-
Now that's what I like to hear!
By funkychicken in forum WOODTURNING - PEN TURNINGReplies: 5Last Post: 29th October 2008, 09:14 PM -
Hear hear
By munruben in forum WOODIES JOKESReplies: 0Last Post: 21st June 2008, 04:54 PM -
Hear ear
By munruben in forum WOODIES JOKESReplies: 7Last Post: 13th April 2008, 01:31 PM -
Where else would you hear this?
By Groggy in forum WOODIES JOKESReplies: 1Last Post: 17th January 2006, 04:08 PM -
What Men Hear
By Wayne Davy in forum WOODIES JOKESReplies: 2Last Post: 14th May 2003, 10:46 PM
