

 Thanks: 0
 Likes: 0
 Needs Pictures: 0
 Picture(s) thanks: 0
Results 1 to 15 of 64
-
12th November 2008, 11:08 PM #1
 SENIOR MEMBER


- Join Date
- Nov 2006
- Location
- NSW
- Posts
- 774
 Lets hear your technique and see your results
Gday everyone,
I hope people dont mind this thread being started and excuse me if its been done before. Id like to get a thread going that can help people like me who have no idea when it comes to finishing your work. Ive just posted a thread recently in this forum regarding finishing and received some good advice and realised that I shouldnt use power sanders as the scuffs and scratches will and do show up when Ive stained the wood unfortunately I found this out the hard way.... AGAIN!!. I have been using my belt sander to get the joins smoothed down after joining pieces together with my biscuit joiner, somehow I always end up with a height variance after I glue and join the two pieces together.
Anyhow I beg please all you experienced woodworkers out there, can you please pass on your secret and your techniques and methods from start to finish for getting great results in your finish. Im only a novice but have made a couple of pieces of furniture up and tried a few different ways of applying a finish. Ive tried the stain and varnish all in one applied with a brush, Ive tried rubbing stain followed by spraying thinned down lacquer and now Ive tried stain followed by wipe on poly. My own personal preference would have to be spraying on a lacquer thinned down. Not only for the fact I think it covers a lot more even, but it seems heaps easier to apply and its easier to apply to the small areas and it beats wiping it on especially where theres not much room for your hand to apply the wipe on poly i.e. like between shelves. I found that I didnt like the all in one approach and I certainly dont like applying it or even lacquer with a brush as no matter how much care you take you end up with brush marks. When I first tried spraying a lacquer through my compressor and spray gun I thought that was crap as I had some nice shiny parts on the job but had dry rough looking parts on it as well. But soon discovered through this forum that Id stuffed up because I was given some bad advice from a guy at Bunnings as he told me to thin it down with turps. Once I had used thinners and thinned it more than 10% I found it flowed through the gun beautifully and left a nice finish. So then I tried the wipe on poly as I found that spraying on the lacquer left the wood looking too shiny. I wanted to achieve a mat type finish similar to what you see when you look at furniture in the shops, and thats how I ended up on the wipe on poly.
So concluding, Id love to hear what you apply to achieve a certain finish/look and then how you apply it and what product you use. If anyone can add some pics with your post that would be great as you get to show off your work, as well as back up your method as being a winner! I love appreciating others work and talent as well so please pass on your pics.
Thanks all for taking the time to read this post and for your help and advice,
Geoff
-
12th November 2008 11:08 PM # ADSGoogle Adsense Advertisement
- Join Date
- Always
- Location
- Advertising world
- Posts
- Many
-
13th November 2008, 08:13 PM #2
SENIOR MEMBER
- Join Date
- Nov 2006
- Location
- NSW
- Posts
- 774
It seems no one is really interested - or they want to hang onto their secrets.
-
13th November 2008, 08:20 PM #3
Novice
- Join Date
- Oct 2005
- Location
- Brisbane
- Posts
- 19
It could be that the question is too broad.....And its only been a day.
Try a specific question about a specific item you have made and post a pic.
Just an opinion, probably worth what you paid for it.
Cheers
Kym
 Originally Posted by garfield

-
13th November 2008, 09:10 PM #4
Head Moderator
Sister of the DarkSide
- Join Date
- Dec 2004
- Location
- Toowoomba Q 4350
- Posts
- 9,217
Never fear Garfield

Sanding
I have learnt the hard way, that if you do not prepare the timber for the finish you will not end up with the finish you want.
1. Always sand with the grain. If the occasion warrants sanding against the grain, make sure you sand with the grain afterwards to remove those sanding marks.
2. Go through each grit level until you get to the desired smoothness
3. If you are using sandpaper, use it like there is no tomorrow. Stop frequently and clear the sawdust off the sandpaper and piece of timber, better yet, set up a sanding station that draws/extracts the dust away from what you are working on.
4. If sanding end grain that is going to be exposed, sand it to a higher grit than the rest of the piece as this will help even out the colour of the finished piece. End grain takes up more of the finish and will end up darker than the rest of the piece.
5. Sand away every single mark. Leaving an obvious line or mark or whatever on the timber will haunt you when you look at the finished project, especially when the finish highlights such imperfections.
Final sealing/sanding step before the finishing starts:
6. Sanding Sealer - fantastic stuff, get some, make some, use it. You'd be surprised how helpful it is. My personal favourite is UBeaut's sanding sealer, or I make my own from as close to 100% metho as i can get and any old UBeaut White Shellac I have left - (dewaxed shellac).
7. Tack cloths - not everyone's preference, but i find them very useful for not only cleaning away dust from the last denib sanding just before the finish is applied.
8. If you don't like tack cloths, get a good very soft brush and a vacuum cleaner and brush/suck away any remaining dust before applying the finish.
9. Grain filling - learn how to do this, it's not hard at all and it is extremely useful for open grained timber.
10. Staining - water-based dyes (yep, UBeaut Water Dyes are my choice) under shellac are fantastic and sooooooo easy to use. (just don't forget to wear gloves ) The staining rule of thumb is to never use the same type of stain with the finish, eg spirit-based stain followed by a spirit-based finish. I find it easier to remember to simply coat any stain with one or two coats of shellac and then apply the finish on top of that. This is my personal preference and what I have learned works well for me and my style of woodworking.
There ya go Garfield, and that's just the prep stuff I've learned.
How did I learn it? Practice, making lots and lots of mistakes , re-reading UBeaut's Book of Finishing and reading/participating in discussions here.
cheers
Wendy Box Challenge 2011 - Check out the amazing Boxes!
Twist One - Wooden Hinge/Latch/Catch/Handle
Twist Two - Found Object
Twist Three - Anything Goes
-
13th November 2008, 09:27 PM #5
Casual Hero and Philanthropist
- Join Date
- Oct 2005
- Location
- Yass
- Age
- 65
- Posts
- 1,196
Wendy's advice is excellent as usual.
For me, the breakthrough came when i bought a copy of "The Polisher's Handbook", which should be available from the U-Beaut website. Best to read it while you're doing - take it to your workshop and read a paragraph, do what it says, read another, etc.
Tex
-
13th November 2008, 10:21 PM #6
SENIOR MEMBER
- Join Date
- Nov 2006
- Location
- NSW
- Posts
- 774
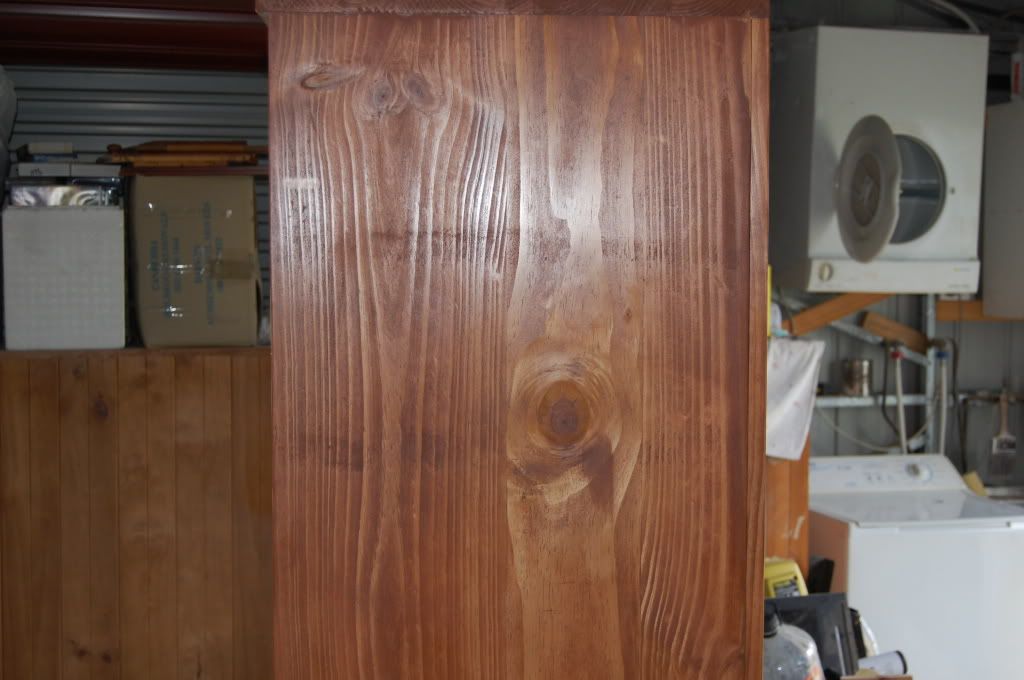
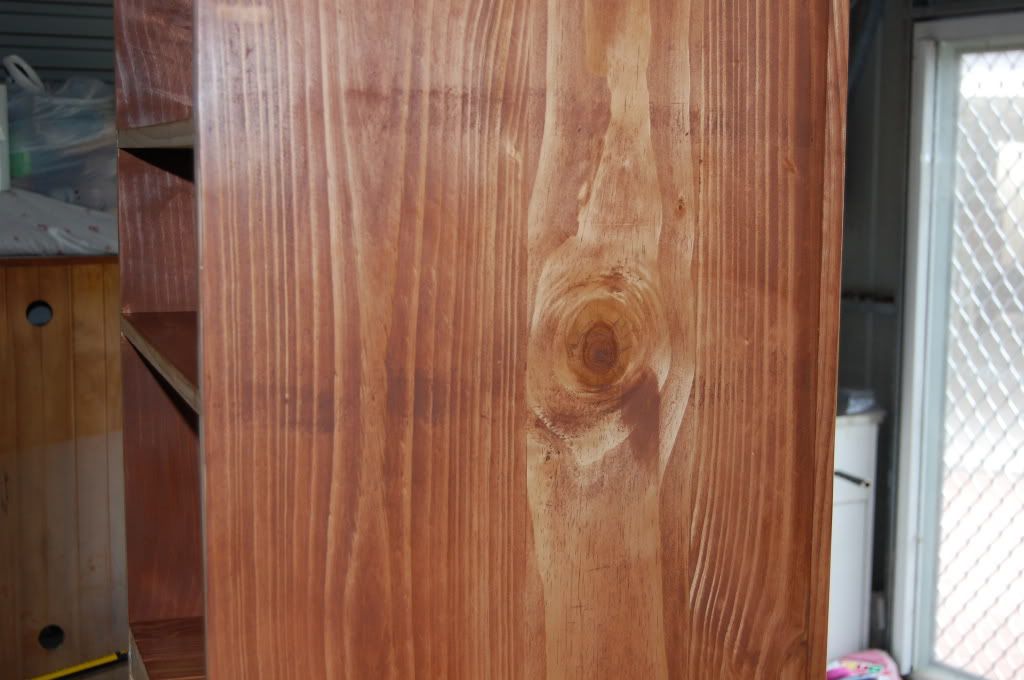
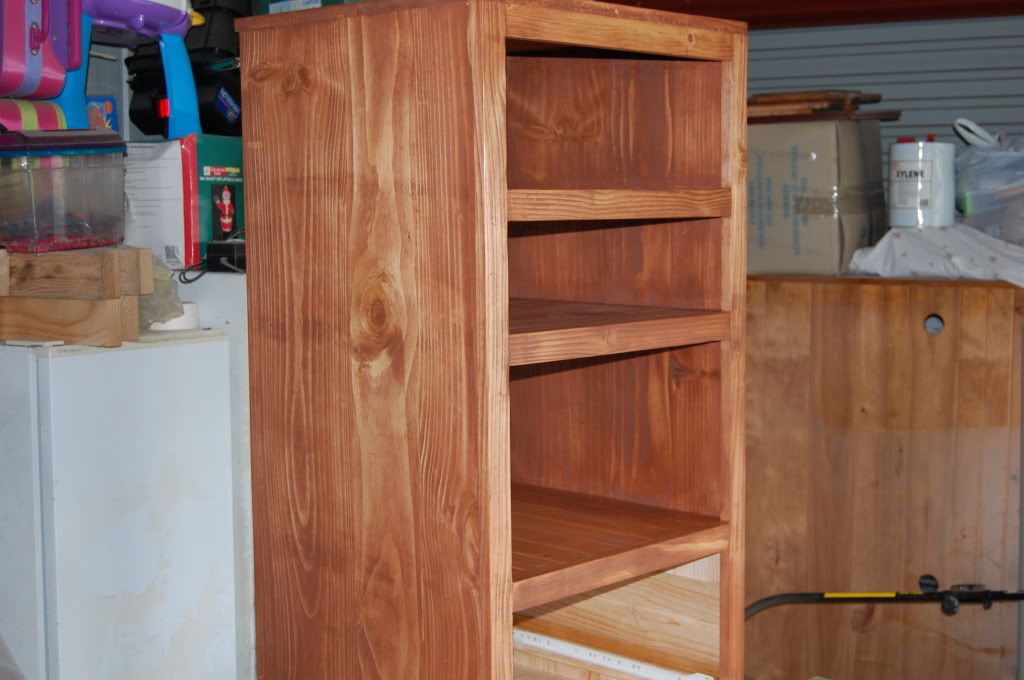
Thanks Heaps for that Wendy. I know what you mean about imperfections showing up in stain. Here's some pics of my belt sander marks showing up Originally Posted by RufflyRustic

Last edited by ubeaut; 22nd March 2009 at 11:36 PM.
-
13th November 2008, 10:25 PM #7
SENIOR MEMBER
- Join Date
- Nov 2006
- Location
- NSW
- Posts
- 774
Thanks Tex. Yeah mate I don't know anything about half these products that I see mentioned in this forum, like shellac and sanding sealer and the like. That's why I started this thread. Originally Posted by Tex B
-
13th November 2008, 10:27 PM #8
SENIOR MEMBER
- Join Date
- Nov 2006
- Location
- NSW
- Posts
- 774
Oh, by the way. The pics I have posted are with only one coat of wipe on poly which I read in this forum was the weapon of choice for a lot of people.... i'm not sold on it though.
-
13th November 2008, 11:44 PM #9
I've got wood
- Join Date
- Feb 2008
- Location
- Deloraine Tasmania
- Age
- 59
- Posts
- 1,092
What was suggested to me & i plan to try this weekend if i get time is to build up coats of a gloss wipe on polly then finish with a satin wipe on polly. I'm hoping that it will give me a deep looking top coat but not super shiney.
-
14th November 2008, 07:37 AM #10
SENIOR MEMBER
- Join Date
- Nov 2006
- Location
- NSW
- Posts
- 774
I'd still like to hear some more and different techniques. I read in this forum one thread where the guy's technique was to spray his 1st coat of lacquer on wait for 10 minutes, whack another coat on, then wait another and add another coat so on and so on.
I think I prefer to spray a lacquer on myself rather than wipe it on. But as I say I'd love to hear more from the experienced guys and gals on their techniques.
-
14th November 2008, 08:11 AM #11
Deceased 18/12/2020
- Join Date
- Aug 2007
- Location
- Melbourne
- Posts
- 2,178
M'sieur Le Chat,
My preferred method of finishing involves using Wattyl Scandinavian oil, usually with a wax finish, but any other final treatment would work.
Briefly;
1. Sand workpiece with a ROS from 80 to 400g.
2. Wipe the workpiece clean with mineral turps and allow to dry.
3. Add Scandinavian oil to saturation.
4 Sand and seal oil with 400 to 4000g using a ROS, preferably with a short stroke. (e.g. Festool ETS150/3) Do not remove slurry as you go.
5. Wipe down with a soft cotton cloth.
6. Allow the oil to dry thoroughly (usually 24 to 72hrs) then finish with UBeaut Trad wax, or Wipe on Poly or whatever else you want to use.
Here's some examples.
Regards,
Rob
-
14th November 2008, 09:45 AM #12
Head Moderator
Sister of the DarkSide
- Join Date
- Dec 2004
- Location
- Toowoomba Q 4350
- Posts
- 9,217
Thanks Tex - I have to second what Tex said about the Book of Polishing. My finishing has moved to a whole new level since I invested in it.
A qualification about finishing. There are many ways to finish a piece, there are many finishes available. It can get awfully confusing and overwhelming very quickly. This is why I have limited my finishes to Wipe on Poly and Shellac. I haven't gone with oils yet as I am having too much fun with WoP and Shellac I don't have anything against Oil finishes, I simply haven't used them much at all so don't have any experience to draw from.
Preparing Boards with knots.
Again learnt the hard way. If a project has a knot it in, always seal the entire piece with one or two coats of shellac before applying your chosen finish. The shellac should seal the knot and stop it from 'taking up' the finish, leaving a dull patch. Why apply shellac to the entire piece? to give the piece the same starting point for the finish.
This process also works well for eg pine and cherry, where the timber is renown for splotchy finishes if not sealed first.
cheers
Wendy Box Challenge 2011 - Check out the amazing Boxes!
Twist One - Wooden Hinge/Latch/Catch/Handle
Twist Two - Found Object
Twist Three - Anything Goes
-
14th November 2008, 09:56 AM #13
SENIOR MEMBER
- Join Date
- Nov 2006
- Location
- NSW
- Posts
- 774
I love your work Rob, they are some beautiful pieces there mate! Originally Posted by LGS
Can you please tell me what "sanding with ROS" means please?
Thanks for the post.
-
14th November 2008, 10:00 AM #14
SENIOR MEMBER
- Join Date
- Nov 2006
- Location
- NSW
- Posts
- 774
So shellac just is more or less a bit of a drink for the wood? It will stop a lot of the soaking of the stain once you go to apply it? Originally Posted by RufflyRustic
-
14th November 2008, 10:57 AM #15
Deceased 18/12/2020
- Join Date
- Aug 2007
- Location
- Melbourne
- Posts
- 2,178
Hi Garfield,
ROS is Random Orbital Sander.
Regards,
Rob


 Reply With Quote


Similar Threads
-
Now that's what I like to hear!
By funkychicken in forum WOODTURNING - PEN TURNINGReplies: 5Last Post: 29th October 2008, 09:14 PM -
Hear hear
By munruben in forum WOODIES JOKESReplies: 0Last Post: 21st June 2008, 04:54 PM -
Hear ear
By munruben in forum WOODIES JOKESReplies: 7Last Post: 13th April 2008, 01:31 PM -
Where else would you hear this?
By Groggy in forum WOODIES JOKESReplies: 1Last Post: 17th January 2006, 04:08 PM -
What Men Hear
By Wayne Davy in forum WOODIES JOKESReplies: 2Last Post: 14th May 2003, 10:46 PM
