

 Thanks: 0
 Likes: 0
 Needs Pictures: 0
 Picture(s) thanks: 0
Results 1 to 8 of 8
-
26th January 2012, 05:30 PM #1
 Intermediate Member


- Join Date
- Jan 2012
- Location
- Melbourne
- Posts
- 33
 Sequoia coffe table top - can I only finish one side?
Hi everyone,
I'm a long time lurker and first time poster From the archive, I haven't been able to find an answer and was wondering if someone can give me advice.
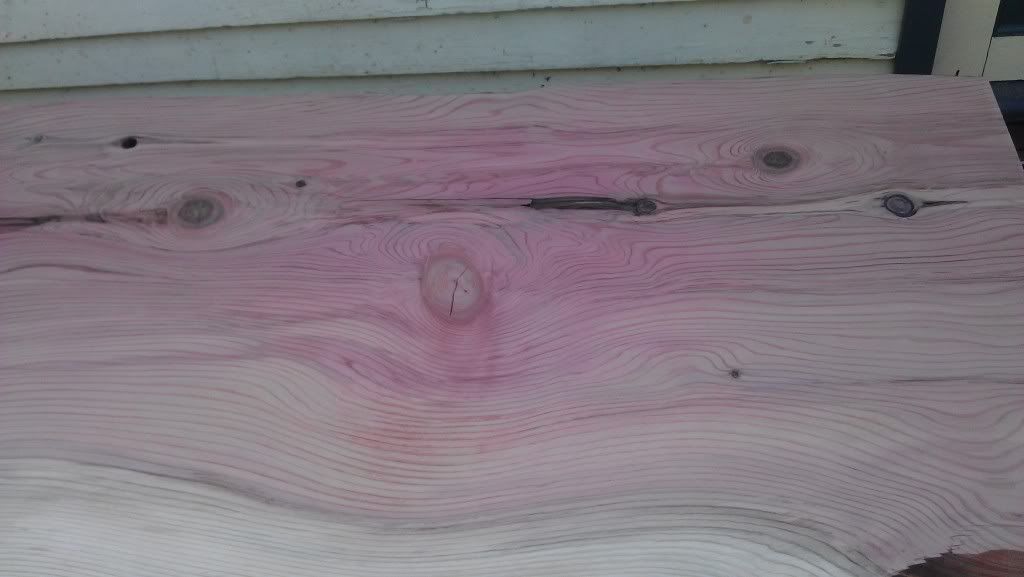
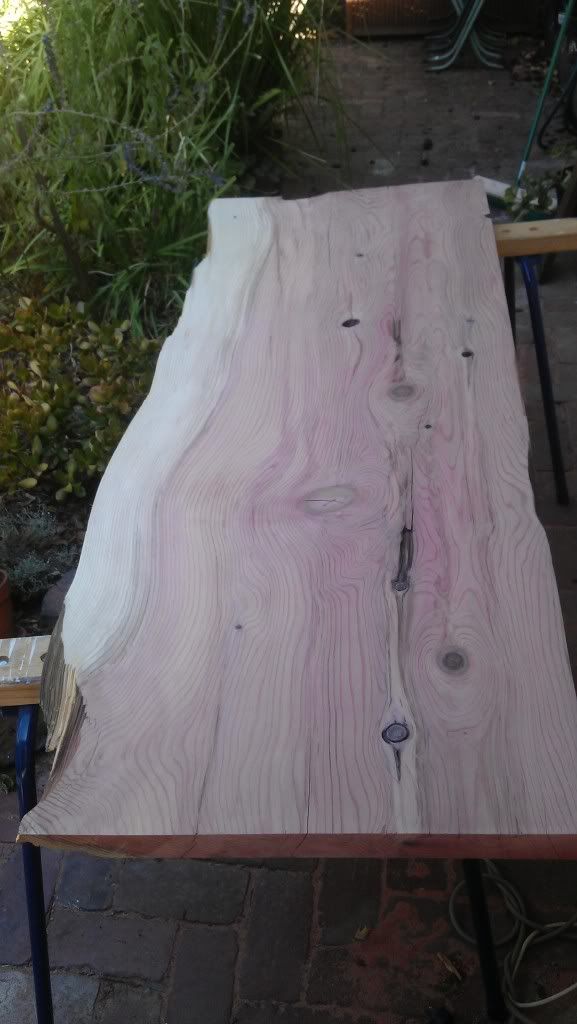
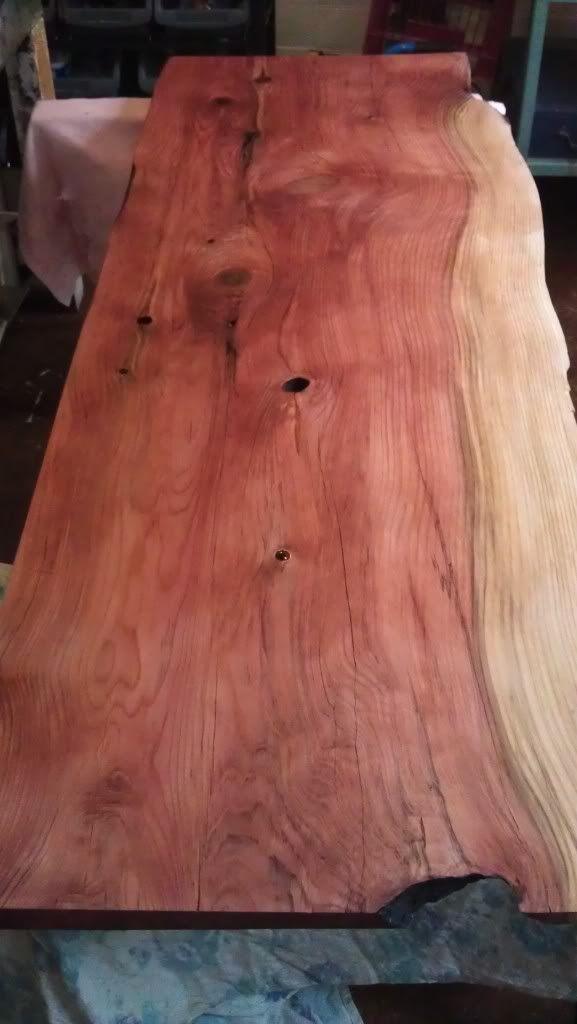
I have a slab of sequoia that I am finishing into a coffee table top, it has the usual authentic wood features of cracks and blemishes that will make the perfect top, see pics below. I have belt sanded it from 40 grit in stages to 120 grit and has come up pretty nice (awaiting the ROS to do the finish sanding grades).
My questions is, I have bought Feaston Scandinavian Oil for the finish and will apply as per the instructions. I am unsure whether I need to do both sides of the slab? I understand maintaining a moisture level if it's completely sealed but if the bottom is 'open' to the elements will it really matter? Will it bow to buggery? I understand the Feastons is actually a poly mix....
Can anyone kindly offer suggestions?
Cheers,
Mook.
-
26th January 2012 05:30 PM # ADSGoogle Adsense Advertisement
- Join Date
- Always
- Location
- Advertising world
- Posts
- Many
-
27th January 2012, 05:07 PM #2
SENIOR MEMBER
- Join Date
- Dec 2005
- Location
- Canberra
- Posts
- 3,260
Do both sides, otherwise the underside will gain/loose moisture at a faster rate that the top and you'll end up with a nicely cupped top.
Also try to to do both sides fairly promptly - there are a few threads here from people who left one side of a board uncoated for 'a few weeks' and ended up having to coax it flat with sunlight/water squirter/more violent techniques.
Even having the blank sitting flat on a bench can impede moisture transfer enough to cause a cup to develop.
-
28th January 2012, 09:44 AM #3
Intermediate Member
- Join Date
- Jan 2012
- Location
- Melbourne
- Posts
- 33
Great, thanks for the advice!
Looks like I will poly all over.
This is my practice piece as I have a larger slab that will be used as a kitchen top. (I have that one drying on the bedroom floor raised by planks for airing underneath).
-
29th January 2012, 07:36 AM #4
SENIOR MEMBER
- Join Date
- Apr 2007
- Location
- Arundel Qld 4214
- Age
- 86
- Posts
- 701
Drying timber
I hope the timber milling experts make some comments on this post. My only experience is with Paulownia but my understanding is that timber will dry quicker in an area that is protected from the rain but has good air movement eg carport. Also there should be planks (stickers) on top of the slab with weight on them to stop cupping as it dries. The stickers should be about 25 x 25 mm and made of the same timber to be ideal Originally Posted by mookschank

Whitewood
-
29th January 2012, 08:17 AM #5
Intermediate Member
- Join Date
- Jan 2012
- Location
- Melbourne
- Posts
- 33
Thanks for the advice Whitewood.
The larger slab was originally drying under several other slabs under corrugated iron outside separated by planks (for about 6 months) and then for the next year on the bedroom floor with the coffee table slab on top (separated by planks). I hope this piece is now dry and no longer needs weight to remain flat? At the moment it seems pretty flat as measured with the eyecrometer...
-
12th June 2012, 02:12 PM #6
Intermediate Member
- Join Date
- Jan 2012
- Location
- Melbourne
- Posts
- 33
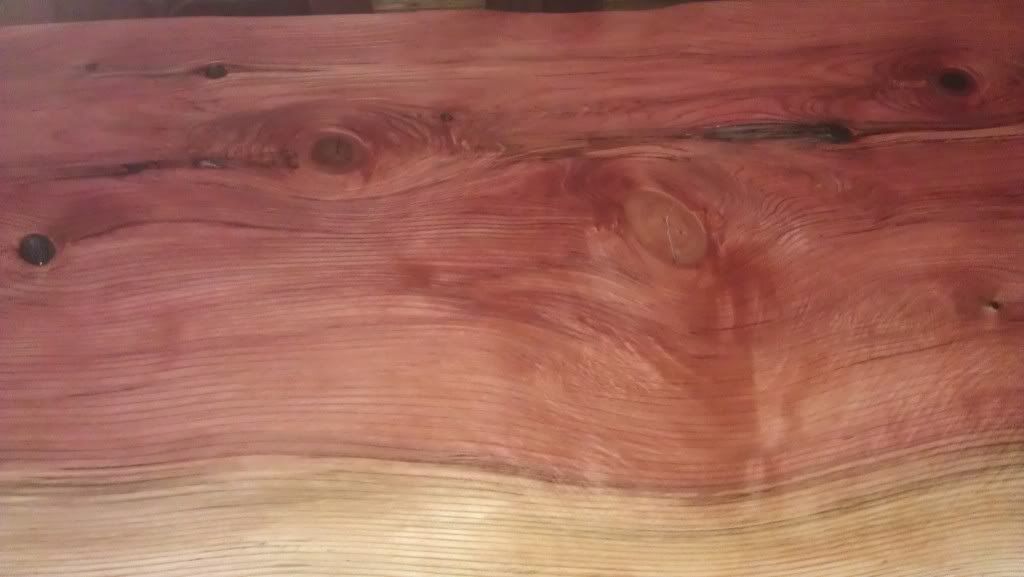
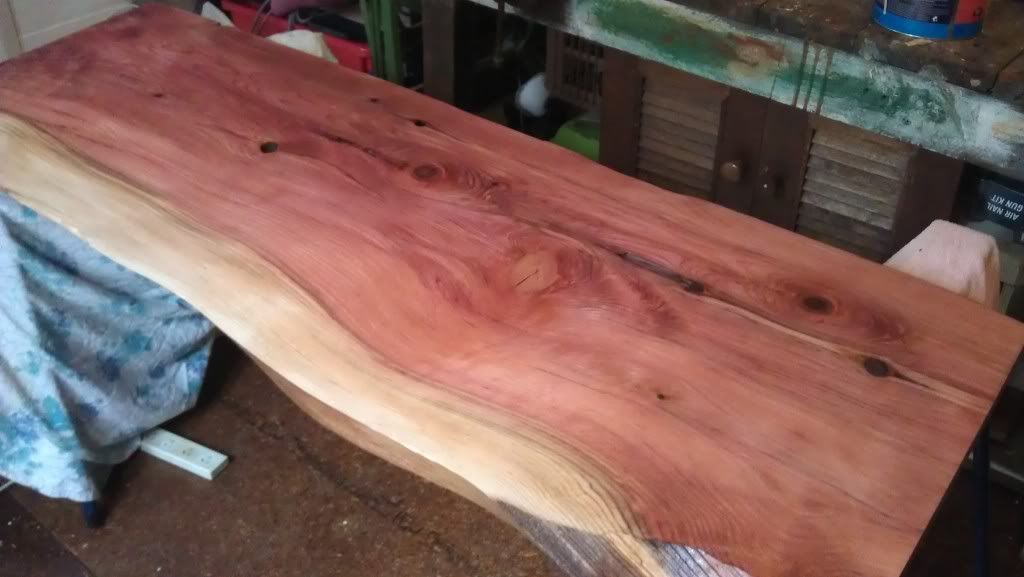
Howdy,
Thought I should add the final pictures of my coffee table. I don't have pics of it in the lounge but it's on top of metal legged coffee table, looks great, the swirls of the grain just pop at you!
Ended up sanding it back to about 320 grit with the belt & ROS, probably too smooth I know, but still learning. I used F&W Scando oil, about 5 coats after finely sanding back after each coat....
-
13th June 2012, 05:56 PM #7
Novice
- Join Date
- May 2012
- Location
- Perth
- Posts
- 13
Looking fantastic! - tell me did you use the belt sander for the whole lot of by hand?
I've found that my belt sander tends to "dig" in occasionally and leave slightly lower sections that look crap.
-
17th June 2012, 01:39 PM #8
Intermediate Member
- Join Date
- Jan 2012
- Location
- Melbourne
- Posts
- 33
Thanks. Originally Posted by .Oxy
Yes, surface was pretty rough with a couple of saw ridges so belt sander starting at 60 grit staged up to 150 grit. Then ROS staged sanding & removal to finish settings took out the belt scratches & any gouges. Took awhile but hey - lucky to live in the age of electrical appliances!

 Reply With Quote
Similar Threads
-
Huon Pine Coffe table need advice to finish
By SP1000 in forum FURNITURE, JOINERY, CABINETMAKING - formerly BIG STUFFReplies: 6Last Post: 29th June 2010, 08:47 PM -
Cheap coffe table
By munruben in forum WOODWORK PICSReplies: 3Last Post: 5th May 2007, 07:18 PM -
finish for coffe table.
By Leeok in forum FINISHINGReplies: 10Last Post: 3rd March 2006, 08:21 AM -
finish for coffe table.
By Leeok in forum FINISHINGReplies: 0Last Post: 27th February 2006, 09:08 PM -
Jarrah Coffe Table............
By Tasman in forum WOODWORK PICSReplies: 5Last Post: 4th December 2004, 09:45 AM
