

 Thanks: 0
 Likes: 0
 Needs Pictures: 0
 Picture(s) thanks: 0
Results 46 to 60 of 158
Thread: New Design - Single Cutaway
-
3rd December 2008, 08:31 AM #46
 SENIOR MEMBER


- Join Date
- Sep 2008
- Location
- sydney
- Posts
- 2,370

 Originally Posted by artme

go for it man,
plenty of help around if you need it
-
3rd December 2008 08:31 AM # ADSGoogle Adsense Advertisement
- Join Date
- Always
- Location
- Advertising world
- Posts
- Many
-
4th December 2008, 09:30 PM #47
triple platinum umm .... thingo
- Join Date
- Sep 2006
- Location
- Melbourne, 'bushy' Donvale
- Age
- 52
- Posts
- 912
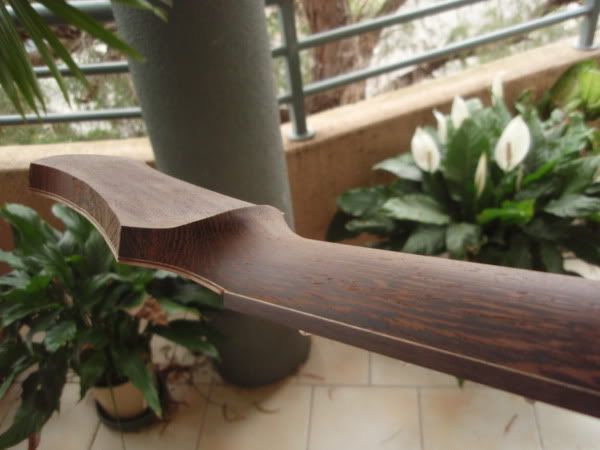
Just thought I'd put your neck pic. up again for ya Peter.
With the lamination detail and how well they all tie in, I figured it was worth a repeat viewing.
Very nice !!
-
4th December 2008, 09:39 PM #48
SENIOR MEMBER
- Join Date
- Sep 2008
- Location
- sydney
- Posts
- 2,370
i really love that neck man...

-
7th December 2008, 07:08 PM #49
Senior Member
- Join Date
- Sep 2007
- Location
- Sydney
- Posts
- 489
No worries with the repeat posting Oz. I taxed that idea from you anyway. I cut 1.5mm slices off the fretboard before fretting and glued some maple to the strips before gluing on the strips onto the fretboard like binding. It has the look of an unbound fretboard with the fret slots covered and some options for accenting the fretboard. I was unsure how I might get the same look with a lighter coloured fretboard, as the slices would be obvious, and the join line on the fretboard surface would be visible, however having seen Oz tradies latest thread the idea of rebating the fretboard along the edge for the accent veneer means that you can maintain the look of an unbound fretboard and introduce an accent line. I'm always coming away with ideas from this forum. i guess that is what makes it a powerful tool for ideas.
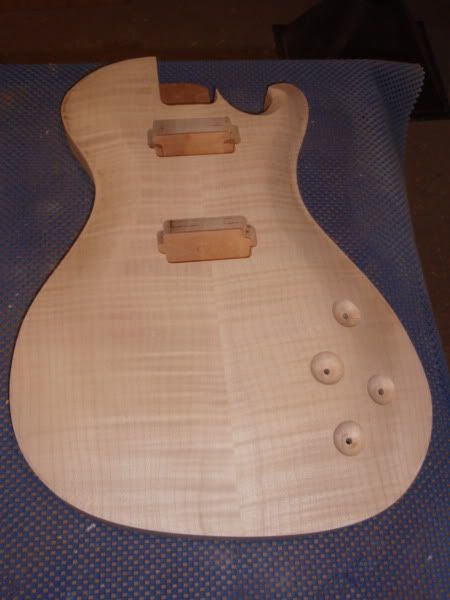
As far as progess for this build goes, i'm just about done with the carving of the top.
Below is the edge routed and control line marked out
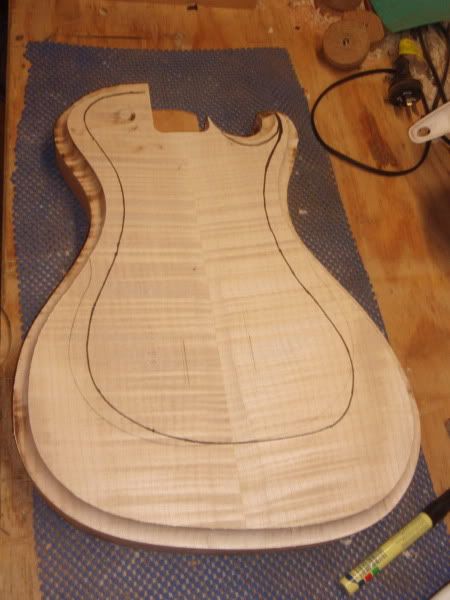
I have taken the bulk of the material off using a sanding disk on an angle grinder
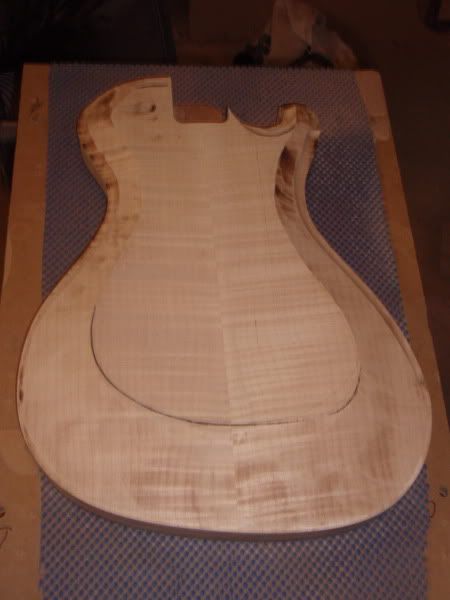
With the basic shape done with the angle grinder I fine tune the carve with a thumb plane. Pic Below.
The top is sanded with a randome orbital sander. It still has a few blemishes that need to be sanded out, but you get the basic idea.
Cheers,
Peter
-
7th December 2008, 08:19 PM #50
Senior Member
- Join Date
- Mar 2008
- Location
- melbourne
- Posts
- 138
Looks great Peter
 May I ask how you do your set in rebates for your controll knobs and swithes ?
Cheers Mark
-
7th December 2008, 08:58 PM #51
SENIOR MEMBER
- Join Date
- Sep 2008
- Location
- sydney
- Posts
- 2,370
looks sweet man
-
7th December 2008, 09:50 PM #52
Senior Member
- Join Date
- Sep 2007
- Location
- Sydney
- Posts
- 489
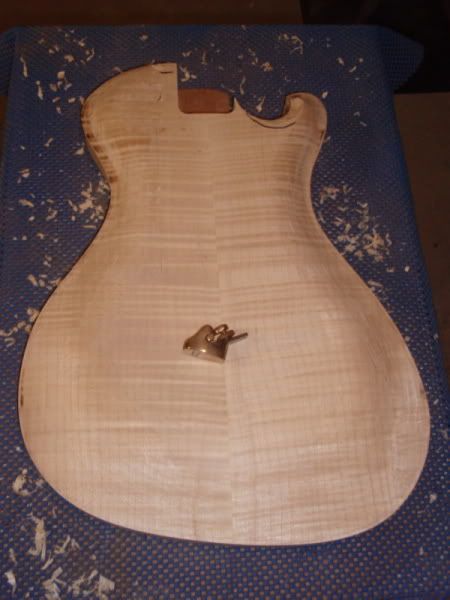
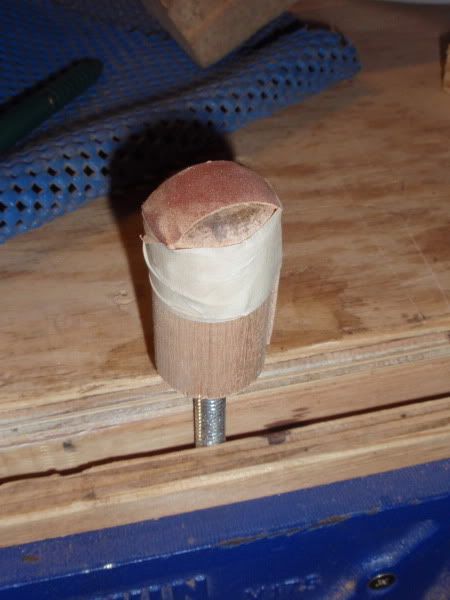
Thanks Mr K. All I use is a router bit, which I think is called a beading bit? Not sure, but it is like the inverse of a round over bit that makes the curved rebate. I take the bearing off the end and rescrew the allen nut back on, which happens to have a head with 5.5mm in diameter. I drill the holes for the potts at 5.5 mm first which makes a hole that controls the router bit on centre while I drill the rebates with a hand drill ( I would use a drill press if I had one). The holes can then be drilled out to the correct diameter one the rebate is to the desired depth. The bit can cause some tear out, especially with some highly figured timbers, so I made up a sanding bit shown below. It's just a piece of dowel with the end rounded over. The shaft is slightly off skew so there is a random wobble to it which helps prevent circular sanding marks. The sanding paper is taped on, and you just work through the grades. You need to use cloth backed sand paper as the paper backed just gets ripped to shreads. Not exactly cuttting edge technology, but works well for me.
Cheers,
Peter
-
7th December 2008, 09:57 PM #53
triple platinum umm .... thingo
- Join Date
- Sep 2006
- Location
- Melbourne, 'bushy' Donvale
- Age
- 52
- Posts
- 912
That's an interesting method for your control rebates, Pete.
Not one I've come across previously. seems to work exceedingly well.
-
7th December 2008, 11:06 PM #54
Senior Member
- Join Date
- Mar 2008
- Location
- melbourne
- Posts
- 138
Thanks for that Peter , I've got two builds started and have been wondering how to go about it.
Stu , if you have a different method I'd be interested to here it also .
Cheers Mark.
-
8th December 2008, 06:40 PM #55
Senior Member
- Join Date
- Sep 2007
- Location
- Sydney
- Posts
- 489
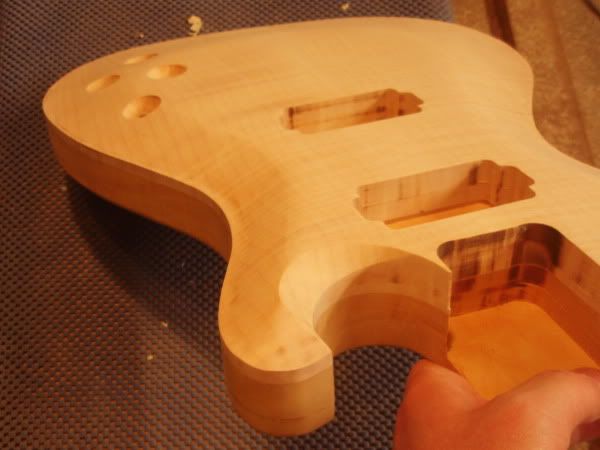
No worries Mr K. If anyone for that matter has any other ways of doing it, I'm all ears.
Some more pics,
Cheers,
Peter


-
8th December 2008, 08:17 PM #56
Senior Member
- Join Date
- Oct 2007
- Location
- Dandenong Ranges
- Age
- 51
- Posts
- 235
I agree with the positive comments on that neck Peter.....volute in particular is excellent and I love that dark Wenge
.
I believe it may be a "Cove Bit" you are referring to for the recessed controls?
These are trickier than they appear I reckon. You can get them looking great only to find the knobs don't sit down far enough to grab onto the pot shaft properly......and to get all the depths even on uneven surfaces is another trick in itself.
What I do admire is the thinking behind the sandpaper on the end of a broom handle idea! To me, so much about guitar building is trying to think you way around a task and that one is a ripper. Good stuff!
-
8th December 2008, 08:57 PM #57
triple platinum umm .... thingo
- Join Date
- Sep 2006
- Location
- Melbourne, 'bushy' Donvale
- Age
- 52
- Posts
- 912
I echo everything Ethereal said, Peter.
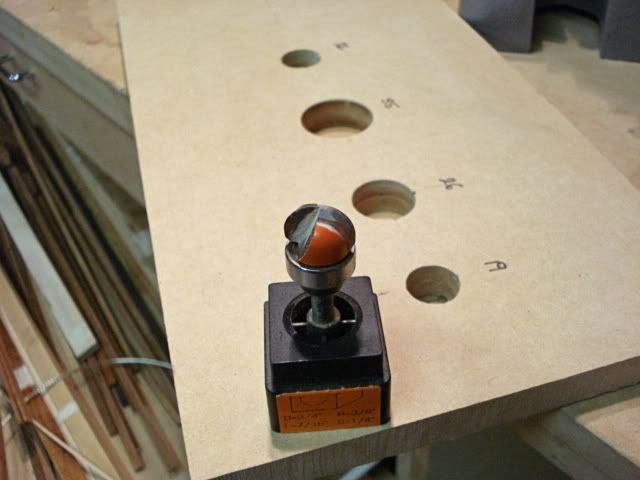
This is my method, which I guess doesn't differ dramatically.
The pic. says it all but for those that prefer a rundown, I've made a basic template with a few different diameter holes. The template gets double-sided taped and clamped in place, then the
coved bearing bit follows it's path. I prefer the template due to my fear of wrecking a freshly carved guitar top with a wondering router bit. For true arched tops, I'll cradle each side of the template
to keep things where they should be.
-
8th December 2008, 09:10 PM #58
Senior Member
- Join Date
- Oct 2007
- Location
- Dandenong Ranges
- Age
- 51
- Posts
- 235
-
8th December 2008, 09:10 PM #59
Senior Member
- Join Date
- Mar 2008
- Location
- melbourne
- Posts
- 138
Thanks for sharing Stu ,I purchased what looks like the same bit with something similar in mind.
And thank Peter for this small hijack.
Cheers Mark
-
8th December 2008, 09:22 PM #60
Senior Member
- Join Date
- Oct 2007
- Location
- Dandenong Ranges
- Age
- 51
- Posts
- 235
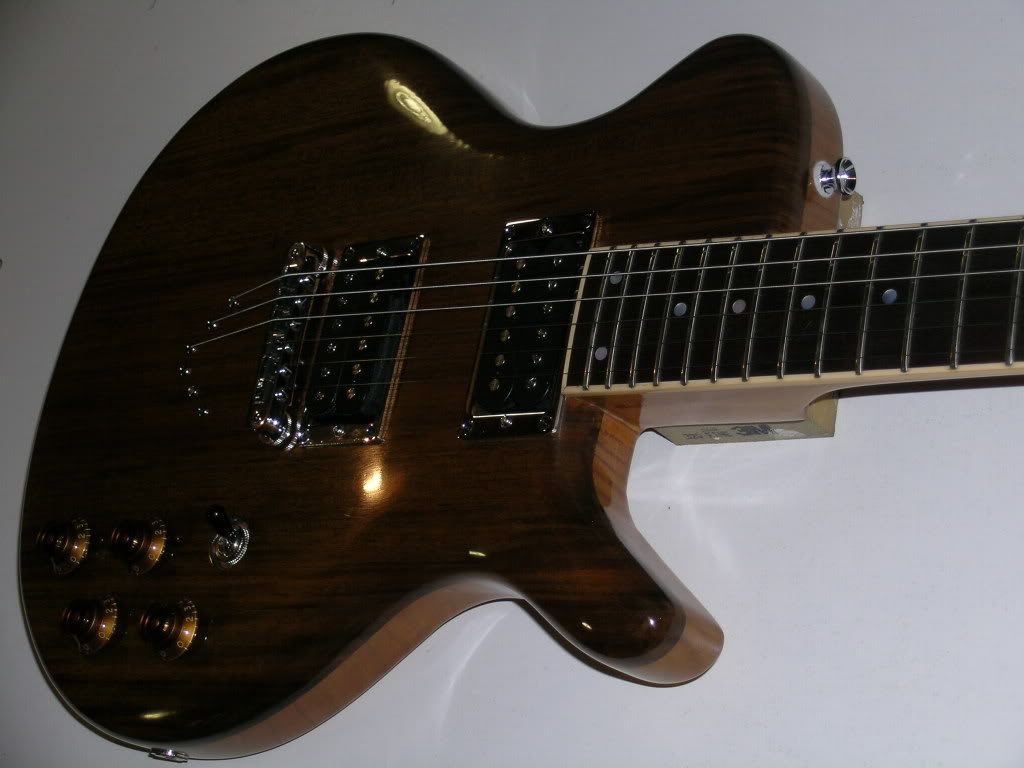
Now getting back on track, I just noticed the depth of the neck pocket.....which looks really thin? Is that just the photo deceiving my eyes or have you left about 5mm of body depth in the pocket?
The reason I ask is that on a really thin body I did a while ago I had this dilemma and was worried the whole way through that I had not left enough meat on....it was a set neck like I assume this is. I ended up with about 12mm of body and it would flex ever so slightly! I went ahead regardless, glued the neck in, finished the build and there were and are no problems at all.
Is there a reason for the thin pocket? Perhaps, more neck wood may add something to the mix? Dunno, just an interesting point I thought.
Here's a reasonable pic of how mine ended up, note thick neck tenon and thin body, in fact you almost can't tell the difference...............

 But have a desire to buil a musical instrument. Looks like a guitar is a good place to start.
 Reply With Quote
 Cheers, Stu
Similar Threads
-
Finding Engineering Design Software For Automatic Machine Design
By davidWilliams in forum METALWORK FORUMReplies: 2Last Post: 11th January 2010, 10:41 PM -
PRS double cutaway plans or template.
By asteam in forum MUSICAL INSTRUMENTSReplies: 4Last Post: 26th August 2009, 07:59 PM -
Cutaway Dread
By Different in forum MUSICAL INSTRUMENTSReplies: 18Last Post: 8th September 2008, 11:48 PM -
Single Bed
By barking770 in forum WOODWORK PICSReplies: 2Last Post: 7th July 2008, 12:23 PM -
Guitar plans with cutaway
By thetassiebfg in forum MUSICAL INSTRUMENTSReplies: 10Last Post: 2nd September 2006, 12:03 PM
