

 Thanks: 0
 Likes: 0
 Needs Pictures: 0
 Picture(s) thanks: 0
Results 16 to 30 of 108
-
3rd March 2008, 06:19 PM #16
 Senior Member


- Join Date
- Sep 2007
- Location
- Sydney
- Posts
- 489

Sound Advise,
It was the body cap, not the headstock that warped (sorry i was a bit vague there). I clamped it down, but was with little sucess. I had it stacked on spaces, but the spaces were not wide enough, which allowed the wood to twist. I think the trick is to have both weight and and lots of spaces the same thickness that run the entire width of the board.
Although they had a bit of a twist, I jointed them and glued the centre while clamped it flat to the bench, which helped a bit. And by the end there was onlt about 0.5mm warp off the body, which clamped on fine.
I had alot more trouble with another fiddlebacked blackwood top I ordered, which was resawn crooked to start with, plus got a twist in it. It was warped within less than a week of receiving it enven though I stored in in clamps. I recon it's part of working with figured timbers.
Thanks for the feedback,
peter
-
3rd March 2008 06:19 PM # ADSGoogle Adsense Advertisement
- Join Date
- Always
- Location
- Advertising world
- Posts
- Many
-
3rd March 2008, 06:49 PM #17
 Manager tool buying
- Join Date
- Apr 2005
- Location
- Melbourne Outer East right next to mount dande
- Age
- 73
- Posts
- 1,859
i have a heap of 3/8" sets clamped up which i know will be pesky once they're out of the cage - like i said work fast, know what to do and you'll have the little b#ggers clamped down and glued before they know what hit em
i am thinking in future of getting it in thicker boards to resaw as needed
i have some 20mm curly maple that has sat unclamped and not really moved at allray c
dunno what's more fun, buyin' the tools or usin' em'
-
3rd March 2008, 09:50 PM #18
Senior Member
- Join Date
- Aug 2007
- Location
- Melbourne
- Age
- 33
- Posts
- 200
tim290280,
Sorry I'm not sure if it is the right term, but its the process of clamping your caps to stop them warping with the use of spaces between each.
Like so:

Sorry for hijacking your thread Peter.
Deano
-
3rd March 2008, 11:05 PM #19
Manager tool buying
- Join Date
- Apr 2005
- Location
- Melbourne Outer East right next to mount dande
- Age
- 73
- Posts
- 1,859
called stickering or sticker stack
i generally use 5 spacers along and clamps in the centre and both ends
sometimes i even have 3 long boards lengthwise top and bottom as well
they dont call me compsessive impulsive for nothingray c
dunno what's more fun, buyin' the tools or usin' em'
-
4th March 2008, 04:48 PM #20
Senior Member
- Join Date
- Sep 2006
- Location
- Sydney
- Age
- 62
- Posts
- 423
Nice work peter ... I guess you're a dab hand with the router by now. Do you cut the inlay with a knife or a power tool?
Strictly speaking, that isn't a star of David though. The Star of David has six points from two crossed triangles, a symbol of Judaism.
My ex-catholic childhood recesses say if anything, you have a Star of Bethlehem.
re: the stickerstack - if you are correctly spacing your caps - or any wood whatsoever - so that air gets to all sides, i think you can probably dispense with the clamps, as well, no?
-
4th March 2008, 07:49 PM #21
Senior Member
- Join Date
- Sep 2007
- Location
- Sydney
- Posts
- 489
Thanks Contrebass,
The shell is cut with a small jeweler's saw and the inlay is cut using a small dremel type tool. I usually tidy up the edges with a small chisel as well. I've got the inlay in progress for the single cut away I'm working on, so I'll take some progress pics as I go.
Your right about the star too.
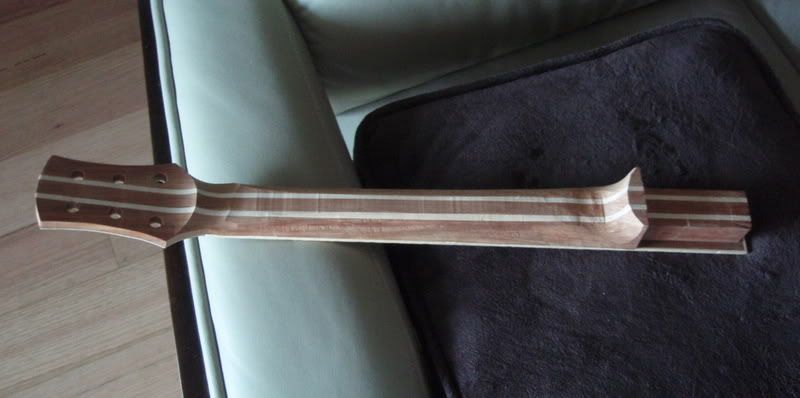
I've got the neck roughed out for the single cut away. See below.
Catch ya,
Peter
-
4th March 2008, 10:20 PM #22
SENIOR MEMBER
- Join Date
- Feb 2007
- Location
- sydney
- Age
- 35
- Posts
- 580
nice looking neck. im looking forward to seeing the build finished.
-
4th March 2008, 10:51 PM #23
Senior Member
- Join Date
- Sep 2006
- Location
- Sydney
- Age
- 62
- Posts
- 423
So what do you use for removing the wood off the back of the neck then? A router again?
-
5th March 2008, 07:26 PM #24
Senior Member
- Join Date
- Sep 2007
- Location
- Sydney
- Posts
- 489
I cut the timber off the back with a bandsaw and rough out the shape with a combination of belt sander, rasp, and spokeshave.
Peter
-
8th March 2008, 11:23 PM #25
Senior Member
- Join Date
- Sep 2007
- Location
- Sydney
- Posts
- 489
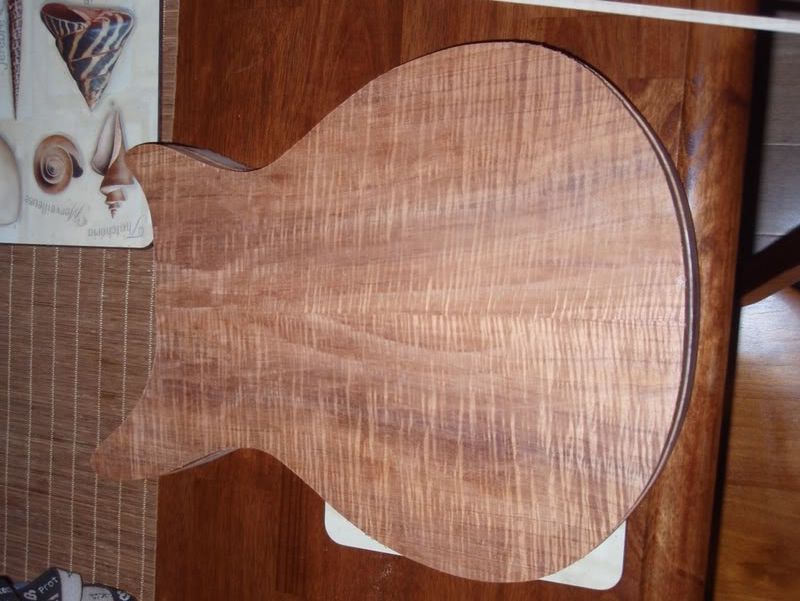
Hi,
Got an update on the double cut away I've got going. Have the top jointed and glued on with the binding rebate routered also.
Cheers,
Peter
-
9th March 2008, 11:23 AM #26
???????
- Join Date
- Mar 2007
- Location
- Adelaide Hills
- Posts
- 242
Looking awesome, love the top!

-
12th March 2008, 07:50 AM #27
New Member
- Join Date
- Mar 2008
- Location
- Dallas, TX, USA
- Posts
- 2
great work! that top is KILLER!!!!
-
5th April 2008, 01:09 PM #28
Senior Member
- Join Date
- Sep 2007
- Location
- Sydney
- Posts
- 489
Hi,
Thought I'd post some progess on the single cut away.
Picture 1: I've got the binding on. The binding is laminated tassie oak veneer, which gives a nice contrast with the balck wood cap and body.
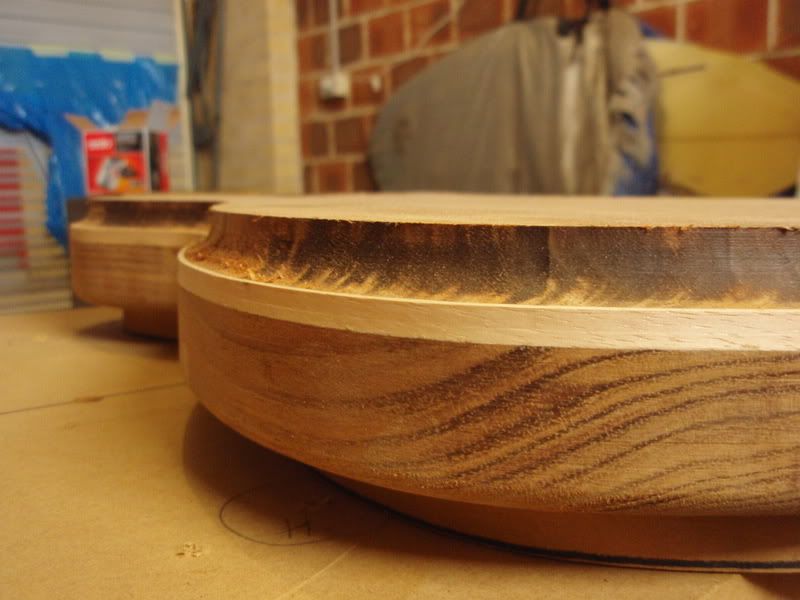
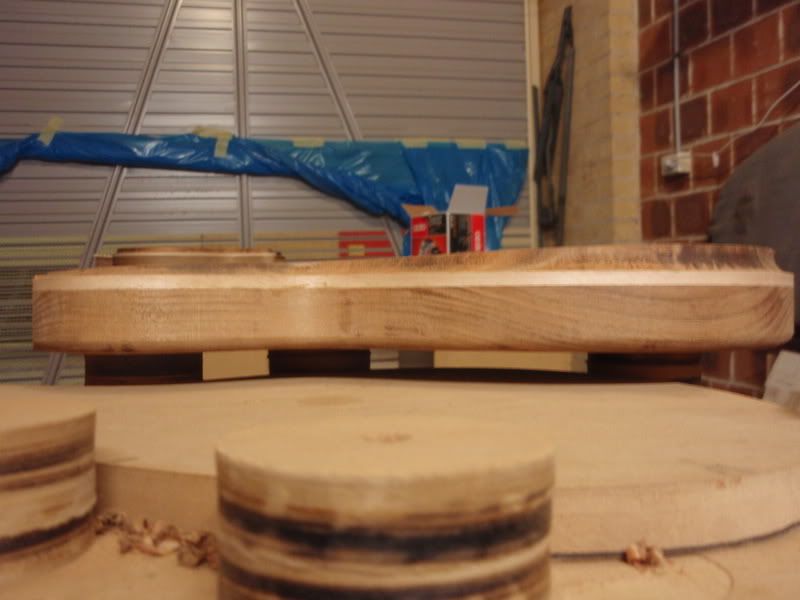
Picture 2: With the binding on, I started routing an angle (2.6deg) on the face to match the neck angle.
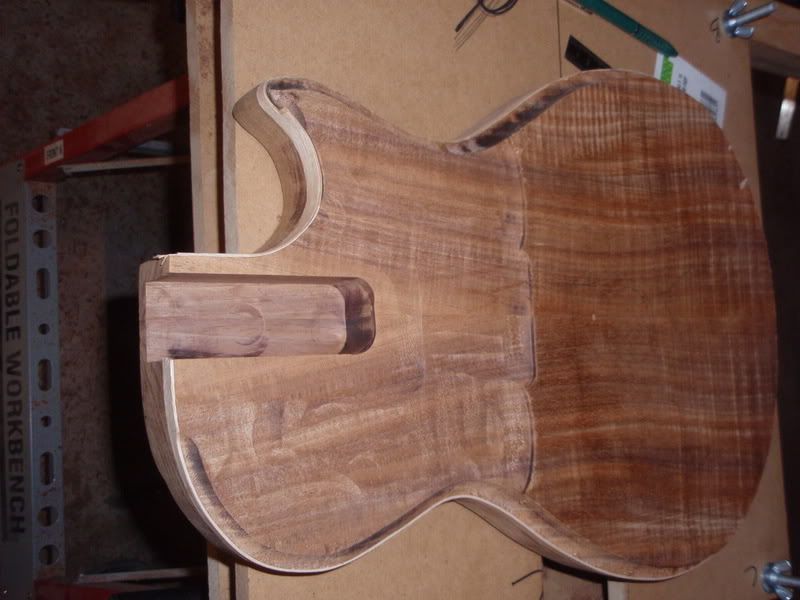
Picture 3: From the end of the fretboard to the tail piece I also routed an angle on the face (1.7 degrees). I am going to blend the face angle into the carve, which will work well I recon. The body is slightly smaller than a regular les paul and the carve is substantially thicker, which is why I've angled it in this way. Pic below shows the angles.
Cheers,
Peter
-
5th April 2008, 03:51 PM #29
SENIOR MEMBER
- Join Date
- Feb 2007
- Location
- sydney
- Age
- 35
- Posts
- 580
looking nice. when do you forsee these builds being finished?
-
5th April 2008, 11:30 PM #30
Senior Member
- Join Date
- Aug 2007
- Location
- Melbourne
- Age
- 33
- Posts
- 200
Very nice/clean binding! wow!.
There is nothing better than wood binding!

 Reply With Quote

Similar Threads
-
A small Box Photo story
By Wood Borer in forum WOODWORK PICSReplies: 52Last Post: 14th October 2005, 08:56 PM -
Can't get a clean cut
By Danster in forum TRITON / GMCReplies: 14Last Post: 1st June 2004, 08:54 PM
