

 Thanks: 0
 Likes: 0
 Needs Pictures: 0
 Picture(s) thanks: 0
Results 46 to 60 of 108
-
13th May 2008, 02:44 AM #46
 SENIOR MEMBER


- Join Date
- Jan 2008
- Location
- Tamworth
- Age
- 51
- Posts
- 550

There is more Pop on the Top, lets face it, its what LP's are all about, aint they!

So, No. 1 for me too.
Just copy everything stu said and stick a cherry on top.
Keep the great work! Cheers!Mongrel
Some inspirational words:
"Talent is cheaper than table salt. What separates the talented individual from the successful one is a lot of hard work." -Stephen King.
Besides being a guitar player, I'm a big fan of the guitar. I love that damn instrument. -Steve Vai"Save me Jeebus!" -Homer Simpson
-
13th May 2008 02:44 AM # ADSGoogle Adsense Advertisement
- Join Date
- Always
- Location
- Advertising world
- Age
- 2010
- Posts
- Many
-
13th May 2008, 11:47 AM #47
Senior Member
- Join Date
- Feb 2005
- Location
- somewhere
- Posts
- 295
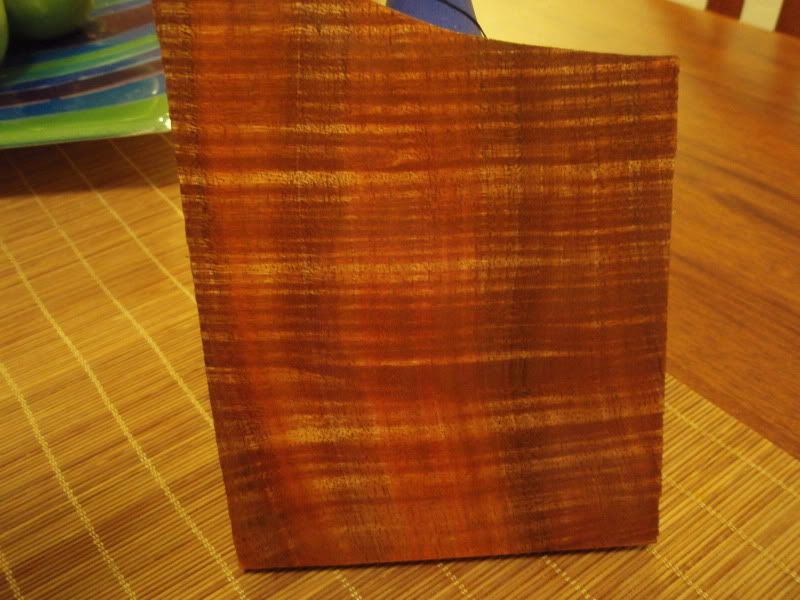
I like the first one too, more clarity and definition in the fiddleback.
-
13th May 2008, 07:12 PM #48
SENIOR MEMBER
- Join Date
- Jul 2004
- Location
- Sydney
- Posts
- 1,153
The first is better by far!!! In my opinion staining is a sin. If timber is ugly enough to need stain it is too ugly to use with or without. Originally Posted by peterbrown

RgdsRoss"All government in essence," says Emerson, "is tyranny." It matters not whether it is government by divine right or majority rule. In every instance its aim is the absolute subordination of the individual.
-
15th May 2008, 09:09 PM #49
Senior Member
- Join Date
- Sep 2007
- Location
- Sydney
- Posts
- 489
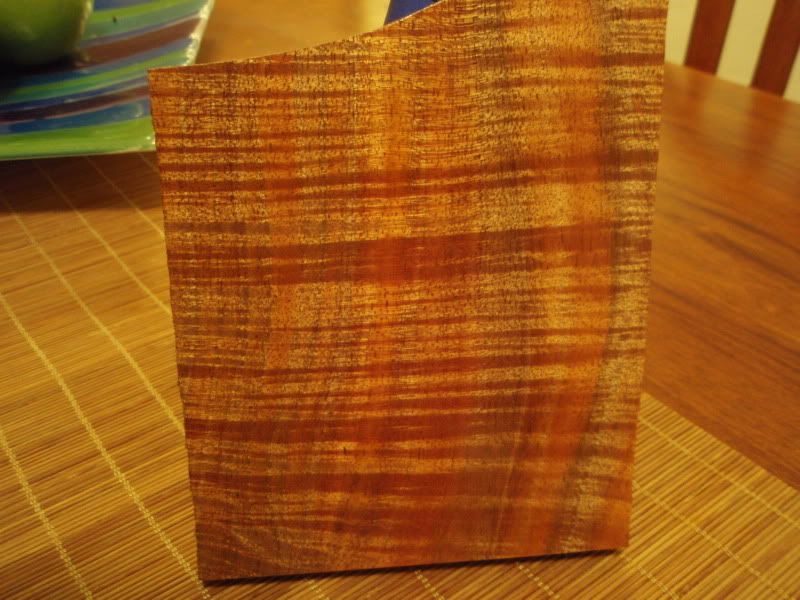
I agree. Unstained is definately better [1]. When you tilt it, it has a 3d effect as ripples appear and disappear up and down the piece. Can't wait to see it on the finished guitar.
Thanks for the input,
Peter
-
15th May 2008, 10:17 PM #50
SENIOR MEMBER
- Join Date
- Jul 2004
- Location
- Sydney
- Posts
- 1,153
Peter
I love this Guitar it is just too right! Simple, Understated, Beautiful!
If I had any money I would make you an offer for it!
Rgds
RossRoss"All government in essence," says Emerson, "is tyranny." It matters not whether it is government by divine right or majority rule. In every instance its aim is the absolute subordination of the individual.
-
25th May 2008, 10:01 PM #51
Senior Member
- Join Date
- Sep 2007
- Location
- Sydney
- Posts
- 489
Thanks for the very kind words different. It's about the nicest thing I think anyone has said about any of my builds. Sorry not for sale, my sister will kill me if I sell her guitar on her after she's been waiting for 6 months.
The grainfiller I have used is tinted "intergrain" water based filller over a wiped on coat of weak blonde shellac (about 12%).
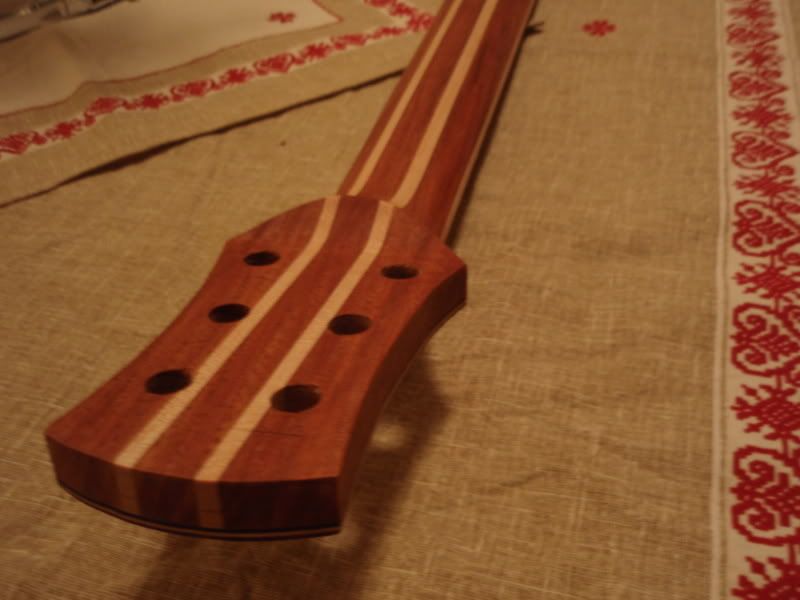
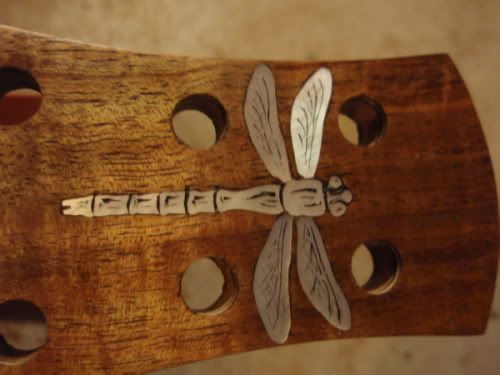
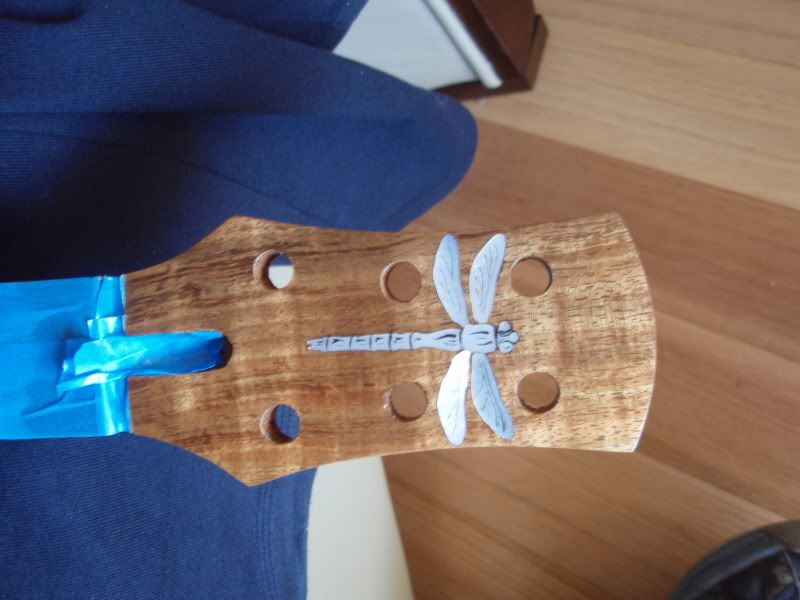
I have ingraved the pearl inlay on the headstock and she's almost ready to start laying on the coats,
cheers,
Peter
-
25th May 2008, 10:03 PM #52
SENIOR MEMBER
- Join Date
- Jan 2008
- Location
- Tamworth
- Age
- 51
- Posts
- 550
Exquisite!
Balanced and beautiful
Cheers!Mongrel
Some inspirational words:
"Talent is cheaper than table salt. What separates the talented individual from the successful one is a lot of hard work." -Stephen King.
Besides being a guitar player, I'm a big fan of the guitar. I love that damn instrument. -Steve Vai"Save me Jeebus!" -Homer Simpson
-
25th May 2008, 10:18 PM #53
the youngin'
- Join Date
- Oct 2007
- Location
- Sydney
- Age
- 33
- Posts
- 120
that dragonfly inlay is out of this world!
-
25th May 2008, 10:27 PM #54
triple platinum umm .... thingo
- Join Date
- Sep 2006
- Location
- Melbourne, 'bushy' Donvale
- Age
- 52
- Posts
- 912
I think Ross's comments can be echoed by the majority of us also ,Peter.
An extremely tasteful combination really works wonders and this is it.
BTW...........have you got any in progress inlay pics of the dragonfly and your methods with ingraving? This also is a corker !!!
-
26th May 2008, 11:22 PM #55
Senior Member
- Join Date
- Sep 2007
- Location
- Sydney
- Posts
- 489
Sorry,
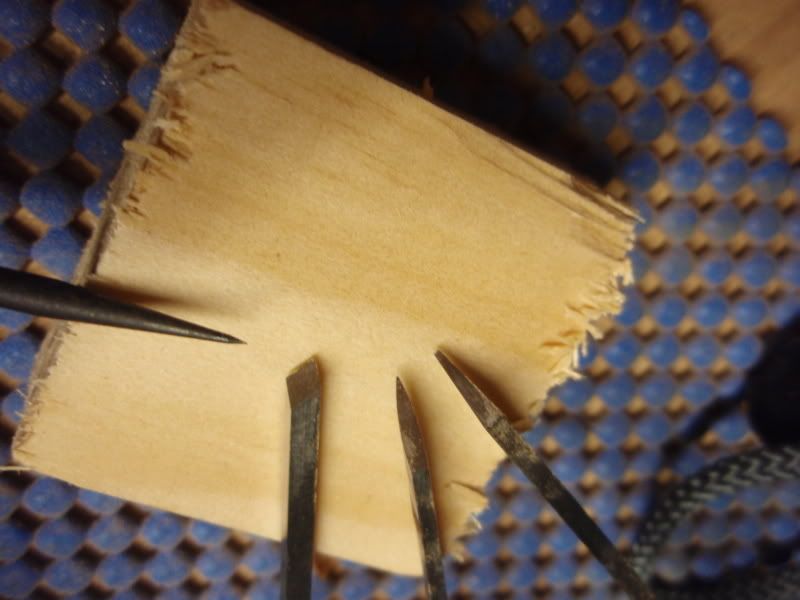
no pics of the ingraving process, however I took a couple pics of the ingraving tools and would gladly describe the process.
The tools below are just an engraving kit from Stewmac, which is money well spent for me.
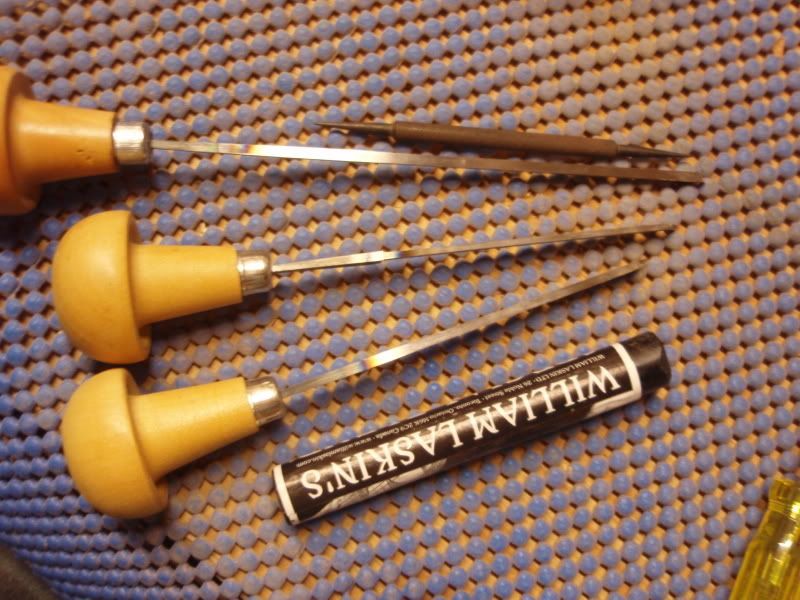
The pics below are a close up of the ends of the chisels. From left is the scribe, which is alot more usefull than just engraving, however has to be very sharp. It is used to scratch a path for the gouging chissels to follow. for doing symetrical patterns it is advised to use templates to guide the scribe. Before engraving I mark up the patterns I am going to engrave with pencil and mark free hand, as I haven't done anything with straigt of parrallel lines as of yet. Second from the left is a pointed gouge that is good for getting "tear drop" shapes with varrying width, as it gouges deep easily and you contro lthe width of the line by going deeper. Third from the left is a finer pointed gouge and is good for the finer "hair lines". Much more difficult to control as it easily skips accross the surface. the end piece has a flat end ( as apposed to pointed) and is for drawing consistent wide lines and has to be sceibed very carefully with a guide channel.
The pearl has to be prepared by sanding up to 600 minimum as any coarser wil leave scatched as large as some of the engraving.
Once the engraving is done you rub the black stich , which is alot like a crayon which fills the channels, scrape it with a flat piece of plastic, and your done. You want to seal it as quickly as possible.
I have skipped over it very quickly, however really the rest is up to trial and error and the limit is your artistic ability. What I have described to you is basically what is provided as instructions with the kit.
Cheers,
Peter
-
28th May 2008, 10:19 AM #56
SENIOR MEMBER
- Join Date
- Jul 2004
- Location
- Sydney
- Posts
- 1,153
No problem Peter I dont hand out compliments all that often but it is well deserved here good work! Hope my first Guitar is as good. Originally Posted by peterbrown
Rgds
RossRoss"All government in essence," says Emerson, "is tyranny." It matters not whether it is government by divine right or majority rule. In every instance its aim is the absolute subordination of the individual.
-
28th May 2008, 01:33 PM #57
SENIOR MEMBER
- Join Date
- Feb 2007
- Location
- sydney
- Age
- 35
- Posts
- 580
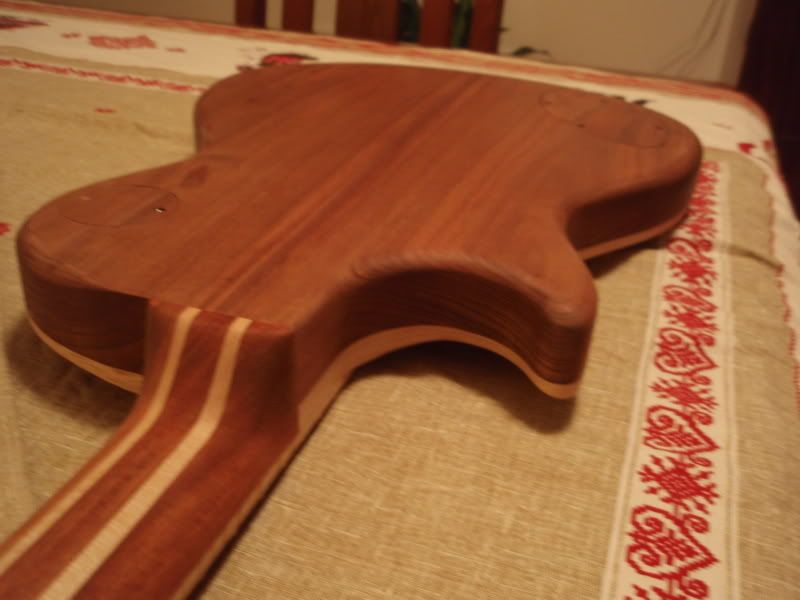
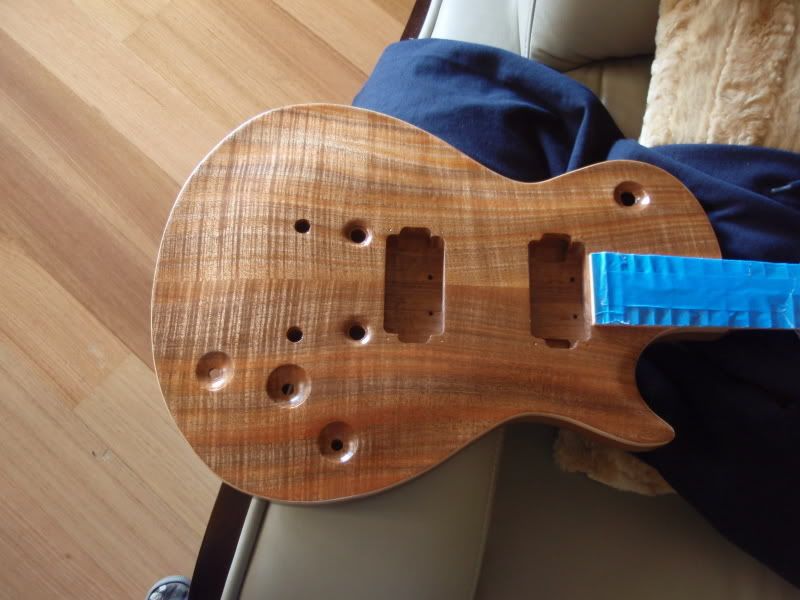
looking great. i assume it will be left natural after seeing the timber cavity covers.
great looking inlay too.
-
28th May 2008, 07:44 PM #58
Senior Member
- Join Date
- Sep 2007
- Location
- Sydney
- Posts
- 489
natural it is.
-
8th July 2008, 08:49 PM #59
Senior Member
- Join Date
- Sep 2007
- Location
- Sydney
- Posts
- 489
Have been finishing the guitar over the past few weeks. It has been slow with the cool weather and finishing of the evening time after work. However have some progress pic to present. Unfortunately I have to hold off before putting on the top coats, as I have had to order some more finish. When I first opened the tin, I accidentally punctured the tin. As I result I put the finish into a replacement tin. When I opened the replacement tin to apply the finish, it was a light orange/brown in colour. When I poured part of the contents into a pot, the bottom of the pot was then exposed to show the bottom of the tin had rusted out. Which explains the colour. So for future refference, you cannot put water based lacquer in any old tin.
Pics below are with the base coats finished before level sanding,
Cheers,
Peter
-
8th July 2008, 11:09 PM #60
triple platinum umm .... thingo
- Join Date
- Sep 2006
- Location
- Melbourne, 'bushy' Donvale
- Age
- 52
- Posts
- 912
Seriously nice, Peter.
I like how the waterbased gear really shows the timber nuances without
subtly yellowing the finished piece.
It really helps bring that figured blackwood into 3d territory.


 Reply With Quote


 Cheers, Stu
 Similar Threads
-
A small Box Photo story
By Wood Borer in forum WOODWORK PICSReplies: 52Last Post: 14th October 2005, 08:56 PM -
Can't get a clean cut
By Danster in forum TRITON / GMCReplies: 14Last Post: 1st June 2004, 08:54 PM
