

 Thanks: 0
 Likes: 0
 Needs Pictures: 0
 Picture(s) thanks: 0
Results 1 to 15 of 108
-
12th December 2007, 10:40 PM #1
 Senior Member


- Join Date
- Sep 2007
- Location
- Sydney
- Posts
- 489
 'Star of David' Singe cut away Build
Hi,
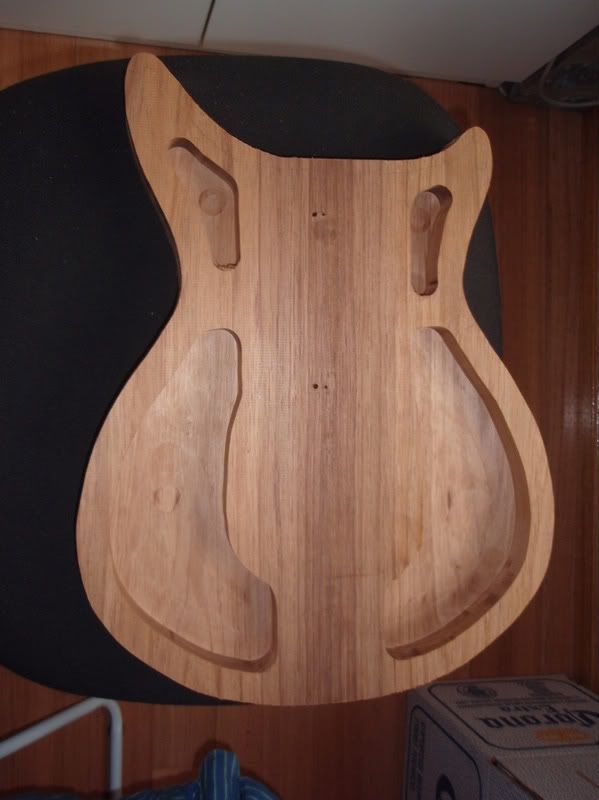
Thought I'd share a build I've got going at the moment.
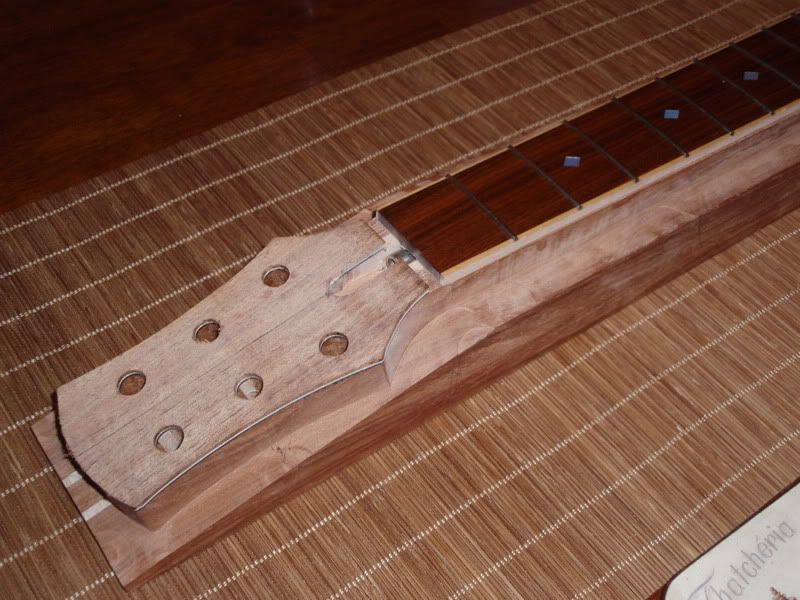
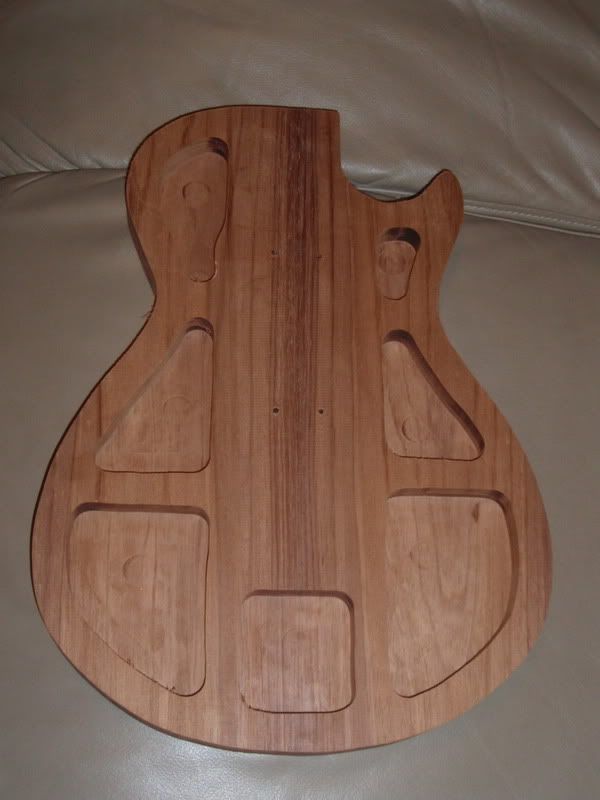
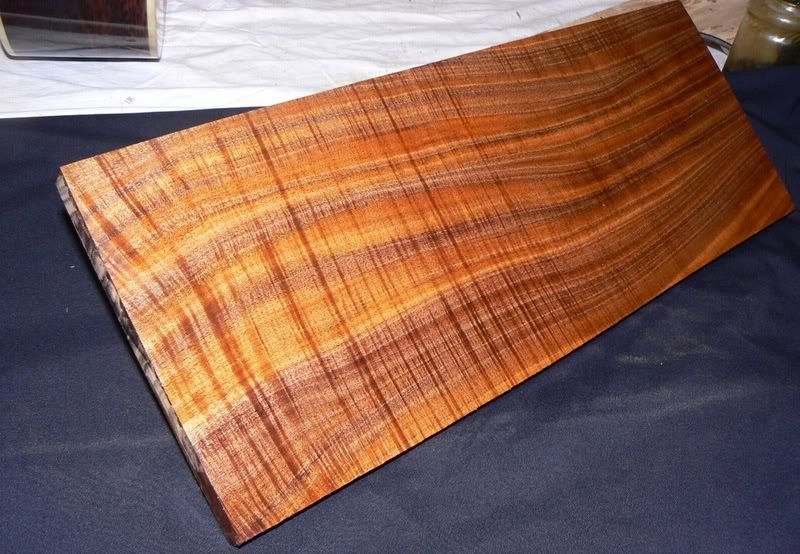
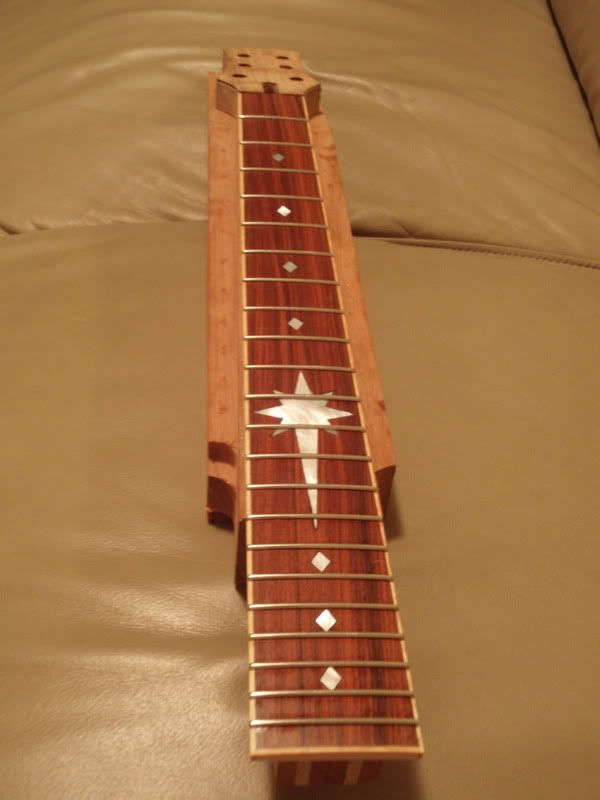
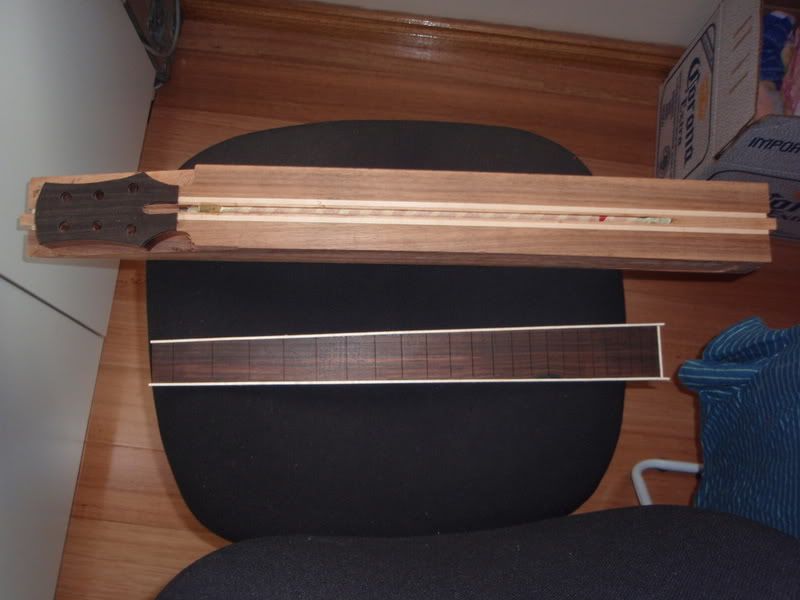
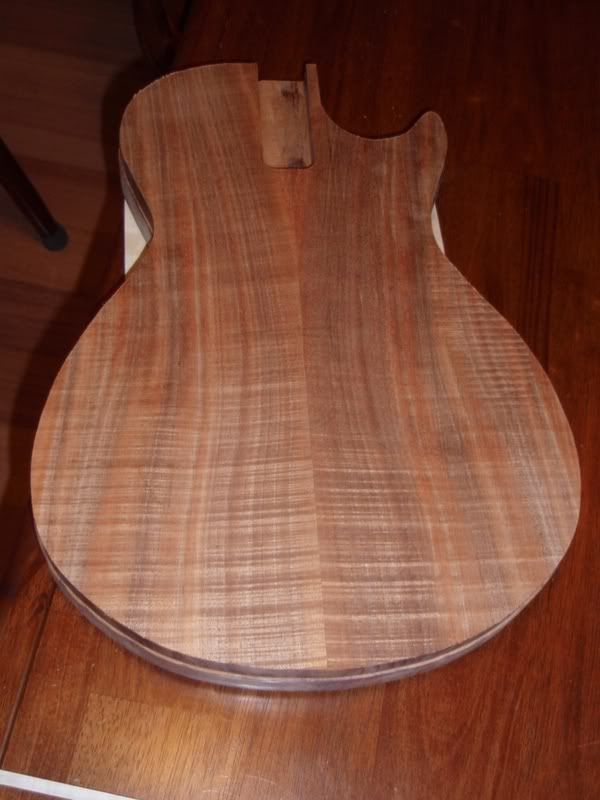
The neck is laminated New Guinea rosewood and rock maple. Body is chambered blackwood, and I've got a fiddlebacked blackwood top to go with it. Fretboard is Santos rosewood with mother-of-pearl inlay. Picks of progress are below.
Cheers.
-
12th December 2007 10:40 PM # ADSGoogle Adsense Advertisement
- Join Date
- Always
- Location
- Advertising world
- Posts
- Many
-
12th December 2007, 11:15 PM #2
Member
- Join Date
- Nov 2006
- Location
- Adelaide
- Posts
- 79
Nice job peter - and very nice bit of blackwood.
 You guys are getting your hands on too much nice timber!
cheers
ArcherNever argue with idiots, they drag you down to their level and beat you with experience - Dilbert
-
13th December 2007, 02:43 AM #3
SENIOR MEMBER
- Join Date
- Feb 2007
- Location
- sydney
- Age
- 35
- Posts
- 580
great looking build in progress. like the inlay, simple but elegant. nice timber selection.
interesting method for making the neck, what made you chose to do the neck like that? will there be much wasted timber?
-
13th December 2007, 12:38 PM #4
Senior Member
- Join Date
- Sep 2007
- Location
- Sydney
- Posts
- 489
Thanks fellas,
To be honest this is the first time I've made the neck this way, which I think I'll do in the future. Normally I would rough cut the neck out prior to gluing the fretboard on, however a times found that the fretboard would absorb some of the moisture from the glue and swell enough to give a slight back bow, however gluing it onto a solid block blank is rigid enough to resist backbow so I don't have to be too concerned about keeping the neck straight during gluing. The other advantage is having a good square base and sides to sit on the bench and put it in the vice whilst doing inlay, radius fretboard, filing frets, and hammering frets on a solid flat surface.
You do get some waste, which I suppose in unavoidable using a laminated neck. In future I might prepare the blank narrower with extra bits on the headstock, but the way the timber was cut, was perfect width to include the headstock, so I thought I may as well use the width.
-
13th December 2007, 06:39 PM #5
Senior Member
- Join Date
- Jan 2006
- Location
- aust
- Posts
- 271
Its the only way to build a neck!
Using thinner stock, causes back or forward bow as Peter mentioned. To avoid this, you need to take this into account when using thinner stock.
-
14th December 2007, 11:18 PM #6
triple platinum umm .... thingo
- Join Date
- Sep 2006
- Location
- Melbourne, 'bushy' Donvale
- Age
- 52
- Posts
- 912
There's no doubting that is the most stable way to build a neck.
What I've often wondered was how much deflection you get after bandsawing the neck thickness and taper ?
I'm sure there would be some. Minimal from my experience, as timber is removed , the tensional properties in the neck would readjust to suit.
Very nice, clean work there Peter.
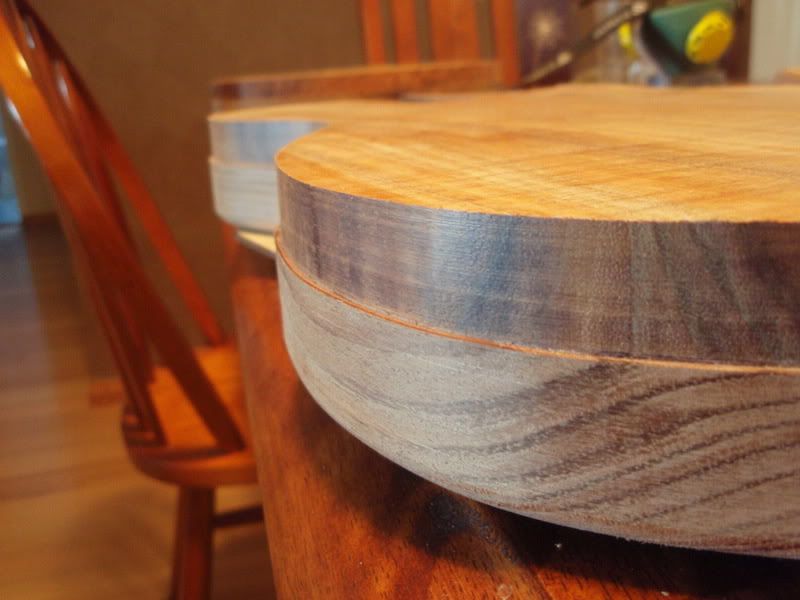
What's your f/board binding detail ? I can see a bit of white/cream colour there.
Is that another binding on the lower section?
Lovely figured q/sawn blackwoood cap (from Tim Spittle, yeah?) and nice body, and I'm also a big fan of chambering where applicable.
I'll enjoy the updates when they come in.
cheers, Stu
-
15th December 2007, 10:05 AM #7
Senior Member
- Join Date
- Sep 2007
- Location
- Sydney
- Posts
- 489
Hi OZ,
I guess only time will tell regarding deflection of the neck after bandsawing. Will let you know the result once I have.
The fretboard binding is curly maple. The colour difference is just due to some linseed oil I have applied to the freboard. I like to apply oil to the fretboard early on to prevent grubby fingerprints from staining the fretboard while I'm working on it.
Cap is from Tim. What can I say... He has some of the best stock I've seen, and the price is pretty good I think aslo, at least for what you get.
Cheers,
Peter
-
9th January 2008, 07:20 PM #8
Senior Member
- Join Date
- Sep 2007
- Location
- Sydney
- Posts
- 489
Hi,
Have done the inlay on the headstock. Have had the top cap warp a little on me. This is mostly my fault since I stored is badly - won't do that again! The top has twisted about 2mm, cupped about 1mm, and bowed about 1mm. I have postponed this build while I've got the top clamped down flat for a few weeks. Don't know how well it will work. Am interested in anybody's thoughts about what is the best thing to do? I would rather avoid thicknessing or sanding down if possible.
Cheers,
Peter
-
9th January 2008, 07:30 PM #9
Senior Member
- Join Date
- Sep 2007
- Location
- Sydney
- Posts
- 489
Hi,
Got another build going which I thought I may as well share on the same thread.
It's a double cut away. Specs so far are as follows.
Body - Chambered blackwood with carved fiddle backed blackwood top.
neck - laminated blackwood and rock maple. Ebony headstock face
fingerboard - stiped ebony with maple binding 25' scale. Abalone inlay.
Picks of progess thus far are as below.
Cheers,
Peter
-
2nd March 2008, 08:24 PM #10
Senior Member
- Join Date
- Sep 2007
- Location
- Sydney
- Posts
- 489
Hi all,
have neglected this thread a bit, so i thought I'd post some progress on the single cut away. To be honest I haven't had much of a chance to do guitar building lately .
.
Have glued the top on the body and routed the binding rebate.
Will have some more progress pic coming.
Peter
-
2nd March 2008, 10:38 PM #11
 Manager tool buying
- Join Date
- Apr 2005
- Location
- Melbourne Outer East right next to mount dande
- Age
- 73
- Posts
- 1,859
how did you go with the warped headstock?
timber must have had a higher moisture content than it should have
how long did you have the board before working it?
define stored badly?ray c
dunno what's more fun, buyin' the tools or usin' em'
-
2nd March 2008, 10:44 PM #12
triple platinum umm .... thingo
- Join Date
- Sep 2006
- Location
- Melbourne, 'bushy' Donvale
- Age
- 52
- Posts
- 912
Great pics Peter. And it's true, a picture does tell a thousand words.
Nice progress, love the chambering and I'm glad you've made great use of that Blackwood top from Tim.
Hmm......and that ebony headplate...lubberly
Very Nice indeed !!!!
cheers., Stu
-
3rd March 2008, 09:26 AM #13
Manager tool buying
- Join Date
- Apr 2005
- Location
- Melbourne Outer East right next to mount dande
- Age
- 73
- Posts
- 1,859
the best way to get a cap back to flat is wet the surface
imagine the wood will expand on the side that is damped down and pull itself in the opposite direction hopefully to a flatter aspect
when done clamp flat and leave till well dried out
thin tops warp like crazy and in double quick time even when well seasoned
- curly maple is a real pig - the ripples are caused by the weight of the tree pressing down so it grows in little wiggles - once the weight is off and the boards are sawn thin the stress is released and its party time - the wood fibres bend and twist in all directions
you just gotta grit yer teeth work fast and clamp tight
if it ain flat press it flat while you joint the edges
when glueing em up use plenty wieght to flat them boards
clamp down with mega clamps and straight boards when glueing onto the body - once its glue down tight it wont ever move
make sure all moisture is well dried before working
btw thats a very nice looking project you got thereray c
dunno what's more fun, buyin' the tools or usin' em'
-
3rd March 2008, 05:00 PM #14
Senior Member
- Join Date
- Aug 2007
- Location
- Melbourne
- Age
- 33
- Posts
- 200
I have had similar problems with warped tops lately.
How are you storing the tops now? One on top of the other or have you got them sticked?
Recently I did a little test with some 5mm Blackwood caps. Stickering and clamping one set, and simply clamping down the other. After a few weeks of clamping I found the stickered stack had responded well with perfectly flat boards, and the simple clamp set still had a slight warp..
Your best bet is to wait until the boards are perfectly flat before gluing, it just takes the stress out of the process and will minimize any movement later on in life, if there is any.
Deano
-
3rd March 2008, 06:16 PM #15
Complete Novice
- Join Date
- Feb 2008
- Location
- Western Australia
- Age
- 46
- Posts
- 110
Deano: What do you mean by "Stickering"?
Pete: Good work so far. Is it the wood that isn't dry or is it re-absorbing moisture?

 Reply With Quote

Similar Threads
-
A small Box Photo story
By Wood Borer in forum WOODWORK PICSReplies: 52Last Post: 14th October 2005, 08:56 PM -
Can't get a clean cut
By Danster in forum TRITON / GMCReplies: 14Last Post: 1st June 2004, 08:54 PM
