

 Thanks: 0
 Likes: 0
 Needs Pictures: 0
 Picture(s) thanks: 0
Results 1 to 15 of 63
-
10th June 2012, 08:35 AM #1
 Senior Member


- Join Date
- Jul 2005
- Location
- Victoria Australia
- Posts
- 116
 Tasmanian Blackwood Superstrat (SS6)
Yesterday I started working with some really nice Tasmania Blackwood which I hope to develop into a six string superstrat with a carved top.
Plan on black hardware with a recessed Floyd and some bareknuckle pickups.
Still unsure un the fingerboard, will be either Macassar ebony or Birdseye maple. Maybe if I can find something Australian that's amazing I might buy it but it'd have to be well and truely dry and ready to work with
First of all, some Mahogany for the back:
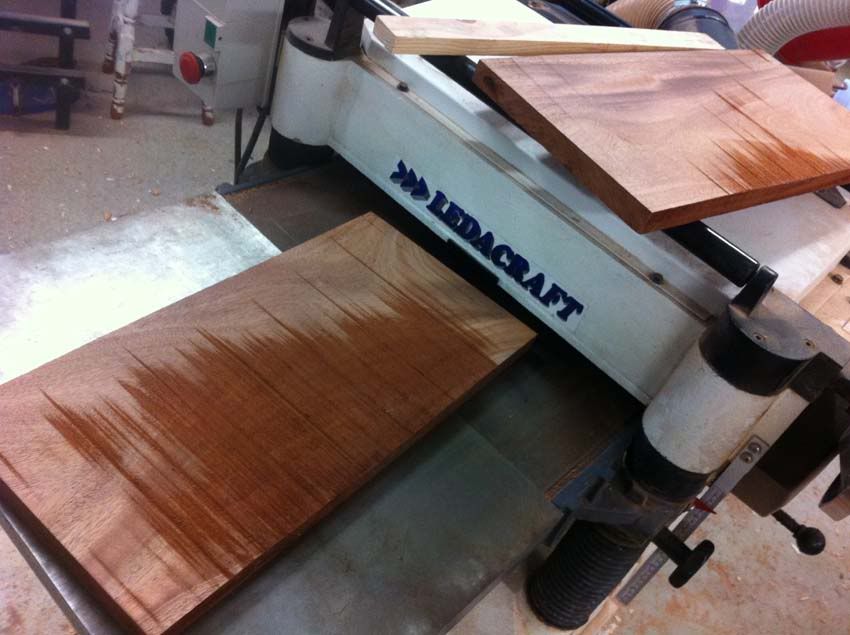
The Tasmanian Blackwood:
Here I am cutting enough off the edge of the plank so I can use it for the neck also!
Sizing things up:
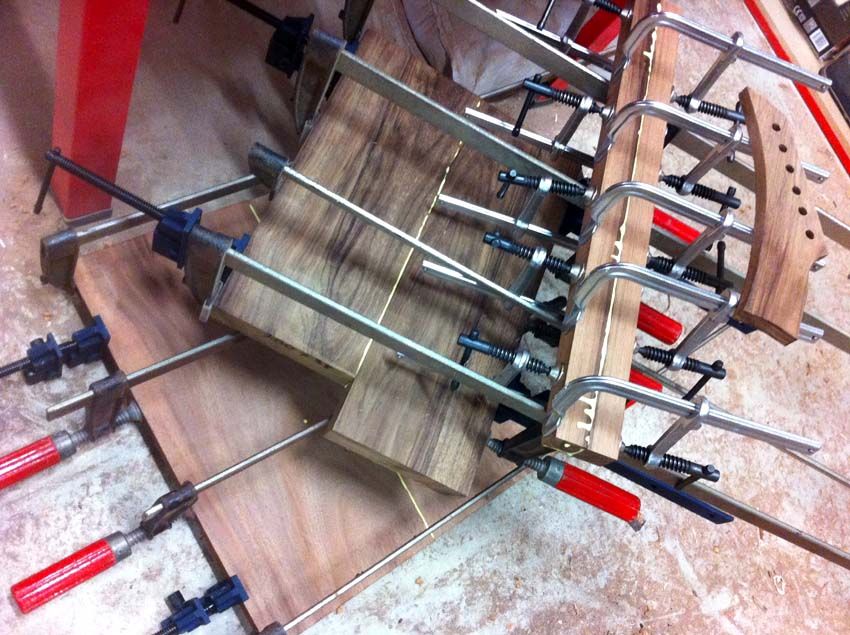
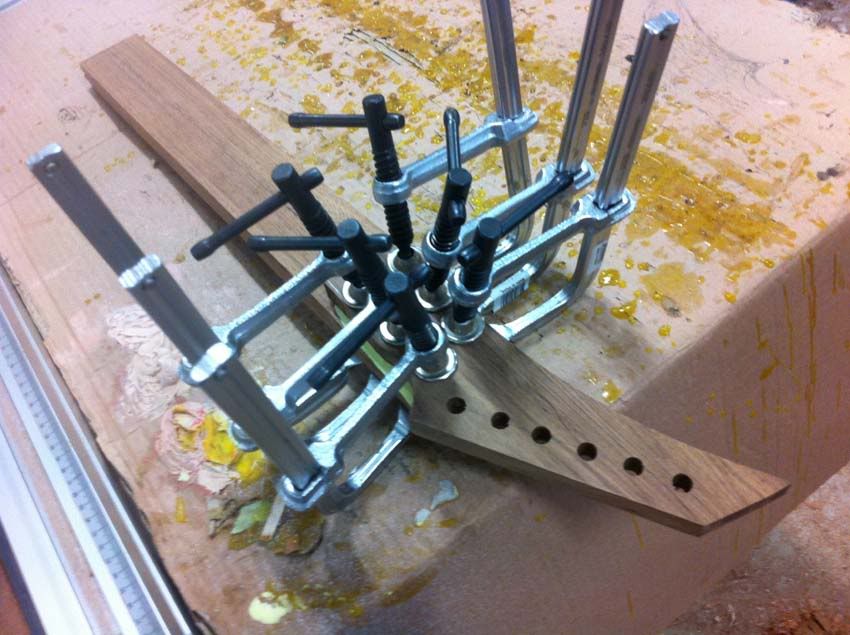
Here you can see the back, top, neck and headstock in clamps:
-
10th June 2012 08:35 AM # ADSGoogle Adsense Advertisement
- Join Date
- Always
- Location
- Advertising world
- Posts
- Many
-
11th June 2012, 06:10 PM #2
Senior Member
- Join Date
- Jul 2005
- Location
- Victoria Australia
- Posts
- 116
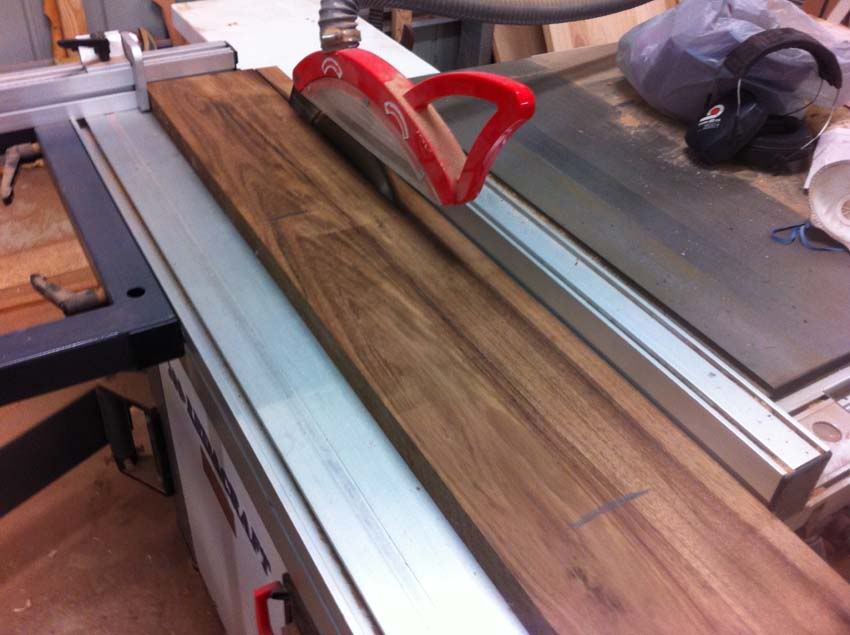
Bit of work today on the neck blank and scarf joint:
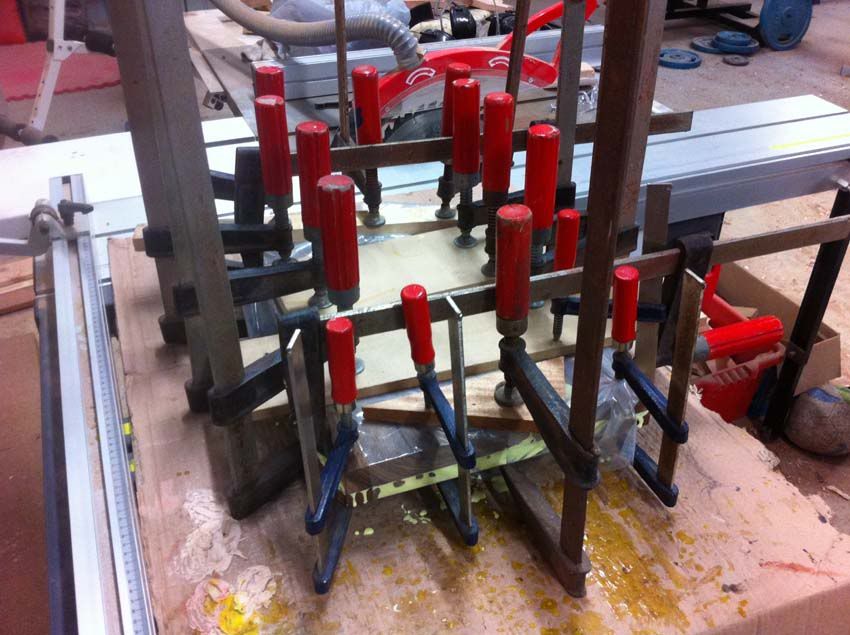
Also got the Blackwood clamped to the Mahogany:
-
27th June 2012, 04:09 PM #3
Member
- Join Date
- Nov 2010
- Location
- NSW
- Posts
- 64
Looks good Demonx.
Keeps everyone updated.
-
27th June 2012, 09:54 PM #4
Senior Member
- Join Date
- Jul 2005
- Location
- Victoria Australia
- Posts
- 116
I haven't touched this for nearly a fortnight, I've been trying to wrap up another build, but I'll be getting back to this tomorrow.
Have an awesome board and some really nice binding for this one. Pics tomorrow if I remember
Is there any particular stage of the build anyone wants me to photograph/document?
-
27th June 2012, 11:59 PM #5
Member
- Join Date
- Jun 2012
- Location
- Melbourne
- Posts
- 61
As much as you can. I get a real kick out of build logs. I've seen your quilted maple build on facebook. Really nice!
-
28th June 2012, 01:04 PM #6
Senior Member
- Join Date
- Jul 2005
- Location
- Victoria Australia
- Posts
- 116
Here is this mornings efforts:
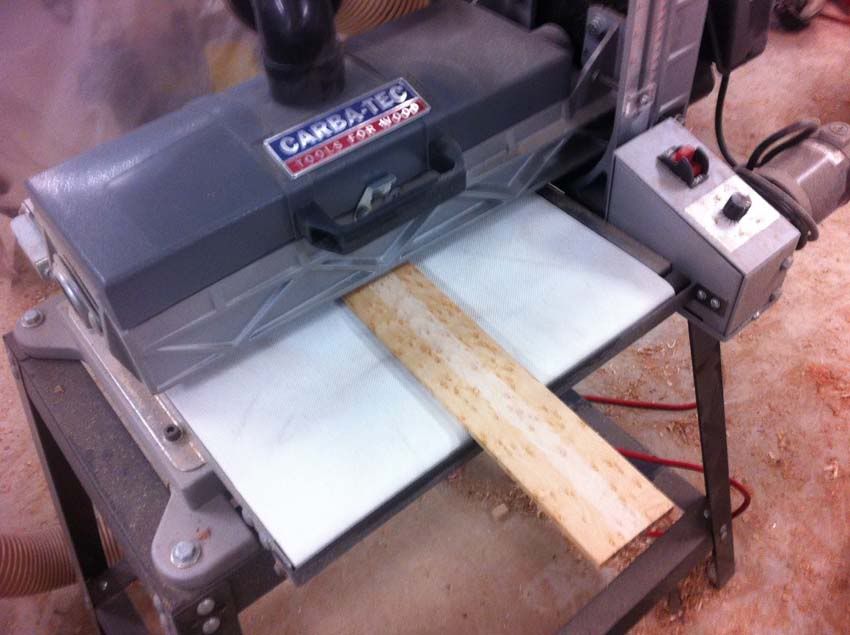
Picked out my best Birdseye Maple board and ran it through the drum sander:
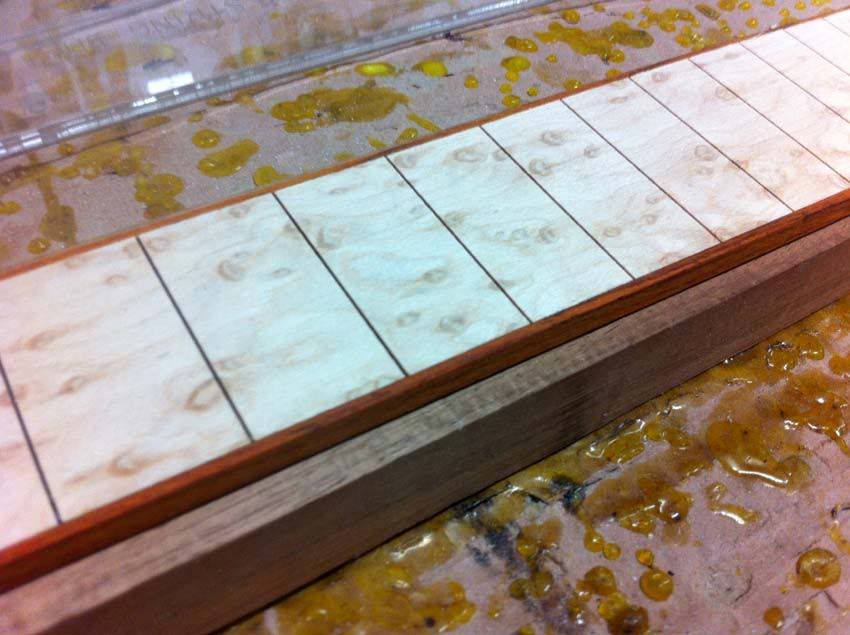
Once at thickness I work out my board placement and square the nut end, then mark it so I know which is the square corner that I'm now working from:
Double sided tape to adhere to a fret slot template:
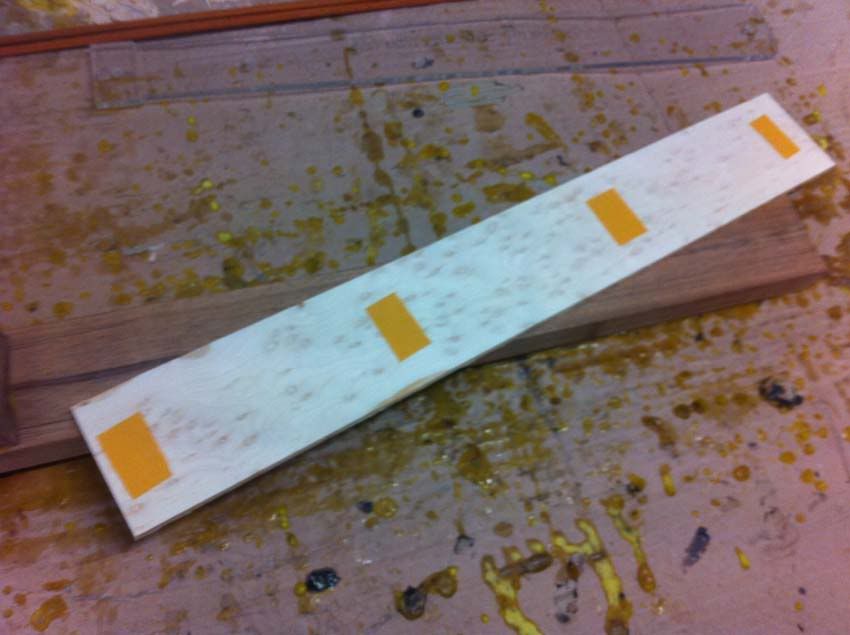
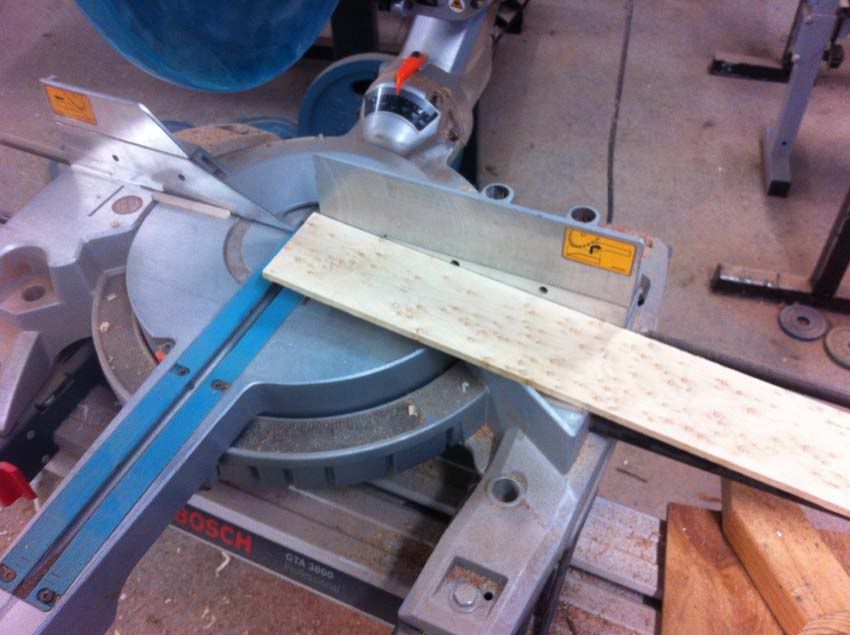
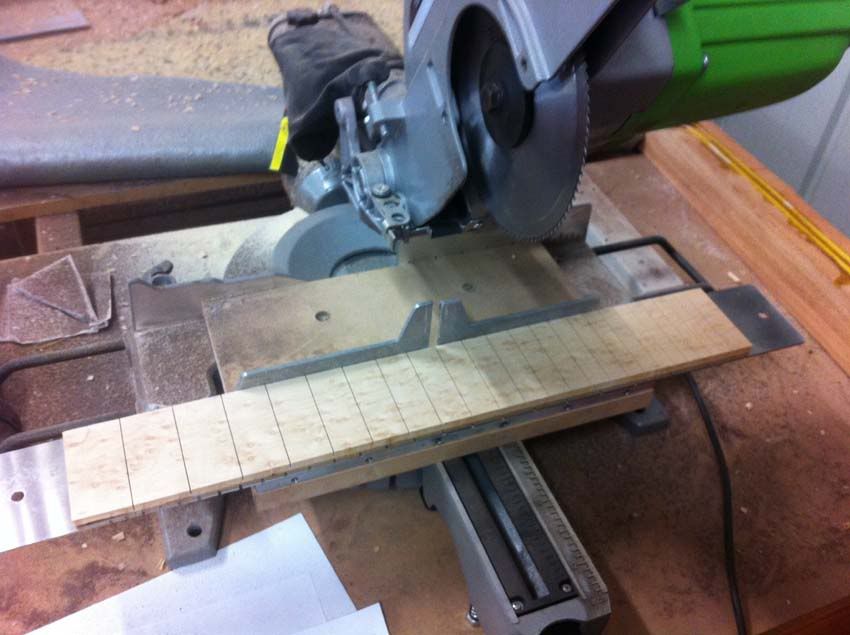
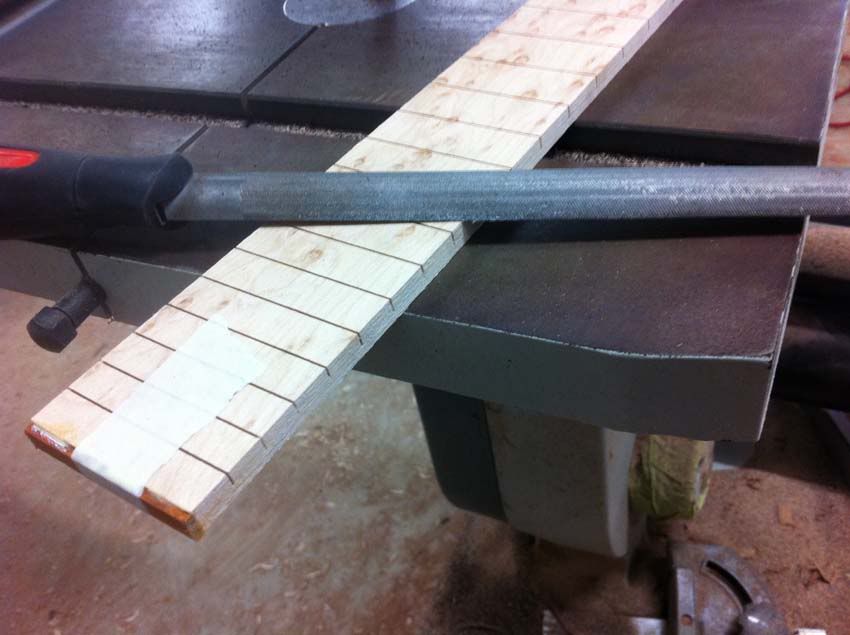
After taking time to make sure its squaring to the blade, a few minutes later and we have fret slots:
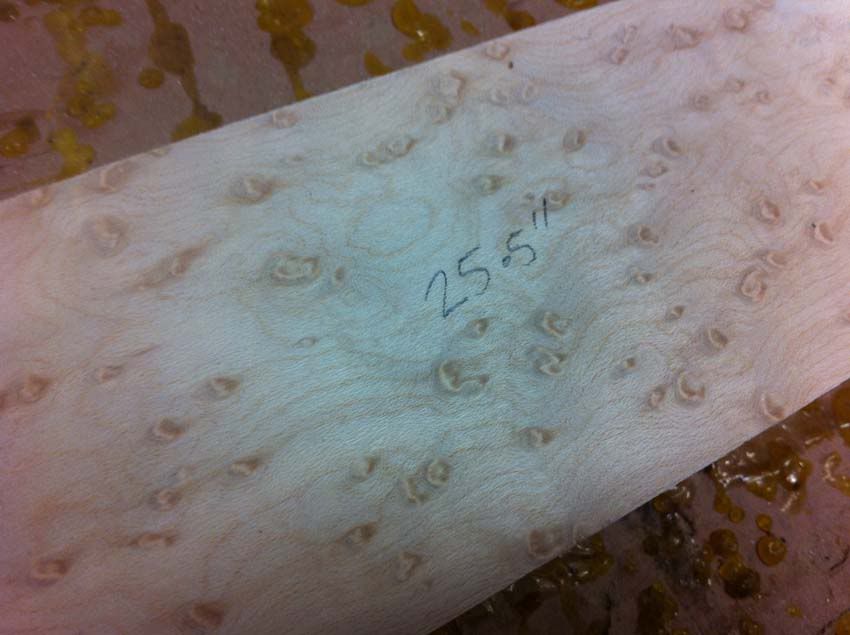
I then write the scale on the back of the board in case I get mixed up, sometimes I have several builds runnigna t one time, for example at the moment I have four builds, so it just means at a quick glance I know what I'm holding:
-
28th June 2012, 01:08 PM #7
Senior Member
- Join Date
- Jul 2005
- Location
- Victoria Australia
- Posts
- 116
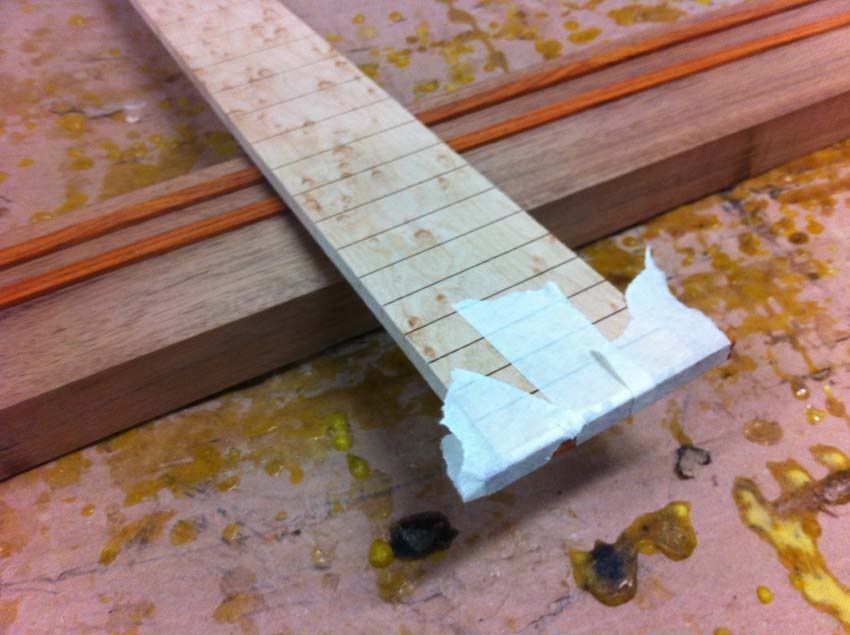
Over to the bandsaw I rough cut the board shape:
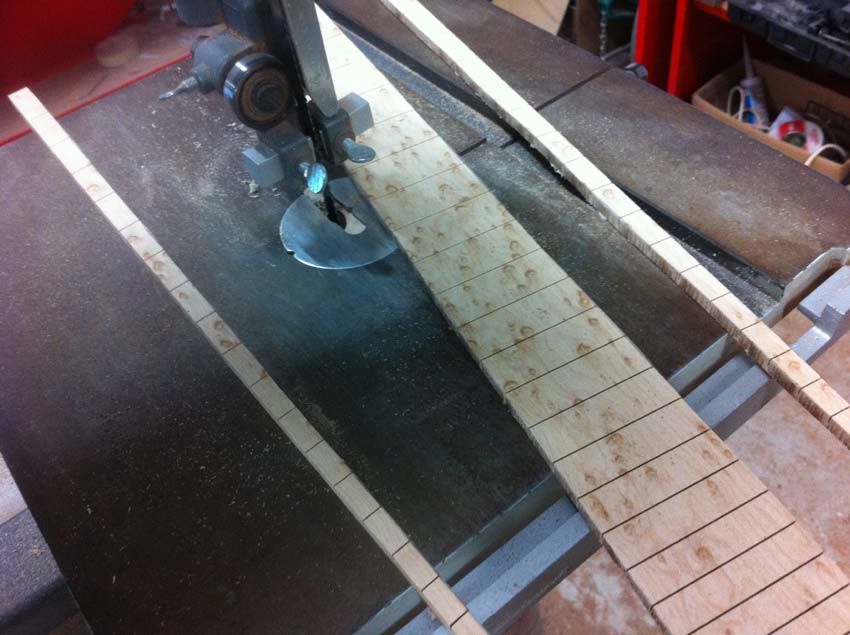
Few seconds on the linisher (40grit) and the edges are smooth:
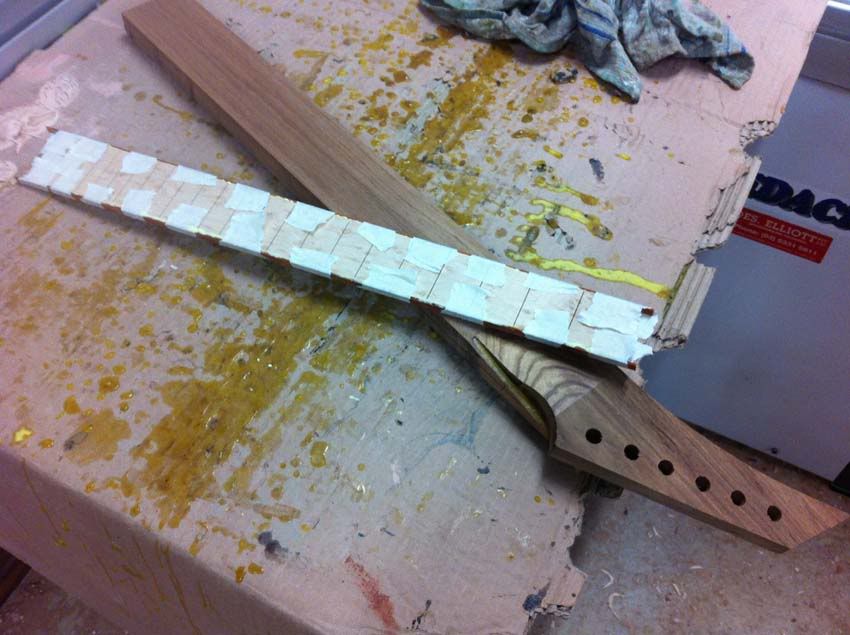
Then I make a few passes until the board is the corrent width INCLUDING the binding so it sits flush on my board template:

Here is now sits on the neck, with two very nice strips of Cocobolo binding:
No actual process here, just me being happy cause it looks so nice!
I thin glue and tape the end strip of binding:
-
28th June 2012, 01:11 PM #8
Senior Member
- Join Date
- Jul 2005
- Location
- Victoria Australia
- Posts
- 116
Whilst I was waiting for the end strip of binding to get tacky enough to cut, I ran the headstock tang through the bnandsaw and then smoothed it somewhat with a handplane:

Followed by a couple passes over the planer to make sure its "as one" with the neck:

By the time I've done this the end binding is tacky enough that I can cut the ends off very carefully (as the glues still wet) with the bandsaw and file the ends smooth with a small bastard file:
I get all my tape ready:
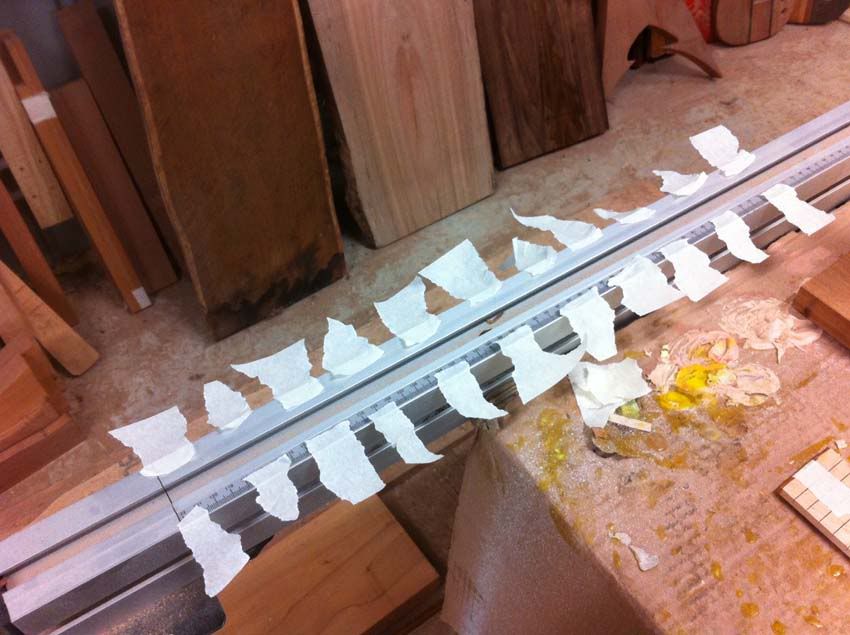
Then glue the side strips of binding:
That is all for today - I have to get ready for work! (the work that pays the bills)
-
28th June 2012, 04:16 PM #9
 GOLD MEMBER
- Join Date
- Nov 2003
- Location
- Sydney
- Age
- 53
- Posts
- 8,882
-
28th June 2012, 08:36 PM #10
GOLD MEMBER
- Join Date
- Dec 2008
- Location
- Bradbury
- Posts
- 1,429
Great work as always man. beautiful fingerboard too.
-
29th June 2012, 10:18 AM #11
Senior Member
- Join Date
- Jul 2005
- Location
- Victoria Australia
- Posts
- 116
Thanks guys.
I'm just hoping I don't screw it up! I somehow always find a way to stuff up a build and have to take time fixing mistakes. Fingers crossed this one goes smooth!
-
29th June 2012, 12:22 PM #12
Senior Member
- Join Date
- Jul 2005
- Location
- Victoria Australia
- Posts
- 116
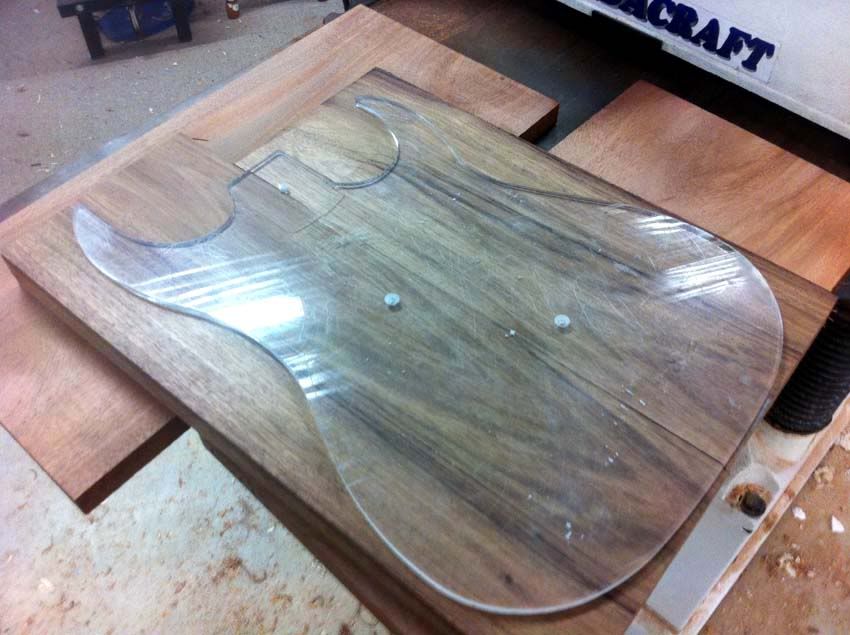
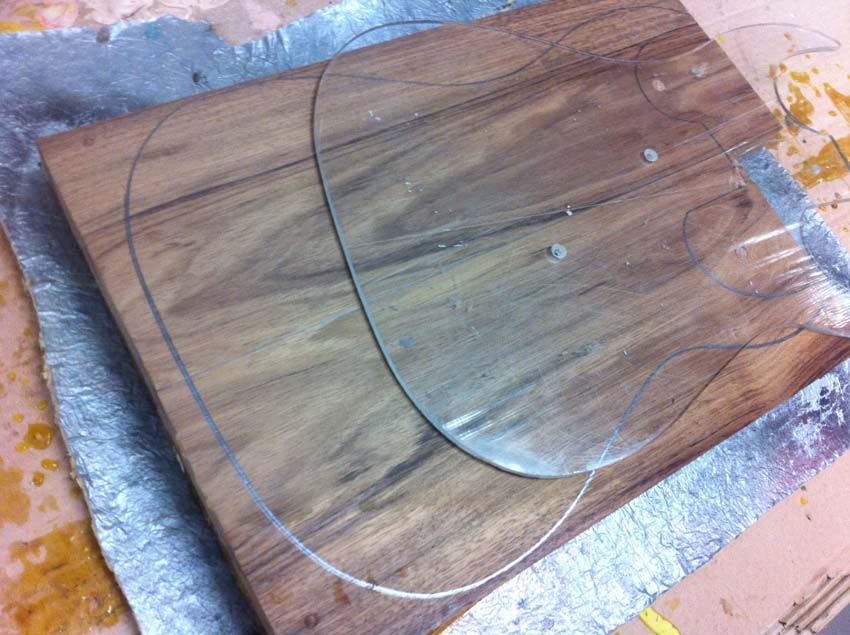
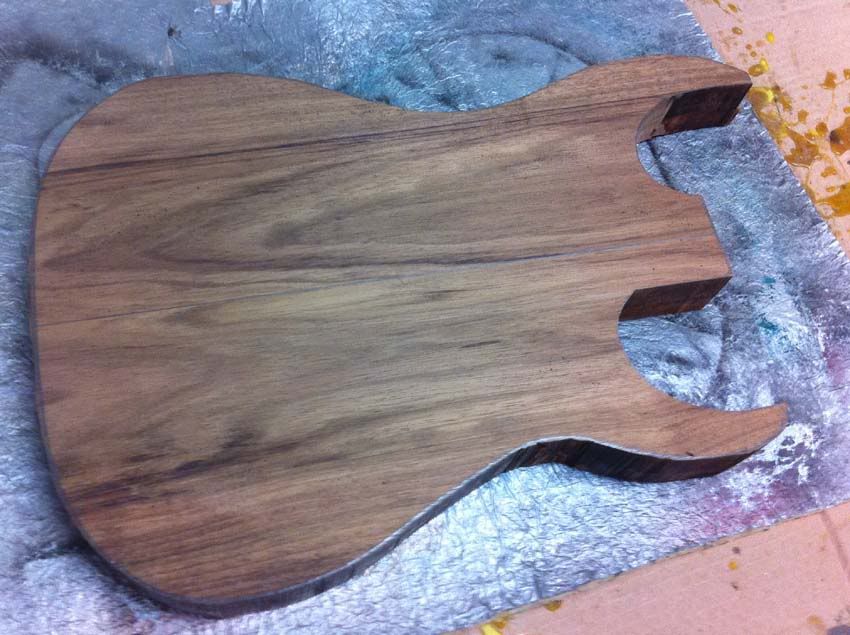
Thought I'd start the body today.
I marked the center line and body shape. Even though the timber top is 2 piece, it's really hard to see the join line, so it makes for much quicker lining up if I mark it in greylead
While I ws cutting the body I was thinking how I really need to buy a new blade and a smaller one. This one is so blunt it's burning through the timber rater than cutting through!
At the exact moment I was thinking this the damn blade jammed in the timber and jumped off the wheels - scared the crap out of me.
Luckily no injury (I was wearing safety glasses, but the blade stayed well confined behind the safety covers and I switched it off as fast as I could move.
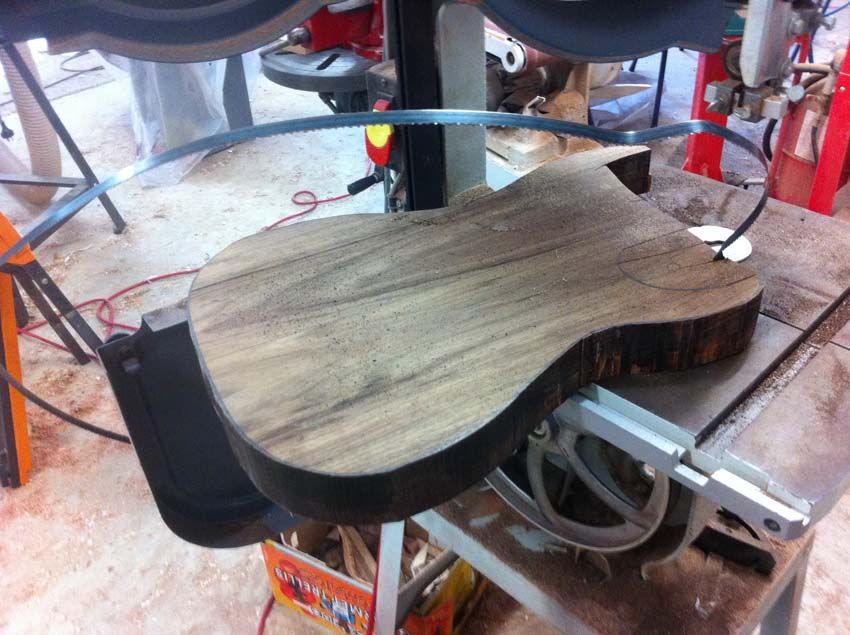
Off to get a new bandsaw blade...
-
29th June 2012, 02:32 PM #13
Senior Member
- Join Date
- Jul 2005
- Location
- Victoria Australia
- Posts
- 116
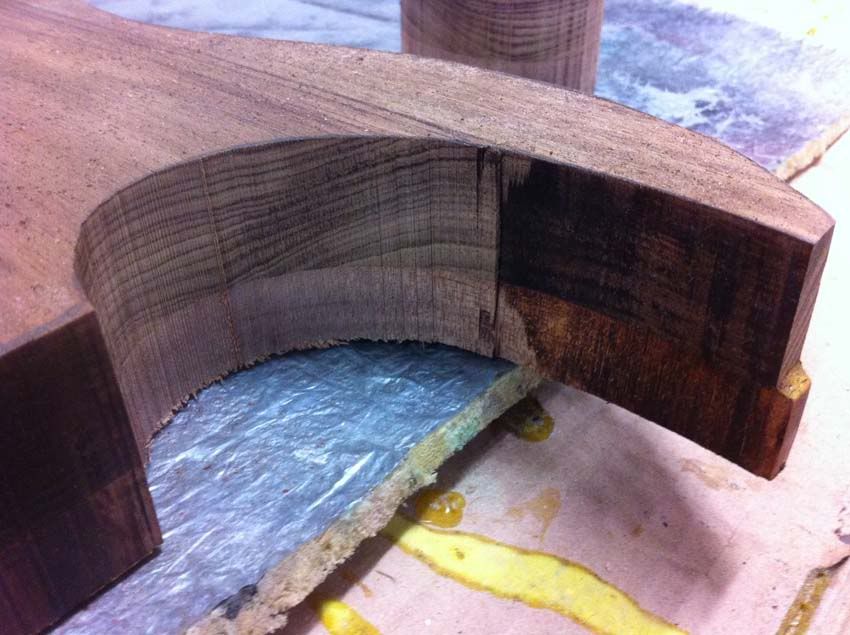
Back from the shop - bandsaw blade on and setup
Check out the burnt cut from the old blade and the fresh cut from the new blade, makes so much difference it's not funny and for only $27.00 I wish I hadn't put it off for so long!
Body rough cut but I'm out of time for today, I didn't get as much done as I would have liked:
-
29th June 2012, 03:30 PM #14
GOLD MEMBER
- Join Date
- Aug 2007
- Location
- Brisbane
- Posts
- 1,156
Demonx, those pieces of timber look terrible. Way below par. I think you should send them up to me immediately just to get them out of your shop. I'm sure I can find some way of disposing of them for you.
 The other day I described to my daughter how to find something in the garage by saying "It's right near my big saw". A few minutes later she came back to ask: "Do you mean the black one, the green one, or the blue one?".

-
29th June 2012, 10:52 PM #15
GOLD MEMBER
- Join Date
- Dec 2008
- Location
- Bradbury
- Posts
- 1,429
I've got a big fire place so just forward them to me and ill take care of them ;-) Originally Posted by petersemple


 Reply With Quote
Similar Threads
-
Narrow Leaf Blackwood v Tasmanian Blackwood
By snapman007 in forum TIMBERReplies: 2Last Post: 3rd September 2011, 10:31 AM -
Tasmanian Blackwood vs. Koa
By Chris 623 in forum MUSICAL INSTRUMENTSReplies: 19Last Post: 1st July 2011, 09:56 AM -
Tasmanian Blackwood
By STAR in forum TIMBERReplies: 11Last Post: 13th March 2008, 09:54 PM -
Tasmanian Blackwood ???
By Sandy Johnston in forum TIMBERReplies: 6Last Post: 9th June 2002, 12:58 PM
