

 Thanks:
  Likes:
  Needs Pictures: 0
 Picture(s) thanks:
Results 61 to 75 of 245
Thread: Roubo Bench Issues and Questions
-
31st January 2012, 10:36 PM #61
 GOLD MEMBER


- Join Date
- Feb 2003
- Location
- back in Alberta for a while
- Age
- 68
- Posts
- 12,006
 the cap only needs to cover the section where the vise is fitted
 Originally Posted by Pac man
 regards from Alberta, Canada
ian
-
31st January 2012 10:36 PM # ADSGoogle Adsense Advertisement
- Join Date
- Always
- Location
- Advertising world
- Age
- 2010
- Posts
- Many
-
31st January 2012, 11:00 PM #62
SENIOR MEMBER
- Join Date
- Jul 2008
- Location
- Aspley, Brisbane
- Age
- 46
- Posts
- 362
Good point Ian. Would one of bolt either side of the wagon fixture have sufficient holding power? Two plugs to cover the bolts and the remainder of the end cap prettily dovetailed in place. Originally Posted by ian

Regards,
Denim
-
1st February 2012, 12:22 AM #63
Be inspired. Be creative. Be bold.
- Join Date
- Apr 2001
- Location
- Perth
- Posts
- 10,872
I have emailed Jameel to get his opinion.
At this stage I am inclined to add bolts on either side of the vise, recess the heads, and cover with plugs (along with the dovetailed ends and pinned tenon (ala breadboard end).
That end cap on Konrad Sauer's bench has the dovetailing running in the wrong direction to strengthen the end cap. per se. Obviously he has done something else - a sliding dovetail is my guess ... hence the dovetailed sides to hide the joint.
I did consider a sliding dovetail. In the main, the tenon (or a sliding dovetailed tenon) stops before the section for the vise thread and dog strip. About 3/4 of the width of the bench top would be secured by the sliding dovetail - but not the area of the end cap behind the vise, which is the very section that needs to be reinforced.
Regards from Perth
DerekVisit www.inthewoodshop.com for tutorials on constructing handtools, handtool reviews, and my trials and tribulations with furniture builds.
-
1st February 2012, 01:48 AM #64
Be inspired. Be creative. Be bold.
- Join Date
- Apr 2001
- Location
- Perth
- Posts
- 10,872
A bit of a search and I found Konrad's description of his end cap construction ...
Here is a photo of the entire bench top - including the end caps. The breadboard end caps are held on by way of a 1" long tenon and a few 1/4" square drawbore pegs. They are also attached to the front of the bench with 1/2 blind dovetails. The 13" plank at the back of the bench is supported by a piece of maple glued into the dado - essentially turning it from an innie to an outie. The board is held in place with two screws from the underside of the outie


Regards from Perth
DerekVisit www.inthewoodshop.com for tutorials on constructing handtools, handtool reviews, and my trials and tribulations with furniture builds.
-
1st February 2012, 06:21 AM #65
GOLD MEMBER
- Join Date
- Oct 2003
- Location
- Canberra
- Age
- 48
- Posts
- 1,484
Derek
I'm planning a similar bench, but am some months off starting. My (perhaps naive) plan was to bolt the end caps on and cover the recessed bolt heads with a sliding panel. The panel would have bevelled edges to keep it in place. Without having thought it fully through, I guess I would glue in the piece closest to the tail vice screw to give the plate something to fix to. The rest would be able to slide away should I need to access the bolts.
Apologies if this doesn't make sense - happy to sketch it out if you think it might be useful for you.
TravSome days we are the flies; some days we are the windscreen
-
1st February 2012, 06:32 PM #66
Junior Senior Member
- Join Date
- Dec 2008
- Location
- Adelaide, SA
- Posts
- 962
I've been thinking of this sort of idea for my bench...would it work?

-
1st February 2012, 11:04 PM #67
GOLD MEMBER
- Join Date
- Feb 2003
- Location
- back in Alberta for a while
- Age
- 68
- Posts
- 12,006
I think not Originally Posted by johnredl
you seem to be dovetailing side grain to long grain, so expansion of the bench top will be constrainedregards from Alberta, Canada
ian
-
1st February 2012, 11:06 PM #68
Neander Normite
- Join Date
- Jan 2005
- Location
- Melbourne
- Age
- 65
- Posts
- 11,997
-
2nd February 2012, 12:24 AM #69
Junior Senior Member
- Join Date
- Dec 2008
- Location
- Adelaide, SA
- Posts
- 962
Oh...thanks Originally Posted by ian
-
6th February 2012, 02:15 AM #70
Be inspired. Be creative. Be bold.
- Join Date
- Apr 2001
- Location
- Perth
- Posts
- 10,872
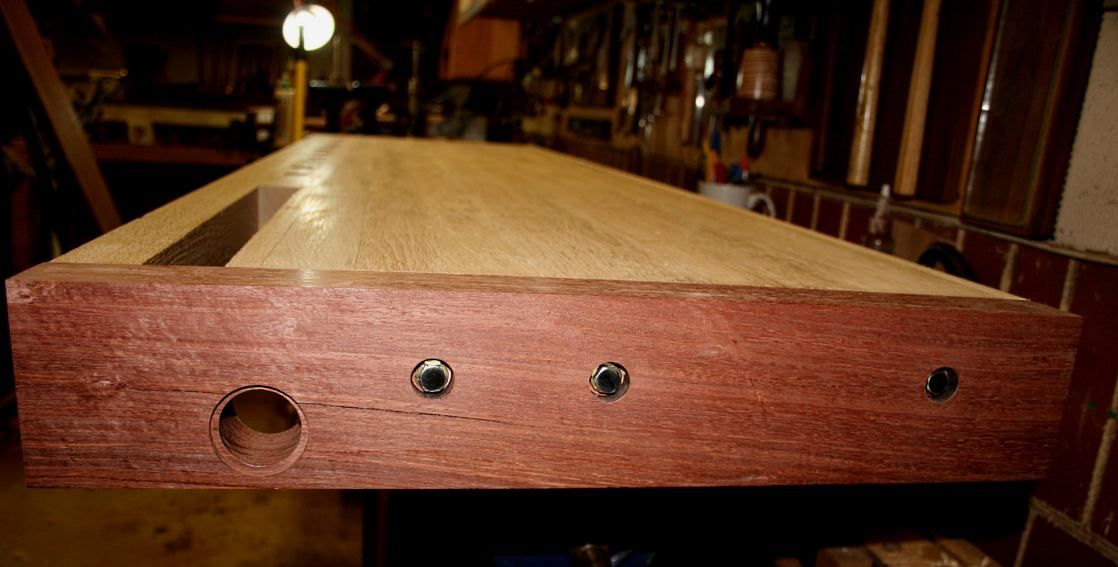
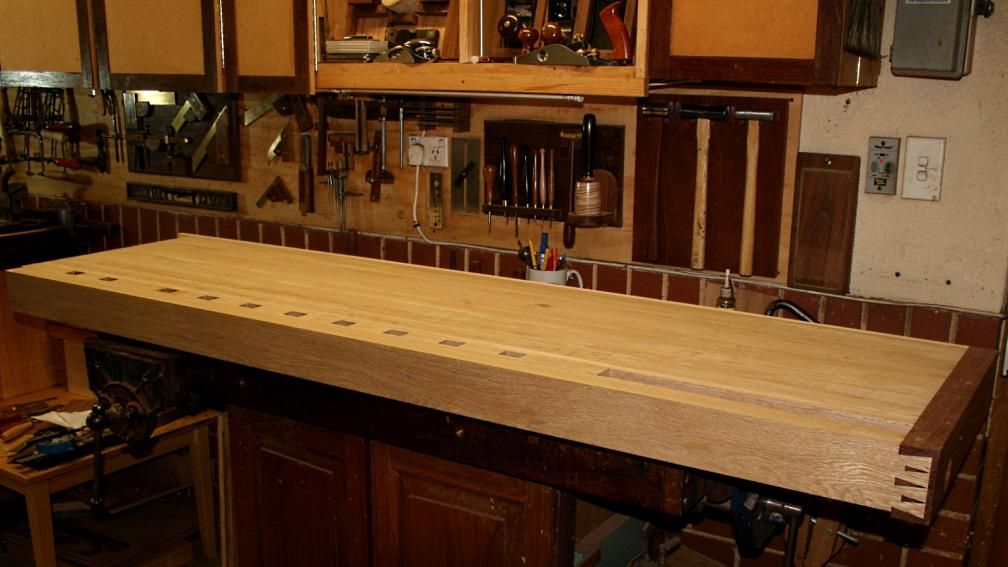
The top is complete ....
Well, almost. The tail vise needs to be bolted in - however I can only do that later. All work is done in preparation.... which means the end cap is completed. How this was to be built was the subject of the last post.
The final length of the bench top is 75", which is a little longer than I expected. About as much as I could have hoped for. The width is 21", which is what I aimed for. Perfect.
So what about the end cap? How did this turn out?
In the end the design was determined by the wagon tail vise. This requires an end cap with strength as the tail screw will create pressure at that end of the bench. This means that the end cap does need to be bolted to the bench. I checked with Jameel, and he confirmed this. I took the easy way out here and used ordinary coach bolts. I did grind and polish the ends, but no one will notice ... just being a little obsessional
The important aspect with the end cap is that it needs to have the ability to move, to expand and contract with changes of the weather. One end is fixed (bolted) - which has to be around the tail vise - and the other must be left unattached.
The attached end of the end cap is fixed with a dovetail and two bolts. The bolts run through the internal tenon (see earlier post). This area (half the tenon) is also glued. The remainder of the endcap is attached with a single bolt, which enters an oversized hole. There is no matching dovetail at this side of the bench as this would restrict movement.

See, the top is done! Flat.
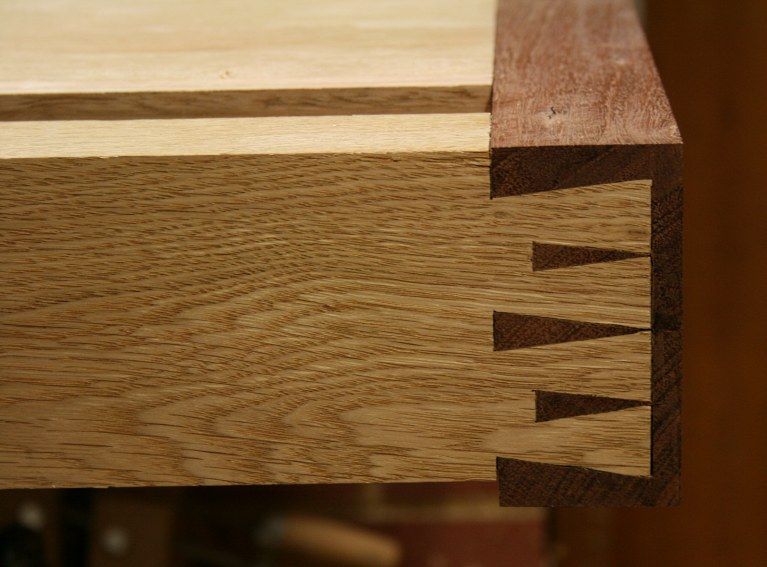
From the sublime to the ridiculous. In this case, while the end cap looks clean and simple from this angle, I did go a little OTT with the dovetail that attached the face side.
I decided that since I did not plan another bench build for ... ever ... and that there was only one dovetail I could cut, I would do something interesting. There was only one shot at this and I would have some fun.
For those who are not interested in a short pictorial of building a half blind (half lap) houndstooth dovetail involving one h-u-g-e board, then simply skip to the end.
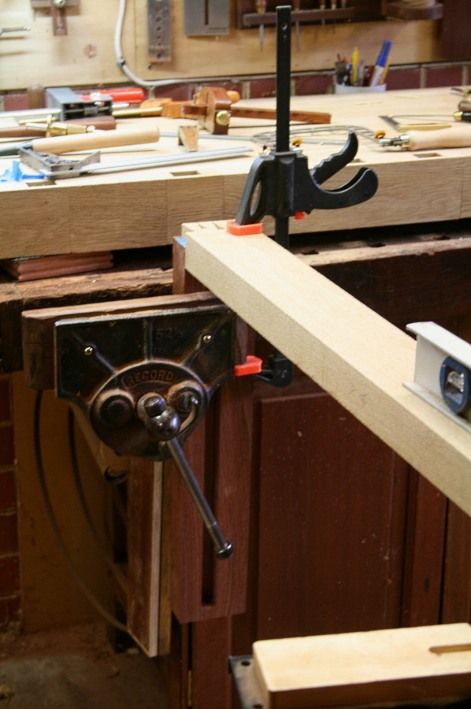
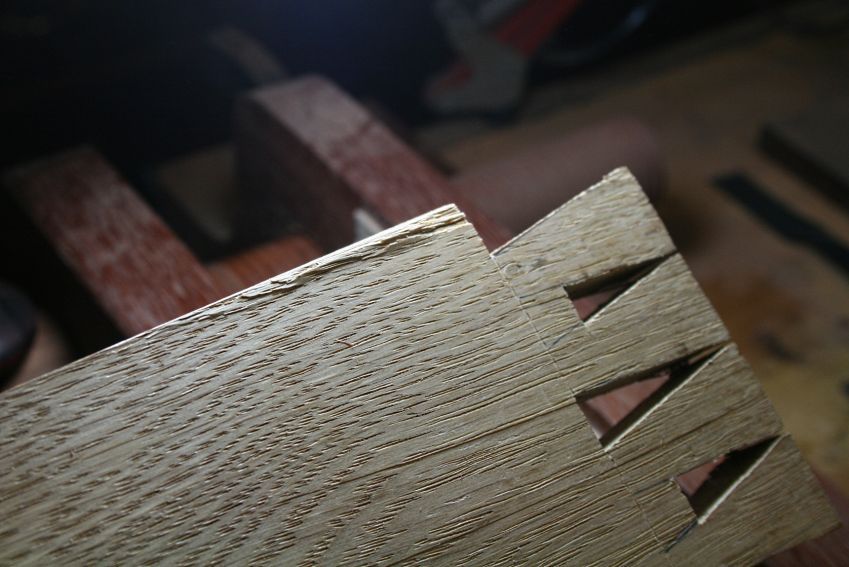
What made this even trickier was that I was struggling for space. I clamped the tail board in my Record vise at an angle, thus ...

... and was forced to saw the lines from the opposite side ...
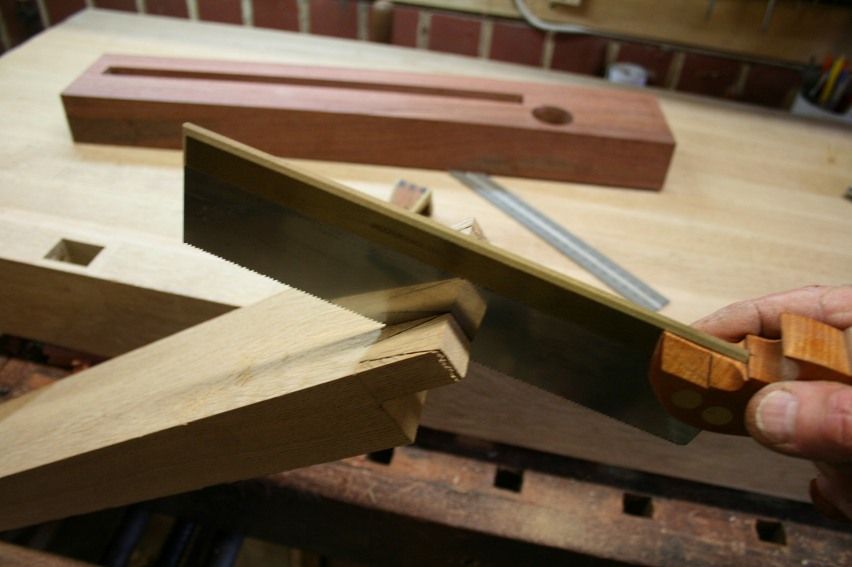
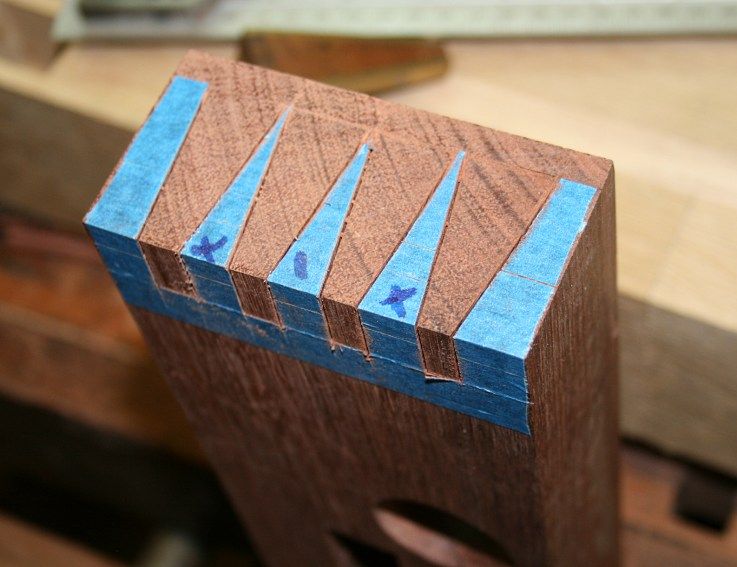
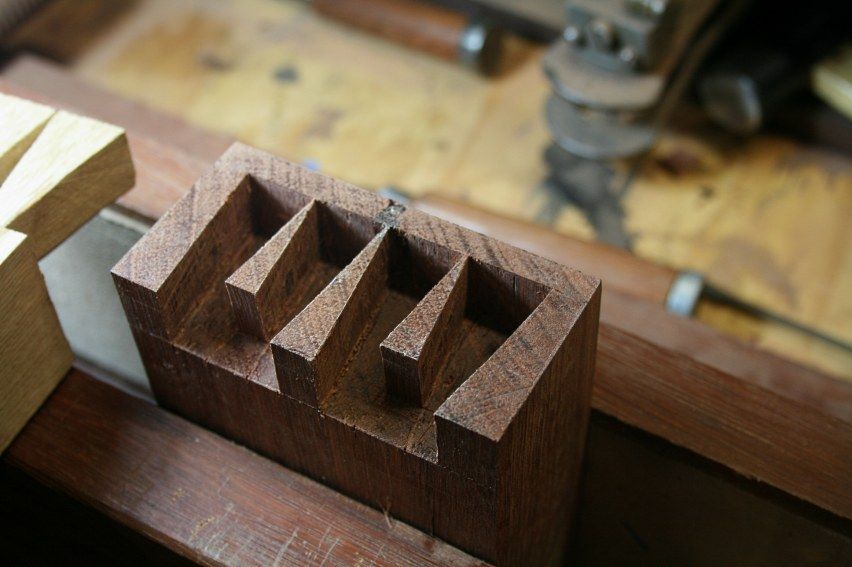
Ok, here you are - the layout for the houndstooth dovetails. There are a couple of reasons for using this format. The first is that the end cap is 2" wide (to maximise the internal screw length) and 4" deep (to get the vise wheel below the bench top). Anything other than slim dovetails would end up looking blocky. Several "normal" tails would look too busy. Houndstooth tails could break this up.
Secondly, you may note that the tails are offset on the tail board. This is deliberate in order to centre the tails as the tail board is 3 1/2" wide and has to join a 4" wide pin board.
The tail waste is removed with a fretsaw ...
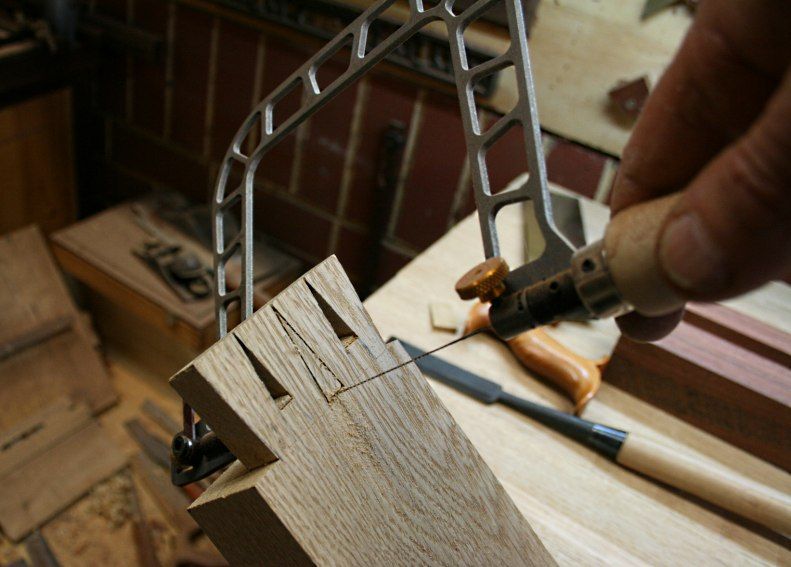
.. and then the remaining waste is chiseled out ...
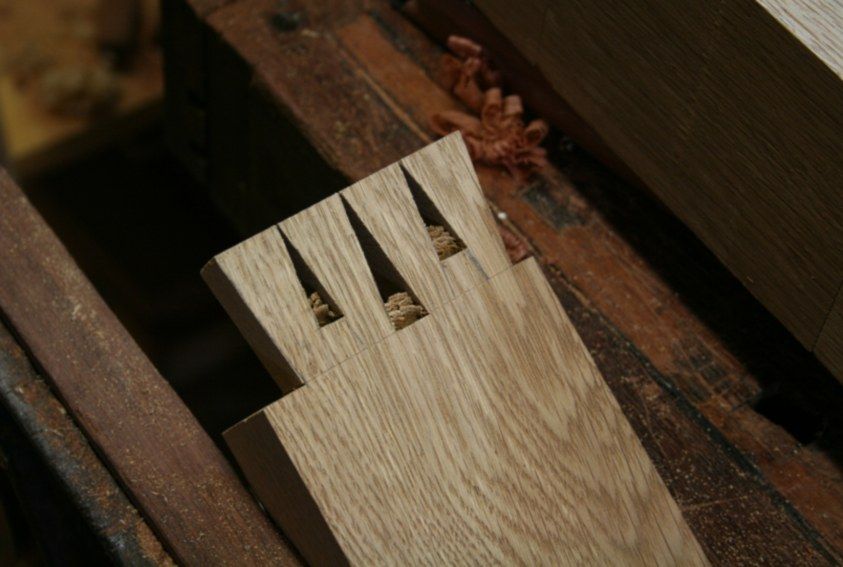
Transfering tails to pins was fun!
In addition to the balancing act here, the kerf for the tails was so tight that a standard narrow marking knife would not fit. I quickly whipped out my Vesper extra-slim marking knife ... (I have to find space for a plug for Chris Vesper - great toolmaker) ..
Here is the extra slim alongside a standard slim marking knife ...

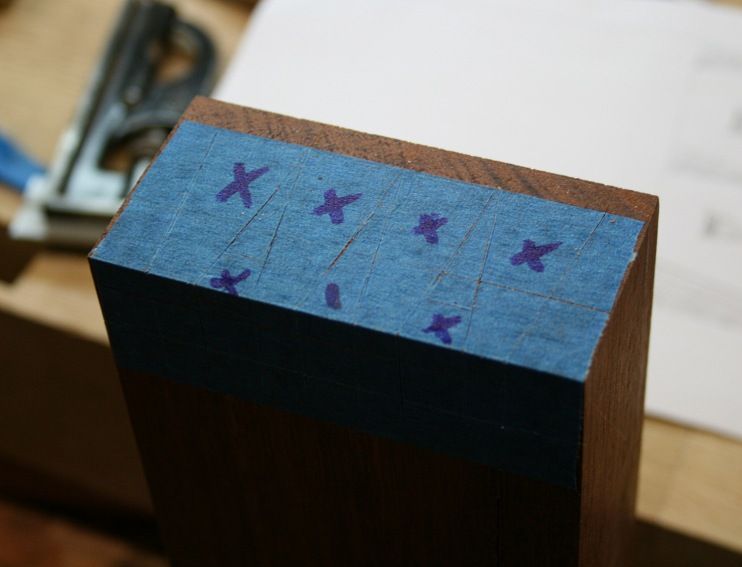
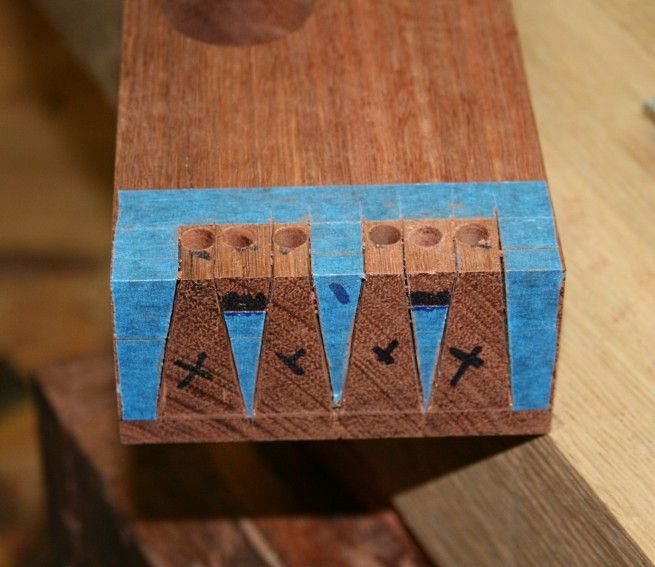
Time for the Blue Tape Method!
Place blue marking tape over the area where the marks will be transferred ..
 Visit www.inthewoodshop.com for tutorials on constructing handtools, handtool reviews, and my trials and tribulations with furniture builds.
-
6th February 2012, 02:16 AM #71
Be inspired. Be creative. Be bold.
- Join Date
- Apr 2001
- Location
- Perth
- Posts
- 10,872
Transfer the marks ...

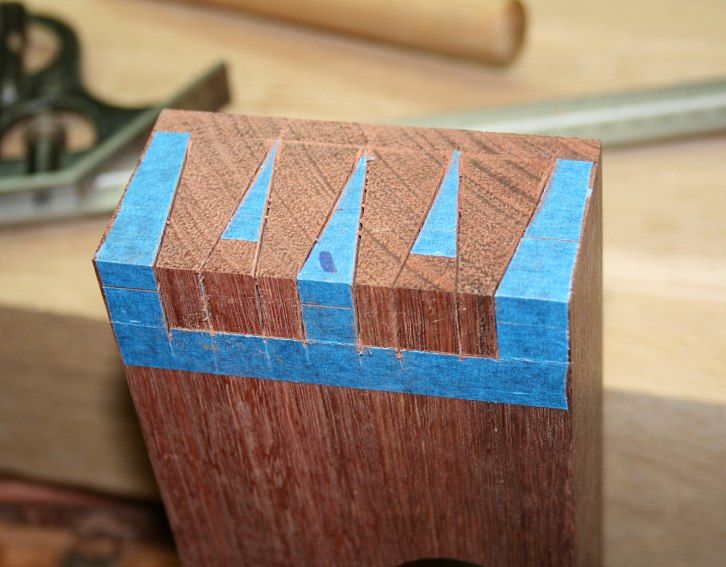
Peel away the waste (at this stage I leave the short pins as long pins) ...

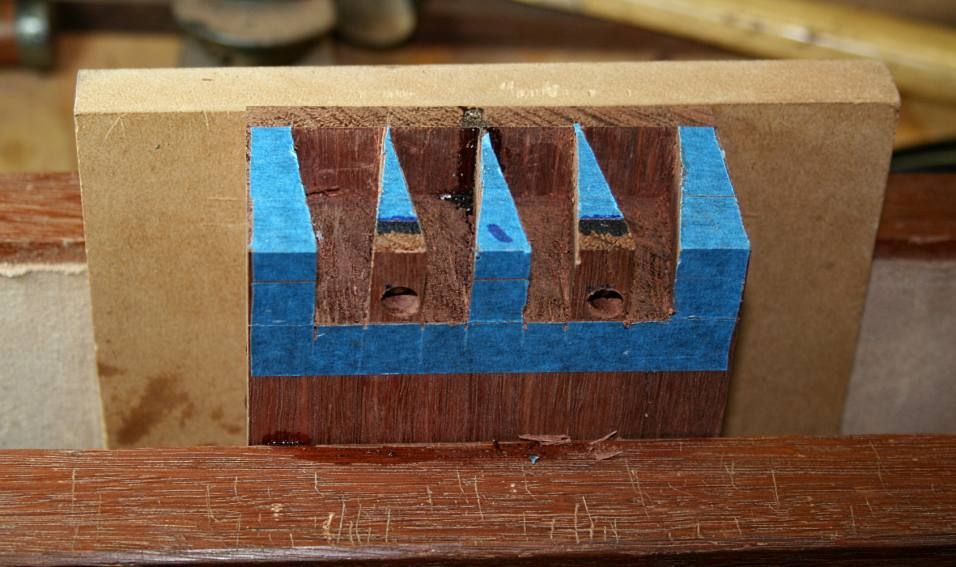
This makes it so easy to saw to the line. Here are my saw cuts. Can you see the kerfs?
Now you can remove the tape from the waste area of the short pins ...
At this point I deepen the kerfs with a kerf chisel (its on my website under Shopmade Tools) ..

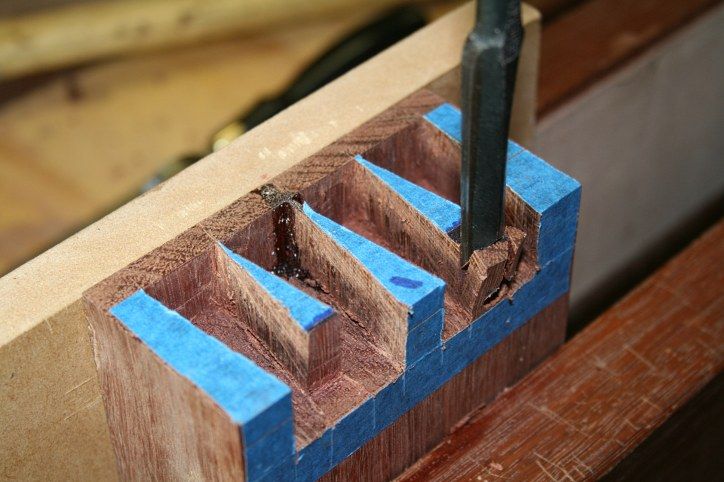
Drill the waste to the depth of the pin. This will make it easier to split out the waste (rather than spend hours chopping it away) ..
Chop it out about 2/3 of the waste ..

Remove the remaining waste (this is basic stuff), using a backing board. Note that the short pins are still intact at this stage ...
Now you can pare them to length ...
If you are using a Moxon vise, as I am, lower the pins level with the top of the vise. The board may now be used to flush the base of the pins ...
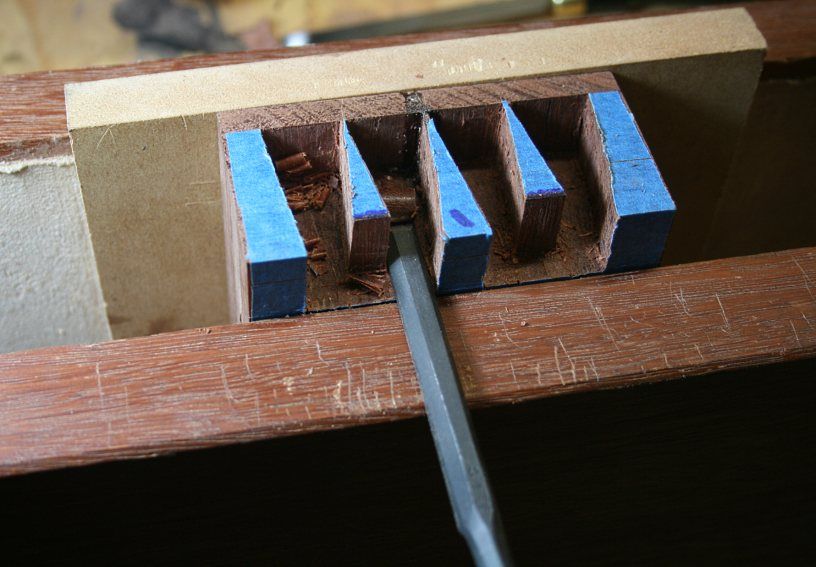
Here you are, nice and tidy ..
 Visit www.inthewoodshop.com for tutorials on constructing handtools, handtool reviews, and my trials and tribulations with furniture builds.
-
6th February 2012, 02:17 AM #72
Be inspired. Be creative. Be bold.
- Join Date
- Apr 2001
- Location
- Perth
- Posts
- 10,872
Slight tangent ...
With so little room to move in I stumbled over the tail board, which went crashing to the ground, and dented the end near the tails. Fortunately the tails were not damaged. Still, not needed at this point.
I had to leave the dent wrapped in a wet paper towel for an hour or so to try and swell it out ..
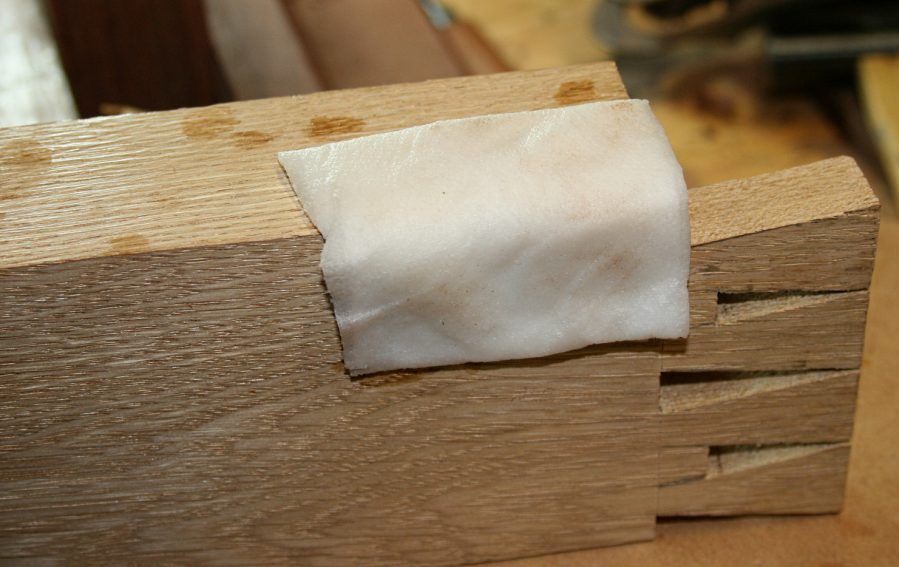
It worked reasonably well. Then, without further ado, and with my heart in my mouth, I added glue to the pins and wacked in the tails. The result was decent, and so I set about glueing the end cap/side board to the bench top ...
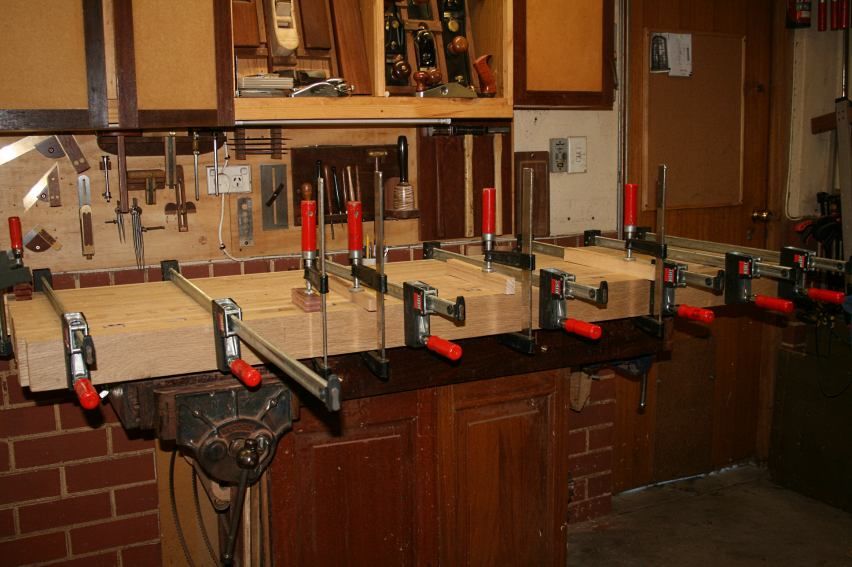
What that .. can't see ... the clamps are in the way? OK ...
Decent job.
Regards from Perth
DerekVisit www.inthewoodshop.com for tutorials on constructing handtools, handtool reviews, and my trials and tribulations with furniture builds.
-
6th February 2012, 08:36 AM #73
Lignum Vexator
- Join Date
- May 2007
- Location
- North of the coathanger, Sydney
- Age
- 68
- Posts
- 9,417
Noice

Can I ask for a piccy of the bottom to see which bolt hole method you went with? Please?regards
Nick
veni, vidi, tornavi
Without wood it's just ...
-
6th February 2012, 09:25 AM #74
SENIOR MEMBER
- Join Date
- Jan 2011
- Location
- Sydney
- Posts
- 613
Looking very nice Derek. How far off finishing do you think you are?
-
6th February 2012, 11:32 AM #75
 Fossil Member
- Join Date
- Jan 2005
- Location
- Perth
- Posts
- 1,181
Hi Derek,
Top job indeed. Just love those dovetails. My next bench, (now about 5 years in the planning) has the same dovetail pattern for the tail vice, (from the Landis Bench book).
I do like the contrast of the timbers as well. A very good Sunday afternoon's work getting it together.
Cheers
Pops


 Reply With Quote


Similar Threads
-
Underhill's Roubo bench
By The Pom in forum THE WORK BENCHReplies: 4Last Post: 14th June 2011, 11:57 AM -
Dan's Blackbutt Roubo Bench
By BozInOz in forum THE WORK BENCHReplies: 215Last Post: 8th April 2011, 08:21 PM -
WIP Roubo bench
By mic-d in forum FURNITURE, JOINERY, CABINETMAKING - formerly BIG STUFFReplies: 48Last Post: 30th January 2009, 04:34 PM -
Bench Questions
By noodle_snacks in forum WOODWORK - GENERALReplies: 89Last Post: 13th March 2006, 11:32 PM -
bench top glue-up questions
By Richie in forum GLUEReplies: 3Last Post: 18th February 2006, 12:00 AM
