

 Thanks:
  Likes:
  Needs Pictures: 0
 Picture(s) thanks:
Results 3,046 to 3,060 of 3347
-
24th January 2013, 08:27 PM #3046
 GOLD MEMBER


- Join Date
- Jan 2009
- Location
- Blaxland, Australia
- Age
- 65
- Posts
- 2,551

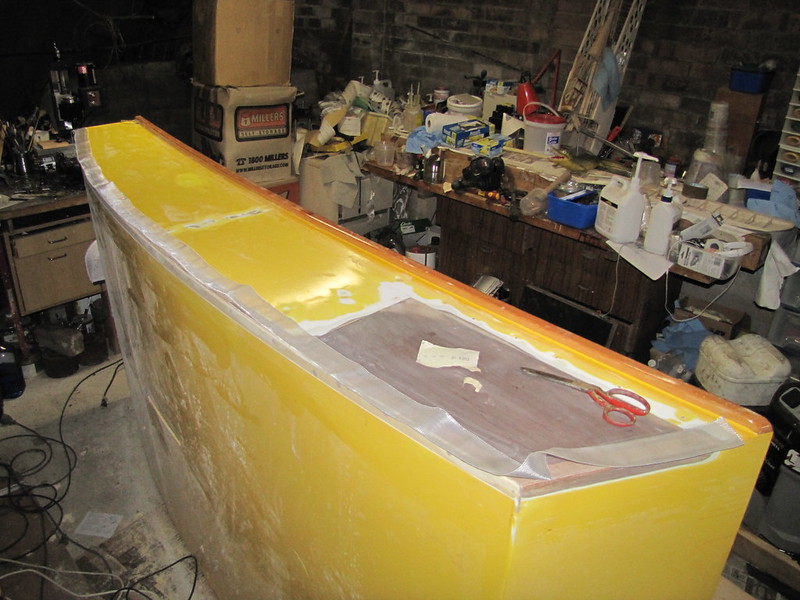
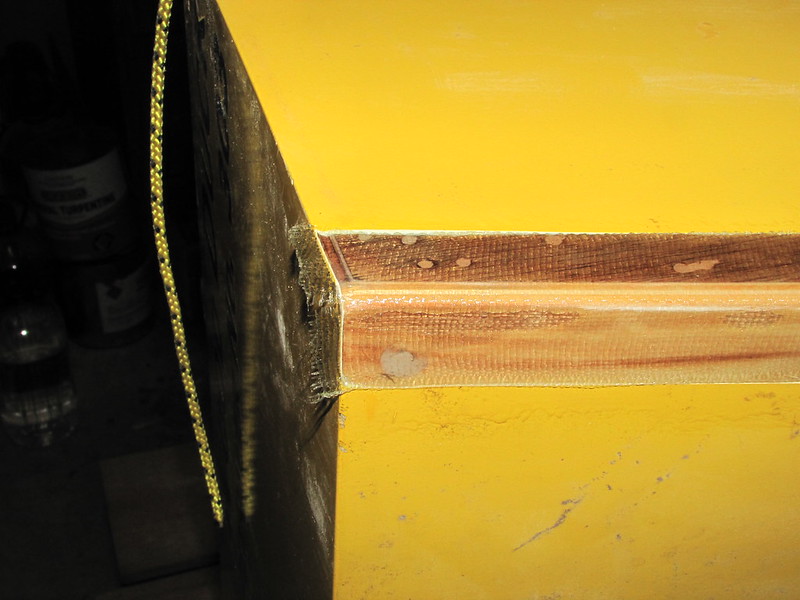
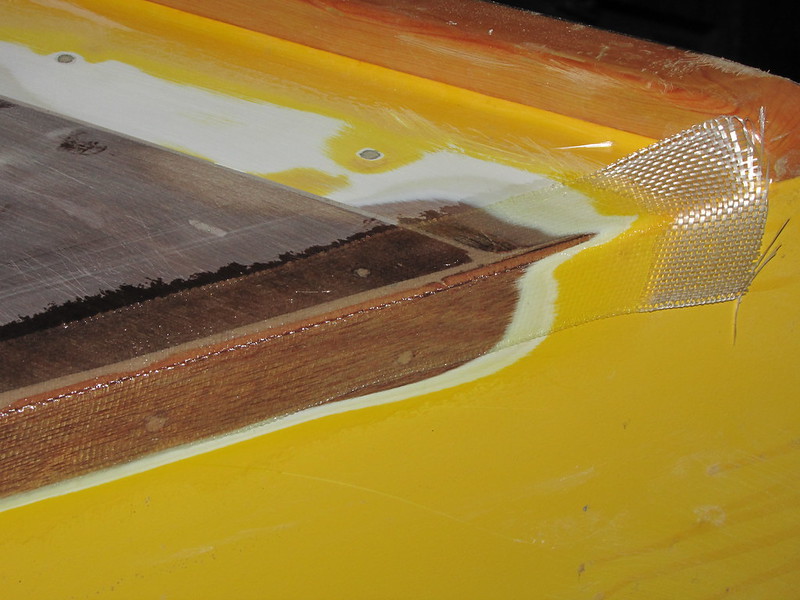
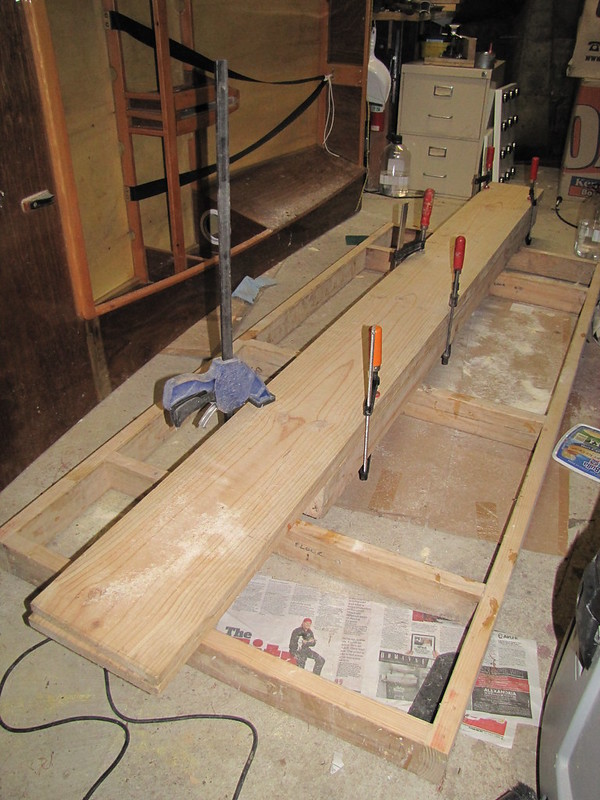
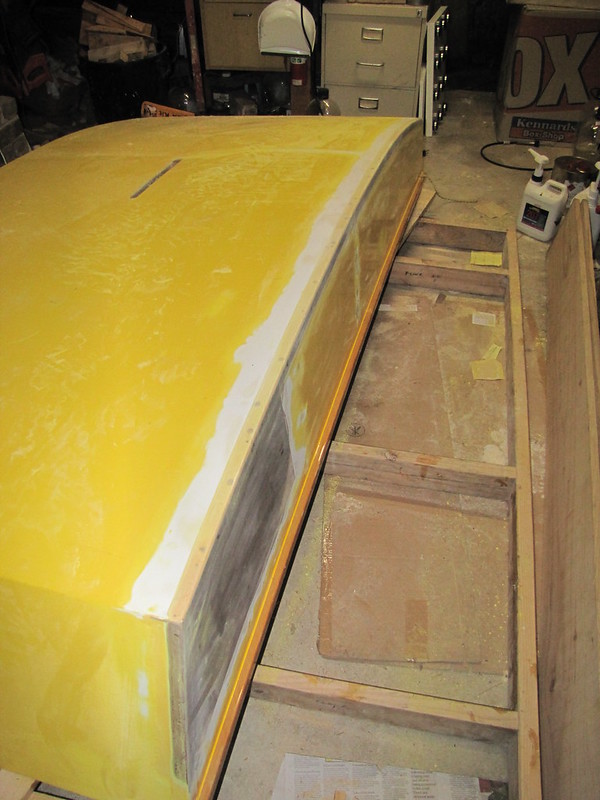
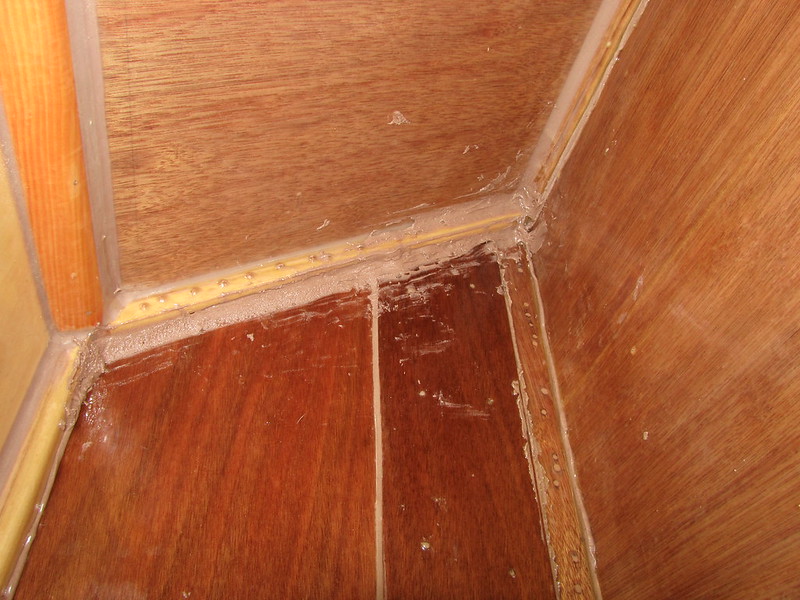
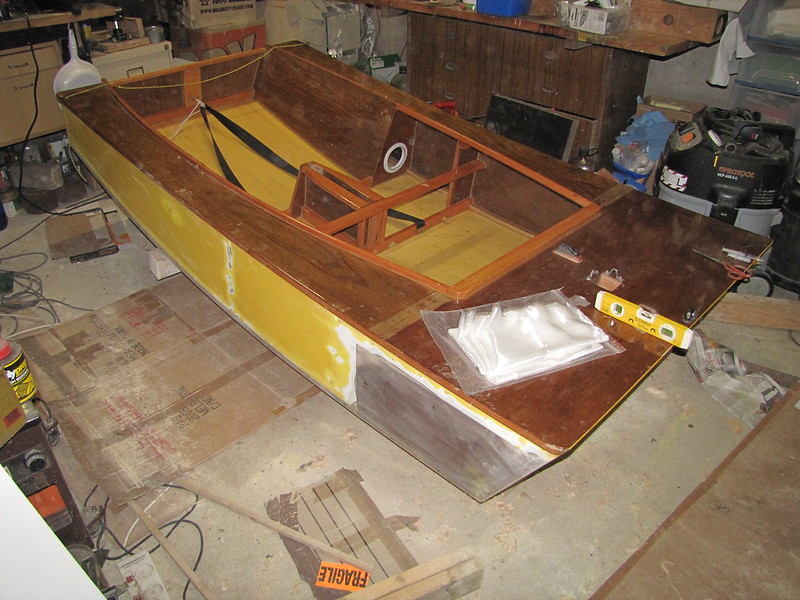
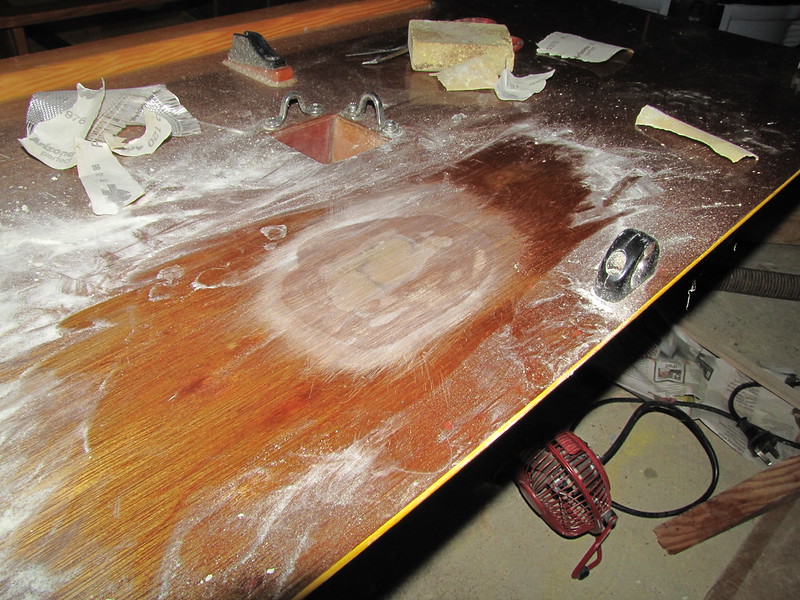
1. Bow region, prepared: most of the remaining undercoats sanded off; note also that I've run along the chine itself with the 0.25 " round-over bit in the router, to remove the remaining paint, etc., that the flat bit couldn't catch
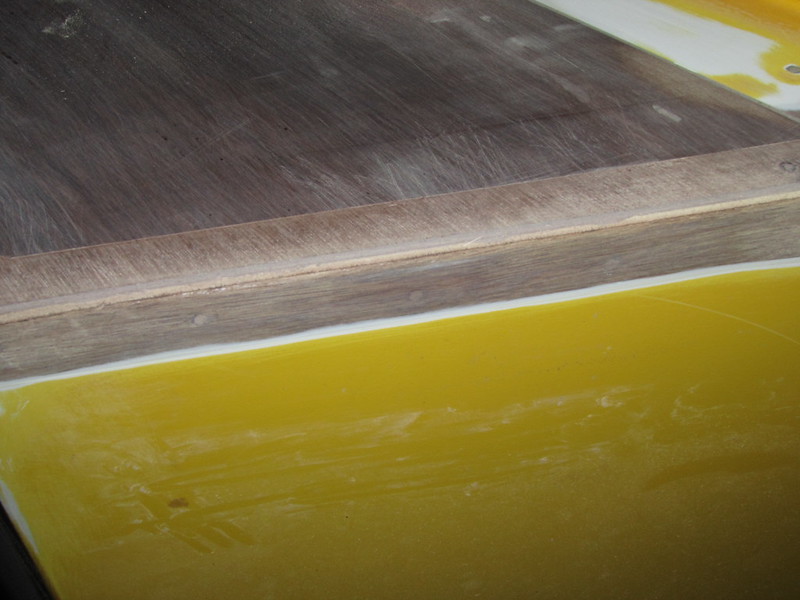
2. Close-up of rounded chine. Again, the router skated over a few low spots, which were dealt with using 120-grit "Sahara" sandpaper
3. Part of the completed tape channel: I had to run along the whole length with the sandpaper to remove a step in the round-over and make the curve slightly fuller than cut
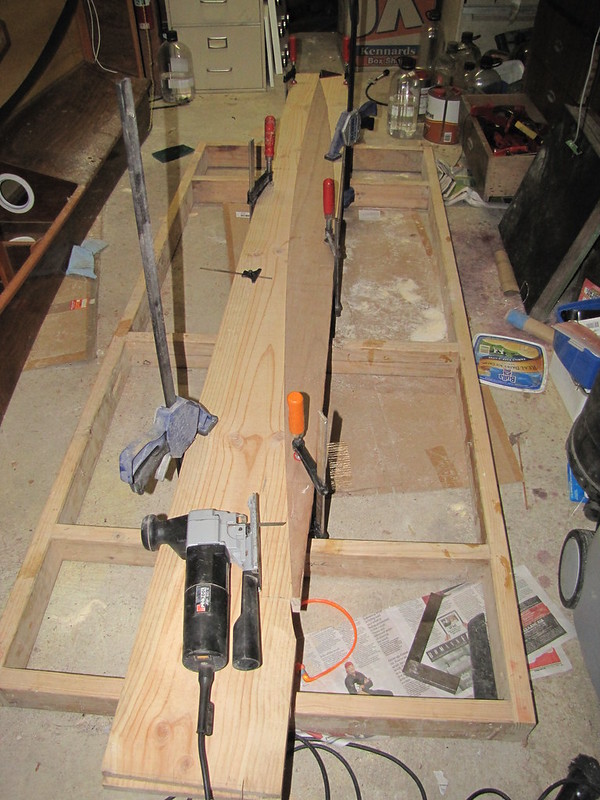
4. More low spots in the repair job, plus a couple of dings from you-know-what
5. Chine region vacuumed and swabbed clean. Methylated spirits used for the latter, then left to dry/ White stuff in the plastic bag is 10 metres of 50 mm-wide fibreglass tape...

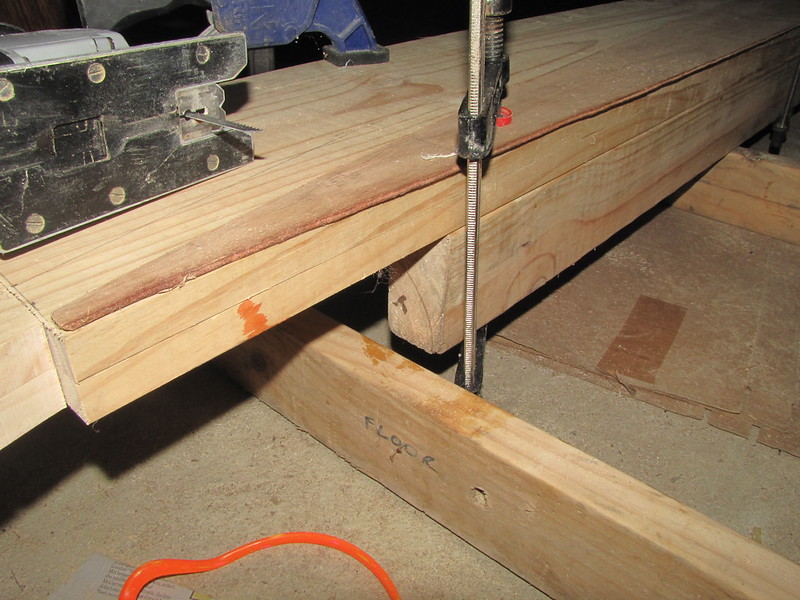
6. Bow view of completed channel. The router's fence and base prevented me from getting any higher up the bow - as it was I had to sand the top of front part of the channel by hand
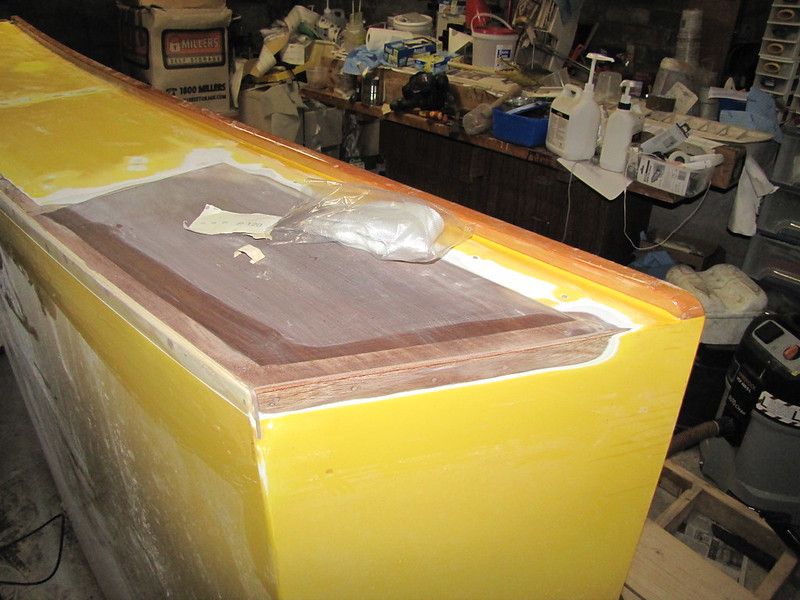
7. 50 mm chine tape cut to length. The kink at the bow will be cut with the scissor to negotiate it - once I reach it with the resin, working from stern to stem
Follow this link to ye Flickrrr account
Since it was rather late in the day for multiple resin coats, and the channel was still probably damp with meths, I left it at that. I'll get onto attaching the tape tomorrow morning. My newly repaired/regulated/re-padded oboe also returned via the post from Adelaide today, so I spent more than my usual practicing blocks getting reacquainted with it. As it is effectivey almost a new instrument as a result, that took some time - and I'll be getting used to it for a while yet.
-
24th January 2013 08:27 PM # ADSGoogle Adsense Advertisement
- Join Date
- Always
- Location
- Advertising world
- Age
- 2010
- Posts
- Many
-
25th January 2013, 06:04 PM #3047
GOLD MEMBER
- Join Date
- Jan 2009
- Location
- Blaxland, Australia
- Age
- 65
- Posts
- 2,551
Hmm... False start to the taping. It seemed to go on fine, with the side face looking perfect. Unfortunately, the bottom face was in the dark and I didn't see the string of air bubbles until too late to fix them... Rather than wait and sand the whole lot off, I stripped it and cleaned off the resin with a vast quantity of meths, then left the meths to evaporate.
The second attempt was much better - given that I was wearing the head torch and could see what I was doing on both sides of the chine.
1. Bow-end of resined tape, first coat, attempt #1. Note the air bubbles: the hull-side part of the tape is perfect, but the hull-bottom side ended up with more than a few air bubbles. The main difference between the two was that the upper surface was well lit, the other one was not. Oops...

2. Stern-end of tape, attempt #1. Note the long air bubble
3. Bow corner, attempt #2. A lot neater :)
4. Top of bow-end of tape run, attempt # 1. Don't be deceived by its flat nature: around the corner there were bubbles galore. End of router track visible on the "top" face of the tape channel
5. Top of bow-end of tape, attempt #2, much the same as attempt #1 at this spot - because I could see what I was doing...

6. 'Midships chine, attempt #2. Look, mum, no bubbles!
7. Chine tape at stern, attempt #2. That long air bubble is back in this photo - I trimmed the end of the tape, cut a relief-slit in the middle of it, then smoothed out the bubble, after this snap was taken. Hopefully the bubble stays banished...
8. Chine tape, attempt #2, looking forward: I'm happy with that

9. Chine tape, attempt #2, without the flash - shows how flat the side surface it (but it was like that the first time). The hull-bottom side of the tape looks a wee bit dark here...

10. Another flashless view of the nice flat tape, attempt #2 :)

Follow this link to my nicely-taped Flickr account...
I keep popping down to the workshop to check that the tape hasn't lifted again - so far so good. I won't put the second coat on until I'm certain that it won't allow the tape to float. I do not want to have to make a third attempt!
Note: I put the second coat on this evening with no problems - and the tape had still remained flat beforehand :). Very reassuring. Final coat(s) tomorrow morning, then it will be on with the priming and the rest of it.
-
2nd February 2013, 05:09 PM #3048
GOLD MEMBER
- Join Date
- Jan 2009
- Location
- Blaxland, Australia
- Age
- 65
- Posts
- 2,551
I've had a few had a few other things to do (like the CNC box) that have been keeping me from finishing off the boat, but I have been doing a bit each day. Speaking of the CNC box - I just noticed that there is a new "Electronics" forum here. My vanity is not in the least tempted to add my CNC box to that, however: too many stupid mistakes have been made by the "designer"/"builder" <rolls eyes>.
I've had a few boat snaps build up over the last few days: I'd better get them out of the way so that I didn't get overloaded and confused (way too easy). The first batch is initial conniptions with the boat's roof:
1. Setting up to cut out the two sides for the roof supports. That's the theory, anyway. It all looks stable enough
2. There's a couple of 4x2s under the two 19 mm planks of P. radiata, to keep the jigsaw blade from sawing through the frame underneath. That actually worked...
3. Close-up of the bow end of the roof side(s). Cutting both sides out at once was supposed to save time. Ha jolly ha :E

4. Ready to roll - or, rather, cut. Note the ply offcut from one of the two original 3.4 mm sheets used in the boat's construction. I hand-palned and sanded it to fit the actual sheer curve of the boat a bit more accurately. I did put the engineer's square back in a safe place after taking this snap - as safe as can be given the dire state of the "workshop"
5. Close-up of one of the supports, and the plywood "template"
6. Starting notch for the jigsaw - first cut. I had a "bright" idea was that I could run the jigsaw along the firlmly-clamped ply template and I would get the right shape - so I installed said "template". Two problems: the main one being that I tried to cut the whole thing in one go rather than backing out every inch/couple of centimetres or so to give the blade a chance. So, of course, the blade wandered out of true... The other problem was the two boards sandwiched together. They vibrated together - of course - during the cut, thus compounding the first problem. Tears before bedtime, children... The orange thingy is a pair of nifty lightweight semi-unlosable ear-plugs aus Duck Flat Wooden Boats, acquired when I was there in April 2010

FFoollooww tthhiiss lliinnkk ttoo mmyy FFlliicckkrr aaccoouunntt .. .. ..
After a bit of head-scratching - and grumbling - over my "handiwork" - I decided (also after a short-lived attempt to plane off the bevel and some measuring of the aft ends of the sides) to junk the the two pieces and put them in the scrap stack. While moving them I decided that they would in any case have been too heavy, and had another "bright idea" - this one was to cut the sides out of the (exterior grade) plywood sheets intended for the roof. Having fossicked about I found some el-cheapo 6 mm ply in one of my stacks that will do for the V-frames, thus liberating sufficient material from the new (and as-yet-unacquired) roof-sheets for the sides.
I'll probably glue strip "feet" to the hull-edge (bottom) of the sides to spread the load a bit and attempt to save the surface "finish" on the side-/fore-decks (such as it is), but am scratching my head over this one. Bendy ply is an obvious candidate, but Mr Plywood doesn't stock it, and one source wants around $100 for a single 2400x1200 sheet - way too much money and bendy ply for my purposes, even if I do need (a very small amount of) said material for b.o.a.t.'s kayak (I may yet use some of my 1/64 aircraft ply and laminate it in position for the kayak).
I did get some Norglass marine enamel paint for the roof and support frame while at Whitworths for the chine tape the other day - colours chosen by The Boss and myself ("Sea Mist" (her) for the roof, and "Opal White" (me) for the frame). The roof is now on hold until I've saved up enough to acquire the plywood. When I do get the plywood, I'll rough-saw the sides one at a time and then tack the template to the pieces and run them slowly through the router table using a ball-bearing-piloted bit.
I have some snaps of further work on sealing up the various patch(es) on the boat itself, which will appear in due course...
-
2nd February 2013, 06:08 PM #3049
GOLD MEMBER
- Join Date
- Jan 2009
- Location
- Blaxland, Australia
- Age
- 65
- Posts
- 2,551
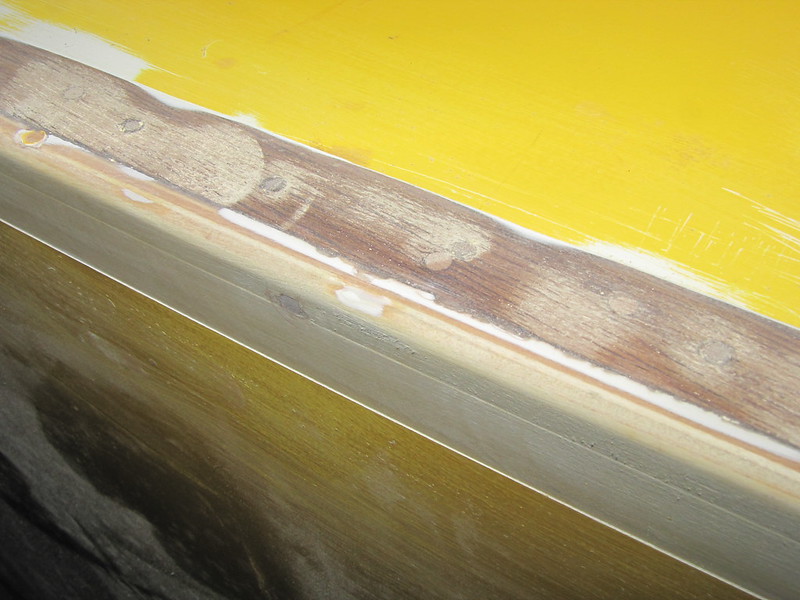
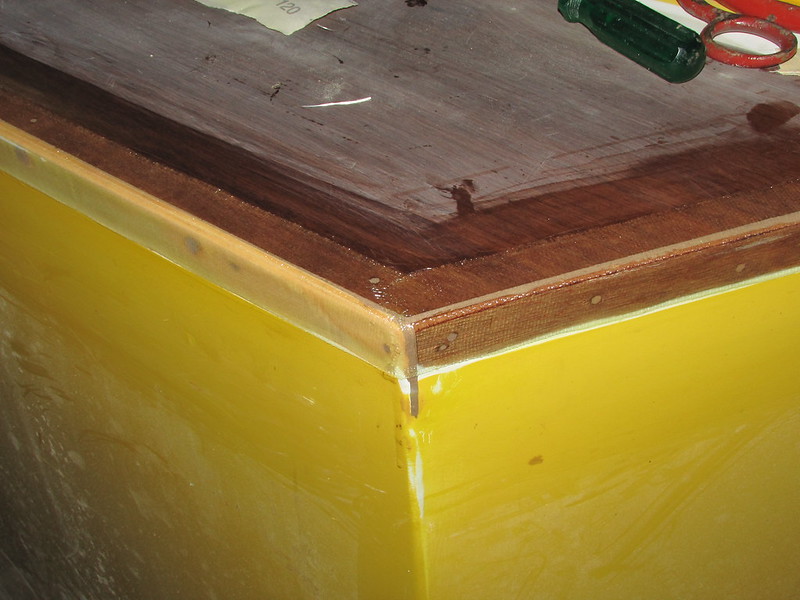
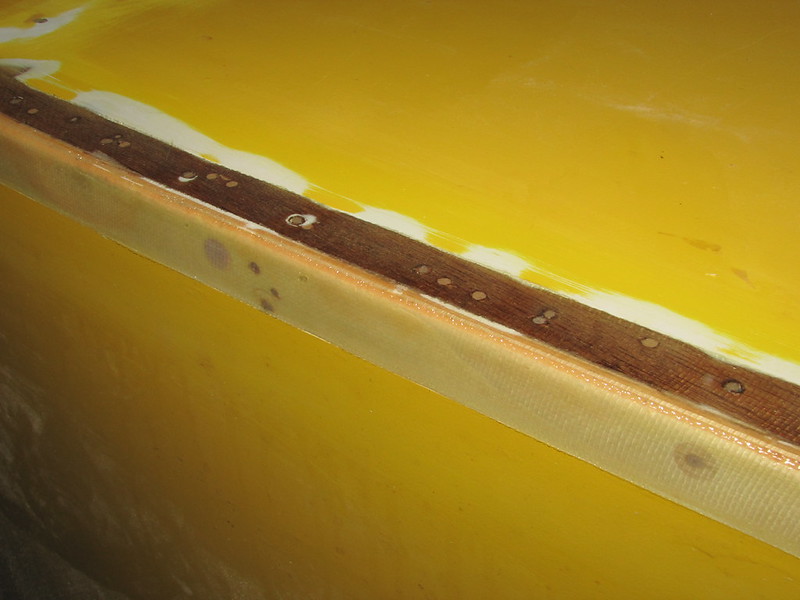
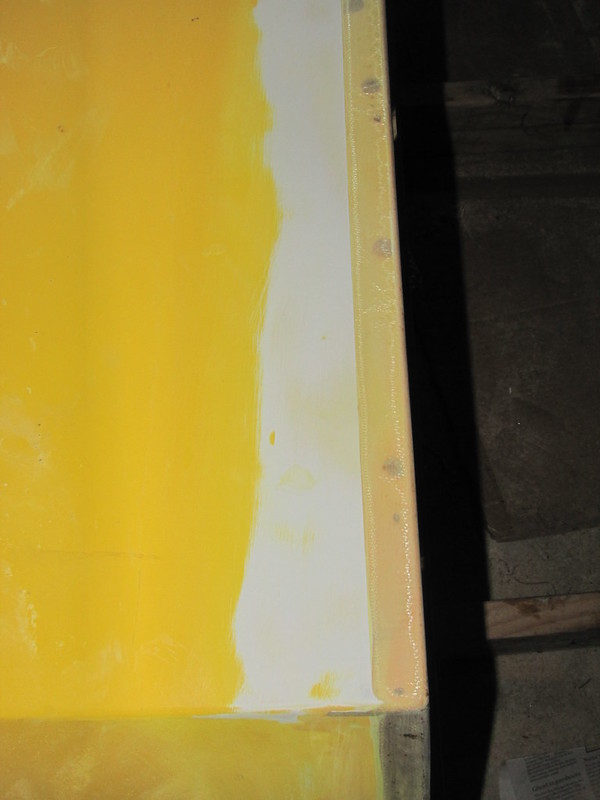
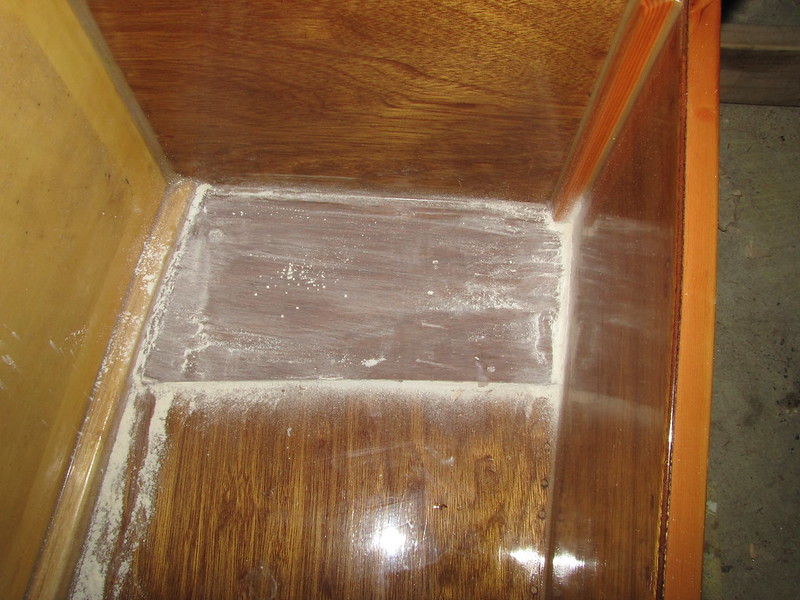
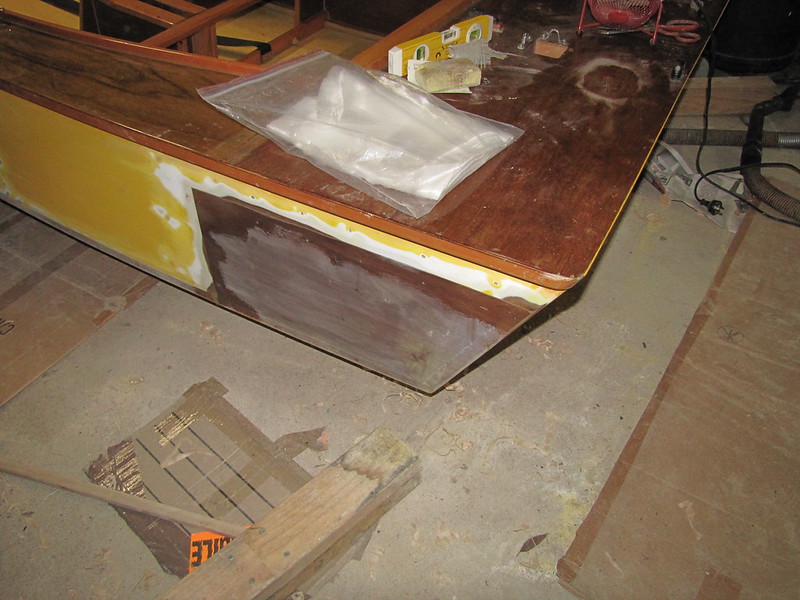
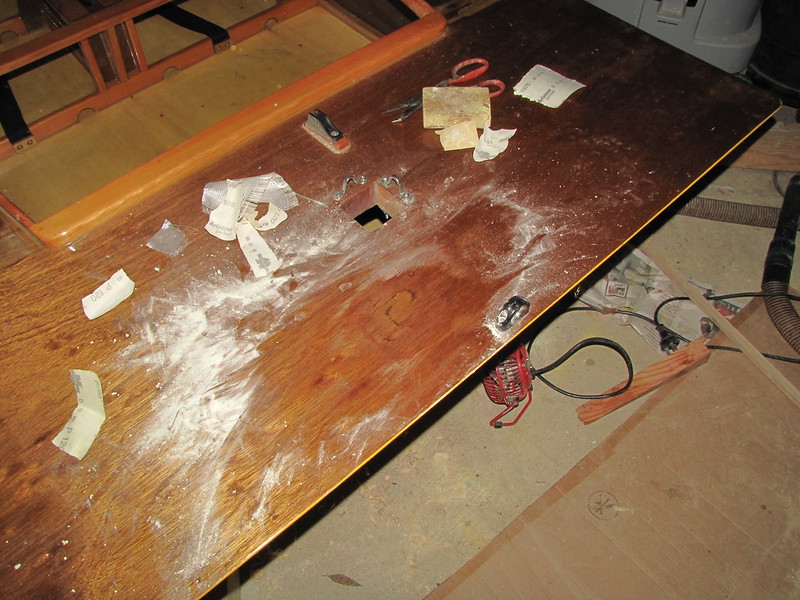
1. 3rd and last coat o' resin on the chine tape. Not a very good snap, but it does show the selvedge poking up - prior to sanding
2. Close-up of the resined tape at the stern: hull-side surface of chine

3. Hull bottom chine sanded clean; quite a bit of yellow paint sanded off as well (shrugs). They aren't visible here, but there are a few nasty gouges (predictably) in the soft poplar-ply bottom, courtesy of the boat's rapid and unexpected descent from its trailer. They are going to need a bit of filling too - once I've dealt with the topsides
4. Boat on its "back", bottom chine surface sanded, close-up of bow. A bit too much sanding in some spots...
5. Test-quantity of BoteCote water-soluble epoxy undercoat. I used this undercoat before when doing the "original" (which one?!) finish, but I wanted to get a small batch to see if it worked in the same way as the first lot. I think it probably will - unless they've added extra emulsifiers...

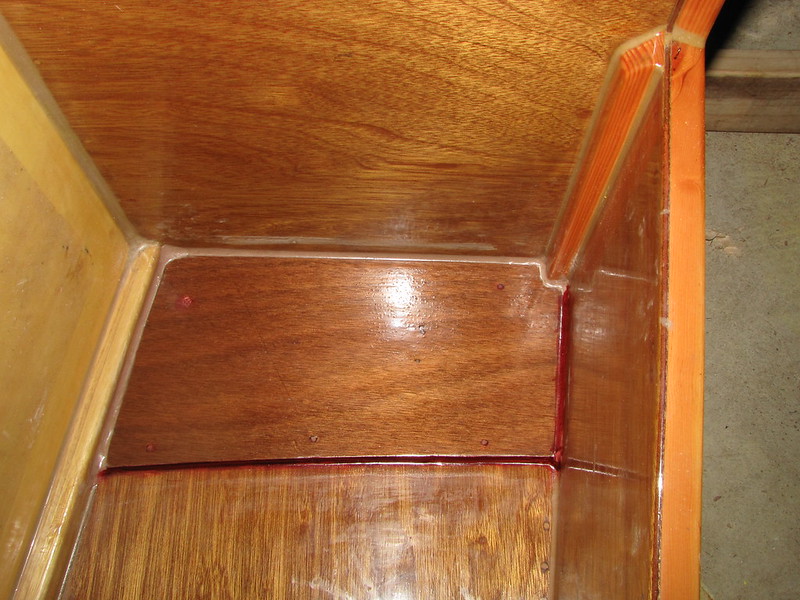
6. Boat on its starboard side for sanding the cockpit butt-strap. Note the spots of wood stain...
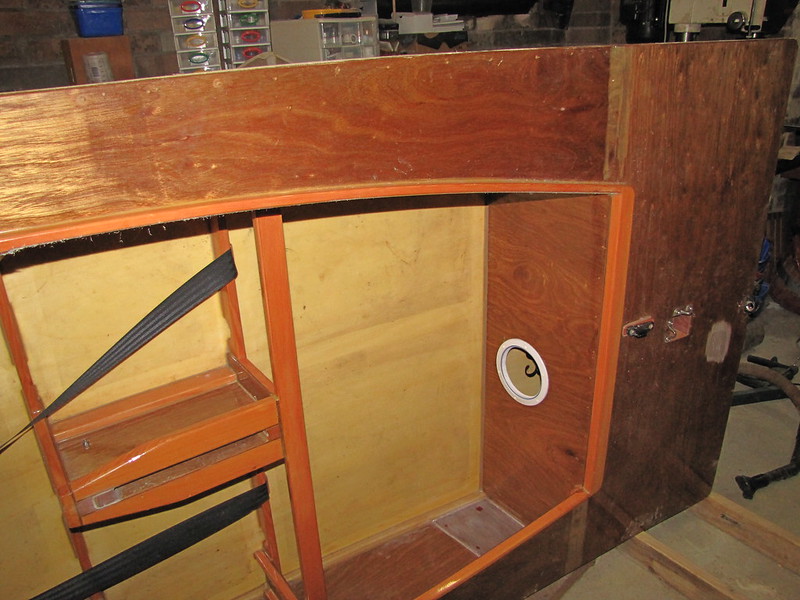
7. Cockpit butt-strap with resin sanded back: and the rather belatedly-added "rosewood" stain (Feast Watson = Orica alcohol-based woodstain). It didn't do much to the cured resin, of course, but it made me feel better - until it came off again when sanded...
8. Resin-coated and sanded (again). The wood stain, of course, came off in a twinkling: if it hadn't, the resin/glue would't be much use!
Follow this link to wossname, to see lots of thingies...
-
2nd February 2013, 10:01 PM #3050
GOLD MEMBER
- Join Date
- Jan 2009
- Location
- Blaxland, Australia
- Age
- 65
- Posts
- 2,551
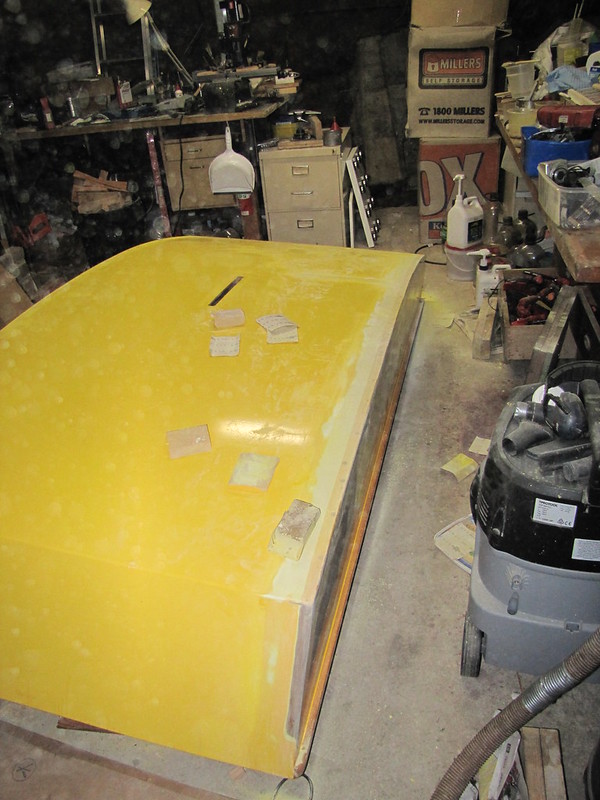
Right. More snaps...
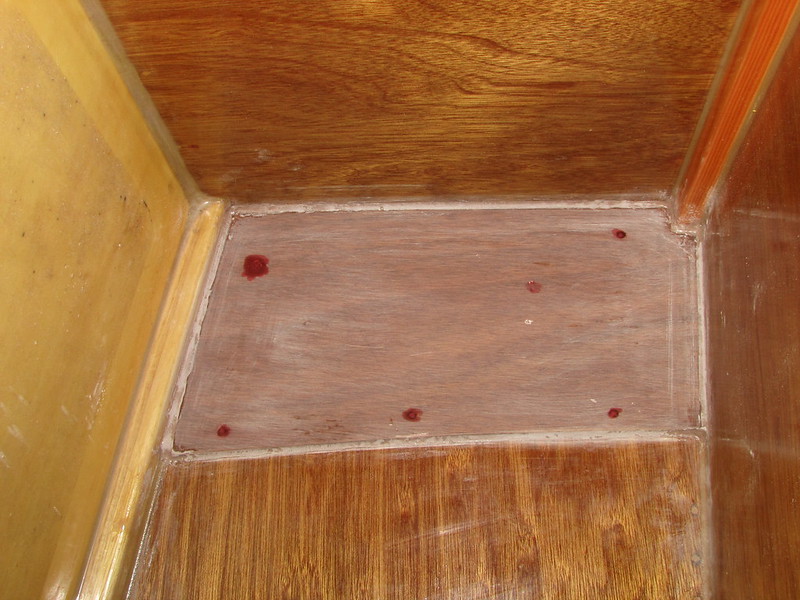
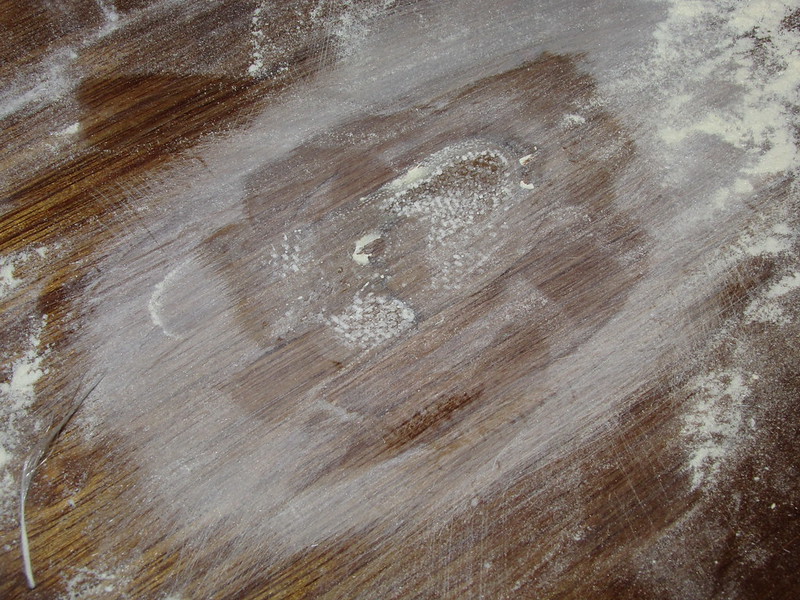
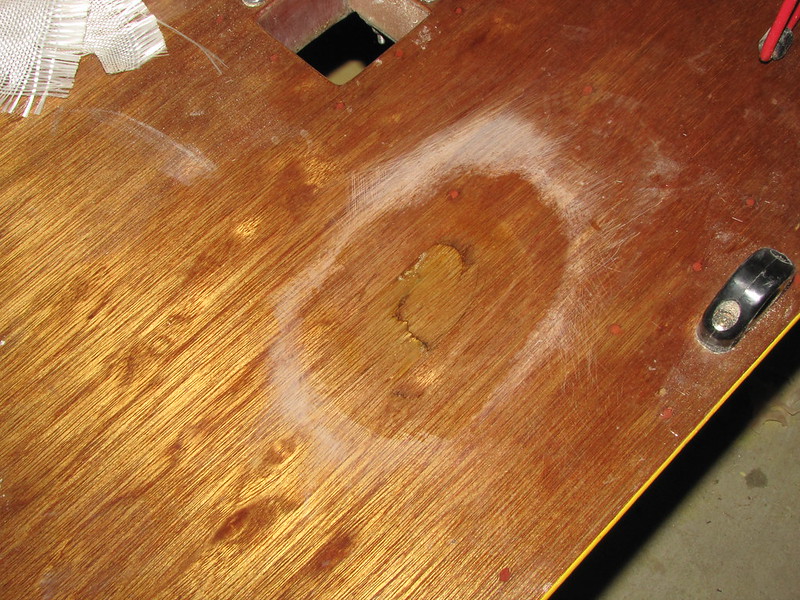
1. Hull patch - complete with bare wood! This is what happens when you don't prime yer material first <cough, cough>...

2. Cockpit butt-strap with stained fillet. The "rosewood" wood stain was painted onto the freshly applied fillet with a cotton bud, rather than mixing it in (I forgot). As it turns out, this approach was quite successful :). The whole thing has turned out quite nicely
3. Untreated bow-patch has been primed with WEST resin; no glue powder - yet. Note that I also ran over the butt-strap face and edges - and the edges of the foredeck ding support - with resin at a previous stage, to catch any lurking bare patches on them (there were a few). When reviewing the photographic results I found the big bare patch
4. Re-introducing the Storer/Duck Flaticing bagglue syringe...

5. Formerly-bare area now has a sizeable fillet of glue mixture squeezed and pressed into it, using the "glue syringe" and a large filletting stick (last used to do the side air-tank floor fillets). There's an air bubble visible on the left which popped later, leaving a void - which I will probably fill in with either resin or glue. The area is still a bit of a mess at this point; the row of small blobs on the bow transom cleat were from the patch-attaching process
6. Bow patch area cleaned up - more or less. Again, that had to be done blind and I reached the end of my tether pretty quickly on that one. The application of the glue, formation of the fillet and the cleaning-up were all done "blind" - so it's remarkable that it wasn't more of a mess than it is. At least, as The Boss pointed out, it won't be seen. Note that the bubble in the fillet on the left has popped
Follow this link to my Flickr account, yada yada yada
That's the patch more or less dealt with, other than putting some resin on the bare timber areas on the outside where I sanded too much - when I remember to do so! The next stage is filling in the foredeck ding with resin and glass, so I'll try to do it then ;). The ding was still pretty deep, so it required quite a bit of glass to top it up sufficiently. More on that next.
-
3rd February 2013, 02:47 PM #3051
AJ
- Join Date
- Jun 2007
- Location
- Aberfoyle Park SA
- Age
- 63
- Posts
- 1,787
Glass tape selvage is always a pain.
the theory of poxy encapsulation as received from Duck Flat's "Book of Dreams",
is that the glass is buried, never to be exposed to water, thus eliminating possible wicking.
The practice seems to be (for me anyway): load up the coats of pox till sanding off the selvage
won't expose other bits of glass, do said sanding, then give it another coat or two of pox to re-bury it.
Then sand it again prior to painting.
-
3rd February 2013, 02:56 PM #3052
GOLD MEMBER
- Join Date
- Jan 2009
- Location
- Blaxland, Australia
- Age
- 65
- Posts
- 2,551
G'day b.o.a.t.,
That sounds a bit like more work ;). Funnily enough I was actually thinking about the wicking of water when sanding back the foredeck patch, and was hoping that the epoxy primer that I'm going to smother the chine with would seal off the mown edges. On pondering your comment for a second or so I have to admit that it probably wouldn't suffice - so more resin on them, then.
Always when you think you've (almost) finished, something else pops up! Better safe that sorry, though, and given that the roof is still nowhere in sight, it doesn't matter anyway. To look on the positive side, I get a whole lot more sanding practice ;).
Thanks,
Alex.
-
3rd February 2013, 03:27 PM #3053
GOLD MEMBER
- Join Date
- Jan 2009
- Location
- Blaxland, Australia
- Age
- 65
- Posts
- 2,551
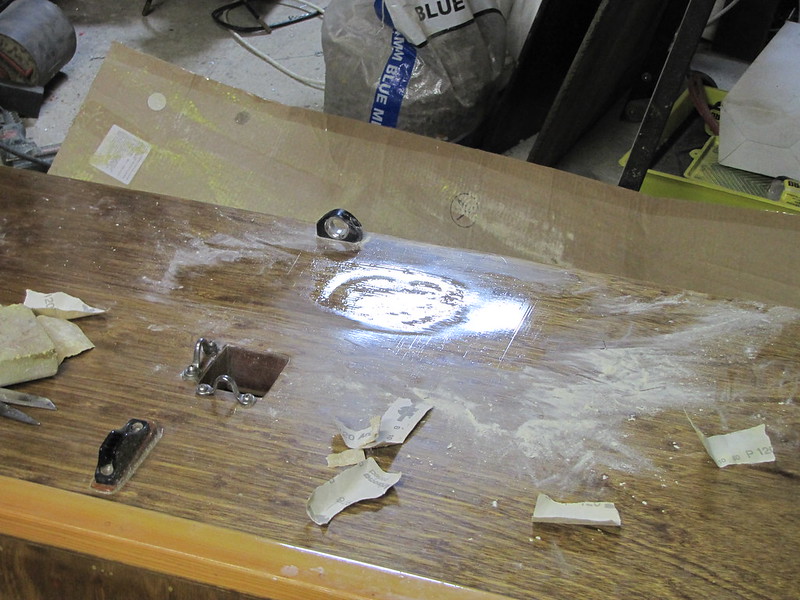
1. Ding close-up with 2 oz glass patchlet
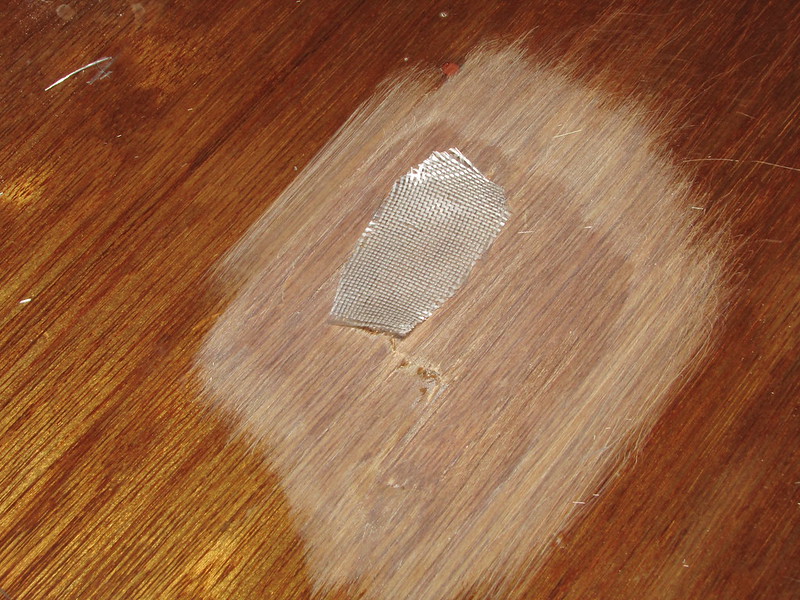
2. Very small amounts of resin used to attach the glass. About 0.8 ml was mixed in the first instance - far too much!
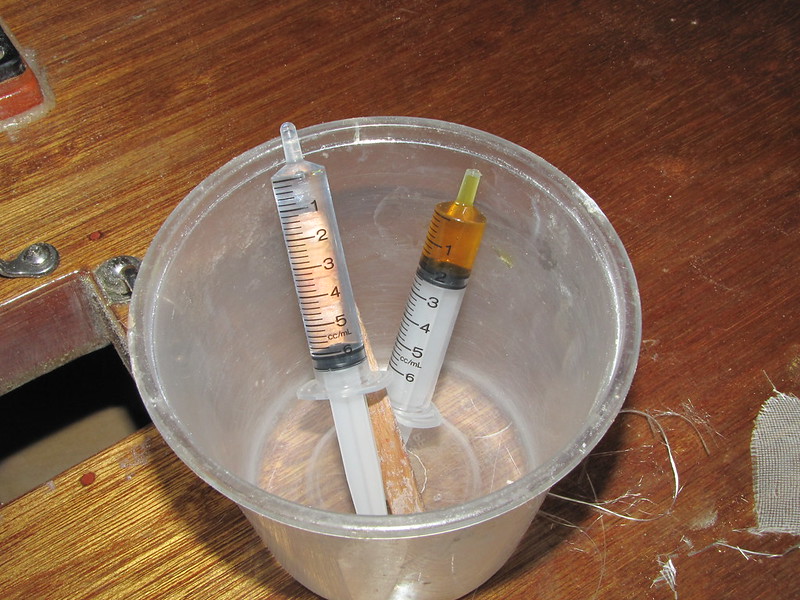
3. Patchlet sogged in place

4. As I said, a tiny amount used. This is what was left over after the first run

5. More 2 oz. cloth; the rest of the hole had some 6 oz cloth added to it, which still didn't fill it right up - but I left it at that. I thought that this snap had the 6 oz cloth in it, but if it's there, it's invisible! Note the resorcinol bleeding at the broken edges of the top ply
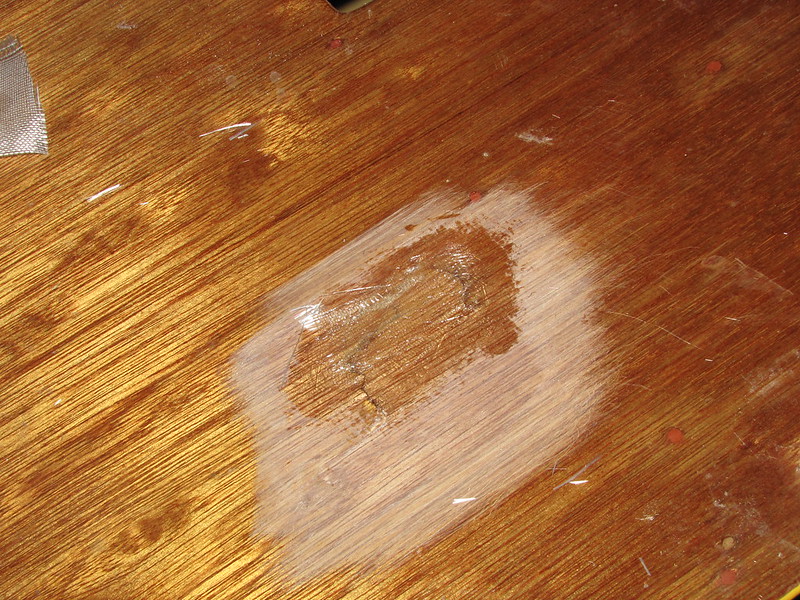
6. Boat tilted forward to get the ding level. Well, almost level... The props towards the stern were in fact two of the legs from the original building frame
7. Glassed area sanded

8. Close up of sanded patch. Still a bit more to fill: this was be done with resin only. There's that 6 oz. cloth!
Follow this link to my Flickr account
Next batch o' snaps will show the filled and sanded patch.
-
3rd February 2013, 05:35 PM #3054
GOLD MEMBER
- Join Date
- Jan 2009
- Location
- Blaxland, Australia
- Age
- 65
- Posts
- 2,551
1. Bare areas of hull patch caused by too much sanding have been given a coat of resin (I finally remembered!). Maybe a bit more resin after some light sanding, before the epoxy undercoat goes on
2. Hole filled with WEST 105/207 resin: all the glass cloth has vanished :). A bit of sanding, then some varnish - and that will be that. The resorcinol bleed from the broken plies is even more obvious here; as is the small amount of glue that I failed to sand off (or glass that hasn't wetted properly)
3. Resin puddle sanded back
4. Sanded patch seen from above (and wiped clean of dust - a bit)

5. A light smear of resin to fill in some bare patches. The resorcinol stain is even more visible - marking out the impact site of the branch-end nice and clearly
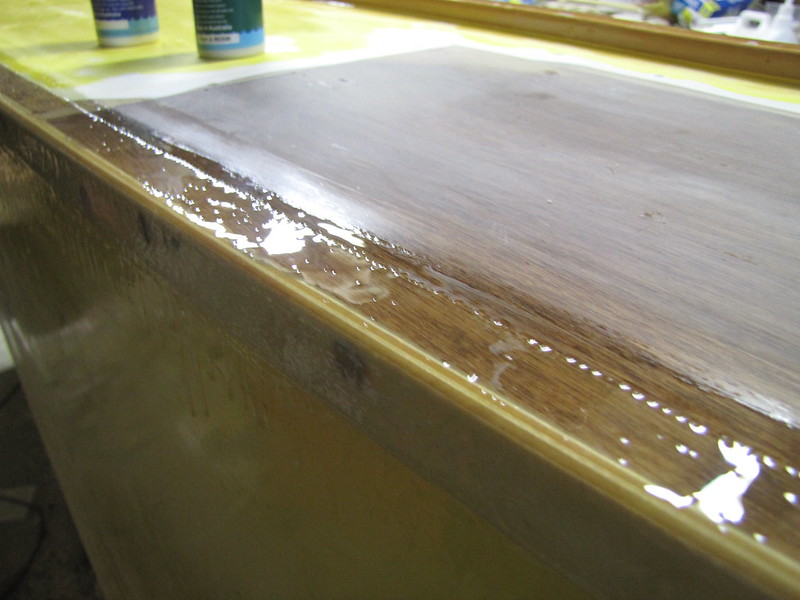
6. Patch against the light: It's still a bit of a blob but "it'll do". Probably ;). Note the brush-streaks in the varnish -Le Tonkinois varnish's surface tension/splitting prevented an even finish. Oh well...
Follow this link to my Flickr account...where's Mr Snappy? Good question...
That's the snaps up to date, finally. I'll turn the boat over once I've finished with the foredeck patch and have a go at sealing the selvedges of the chine tapes. Fingers crossed.
-
3rd February 2013, 05:51 PM #3055
GOLD MEMBER
- Join Date
- Jan 2009
- Location
- Blaxland, Australia
- Age
- 65
- Posts
- 2,551
I've just been feeling the chine edges - the tape along the bottom edge sticks up more than along the side edge, but I'll go ahead and coat both in any case, sanding lightly between coats. I might even slick any later coat(s) off with a roller.
-
4th February 2013, 03:13 AM #3056
AJ
- Join Date
- Jun 2007
- Location
- Aberfoyle Park SA
- Age
- 63
- Posts
- 1,787
Maaaaaate... It's an OZRacer, not an 18ft skiff.
Sand it. Wave a brush at it. Go sailing !
;-)
AJ
-
4th February 2013, 01:36 PM #3057
GOLD MEMBER
- Join Date
- Jan 2009
- Location
- Blaxland, Australia
- Age
- 65
- Posts
- 2,551
Aye, aye, Cap'n :).
-
6th February 2013, 09:23 PM #3058
GOLD MEMBER
- Join Date
- Jan 2009
- Location
- Blaxland, Australia
- Age
- 65
- Posts
- 2,551
Rightio. Where are we up to? Hmm. Sanding. Lots and lots of sanding. By hand. Any further projects are going to have the use of power sanders incorporated therein, somewhere. I dealt with the Forest o' Furry Feelers fairly brutally, with a Perma-Grit file. Said bits of glass were rather reminiscent of my seeing hundreds of thousands of cockroach feelers - during the day - waving up between the cracks in the concrete blocks that made up wharves in Mombasa Port when I was there many moons ago. A sight not to be forgotten - even though one might wish that it could be ;).
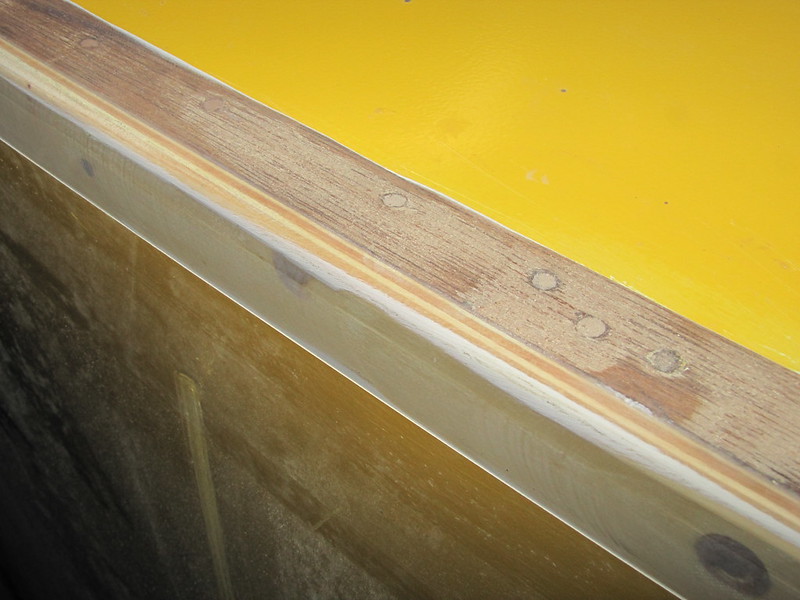
1. Heavy-handed instrument for heavy-handed "boatbuilders"

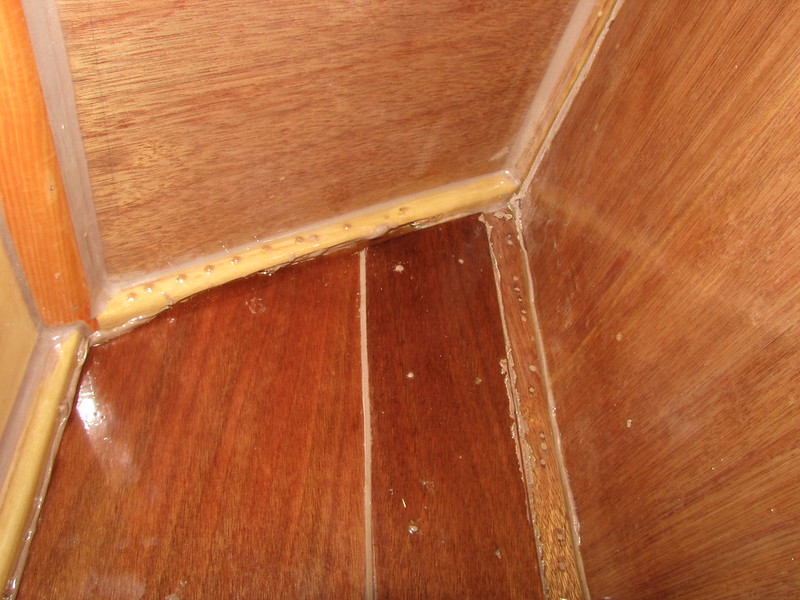
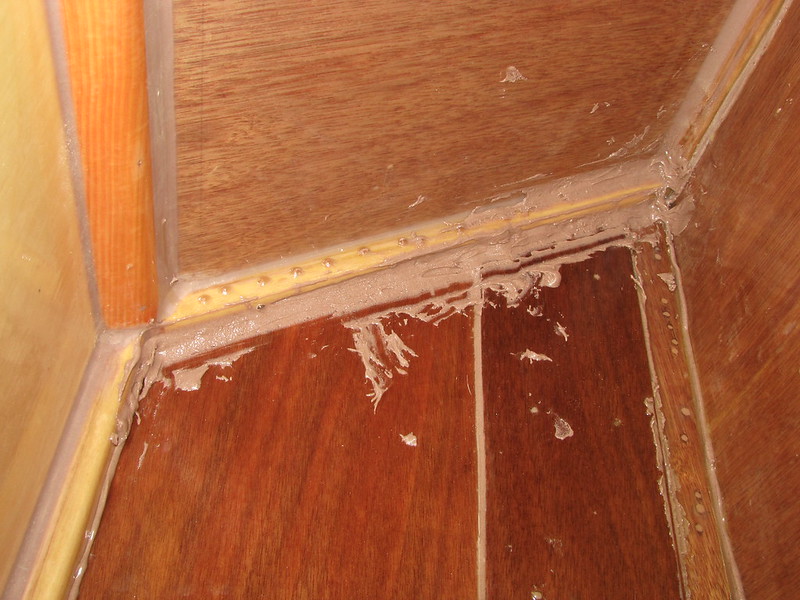
2. The Forest of Furry Feelers has been gouged out, along with quite a bit of resin and paint - but remarkably little wood, considering. The gouge was filled in with neat resin
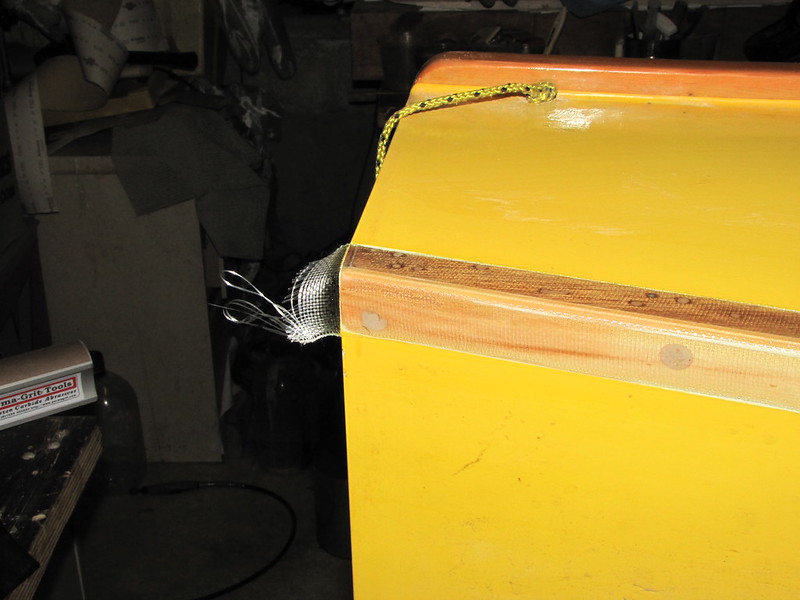
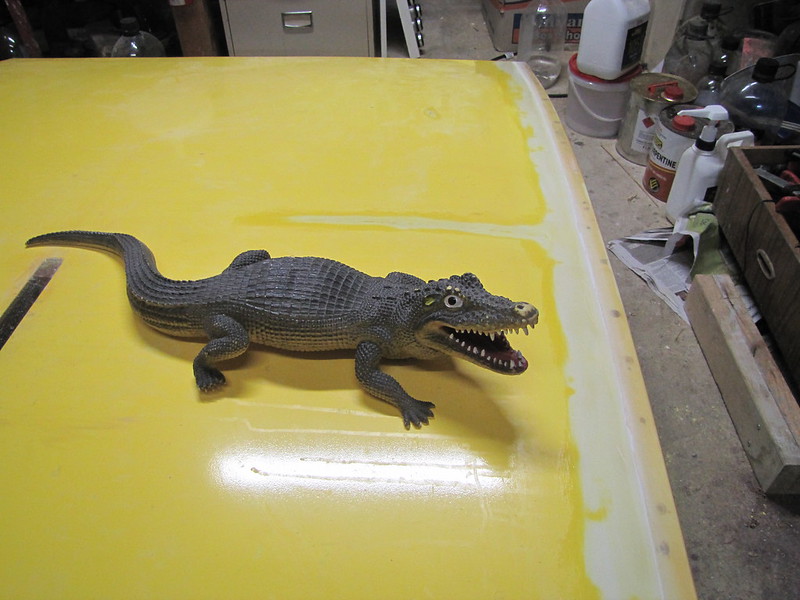
3. Mr Snappy lending a paw or two. Note the filled-in ding in the hull bottom behind Mr S, where the boat hit a rock on her way to the ground
4. Hull-bottom part of tape encapsulated and faired in. Now for the hull-side edge...
Follow this link to yon Flickrr account...
Camera lens needs cleaning after that last bout of snaps. The hull-side part of the tape should be a lot easier to deal with as the glass didn't poke up on that edge, and the resin coats are a lot thinner. once that's done and the chine itself cleaned up, out will come the water-soluble epoxy undercoat - and some more sanding, no doubt. Unless I do something very unusual and just splash some undercoat on it. What's the odds of that happening, eh?
The nice chappy at Mr Ply&Wood Hornsby said that he thought that my plywood order had a good chance of being delivered tomorrow. He went out of his way to assist, which was very nice.
-
7th February 2013, 02:45 AM #3059
Intermediate Member
- Join Date
- Oct 2008
- Location
- Vermont, USA
- Posts
- 29
WOW! Alex this is looking so great.
Alex,
A very neat job of this "furniture/boat repair"

Stephen (VT USA)
-
7th February 2013, 08:20 PM #3060
GOLD MEMBER
- Join Date
- Jan 2009
- Location
- Blaxland, Australia
- Age
- 65
- Posts
- 2,551
Hello Stephen, thanks for the kind words :).
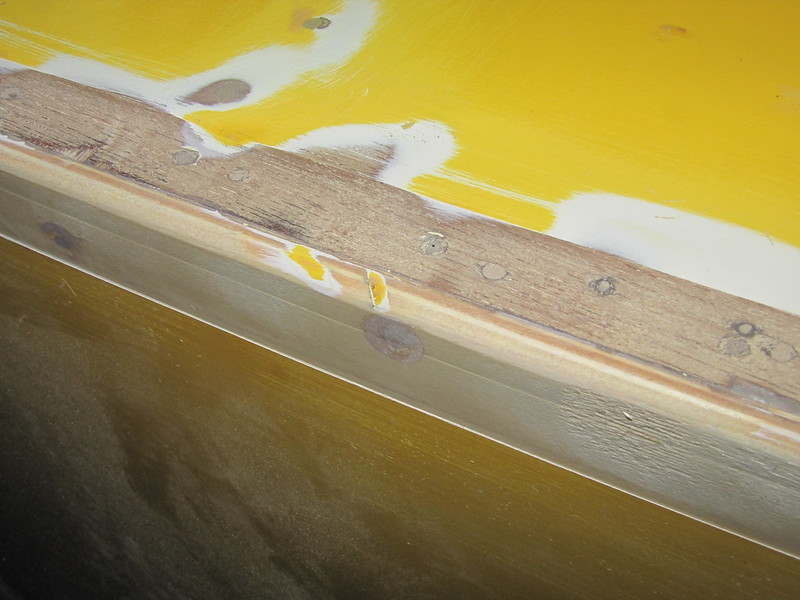
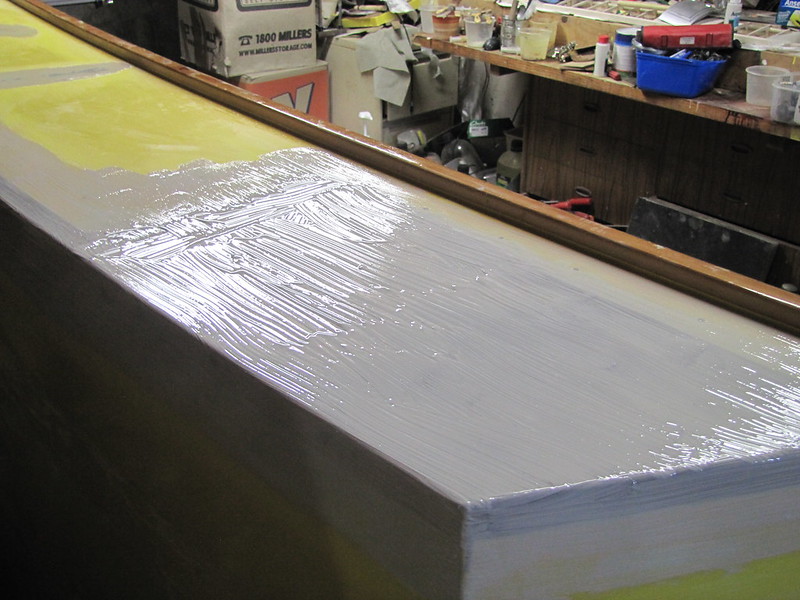
Sanding of the chine and environs complete - for the moment. The water-based 'pox went on next:
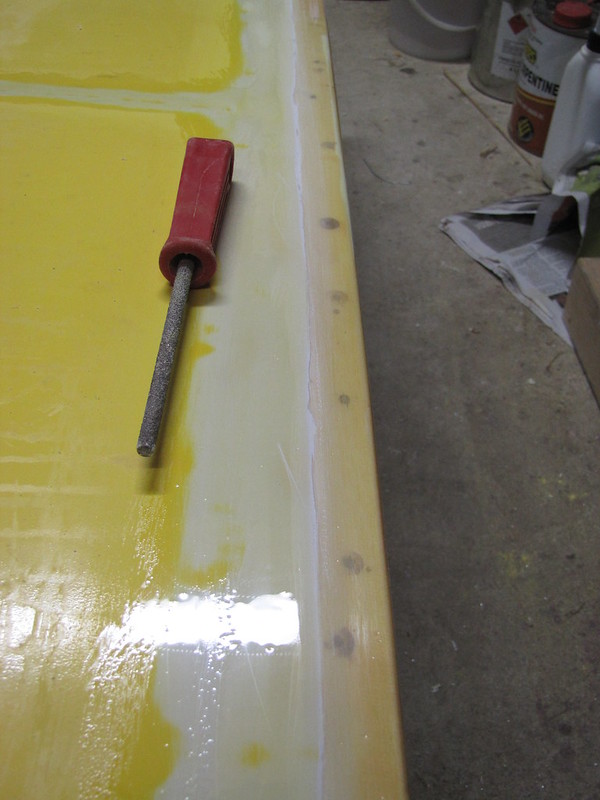
1. Hull with its first coat of epoxy undercoat; it will need at least one, maybe two, more coats

2. Closer view of the hull patch region. This is actually quite dished (my fault) - it doesn't show up in photographs but human (stereoscopic) vision detects it very easily. So I'm filling it in slightly with some the of epoxy undercoat
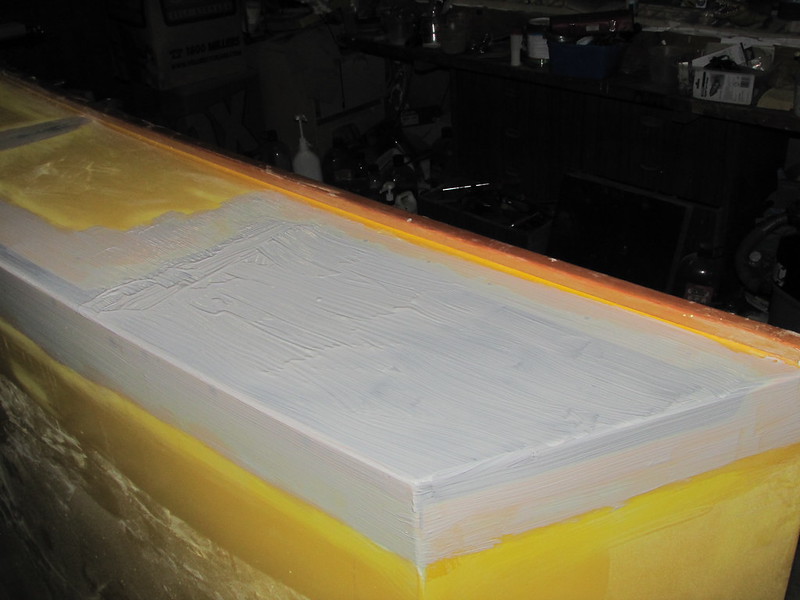
3. Another view of the thick puddle of undercoat in the dished area. I have to say that using a roller gives a better result with this stuff - I used a brush here, of course - but it would not have been possible to apply it at this depth using the roller
Follow this link, this is a recording; follow this link, this is a recording; follow this link, this is a...
Interestingly, my thoughts about an absence of emulsion in my first batch of BoteCote water-based epoxy high-build primer seems to have been borne out by my experience with this sample batch. The original stuff took a long time to mix - in fact, it would separate out very quickly no matter how long I spent mixing it. This batch, however, appeared to mix quickly - and stay mixed. So my idea that the earlier batch was missing some or all of its emulsifiers seems to hold some water, so to speak. Or the older batch wasn't meant to have emulsifiers at all, but I find that hard to countenance, the nature of the beast being what it is, i.e., "water-based".
The plywood didn't show up today, but that was probably always going to be a long shot. Maybe tomorrow - not that it matters too much since I am still hard at it on the boat. Well, reasonably hard at it. All right, a bit hard at it. I am being careful to not do to my elbow and wrist what I did to them at the end of 2011, i.e., needing weeks of physio on 'em, so I'm being much more careful about the length of all sanding sessions - keeping 'em short!
I had another "bright idea" regarding the putative roof: that the sides of the supporting frame should have some feet to spread the load on the poor foredeck a bit, otherwise the sides will end up sinking into the varnish and have to be surgically removed with a chainsaw. Or similar. The most obvious solution - to my weird mind - was to use 5 mm bendy ply, thus doing in two bits with ye single rock: it allows me to significantly spread the cost of the very small amount of bendy ply that will be used on b.o.a.t.'s kayak ;). So I ordered a sheet of that (and some seam tape for the kayak) from Boatcraft Pacific, should be here next week. Woo hoo :).
Some further notes about AquaCote epoxy primer.
I found the instruction pamphlet after tea, and it made a point of saying that the primer should not be put on too thickly or it won't dry out and the cure will be a lot slower. As it was still wet I scraped off most of what I'd put on, using an old credit card and leaving a thin, even-ish layer. Moral of the story - read what it says on the tin before you start playing with it ;).
The other thing is that although the original batch of AquaCote was hard to mix, that didn't stop it from curing relatively quickly, even in the swamp. In fact, I remember it being extraordinarily tough stuff to sand - much harder than ordinary BoteCote. It will be interesting to see the curing and sanding characteristics of this newer batch compare.
I think I'll put the next coat(s) on with the roller.


 Reply With Quote

Similar Threads
-
New Queensland PDRacer Build
By duncang in forum Michael Storer Wooden Boat PlansReplies: 71Last Post: 26th April 2012, 08:30 AM -
Oz PDR build in Adelaide - sexy black PDRacer
By m2c1Iw in forum Michael Storer Wooden Boat PlansReplies: 39Last Post: 27th April 2009, 06:30 PM -
OZ PDRacer - Dylan's build in the Philippines
By Boatmik in forum Michael Storer Wooden Boat PlansReplies: 16Last Post: 23rd February 2009, 05:50 PM -
Brisbane Timber and Working with Wood. Boatmik/PDRacer
By Boatmik in forum Michael Storer Wooden Boat PlansReplies: 1Last Post: 11th April 2007, 08:06 PM -
Flawed wood on the TS --DUCK!
By Robert WA in forum WOODWORK - GENERALReplies: 7Last Post: 19th February 2004, 11:42 AM
Tags for this Thread
balanced lug,
boatmik,
build,
dacron(tm),
douglas fir,
duck,
enamel,
epoxy resin,
fibreglass,
hoop pine,
interminable,
lug,
machinery,
materials,
michael,
oregon,
oz racer mk 2,
ozracer,
paint,
paulownia,
paulownia/glass mast,
pdracer,
plywood,
polytarp,
primers,
really simple sails,
sail-making,
sailmakers thread,
sanding,
storer,
sydney,
timber,
tools,
varnish,
verbose,
western red cedar,
wood,
wood duck,
wrc
