

 Thanks:
  Likes:
  Needs Pictures: 0
 Picture(s) thanks:
Results 3,241 to 3,255 of 3347
-
7th July 2013, 05:52 PM #3241
 GOLD MEMBER


- Join Date
- Jan 2009
- Location
- Blaxland, Australia
- Age
- 65
- Posts
- 2,551
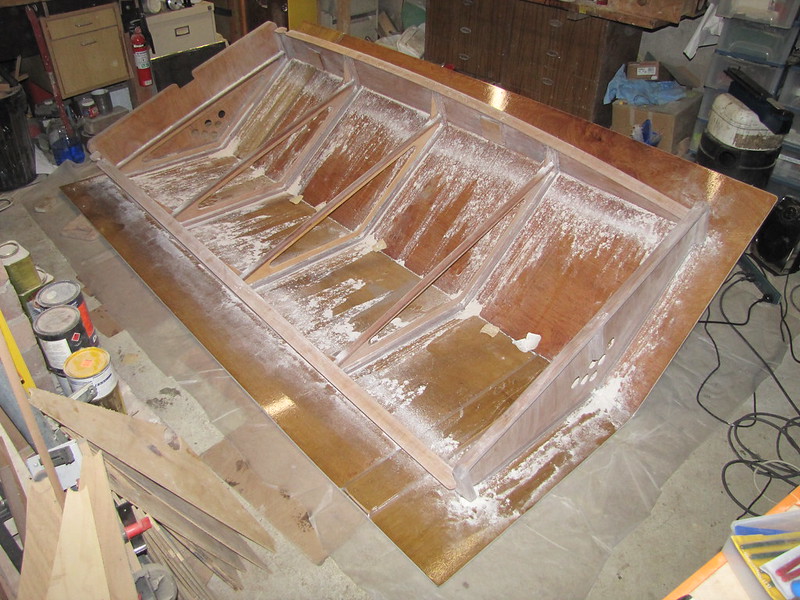
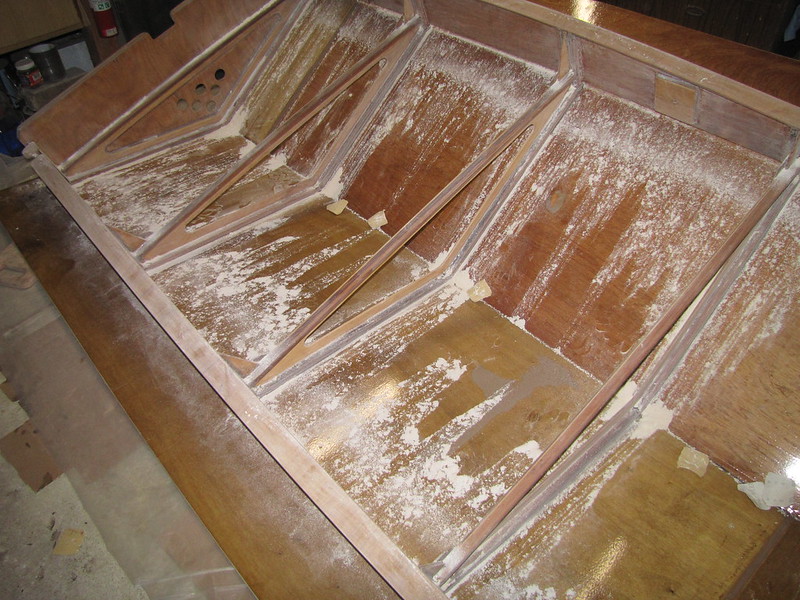
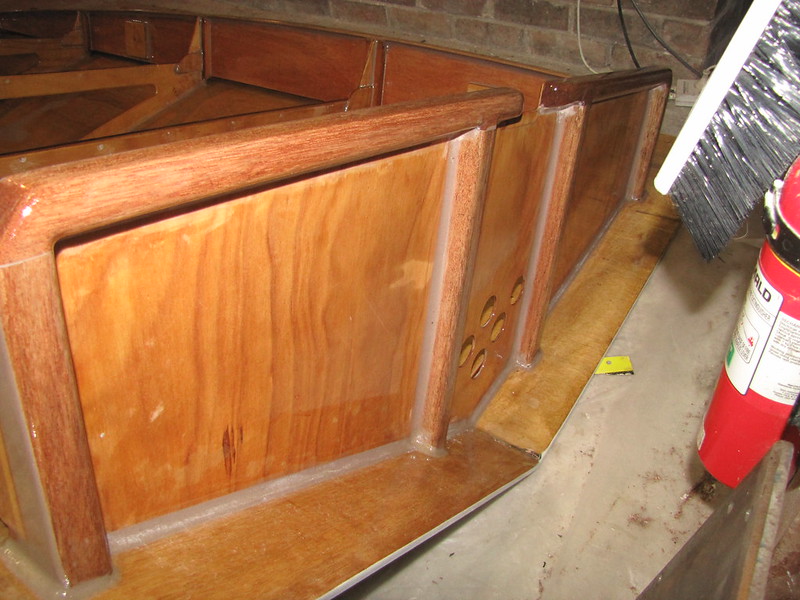
 A bit of progress <gasp, stagger>
Without further ado:
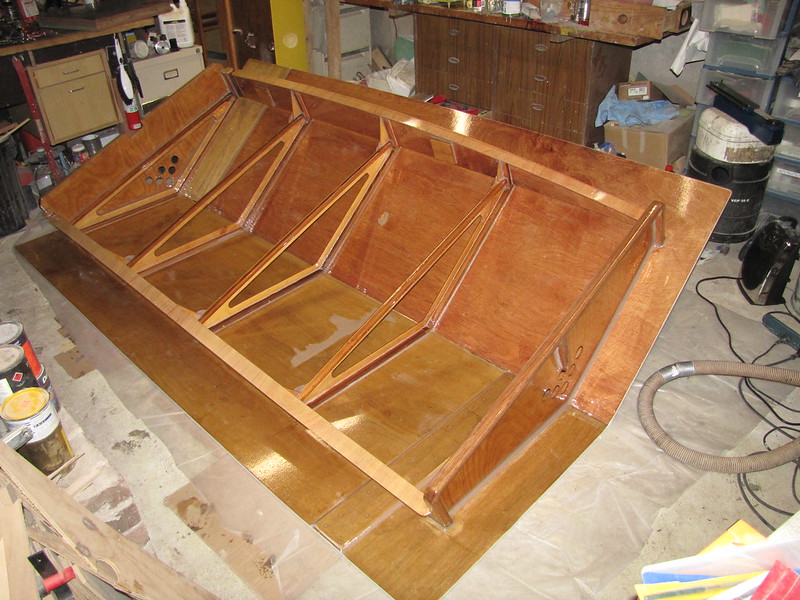
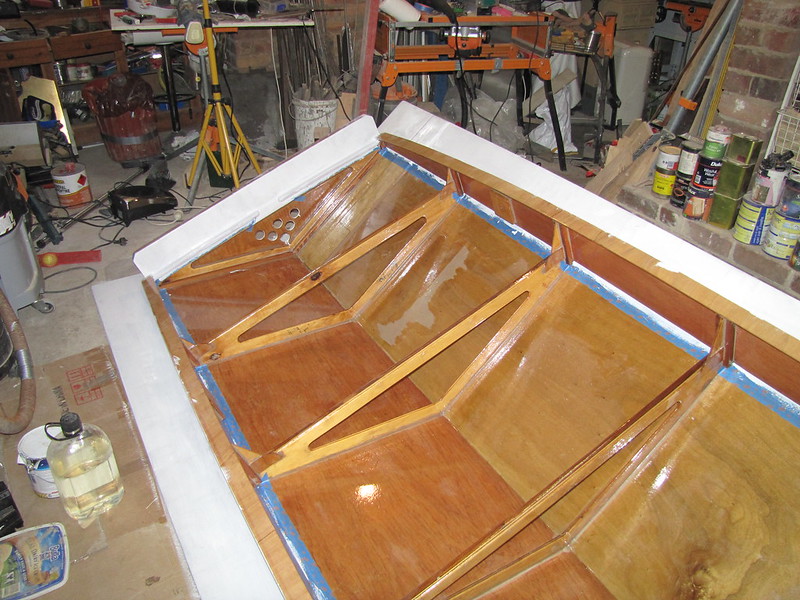
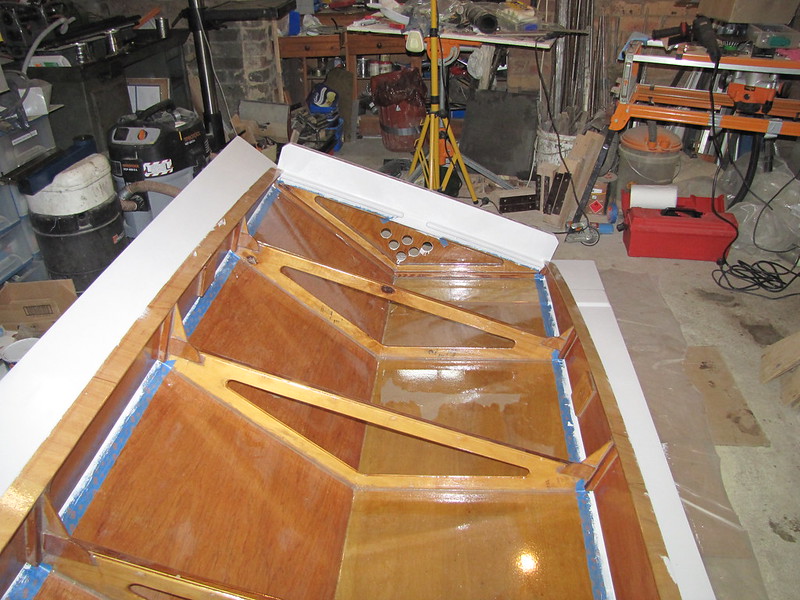
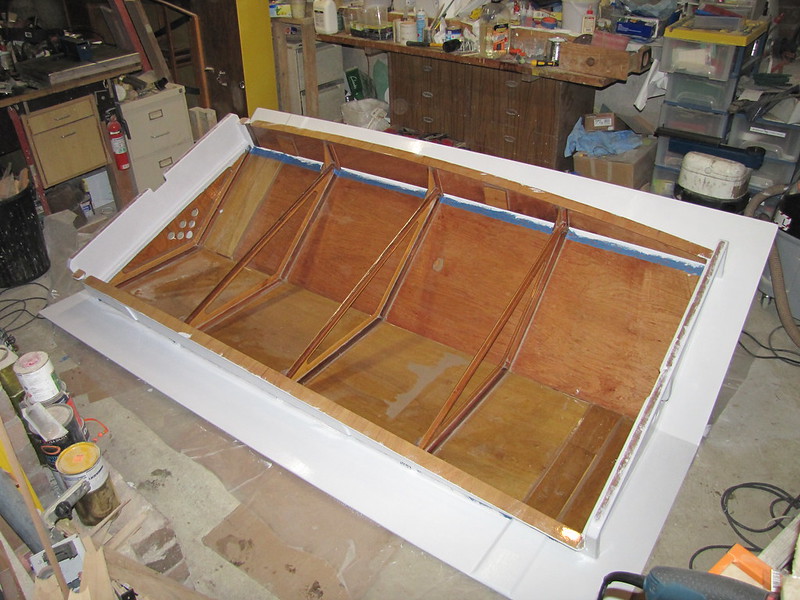
1. A sealing coat of resin on the interior flat surface again - at last! WEST 207/105 used - but I was exceedingly careful to clean out the hardener pump nozzle (again) and test it, as precautions against the last disaster
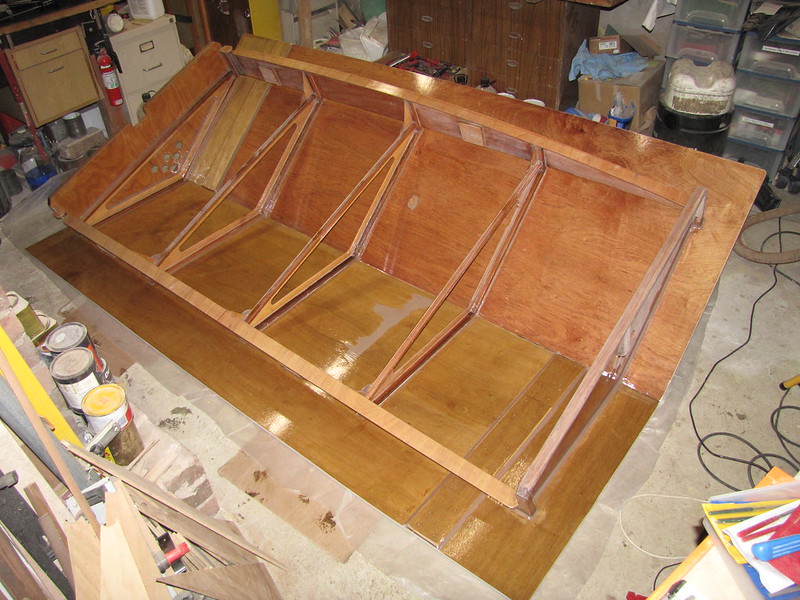
2. Resin sealing coat viewed from the other side, looking at the long thin ex-bubble. The odd marks near it are where I slapped a bit of extra (rapidly gelling) resin over this and the other ex-bubble, using a brush
3. Very slightly different view from previous snap. I'll be putting one - and one only - more coat on this before flipping the roof over and dealing with the top surfaces (another coat or two of Aqua-Cote high-build epoxy primer to toughen things up
4. View of one of the underside "panels" without flash. Given that the resin that it went on top of is still slightly gummy (as far as sandpaper is concerned) I added an extra pupm of hardener to the 10 resin:10 hardener batch
5. Same area as in previous snap, with flash. No alarming fish-eye tendencies here :). Cross fingers...
Follow this link to my Flickr account
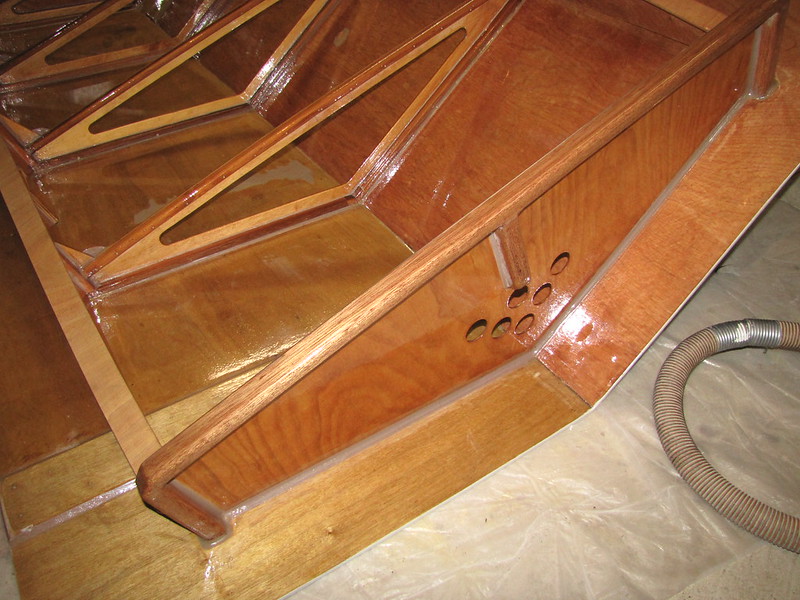
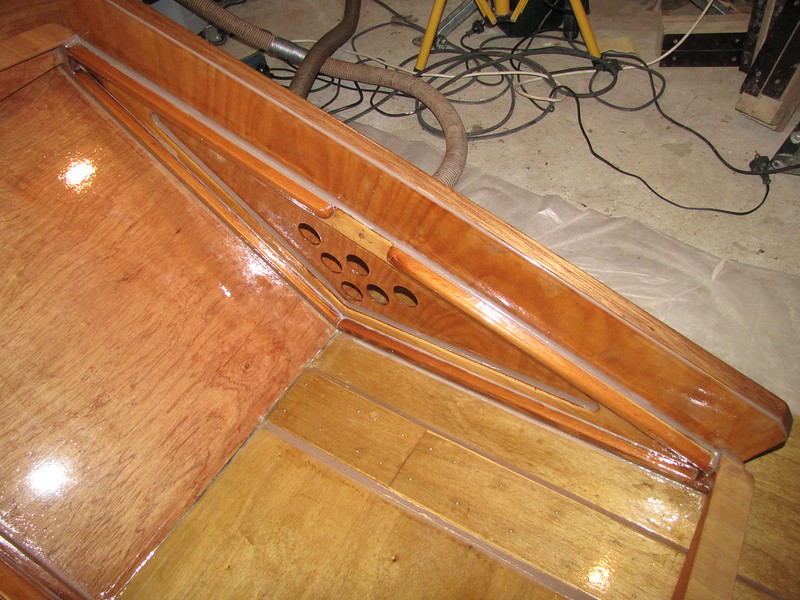
I ended up cleaning the "eaves" fairly thoroughly with degreasing fluid followed by acetone, on account of walking around on it and getting a small amount of cutting-oil-soaked swarf from the mill on (restricted) portions thereof. There was one small, quasi-hidden spot on the other side of the frame which the resin didn't take too kindly to: no doubt a flying droplet of kerosene and oil. Happily, it responded well to some fairly vigours treatment with a brush. One more coat of resin will get slapped on next, then I'll deal with the slightly starved A-frames. After that, the thing can be flipped over and the final coats of high-build water-based epoxy primer rolled on. I'm really not going to be terribly fussy with these final stages: get the resin dealt with, the paint rolled on, and it and the boat out the door! There will stiull be the odd bout of sanding in between various coating sessions to keep my fingers from freezing off. The pump has stopped coming on now, which is probably a Good Thing(TM).
I used some of the small amount of left-over resin to mix up a very small batch of glue so that I could make some temporary repairs on my broken reading glasses frame. They (frames and a lens, I'm rather rough on my poor spectacles) will need to be replaced soon, though.
A quick check an hour or so later and there was no sign of fish-eye, so I'm going to go out on a creaking limb and say that it is probably going to be reasonably successful this time.
A check made four or so hours after applying the resin showed it to be getting pretty tacky and no sign of fish-eye. Whew! Second and final coat tomorrow, then.
-
7th July 2013 05:52 PM # ADSGoogle Adsense Advertisement
- Join Date
- Always
- Location
- Advertising world
- Age
- 2010
- Posts
- Many
-
7th July 2013, 10:32 PM #3242
Sawing hack
- Join Date
- Oct 2007
- Location
- Sydney
- Posts
- 178
It's looking good Alex.
-
7th July 2013, 10:38 PM #3243
GOLD MEMBER
- Join Date
- Jan 2009
- Location
- Blaxland, Australia
- Age
- 65
- Posts
- 2,551
Why, thank you, Theodor :). I'm just glad that the jolly stuff worked as expected this time! Thaty short-stroke hardener pump of WEST's has to have a very close eye kept on it: if the hardener dries out in the spout, there isn't enough effective pressure to clear it easily.
Cheers,
Alex.
-
8th July 2013, 11:46 PM #3244
GOLD MEMBER
- Join Date
- Jan 2009
- Location
- Blaxland, Australia
- Age
- 65
- Posts
- 2,551
No snaps tonight, as it would only be yet more of the same. I did, however, get the last coat of epoxy onto the roof interior this arvo, so that's that chore out of the way. I just have to deal with the A-frames and end-plates and I can flip the thing over and start on the final stages.
-
9th July 2013, 01:59 AM #3245
AJ
- Join Date
- Jun 2007
- Location
- Aberfoyle Park SA
- Age
- 63
- Posts
- 1,787
 Alan J
Nothing says "Unprofessional Job" so loudly as wrinkles in the duct tape. - B.Spencer
-
28th July 2013, 05:16 PM #3246
GOLD MEMBER
- Join Date
- Jan 2009
- Location
- Blaxland, Australia
- Age
- 65
- Posts
- 2,551
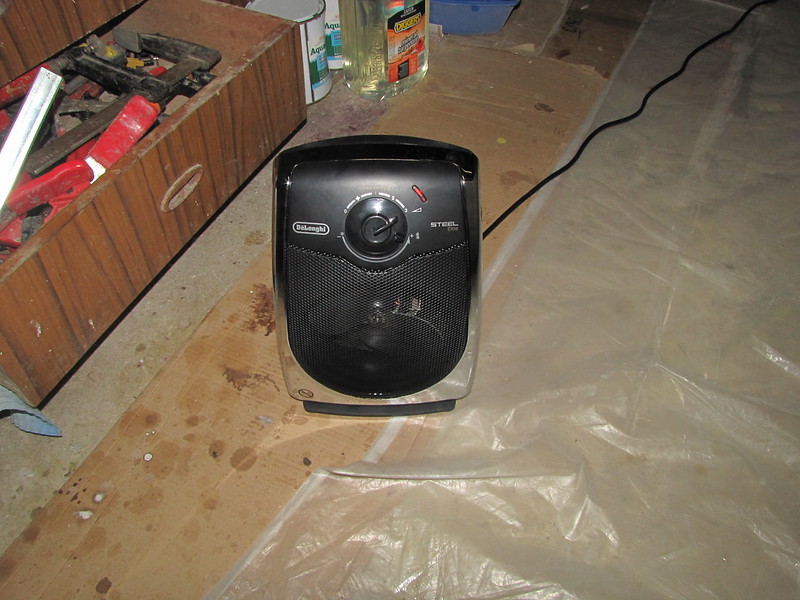
Unfortunately for all my projects, etc., I caught a very nasty cold not long after my previous post: this stopped everything for a few weeks: I've only just got back to practicing in a disciplined manner. The CNC work has had a few tweaks - I've finally hooked the control box up to the motors and got the latter turning along in time to some of the LinuxCNC sample g-code programs, which is good. I've done absolutely nuffin' on the roof, however. Nuffin' at all. Here's some snaps to prove it (I don't need to prove it to myself, of course, because I continue to trip over the thing) -
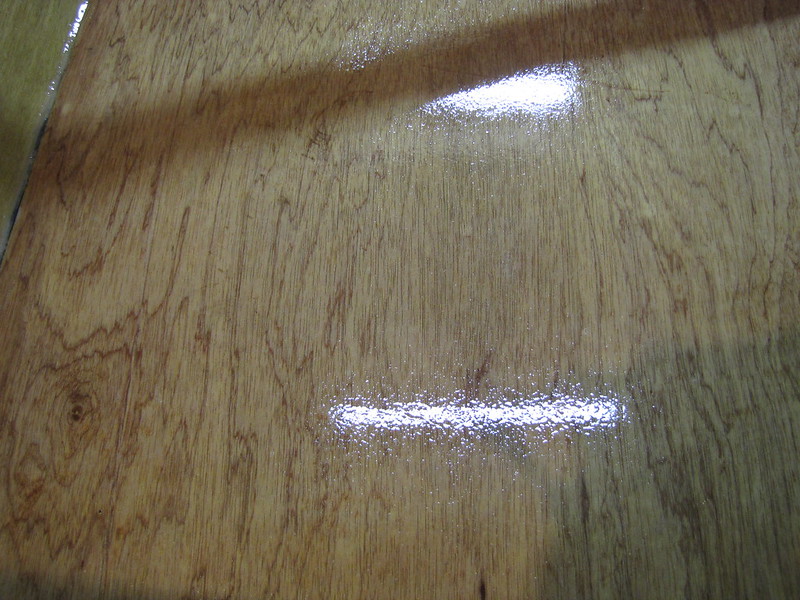
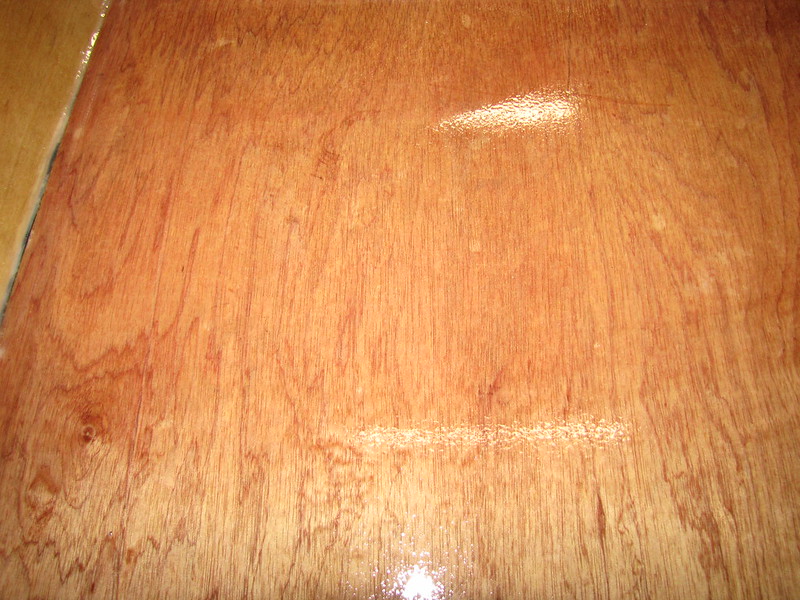
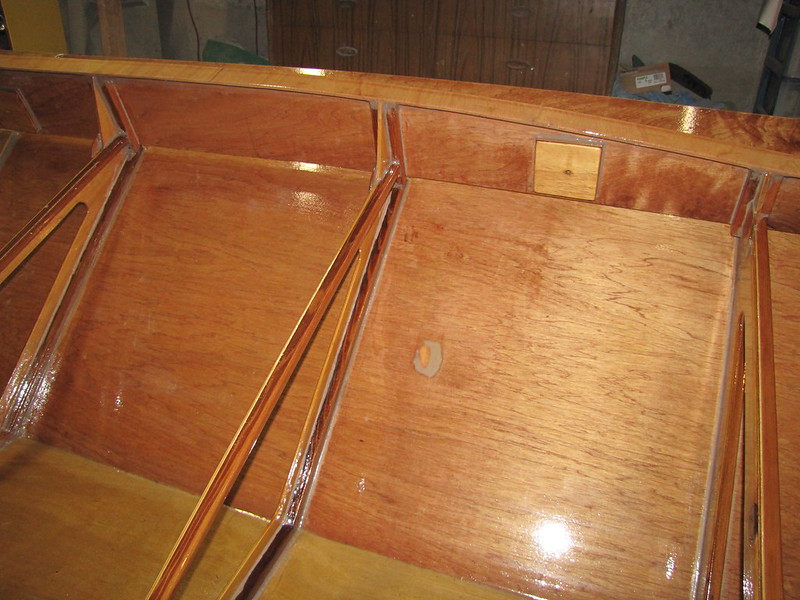
1. Roof with its second coat of resin: no change in the status of this object has happened for quite a while. And may still not...
2. Close-up (without flash) of 2nd resin coat
3. Small fan heater: it struggles a bit with the cold but it's better than nothing when kept close by (otherwise it just creates an annoying draught). One useful feature for use by fumble-footed fools such as myself is the auto-shutoff-when-tilted-slightly switch in its base. That means that if I trip over it I'm less likely to set fire to the place with it. I acquired the heater to give myself at least a fighting chance of doing some work in the workswamp sometime before mid-summer...
Follow this link to my Flickr account
When will I start back on the roof? Good question. I'm going to need a relatively dust-free environment while I continue to reassemble the mill in its new guise - and that isn't going at a rate of knots exactly, either. Your guesses are likely to be a lot more accurate than mine.
-
7th August 2013, 06:59 PM #3247
GOLD MEMBER
- Join Date
- Jan 2009
- Location
- Blaxland, Australia
- Age
- 65
- Posts
- 2,551
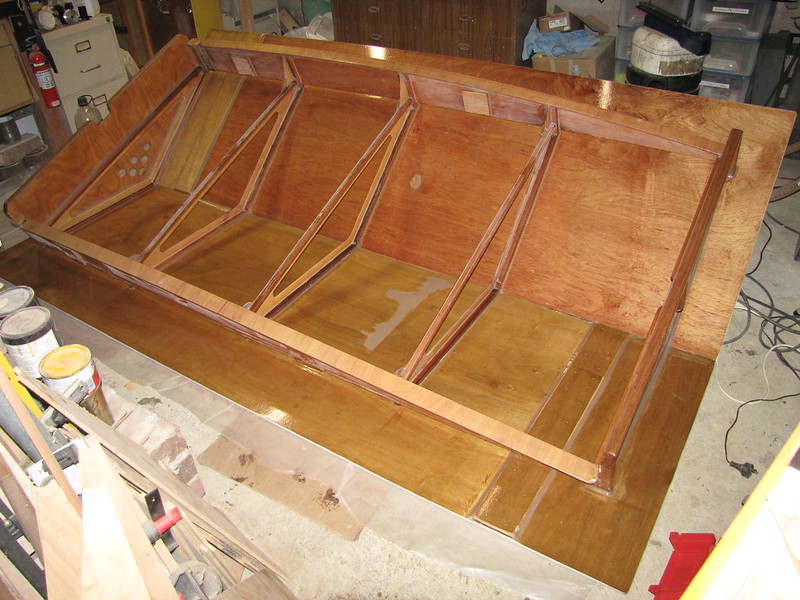
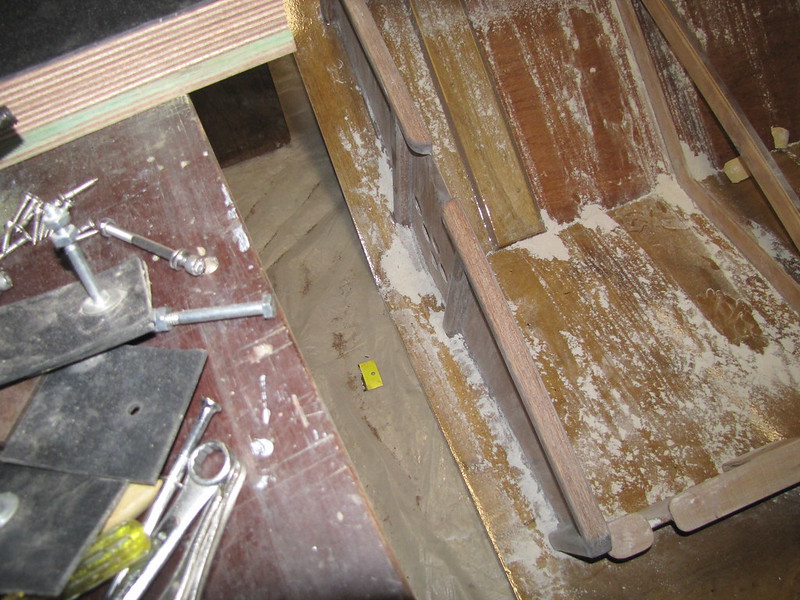
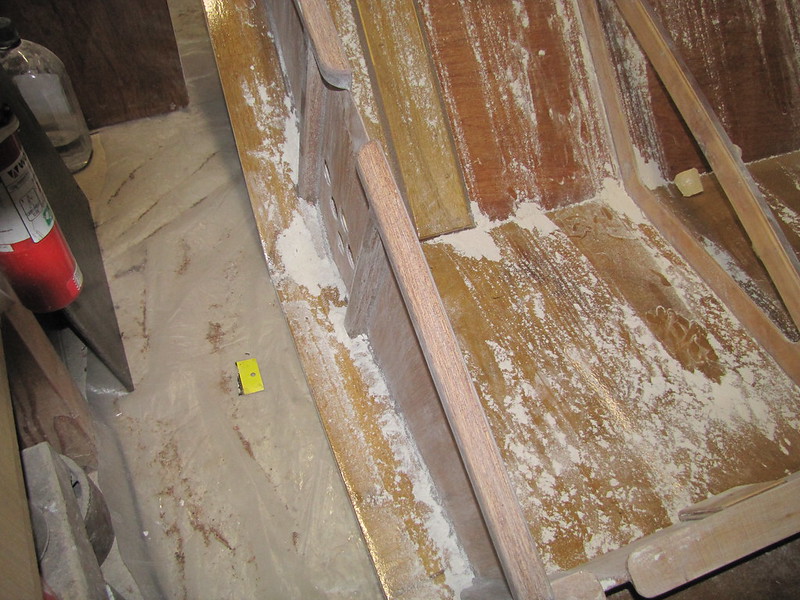
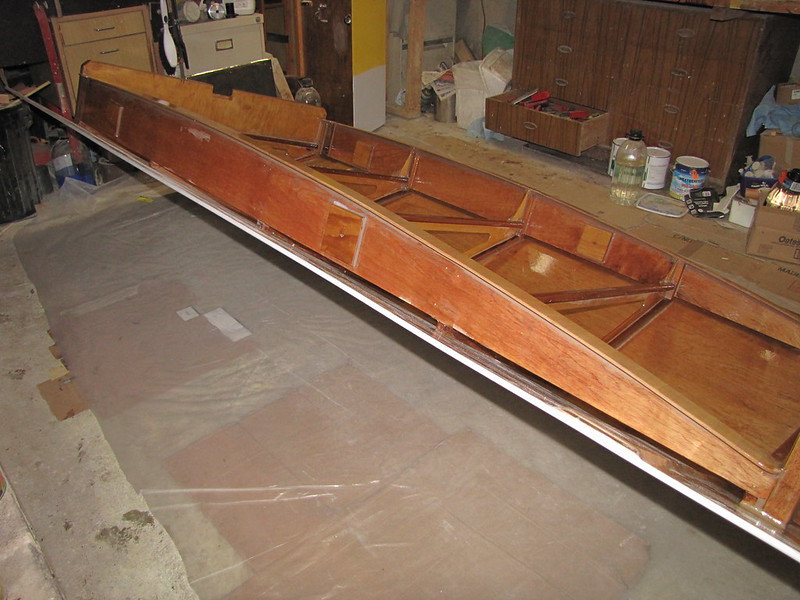
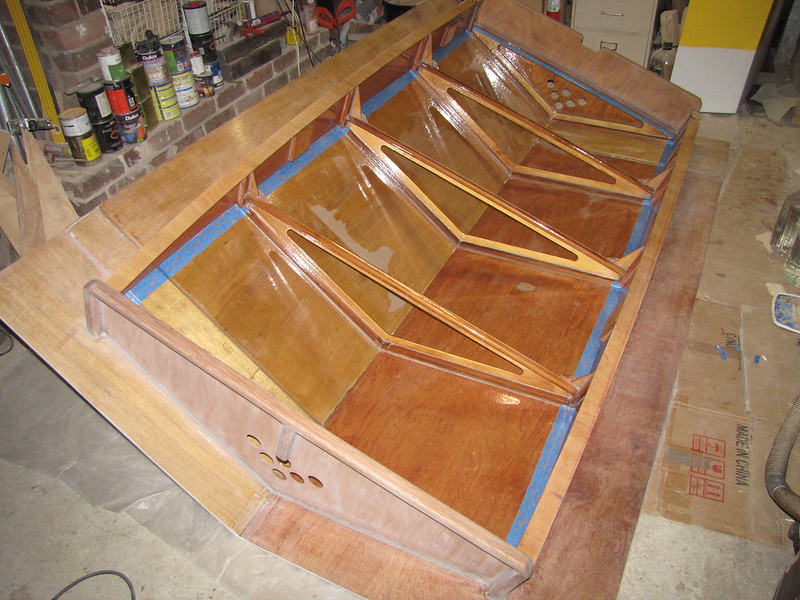
OK. Nothing much has been put up because it would have been too painful for all concerned - and especially me - to post snaps of the sanding of the roof underside. This task has gone at rather a snail's pace. Done now, though :) Here you are:
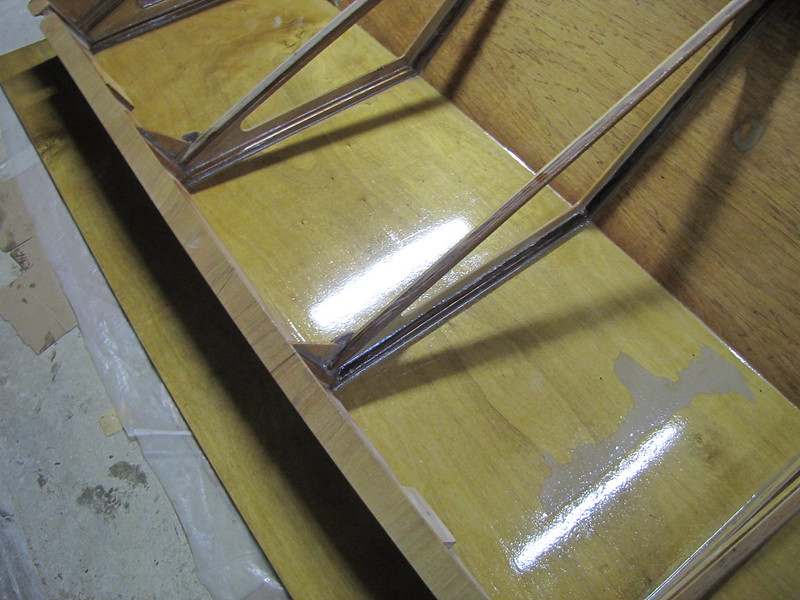
1. Roof underside sanding complete, as far as it's going to go: A-frames, "runners", side-frames and end-panels, inside and out where approriate. I'll whizz over the eaves when I get the 60-grit "paint" pads that I ordered for the Bosch "Prio" sander
2. Closer-up view of the sanding snow and the A-frames. I did not take an awful lot of care over this: just enough to shave off the fur (from the raised grain) and the worst of the runs and blobs. I went as fast as I could, too: it just took longer than I would have liked because there was rather a lot of it - then I had to turn around and sand the side panels and "runners", which had only had one resin coat too, and which I had forgotten to sand earlier. I also had a few time constraints on the task, too...
3. The rear end-panel got the treatment as well, of course. Belt-sanded edge of the milling machine's new base-board (stack of three pieces of 19mm form-ply screwed together, with a sheet of 3 mm insertion rubber on top) can be seen in the top LH corner of this snap, along with a few tools. One of many really, really compelling reasons to get this roof done and out the door
4. Closer-up view of the rear end-panel: 80-grit Wuerth sand-paper used throughout (except for a small region done with 120-grit at the beginning, rapidly abandoned for the 80-grit). I may jump the gun and block- and finger-sand the eaves if the sanding sheets don't arrive by the weekend
Follow this link to my Flickr account...
This means that barring doing the eaves and cleaning up, I'm ready to give the vertical parts of the structure their final coat of resin, prior to flipping the roof over (so to speck) and finishing off the high-build primer on the rooftop. The reason that I'm going to sand under the eaves (i.e., on the edges of the roof underside outside the framework) is that I'm going to whack a bit of paint on 'em. probably. I really can't get this over and done with quickly enough: it has been a real penance.
-
8th August 2013, 12:46 AM #3248
Senior Member
- Join Date
- Dec 2008
- Location
- McAllen, Texas, USA
- Age
- 64
- Posts
- 154
Sure you won't reconsider and finish it bright?

Looking really good. There really is no reason to sand with the fine grits to begin with unless you are really trying to atone for some past sin or just general karma building.
-
8th August 2013, 10:29 PM #3249
GOLD MEMBER
- Join Date
- Jan 2009
- Location
- Blaxland, Australia
- Age
- 65
- Posts
- 2,551
Ha! Nice try ;). What I really think of bright finishes these days is in fact unprintable. On the other hand, I have been convinced by persons on this forum to leave the resin-coated undersides as-is, and not put paint on it. Purely as a time-saving device, I might add. The topsides is a different bucket o' snakes (to quote Mr Pratchett), as they have a layer of epoxy primer on them. I think I'll paint the end-plates in one coat of colour, as well as the outer side-frame surfaces. The idea of going through the process of multiple sandings and coatings of the accursed varnish on the Accursed Roof is just too much for me to even contemplate and keep my dinner down at the same time.
Cheers,
Alex.
-
9th August 2013, 12:27 AM #3250
AJ
- Join Date
- Jun 2007
- Location
- Aberfoyle Park SA
- Age
- 63
- Posts
- 1,787
exquisitely and colourfully put.
 Alan J
Nothing says "Unprofessional Job" so loudly as wrinkles in the duct tape. - B.Spencer
-
12th August 2013, 06:49 PM #3251
GOLD MEMBER
- Join Date
- Jan 2009
- Location
- Blaxland, Australia
- Age
- 65
- Posts
- 2,551
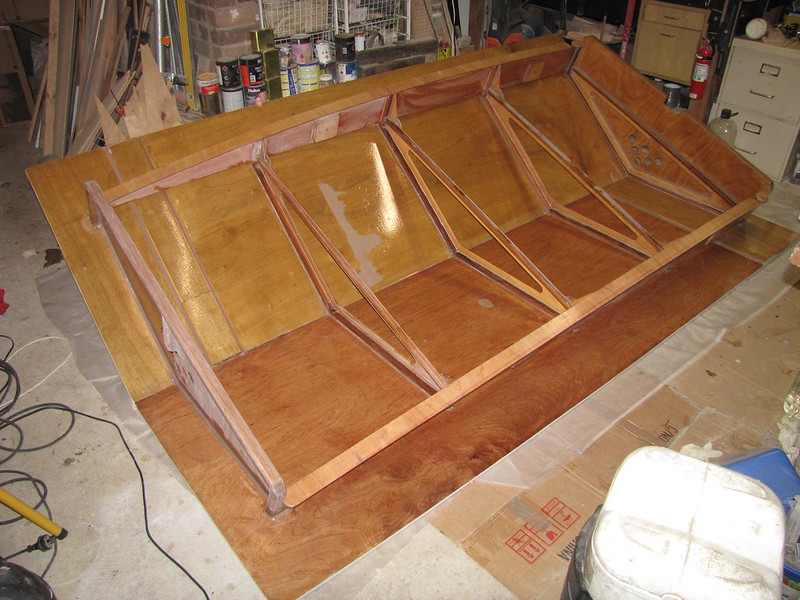
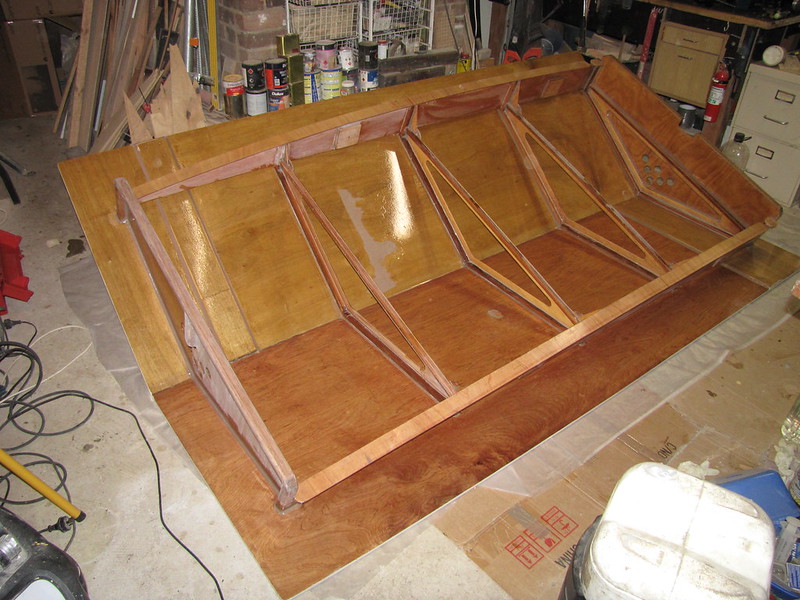
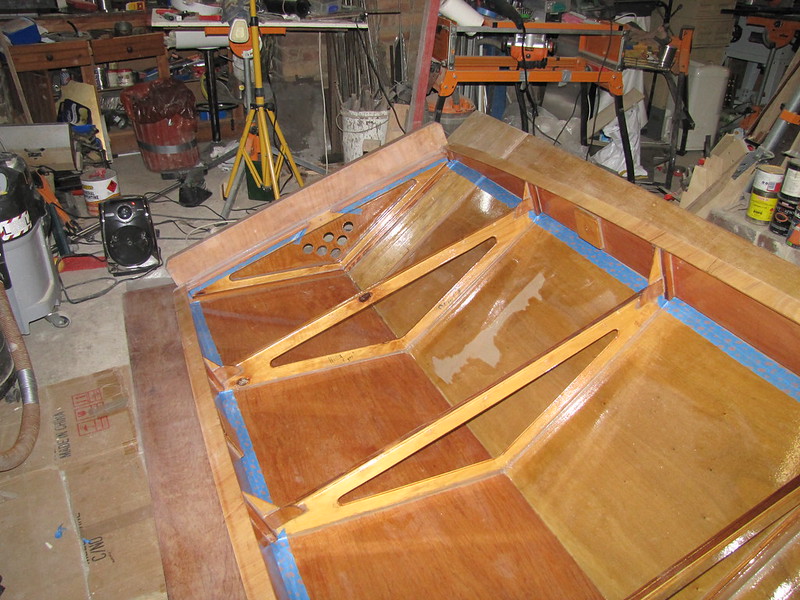
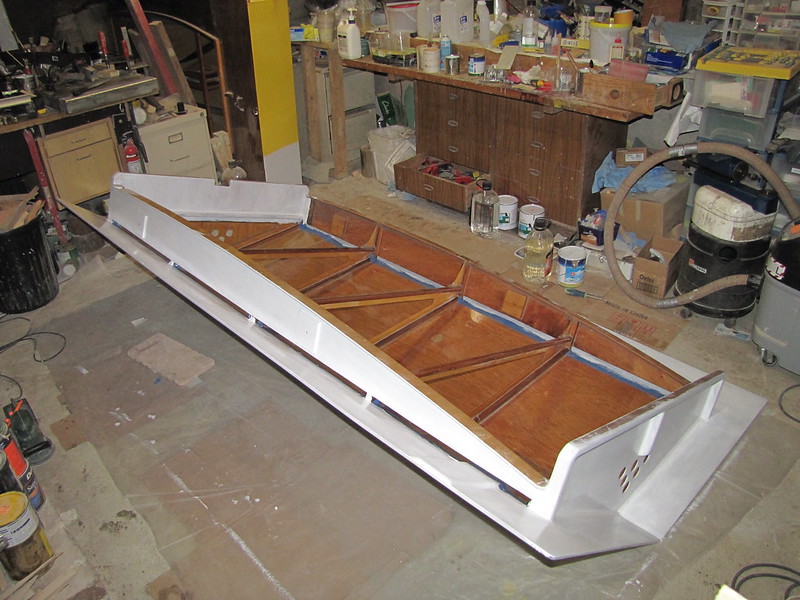
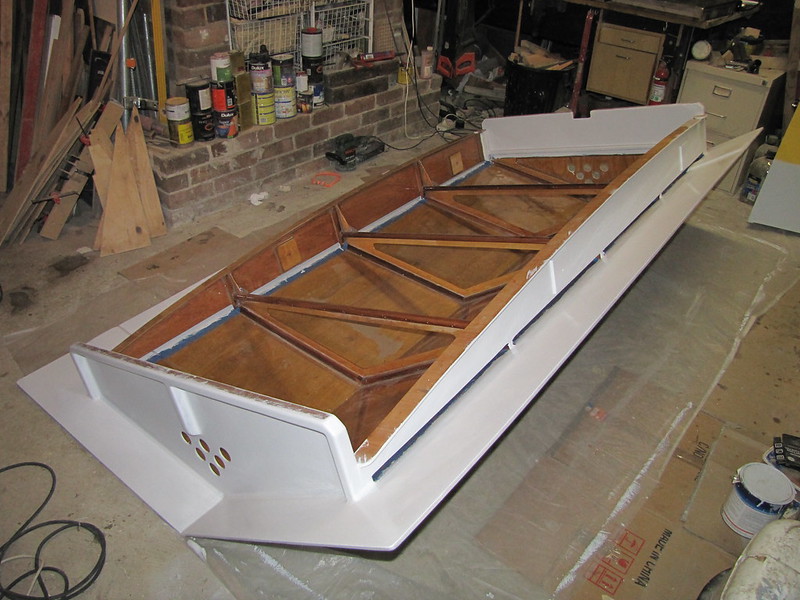
Right-io. Another milestone: I put the FINAL coat of resin on the undersurfaces requiring it, yesterday arvo :). Hooray! Here's the series o' snaps: the last time that I'll be posting this series, hooray! again:
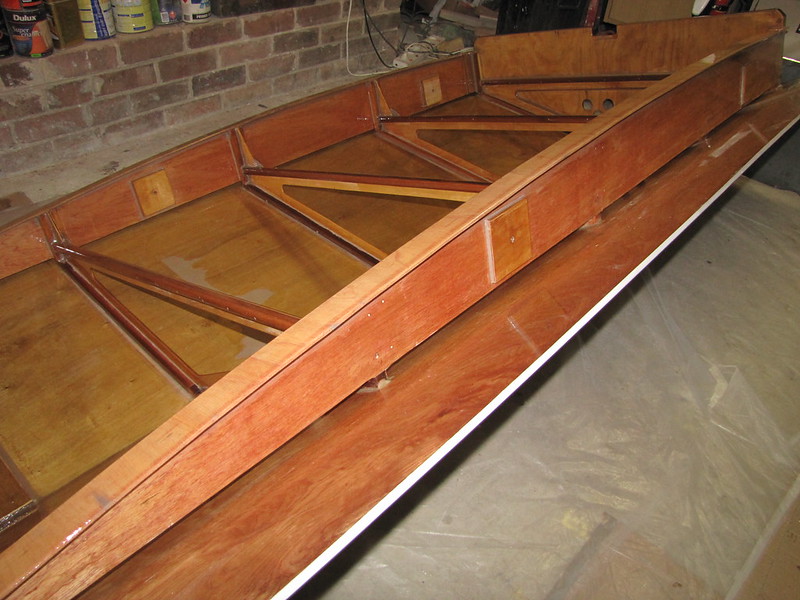
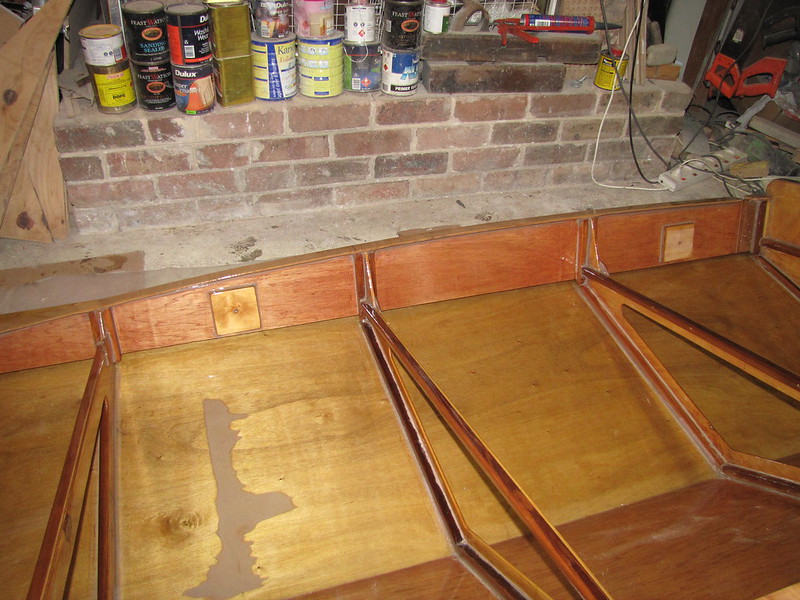
1. Underside complete :). A coat of WEST resin (nearing the end of these bottles, too) applied with a combination of black foam and white foam rollers, and a small paint brush to touch up where neither of the rollers could fit
2. Front panel, final resin coat. This will be getting a coat of Norglass marine enamel, however - as will the sides and rear end-plate
3. Inside face of the front end-plate
4. Three roof formers and starboard side-frame+"skid"
5. Rear end-plate, inside face
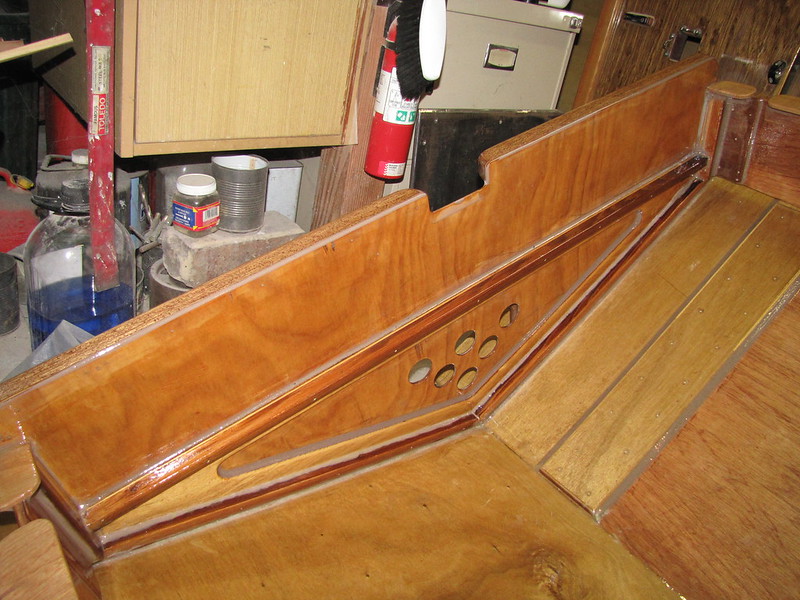
6. Port side frame, outer face. One of the reasons for taking so many snaps, as I've said repeatedly is that it gives a check on the coverage - if the camera flash is turned on, of course. In this case, I immediately nipped back and finish off the bare patches
7. Starboard side-frame, outer face
8. Port side-frame, inner face
9. Rear end-plate, outer face
10. Roof formers and starboard "skid", looking forward from the back. The small areas that look as though I missed them with the resin are in fact diffuse patches of filler from way back

Follow this link to my Flickr account, where you can see larger versions of these snaps...
Whew! Thank goodness that's done! I may paint the outer lower surfaces before I flip the thing over: not quite sure yet. In any case, I'm waiting for some coarse-ish grit pads for the power sanders - so I'll have a few days to ponder this and make up my mind. If I do paint before flipping, I'll add the rubber "soles" to the "feet" before turning over.
-
12th August 2013, 08:48 PM #3252
i-Sails Australia
- Join Date
- Apr 2009
- Location
- Hunter Valley NSW
- Age
- 69
- Posts
- 1,759
Hi Alex
It's looking great and I'm sure you're relieved to see the back end of this project! Well done.
-
20th August 2013, 10:54 PM #3253
GOLD MEMBER
- Join Date
- Jan 2009
- Location
- Blaxland, Australia
- Age
- 65
- Posts
- 2,551
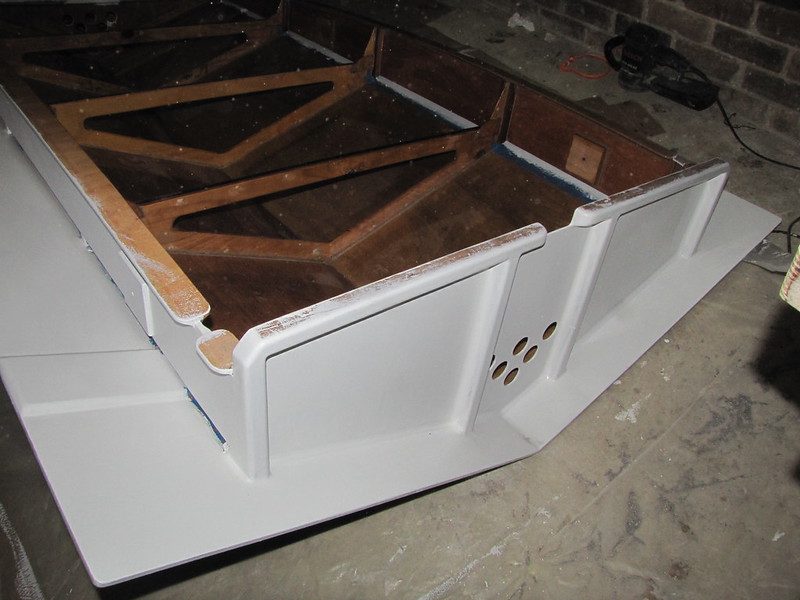
Another milestone :)
Thank you for your kind remarks, those who have done so and/or ticked the boxes.
Well, some progress of a somewhat more visible kind. I'm never quite sure with surface coatings these days as to whether it is progress or something retrograde. We'll see:
1. A bit of masking tape, just to keep things a bit neater than they otherwise might be
2. More of the masking tape. The eaves and end plates have had a bit of sanding to flatten out the resin. Even though I wiped the surfaces with the roller(s) while the resin was still wet, it stayed/got a bit lumpy
3. And now for something a little bit different, to paraphrase Monty Python's Flying Circus: the first coat of Norglass PRi-COAT primer/undercoat :)
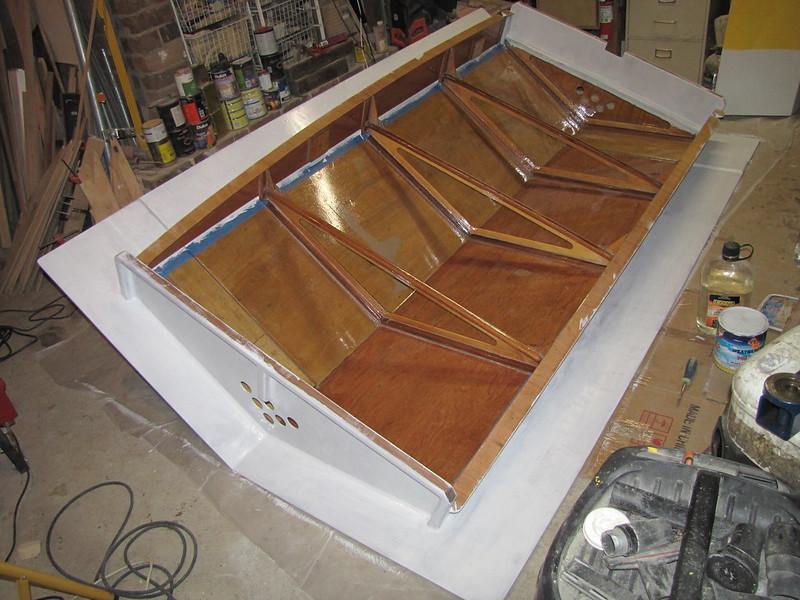
4. Undercoat viewed from the other end of the 'Duckcote. As you can see, the masking tape will create more of a net line 'twixt painted and unpainted
5. Undercoated side and front end. It's a bit rough, but will do for a first coat
Follow this link to my Flickr account
Since I used a brush the coat is a bit rough, and I'm hoping that a second coat will even things out a little more. Given that the thermometer in the workswamp is reading about 12 degC, I'll probably put that coat on on Thursday morning. I know I said that the previous batch of photos was going to be the last sequence, but I overlooked the fact that I was going to be splashing paint about. There will probably be several more before the roof's finished, too.
-
25th August 2013, 07:01 PM #3254
GOLD MEMBER
- Join Date
- Jan 2009
- Location
- Blaxland, Australia
- Age
- 65
- Posts
- 2,551
After a few ups and downs - mostly downs - I finally got the second and hopefully last coat of undercoat on the exterior framing parts and those interior parts that will be in direct contact with water spray from the ground:
1. Rear end-panel, second coat of undercoat
2. Rear side of front panel, second undercoat coat
3. Overview of second undercoat coat
4. Second undercoat coat from the other side. The whole thing looks a little less patchy now: next and hopefully final coat will be one of Norglass "Opal White" gloss marine enamel
Follow this link to my Flickr account
Apart from contriving - inadvertently - to get a whole lot of swarf/filings/sawdust from the shaping of the CNC-mill-to-be's heavy baseboard over the new wet paint under the eaves at the rear end of the roof, things went smoothly. I used a brush again, although, rather, two brushes: a smaller one to get at more inaccessible spots such as the (eventual) topsides of the "skids" and similar; and a larger one for the rest of it. I'm hoping to get away without having to do too much sanding, but where you have a surface coating, you almost invariably have the sanding <sigh>.
-
25th August 2013, 11:48 PM #3255
AJ
- Join Date
- Jun 2007
- Location
- Aberfoyle Park SA
- Age
- 63
- Posts
- 1,787
getting close to finished Alex.
Alan J
Nothing says "Unprofessional Job" so loudly as wrinkles in the duct tape. - B.Spencer


 Reply With Quote


Similar Threads
-
New Queensland PDRacer Build
By duncang in forum Michael Storer Wooden Boat PlansReplies: 71Last Post: 26th April 2012, 08:30 AM -
Oz PDR build in Adelaide - sexy black PDRacer
By m2c1Iw in forum Michael Storer Wooden Boat PlansReplies: 39Last Post: 27th April 2009, 06:30 PM -
OZ PDRacer - Dylan's build in the Philippines
By Boatmik in forum Michael Storer Wooden Boat PlansReplies: 16Last Post: 23rd February 2009, 05:50 PM -
Brisbane Timber and Working with Wood. Boatmik/PDRacer
By Boatmik in forum Michael Storer Wooden Boat PlansReplies: 1Last Post: 11th April 2007, 08:06 PM -
Flawed wood on the TS --DUCK!
By Robert WA in forum WOODWORK - GENERALReplies: 7Last Post: 19th February 2004, 11:42 AM
Tags for this Thread
balanced lug,
boatmik,
build,
dacron(tm),
douglas fir,
duck,
enamel,
epoxy resin,
fibreglass,
hoop pine,
interminable,
lug,
machinery,
materials,
michael,
oregon,
oz racer mk 2,
ozracer,
paint,
paulownia,
paulownia/glass mast,
pdracer,
plywood,
polytarp,
primers,
really simple sails,
sail-making,
sailmakers thread,
sanding,
storer,
sydney,
timber,
tools,
varnish,
verbose,
western red cedar,
wood,
wood duck,
wrc
