

 Thanks:
  Likes:
  Needs Pictures: 0
 Picture(s) thanks: 0
Results 151 to 165 of 377
Thread: 2/3 Harley Davidson 1920 JS
-
2nd March 2015, 07:07 AM #151
 Deceased


- Join Date
- Mar 2013
- Location
- St. Helens Tasmania
- Posts
- 2,227
 That's only because I don't post the ones that show no detail and are out of focus mate!.
 Originally Posted by Keith_1


And the older I get the more of those there seems to be!.
Cheers mate
Trev.
-
2nd March 2015 07:07 AM # ADSGoogle Adsense Advertisement
- Join Date
- Always
- Location
- Advertising world
- Posts
- Many
-
2nd March 2015, 07:09 PM #152
Deceased
- Join Date
- Mar 2013
- Location
- St. Helens Tasmania
- Posts
- 2,227
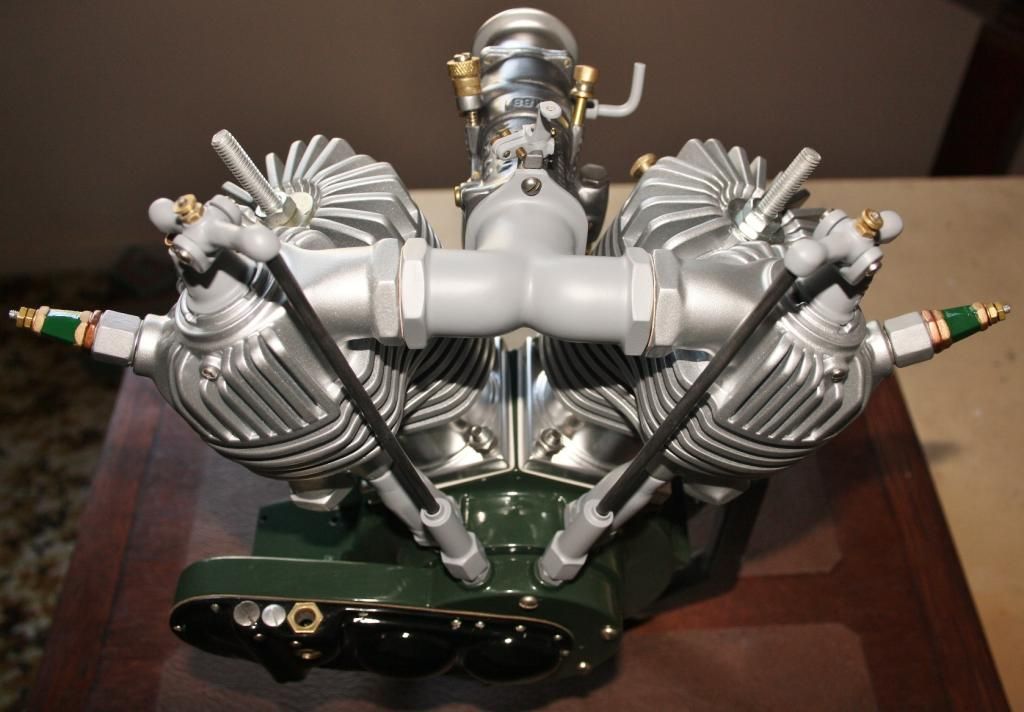
It was a very enjoyable day working on the Harley.
I repaired and modified the exhaust valve covers and rebuilt the pushrod covers.
Now it's starting to look like an engine again.
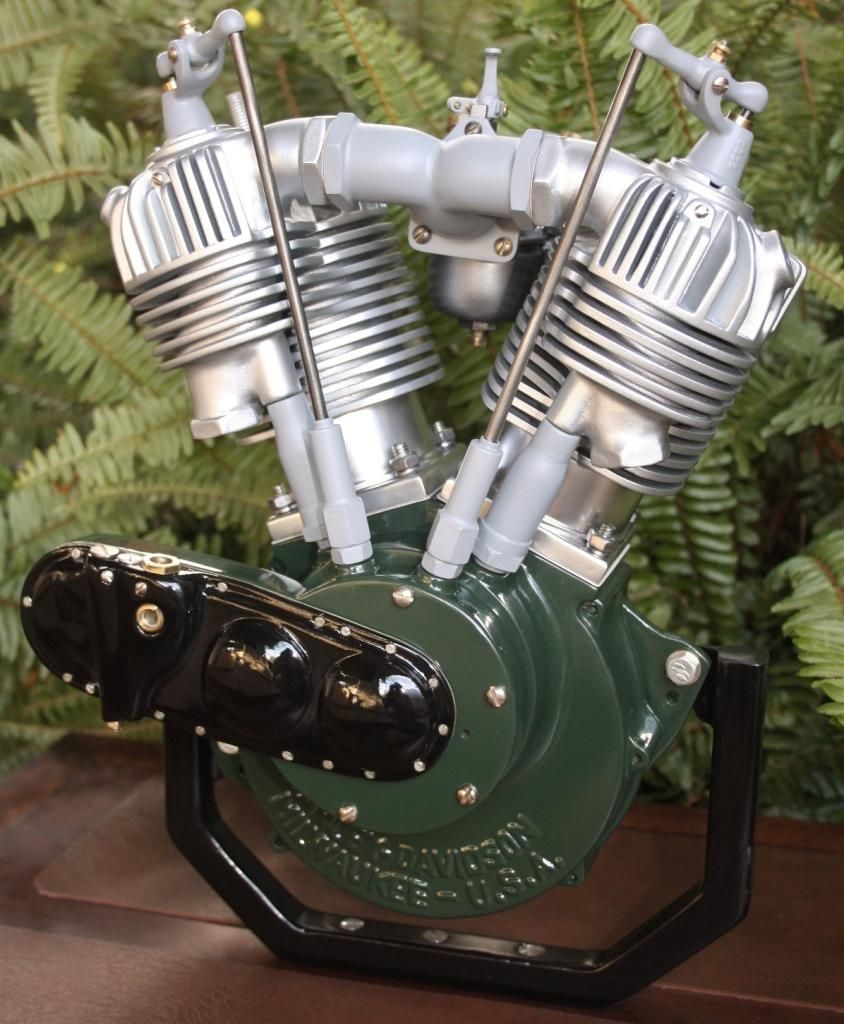
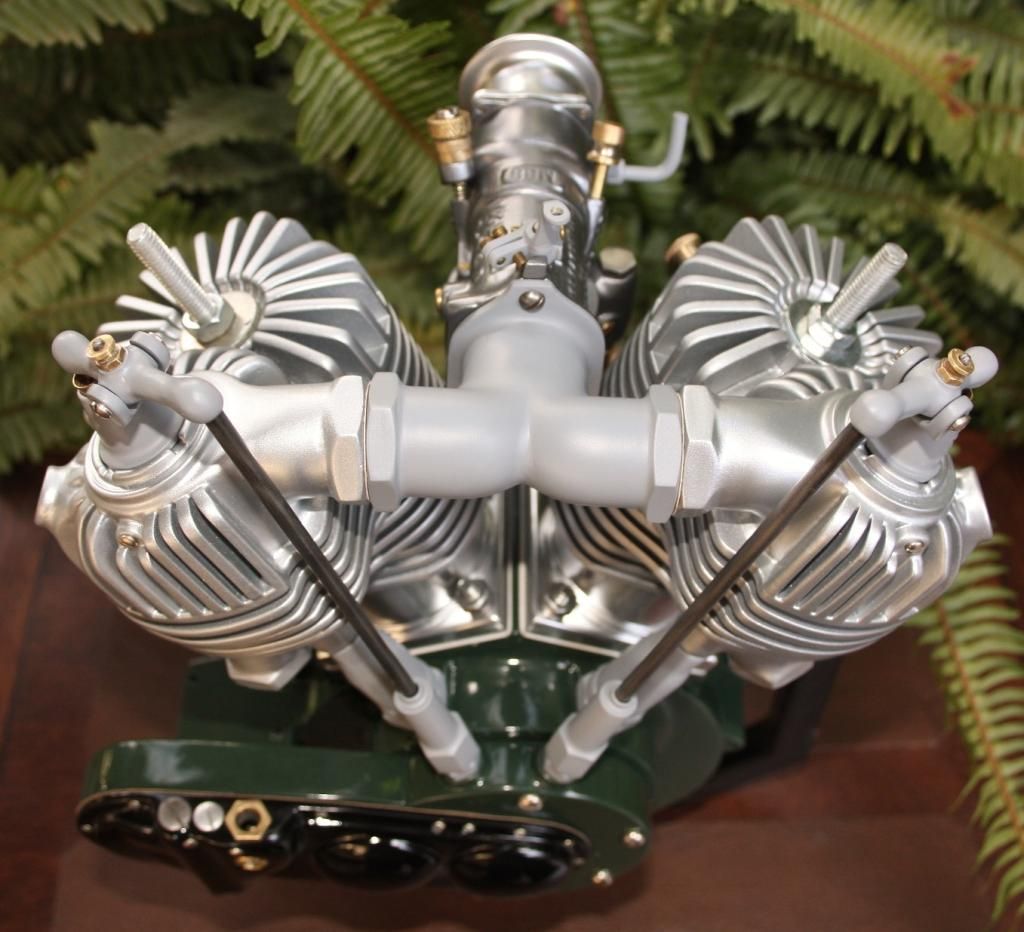
I'm really happy with the improvement in the detail and finish of the engine so far.
As with the rockers I'll leave the valve covers in primer until the engine is finished.
Then I'll give them a coat of nickel.
The Splitdorf sparkplugs will be the next to be made.
I'll have a ton of fun making those lots of small detail to chase.
Cheers
Trev.
-
2nd March 2015, 09:03 PM #153
Retired teacher, lifelong learner
- Join Date
- Jul 2012
- Location
- Murray River, NSW
- Posts
- 344
brisway.jpg
Just sayin....
-
2nd March 2015, 09:10 PM #154
Retired teacher, lifelong learner
- Join Date
- Jul 2012
- Location
- Murray River, NSW
- Posts
- 344
An awesome rebuild Trevor. I think the timeframe for it is going to need extending, considering all of the fine work you are doing; the Brough can wait, we have Harley up to plate! And it's swingin' for the bleachers...
-
2nd March 2015, 09:39 PM #155
Most Valued Member
- Join Date
- Aug 2010
- Location
- Horsham Victoria
- Posts
- 5,713
potatoe cakes, fritz, stoby poles and deli's
Looking good btw
Dave the turning cowboy
turning wood into art
-
2nd March 2015, 09:52 PM #156
Most Valued Member
- Join Date
- Aug 2010
- Location
- Horsham Victoria
- Posts
- 5,713
2/3 Harley Davidson 1920 JS
whoops double post 15 minutes apart
-
3rd March 2015, 07:02 AM #157
Deceased
- Join Date
- Mar 2013
- Location
- St. Helens Tasmania
- Posts
- 2,227
I'd go along with that mate. Originally Posted by CAG
It's going to take sometime to gather up all the info needed for the Brough.
And I'm really having a ball with the Harley at the moment, so I'll make sure I finish it completely before starting anything on the Brough.
Besides I reckon the Indian and the Harley standing side by side would look really kool!.
Although now that you've made all thoughts baseball references,
I'll have to make sure I use some more of the bat that I built into the Indian (aka Slugger) on the Harley.
Which is probably fair enough because what ever I build we all know it's ending up in left field!.
Cheers mate
Trev.
-
3rd March 2015, 08:13 PM #158
Retired teacher, lifelong learner
- Join Date
- Jul 2012
- Location
- Murray River, NSW
- Posts
- 344
Don't take the bat to all of the replaced parts in frustration at the end of the rebuild, or yourself Originally Posted by Repliconics


-
4th March 2015, 04:44 AM #159
Deceased
- Join Date
- Mar 2013
- Location
- St. Helens Tasmania
- Posts
- 2,227
I worked on the sparkplugs pretty much all day yesterday.
Tricky little things with lots of fiddley bits to drive me nuts (Luvin it).
Not a lot to show yet although I thought some maybe interested in the way I make the main section of the plug.
The Splitdorf sparkplugs have a tapered hexagon insulator.
When I made the ones for the Indian it took me quite awhile to workout a relatively easy way to make them.
I first tried drawing it all up onto a piece of timber, but the part is so small you couldn't keep track of all the lines.
In the end I glued a nut in the centre of each end of the timber, one of them smaller than the other to create the taper.
I made sure that they where as square as possible, and then ran the sides through on the bandsaw as close as I'd dare to the nuts.
After that I used a sanding bloke to take each of the six sides down to the nuts.
Then I just snapped the nut off each of the ends.
It's a simple way to make what can otherwise be a difficult shape.
Cheers
Trev.
-
4th March 2015, 08:46 AM #160
GOLD MEMBER
- Join Date
- Apr 2013
- Location
- Torquay
- Posts
- 4,422
Great resourcefulness. Coming up with extraordinary ideas on how to achieve outcomes is the thing that makes model making great.
Well Done
-
4th March 2015, 04:37 PM #161
Deceased
- Join Date
- Mar 2013
- Location
- St. Helens Tasmania
- Posts
- 2,227
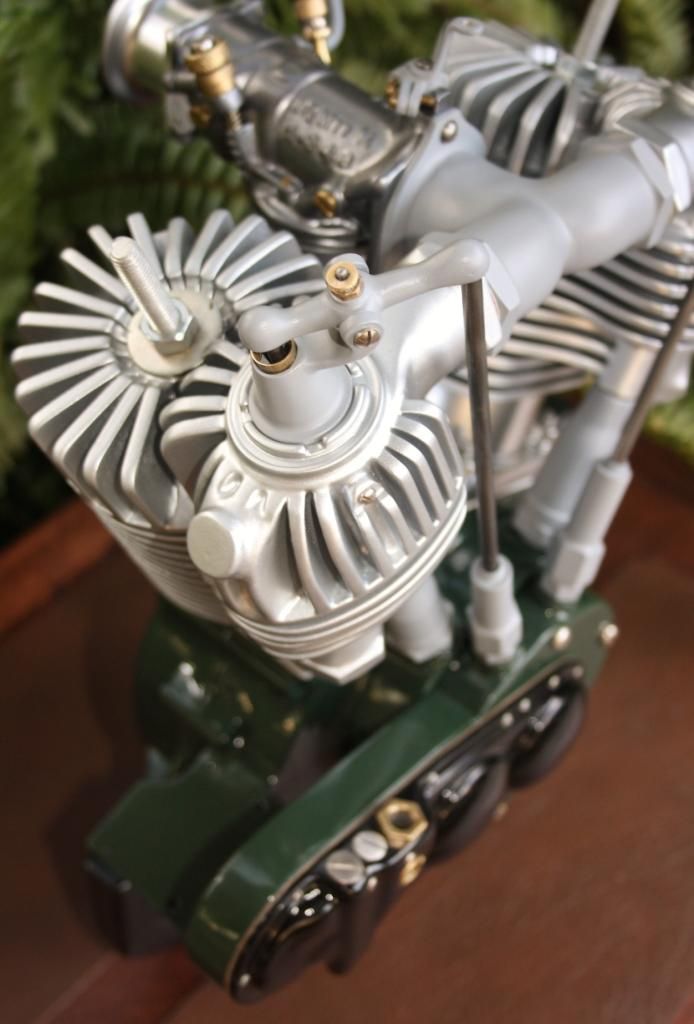
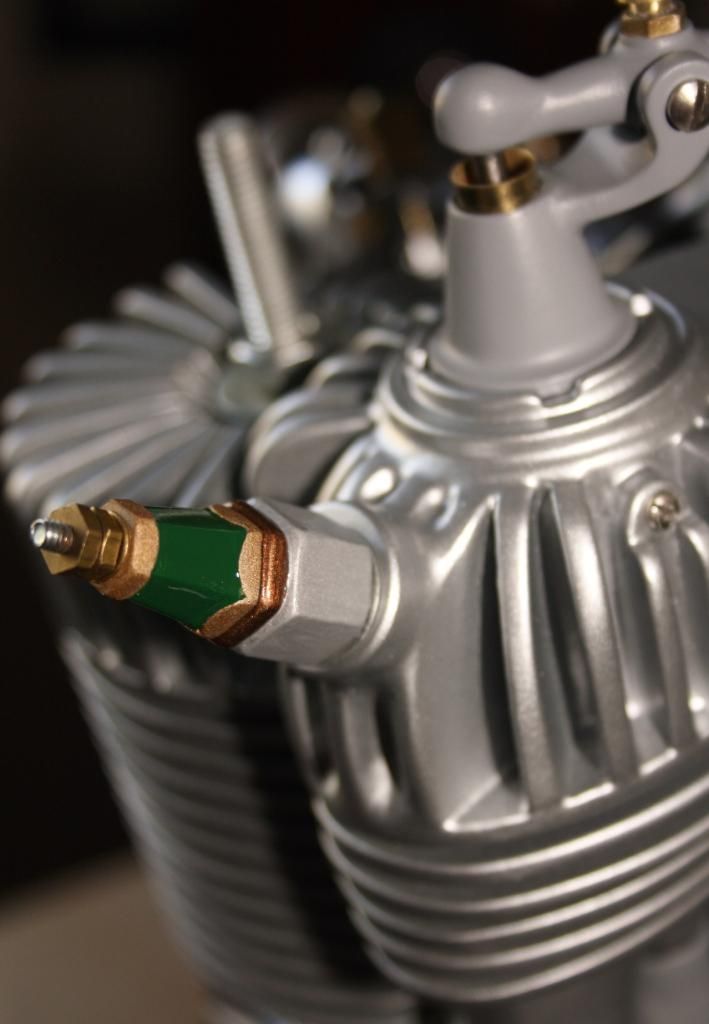
Got some paint onto one of the sparkplugs but it wont be staying.
I made the convex pieces around the centre of the second sparkplug (to the left in primer) more pronounced.
It looks much better than the first one I made with a shallower appearance to them.
So I'll strip the paint off and redo it, no great drama the parts are only made from a Corn Flake box.
The sparkplug to the right is one of the original ones I had on the engine.
I gave the plugs a test fit and I'm really happy with them!.
But then comes the "except".
The boss that the sparkplug goes into on the left cylinder head is obviously smaller than the one on the right.
The base of the left plug is larger than the boss.

I'll need to take the head off and rework the boss then give the head a respray.
Not so bad it should only take a couple of hours to fix.
So hiccups aside it's all good.
Cheers
Trev.
-
4th March 2015, 04:57 PM #162

 GOLD MEMBER
- Join Date
- May 2012
- Location
- Woodstock (Cowra)
- Age
- 74
- Posts
- 3,381
Making the plugs is really "thinking outside of the hexagon"
Well done!The person who never made a mistake never made anything
Cheers
Ray
-
5th March 2015, 08:23 AM #163
Most Valued Member
- Join Date
- Aug 2010
- Location
- Horsham Victoria
- Posts
- 5,713
Looking good trev,
If you need more of the one on the right I can ,an age that I reckon
Dave the turning cowboy
turning wood into art
-
5th March 2015, 08:32 PM #164
Deceased
- Join Date
- Mar 2013
- Location
- St. Helens Tasmania
- Posts
- 2,227
I reworked the boss that the sparkplug fits to and patched up the paint work.
I also gave the second of the sparkplugs some paint.
The convex pieces around the centre of the second sparkplug I think look a lot better being more pronounced.
So I'll definitely change the sparkplug on the right to match it.
It's good to get that little oops out of the way!.
Cheers
Trev.
-
5th March 2015, 08:58 PM #165
Mildly Moderate
- Join Date
- Nov 2007
- Location
- Albury Well Just Outside
- Posts
- 13,315
Refine work on the spark plug.
Last edited by Christos; 5th March 2015 at 09:02 PM. Reason: forgot my thumbs


Similar Threads
-
It's a No.1, but not a Harley
By Bushmiller in forum HAND TOOLS - UNPOWEREDReplies: 19Last Post: 13th October 2014, 11:24 PM -
Harley Davidson chopper
By bobman 58 in forum INTARSIAReplies: 6Last Post: 6th February 2014, 08:26 AM -
Harley Davidson logo
By bobman 58 in forum SCROLLERS FORUMReplies: 4Last Post: 10th August 2013, 09:38 AM -
Harley Davidson
By Rum Pig in forum WOODIES JOKESReplies: 0Last Post: 15th October 2009, 12:10 PM -
Arthur Davidson
By Baz in forum WOODIES JOKESReplies: 5Last Post: 28th December 2005, 11:10 AM
