

 Thanks:
  Likes:
  Needs Pictures: 0
 Picture(s) thanks: 0
Results 181 to 195 of 377
Thread: 2/3 Harley Davidson 1920 JS
-
9th March 2015, 12:23 PM #181
 Deceased


- Join Date
- Mar 2013
- Location
- St. Helens Tasmania
- Posts
- 2,227

The painting and detailing of the Magneto is coming along pretty well.
I think it's overall appearance is much improved on the way it was originally.
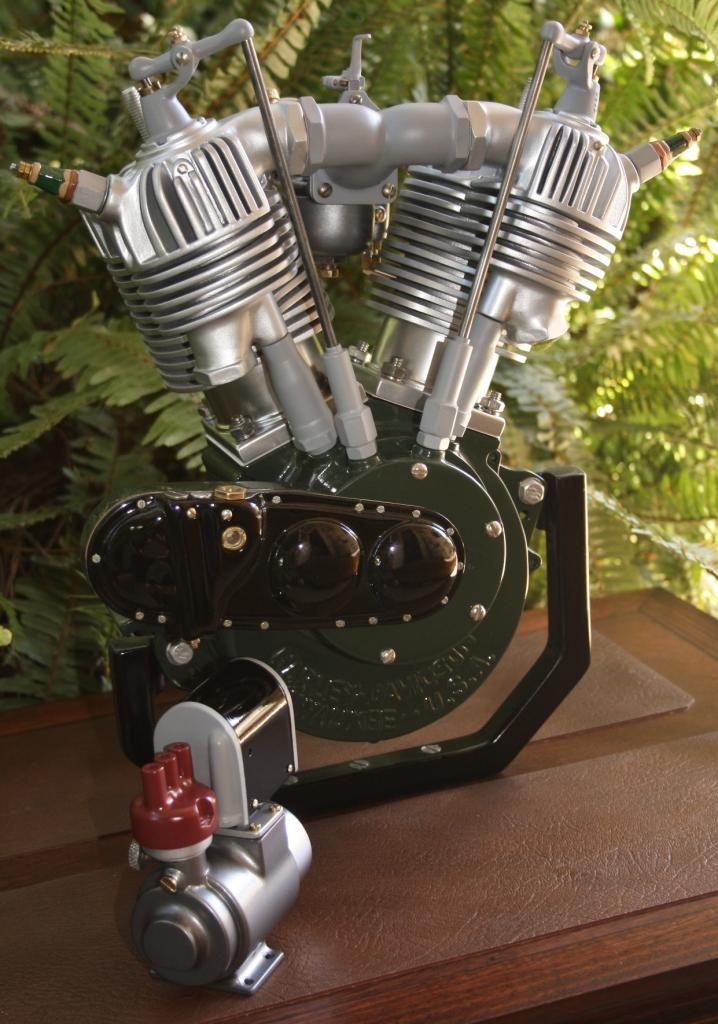
I found a few screws and other bits that don't look out of place.
I've really got to get my hands on some more of that single strand braided wire.
After using it on the Indian the plastic coated stuff just looks wrong!.
I gave the cover of the Coil another coat of black and the finish is much better this time.
The cover on the back of the Generator is looking a lot better as well, now that it appears as if it is screwed in place.
I'm not to sure on the colour of the distributor cap though.
I'd like to find a colour a little closer to the Bakelite reddish/dark brown.
Cheers
Trev.
-
9th March 2015 12:23 PM # ADSGoogle Adsense Advertisement
- Join Date
- Always
- Location
- Advertising world
- Posts
- Many
-
9th March 2015, 07:37 PM #182
GOLD MEMBER
- Join Date
- Apr 2013
- Location
- Torquay
- Posts
- 4,422
Trev,
We dealt a fair bit with bakelite when I worked (many moons ago)
Looked up and found photo of bakelite radio. (Colour exactly how I remember)
Do you have a Bunnings up in distant Mildura. They have been able to colour match printouts for me.
Hope this is of some assistance (if you are not happy with your colour) Reckon your build is great.
Regards
Keith
Bakelite.jpg
-
10th March 2015, 07:30 AM #183
Deceased
- Join Date
- Mar 2013
- Location
- St. Helens Tasmania
- Posts
- 2,227
Thanks for that Keith.
Your picture of the radio got me looking online at other things made from Bakelite.
I found that what I'm thinking of is that classic bakelite light switch colour.
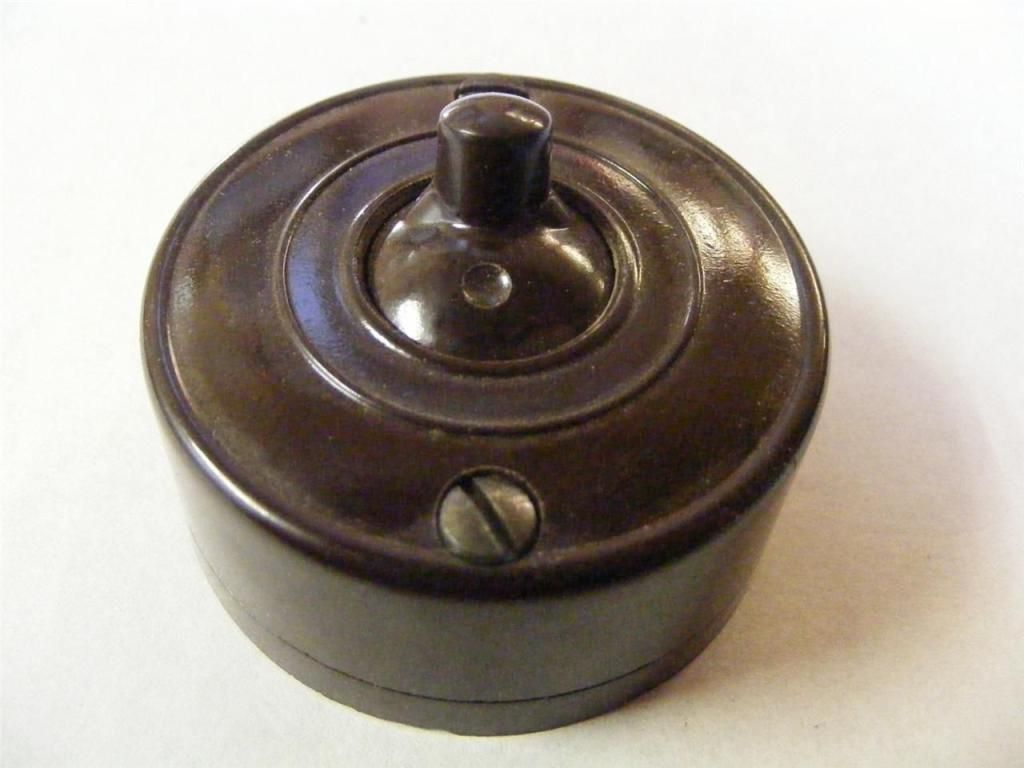
It shouldn't be to hard to find something very close to that in a spray can.
Mildura has a Bunning's along with all the other Mall's and fast-food outlets anyone could hope for.
Although I remember my Dad buying nails by their weight in brown paper bags.
Sawdust on the floor at the local Butchers and fish n chips wrapped in newspaper.
Ah the good old day's.
Cheers
Trev.
-
10th March 2015, 10:40 AM #184
Retired teacher, lifelong learner
- Join Date
- Jul 2012
- Location
- Murray River, NSW
- Posts
- 344
That's the bakelite colour I know. Originally Posted by Repliconics

Craig
-
11th March 2015, 08:14 AM #185
Deceased
- Join Date
- Mar 2013
- Location
- St. Helens Tasmania
- Posts
- 2,227
Me too mate. Originally Posted by CAG
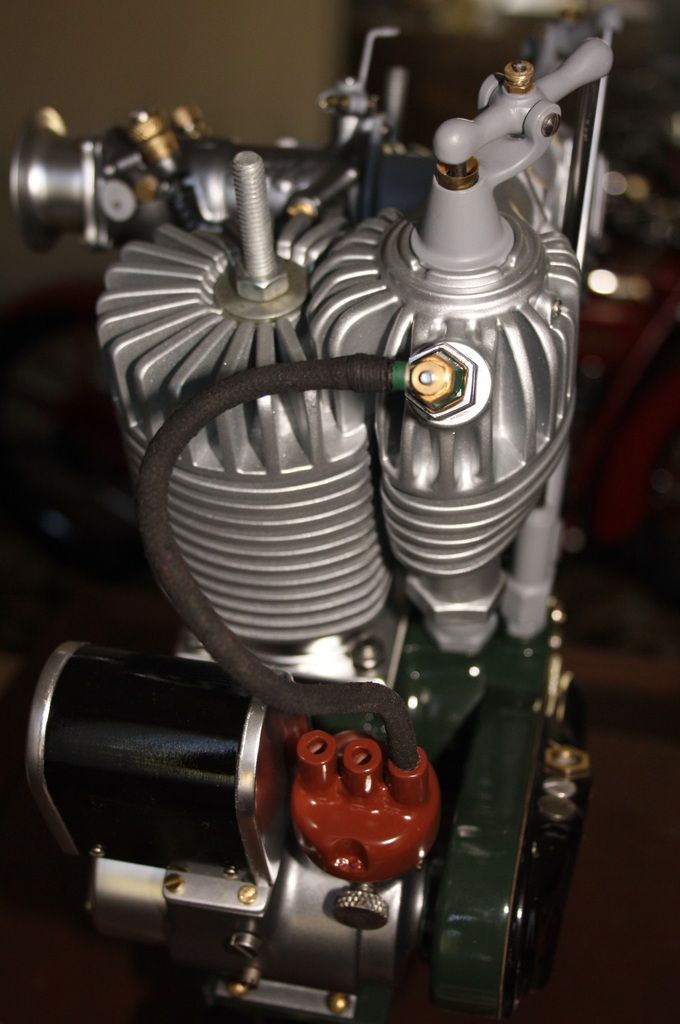
I went and got some darker paint for the distributor cap, but I'm still not happy with it.
The colour is about two shades darker than it appears in the photo below but it's not there yet.
I think I'll just try a full on dark brown gloss and see it that does the trick.
If nothing else I'm getting a good collection of reddish/brown paint.
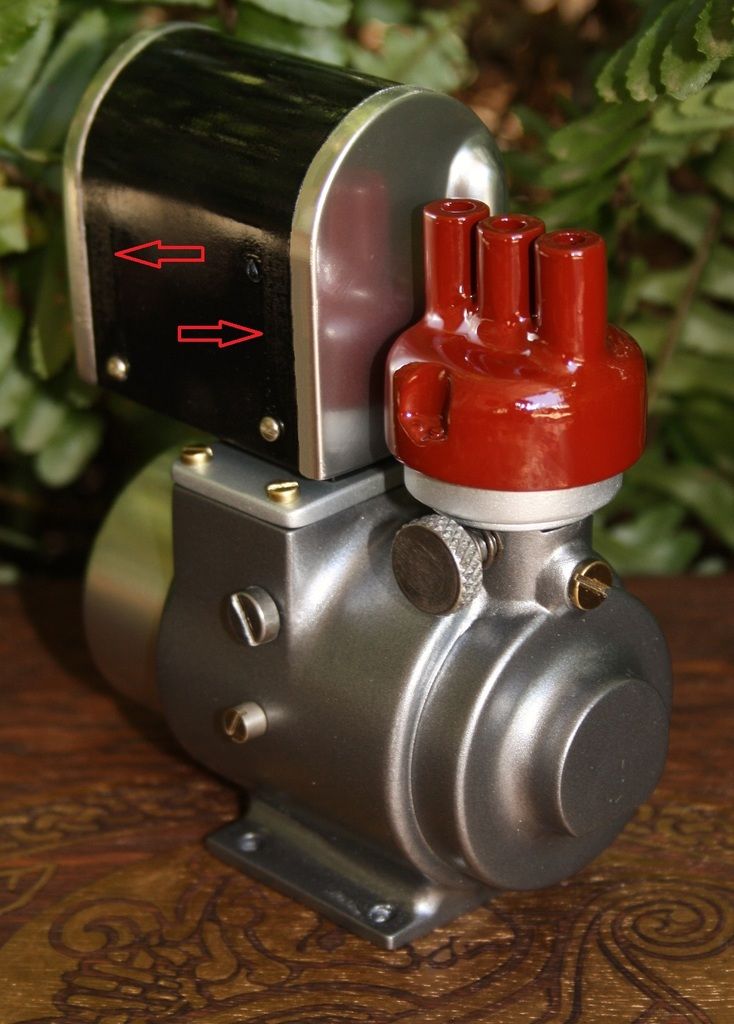
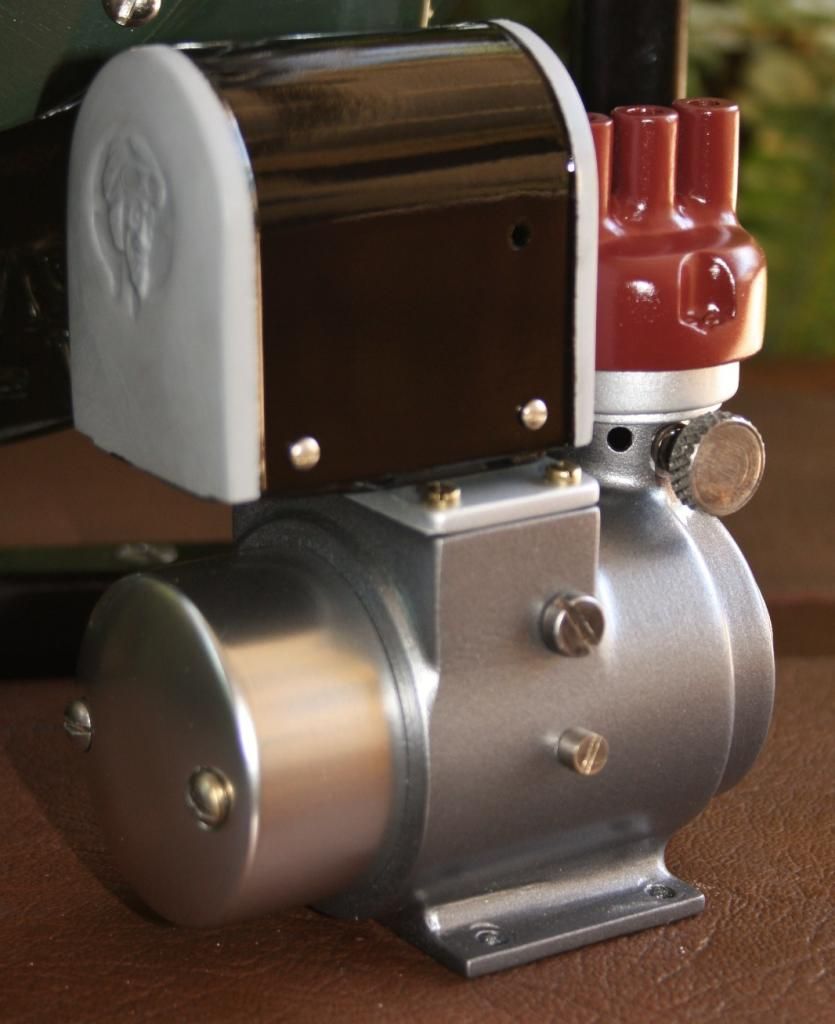
Everything was going great guns with the Coil, the nickel paint had a pretty good finish on it.
But when I took the masking tape off it had reacted with the black and left a horrible mark I cant remove.
I've marked the two areas with the arrows.
The Coil will need to have all the paint taken off it and start again.
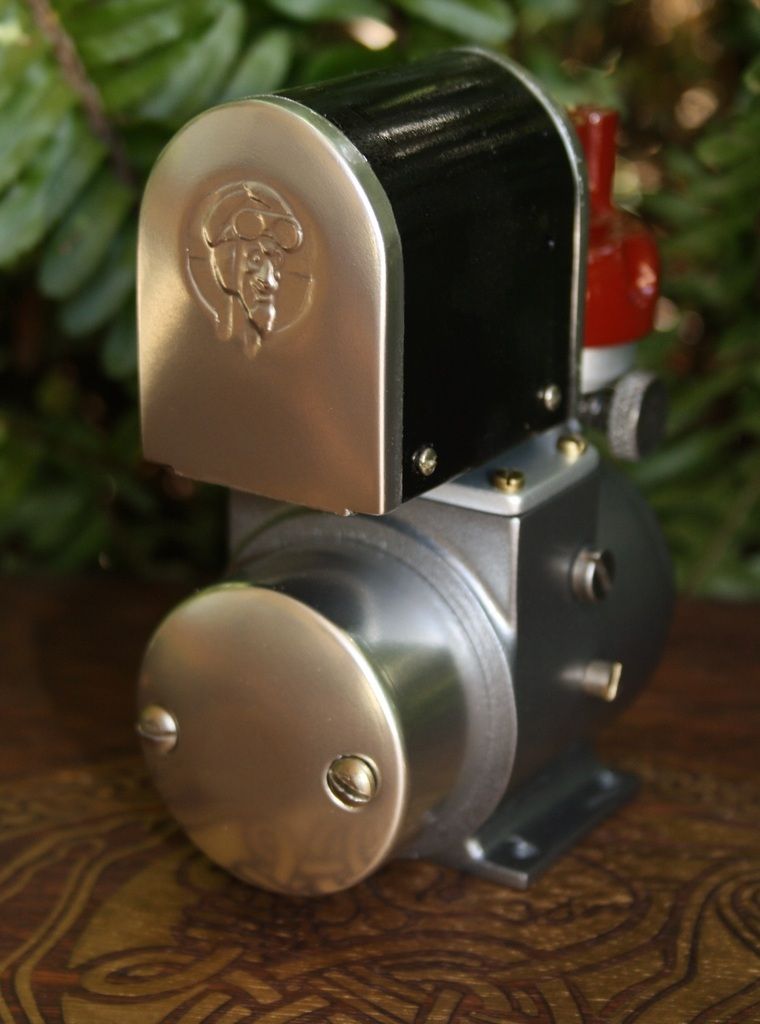
The kool dude on the back of the Coil was looking good at the time.
A bit of a bother but at least I know it will look pretty good when its done.
So yesterday was one step forwards two steps back in a lot of ways.
But I did have some very good luck with the "Ye Oldie" braided wire I've been looking for.
There's a bloke in town who was repairing radios when I was kid and is still around.
He pretty much has the stuff on tap.
You gotta get lucky sometimes!.
Cheers
Trev.
-
11th March 2015, 10:26 AM #186
GOLD MEMBER
- Join Date
- Nov 2008
- Location
- Canterbury UK
- Age
- 67
- Posts
- 3,996
-
11th March 2015, 10:12 PM #187
Life's Good, Enjoy each new day & try to encourage
- Join Date
- Dec 2009
- Location
- Faulconbridge, Lower Blue Mountains
- Age
- 68
- Posts
- 11,189
G'Day Trev,
That dizzy colour looks good to me, the same as I remember from my first cars.....
Love the photos, your are doing a top job of the resto, sir..
Cheers, Peter
-
12th March 2015, 10:36 AM #188
Deceased
- Join Date
- Mar 2013
- Location
- St. Helens Tasmania
- Posts
- 2,227
Thanks mate. Originally Posted by Dalboy
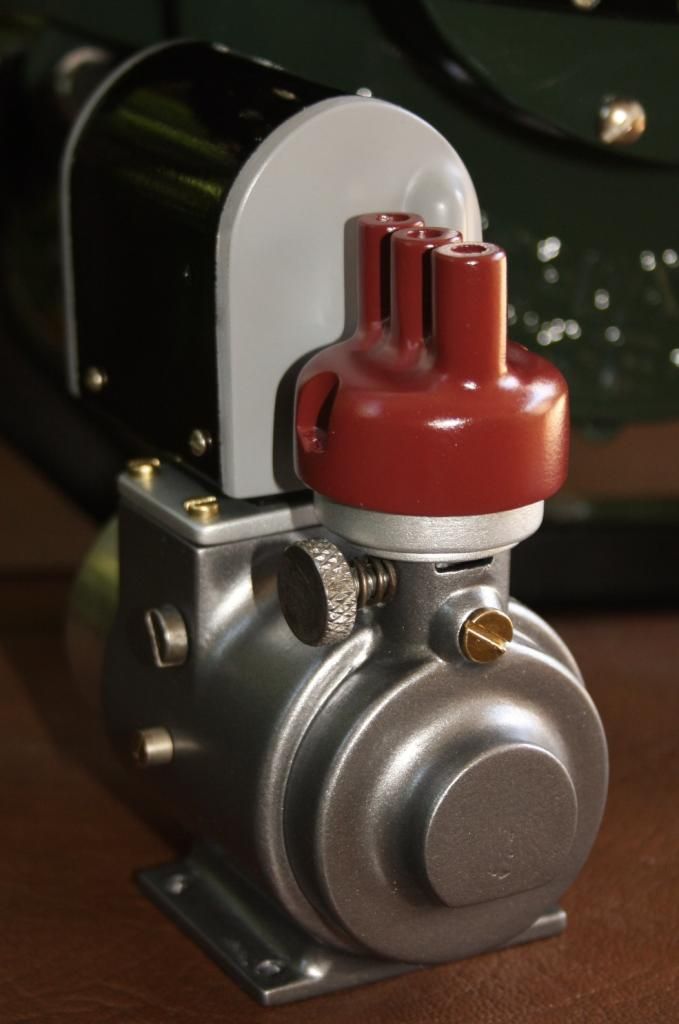
I'm being a little picky about the bakelite colour and the detail of the sparkplugs but I think their both pretty close to being right now!.
Thanks Peter. Originally Posted by crowie
I think I'm dizzy from driving back and forth to the hardware store getting cans of paint.
Maybe I'm being a little to pedantic (like that's new) but I think the parts are looking better for it.
Here's the colour I settled on for the Distributor cap.
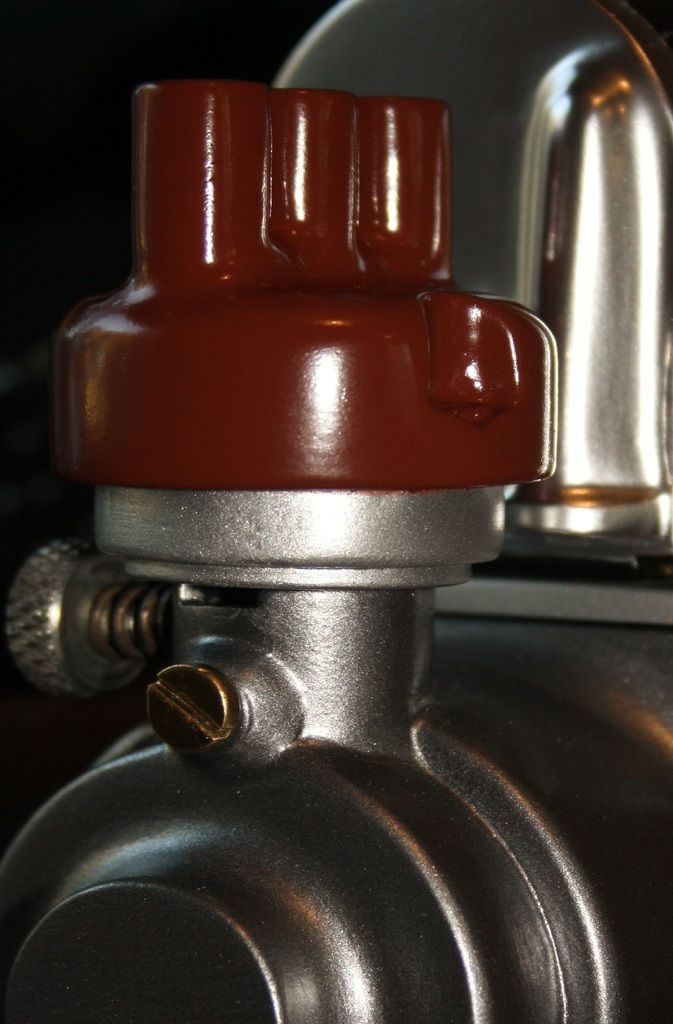
And this is the changes made to the sparkplug.
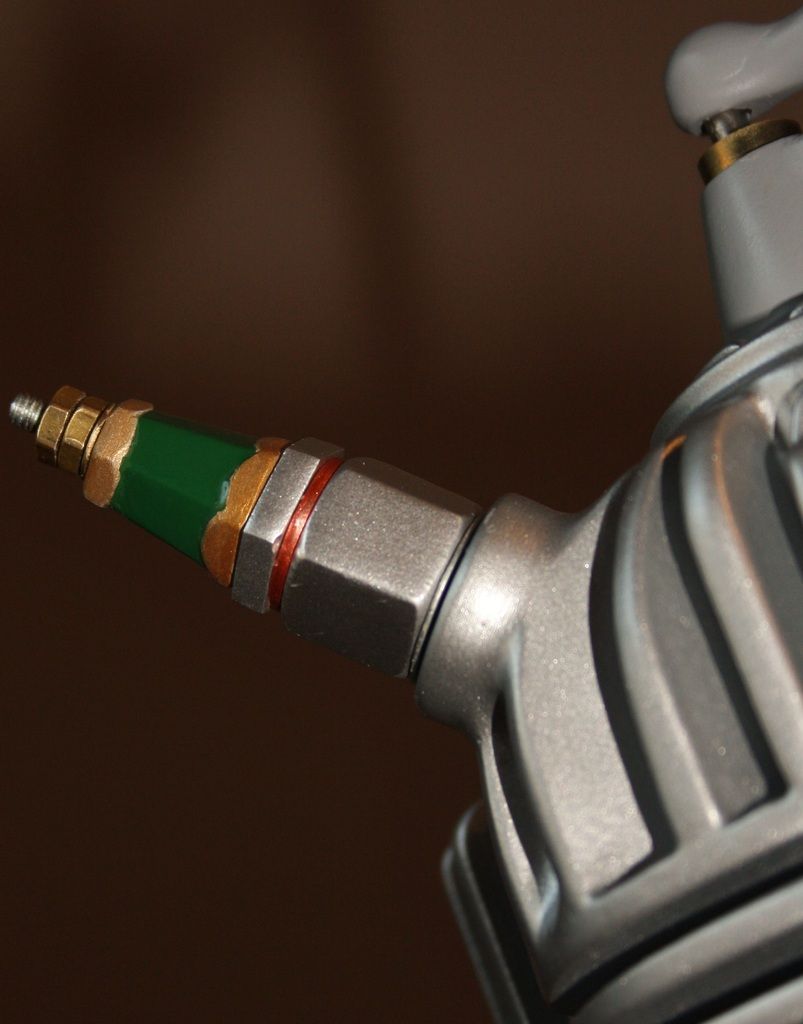
I'm pretty happy with both.
Although I may have a better way to get the Splitdorf script onto the side of the sparkplug than just writing it on.
Cheers
Trev.
-
12th March 2015, 10:55 AM #189
GOLD MEMBER
- Join Date
- Apr 2013
- Location
- Torquay
- Posts
- 4,422
I think that is about the perfect colour Trev
Spot on
Keith
-
12th March 2015, 08:09 PM #190
 GOLD MEMBER
- Join Date
- May 2012
- Location
- Woodstock (Cowra)
- Age
- 74
- Posts
- 3,381
+ 1 for the colour Originally Posted by Keith_1
The person who never made a mistake never made anything
Cheers
Ray
-
12th March 2015, 08:27 PM #191
Deceased
- Join Date
- Mar 2013
- Location
- St. Helens Tasmania
- Posts
- 2,227
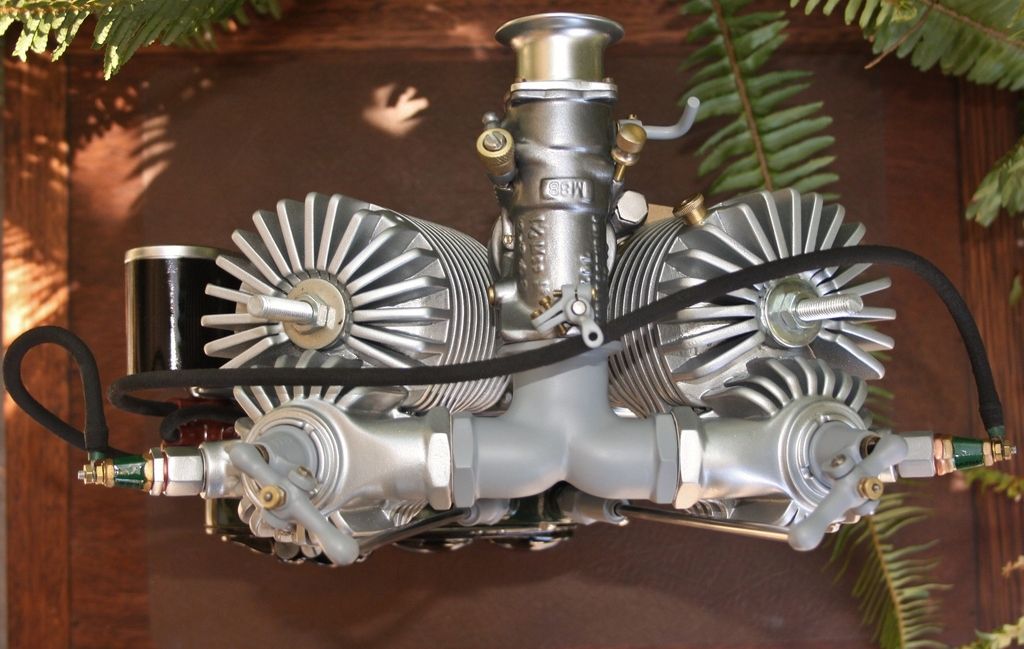
I had a very slow day working on the engine, I'm making the sparkplug leads.
I wonted to have the leads more ridged than they where before.
So I've used coat hanger wire and cover it with rubber air hose, then covered that again with braided fabric.
Most of the time was spent getting the fabric cover off six foot of electric cord from an old iron.
Then getting the rubber air hose to go back through it.
The braided fabric was originally a light brown colour so I've painted it flat black.
The best part is that with the wire inside it I can shape the leads in any way I like and they stay in place.
Don't mind the sparkplug being off centre it's only there temporarily.
I bound the end of the covering to get a better finish.
Only the shortest of the two leads is dry enough to handle at the moment and it still needs a second coat.
But I think their going to look "Much More Bettera"!.
Cheers
Trev.
-
12th March 2015, 09:58 PM #192
GOLD MEMBER
- Join Date
- Apr 2013
- Location
- Torquay
- Posts
- 4,422
Real nice work

-
13th March 2015, 03:49 PM #193
Where did I put that....
- Join Date
- Jan 2009
- Location
- Tampa, FL - USA
- Posts
- 73
Looking great Bud. I think you nailed the color for the distributor cap.
 He who blesses his neighbor in a loud voice, rising early in the morning, it shall be counted as cursing!
Videos I have made. Abandon All Hope Ye Who Enter Here!
https://www.youtube.com/user/johnnie52/videos
-
13th March 2015, 05:04 PM #194
Deceased
- Join Date
- Mar 2013
- Location
- St. Helens Tasmania
- Posts
- 2,227
Thanks cobber glad you like it. Originally Posted by johnnie52
It took a few tries but I'm happy with it now!.
I got the sparkplug leads done today.
Still need to redo the sparkplug on the right.
But the engines starting to look more the go now!.
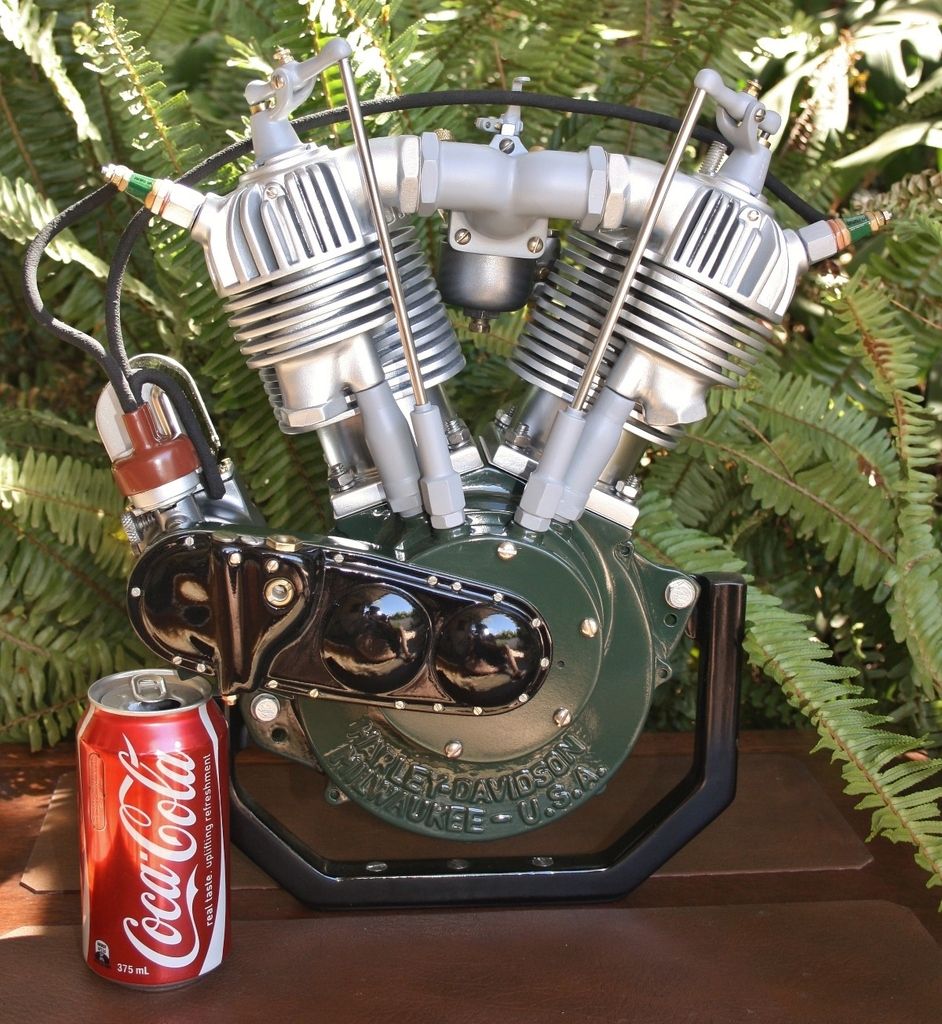
Got the old Coke can out for scale just so CAG knows it's still safe and sound!.

I really like the way the engine looks across the heads.
But the fit is pretty tight on the Harley so when the engine goes in the frame most of the detail will be lost.

I may not get to much done on the engine over the weekend.
Believe it or not Crowie I'm planning on cleaning up the carport (Workshop).
There's so much bodyfiller, fibreglass and sawdust out there I can't find a thing.
But it's fair enough a good clean up once ever four or five years isn't to over the top!.
Cheers
Trev.
-
13th March 2015, 05:44 PM #195
Retired teacher, lifelong learner
- Join Date
- Jul 2012
- Location
- Murray River, NSW
- Posts
- 344
Those photos are ace Trev! The top view is great and, as you say, it will almost be a shame when the motor goes back into a frame.


Similar Threads
-
It's a No.1, but not a Harley
By Bushmiller in forum HAND TOOLS - UNPOWEREDReplies: 19Last Post: 13th October 2014, 11:24 PM -
Harley Davidson chopper
By bobman 58 in forum INTARSIAReplies: 6Last Post: 6th February 2014, 08:26 AM -
Harley Davidson logo
By bobman 58 in forum SCROLLERS FORUMReplies: 4Last Post: 10th August 2013, 09:38 AM -
Harley Davidson
By Rum Pig in forum WOODIES JOKESReplies: 0Last Post: 15th October 2009, 12:10 PM -
Arthur Davidson
By Baz in forum WOODIES JOKESReplies: 5Last Post: 28th December 2005, 11:10 AM
