

 Thanks:
  Likes:
  Needs Pictures: 0
 Picture(s) thanks:
Results 3,331 to 3,345 of 3347
-
10th March 2016, 01:50 PM #3331
 Moderate Moderater


- Join Date
- Feb 2006
- Location
- Lindfield N.S.W.
- Age
- 62
- Posts
- 5,643

Alex, I agree with your second thoughts.
Just go sailing!
Screwing up in new ways every day Cheers
Jeremy
If it were done when 'tis done, then 'twere well it were done quickly
-
10th March 2016 01:50 PM # ADSGoogle Adsense Advertisement
- Join Date
- Always
- Location
- Advertising world
- Age
- 2010
- Posts
- Many
-
10th March 2016, 02:18 PM #3332
GOLD MEMBER
- Join Date
- Jan 2009
- Location
- Blaxland, Australia
- Age
- 65
- Posts
- 2,551
Thank you Jeremy :). I have just arranged some help getting the Roof off the boat to check the interior. It (the Roof) is too heavy and cumbersome for one person on their own!
Hopefully the interior (boat and Roof) haven't been too badly gnawed by small rodents or marsupials - or termites! I haven't had the roof off since it was originally installed over two years ago.
Cheers,
Alex.
-
15th March 2016, 11:28 AM #3333
GOLD MEMBER
- Join Date
- Jan 2009
- Location
- Blaxland, Australia
- Age
- 65
- Posts
- 2,551
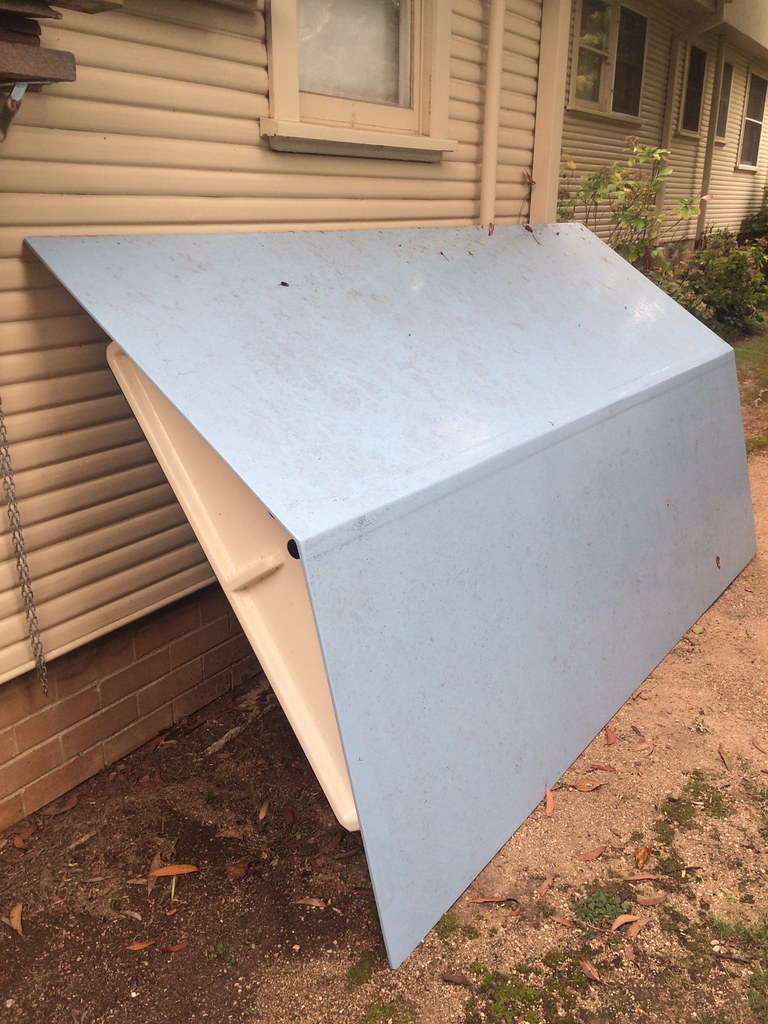
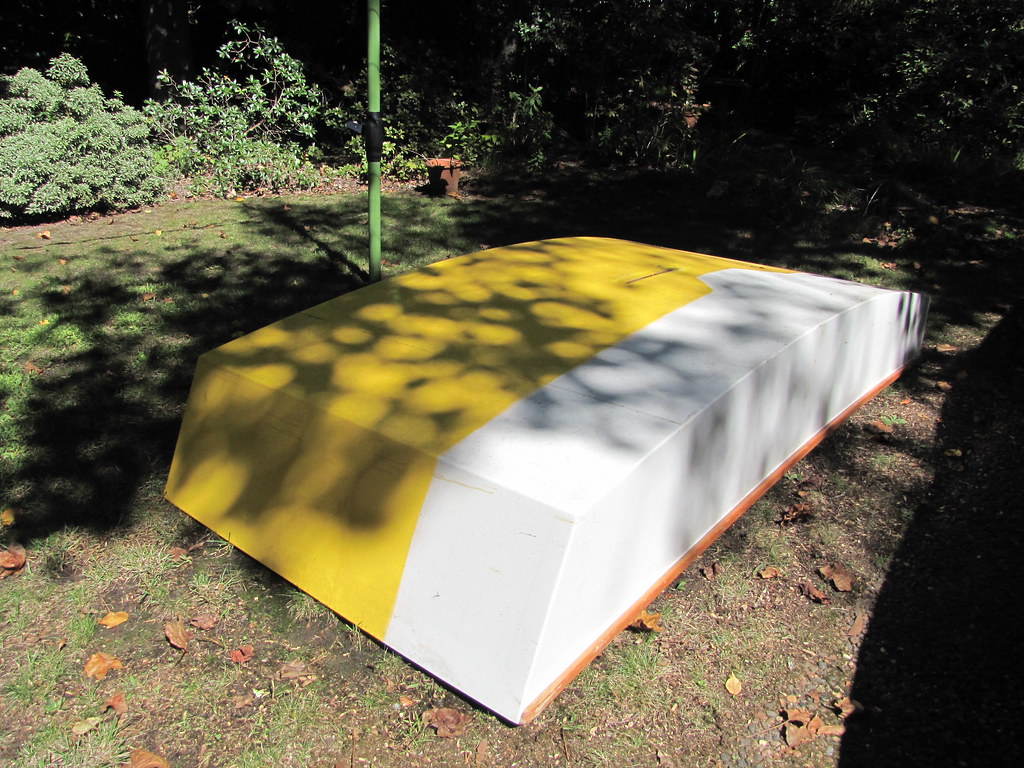
OK. Some movement, albeit not a lot. A couple of friends very kindly lifted the Roof off for me in my absence, per my request, and tucked the Roof neatly away behind the garage. Thanks, chaps! My apologies for the weird colours in some of the snaps - I was using the phone camera, of which I am no friend at all. So:
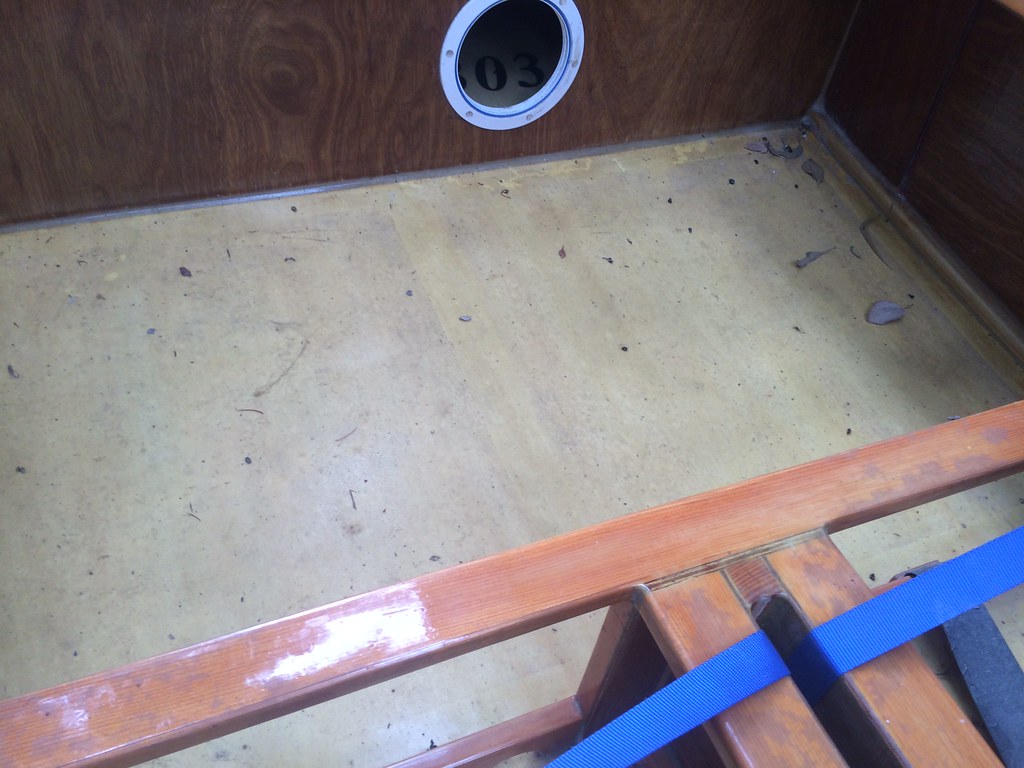
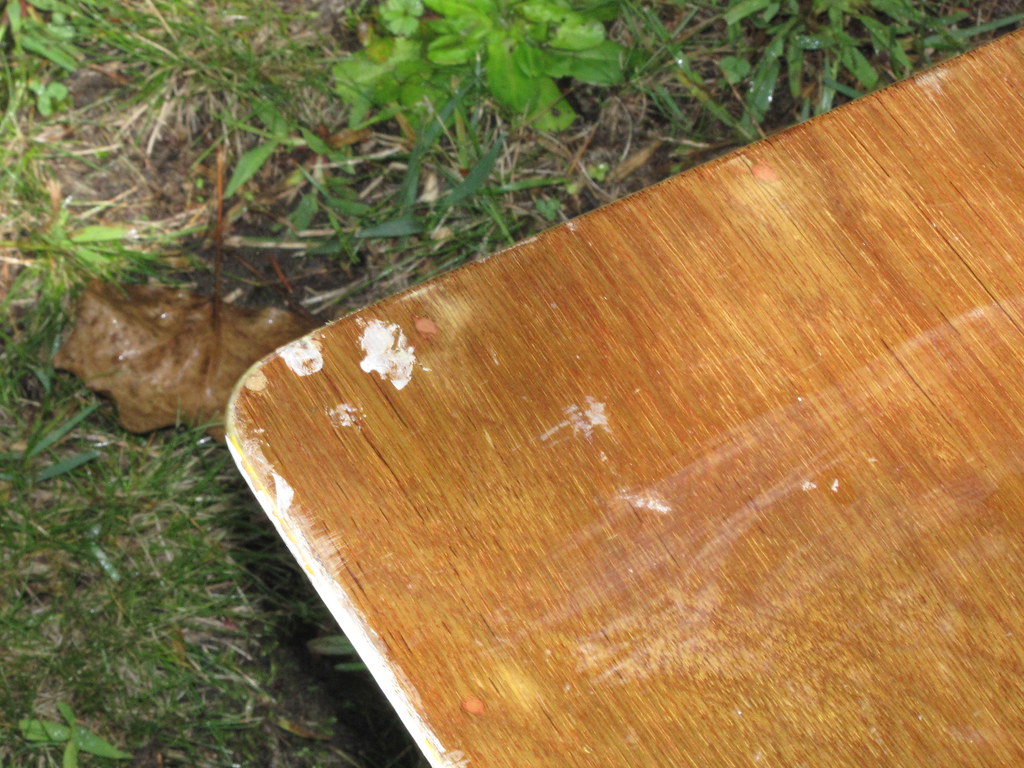
1. Wood Duck with her roof off for the first time in over two years. There was no apparent gnawing damage visible, but there was a thick layer of mould all over the bright surfaces, and a lot of mollusc(?) trails through that...
2. Port side-deck of a rather dirty boat. It could have been worse - the gnawing sorts of creatures could have been havng a field day under the protection of the roof

3. Grubby foredeck of boat. Tracks through the mould can be seen very clearly here. I suppose, at least, that they could be said to have been doing some cleaning for me ;). Good little molluscs :)

4. Side-deck, buoyancy tank side and cockpit floor - grubby-looking and rather drab and uncared-for - which is the unfortunate case
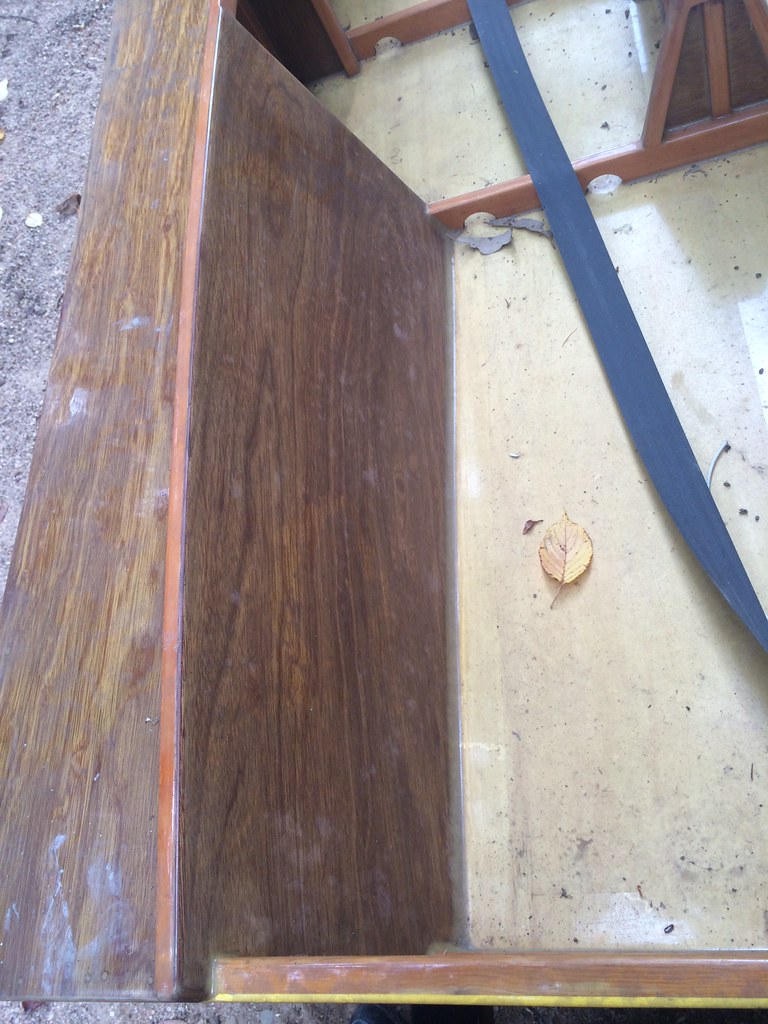
5. Centrecase cleats covered in mould; the whole boat's grubby, inside and out, as a matter of fact
6. Forward cockpit area of the dirty boat. Note the tracks in the mould in the top RH corner of the snap
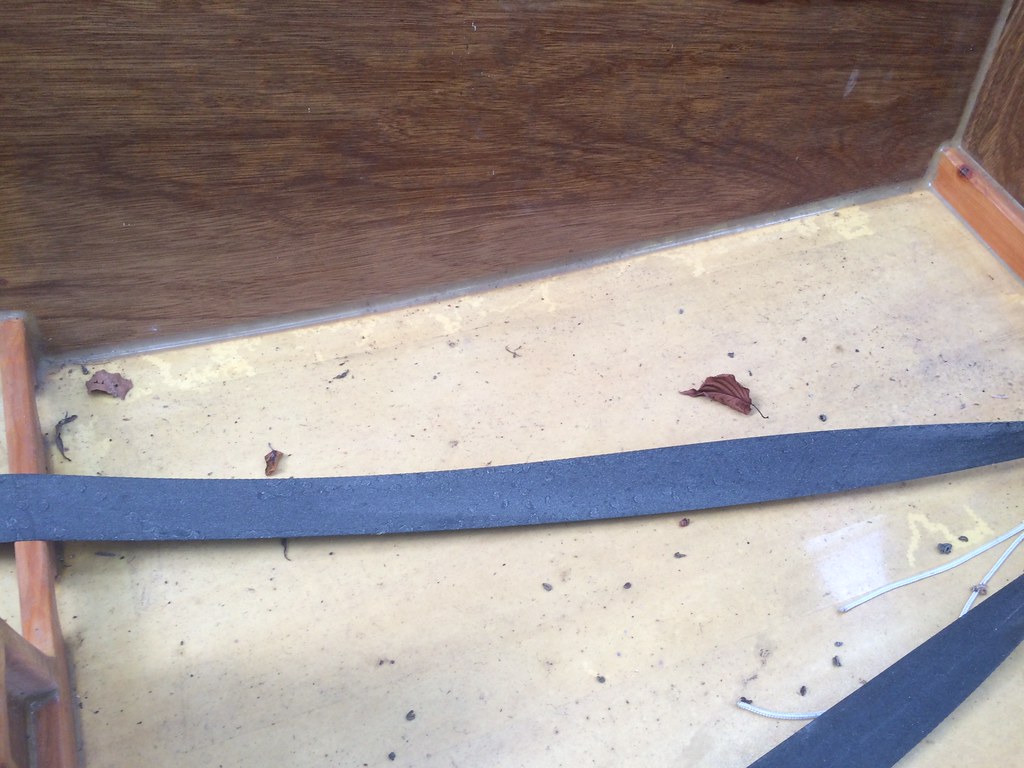
7. Mollusc(?) tracks and droppings on the cockpit floor. Mould quite apparent here, as is some sawdust that I have either forgotten about, or has been produced post-"storage" by some wee beastie(s) or other...
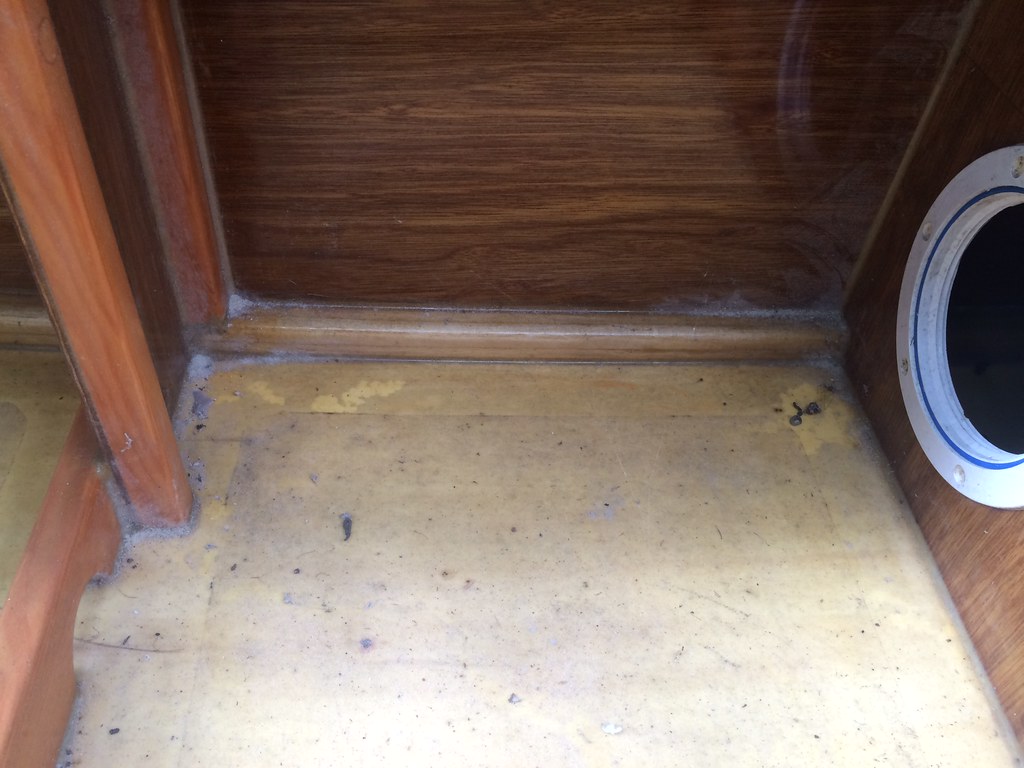
8. Aft cockpit well with tracks in the mould; a repeating theme. The tracks are only on the smooth areas: where the non-slip is, the tracks aren't. Too rough for their little gastropods, no doubt
9. Boat roof leaning up against the house. A bit of chicken wire at each end and it would make a good coop or shelter for chooks :)
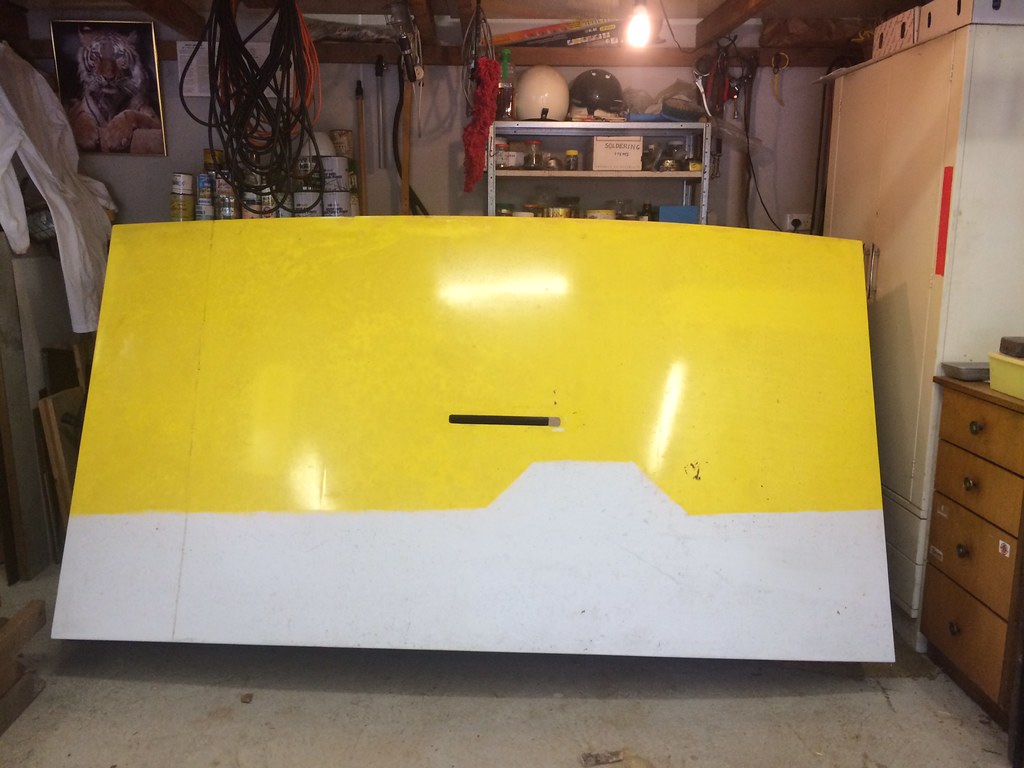
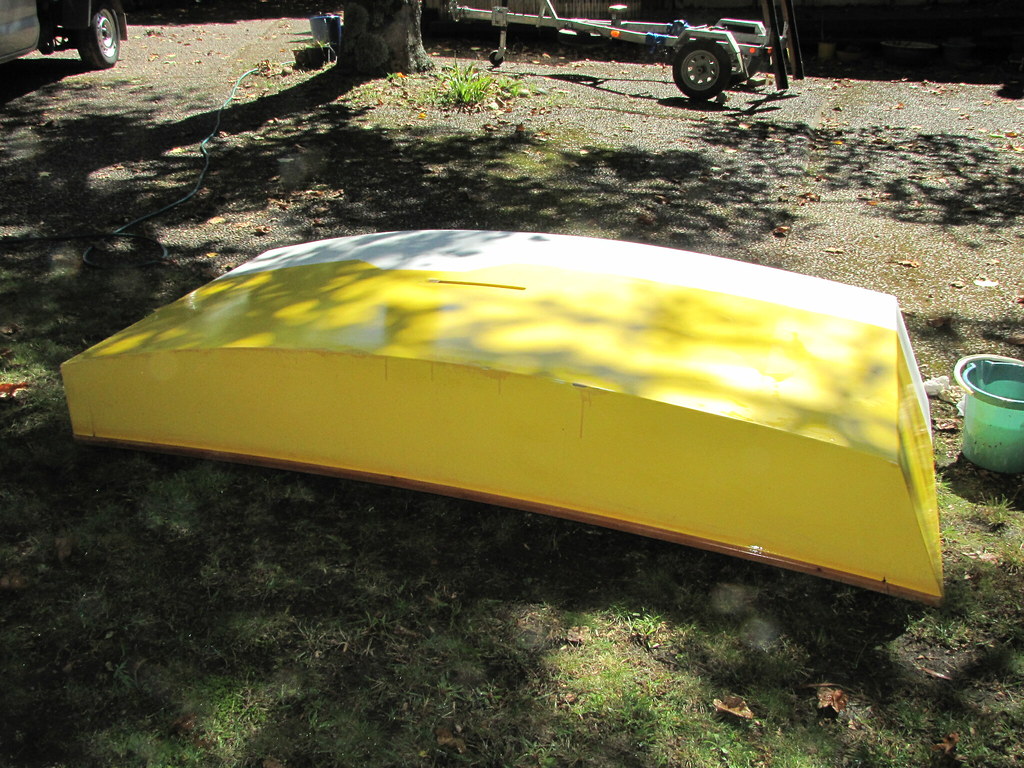
10. Boat in the garage. She doesn't look much like a boat in this snap - just a (large-ish) box. I put her in the garage temporarily as I didn't want her to fill up with rain and fall off her perch again, like last time... She also needs a good sponge down on the bottom, too. I noticed some possible further cracking of that infernal lite-ply, so I will need to go around the edges again more carefully. There are also some depressions and creases where the boat has been sitting on the trailer: this would not happen with proper marine ply. I really am going to have to replace that bottom at some stage, but not at the moment
Follow this link to my Flickr account, also in my Wood Duck Repairs set/album...
The boat was remarkably easy to move, much more so that I remembered her to be. I wheeled her into the garage, then slid her off the back of the trailer onto a doormat, then tugged and slid her into position. This is only temporary while I do some sorting out on the other side of the shed, and/or get her upside down on her trailer. I REALLY don't want a repeat of what happened last time when I left her uncovered for too long (hence, of course, the roof). She does, of course, need a jolly good clean inside and out before anything else, and an inspection of that many-times-accursed lite-ply bottom for more transport-induced damage.
Every time that I look at that bottom I twitch violently. The problem is that replacing it is probably going to be almost as much work as that which I spent on the Roof - time that I would thoroughly begrudge, since it - and the money involved - could be put to much better use. The very thought of it makes me grind my teeth (something that an oboist particularly should never do). I will see what I think after sailing her with her new suit of clothes for a bit. Unless, of course, the bottom gives way and she sinks...
-
15th March 2016, 11:58 AM #3334
Moderate Moderater
- Join Date
- Feb 2006
- Location
- Lindfield N.S.W.
- Age
- 62
- Posts
- 5,643
I would get to work with some bleach (Chlorine) in solution to get rid of the mould ASA and P! The toughts of what it might be doing to varnish etc is too horrifying. So get rid of it pronto and then you can take your own sweet time deciding what to do next.
Cheers
Jeremy
If it were done when 'tis done, then 'twere well it were done quickly
-
15th March 2016, 12:08 PM #3335
GOLD MEMBER
- Join Date
- Jan 2009
- Location
- Blaxland, Australia
- Age
- 65
- Posts
- 2,551
Thank you Jeremy (once again :). The thought of the mould gobbling up the varnish has been worrying me too. I'll take some bleach with me (along with a couple of push-sticks) next time that I go up to Wentworth Falls (WF).
Cheers,
Alex.
-
31st March 2016, 09:18 PM #3336
GOLD MEMBER
- Join Date
- Jan 2009
- Location
- Blaxland, Australia
- Age
- 65
- Posts
- 2,551
I got stuck into cleaning the boat today, inside and out. I just used warm water and a sponge (and occasionally some meths and paint thinners to get some intransigent marks off) since I didn't want to attack the varnish with a heavy duty oxidising agent, and the warm soapless water did well enough with some elbow grease, a tin of which I had happily to hand:
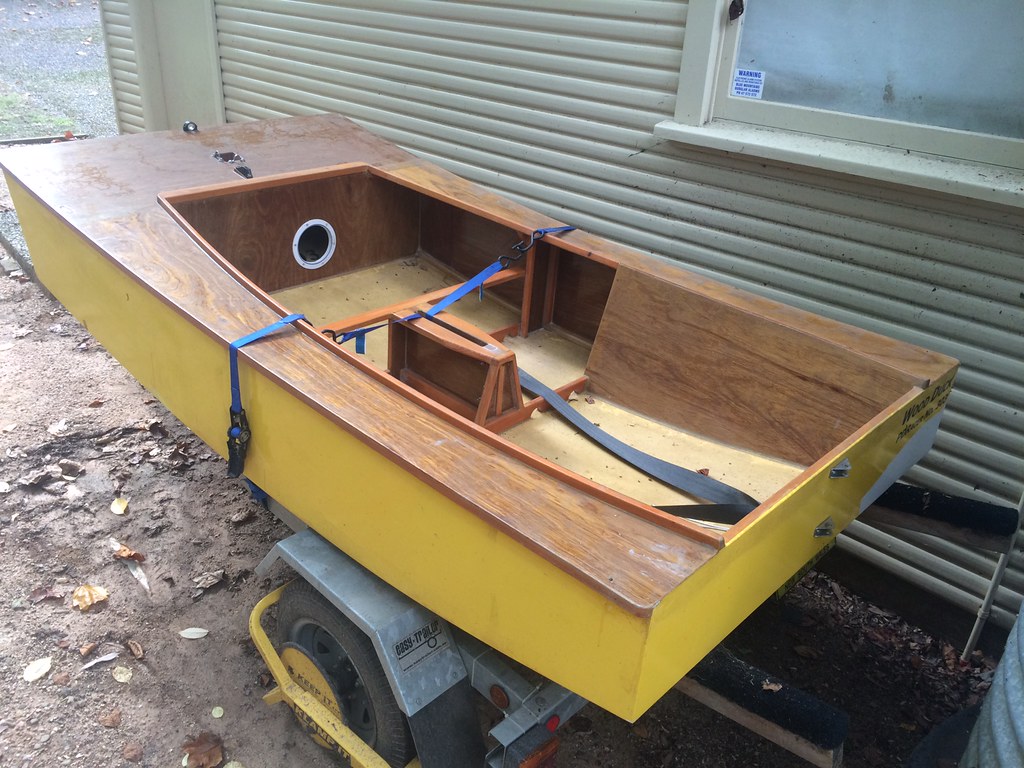
1. Wood Duck on the father-n-law's back lawn before being hosed: grubby, grubby grubby...
2. Outside of the hull has had a bit of a scrub with warm water and a sponge; no bleach or detergents
3. Depressed area in the lite-ply bottom from sitting on the trailer. Oh well, says he philosophically
4. Interior cleanup well on the way. Nasty sort of soup at the bottom of the forward cockpit
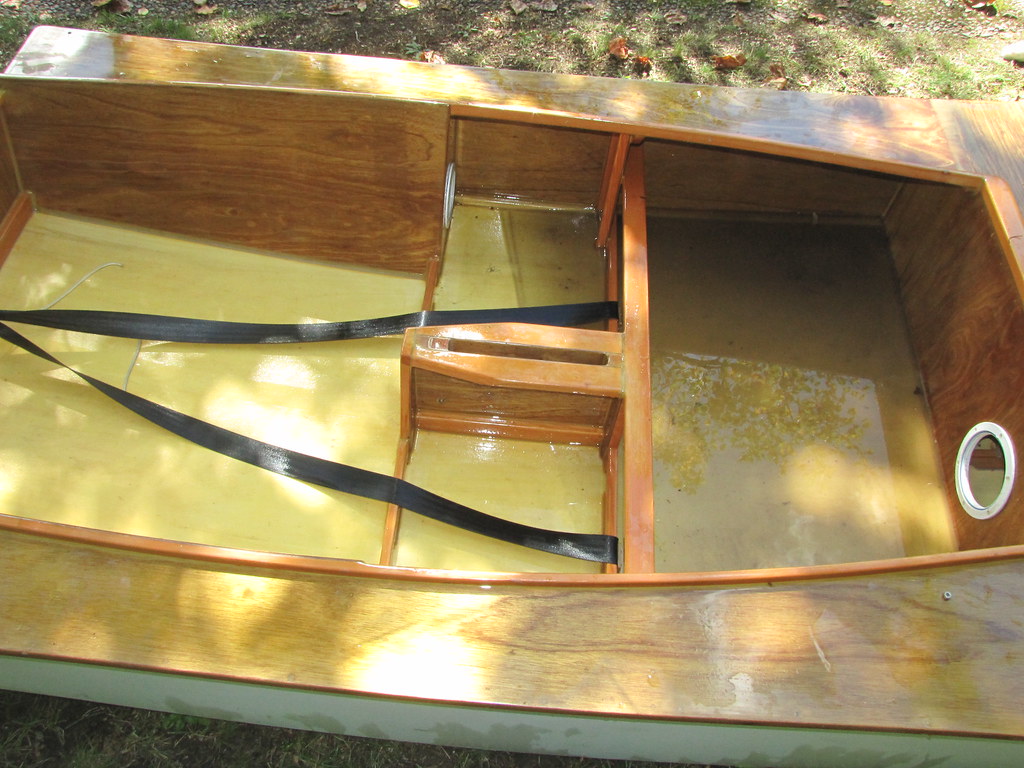
5. Some stray glue and high-build epoxy primer on the foredeck, from being untidy when repairing the severely damaged hull
6. More stray glue: same cause as the other lot. There are quire a few blobs around the boat that will require cleaning up - eventually. Note to self - the traveller needs to go back into the hole(s) in the gunwale(s). Now where did I put that?...
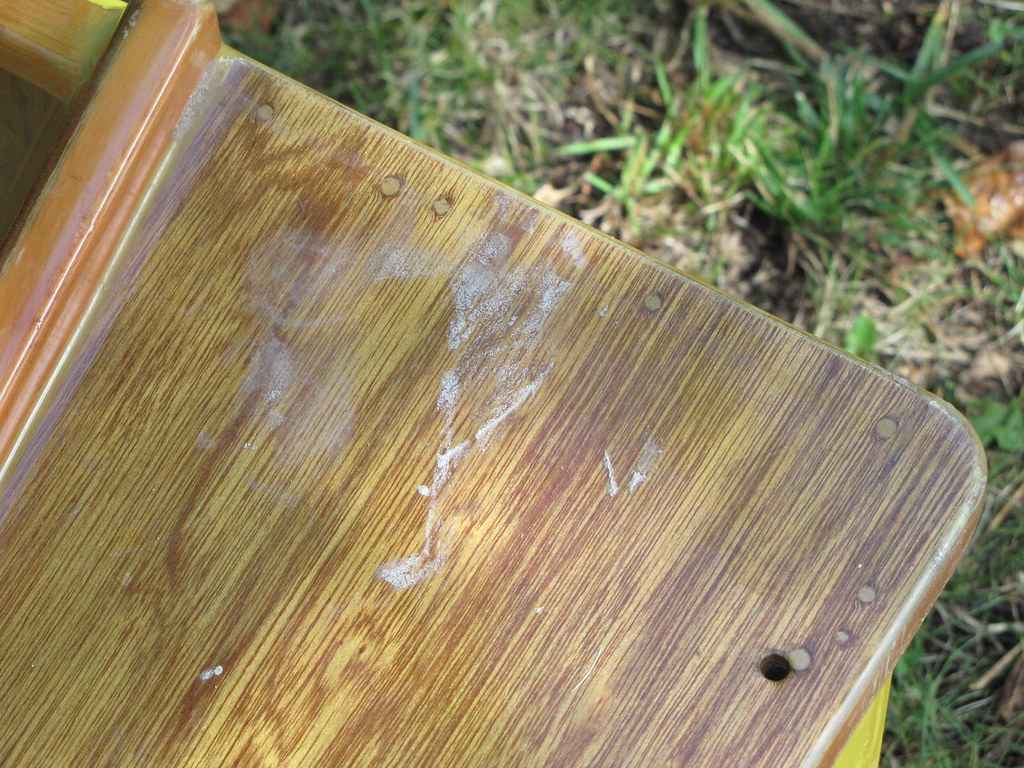
7. Nice sparkling clean boat :). Well, a bit clean - it could do with another going over, since I was in rather hurry with the (really) hired help needing to get going. Quite a bit of rogue glue visble in this snap, too

8. Clean Wood Duck from the stern, looking forward. She's in the garage here, back on her trailer again
9. Forrard cockpit, clean
10. Clean centreboard case! OK, there's a bit of a change with this last snap: I am trying out the Flickr (i.e., Yahoo!) Lawyers' "Use this code or we'll sue you" link: it messes up my nice clean flow considerably, but presumably keeps the Lawyers off our backs. It effectively turns the image into a link - and turns the caption quite unnecessarily into another totally redundant link, goodness me, what sort of mind-altering drugs are these people on? - which I had to fiddle with to get it a little bit to my liking...
by Alex1N on Flickr
I did take the push-sticks up to the father-in-law's, but I seem to have mislaid the corroborating snap somewhere - probably on the phone, so I'm afraid that you will have to take my unreliable word for it...
Just as a point of interest, the unpainted Aqua-Cote high-build epoxy primer side of the hull was much less deeply marked by the dirt than the International Brightside Yellow, and much easier to clean. It has quite a nice smooth finish to it, too, even though roller-panted without tipping off with eiher the roller or a brush.
To say that I am not happy with the Yahoo!-anointed FLP at all is something of an understatement, and I will play around with it a bit: I may be able to flange up a text-expansion that drops the stub code into my text editor. If I can't get it working on this forum I will unceremoniously dump the code and go back to my original FLP. I really get fed up with the tail wagging the dog on a continual basis.
So, now I need to go hunting seriously for a sailing spot - when I get the opportunity I will have a look at Penrith Lakes and Ross Venner's Concord club. And maybe Wentworth Falls Lake ;).
-
1st April 2016, 05:36 PM #3337
GOLD MEMBER
- Join Date
- Jan 2009
- Location
- Blaxland, Australia
- Age
- 65
- Posts
- 2,551
Mini-update:
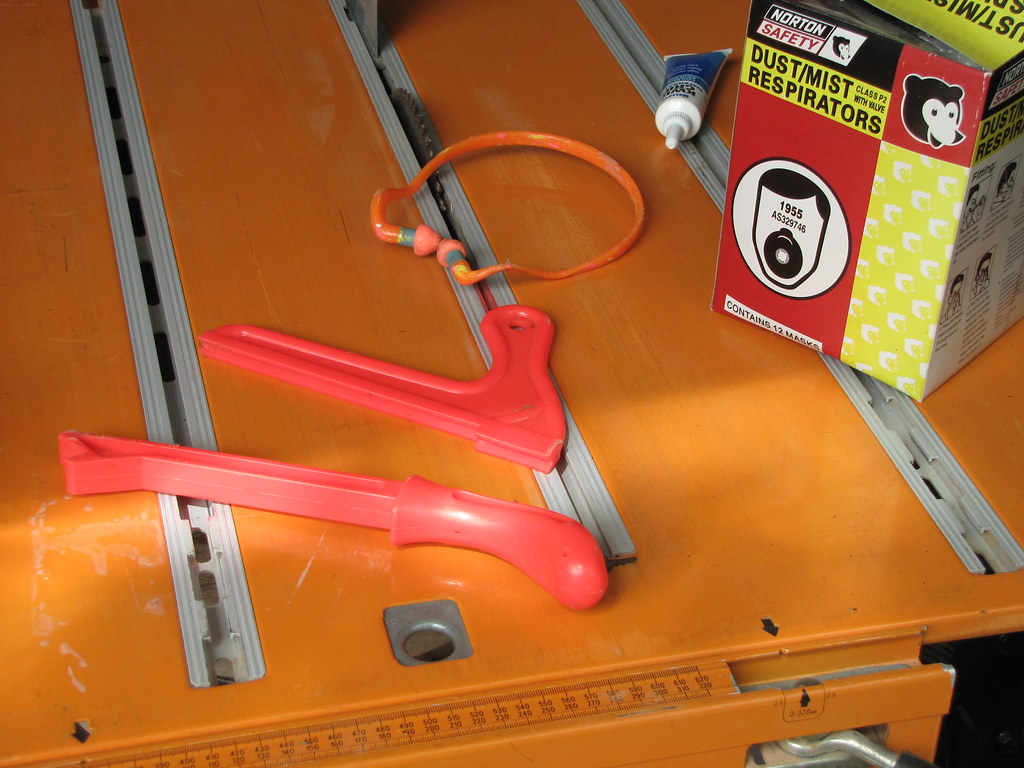
1. Two push-sticks to be kept with the Triton, along with the light-weight ear plugs and some P2 valved dust masks; I knew that this snap was lurking around somewhere
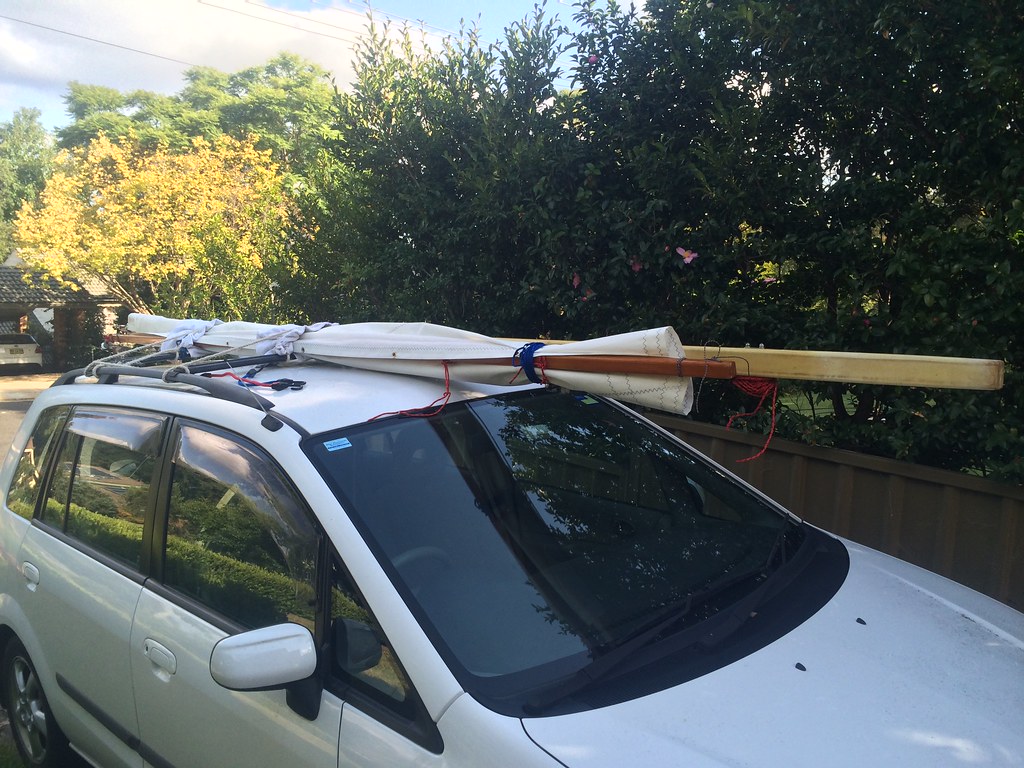
2. Mast, sail and spars about to go off to join the rest of the boat. Note the nice crisp new Really Simple Sails balanced lug sail rolled up on its spars :)
Follow this link to my Flickr account; see also New Shed and Wood Duck Repairs albums in the same account
I have decided that the recommended Flickr method of posting links for forums is too clumsy and difficult, and have reverted to my original FLP (Flickr Lawyer Pacifier).
Almost all the ducks are now in a row, so to speak, so all that remains to be done is find the traveller and re-install it. Since I am busy trying to get the third and last of my workshop benchtops sealed and painted at the moment, I will not have a chance to deal with the traveller and visit various potential sailing sites yet. There's always something to get in the way...
-
4th April 2016, 12:31 PM #3338
GOLD MEMBER
- Join Date
- Jan 2009
- Location
- Blaxland, Australia
- Age
- 65
- Posts
- 2,551
Found the traveller :)
As I had hoped, the traveller cord was in my sailing tackle crate, along with most of the other requisite bits. I had removed it from the boat for the repairs to the broken port side:
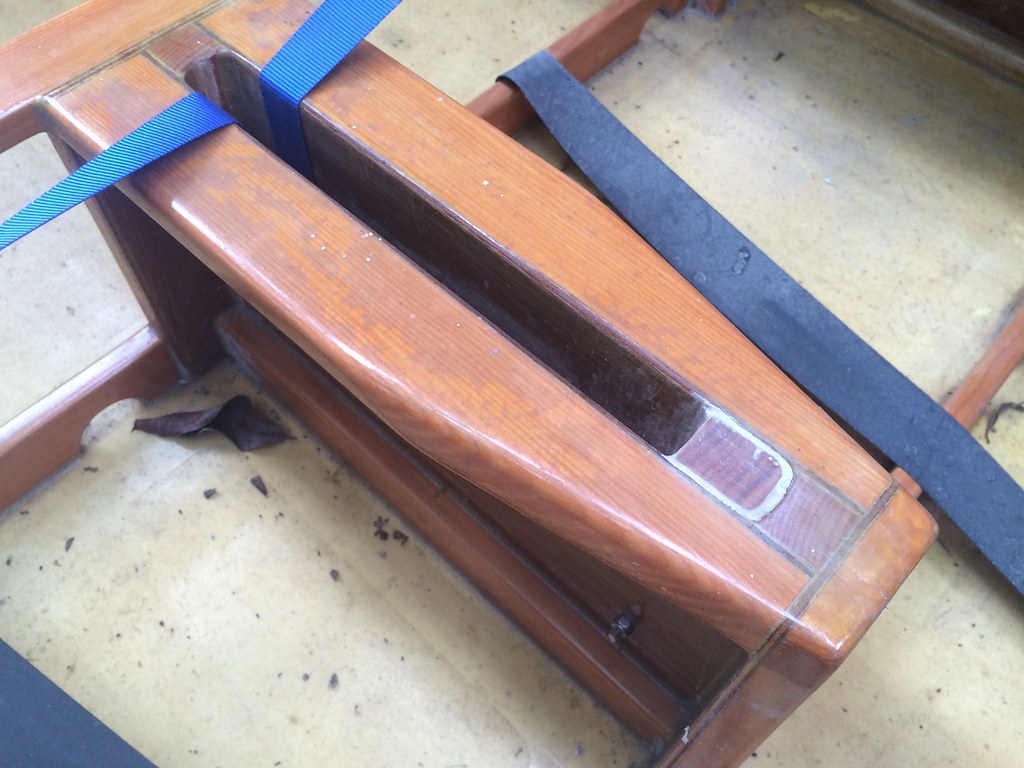
1. Mainsheet traveller cord with mainsheet and block. The mainsheet has been looped loosely on itself to reduce its length and keep it a bit more manageable in storage - a little trick that I picked up from the very handy knot app that I have on my phone. The tow-rope has been dealt with in the same way. The ropes are, of course, unlooped before use...
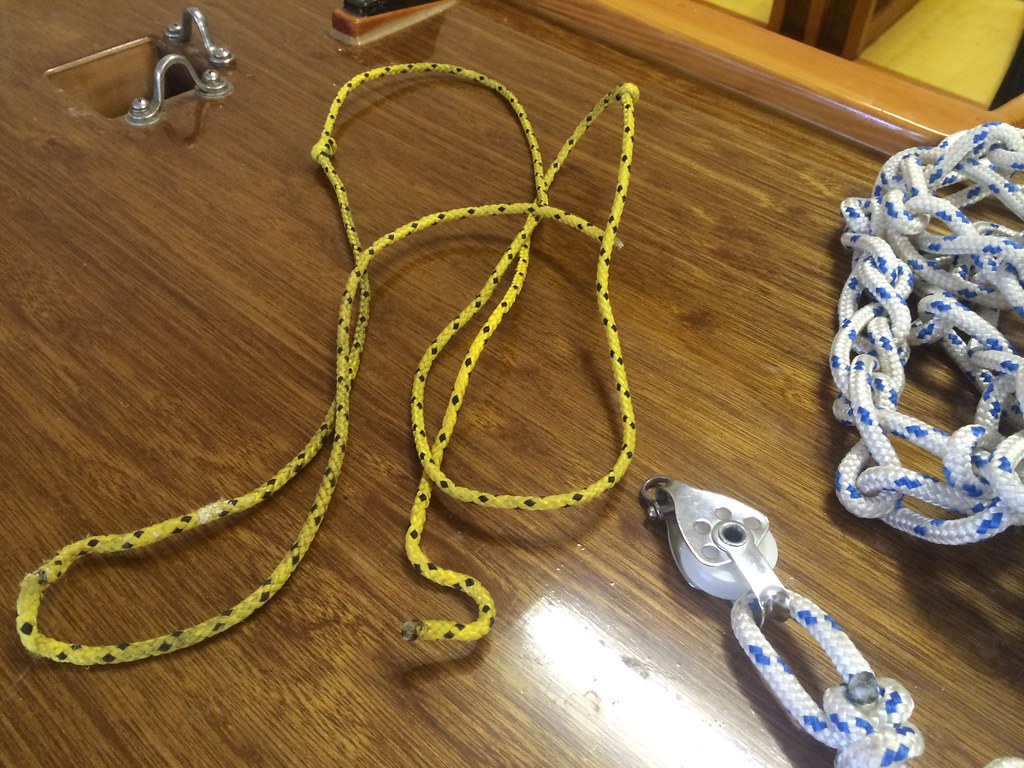
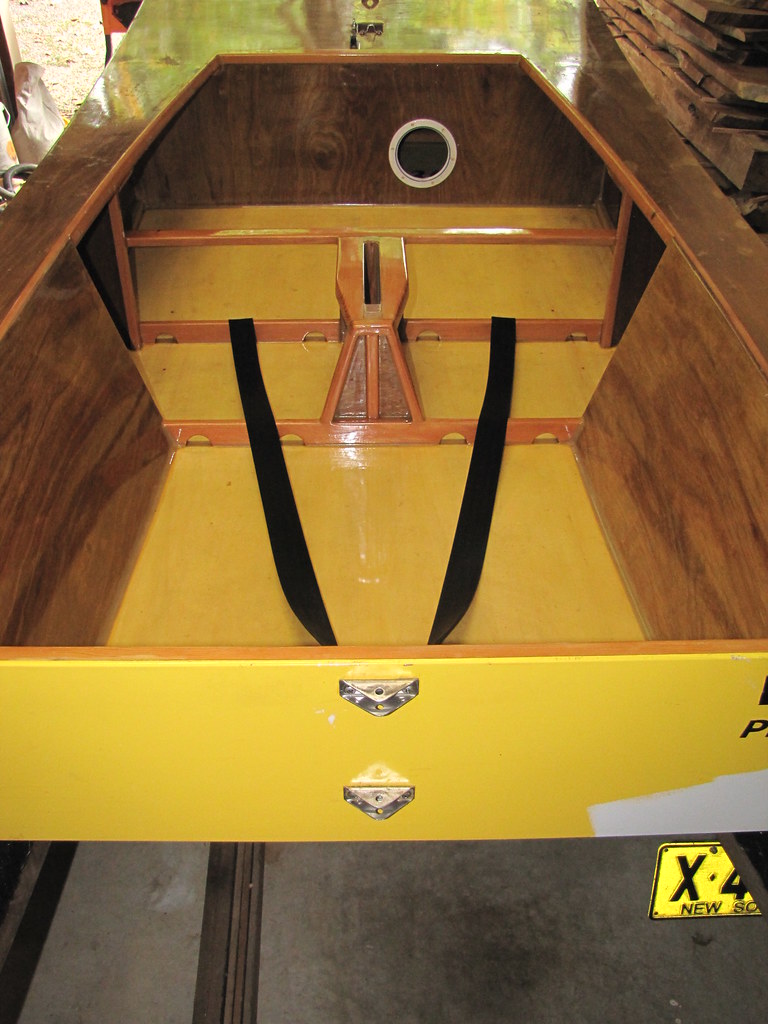
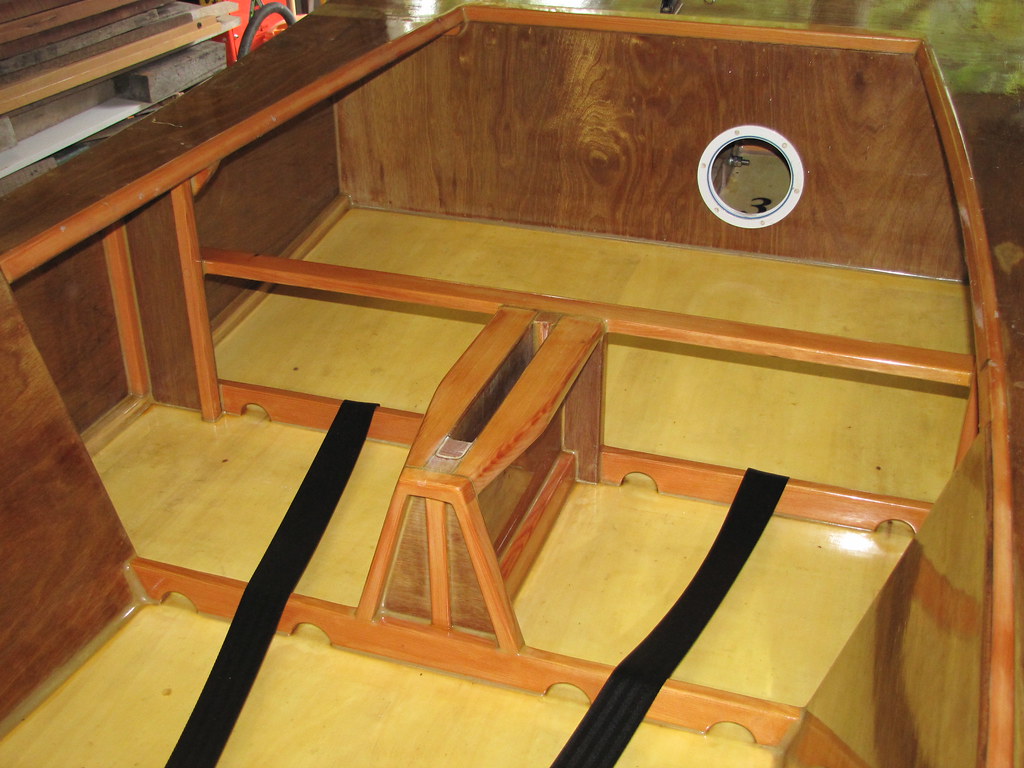
2. Overview of traveller, mainsheet and hiking straps. The buoyancy tank port covers (all three of them) are in the sailing tackle box, where the mainsheet and traveller were also stored along with various other necessary bits and pieces
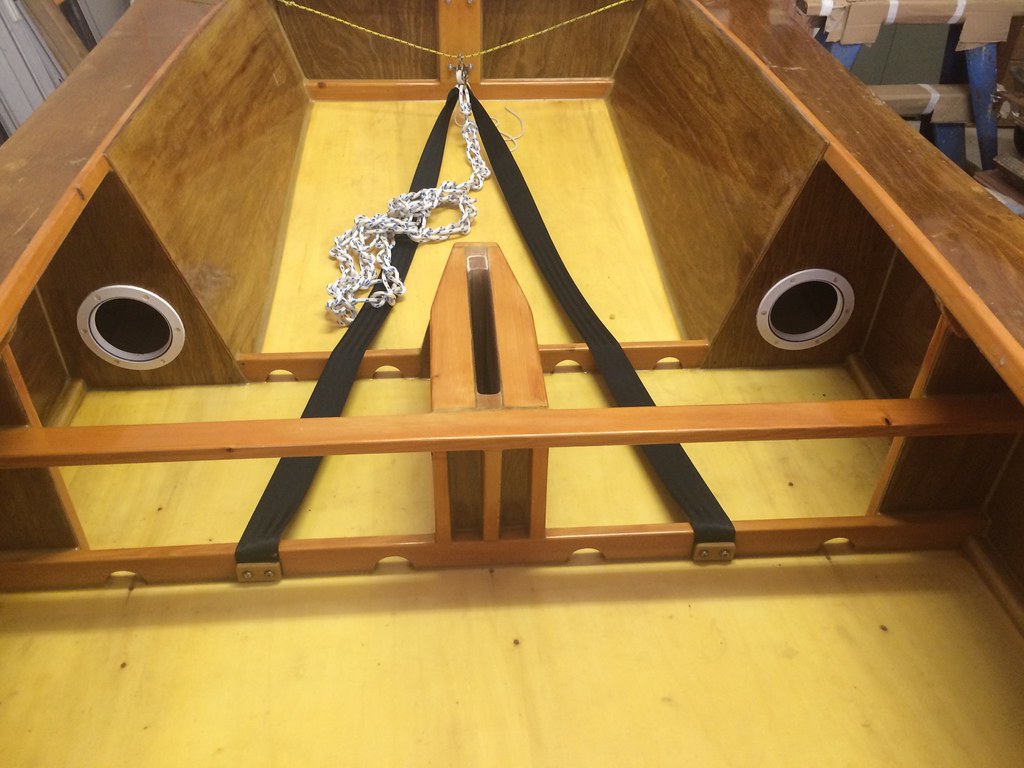
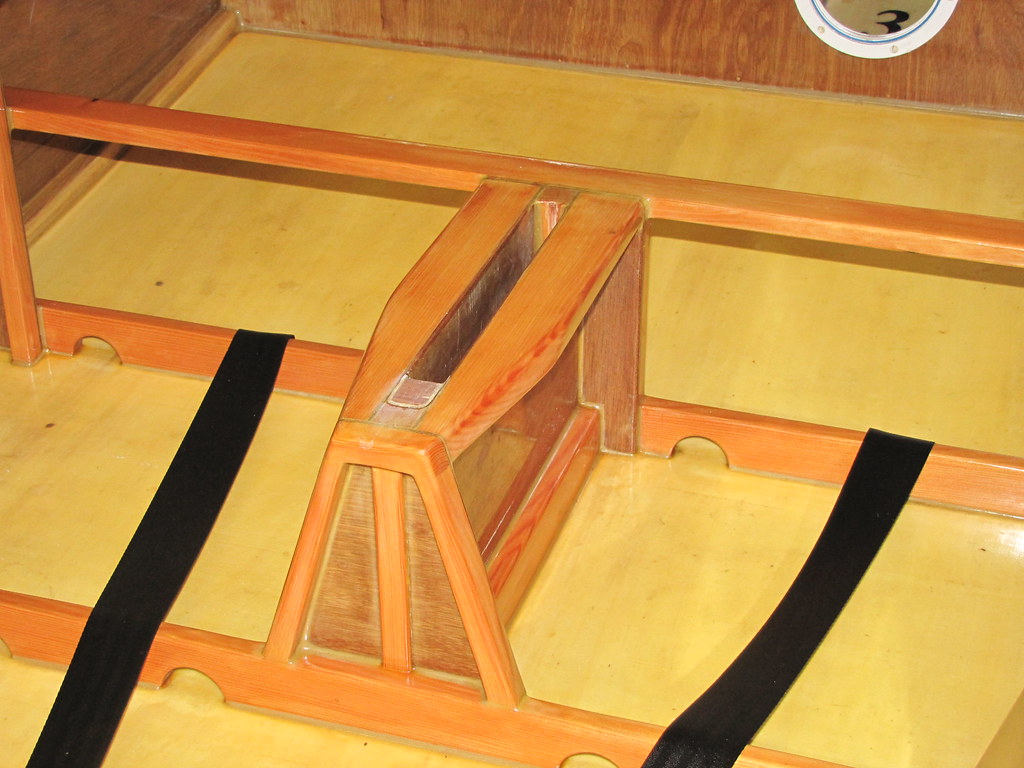
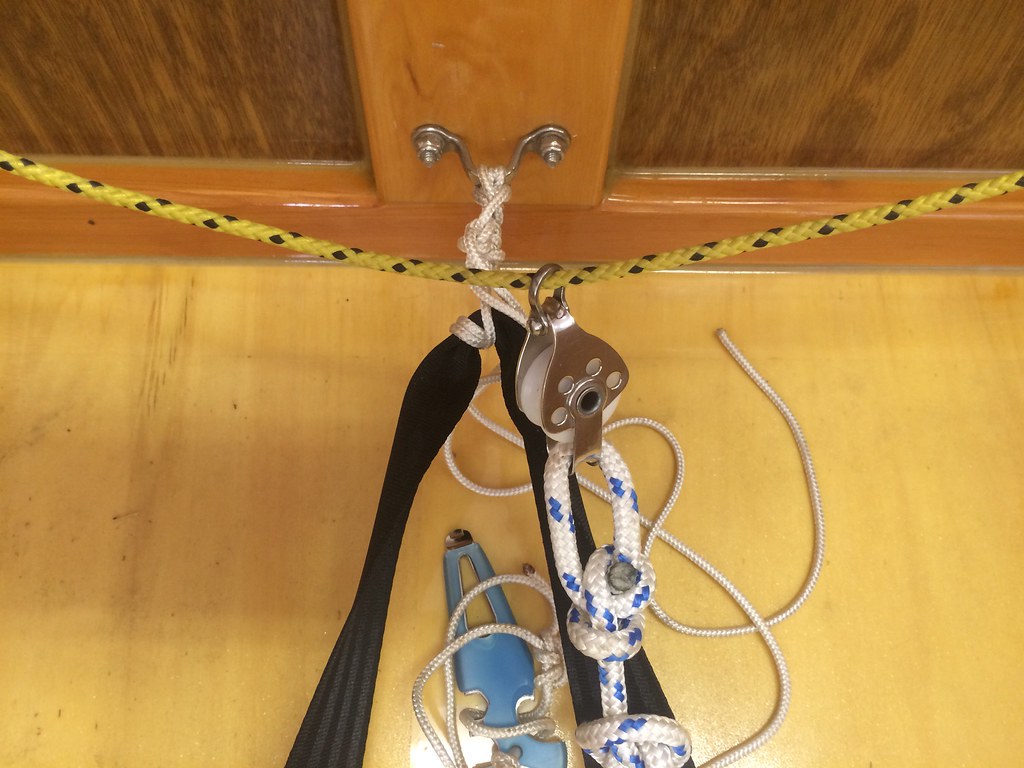
3. Traveller attached to gunwales, mainsheet block attached with tiny shackle. The knots in the rope are for limiting the shackle's - and therefore the boom's - travel
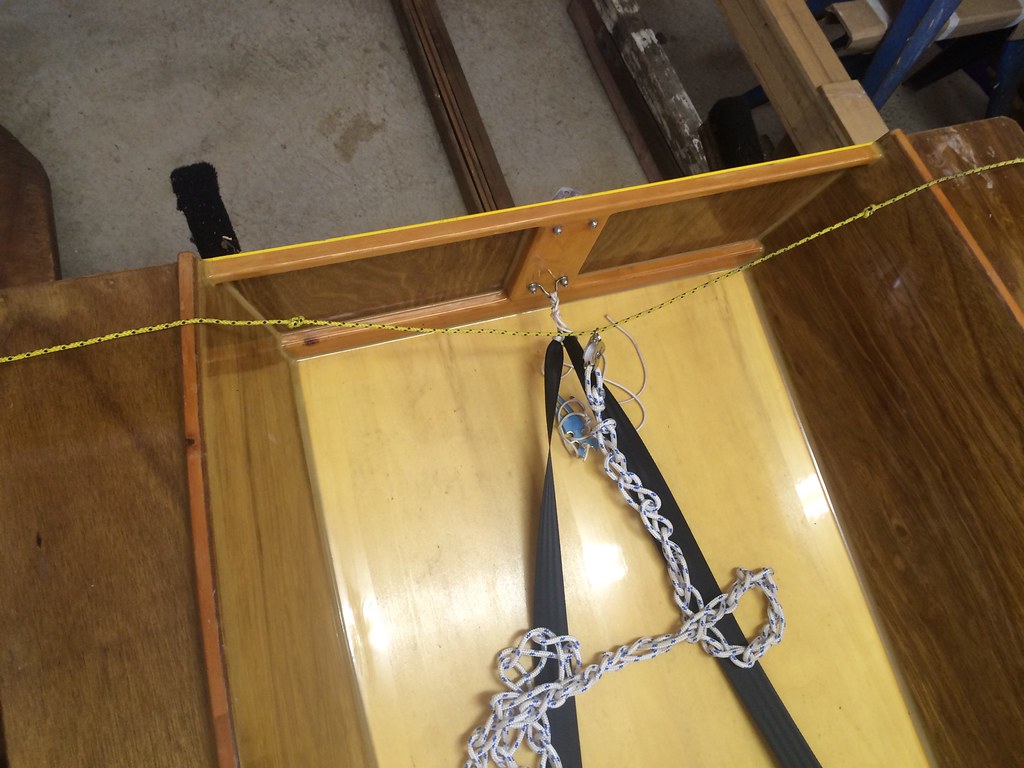
4. Closer-up view of traveller, block and shackle. Note shackle key with lanyard. Looking back in this behemoth of a thread, I don't seem to have added any rigging close-ups (not that there is very much in any case with the balanced lug), so this post might be useful for someone else (and me if I forget!)
Follow this link to my Flickr account; specifically, see my Wood Duck Repairs and OzRacer Build Flickr albums
I had a "Bright Idea" yesterday regarding the bottom of the 'Duck's hull and the replacement of the lite-ply. This - and it is quite cunning - is to skim off all but the top-most ply using the router, thus leaving the nice light-coloured poplar contrast in the cockpit, the varnished top-coats, and ALL of the painstakingly applied and sanded fillets intact, and glueing a sheet of 3 mm gaboon (of which I will have an excess even after builidng AJ's (b.o.a.t.'s) kayak) underneath. It should also be quicker, and not lead to any material increase in draught.
What could possibly go wrong!
Well...in the first instance, not being able to get sufficient and even pressure on the gaboon so that it is glued down completely and doesn't drum or spring off the poplar-ply layer above. That is a serious potential problem, but I think that I can get around it by the judicious application of many ratchet straps wrapped around the boat, with care taken not to squish the gunwale, etc. The use of button-head screws after carefully identifying frame members would be used in addition, after using the straps to assist bending. Running the sheet "across" the boat with respect to the grain direction might also assist in this matter, although it would require cutting the (2500 x 2440 mm Joubert) sheet in half for this.
The resulting butt-joint should be run along one of the limber-holed "floors" (to borrow a term from traditional design/building practices) - or I could scarph the sheets and run the scarph-join along or just behind the rear "floor", where the rocker straightens out a little bit.
I will have to do some measuring and a lot more thought before I start doing this. Will ponder this in depth - as I've said before, I'm not going to rush into any bottom sheet replacement - if at all. This may make this exercise more practicable, however..
-
4th April 2016, 03:22 PM #3339
Moderate Moderater
- Join Date
- Feb 2006
- Location
- Lindfield N.S.W.
- Age
- 62
- Posts
- 5,643
Not that I want to be a party pooper, but I would stop thinking about that as a solution. I can see too many things to go wrong, both with routing the existing ply off (except for the last ply) and with gluing a new sheet on.
I would spend the time, effort and materials on a new and better boat, rather than trying to reverse the deficiencies of this boat.
If it were up to me, I would just sail the 'Duck until it is unsailable and then move on to the boat you really want (ISTR you wanted to build a GIS). Use the time you would spend 'perfecting' the 'Duck sailing or building the replacement.
If the bottom continues to be a b*st*rd and you decide you want to keep the 'Duck, I would do the unthinkable and either:
- remove it entirely and replace with gaboon ply; or
- glass over the whole bottom of the boat.
Cheers
Jeremy
If it were done when 'tis done, then 'twere well it were done quickly
-
4th April 2016, 05:43 PM #3340
GOLD MEMBER
- Join Date
- Jan 2009
- Location
- Blaxland, Australia
- Age
- 65
- Posts
- 2,551
Hello Jeremy,
Thank you for your sage advice! The bottom of the boat was glassed against forthcoming damage, but in 1-ounce cloth (to save weight) - which is, let's face it, not really glass-coating the bottom.
Putting more time, effort, materials and money into another boat - rather than pouring further resentment-provoking resources into the 'Duck, other than sailing in her of course - is something that I have been considered very seriously: I am, in fact, looking at the clinker-built Iain Oughtred line at this very moment. It will be one with a balanced lug rig since I have come to appreciate this rig with Mr Storer's designs.
Your memory is correct: I was going to do the GIS next (after AJ's kayak) - but more and more I want to build a traditional-looking boat (but without the traditional problems of ribs, rivets, caulking and so-forth). Ross Lillistone's line of clinker-built boats is also tempting. I have been researching this "change in direction" in depth over the last month, with emails to Robert Ayliffe, Alec Jordan and Iain Oughtred. It was going to be the Tammie Norrie but I seem to have been talked away from that design by Iain, beautiful though the TN is (you probably won't remember my mutterings on this thread some years ago about building Iain's "Fulmar" - it won't be one of those, either!).
In any event, my approach to building the next boats will be quite different from the one documented above. One of the biggest differences will be that very documentation: there won't be nearly as much! Looking back on that build I have decided that as much time or more was spent on the snapping and writing as was spent on the building, and in the case of the snapping, got in the way to the detriment of my concentration on tasks in hand.
Having a well-laid out working environment with lots of clear space is going to be a major prerequisite, and I have a couple of options there, to my great fortune. Much better than the old workswamp, which was cluttered, cramped and damp: I have been taking my time getting my new workshop set up before using it. I will be doing a lot of preparation beforehand, too: necessary on account of the lofting and strongback and mould production required in producing a clinker-built boat. I won't be building from a kit, though - the kayak only comes as drawings and a list of offsets - as I wish to learn the craft involved. And I am not going to rush at it headlong like last time. Lest haste, less waste.
What I need to do next with the 'Duck is work out the downhaul again: I'm not sure which saddle on the foredeck that the (double) block attaches to! A fairly trivial exercise involving a dry run on the back lawn should suffice, however.
Cheers and thanks for your input,
Alex.
-
4th April 2016, 06:49 PM #3341
Sawing hack
- Join Date
- Oct 2007
- Location
- Sydney
- Posts
- 178
I agree with Jeremy. It's good to fix up the OzRacer to sail, but it's probably going to be more enjoyable moving onto a new boat construction project. I too plan to make a GIS one day, but the ultimate would be one of Oughtred's Caledonia Yawls. I think they look stunning.
BTW I enjoy your build documentation. This post/blog was a helpful guide for my own build. Plus it's probably part of your personality typing to build and document the process. So I wouldn't make plans just yet to do things differently.
-
4th April 2016, 11:16 PM #3342
GOLD MEMBER
- Join Date
- Jan 2009
- Location
- Blaxland, Australia
- Age
- 65
- Posts
- 2,551
Hello Theodor,
I'm pleased that you are finding this thread useful! I do mean it about putting up less - it had become a habit that I feel that I need to break. But we'll see.
I am currently looking seriously at the Caledonia/Ness Yawls and derivatives, in fact, having had the Tirrik suggested to me by Mr Ayliffe during a phone conversation recently. It took a while to grab me, but viewing a video on the StrayDog web site of Paul Cleaver's Fedelma (also on YouTube) I became more interested.
I think that I prefer the extra two planks/strakes per side of the Arctic Tern - the Tirrik has four to the AT's six (and a more rounded bilge for the AT as a result). The stretched version of the AT, the Sooty Tern, is 50 mm longer than the CY (6 m and 5.95 m respectively), while being a bit narrower in the beam (1.64 m and 1.95 m respectively, i.e., about a foot). The AT and ST have three rig options - balanced lug, balanced lug yawl, and gunter with jib; the CY has rig options of balanced lug yawl and gunter yawl.
One fantastic example of the ST that I drool over is Max Filusch's "Long John Silver". Herr Filusch has a couple of capsize/righting videos on YouTube as well which are well worth a look.
I have ordered the Oughtred Catalogue book, but something seems to have gone wrong with Australia Post recently: what used to take a couple of days at the most for non-Express items now seems to take weeks. And more expensive for the privelege, to boot. How to kill the goose that laid the golden egg, sort of thing.
A bit for me to think about, anyway.
Cheers,
Alex
-
2nd June 2016, 06:45 PM #3343
GOLD MEMBER
- Join Date
- Jan 2009
- Location
- Blaxland, Australia
- Age
- 65
- Posts
- 2,551
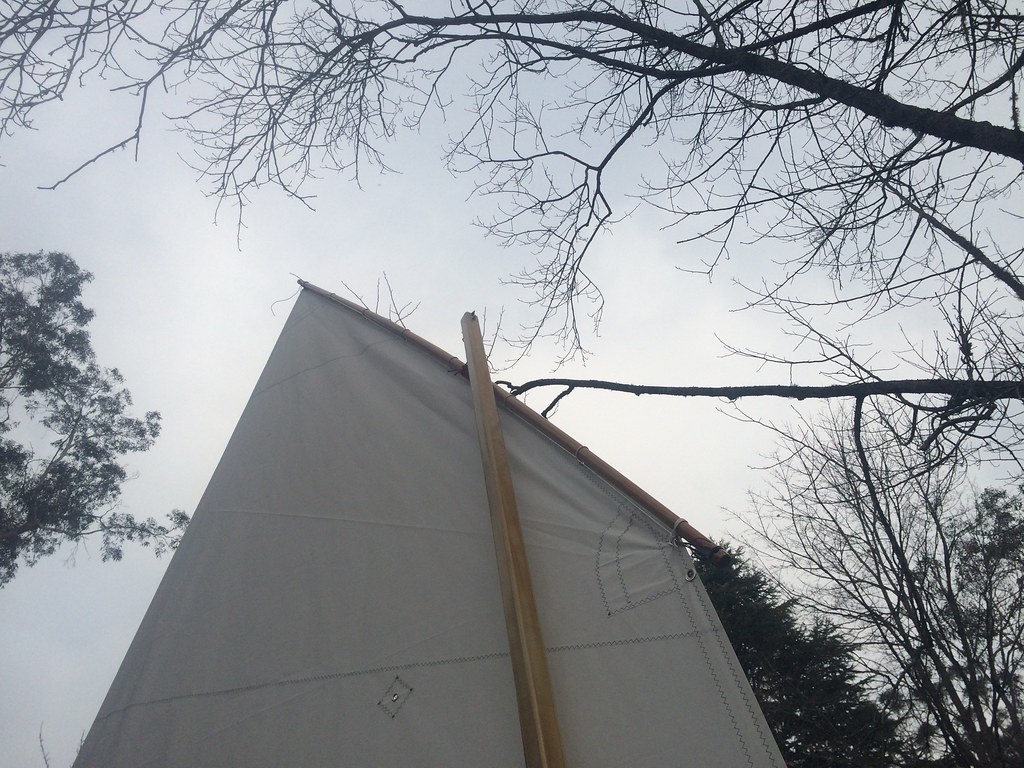
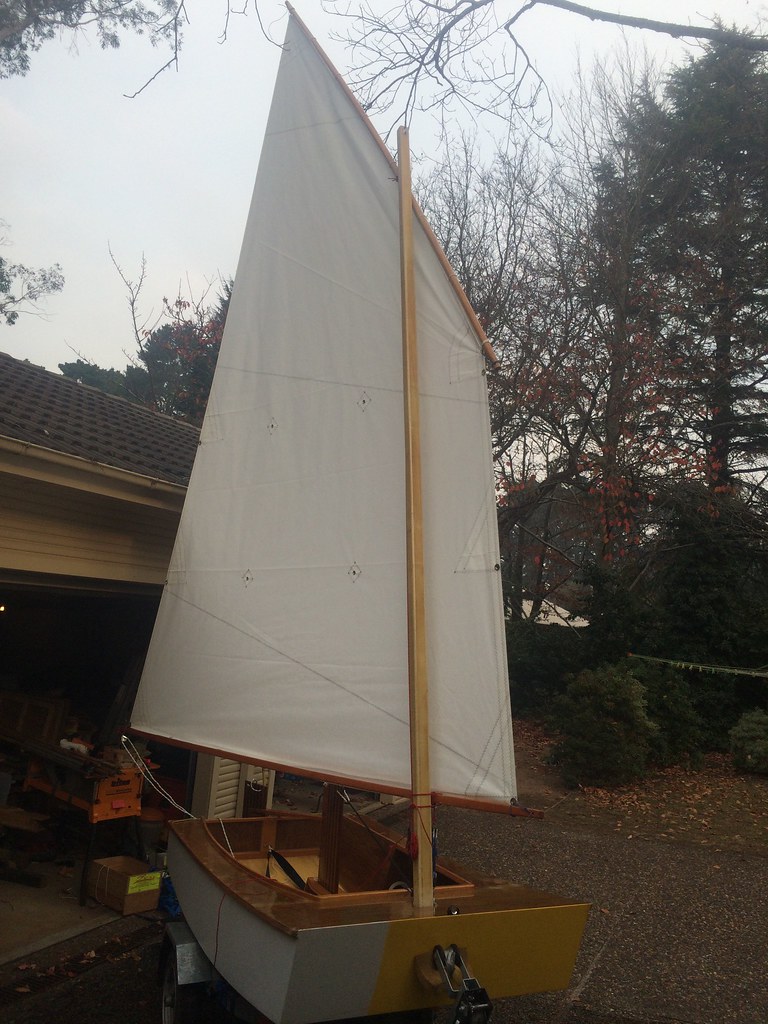
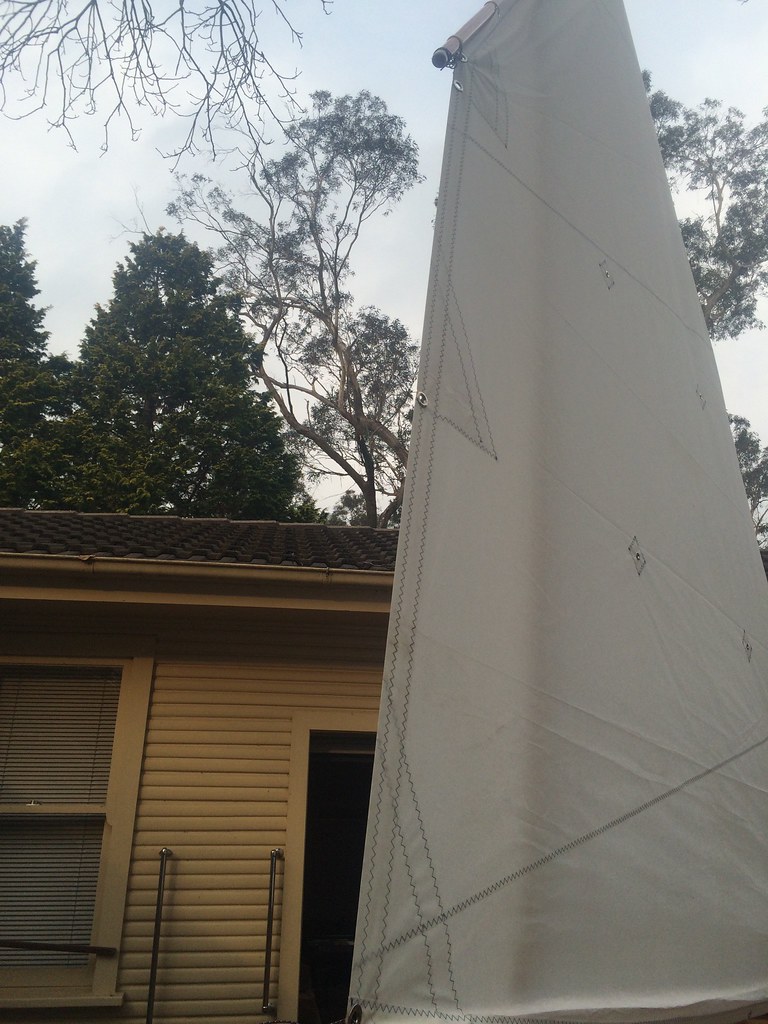
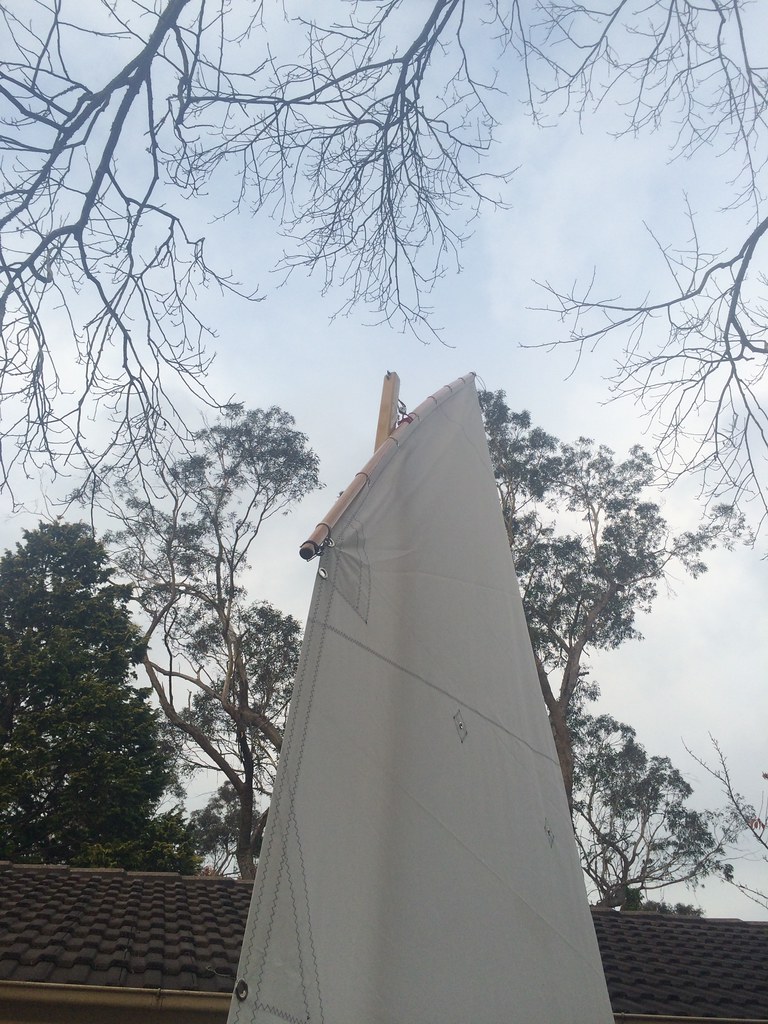
Some recent snaps with the new Really Simple sails lugsail hoisted - for the first time. Still landlocked, sadly...
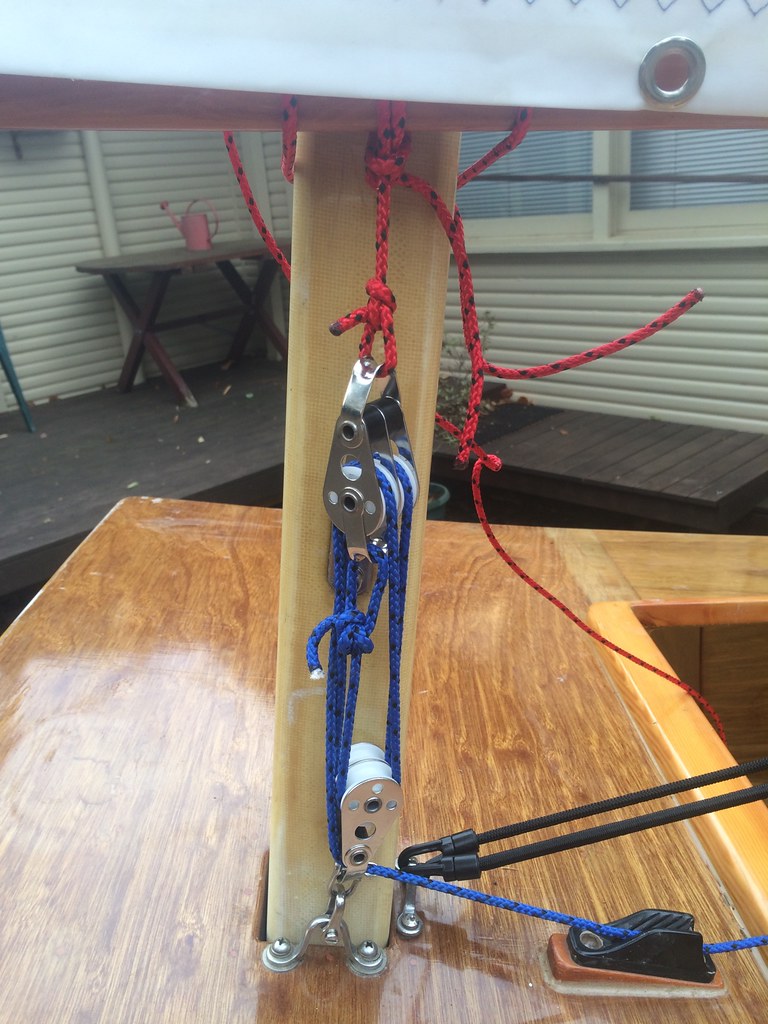
1. New Really Simple Sails lug sail raised on Wood Duck for the first time. There was almost no air movement at all when I did this(!). The luff, thanks to my 4:1 downhaul and the Dacron(tm) material, is much tighter than the old polytarp sail which this one replaces. No surprises there!

2. Closeup of the 4:1 downhaul. I'm not entirely happy with the angle of the line as it enters the jam cleat - it would be too easy for the line to pop out. I think I'll run the line down to the saddle - as long as there is no chance of the tensioned line fraying on a sharp metal edge. the upper block's attachment line could be shortened somewhat, too...
3. Boom retaining line: known by the GIS crowd as a "bleater" (and the Oz Goose lot as a "honker" - wood ducks are geese so this is a honker, I suppose). The difference between mine and theirs is that theirs trundles off to the clew, where it is fastened. I will change mine in due course (I need the shorten the halyard by about half, so I will use some o' that)

4. Bend in the yard - the (intended) effect of the downhaul. The sail shape is bowed upwards along the head
5. New sail viewed from in front of the bow. Note that the halyard should be passing on this (starboard) side of the mast, on its way to the cringle at the throat: another to be made in due course - but before I shorten the halyard
6. "Bar-tight" luff, compared with the polytarp version, anyway! This is also the first time that I have tried out the 4:1 downhaul, I think
7. Another view of the bent yard: the bend is a bit more obvious in this snap. Sail area is around 7.9 sq m (85 sq ft), from memory
8. View of the boom, pulled downwards by the downhaul. Bad but unavoidable flare in the phone's camera lens. Part of the problem is probably the beaten-up phone case; but without that case, I would no longer have a phone. A nearby Hazard Reduction burn (which I was obviously not taking part in) probably made the flare worse, too
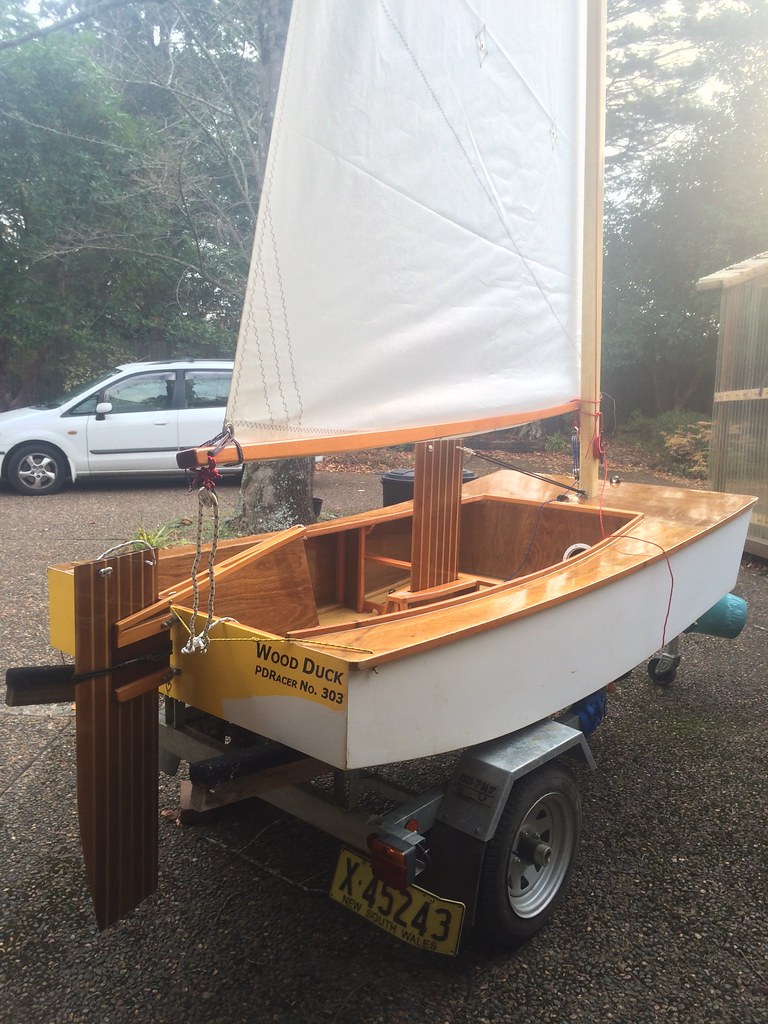
Follow this link to my Flickr account, also in my Wood Duck Repairs album
Some rigging tweaks still to do, some mentioned above:
Re-route the halyard around the mast and to the fore end of the halyard, possibly removing the (partially redundant) yard block, thus gaining a bit more downhaul purchase;
Re-do the "honker" out to the fore end of the boom;
Re-attach the mainsheet to the tack cringle;
Re-route the downhaul line through the saddle before entering jam cleat (possibly);
Shorten the downhaul's boom attachment line
Shorten halyard;
Add reefing gear;
Go sailing?
-
13th June 2016, 12:12 AM #3344
GOLD MEMBER
- Join Date
- Jan 2009
- Location
- Blaxland, Australia
- Age
- 65
- Posts
- 2,551
After some shopping yesterday morning we went and had a look at the Penrith Lakes sailing lake on the way home (it was just around the corner). I had a chat with the Sailability people about the use of the lake, and they referred me to the Lakes admin - who I will contact on Tuesday. It's a beautiful spot - just right for ironing out the wrinkles in the 'Duck's rig (of more anon). The sailing lake is not partcularly large, but it isn't too small either. There was a small regatta of 303s underway in the very light air while we were there chatting.
We also saw some unusual (to us) green parrots ambling about.
This is promising, and something to look forward to when we get back from holidays.
Regarding the wrinkles in the rigging, I spent some time this morning working away at changes that I found on the Open Goose Rigging Page, as referred to obliquely in post no. 3343 (caption to snap no. 3) above: the only things that I didn't do were shorten the downhaul line and nstall shock-cord for the reefing (haven't bought any yet). Or go sailing. I tried out the re-routing of the tail of the downhaul lne, but reverted back to the orginal route when I found that the line would indeed fray. Robm in the WoodenBoat Forum, where I also posted some of the recent sail snaps above, plus others, suggested a roller clamcleat, which can be seen here, and which looks just the very thing - but I will let that wait until after I have sailed the boat again a bit. I also have to find somewhere to acquire this wee beastie - and get out the soldering iron to weaken the high-strength epoxy glue on the current cleat's bolts.
Cheers,
Alex.
-
15th June 2016, 09:26 AM #3345
Senior Member
- Join Date
- Sep 2012
- Location
- NSW, Australia
- Posts
- 474
The green parrots are most likely rainbow lorikeets.

I think you have this list backwards. Take her out for a spin in a lightish breeze. See what works and what doesn't.Re-route the halyard around the mast and to the fore end of the halyard, possibly removing the (partially redundant) yard block, thus gaining a bit more downhaul purchase;
Re-do the "honker" out to the fore end of the boom;
Re-attach the mainsheet to the tack cringle;
Re-route the downhaul line through the saddle before entering jam cleat (possibly);
Shorten the downhaul's boom attachment line
Shorten halyard;
Add reefing gear;
Go sailing?
It's a very clever idea. It also doesn't have a snowball's chance in hell of working, for a range of reasons. Originally Posted by AlexN

Honestly, if you do decide to fix the bottom, the best option would be to simply strip the paint off and and stick something else on top of what's already there. If you want to stick more ply on top, the only realistic option would be vacuum bagging it. That would work a treat, but obviously would be a hassle to set up for one little job on an 8 foot boat.
Other possibilities are:
1/ Glue a butt block inside the bottom, over the dodgy bit. Easy, fast, cheap, and would probably be sufficient.
2/ Go all techy and throw a layer of kevlar over the outside. Easy, fast, not nearly as cheap, but you'd only need a couple of metres, and would probably be sufficient.
Do not, under any circumstances that even remotely involve a desire to retain what's left of your sanity, try to rout off the top two layers of the existing bottom and glue another sheet of ply on top without vacuum bagging it. If you attempt that stunt, this thread will rapidly extend to 400 pages and the extra pages will be composed of you grumbling and others commiserating. Trust me on this.
You know you're making progress when there's sawdust in your coffee.


 Reply With Quote

Similar Threads
-
New Queensland PDRacer Build
By duncang in forum Michael Storer Wooden Boat PlansReplies: 71Last Post: 26th April 2012, 08:30 AM -
Oz PDR build in Adelaide - sexy black PDRacer
By m2c1Iw in forum Michael Storer Wooden Boat PlansReplies: 39Last Post: 27th April 2009, 06:30 PM -
OZ PDRacer - Dylan's build in the Philippines
By Boatmik in forum Michael Storer Wooden Boat PlansReplies: 16Last Post: 23rd February 2009, 05:50 PM -
Brisbane Timber and Working with Wood. Boatmik/PDRacer
By Boatmik in forum Michael Storer Wooden Boat PlansReplies: 1Last Post: 11th April 2007, 08:06 PM -
Flawed wood on the TS --DUCK!
By Robert WA in forum WOODWORK - GENERALReplies: 7Last Post: 19th February 2004, 11:42 AM
Tags for this Thread
balanced lug,
boatmik,
build,
dacron(tm),
douglas fir,
duck,
enamel,
epoxy resin,
fibreglass,
hoop pine,
interminable,
lug,
machinery,
materials,
michael,
oregon,
oz racer mk 2,
ozracer,
paint,
paulownia,
paulownia/glass mast,
pdracer,
plywood,
polytarp,
primers,
really simple sails,
sail-making,
sailmakers thread,
sanding,
storer,
sydney,
timber,
tools,
varnish,
verbose,
western red cedar,
wood,
wood duck,
wrc
