

 Thanks:
  Likes:
  Needs Pictures: 0
 Picture(s) thanks:
Results 1 to 15 of 88
Thread: Entry hall table for a niece
-
4th November 2019, 03:33 AM #1
 Be inspired. Be creative. Be bold.


- Join Date
- Apr 2001
- Location
- Perth
- Posts
- 10,856
 Entry hall table for a niece
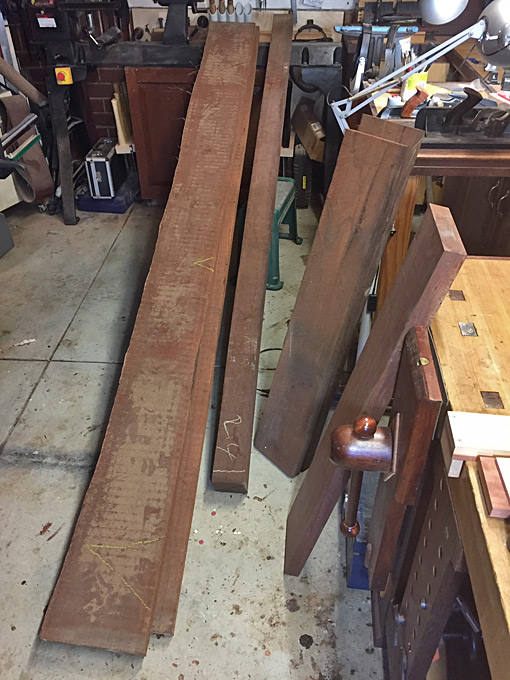
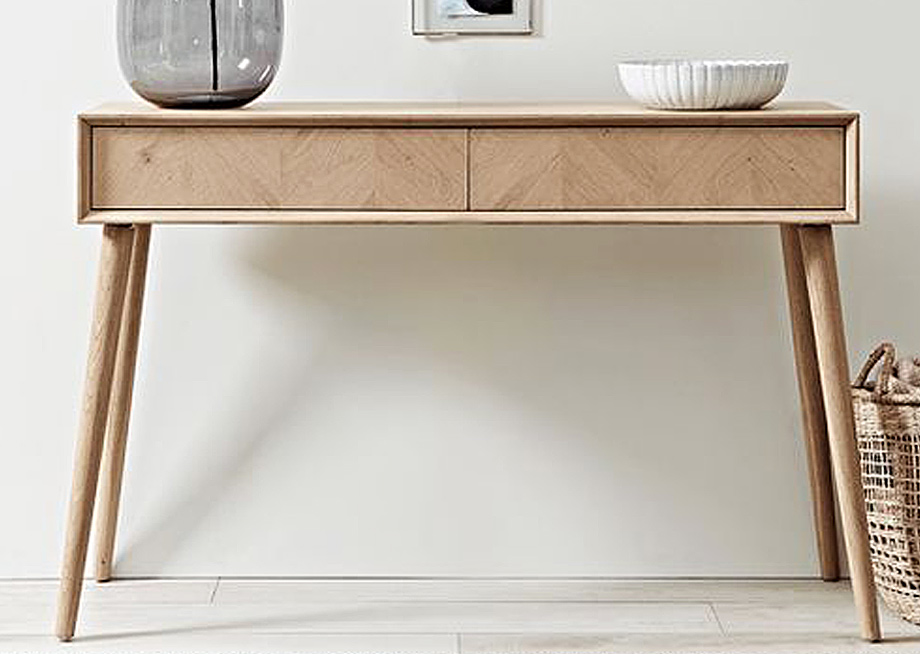
The build is an entry hall table for a wedding present for a niece. Her choice was this mid century modern piece, which will be the basis for the build. My job is to re-invent it somewhat.

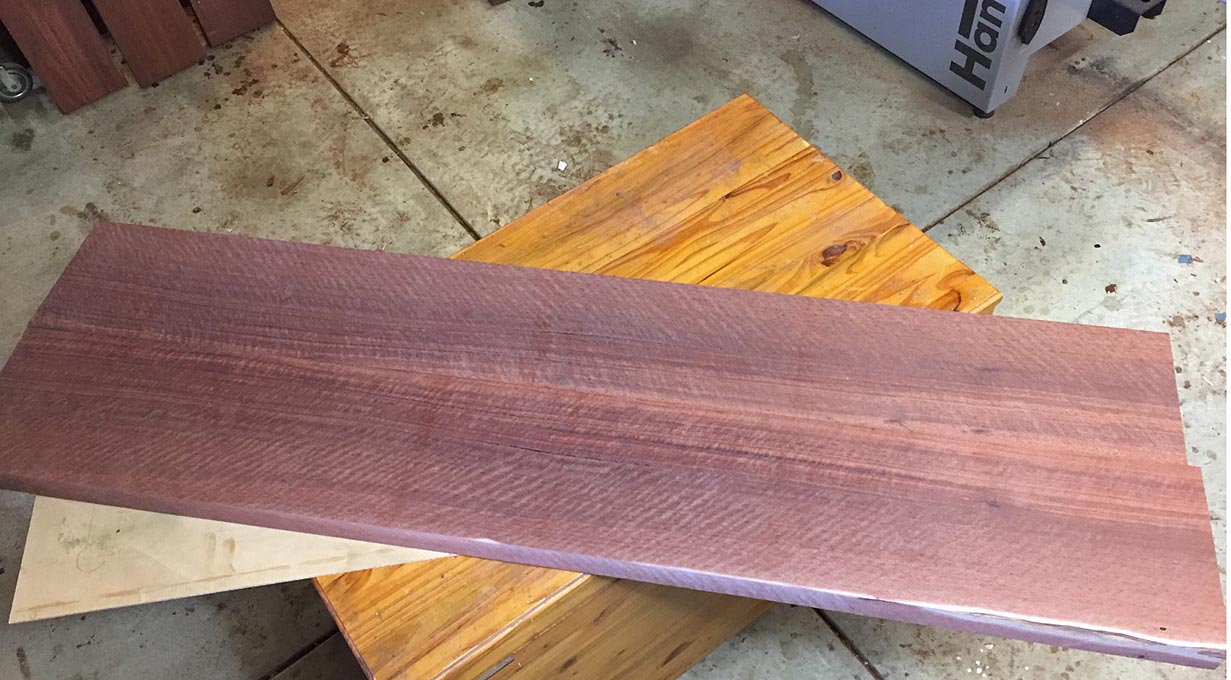
She wants Jarrah, and I have managed to find something spectacular ... a subtle fiddleback (curly) set of boards that will make a book match (as they are only about 9" wide each).
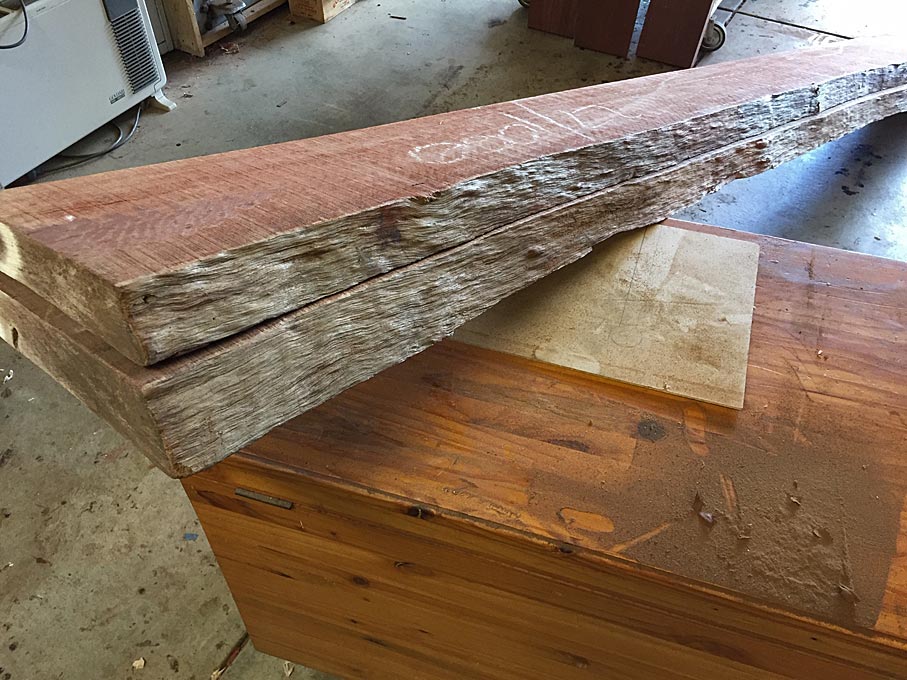
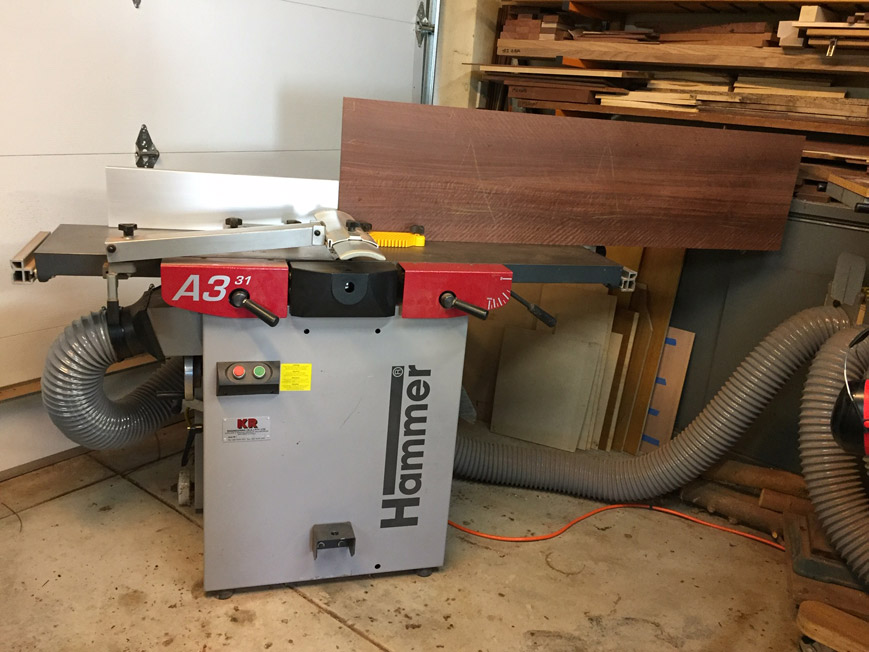
Most imagine that the value of a slider lies with cross-cutting. It certainly is so. However it is the rip using the slider - rather than the rip fence - which is so amazing.
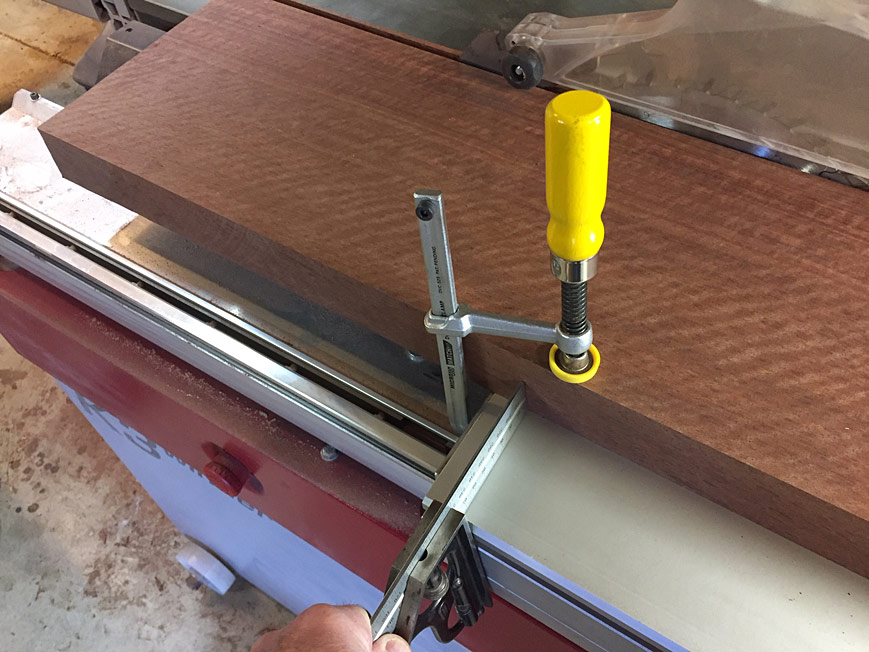
One side of each board was to be ripped on the slider, before being jointed and resawn. Ripping on the slider is such an advantage with life edges. No jigs required. No rip fence to slide against. Just clamp the board on the slider, and run it past the saw blade. The long sliders can complete the rip in one quick pass. It occurred to me that I should take a few photos of ripping to width since the boards are longer than the slider.
Here you can see that it comes up short ...
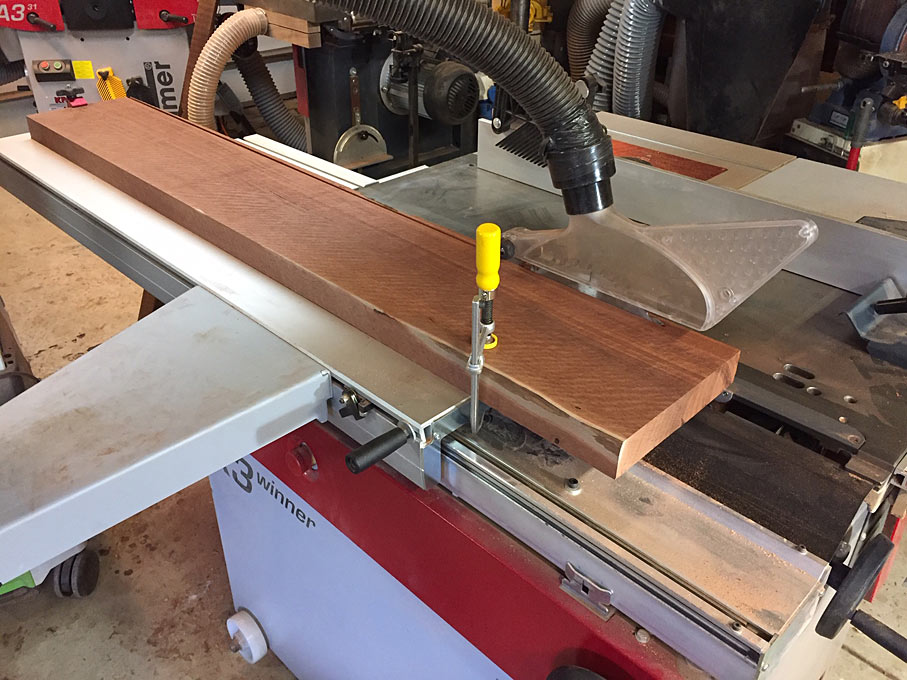
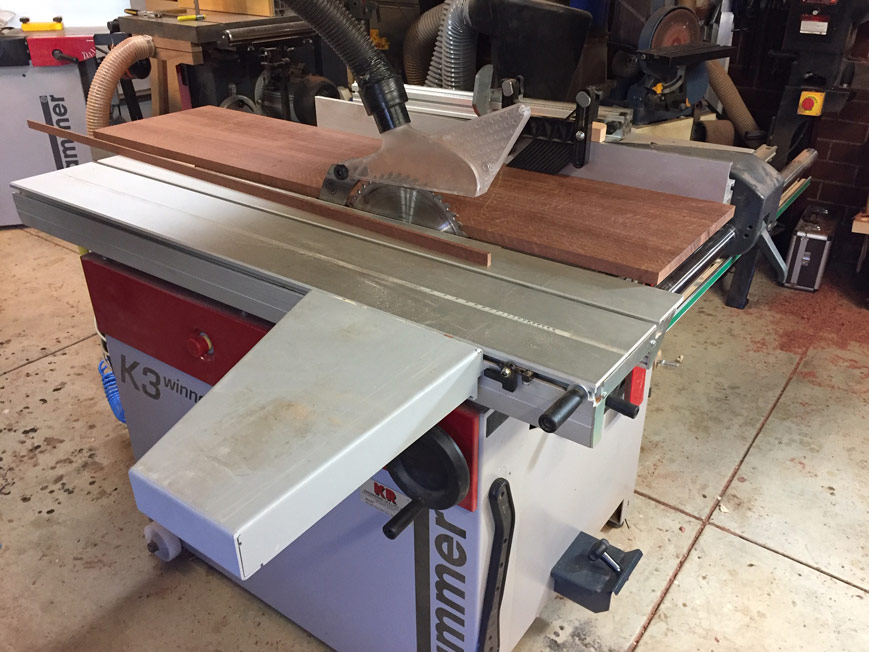
In actuality, with the blade raised fully, there is a cut of nearly 54" ...
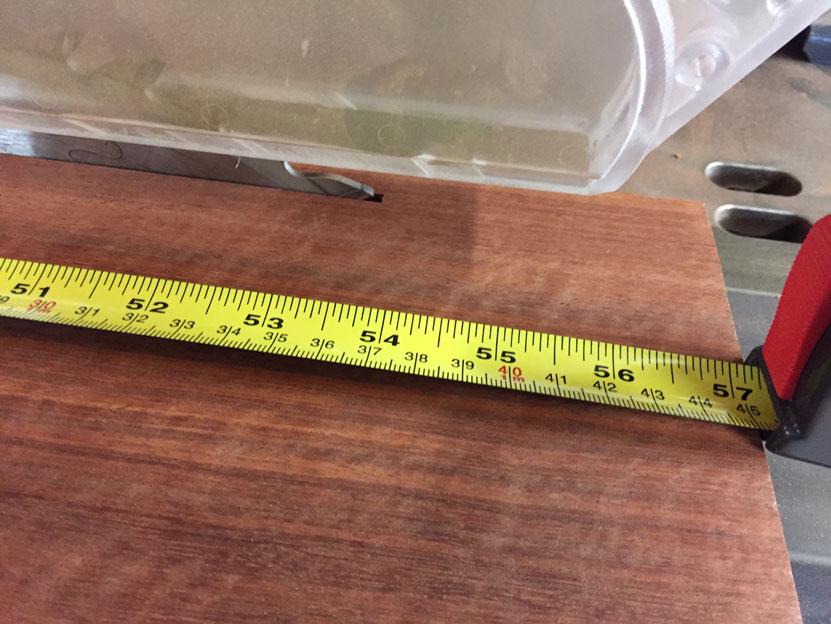
The solution is to use a combination square to register the position of the side of the board at the front, and then slide the board forward and reposition it ...
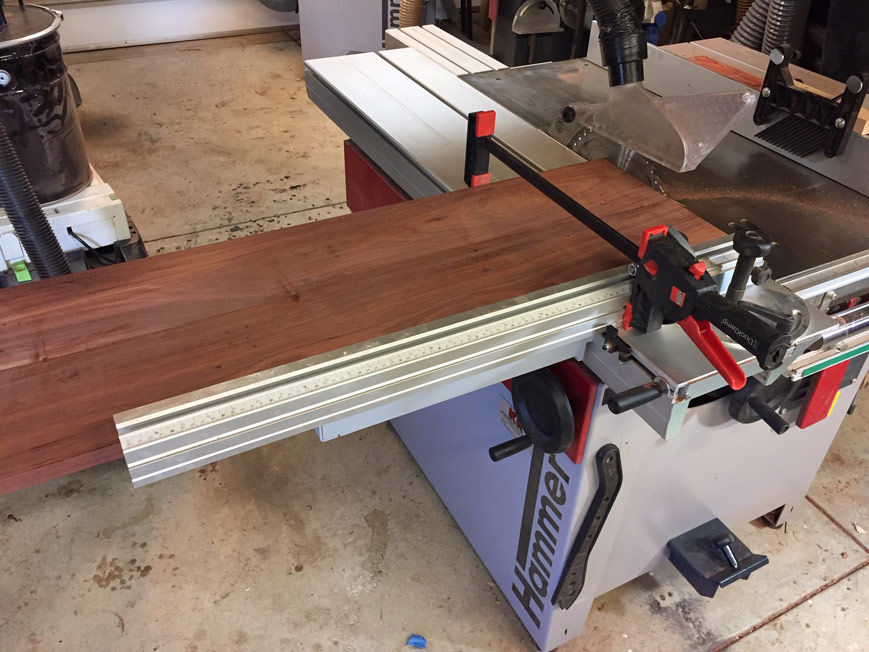
... and repeat at the rear ...
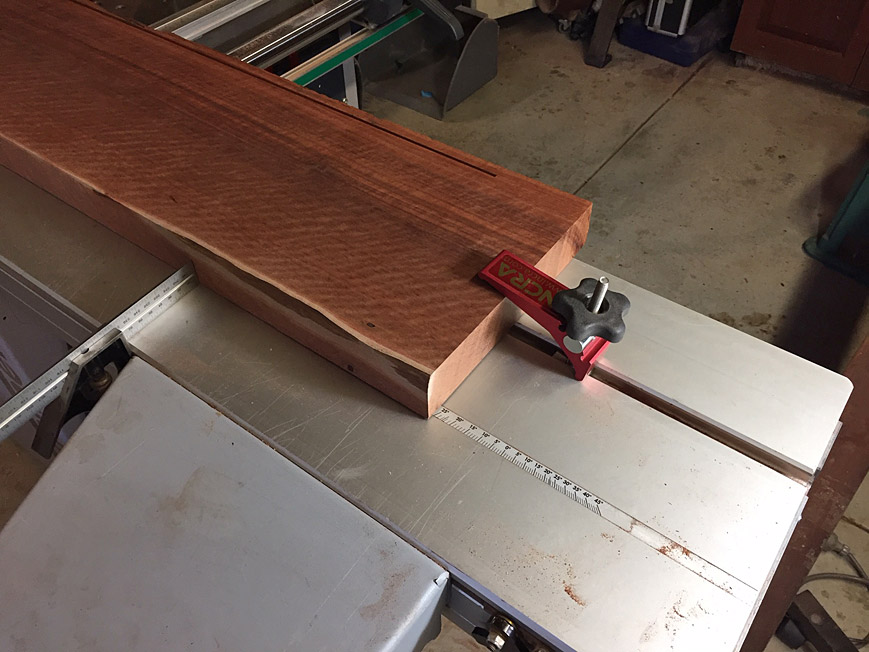
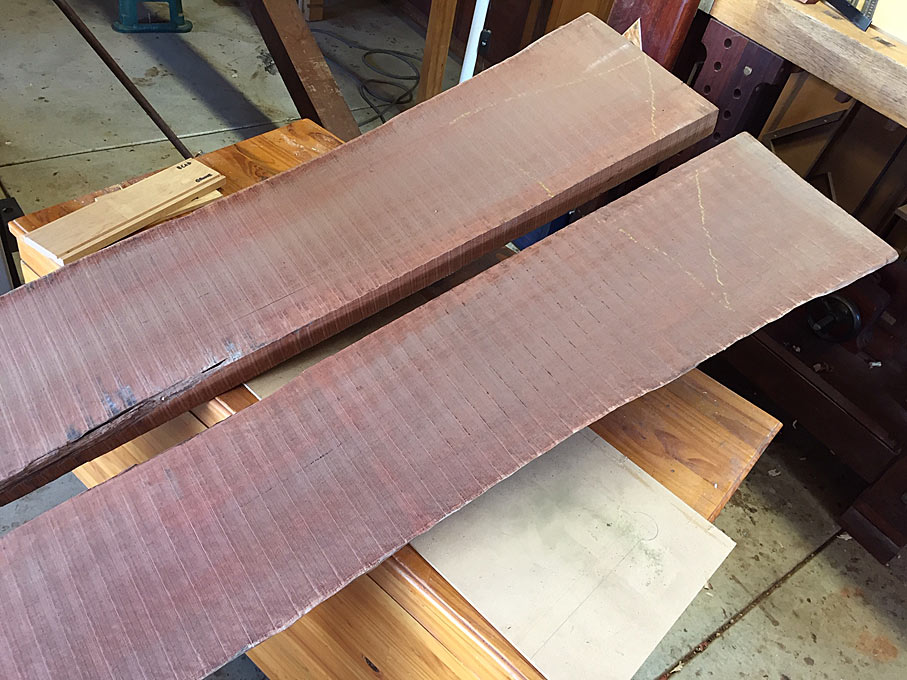
The result is a pretty good edge, one that is cleaned up on the jointer in 1 or 2 passes, and then ready for resawing ...
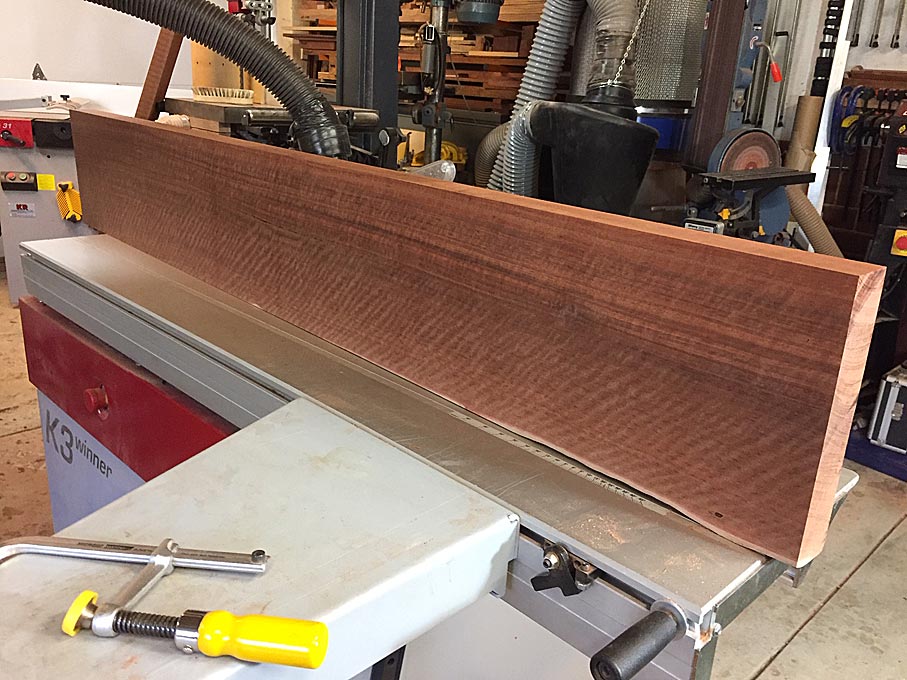
This is the glued panel. It is long enough to make a waterfall two sides and top section (still oversize) ...
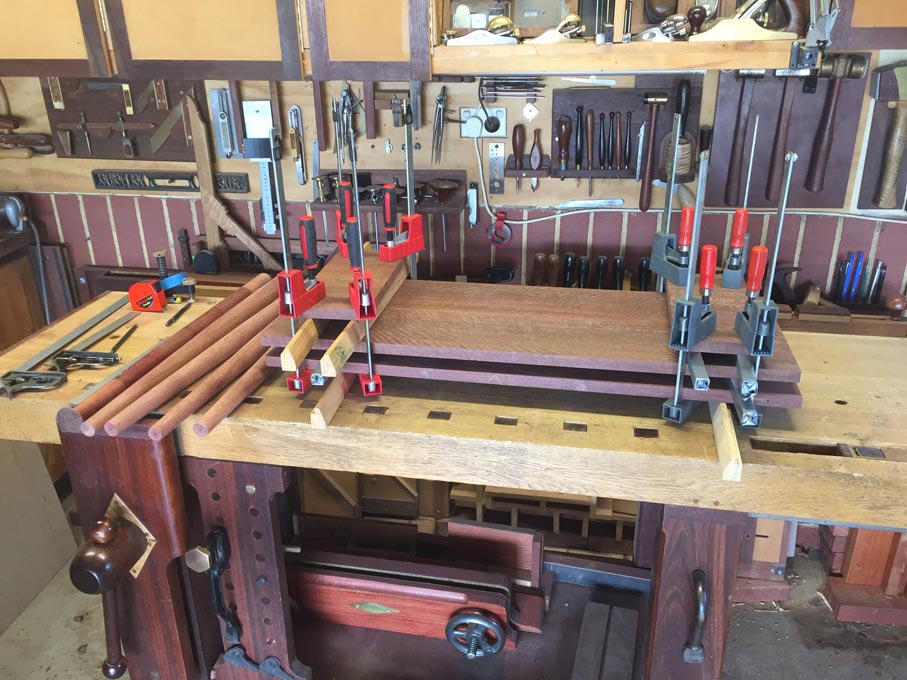
The following photo shows the lower section at the rear. What I wanted to show is the way boards are stored. Since I shall not get back to this build until next weekend, all boards are stickered and clamped using steel square sections.
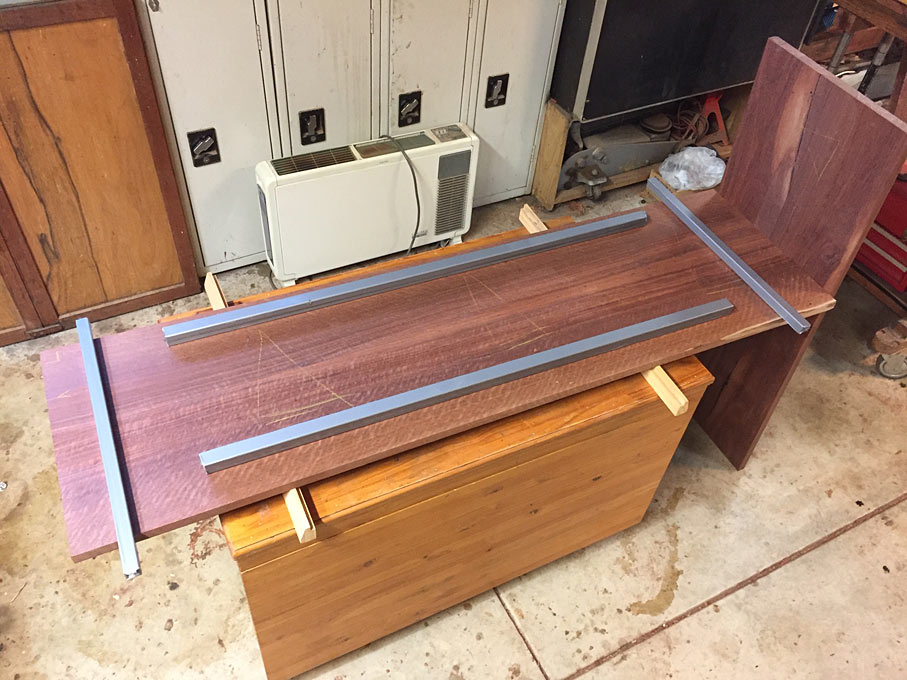
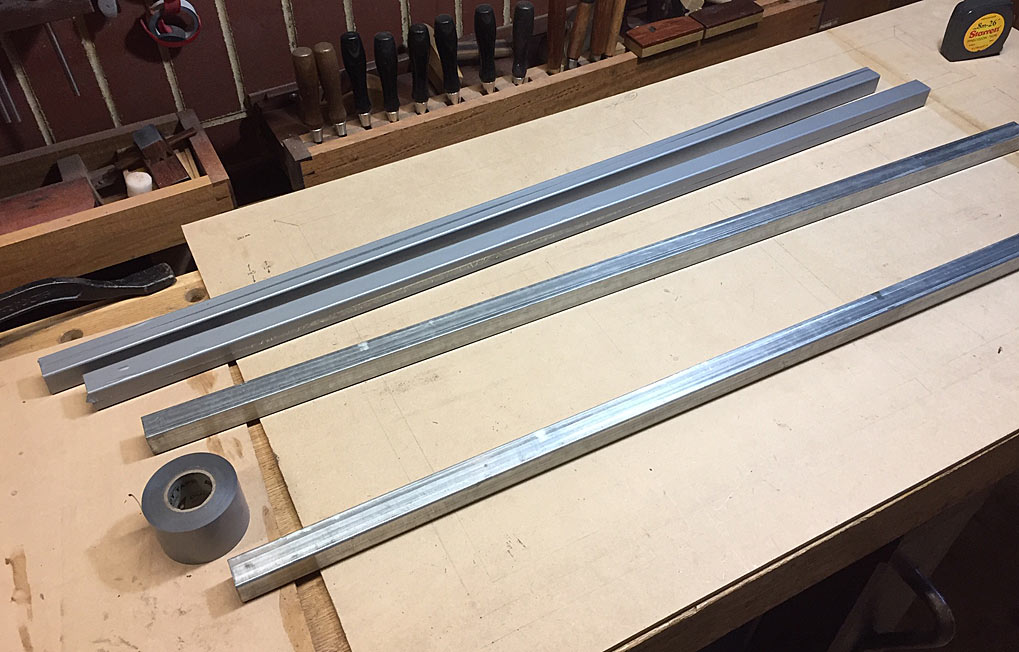
The steel sections are inexpensive galvanised mild steel. These are covered in vinyl duct tape to prevent any marks on the wood and ease in removing glue ...
Done for the day ...
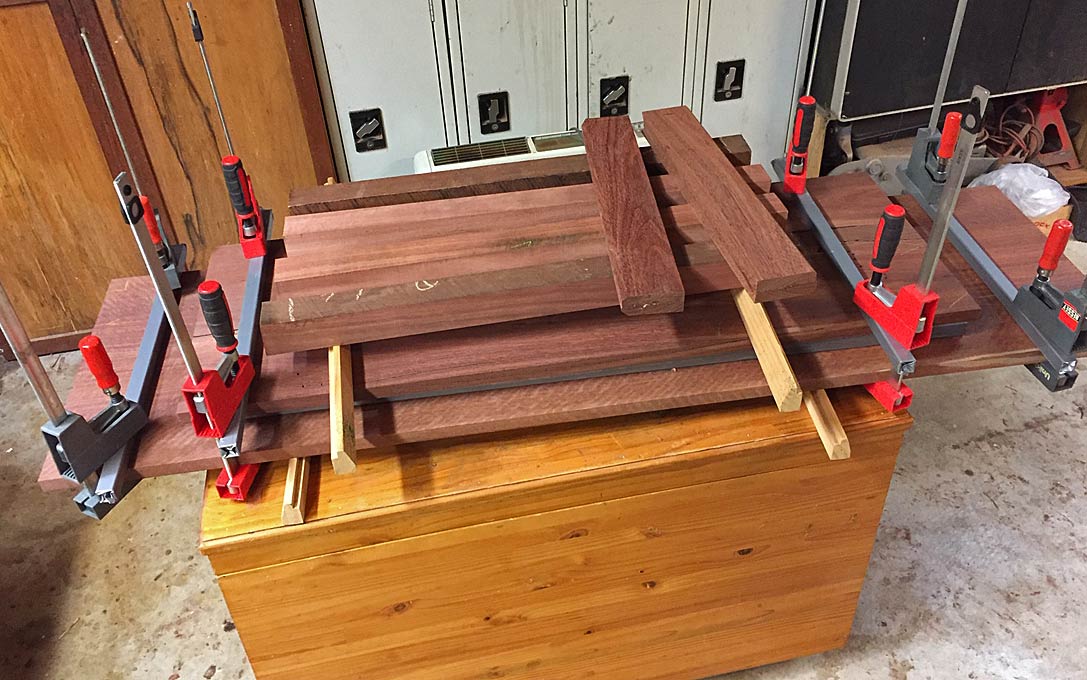
Enough for the case (top/bottom and sides), which will be through dovetailed with mitred corners, the stock for 4 legs (yet to be turned), and rails for the legs (the legs will be staked mortice-and-tenon) and attached with a sliding dovetail.
Regards from Perth
DerekVisit www.inthewoodshop.com for tutorials on constructing handtools, handtool reviews, and my trials and tribulations with furniture builds.
-
4th November 2019 03:33 AM # ADSGoogle Adsense Advertisement
- Join Date
- Always
- Location
- Advertising world
- Posts
- Many
-
4th November 2019, 06:17 AM #2
SENIOR MEMBER
- Join Date
- Jan 2010
- Location
- Auckland New Zealand
- Posts
- 312
Looking forward to follow the build Derek.
How do you rate the machineability of the Jarrah?
Jacques
-
4th November 2019, 07:12 AM #3
SENIOR MEMBER
- Join Date
- Feb 2015
- Location
- Hobart
- Age
- 77
- Posts
- 655
Derek,
"...all boards are stickered and clamped using steel square sections."
I understand why you are doing so but would have thought that the timber selected for this project would be well seasoned and stable.
Is the re-sawing releasing internal tension in the timber to cause twisting/warping?
The movement of timber still remains a mystery to me
Yvan
-
4th November 2019, 08:53 AM #4
 GOLD MEMBER
- Join Date
- May 2011
- Location
- Albury
- Posts
- 3,028
Hi Derek, looking forward to seeing your progress with this build. I'm putting the finish on my Moxon vice today, your wip's on here are a constant source of inspiration.

Are the clamps in your pic's (the red jaw one's) the Chinese versions of the Bessey Uniklamp (branded Duratec?) any good? I've often looked at them and been tempted. A few of the 16" versions would be a very handy fit between the 300mm and 600mm full size clamps.
-
4th November 2019, 11:55 AM #5
Be inspired. Be creative. Be bold.
- Join Date
- Apr 2001
- Location
- Perth
- Posts
- 10,856
Hi Jacque Originally Posted by botesmj1

This Jarrah machines very easily. In part this is due to the 4 hp of the K3, and also a brand new carbide 1" Woodmaster blade in the bandsaw, which is also 4 hp. The surface finish is just that off the thicknesser, and the quality is rather dull. It will be hand planned to finish.
I must add that I am so impressed with this Woodmaster blade. It is my second, with the first used over a few years. This one leaves a much better finish.
Regards from Perth
DerekVisit www.inthewoodshop.com for tutorials on constructing handtools, handtool reviews, and my trials and tribulations with furniture builds.
-
4th November 2019, 11:57 AM #6
Be inspired. Be creative. Be bold.
- Join Date
- Apr 2001
- Location
- Perth
- Posts
- 10,856
Yvan, all wood moves a little. I have found that restricting movement with cauls and clamps reduces movement as much as possible. Over a week, the wood moves and then relaxes. Better than it relaxes in the shape I want. Originally Posted by yvan
Regards from Perth
DerekVisit www.inthewoodshop.com for tutorials on constructing handtools, handtool reviews, and my trials and tribulations with furniture builds.
-
4th November 2019, 12:02 PM #7
Be inspired. Be creative. Be bold.
- Join Date
- Apr 2001
- Location
- Perth
- Posts
- 10,856
David, the Chinese versions are better! The grips on the handles are more like the Bessey K Body Revo. The Uniklamp feels flimsy by comparison. Originally Posted by aldav
I did not realise that these were Uniklamp copies when I ordered them. I thought they were going to be shorter parallel clamps - I needed 12"/300mm lengths. I doubt that I would go longer on this type of clamp. I do have a bunch of Revos, which I like.
And thanks for the kind words.
Regards from Perth
DerekVisit www.inthewoodshop.com for tutorials on constructing handtools, handtool reviews, and my trials and tribulations with furniture builds.
-
27th November 2019, 03:08 AM #8
Be inspired. Be creative. Be bold.
- Join Date
- Apr 2001
- Location
- Perth
- Posts
- 10,856
We are building a version of this hall table ...
We left off last time with basic preparation of stock from rough sawn boards ..
A word of introduction before continuing: while I am best known for hand tool work, I am a blended woodworker and have a pretty full compliment of power tools, which I use. It is horses for courses - power does the grunt work and hands do the details and joinery. So there are machines here as well as hand tools, and I like to believe they coexist well in my builds, as they should.
I began this session by turning the legs ...


The Jarrah for the legs turned out a few shades lighter than expected, and I made an extra piece to experiment with different dye mixes. A final decision shall be made once the case is completed.
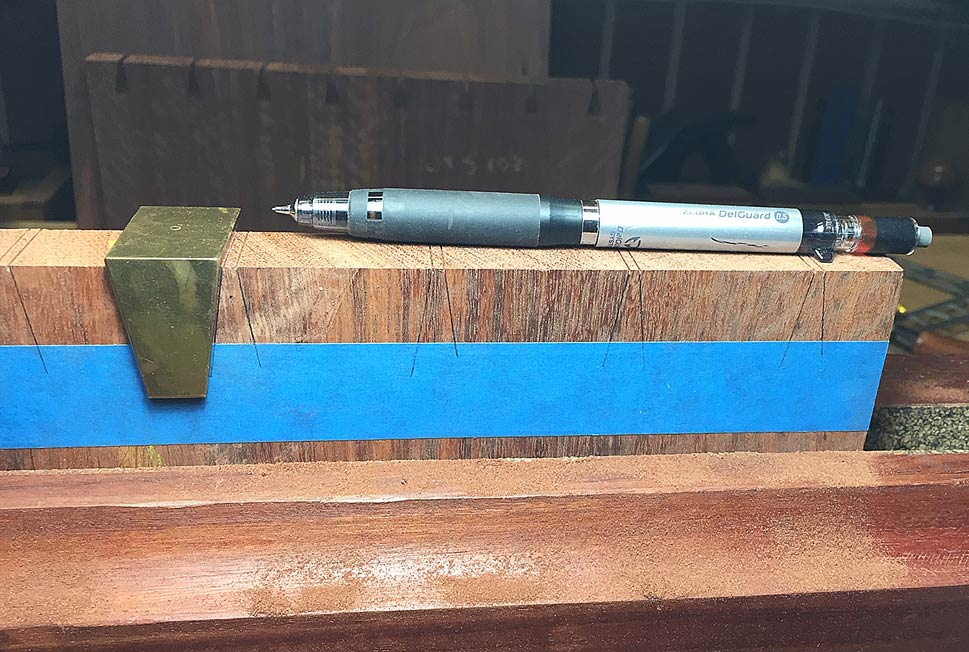
The panels needed to sized, which involved measuring from the centre line of the book-matched panels. The quickest way to square this up was to mark a line (in blue tape), and plane to it ... much faster than using power saws, etc.


Once done, you can square up on a jointer ..
... rip to width ...
... and cross cut ...
Here are the panels for the case (sides yet to be dimensioned for height) ...

Packed away for the night ...
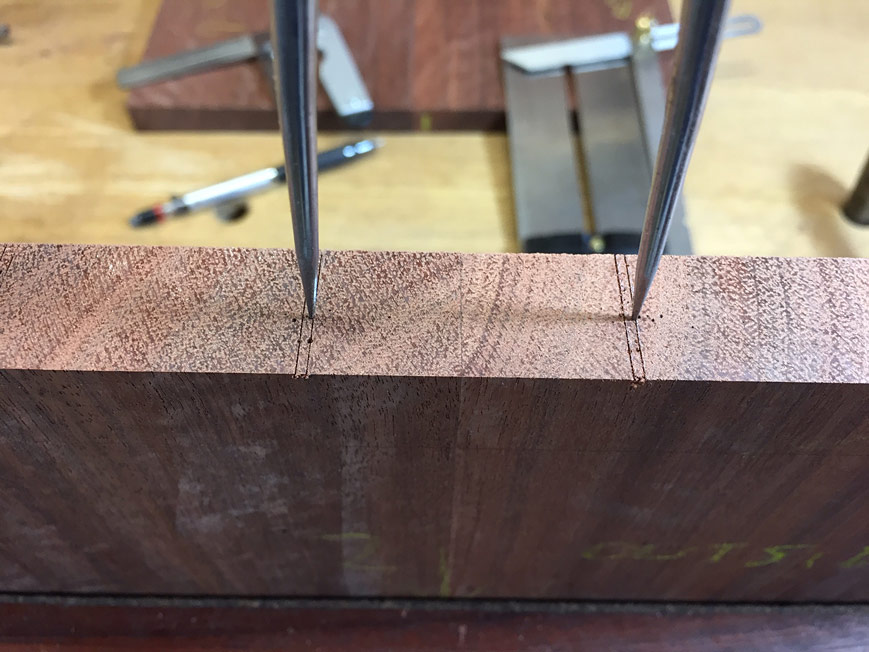
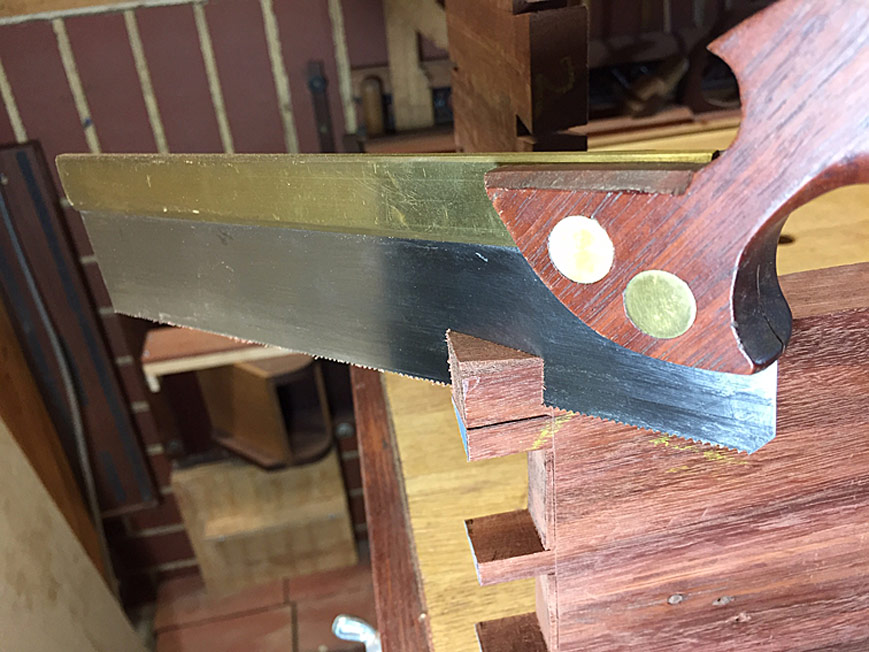
When marking the dovetails, it pays to work precisely. Mark carefully ...
My favourite dovetail saw is usually the one I sharpened most recently. This is an original Independence Tools saw by Pete Taran (circa 1995) ..

Completed side panels ...

It begins to be a little more fun as I get to use one of the features I recently built into my new Moxon vise - the Microjig clamps (details of Moxon vise here: http://www.inthewoodshop.com/ShopMad...LastMoxon.html).
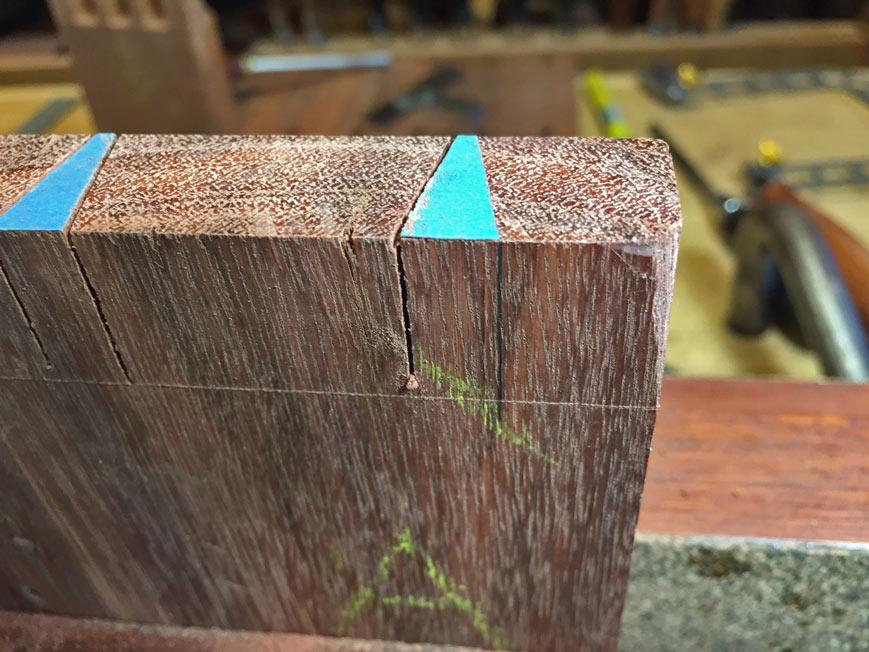
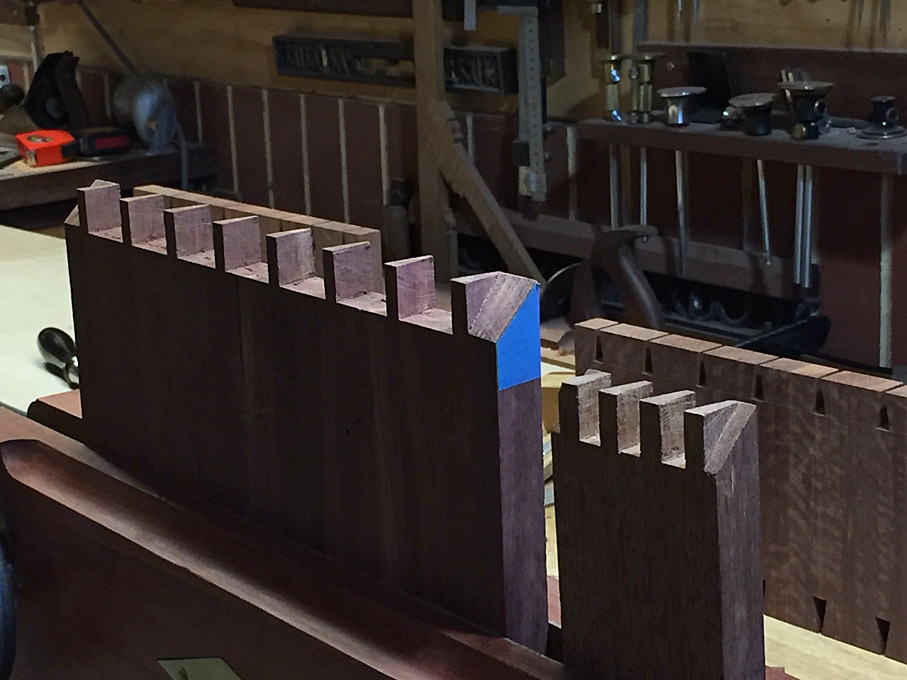
These are used to hold the tail board to transfer to the pin board ...

Here you see the transferred tails outline in blue tape (easier to see in the hard wood). On the left is a model of the mitred ends that will be part of this build ...

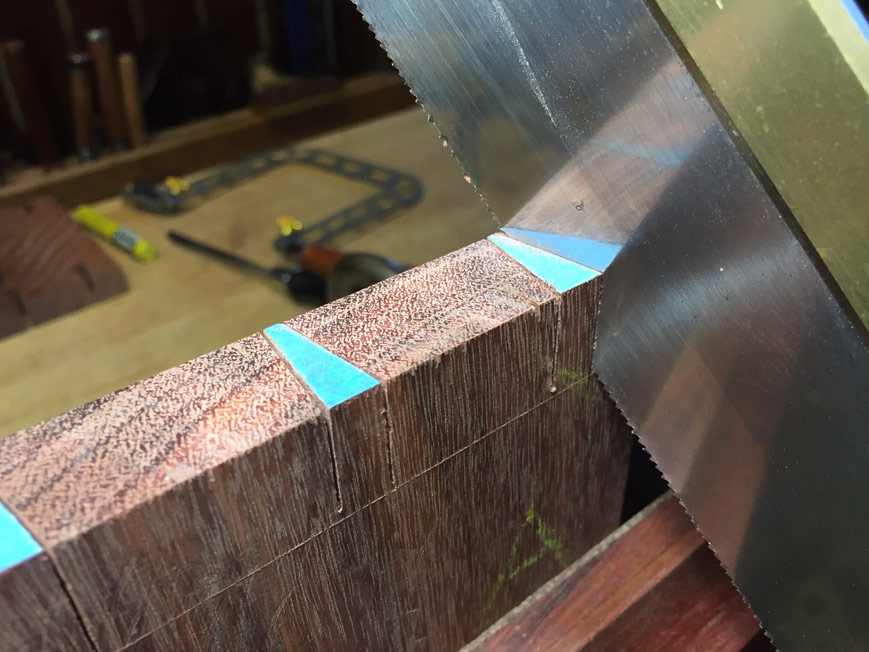
Saw the pins ...
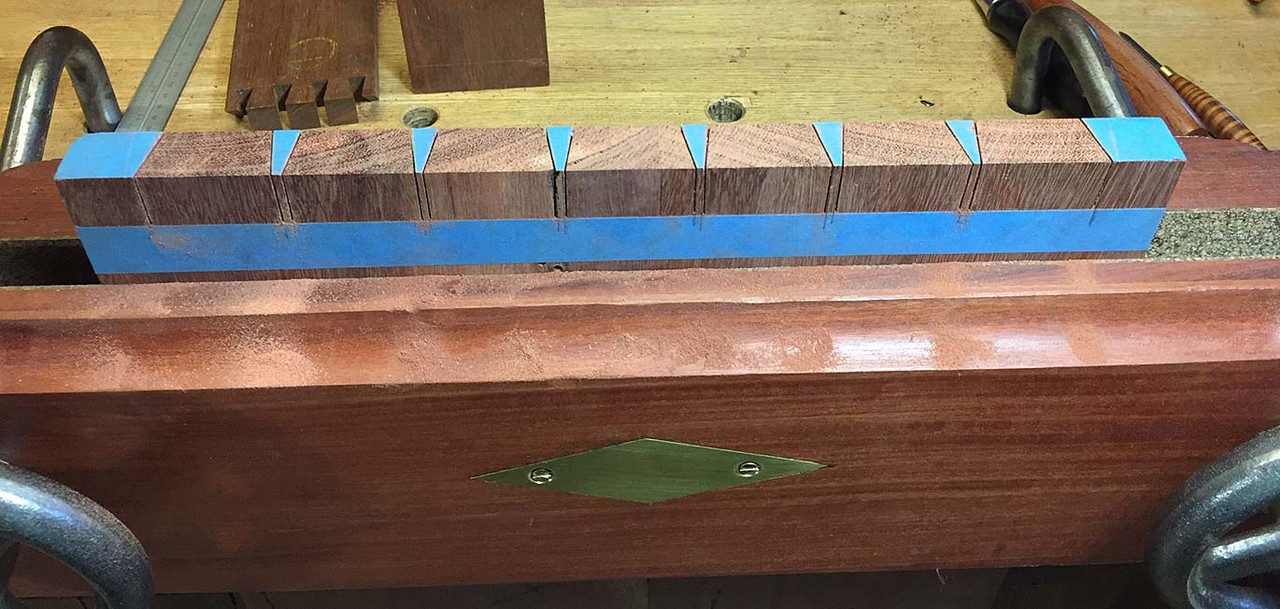
Note that the end pins are not sawn on the outsides.
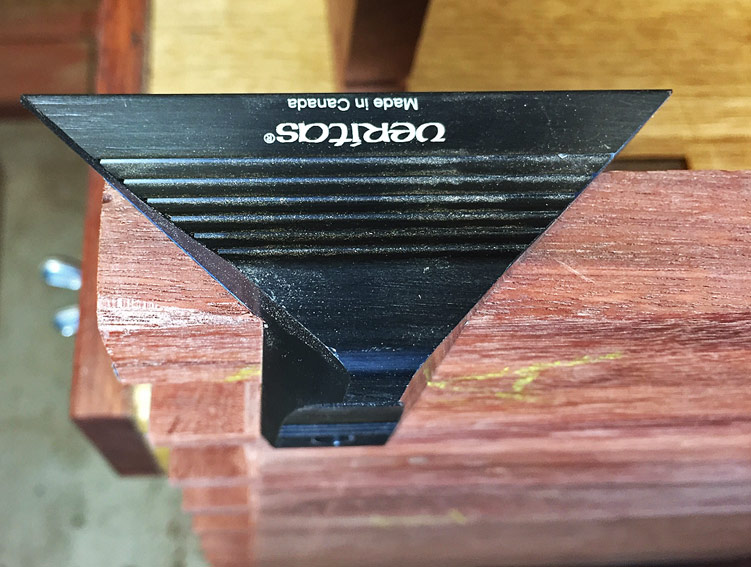
Now turn the board around, and strike a vertical line at the outer pin ...
Saw this on the diagonal only. Do both sides ...
Place the board flat on the bench and create a chisel wall for each pin (earlier, this would have been done for each tail) ...

The chisel wall will make it easier to create a coplanar baseline when removing the waste (by preventing the chisel moving back over the line). Do this on both sides of the board before proceeding.
Now you can fretsaw away the waste.
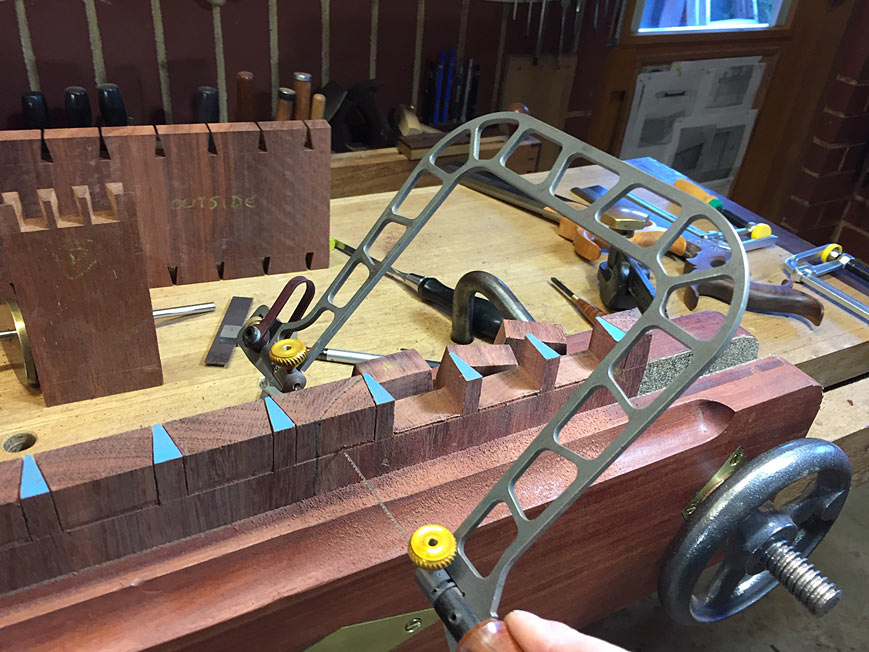
Try and get this to about 1mm above the baseline ...
Here is a video of the process:
YouTube
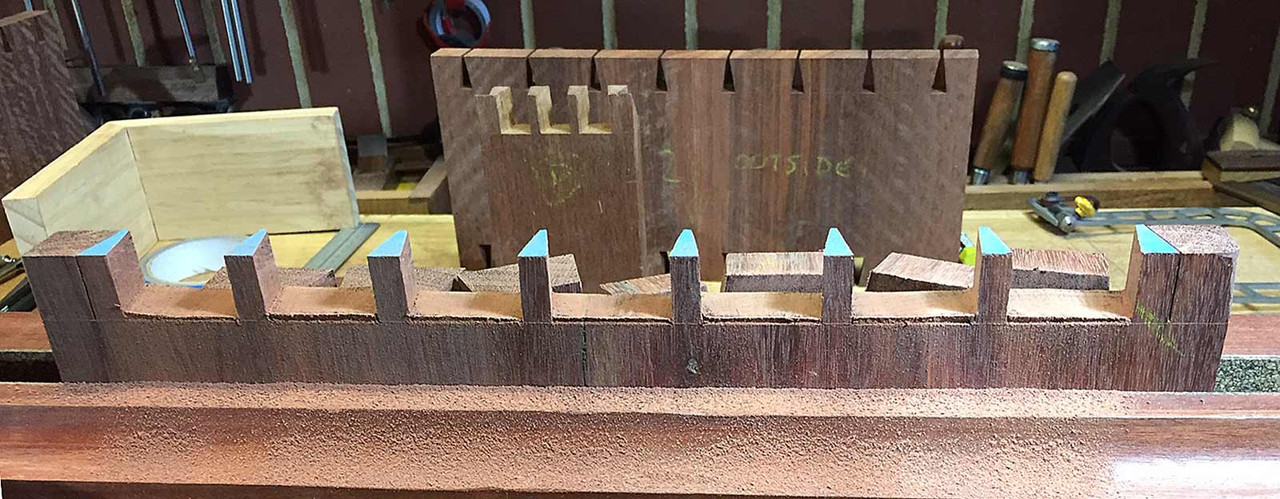
To create the mitred ends, first mark ...
... and saw about 1mm from the line. This will later be flushed with a chisel for accuracy.
And so this is where we are up to at the end of the weekend ...
So will the sides fit ... or won't they .... mmmmm
Regards from Perth
DerekVisit www.inthewoodshop.com for tutorials on constructing handtools, handtool reviews, and my trials and tribulations with furniture builds.
-
27th November 2019, 08:14 AM #9
SENIOR MEMBER
- Join Date
- Feb 2015
- Location
- Hobart
- Age
- 77
- Posts
- 655
Derek
What is the source of your Chinese clamps?
Cheers Yvan
-
27th November 2019, 08:41 AM #10
Butcher of wood
- Join Date
- Jun 2010
- Location
- Bundaberg
- Age
- 54
- Posts
- 3,442
Looks like another interesting build!
I take a similar approach with mixing power and hand tools; power for roughing and hand for refining. I see that you went from using a jointer plane then to Hammer jointer, my approach is slightly different in that I�ll start using a hand electric plane (for really rough edges), then the powered jointer but I finish off with a jointing plane to give the best glue surface. Are you finding the finish off the Hammer to be good enough as is or did you give the edges a final lick with the HNT jointer before glueing? My electric jointer is a straight knived 6� long bed from Timbecon; good enough for carpentry but not for joinery.Nothing succeeds like a budgie without a beak.
-
27th November 2019, 10:17 AM #11
GOLD MEMBER
- Join Date
- May 2011
- Location
- Albury
- Posts
- 3,028
After seeing Derek's post and recommendation I've recently bought 4 of these Yvan, they're branded 'Duratec'. There are 3 sellers on eBay that are variously too expensive or don't let you choose a size (go figure?). I bought mine from this seller on Aliexpress - 8/12/16/24 Inch F Parallel Clamp Heavy 80mm Depth F Clamp Woodworking Clamp Adjustable DIY Wood Carpenter Clamps Grip-in Clamps from Home Improvement on AliExpress - they were sent with Toll and arrived in about 10 days. I bought the 400mm (16") size and they were about $32 each delivered. There are quite a few sellers of these on Aliexpress and it would pay to do a bit of a search to ensure the best deal. They're probably also available on other Chinese shopping sites such as Banggood, but I've never had good experiences with them so I stick to Aliexpress. Originally Posted by yvan
-
27th November 2019, 10:18 AM #12
GOLD MEMBER
- Join Date
- May 2011
- Location
- Albury
- Posts
- 3,028
Deleted.
-
27th November 2019, 04:37 PM #13
Be inspired. Be creative. Be bold.
- Join Date
- Apr 2001
- Location
- Perth
- Posts
- 10,856
I purchased the clamps on Bangood. They appear cheaper there than AliExpress: 8/12/16/24 inch f parallel clamp heavy duty 80mm depth f clamp woodworking clamp Sale - Banggood.com
Regards from Perth
DerekVisit www.inthewoodshop.com for tutorials on constructing handtools, handtool reviews, and my trials and tribulations with furniture builds.
-
27th November 2019, 08:01 PM #14
GOLD MEMBER
- Join Date
- Mar 2008
- Location
- Hobart, Tas
- Posts
- 1,211
How do they compare to the clamps you used to sell (which I'm still smitten with)? Originally Posted by aldav
-
27th November 2019, 09:11 PM #15
GOLD MEMBER
- Join Date
- May 2011
- Location
- Albury
- Posts
- 3,028
I've posted a response here - Parallel Action Clamps Compared to Duratec Lightweight Clamps - Lance. Don't want to hijack Derek's thread, which I'm following very closely. Originally Posted by LanceC


 Reply With Quote

Similar Threads
-
Entry Hall Mirror - WIP
By Rookie in forum WOODWORK - GENERALReplies: 5Last Post: 31st August 2010, 11:12 PM -
A gift for my Niece's 21st ... ssshhh don't tell her!
By Touchwood in forum BANDSAWN BOXESReplies: 10Last Post: 22nd November 2009, 11:13 AM -
hall table, wine table, water stone box
By driftit in forum WOODWORK - GENERALReplies: 6Last Post: 1st May 2009, 11:20 PM -
Project 1 - Entry Way Table
By `Felix` in forum WOODWORK PICSReplies: 13Last Post: 25th March 2004, 03:54 PM
