

 Thanks:
  Likes:
  Needs Pictures:
  Picture(s) thanks:
Results 76 to 90 of 169
Thread: The Unicorn method
-
30th November 2020, 05:15 AM #76
 GOLD MEMBER

- Join Date
- Apr 2011
- Location
- McBride BC Canada
- Posts
- 3,543

I've bought pairs of 12 mm Narex skews at the factory bevel of 25 degrees, that's just fine.
For wood carving, I've revised them to 20 degrees. They hold up very well and are much less of a "push."
20 is good for a day's effort, cutting formline in Pac NW First Nations style relief carving.
They all get the usual lick with CrOx/AlOx on a box card strop every 30 minutes or so.
Narex skews are good steel to start with to make other kinds of wood carving tool edges.
Just joint the skew bevel and start over without cooking it.
-
30th November 2020 05:15 AM # ADSGoogle Adsense Advertisement
- Join Date
- Always
- Location
- Advertising world
- Posts
- Many
-
4th December 2020, 04:48 PM #77
Bowl Turner


- Join Date
- Apr 2007
- Location
- Adelaide Hills, South Australia
- Posts
- 4,332
OK, I did some experimenting with 'the method' on woodturning scrapers and posted my results over on the woodturning forum. Originally Posted by NeilS

Experimental application of David Weaver's 'Unicorn' sharpening method to scrapers
Summary of findings:
- I got a better finish on the wood with this method than straight off the #180 CBN grinder
- The time required to create and reform a 'polished' burr took less time than burnishing
- But, the edge/burr created with this method did not last any longer when scraping before needing to be refreshed.
What everyone is reporting on in this thread is their experience with chisels, and the like, which are use to slice through wood and not dragged tangentially over the surface of the wood as we woodturners do with our scrapers. So, it should not be a surprise that I got a different result on the durability of the edge with my scraper experiments.
It is known that a well polished upper bevel improves the durability of the edge/burr formed on woodturning scrapers. Buffing certainly quickly achieves a suitable polish.
It will be interesting to hear if and how well 'the method' works with woodturning skews. I'm leaving that to someone else who spends more time with those.
Stay sharp and stay safe!
Neil
-
2nd June 2021, 07:10 PM #78
SENIOR MEMBER
- Join Date
- Nov 2007
- Location
- Victoria
- Posts
- 733
Has anyone been using the unicorn method for awhile now ? Any thoughts ? Bevel down blades still a no go ?
Bevel up plane blades are ok to use this on ? The 20 degree primary bevel the unicorn method begins with seems to match up with the low angle blade we would use for shooting but what of the 50 degree micro bevel blade we all have for smoothing ? *LV marketers giggle in the corner*You boys like Mexico ?
-
3rd June 2021, 08:33 AM #79
GOLD MEMBER
- Join Date
- Mar 2010
- Location
- US
- Posts
- 3,117
I've been using it for a while!
You can use it with a 20 degree primary if you want and then add a secondary large enough for the secondary to work.
A starting rule of thumb for tearout control is -5 degrees total bedding angle.
For example, if you're using a low angle plane and you want 55 degrees 55-12 (bed) - 5 = 38 degree bevel on the iron and then feel free to have a fairly heavy hand with the unicorn.
You'll be shocked how much better the iron holds up at lower angles, but also with how a junk iron (or a site iron maybe more appropriately, like the old extremely soft stanley 18 irons and such) will hold up to anything, including planing woods with silica in them.
-
3rd June 2021, 08:55 PM #80
GOLD MEMBER
- Join Date
- May 2009
- Location
- melb
- Posts
- 1,125
what grit stone should one use when creating the bur between the grinder and the buffing step? I have been using 7 micron paste which is about 2800 grit
-
3rd June 2021, 10:04 PM #81
GOLD MEMBER
- Join Date
- Mar 2010
- Location
- US
- Posts
- 3,117
Whatever it takes to re-establish a burr, but not have it be too coarse. I'd say anything from like fine india (which is similar to an aggressive 1000 grit waterstone) to 5 micron diamonds should be fine.
If it takes too long to reestablish the burr, then go to something more coarse. If the burr is too coarse, then something finer.
-
4th June 2021, 01:36 PM #82
SENIOR MEMBER
- Join Date
- Nov 2007
- Location
- Victoria
- Posts
- 733
Picked up my buffing wheel kit this morning (essential shopping within 10km of my house - shout out to all the melbourne members)
ToolPRO Bench Grinder Polishing Kit 8 Piece | Supercheap Auto
Initial results seem very good ! I used the top multi coloured layered wheel in the packet with the included grey polish. Not sure which wheel is which as they're not labelled, the lowest wheel in the kit spread the fibres everywhere and seemed a bit floppy with all the stragglers hanging out. The compound doesnt really coat the wheel heavily as in Derek's pictures. Do I need to add anything to the wheel ie oil or will it build up over time ?
edit - after watching Winston's video I think I'm sure the correct wheel
Sharpened a few chisels and a cheap stanley plane blade which afterwards shaved a huge patch of arm hair much much quicker than I expected ! The plane blade was ready for a final honing prior to buffing. So have I got the unicorn method working or did I just buff the tip or is there even a difference ? Watched all the videos but still not 100% sure why this isnt more common.
DW, thank you for your videos. If you make anymore would you please show the buffing part up close ?You boys like Mexico ?
-
4th June 2021, 01:51 PM #83
GOLD MEMBER
- Join Date
- May 2009
- Location
- melb
- Posts
- 1,125
Question regarding buffer, on that supercheap auto link there are 3 wheels I am using the bottom one which is basically cloth and twine between layers of cloth. It has been working amazing on kitchen knives and softer steel chisels but on my pmv11 chisel I feel like it's not as sharp. This could be just in my head though... I have been using Chrome oxide.
My thinking is that the more aggressive wheel does a bit of damage on the harder steels edge as its more brittle?
Should I get the full cloth wheel?
Sent from my ONEPLUS A5010 using Tapatalk
-
4th June 2021, 02:21 PM #84
SENIOR MEMBER
- Join Date
- Nov 2007
- Location
- Victoria
- Posts
- 733
Wheel on the left is the one I started with that got all chewed up/pieces fell out. The wheel right hand side the one that I got good results from.
Should have mentioned I'm using a 90's bench grinder.You boys like Mexico ?
-
4th June 2021, 06:38 PM #85
Be inspired. Be creative. Be bold.
- Join Date
- Apr 2001
- Location
- Perth
- Posts
- 10,821
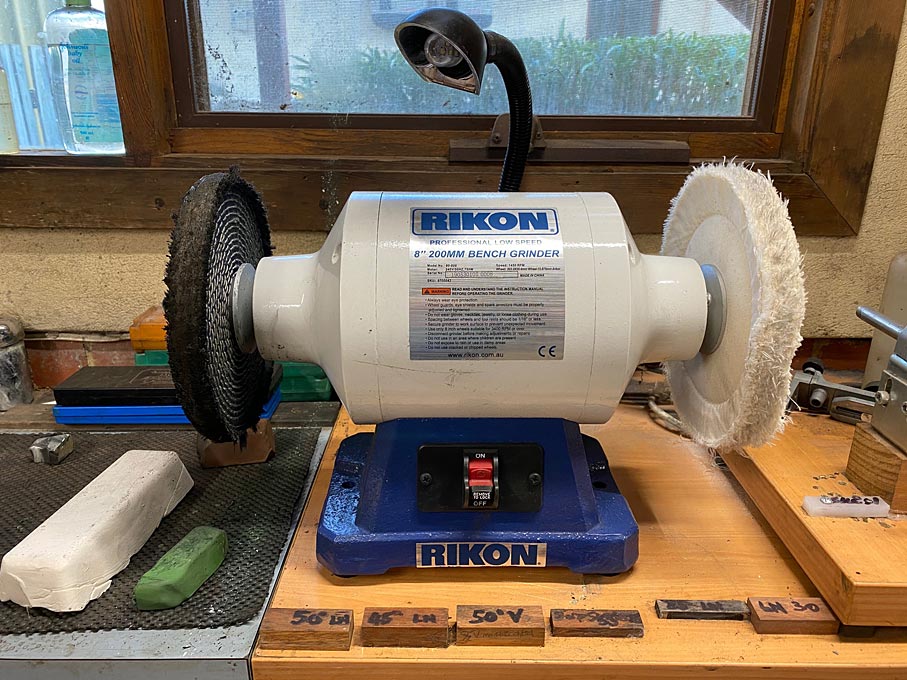
Sam, the "loaded up" wheel in my original post was from when I was testing out the process. The wheel was used as a strop, but for other tasks, not for the unicorn profile. Once it became evident that the process worked, I invested in another half speed bench grinder, and onto this went a stitched (left) and a loose cloth wheel (right). The loose cloth wheel is the one used for the unicorn profile. The photo below was taken early on, but it has not became much "dirtier", as the compound used is white in colour. The other wheel is for more heavy duty buffing and uses Lee Valley green compound. Originally Posted by Sam
Regards from Perth
DerekVisit www.inthewoodshop.com for tutorials on constructing handtools, handtool reviews, and my trials and tribulations with furniture builds.
-
4th June 2021, 08:35 PM #86
GOLD MEMBER
- Join Date
- May 2009
- Location
- melb
- Posts
- 1,125
Derek just to confirm the wheel on the right is 100% cloth nothing in between the layers of cloth? What compound are you using?
-
4th June 2021, 08:40 PM #87
Be inspired. Be creative. Be bold.
- Join Date
- Apr 2001
- Location
- Perth
- Posts
- 10,821
I purchased these from Caswell Australia ... Originally Posted by qwertyu
CB8 Cushion Buff 200mm
CB8 Cushion Buff 200mm Part Number: CB8
Base Price:
$14.95
Quantity: 1 @$14.95$14.95White Rouge Compound Large
White Rouge Compound Large PART NUMBER: WRC5
Base Price:
$11.95
Regards from Perth
DerekVisit www.inthewoodshop.com for tutorials on constructing handtools, handtool reviews, and my trials and tribulations with furniture builds.
-
11th July 2021, 10:19 PM #88
SENIOR MEMBER
- Join Date
- Nov 2007
- Location
- Victoria
- Posts
- 733
DW has posted a close up video of this method to YouTube which is awesome. I think it covers the information that’s been a bit unclear so far.
Unicorn Method - Close up of the buffing wheel and refresher on the goals of the process - YouTubeYou boys like Mexico ?
-
11th July 2021, 10:24 PM #89
SENIOR MEMBER
- Join Date
- Nov 2007
- Location
- Victoria
- Posts
- 733
DW has posted a close up video of this method to YouTube which is awesome. I think it covers the information that�s been a bit unclear so far.
Unicorn Method - Close up of the buffing wheel and refresher on the goals of the process - YouTube
- - - Updated - - -
DW has posted a close up video of this method to YouTube which is awesome. I think it covers the information that�s been a bit unclear so far.
Unicorn Method - Close up of the buffing wheel and refresher on the goals of the process - YouTubeYou boys like Mexico ?
-
12th July 2021, 09:47 AM #90
Deceased
- Join Date
- May 2008
- Location
- Australia
- Posts
- 2,357
Hi Derek; a little curious as to why buffing a bench plane iron will create an uneven edge, but it doesnt become a factor when applied to a block plane iron.I got to thinking about trying this out on plane blades. In fact, I did so, and realised that it may not be a good idea. All the bench plane blades I have are cambered. Planing with a buffed cambered blade created shavings that were stringy, indicating an uneven edge. You can get away with this in a chisel, but not a plane blade. I shall try again, but that is my initial observation.
I also tried this with block plane blades. Now this was different: 25 degree straight bevel, just like a chisel. But would it cut differently, especially on end grain where low cutting angles are expected to rule?
Is it because theirs no camber on a block plane iron.
regards Stewie;

 Reply With Quote

Similar Threads
-
Unicorn Spit?
By heffa in forum FINISHINGReplies: 0Last Post: 4th April 2020, 01:25 PM -
Unicorn
By ClaudeF in forum WOODCARVING AND SCULPTUREReplies: 0Last Post: 14th March 2016, 06:21 AM -
UNICORN
By cobalt32 in forum WOODCARVING AND SCULPTUREReplies: 11Last Post: 9th November 2014, 10:13 AM -
sharpening knives on waterstones: japanese method vs western method
By J_SAMa in forum SHARPENINGReplies: 5Last Post: 28th December 2012, 04:35 AM -
Unicorn horn
By ElizaLeahy in forum WOODTURNING - GENERALReplies: 36Last Post: 24th April 2009, 12:31 PM
