

 Thanks:
  Likes:
  Needs Pictures:
  Picture(s) thanks:
Results 1 to 15 of 252
Thread: First stages in drawer building.
-
30th August 2011, 03:10 AM #1
 Be inspired. Be creative. Be bold.


- Join Date
- Apr 2001
- Location
- Perth
- Posts
- 10,826
 First stages in drawer building.
I put in several hours this weekend on the chests, and yet it feels no further along. There is a question I have for you about management of work. It's a good topic here for discussion, especially for us weekend warriors who are limited for time and have to deal with longer builds.
It had got to the stage where I was ready to build the drawers. My first reaction was "Oh Boy!". I love dovetails. Generally I like making drawers. Then I began to plan out what was needed to build 12 drawers, and how to manage this area. Building one or two is relatively simple; building 12 is quite a different proposition.
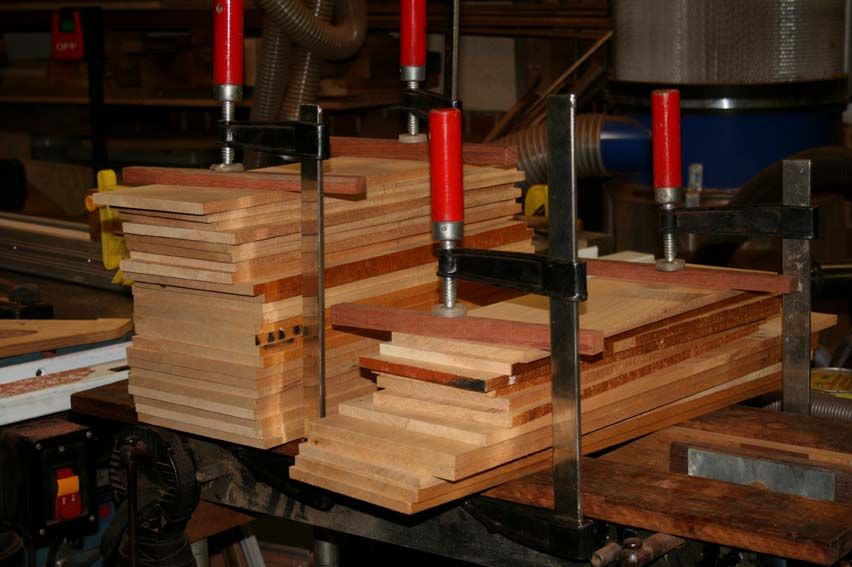
Here is where I ended off last weekend - a pile of thicknessed Kauri Pine boards for the drawers, along with drawer fronts that I had painstakingly fitted to an exact, tight fit ...
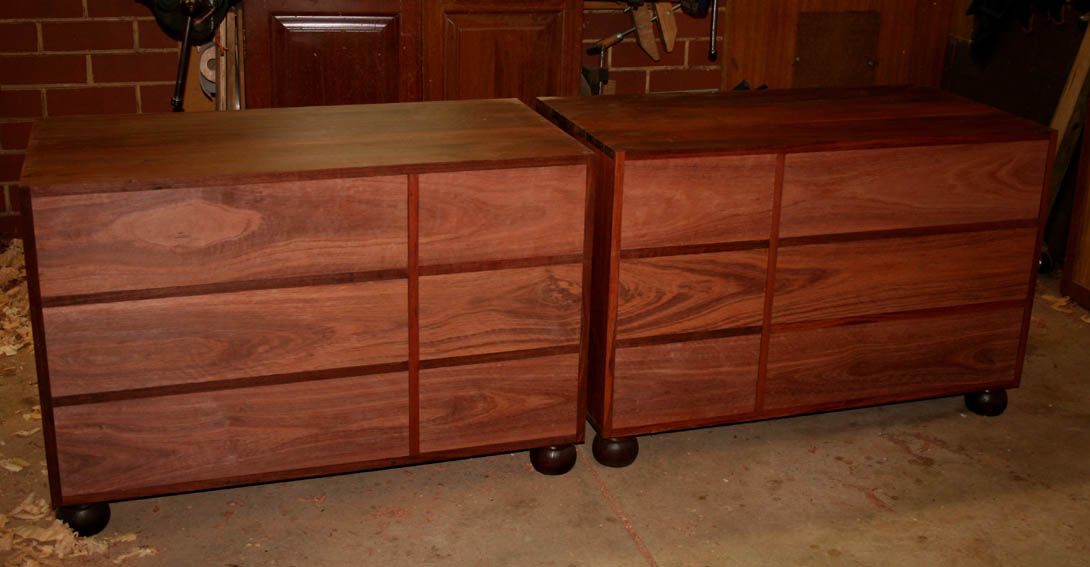
Here are the drawer fronts now planed (but unfinished) ...
I was asked why fit the drawers fronts this way (the alternative is to shape them after the drawer is completed)? Now I can only offer my thoughts and method, and I put them out here for critique. This is how I learn.
Basic answer, I use the drawer fronts as a template for the rest of the drawer. I aim to work with as much precision as I can muster so that minimal adjustments are needed, and then these will only be required to the drawer sides.
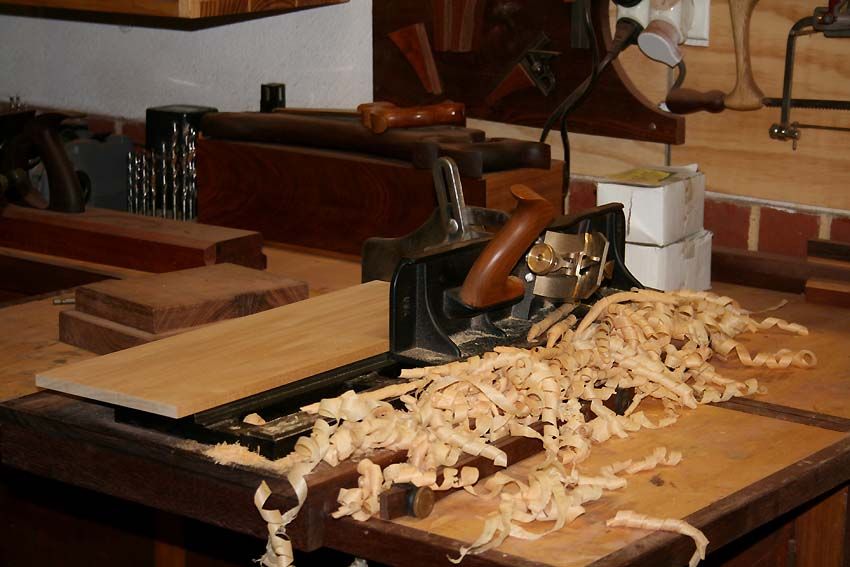
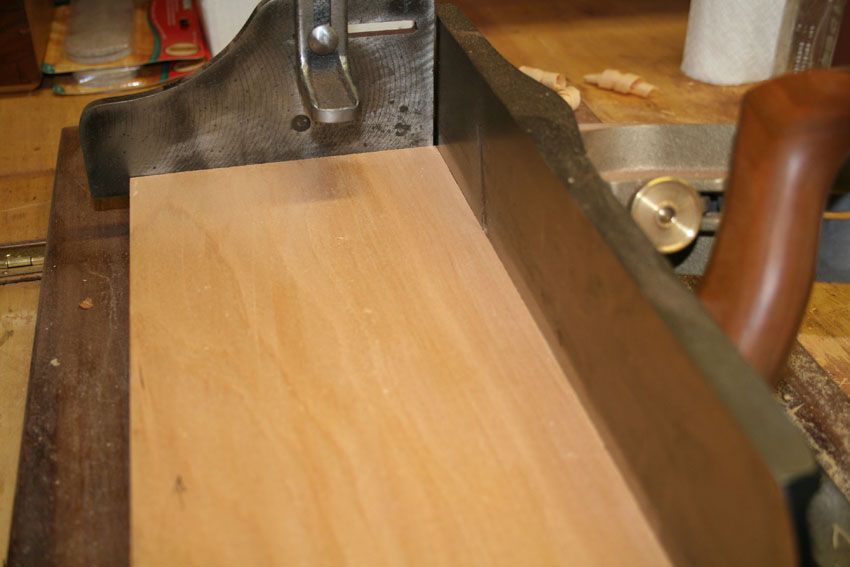
One of the pleasures of working with wood is seeing the grain appear with the first swipe of a handplane on a rough sawn board ..
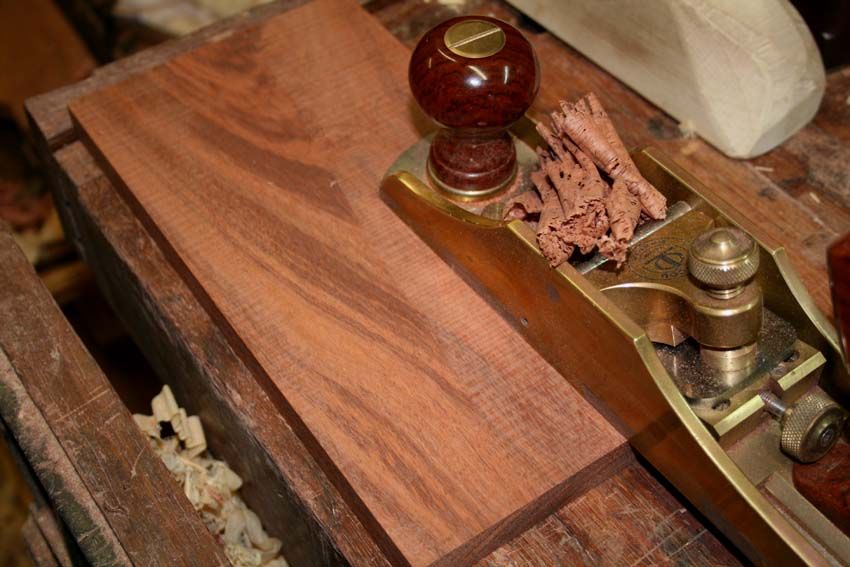
After the drawer fronts are done it is the turn of the drawer sides. I am using Kauri Pine. This is a light but strong and straight-grained wood. I have hand planed it to 3/8" thick ..
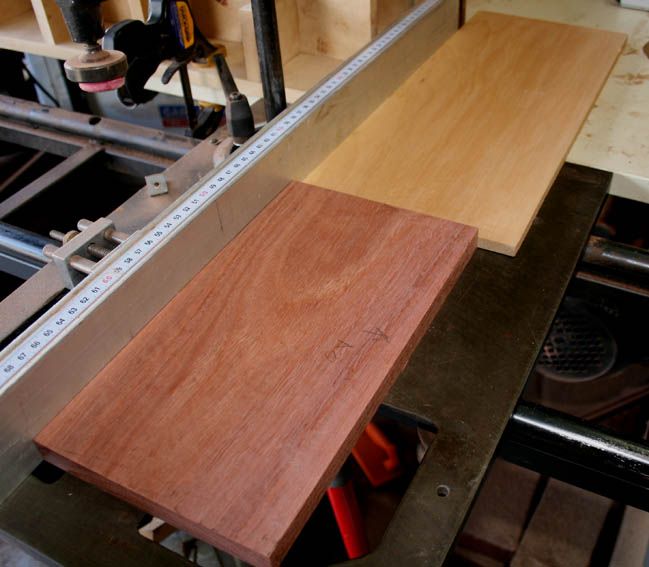
... and dimensioned it on the tablesaw and shooting board ...
A reference edge and end are chosen. The grain is optimised to run from the front to the rear of the drawer so not to threaten the halfblind dovetails when planing the sides ...
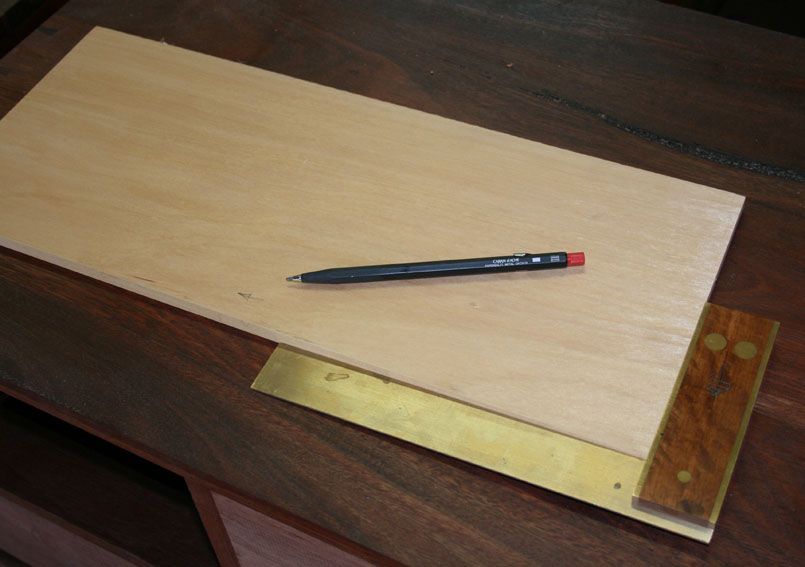
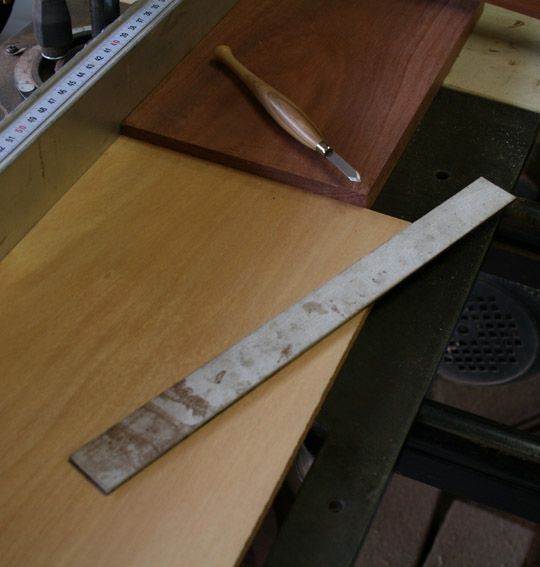
The drawer front and side are placed against a straight edge. I am using here the fence of my sliding table ..
Now it is easy to transfer the same height with a straight edge ..
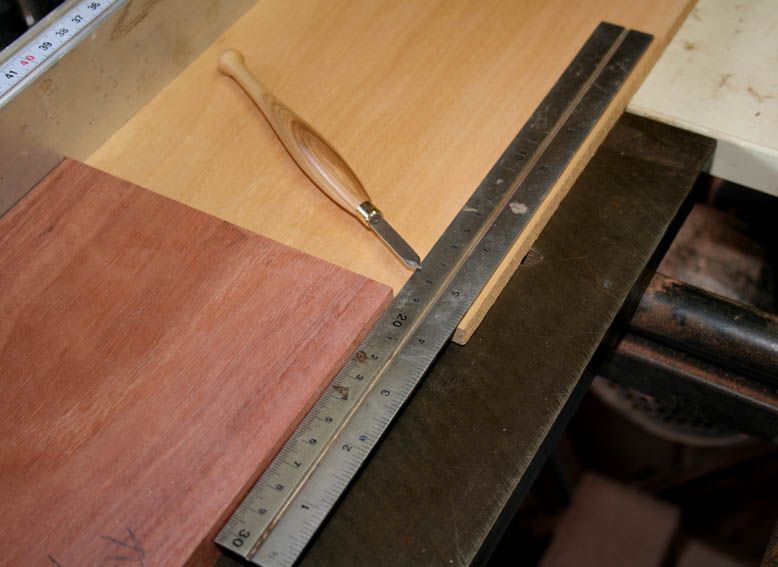
I used the tablesaw to get close to the line, then fine tuned with the shooting board ...
Do the other side. A tip for the rule is to glue 240 grit sandpaper as nonslip. Fantastic!
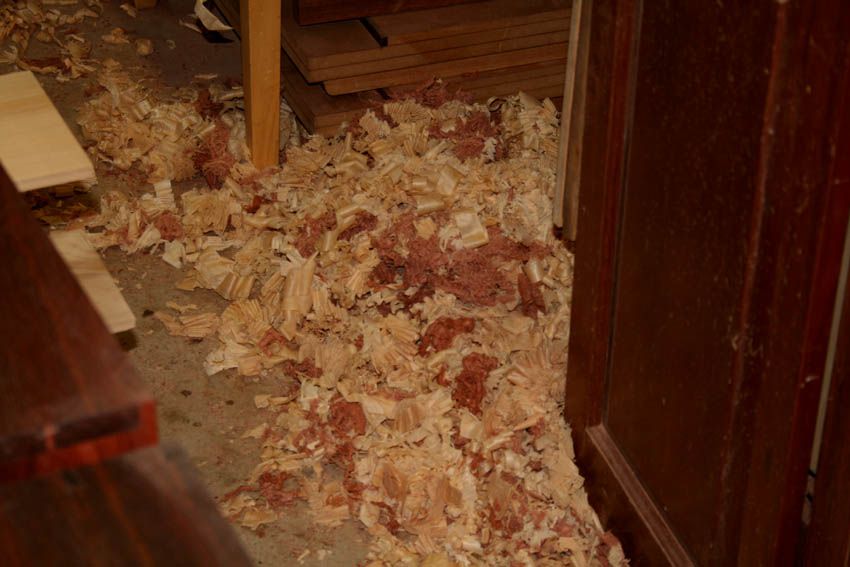
Finally I ended with a 24 drawer sides, 12 drawer fronts and 12 drawer backs ...
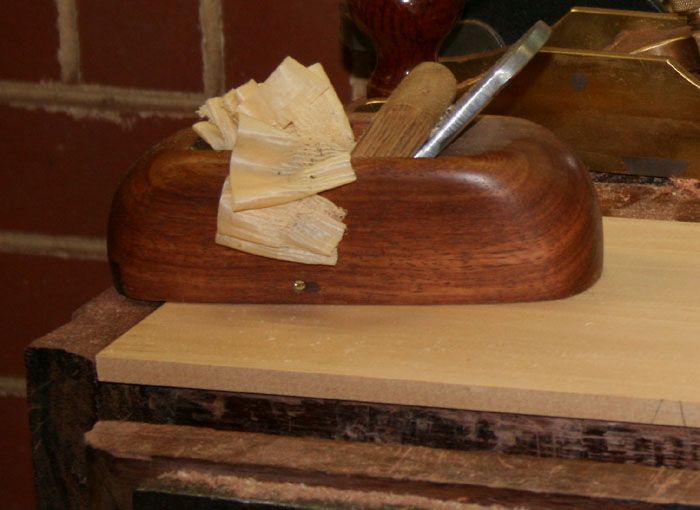
It left a few shavings behind ...
 Visit www.inthewoodshop.com for tutorials on constructing handtools, handtool reviews, and my trials and tribulations with furniture builds.
-
30th August 2011 03:10 AM # ADSGoogle Adsense Advertisement
- Join Date
- Always
- Location
- Advertising world
- Posts
- Many
-
30th August 2011, 03:11 AM #2
Be inspired. Be creative. Be bold.
- Join Date
- Apr 2001
- Location
- Perth
- Posts
- 10,826
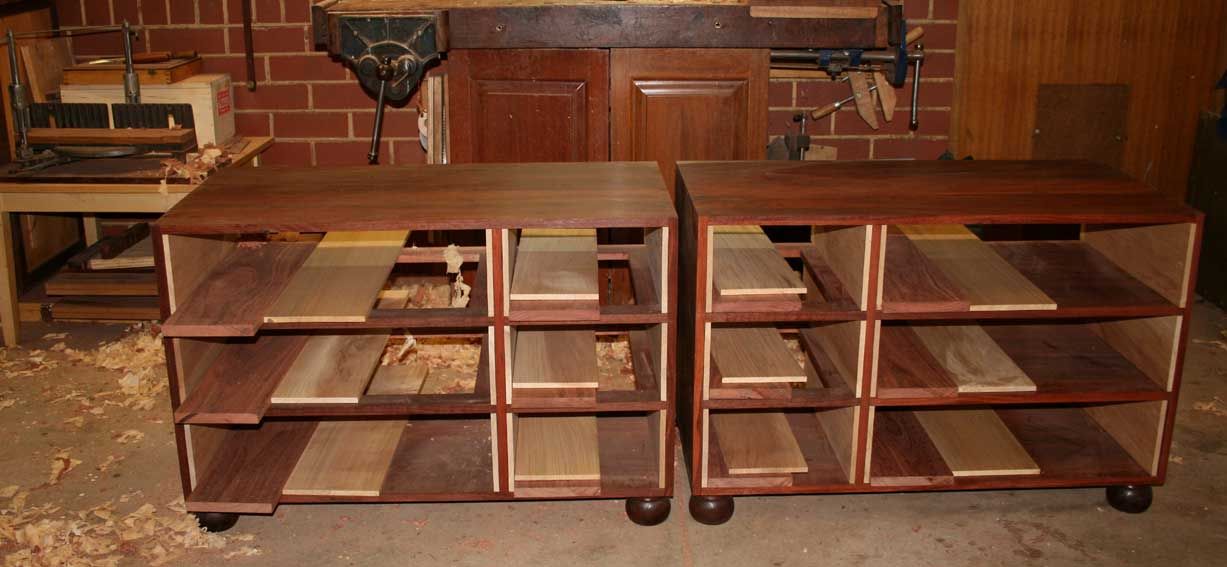
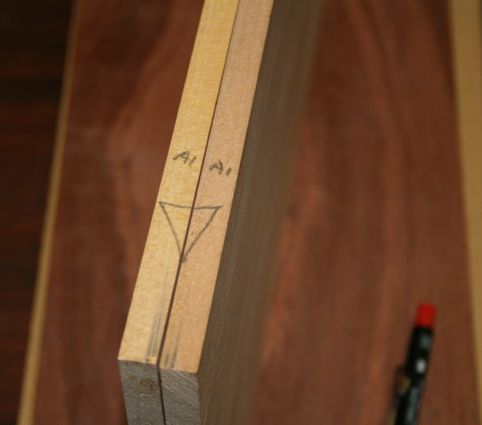
I spent time carefully marking every piece, drawer-by-drawer, coding each drawer ...
The drawer backs have been thicknessed but are left oversize at this point. They will only be sawn to size once I have completed the slips for the drawers. The slips have to be completed before I can be certain where the groove will be placed at the rear of the drawer front, and of course the drawer back will be sawn to end at the top of the groove within the slip. So the slip comes next.
I decided on Jarrah for the slips. This will be hard wearing, and the contrasting colour will link to the carcase. The slips are 3/4" in the vertical (although I may shorten this), 3/8" in the horizontal, and have a 1/4" x 1/4" groove. The slips follw the guidelines of Richard Jones (thanks Richard).
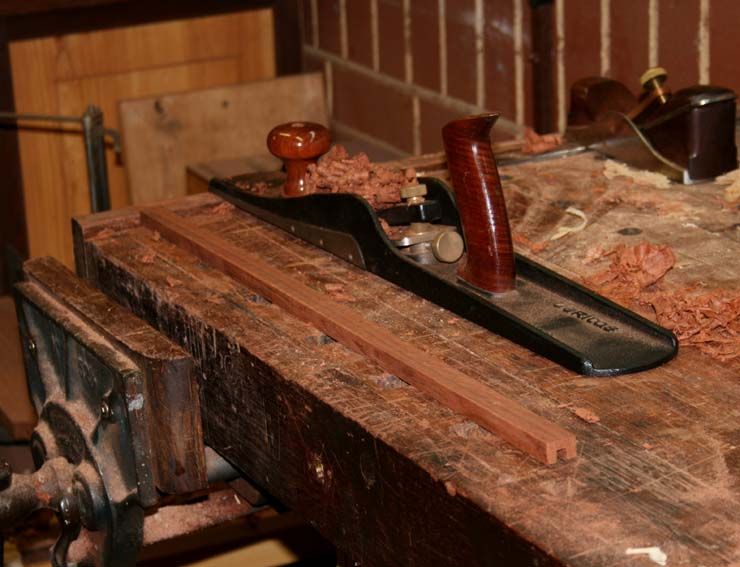
I prepared 3/4" thick boards. The grooves were created at the edge on the router table (I can live with this), then sliced off on the bandsaw. Out came the jointer to plane them to flat and to size ..
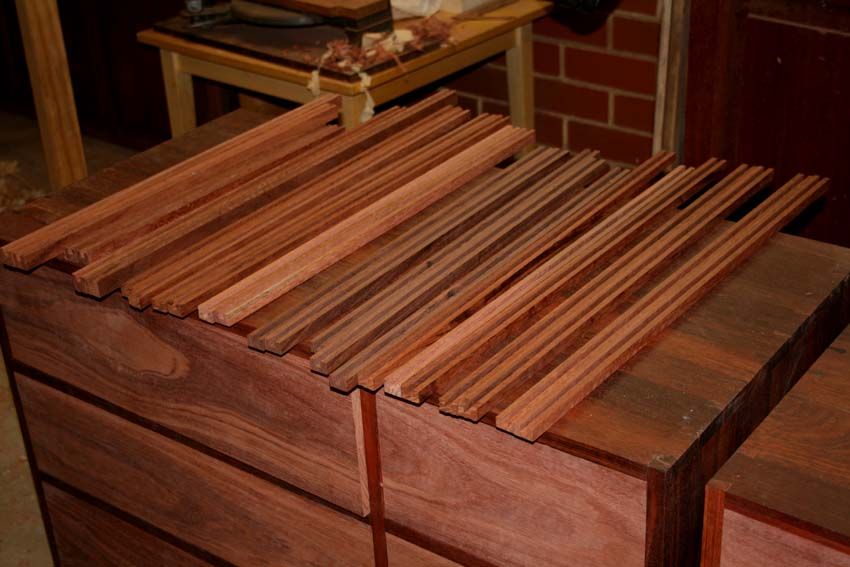
And the result was 24 lengths of slips in the basic shape (yet to be finsihed to the final shape ... next weekend) ...
I have also still to make the drawer bottoms, which will be 3/8" thick Kauri Pine. I am planning to use muntins for the longer drawers (about 600mm wide). Is there a rule about when they are to be included? It just makes sense to me here.
In addition to comments about the work order and methods, how would you do to store the pieces until the next work session?
Regards from Perth
DerekVisit www.inthewoodshop.com for tutorials on constructing handtools, handtool reviews, and my trials and tribulations with furniture builds.
-
30th August 2011, 07:37 AM #3
GOLD MEMBER
- Join Date
- Mar 2008
- Location
- Townsville, Nth Qld
- Posts
- 4,236
You did all this in one weekend Derek? AWESOME! Thanks for posting a great set of WIP photos.
I was interested to learn that you use the shooting board after using the table saw for the edges of the sides of the drawers.
Can you please post a link for guidelines of Richard Jones for those jarrah slips? I didn't know there were any things to consider in making theseregards,
Dengy
-
30th August 2011, 08:30 AM #4
What... you mean it's not 1792?
- Join Date
- Oct 2006
- Location
- Melbourne
- Posts
- 5,271
Derek, how many of these chests are you making? There seem to be fragmented threads all over the place with reference to chests you're making.
If you glue a thin strip of cork to the back of your ruler it will prevent it from slipping about, but won't scratch critical surfaces like your sandpaper will.
Muntins were used on drawers from Victorian times to compensate for their scant < 1/4" thick drawer bottoms. Your 3/8" bottoms are massive and shouldn't require muntins unless you intend storing bullion in the drawers..
I know you believe you understand what you think I wrote, but I'm not sure you realize that what you just read is not what I meant.
Regards, Woodwould.
-
30th August 2011, 08:37 AM #5
Awaiting Email Confirmation
- Join Date
- Feb 2008
- Location
- Peakhurst
- Age
- 67
- Posts
- 1,173
 Originally Posted by Woodwould

I think bullion and brownie points weight about the same.
Nice work Derek...I'll keep watching.
-
30th August 2011, 11:12 AM #6
Be inspired. Be creative. Be bold.
- Join Date
- Apr 2001
- Location
- Perth
- Posts
- 10,826
WW
How many chests? Just two. I start a new thread for each "chapter". It helps having to wade through the same stuff over again.
That's useful info about the muntins. The reason I asked is that the last time I built drawers this width it was suggested that I should have used one (when I did not). What if the drawer bottom was 1/4" thick, which is what I would prefer (for lightness).
Regards from Perth
DerekVisit www.inthewoodshop.com for tutorials on constructing handtools, handtool reviews, and my trials and tribulations with furniture builds.
-
30th August 2011, 11:27 AM #7
What... you mean it's not 1792?
- Join Date
- Oct 2006
- Location
- Melbourne
- Posts
- 5,271
Surely if you posted the entire build in one WIP as others do then viewing the most recent posts would keep one up to date? It seems odd to break from the norm. Originally Posted by derekcohen
So far I have seen only this 'chapter' and one other where you were making carcases. I couldn't be bothered digging around for any others..
I know you believe you understand what you think I wrote, but I'm not sure you realize that what you just read is not what I meant.
Regards, Woodwould.
-
30th August 2011, 12:32 PM #8
Be inspired. Be creative. Be bold.
- Join Date
- Apr 2001
- Location
- Perth
- Posts
- 10,826
WW
It is easier to see the "chapters" on my website than wade through the threads here ...
1. http://www.inthewoodshop.com/Furnitu...entCentre.html
2. http://www.inthewoodshop.com/Furnitu...stayinbed.html
3. http://www.inthewoodshop.com/Furniture/GlueingUp.html
4. http://www.inthewoodshop.com/Furniture/Scraping.html
5. http://www.inthewoodshop.com/Furniture/bunfeet.html
6. http://www.inthewoodshop.com/Furnitu...otCricket.html
You are probably right about maintaining one thread. It has just been easier to start afresh each time than hunt for the old one.
Your comments are appreciated.
Regards from Perth
DerekVisit www.inthewoodshop.com for tutorials on constructing handtools, handtool reviews, and my trials and tribulations with furniture builds.
-
30th August 2011, 12:41 PM #9
What... you mean it's not 1792?
- Join Date
- Oct 2006
- Location
- Melbourne
- Posts
- 5,271
It probably would be easier, but defeats the whole purpose of posting a WIP on the forum in the first place! Originally Posted by derekcohen
.
I know you believe you understand what you think I wrote, but I'm not sure you realize that what you just read is not what I meant.
Regards, Woodwould.
-
30th August 2011, 04:00 PM #10
GOLD MEMBER
- Join Date
- Mar 2008
- Location
- Townsville, Nth Qld
- Posts
- 4,236
Not an easy one, Derek and WW. The way I am reading this is Derek's prime storage area is his website, and WW prefers that the photos for WIPs be stored on the Forum server, so that if Derek gets hit by a bus ( heaven forbid), we still have them available. Excuse me if I am way off the mark here.
I am just too glad that Derek takes the time to share his WIP photos with us, and look forward to seeing a craftsman at work. I have no problem with the various chapters as separate threads, but a link to the previous chapter , and also to the web site would resolve WW's concerns, I'm sureregards,
Dengy
-
30th August 2011, 06:46 PM #11
GOLD MEMBER
- Join Date
- Mar 2009
- Location
- Sydney
- Age
- 37
- Posts
- 2,711
I'm really enjoying your WIP Derek... It's rare to see you refer to your table saw or any other power tool in your posts!
One thing I did notice was your handle and tote on your LAJ seems darker than the standard Rosewood handle and tote?
Keep the posts coming!
Andy
-
2nd September 2011, 11:25 PM #12
Planker
- Join Date
- Mar 2008
- Location
- South Australia
- Age
- 66
- Posts
- 23
I am very grateful. I am building a sideboard and have almost finished the carcass. I am about to start work on the three drawers and the three doors. I will use your timely advice.
My project is made from Huon Pine boards that I bought in Tassie a couple of years ago. It is a pleasure to work with and I want to do the timber justice.
I will post some pictures one day, but I work so slowly..........don't .......hold......your.......breath.Experience is that knowlege that enables you to recognise a mistake when you make it again. :B
-
3rd September 2011, 11:58 AM #13
SENIOR MEMBER
- Join Date
- Jan 2008
- Location
- NSW southern Highlands
- Posts
- 548
Derek
I agree with WW that unless you are planning on leasing space to the Perth Mint a 3/8" thick drawer bottom with a Muntin is substantial. My suggestion would be for a 1/4" bottom with slips on the sides and a groove in the drawer front.
However, I also recollect that you raised this issue some time ago on another project, but don't recall you posting a conclusion. Where did that finish up ? & was the result satisfactory ? That may give you a good point of reference.
Additionally if you are intending to use slips, you could make one drawer bottom, then reduce the thickness of this without affecting the fit in the slips until you reach a thickness that will suffice. Then make the remainder.
Regards
-
3rd September 2011, 02:01 PM #14
Be inspired. Be creative. Be bold.
- Join Date
- Apr 2001
- Location
- Perth
- Posts
- 10,826
Hi Basil
Actually I agree with both you and WW. To date the thickness of the drawer bottoms I have made have tended to be 1/4". The reason I was (no longer am) considering a 3/8" thickness was the design of the slip/drawer intersection.
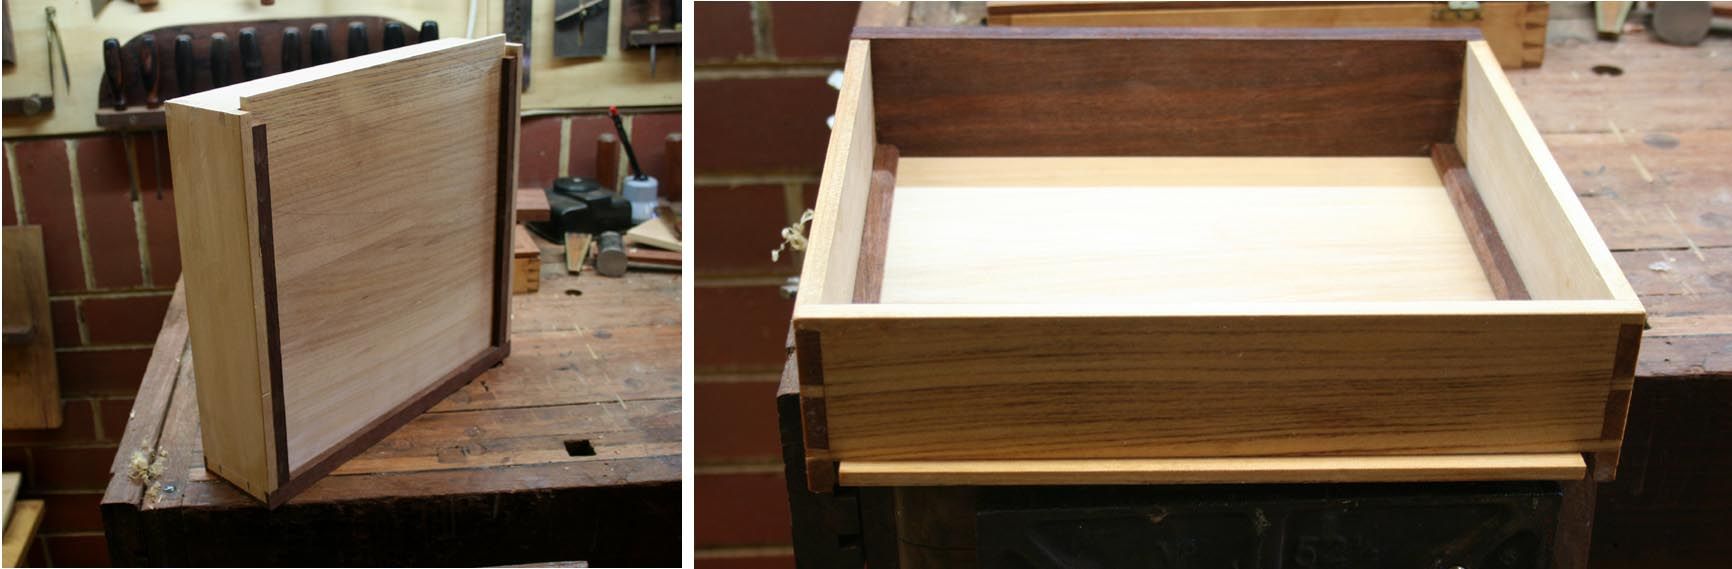
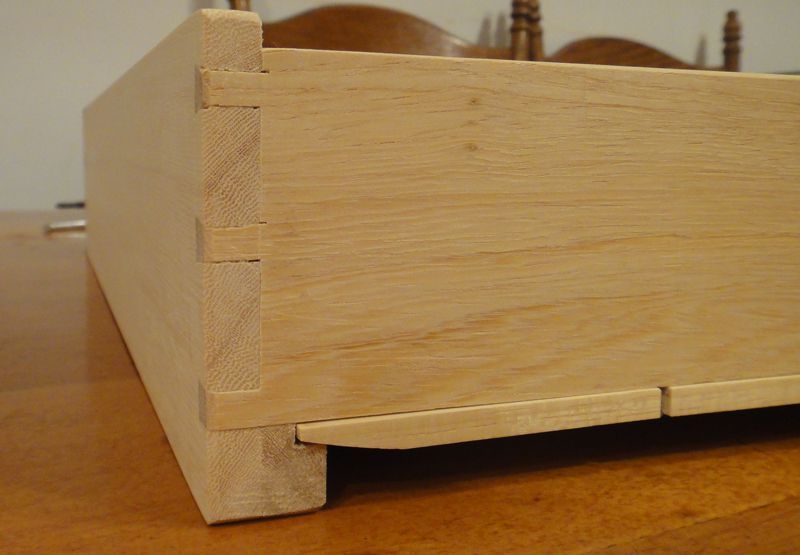
Here is a drawer I built a few months ago. Note the lip at the intersection ....

Ian sent me a couple of his pictures (which I am sure he won't mind my posting here as they are beautifully made) ..
I am not sure what the thickness is for his drawer ...
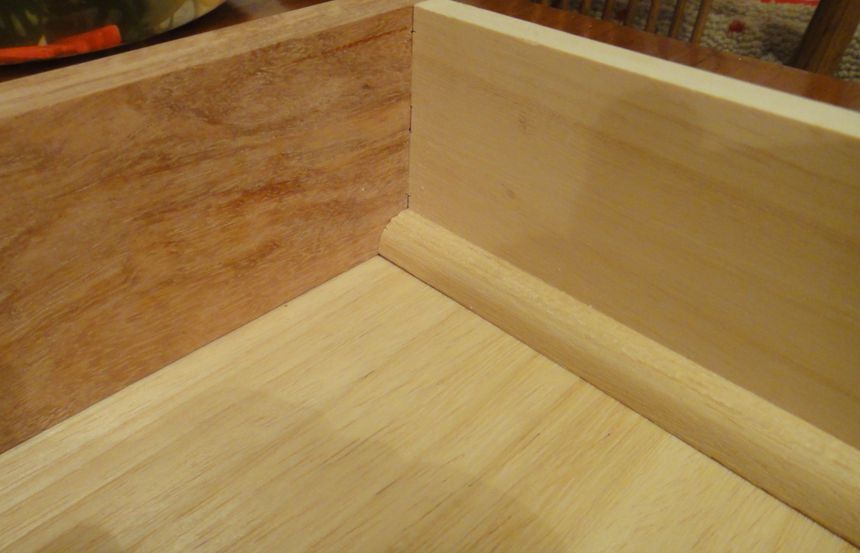
OK, so why the change to 3/8"? Well I wanted to retain a 1/4" tongue-and-groove connection size. But I also wanted to create a flush surface for the slip and drawer bottom, such as in the picture below. Further, this became more relevant as I was also thinking of a muntin for the wider drawers ..

I considered a 1/8" tongue-and-groove to go with a 1/8" rebate, but decided that the T&G would be too small/weak. Hence the 1/4" T&G plus 1/8" rebate = 3/8" thick drawer bottom.
Now that muntins are no longer being used, I will revert to the 1/4" thickness for the drawer bottoms and lower the thickness of the slip shoulder above the drawer to 1/8".
Regards from Perth
DerekVisit www.inthewoodshop.com for tutorials on constructing handtools, handtool reviews, and my trials and tribulations with furniture builds.
-
3rd September 2011, 02:49 PM #15
Franklin Ferrier
- Join Date
- May 2007
- Location
- Gold Coast
- Age
- 70
- Posts
- 2,735
I had not thought through the drawer usage/ design properly when I started building my entertainment centre. During the design I just assumed I would use thin drawer sides and slips and proceeded in that vein until, during construction, I realized I would have a problem in storing CD's because the slips would have protruded into the drawer space and the CD's would not fit snug to the drawer sides. (I had succumbed to using ply for the drawer bottoms and could not make a flush tongue and groove style slip with a solid bottom)
I then had to redesign the drawers after I had finished the main dimensioning. I felt that I would now have a structural integrity problem plowing the groove for the ply bottom in the thin drawers sides. Although the feared deficit does not seem to have caused any problem so far in usage. At about that time WW had a WIP going where I believe he introduced a Georgian style of drawer construction with the runner glued directly to the bottom of the drawer rather than the side. I wasn't in a position to change the drawer design that radically at that stage of my construction, however I believe I will try that design for my next build and skip slips entirely. They don't seem to be compatible with the things one might want to keep in an electronics cabinet where a clean intersection between bottom and sides is useful. It seems to be less of an issue in drawers designed to hold clothes and fabric where the fabric may sit unobtrusively over the usual slip projecting into the drawer space.


 Reply With Quote


Similar Threads
-
Finished building a tallboy / drawer chest
By chubs in forum WOODWORK - GENERALReplies: 32Last Post: 4th July 2009, 12:55 PM -
4 stages
By wheelinround in forum WOODIES JOKESReplies: 2Last Post: 25th August 2007, 03:26 PM -
My dream shed...the planning stages.....
By bulldog in forum WOODWORK - GENERALReplies: 17Last Post: 17th May 2007, 01:08 AM -
Basic stages of Finishing
By Shane Watson in forum FINISHINGReplies: 0Last Post: 24th June 2001, 12:41 PM
