

 Thanks:
  Likes:
  Needs Pictures:
  Picture(s) thanks: 0
Results 1 to 15 of 33
-
22nd October 2020, 08:50 PM #1
 GOLD MEMBER


- Join Date
- Nov 2012
- Location
- SE Melb
- Age
- 65
- Posts
- 1,278
 Product Review - Luban Chip Breaker
Recently I came across these chip breakers from McJings, and I ordered a few to try out.
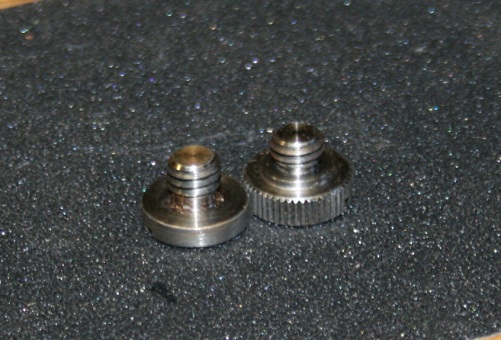
Orginially they didn't come with cap screws, and upon a few emails and telephone calls. McJing went and ordered some screws so that they can sell them together. The screws have M8 thread, and they are not the same as the cap screws from the Vintage Bailey Stanley chip breakers.
I have a very ordinary #5 Stanley plane that I bought from Amazon a few years back (brand new).
20201022_180737 (640x480).jpg
When I put the original chip breaker very close the edge of the plane, the shavings were concertinaed and squashed,
20201018_135959 (480x640).jpg
So I thought it would be a good candidate to try out a new chip breaker.
20201022_181817 (480x640).jpg
The Luban chip breaker arrived in a vacuum sealed plastic bag. I put it side by side with the original stanley chip breaker, and for some extra comparsion, I also place the Veritas chip breaker next to it as well.
20201022_181000 (480x640).jpg
The location of the holes are exactly the same for all 3 chip breakers. The Veritas chip breaker is slightly longer than the other two.
Thickness wise, The original chip breaker is 1.9mm thick, The veritas 3mm and the Luban being the thickest at 3.2mm or there about.
The Luban appears to be flat, the finish is not as refined as the Veritas for sure.
How does it perform?
20201018_151906 (480x640).jpg20201022_184235 (480x640).jpg
Using the exactly same blade, and adjust the chip breaker close to the edge, I was able to completely change the way it planes,
Crispy curls and continuous shavings.
I think this chip breaker completely transform this very ordinary stanley to an extremely good user.
I also tried out the Veritas chip breaker and I couldn't tell the difference in the way the plane behaves.
My conclusion:
- A competent chip breaker makes a bigger difference to your planing experience than a new blade.
- Veritas definitely has a better finish. But it is at twice the cost and stock has been an issue during Covid.
While I'm at it. I want give McJing a call out for their great customer service
In addition to getting the screws from Luban within 2 weeks of my call, It was especially pleasing the way they handle defects
The first shipment that I received was a chip breaker with a nick in it
20201018_124940 (480x640).jpg
I called them. They shipped me a replacement that arrived within two days, and with a pre-paid envelope to return the defective chip breaker. I can't see them do better than that.
-
22nd October 2020 08:50 PM # ADSGoogle Adsense Advertisement
- Join Date
- Always
- Location
- Advertising world
- Age
- 2010
- Posts
- Many
-
22nd October 2020, 09:02 PM #2
 GOLD MEMBER
- Join Date
- Sep 2012
- Location
- Coffs Harbour
- Posts
- 1,834
Thanks for posting this. Im currently restoring a 4 and 5 stanley I have and recently purchased no7 Asutralian carter. Ill be looking at chip breakers and guess am surprised at the cost for veritas pmv11 blades and associated chip breakers for these along with fixing up the totes and making some larger knobs
Great to hear alternatives locally sourced and good customer support. Sometimes its just a matter of not knowing of their existence and when Google optimises the big paid for brands its easy to miss.
Appreciate this write up and will keep them in mind when adding some solid components to the collection
Sent from my SM-A515F using Tapatalk
-
23rd October 2020, 01:29 AM #3
Be inspired. Be creative. Be bold.
- Join Date
- Apr 2001
- Location
- Perth
- Posts
- 10,863
Thanks for this Justonething, or can I call you J1T?

The chipbreaker is indeed a wondrous thing, and it is very important to discuss what attributes a good one has. I am going to add a bit of info to contribute to what you have started. Thank you for making us aware of the Luban. I think that they can be useful, but must emphasise that I would consider them a kit, not a completed tool.
In recent years, many have re-discovered the part played by the chipbreaker in tamng tearout. Chipbreakers need to be set up - none, repeat none, are ready to go out of the box.
1. The first step is to ensure that the underneath of the leading edge mates perfectly with the back of the blade. This will almost always involve lapping the leading edge. Did you do this?
2. When closing up a chipbreaker - getting it close is in the region of 0.4-0.5mm - the leading edge of the chipbreaker needs to be 45-50 degrees. All chipbreakers come with a 25 degree leading edge. This is rectified by adding a secondary bevel. If the leading edge is 25 degrees, it is too low to turn the shaving at the needed angle to effect any downforce at the edge, which is instrumental in causing a reduction in tearout. What was the angle of the Luban chipbreakers?

3. Can you say something about the chipbreaker screw? One of the following is easier to use than the other ...
4. The position of the slot for the lateral adjuster affects which planes may use a chipbreaker. The slot is responsible for advancing the chipbreaker. The LN is further back than the Veritas, which means that they are not interchangeable. Did you compare the Luban with other makes>

5. The shape of the shaving says more about how well the chipbreaker is set than about the chipbreaker, itself (see point 7, below). Too close to the edge, and it will cause crinkly, concertina type shavings. When working correctly, the shavings will straighten up (not remain curly) ...

6. I find most of the modern chipbreakers preferable to the old Stanleys (when these are thin) as the latter are too flexible to set reliably (they move when tightened down). Nevertheless, modern types (such as LN, Veritas, Luban etc) are too flat and generally benefit from a little (tiny) bend to induce some spring.
7. One last factor: when you close up a chipbreaker, you also block the path for shavings to escape. To prevent shavings jamming up the plane, open the mouth. A tight mouth is unnecessary when the chipbreaker is working correctly. I think the crinkly shavings were caused this way.
Regards from Perth
DerekVisit www.inthewoodshop.com for tutorials on constructing handtools, handtool reviews, and my trials and tribulations with furniture builds.
-
23rd October 2020, 08:16 AM #4
GOLD MEMBER
- Join Date
- Mar 2004
- Location
- Brisbane (western suburbs)
- Age
- 78
- Posts
- 12,172
Woops, I think you made a typo there, me lad. The slot in the cap-iron is for the cam of the depth adjuster. The slot in the blade is for the lateral adjuster. Originally Posted by derekcohen

And the pic shows the Luban comared with the Stanley & a LN.....
No quibbles with the rest...
But I will emphasize that the distance from the leading edge of the cap-iron to the adjuster cam slot is critical. The metal is sufficiently soft on all the cap-irons I've met to file easily, but if you take a file to the edge to put a steeper angle on it, go easy! At least two people I know have wrecked their new cap-irons by over-enthusiastic filing and shortening them to the point they ran out of adjuster travel before the blade was protruding enough to cut. If you set you cap-iron tight, set it in the plane, and if the blade is just starting to cut with the adjuster wheel at or before the centre of it's travel on the stud, you should be able to remove up to a mm from the cap-iron and still have adequate adjustment. But I'd go very cautiously, remove the minimum amount of material you can to get the angle on the leading edge where you want it.
Finish by 'sharpening' on a good flat stone to ensure the edge is straight (& square, there is nothing more annoying than an off-square edge on your cap-iron). I use a rotating motion to form a gentle curve that blends into the curve of the CI. Then I polish the leading edge with a buffing wheel. If you don't have a buffing wheel, finishing with 1200 W&D does a pretty good job. It may sound like overkill, but I'll guarantee you'll notice a difference with a polished leading edge on your cap-iron vs one that still has fine grinder-marks....
Cheers,IW
-
23rd October 2020, 10:46 AM #5
Be inspired. Be creative. Be bold.
- Join Date
- Apr 2001
- Location
- Perth
- Posts
- 10,863
Thanks for the correction Ian - that was a typo.
Regarding the higher secondary bevel on the leading edge of the chipbreaker, what I do is (1) use a honing guide (in this case, a LN or Eclipse - they ensure square) to create a 50 degree secondary bevel using a medium- , then fine diamond stone. My fine diamond stone is old and well broken in, and now the equivalent of about 3000 grit. It leaves a polished surface. (2) I then freehand the chipbreaker, in a style similar to Paul Sellers, to round the secondary bevel. The result is a rounded and very polished leading edge.
Be careful not to go much over 50 degrees. A secondary bevel that is too high will prevent the plane taking shavings - it will screech and create concertina-to-dust shavings.
Learning to set the chipbreaker at 0.4-0.5mm sounds impossible, but it just takes practice ... like everything. Once working, you can plane anything! The best example is the join of a book-matched panel (where half is into the grain). And - ! - this set up will out-plane the best high angle plane. Bar none!
Regards from Perth
DerekVisit www.inthewoodshop.com for tutorials on constructing handtools, handtool reviews, and my trials and tribulations with furniture builds.
-
23rd October 2020, 11:48 AM #6
GOLD MEMBER
- Join Date
- Jul 2011
- Location
- In between houses
- Posts
- 1,782
I was always told the English name for that was the “cap iron” ����♂️
-
23rd October 2020, 01:42 PM #7
GOLD MEMBER
- Join Date
- Mar 2004
- Location
- Brisbane (western suburbs)
- Age
- 78
- Posts
- 12,172
'Tis, rb, or 'twas - I notice plenty of Poms on the UK forum say "chip-breaker". The pernicious infiltration of U.S."English" permeates the written world. Ya just have to be bilingual nowadays...... Originally Posted by riverbuilder

Cheers,IW
-
24th October 2020, 09:05 AM #8
GOLD MEMBER

- Join Date
- Oct 2018
- Location
- Dandenong Ranges
- Posts
- 1,921
So is the cutter a plane iron or a plane blade? Originally Posted by IanW
-
24th October 2020, 10:30 AM #9
GOLD MEMBER
- Join Date
- Mar 2004
- Location
- Brisbane (western suburbs)
- Age
- 78
- Posts
- 12,172
Originally Posted by Mountain Ash
Whichever of the 3 you prefer.....
"Iron" is a very ancient & venerable name for a plane blade, but then again, plane blades have always been made of steel, and now we have multiple types of steel, so maybe just simple "blade" is safest?
[In my former life I fought a constant but losing battle over names - pathologists strive to be exact, clinicians tend to be a little less stringent, which often confused the poor students. However, as in vernacular speech, the precise meanings of words can drift, and no matter how hard we may try to prevent it, any language will change. So I had to just grit my teeth & accept oxymorons like "malignant lymphoma" (a lymphoma is, by definition a benign condition, lymphosarcomas are the malignant form!)......]
CheersIW
-
24th October 2020, 01:04 PM #10
GOLD MEMBER
- Join Date
- Oct 2018
- Location
- Dandenong Ranges
- Posts
- 1,921
Some of my pedantry comes from the ever increasing influence of American English. Originally Posted by IanW
-
24th October 2020, 04:49 PM #11
Be inspired. Be creative. Be bold.
- Join Date
- Apr 2001
- Location
- Perth
- Posts
- 10,863
You know, I have never thought about the actual derivation of cap iron/chipbreaker - which came first, and which may be corrupted English. Is "cap iron" English and "chipbreaker" American? I have preferred "chipbreaker" simply because it is factually more correct (bending/breaking shavings) than "cap iron" (supporting the blade).
Regards from Perth
DerekVisit www.inthewoodshop.com for tutorials on constructing handtools, handtool reviews, and my trials and tribulations with furniture builds.
-
24th October 2020, 05:32 PM #12
GOLD MEMBER
- Join Date
- Nov 2011
- Location
- Melbourne
- Posts
- 7,048
An unfortunately it gets even more confusing,as metal cutting tools used in machines such as a lathe or mill the tool is formed with the geometry to break the formed chip �Chip breaking� Originally Posted by derekcohen
Cheers Matt[emoji3064]
-
24th October 2020, 06:40 PM #13
GOLD MEMBER
- Join Date
- Mar 2004
- Location
- Brisbane (western suburbs)
- Age
- 78
- Posts
- 12,172
I'm fairly sure 'cap-iron' is older than 'chip-breaker' by a good margin, but I could easily be wrong on that. Up til anbout 20-30 yeas ago, I noticed British authors always used the former, Americans the latter. I don't know which country the device itself first appeared in, & I don't think anyone is certain, but they have a much longer pedigree than metal planes like those of Mr. Bailey. If we could establish who first named it, that name should get precedence by Linnaean rules. Originally Posted by derekcohen
I don't think you could make a case for either name being more factually correct - one name says what it does, the other where it's located. One dictionary definition of 'cap' is 'a lid or cover'. Can't argue with that....
I think it's easier to be bilingual....
IW
-
24th October 2020, 10:34 PM #14
Be inspired. Be creative. Be bold.
- Join Date
- Apr 2001
- Location
- Perth
- Posts
- 10,863
That does not help Ian!
I am still confused.
I shall ask this question on a US forum, and if they plump for chipbreaker, I shall use cap iron from now on ..
Regards from Perth
DerekVisit www.inthewoodshop.com for tutorials on constructing handtools, handtool reviews, and my trials and tribulations with furniture builds.
-
25th October 2020, 08:20 AM #15
GOLD MEMBER
- Join Date
- Mar 2004
- Location
- Brisbane (western suburbs)
- Age
- 78
- Posts
- 12,172
Originally Posted by derekcohen
Well, you're with the majority opinion there.....
As Oscar Wilde said (of the U.S. & Britain), "Two countries divided by a common language"...... Originally Posted by derekcohen
IW

 Reply With Quote


Similar Threads
-
Chip Breaker for the Diamond Tool Holder?
By MWF FEED in forum METALWORK FORUMReplies: 0Last Post: 7th July 2018, 08:40 PM -
Best way to make a chip-breaker fit?
By JPA in forum JAPANESE HAND TOOLSReplies: 9Last Post: 27th May 2015, 10:05 PM -
Wanted:Chip Breaker
By The Bleeder in forum HAND TOOLS - UNPOWEREDReplies: 13Last Post: 19th March 2012, 04:36 PM -
sargent 3412 chip breaker
By jgiles in forum HAND TOOLS - UNPOWEREDReplies: 0Last Post: 1st July 2010, 03:39 PM -
Blood on my chip breaker...
By Shedhand in forum SAFETYReplies: 0Last Post: 10th January 2007, 10:29 AM
